


Canon imagePROGRAF TX-3000 review
Review: Canon imagePROGRAF TX-3000
36″ width large format printer

Keith has removed all Google ads. Too many deceptive and irritating adverts.
Any ad links left are non tracking, to companies we know, trust and we've worked with for years [Park Cameras]
Ads helped pay for site running costs, so if you found something useful, please
...Make small KoFi donation?
...Subscribe to Keith's YouTube Channel
...Get Keith's book about how to use tilt/shift lenses
Our site contains affiliate links - these help support the site. See our Advertising policies for more
Keith Cooper has been looking at Canon’s TX-3000 printer on a visit to their Birmingham printer showroom.
The 36″ width printer is also available as the 24″ TX-2000 and 44″ TX-4000 models.
It’s a fast 4 colour (5 ink) inkjet printer primarily aimed at the CAD, plans and poster printing markets.
This is somewhat shorter than Keith’s usual in-depth printer reviews, looking mainly at how good the print quality is for making photo/poster prints – surprisingly good it turns out, even with just 4 colour inks (CMYK). It is not an exhaustive test of the CAD/plotting side of its functionality.

The TX 2000/3000/4000
I’m looking at the Canon TX-3000 printer. This has a 36″ media width, and from a design point of view is very similar to the PRO-2000/4000 I’ve covered in an extensive PRO-2000/4000 review along with a detailed guide to PRO-2000/4000 setup and moving.
The similarities are so great that if you are interested in a TX-x000 printer, I’d suggest you might also benefit from reading the PRO-x000 articles.
Here’s the 36″ TX-3000 next to a 44″ PRO-4000.
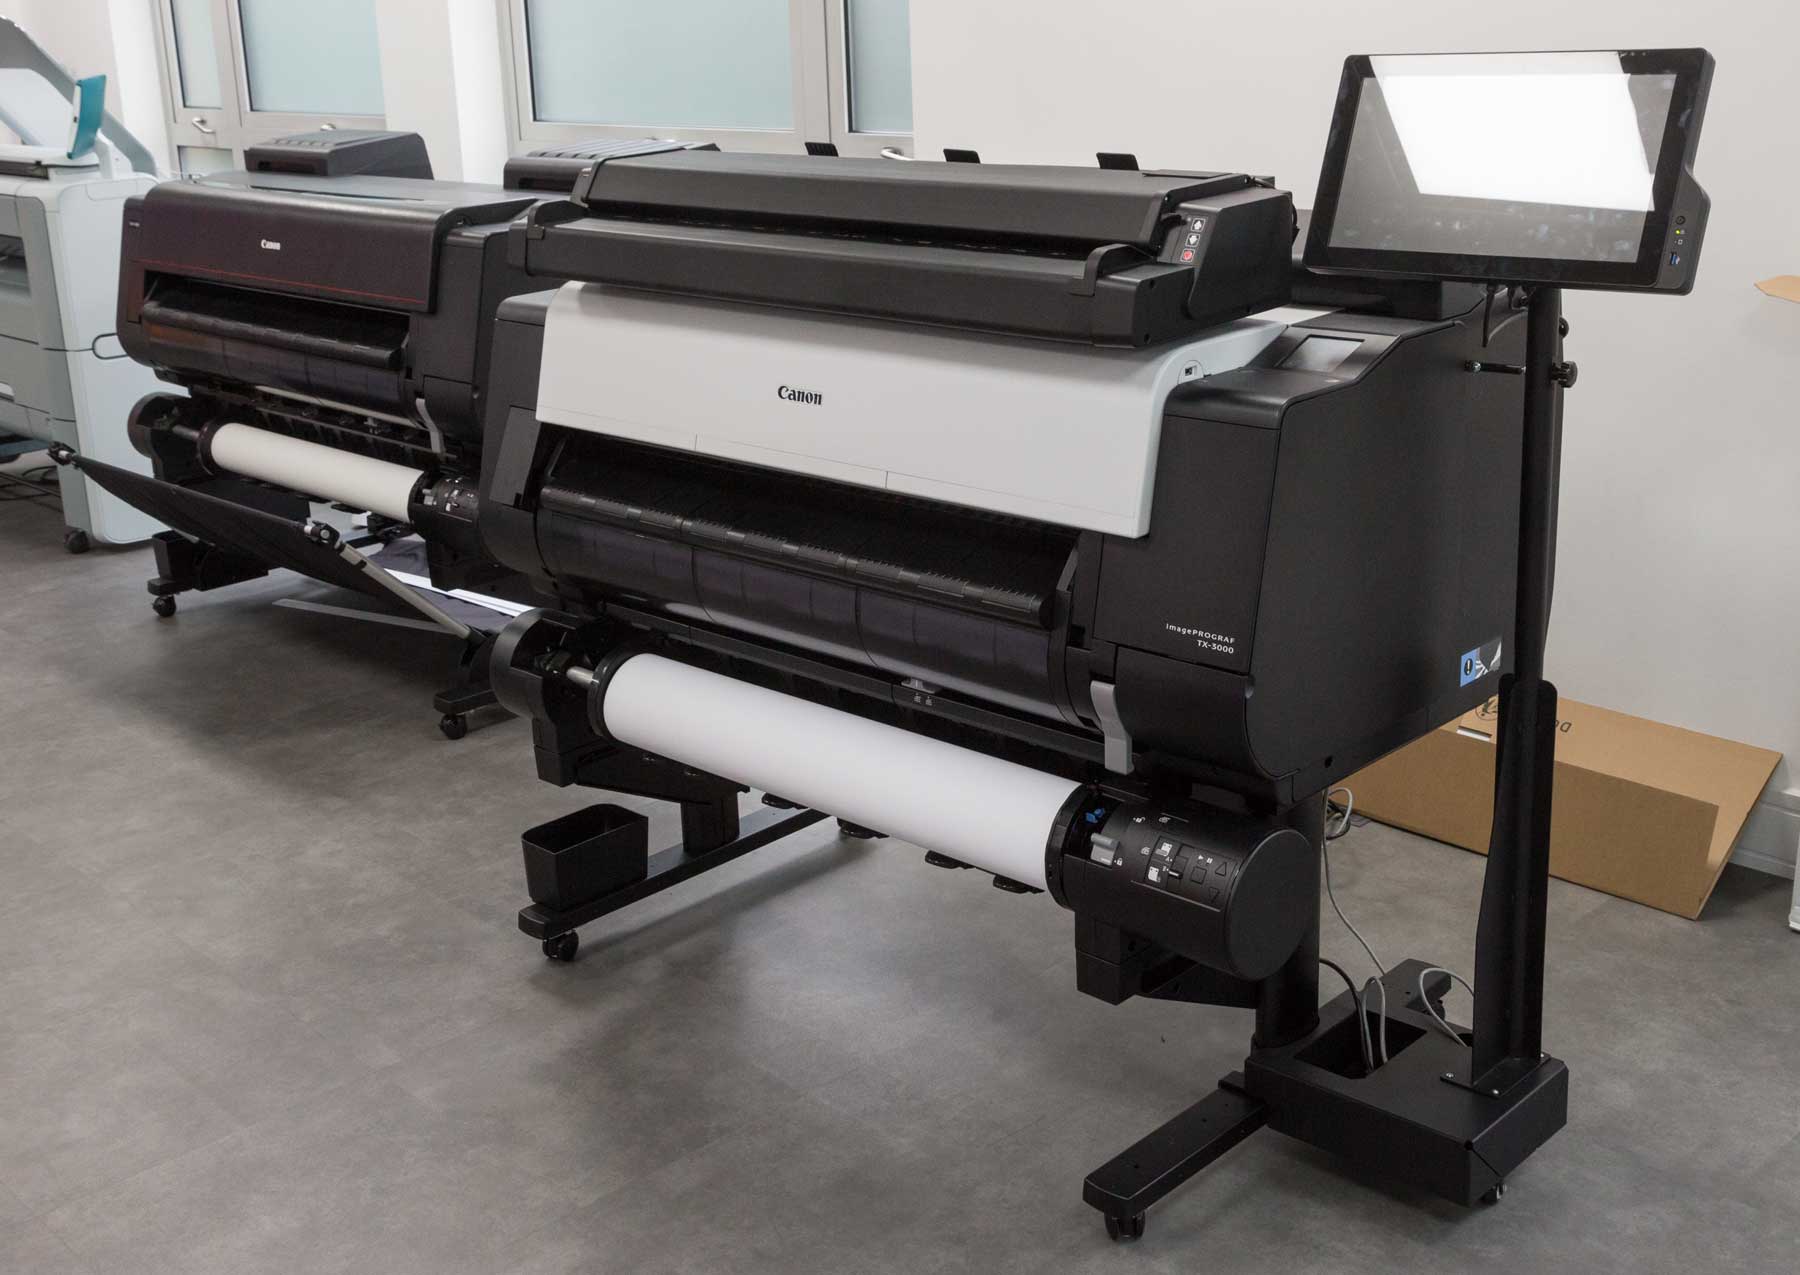
Three immediate differences:
- The lift up lid of the TX-3000 is white
- There is a hefty 36″ scanner on top
- There is a tablet computer at the side
The scanner and tablet are an optional print/scan MFP system known as the TX-3000 MFP T36
This comes as a kit with:
- T36 scanner
- Stand assembly
- 2 paper edge guides
- 3 Document return guides
- Calibration target
- CD for SmartWorks MFP software and PDF documentation
- T36 Scanner User Manual and Quick Start Guide
- USB3 cable (3 metre)
- Power Supply

This is well out of my area of expertise, so I happily left the windows 10 based tablet well alone, unplugged its USB cable and plugged in my Macbook Pro to get on with some printing.
What do you get
Canon advertises the TX-3000 as:
“Advanced 36-inch inkjet LFP for CAD, GIS and Poster production, offering productive printing, clever features and easy operation.”
Key Features of the imagePROGRAF TX-2000, TX-3000 and TX-4000:
From Canon – see full specs at foot of article.
- LUCIA TD pigment ink produces fine lines, sharp text and vibrant colours, making it perfect for long lasting, high-precision CAD drawings and posters alike
- Specifically formulated for weather resistance, including water resistance
- Ink performance exceeds the needs for poster quality on both coated and uncoated paper
- All models can be expanded with two rolls
- The optional dual-roll system enables high-volume printing from two rolls of the same kind
- The imagePROGRAF TX series accepts rolls up to 170mm in diameter
- A new high-capacity stacker offers holding room for 100 A0 sheets
- L-COA PRO high-speed image processor
- SNMPv3 and IPSec support to prevent leaks and intrusions.
The ink set is not the same as in the large format PRO printers I’ve looked at, and is much better on plain paper and exposed locations. As I’ll show later, with the right media it’s also pretty waterproof.
It’s still a normal aqueous inkjet though, so don’t start thinking of it for your sign-writing needs…
The printer is set up and initialised the same way as in my PRO-2000 setup although there are just 5 inks to load up.
The print head assembly sits off to the right when not printing. It moves across for printing and print head (PF-06) fitting/replacement.
The print head has six print channels (2 for matt black) which give a faster print speed – particularly noticeable when printing black only charts at draft settings.

Note the 5 ink lines.
The ink cart hopper on the left side of the PRO range is still there on the TX, but used for storage.

Connectivity
The printer has wired Gigabit Ethernet and USB connectivity at the back.
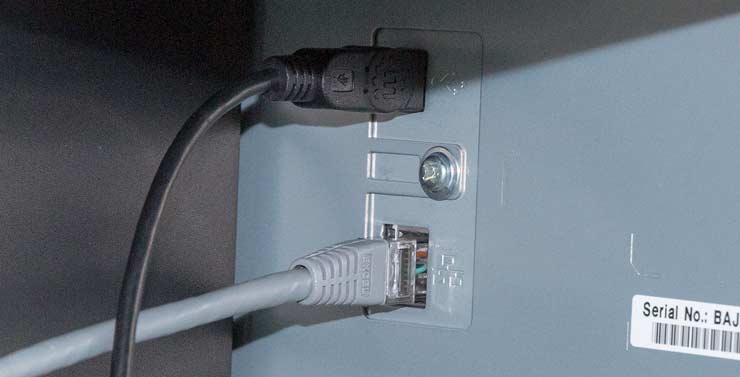
Still not USB-C, so you can notice a bit of sluggishness with some very big image files.
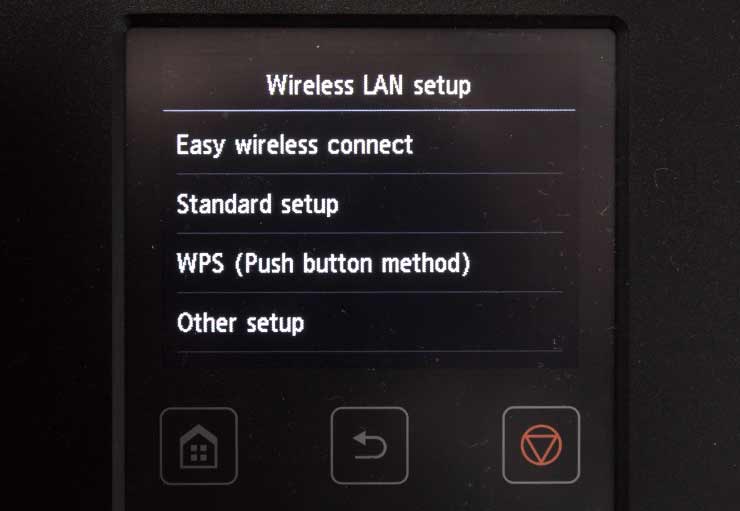
There is built-in wireless support too.
A useful feature is the internal hard disk, allowing for job spooling and storage.It’s encrypted, if you were worried about someone stealing your print jobs.
There is some more info about the many security related features in the specifications section, at the foot of the article.

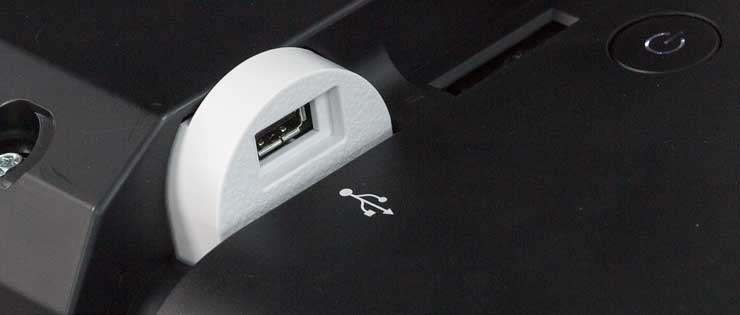
There is also a USB-A socket at the front for direct printing off memory sticks and the like. JPEG and PDF file formats are supported.
The colour touch screen at the front is clearly laid out for basic printer control and setup.
Note how one of the five inks (matt black) is showing low.
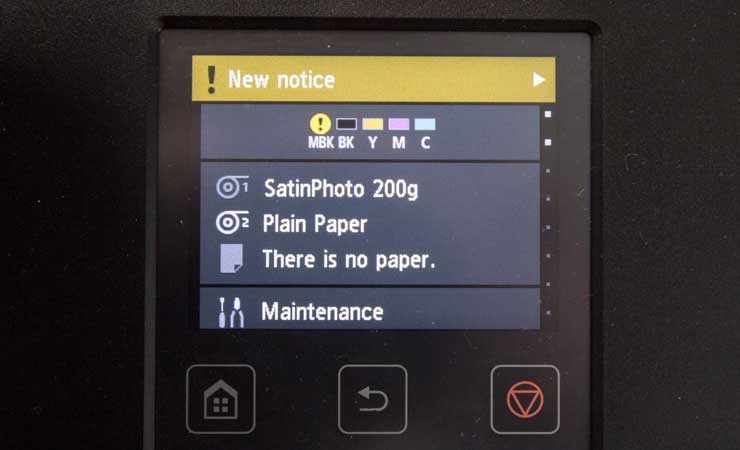
The main menu scrolls up for more.

The scanner fits on its own support frame, so I just lifted it out of the way for my printer testing.
It only has a few controls – remember that it’s driven by the tablet at the side (which I’ve unplugged).
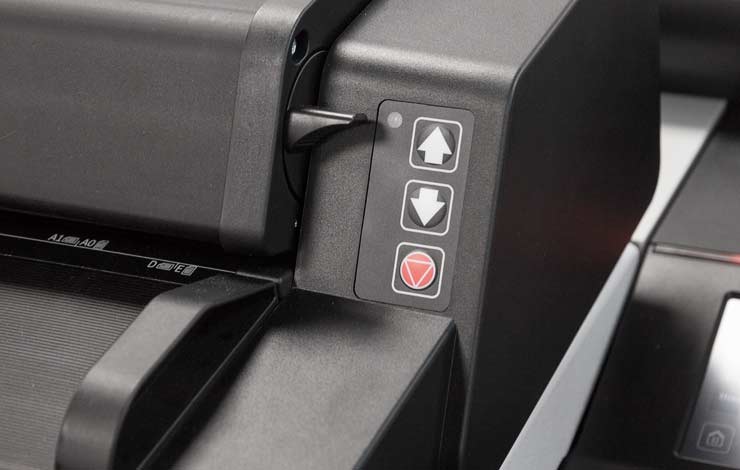
The lift has a locking clip (red) you need to press to lower.

If you do have this option – be sure to get a few extra cable ties to tidy up the cables.
Paper handling
The printer has a curved media path, with paper coming up from the upper or lower roll holders.
This first view shows the printing area, with the light grey top cover raised. [click to enlarge images]
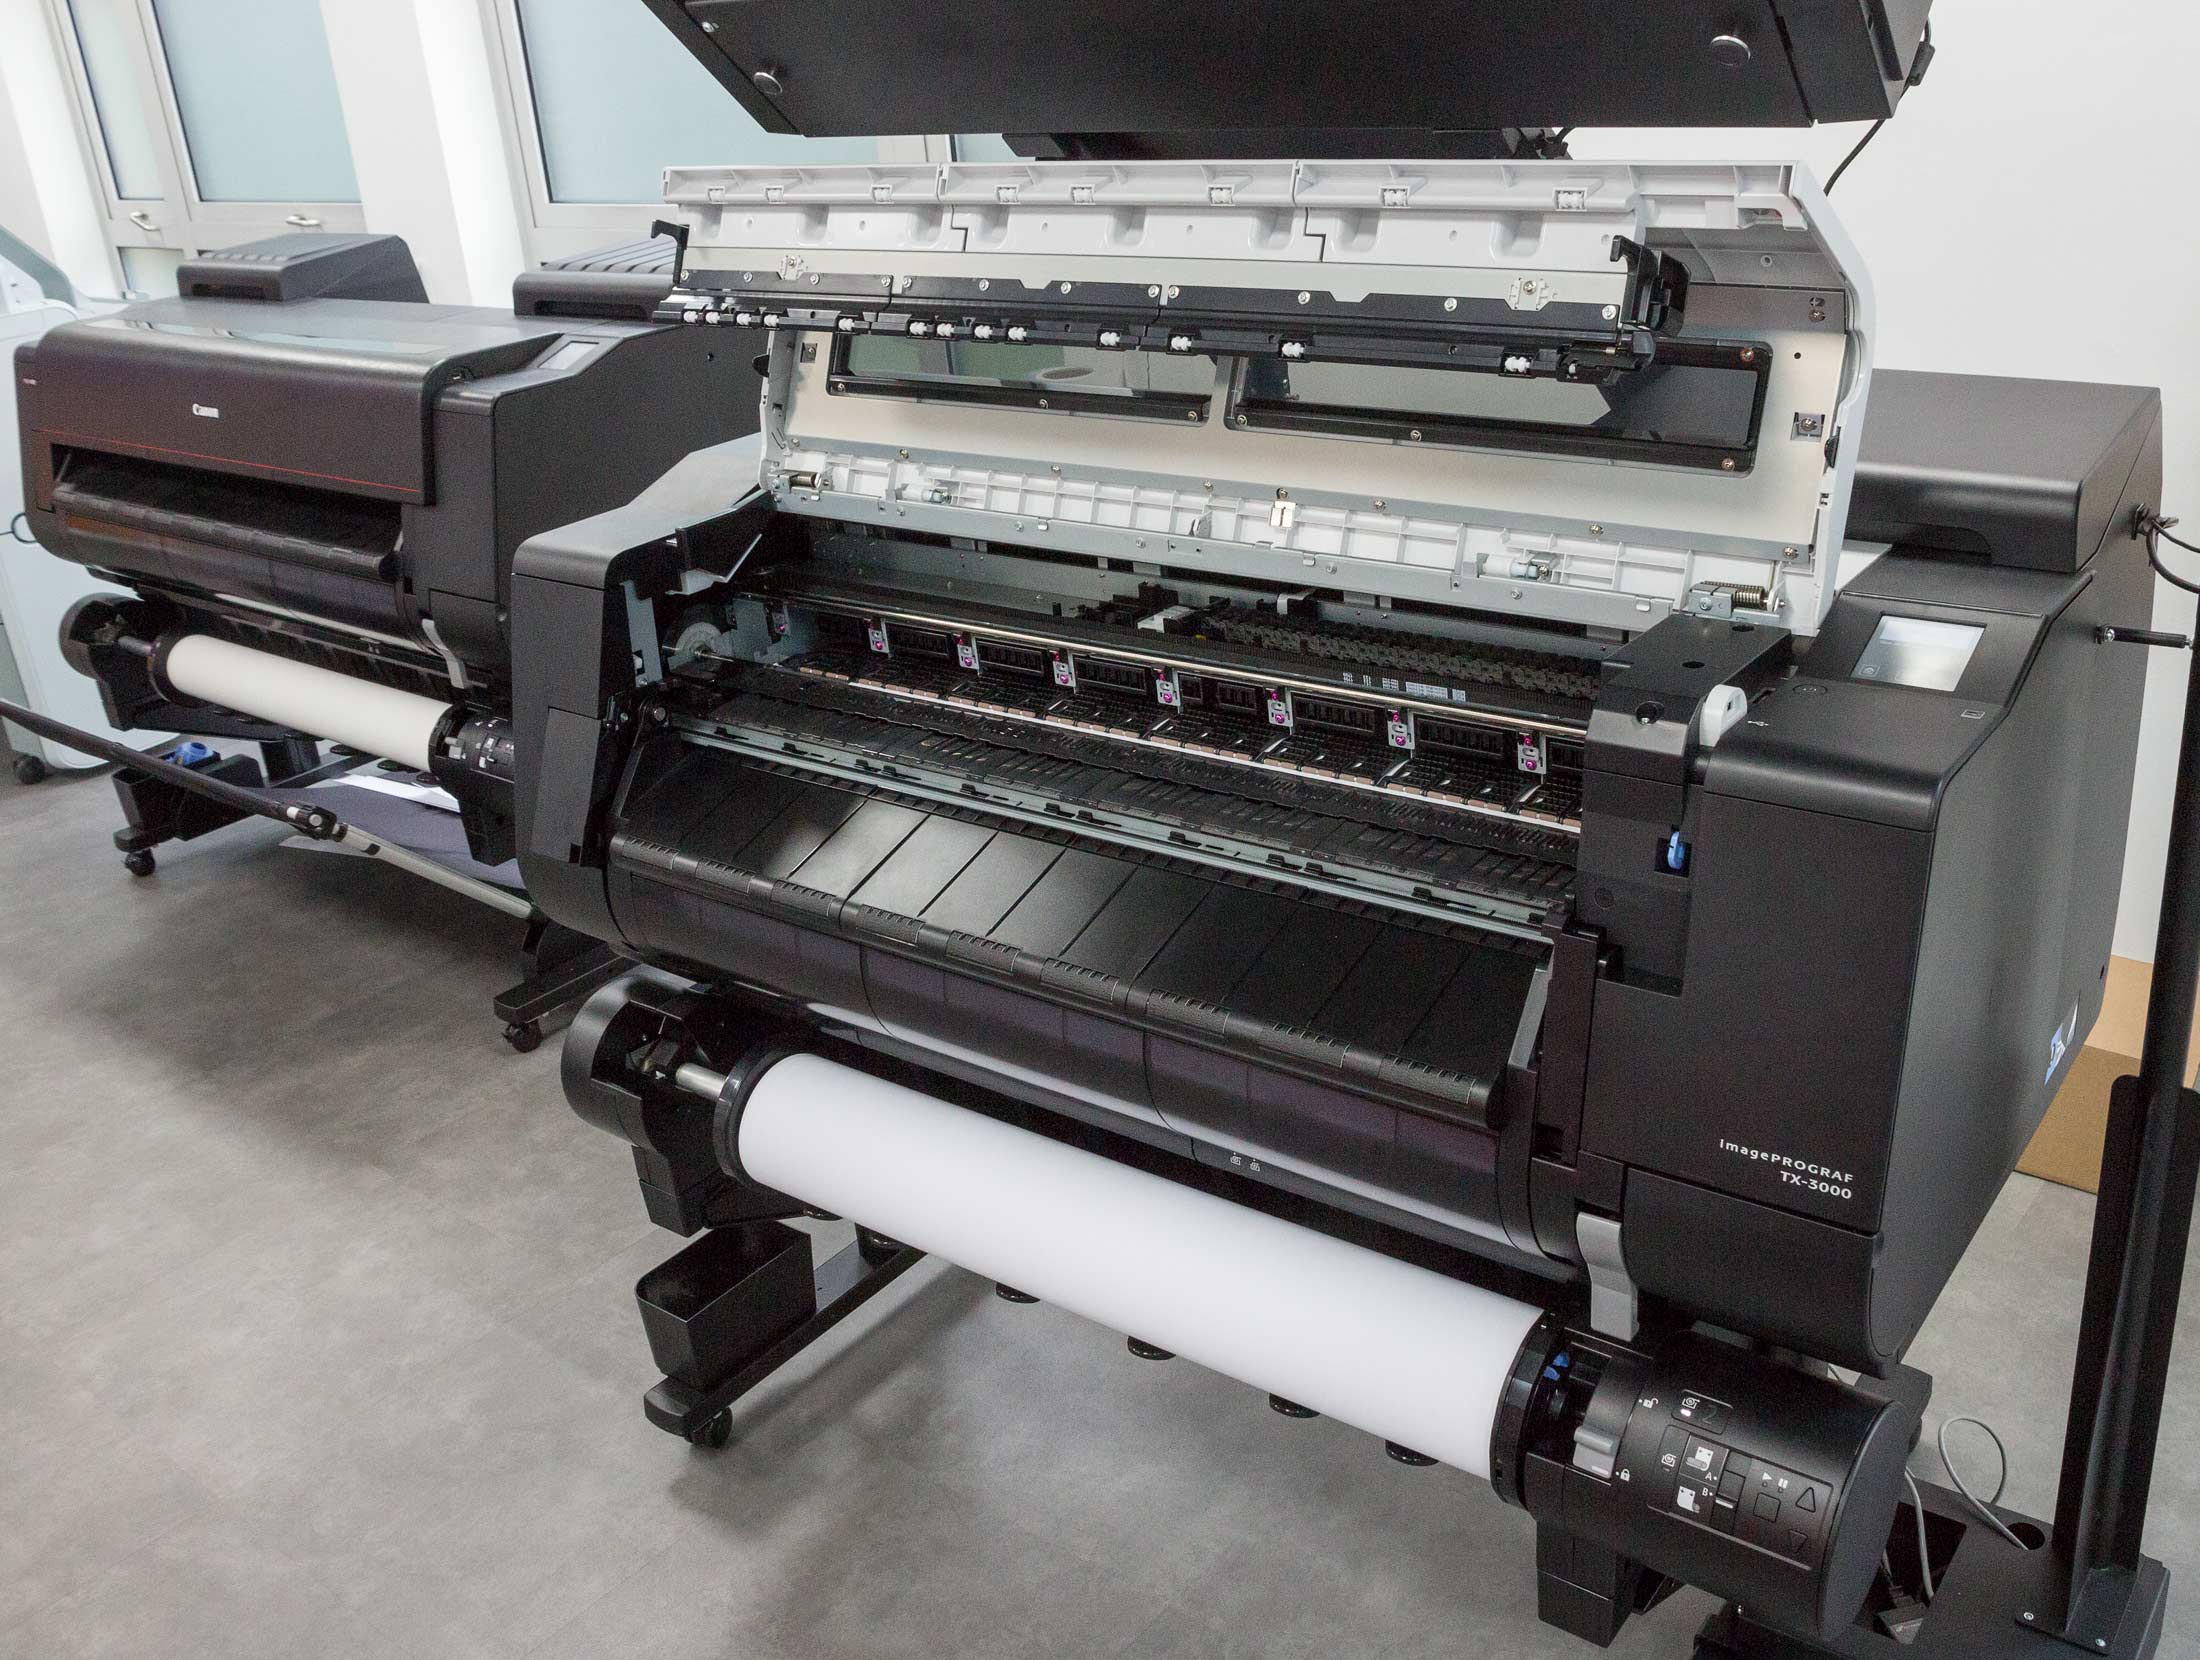
The lower roll holder is powered and can be used for paper or take-up spooling.
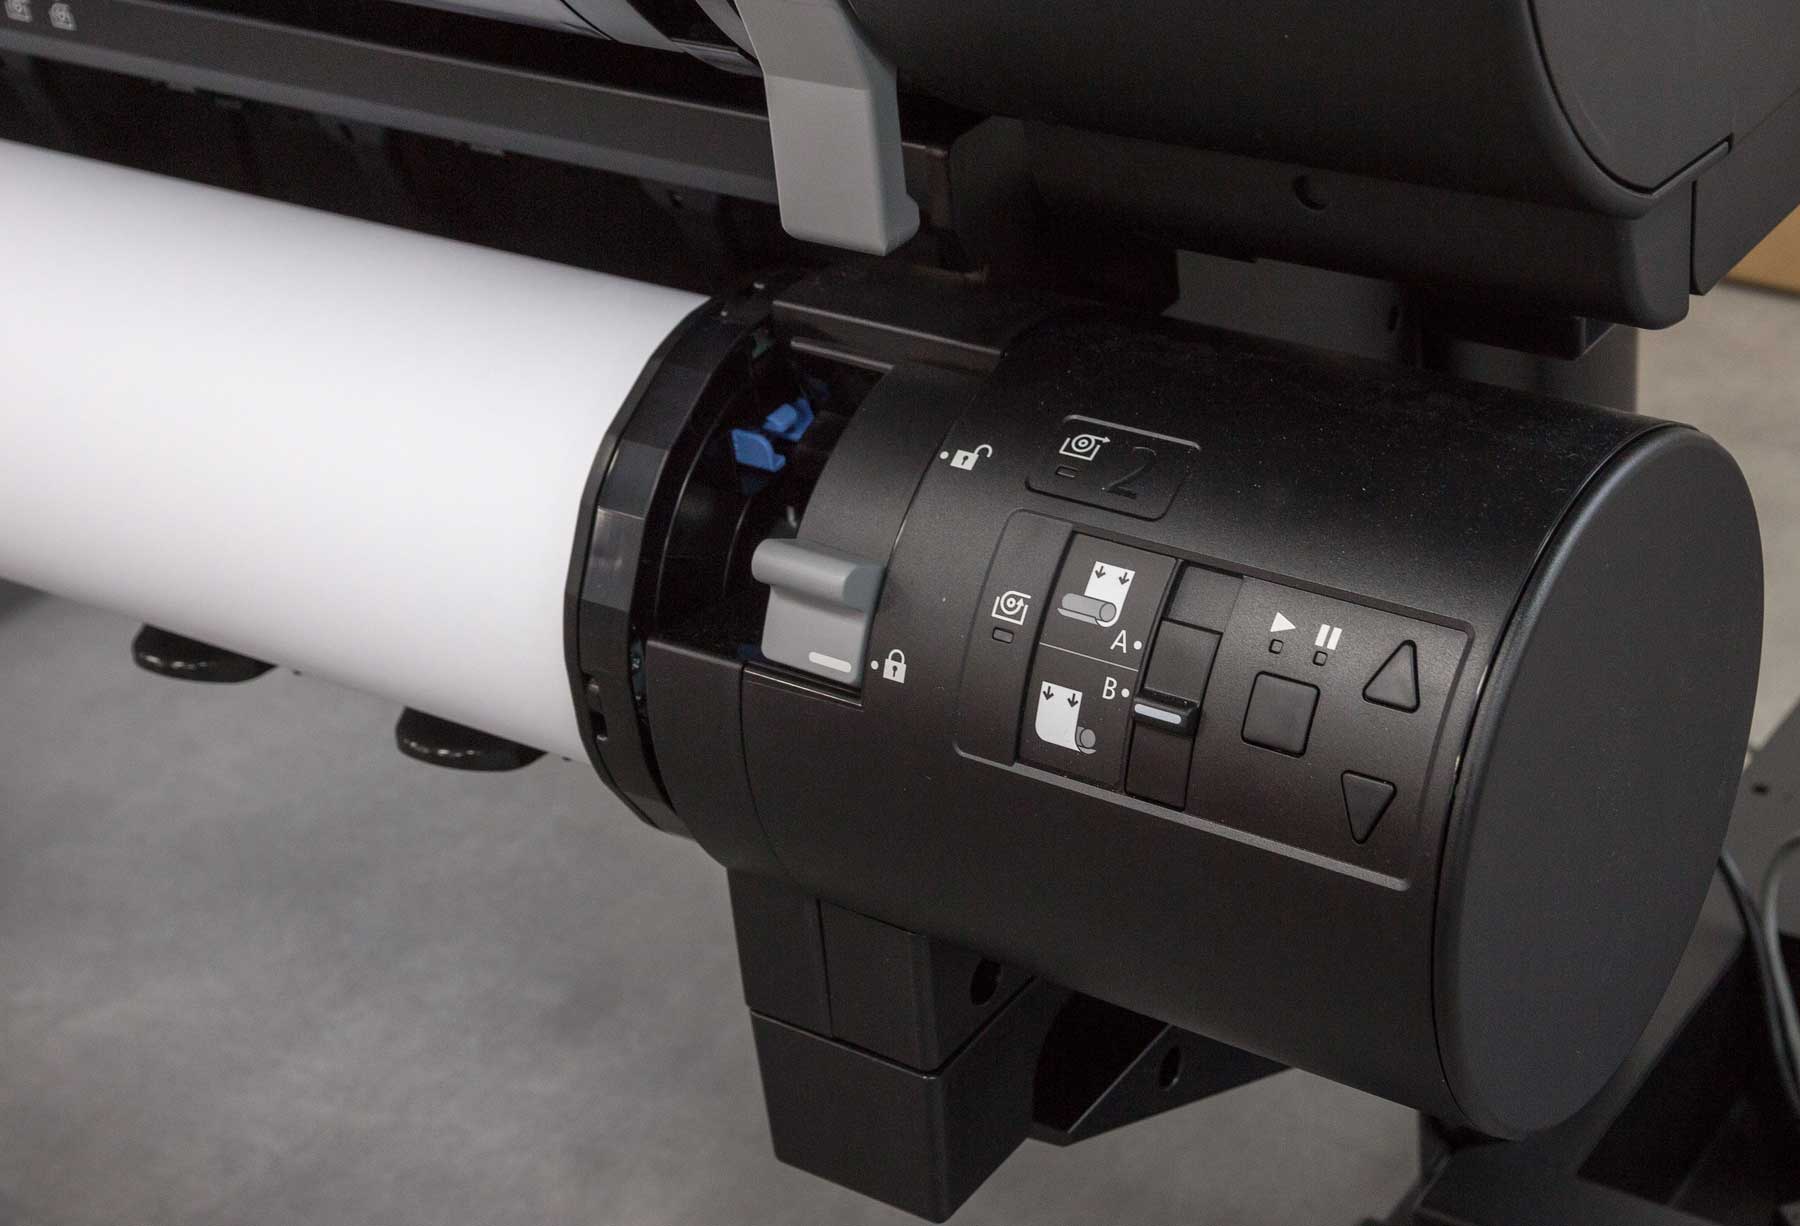
The main paper roll holder is accessed by raising the roll cover.

The top roll in this case is Canon 200gsm Satin Photo paper and the lower roll is Canon 80gsm Plain paper.
The roll loaded at the top is a 36″ one and the bottom is A0 size.

Sheet feeding is also available. See the PRO-2000 review for much more about paper handling.
Trimming
There is a built in roller cutter at the front of the printer.

It’s a user replaceable part (CT-07), but do take care with what you cut. I used it on a moderately heavy canvas and it cut very well. However, for day to day heavy use with such media, you might want another cutting solution.
There is an interesting print catcher option that can hold a lot of cut prints.
As with almost every print catcher I’ve ever tried on a large printer, it’s not entirely intuitive to use – check the user guide…
Here, it’s caught a 36″ x 24″ print (cut from a 36″ roll)

A side view (Canon photo) – fortunately I could just wheel it out of the way…

Media loading
The printer lets you specify what paper is loaded (I’ll come back to this in a bit) and it shows on the front panel what it thinks is there.

You can set paper parameters and load/unload paper via the panel.

You can optionally get ID codes printed on roll paper ends which say how much is left and what it is. This is useful if you’ve lots of people potentially using the printer, on an occasional basis.
You can also manually feed paper from rolls, and for many thicker media this is the best option.
When testing the PRO-2000 I found that some heavy fine art media were too stiff to work with the auto take-up options and needed manually feeding. The pressure rollers on the roll unit can also mark more delicate papers if left in place for any length of time. My own preference would be to avoid leaving media loaded in the machine longer than necessary. Remember though that I was testing the PRO-2000 with some pretty expensive papers.
Media settings
One of the features I particularly liked with the PRO-2000 I had here (and other larger Canon printers) is that media settings can be grouped together and defined as a set for a particular media type.
You can create ones for yourself with the Media Configuration Tool software or use ones available from paper suppliers. I go into this in some detail in the PRO-2000 review and others (such as the PRO-1000 and iPF6450)
The settings contain information about paper feed and alignment, along with all kinds of settings such as drying time or even the preferred ICC printer profile for the paper.
The settings held in the printer are the default ones used. So, when I set up my Macbook Pro with the TX-3000 printer driver, I need to get the current settings from the printer.

This will, after a short while, update my driver with all the media settings installed on the printer.
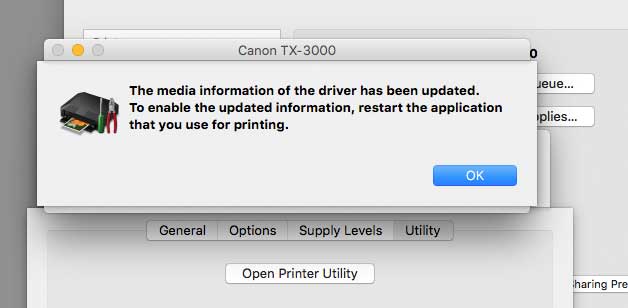
What if I want to try a new paper type?
Well, you need to create or get the settings, and download them to the printer.
Here’s Matt from Canon (my guide for the day – thanks!) finding the appropriate settings from Canon’s paper info site, and sending them to the printer.
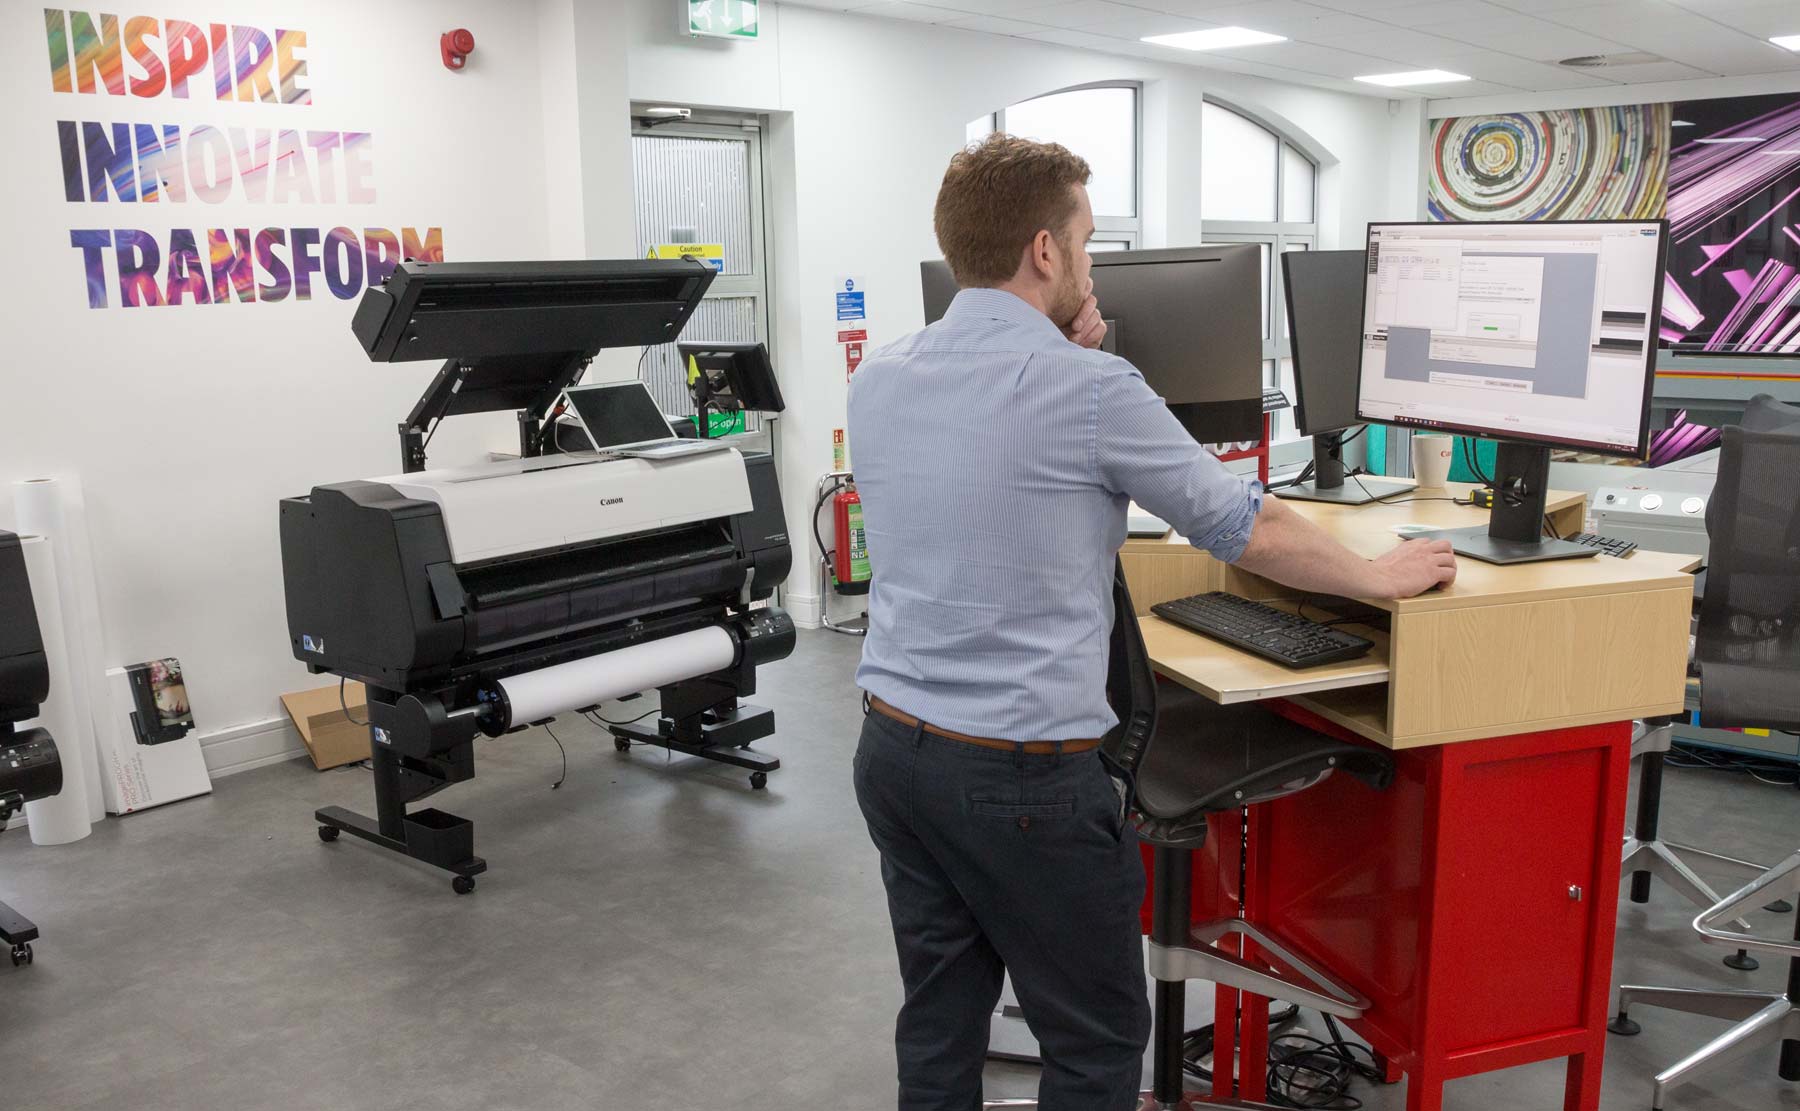
This is from a windows PC – the files are the same. You can see my Macbook on the printer.
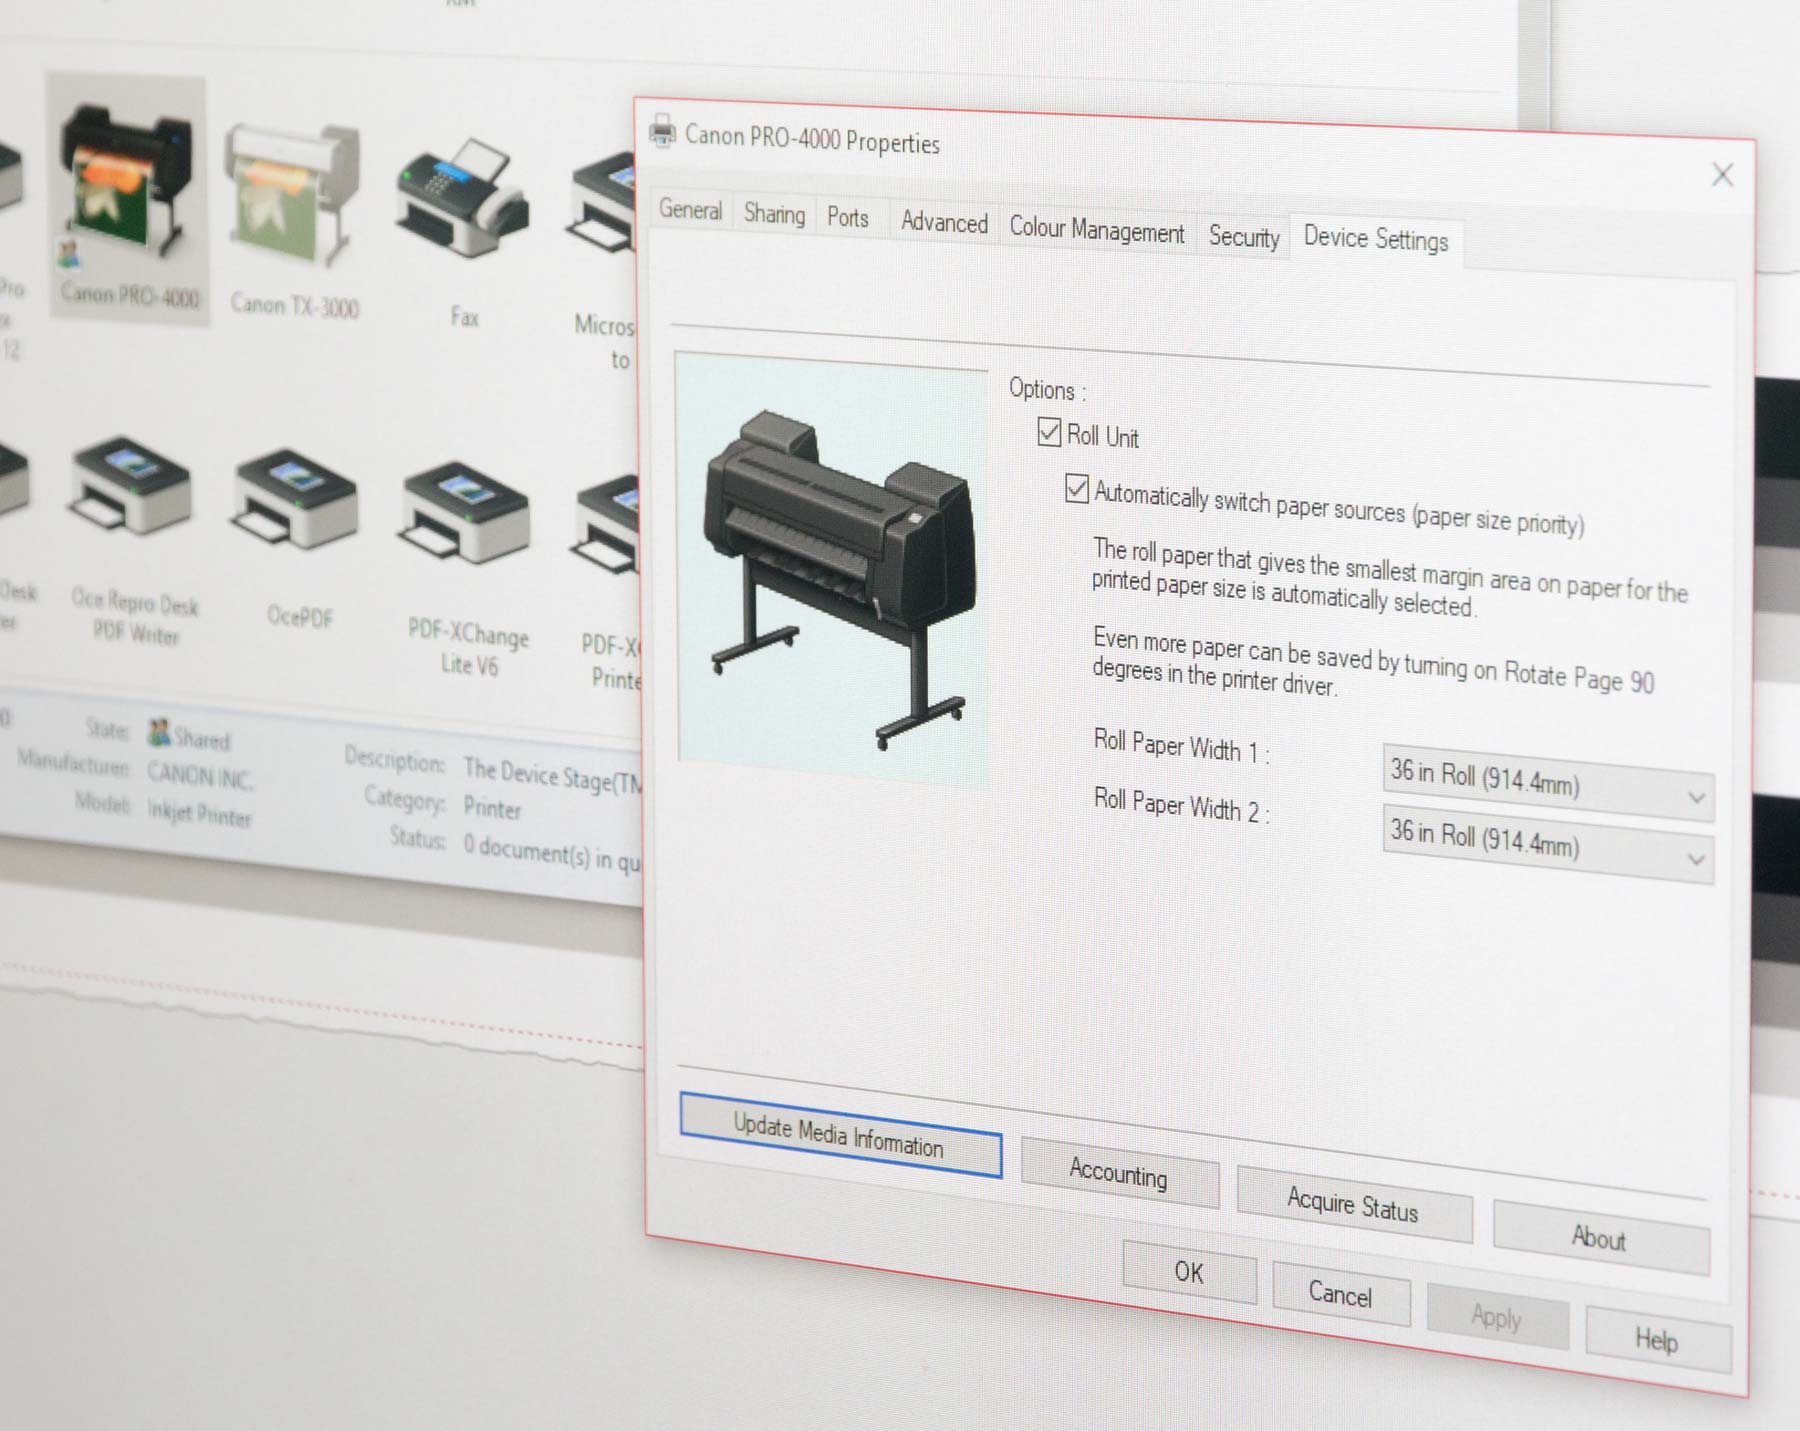
Once the info is on the printer, I’ll need to update what’s on my Mac again to get the new ones.
One minor limitation is that the printer can only hold a maximum of 65 media types. You might think that this is not a limit you’d be likely to face, however there are over 60 media types pre-installed, so you may want to remove a few of the more uncommon ones.
The standard paper types installed include:
- CAD plain papers down to 75gsm uncoated paper with several options for ink usage
- Coated papers up to 120gsm and Heavy Weight
- Photo Gloss & Satin papers from 170gsm to 280gsm
- Tracing papers and Clear films for CAD and screen printing
- A Selection of Polypropylene outdoor medias
- A Selection of Self-adhesive vinyl
- A Selection of Water resistant Scrim banner vinyl
- Backlit film
Inks
The ink carts for the printer are available in different sizes, and simply drop into the hopper at the back, via a locking lever.
When I started with the printer, one ink was low and quickly needed changing.
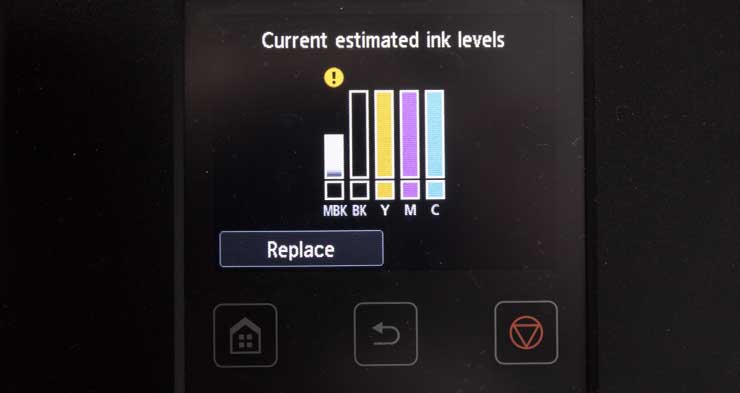
Looking in the ink cart area, I can see that the MBK cart is one of the smaller ones.

Lifting the blue lever, extracts it.

I’m replacing the small PFI-110 (160ml) cart with the largest PFI-710 (700ml) type.

There is also a 330ml size (PFI-130) available.
The whole process takes only a few minutes, and from PRO-2000 experience can be done whilst a print is being produced. However, do note that if you wait too long to replace an empty cart mid job, then the printer may abort the job. Empty carts are properly empty.
Ink usage
There is Canon software available that lets you record ink and media usage. It’s the same as I’ve covered in some detail in the PRO-2000 and PRO-1000 reviews.
Do note though that the accounting software records ink usage for printing, not cleaning. More detail is possible, but you’ll have to work it out for yourself from total ink usage.
Profiling
When I was asked if I’d like to look at the TX-3000, my first thought was to wonder just what sort of quality I’d get for photos from a 4 ink CMYK printer? I remember the difference that adding light magenta and light cyan inks made to photo prints many years ago. The printer might be great for graphics, CAD and posters, but what about if you wanted to print the occasional large photograph?
I picked a fairly basic 200gsm satin photo paper to try. It’s a bright white and if handled carefully not too prone to creases.
First up I need to print a profiling test target.
I’m using Apple’s ColorSync Utility, since it has a print mode specific for target printing, by making sure all colour management is turned off.

Here’s the target being printed. It’s ~3000 patches and fits on an A3+ (13″ x 19″) sheet.
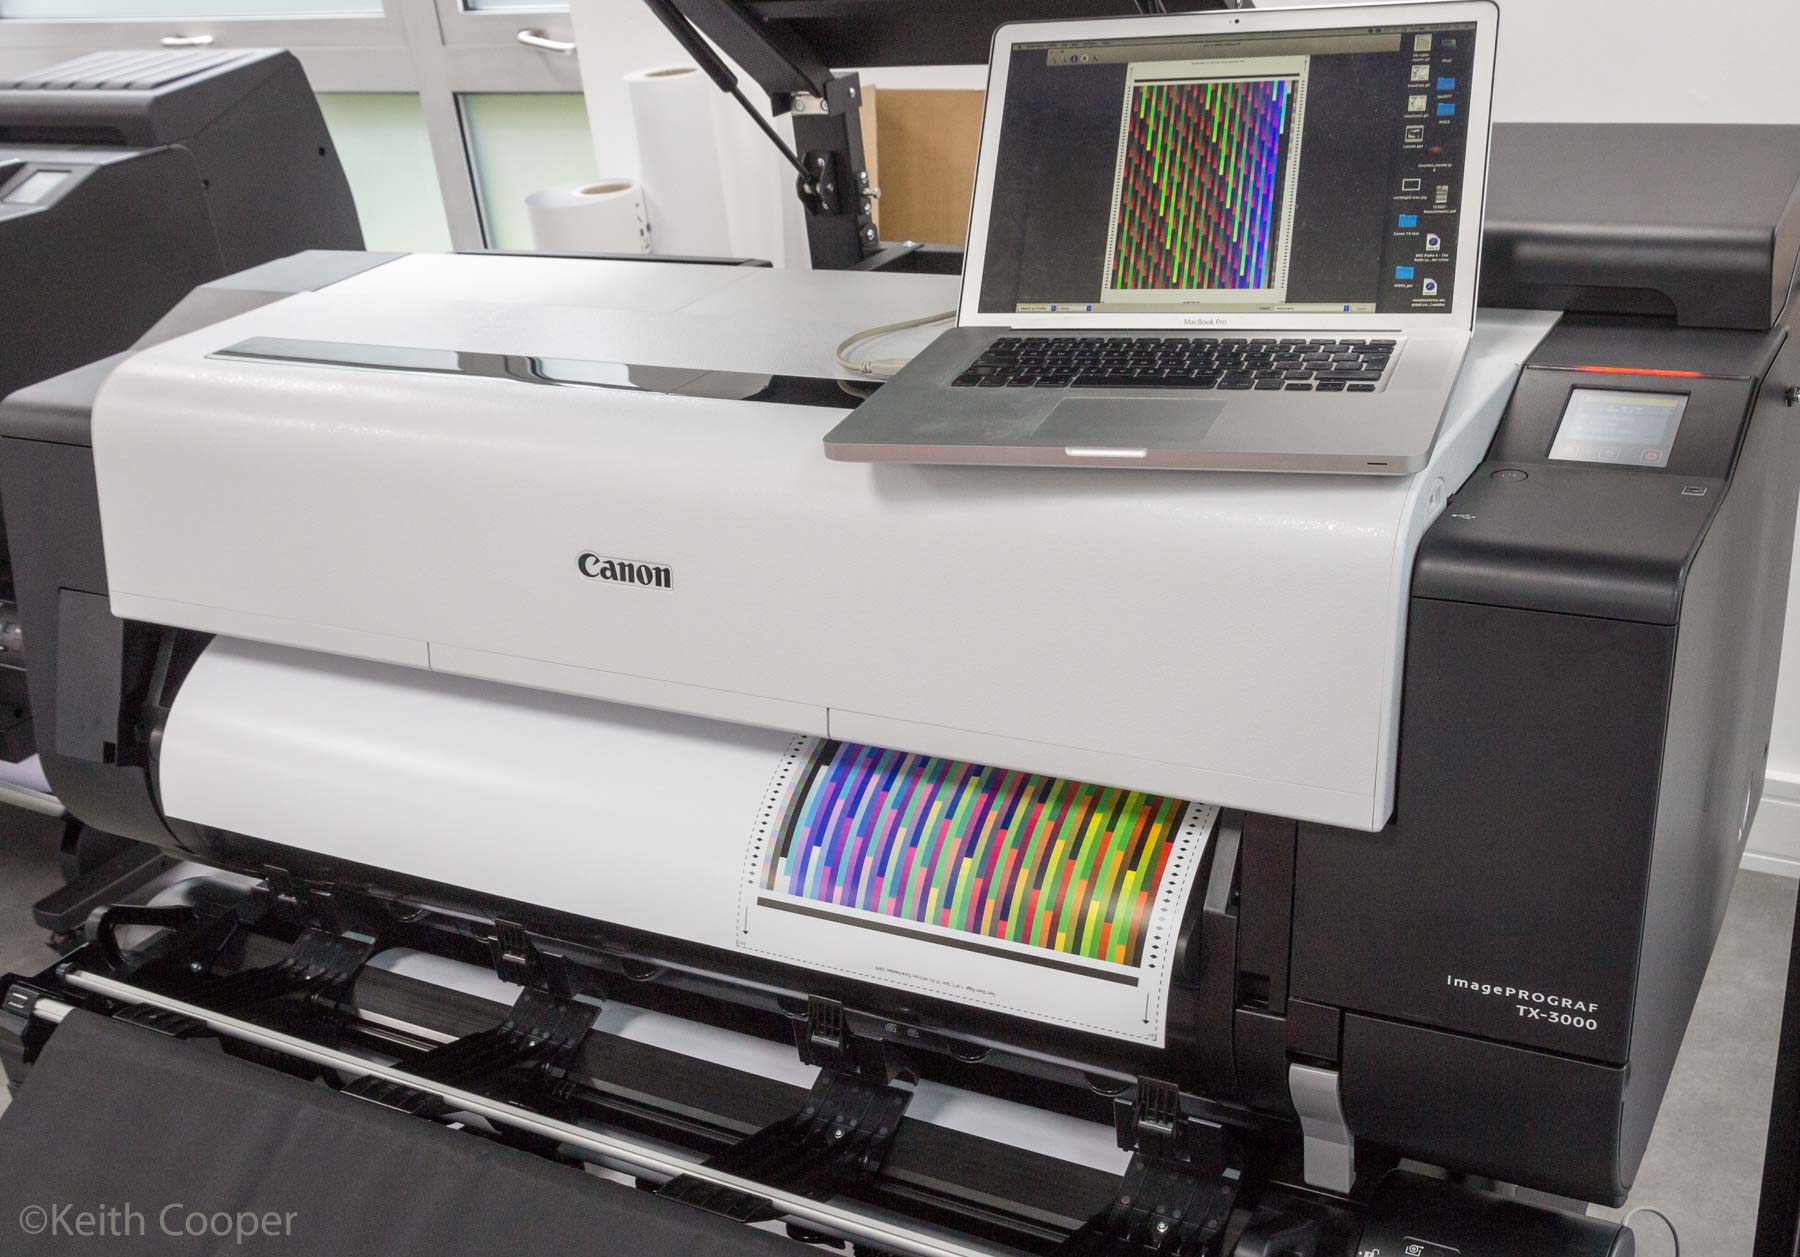
After leaving it to dry for 40-50 mins, it was time to measure the chart with my X-rite i1iSis spectrophotometer.
Note, when making profiles for my normal reviews, I like to leave all targets to dry overnight. This lightish satin paper is pretty quick drying though, so I’m OK…
I’m making my ICC profile with X-rite i1Profiler software.

I don’t normally set much store by various graphic displays of profile gamut, but since I now had profiles for the same paper for the PRO-2000 and the TX-3000, it’s worth a quick look…
The transparent outline represents the gamut of the PRO-2000, whilst the smaller solid shape shows it for the TX-3000.
From ‘above’ the expanded gamut of all those inks in the PRO-2000 is quite clear.

Looking at a side view, shows the differences are not that huge.

In some dark areas, the 4 colour printer is besting the photo printer.
Let’s get back to real world images though.
One reason that I generally eschew these graphical displays is that they invite an overly simplistic better/worse comparison.
This is the gamut plot for semi-gloss/lustre media, using the photo black ink. On matt media you get a smaller gamut anyway, and the differences would be even less.
I used my new profile for test prints on the satin paper, but for others used the Canon supplied profiles.
When you update your printer driver with new media settings, these may include ICC profiles for the media.
I noticed that all the profiles for the new papers added via the PC earlier, were now there on my Mac.
One slight problem is with Canon’s profile naming – the profiles are identified by the paper ID code, rather than any meaningful names. You can get this code from the end of the box that the paper came in, but it’s a pain.
More meaningful names following some code that included the name of the paper would be welcome, but given the vast collection of numbered profiles that accumulated on my Macs over the years of testing Canon printers I guess someone somewhere thinks we all memorise paper ID codes…
You can print in ways that will automatically use the profile from the media configuration file, however for printing images from Photoshop or Lightroom, I’d strongly suggest letting the application manage the colour and making sure that colour management is not being done for you by the driver.
Here’s a couple of prints (of a steam train at Whitby) showing what happens if the driver tries to do colour management for you, when it’s not needed (aka double profiling).

The media is a self adhesive waterproof matt polypropylene paper.
Note how the muted colours of the first print are much better.
The original image of the steam engine at Whitby station shows how the matt media flattens the look of photos if you are not careful.

It also shows why choosing the right paper for an image is important. My original print of the photo above was printed on a cotton rag paper (and framed as a present for my Father) with specific tweaks to the saturation/tone of parts of the image to match the paper used.
As you’d expect, most comments from viewers concerned the steam engine (a ‘Black 5’ 45428 ‘Eric Treacy’ Nth. York Moors Rlwy.)
It was never intended to be printed on self adhesive paper – mind you, the print is water resistant…

Print is the ‘wrong colour’ one.
Some test prints
Two large photos I printed on the satin paper both have areas that stretch some print setups.
The blue sky of the big wheel photo very easily shows banding and posterisation in the sky.
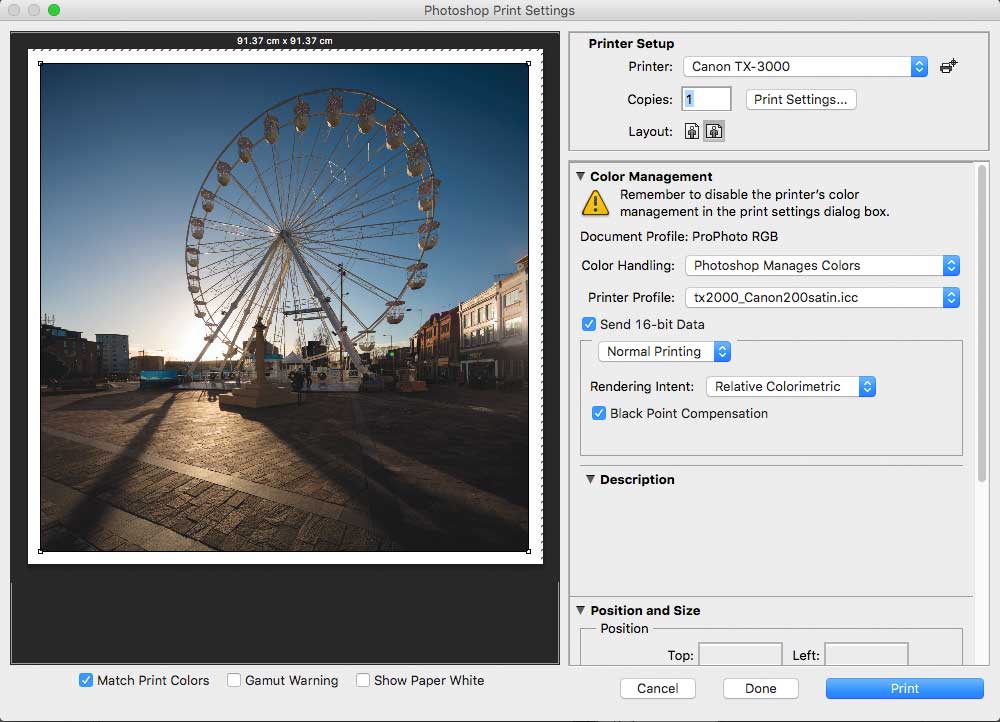
I’m printing directly from Photoshop using my freshly made profile.
You’re seeing a screenshot of Photoshop’s version of a soft proof.
Turning on the ‘Gamut warning’ indicator, shows only a few light grey areas out of gamut.

Here’s the print along with two B&W test prints. [click to enlarge]
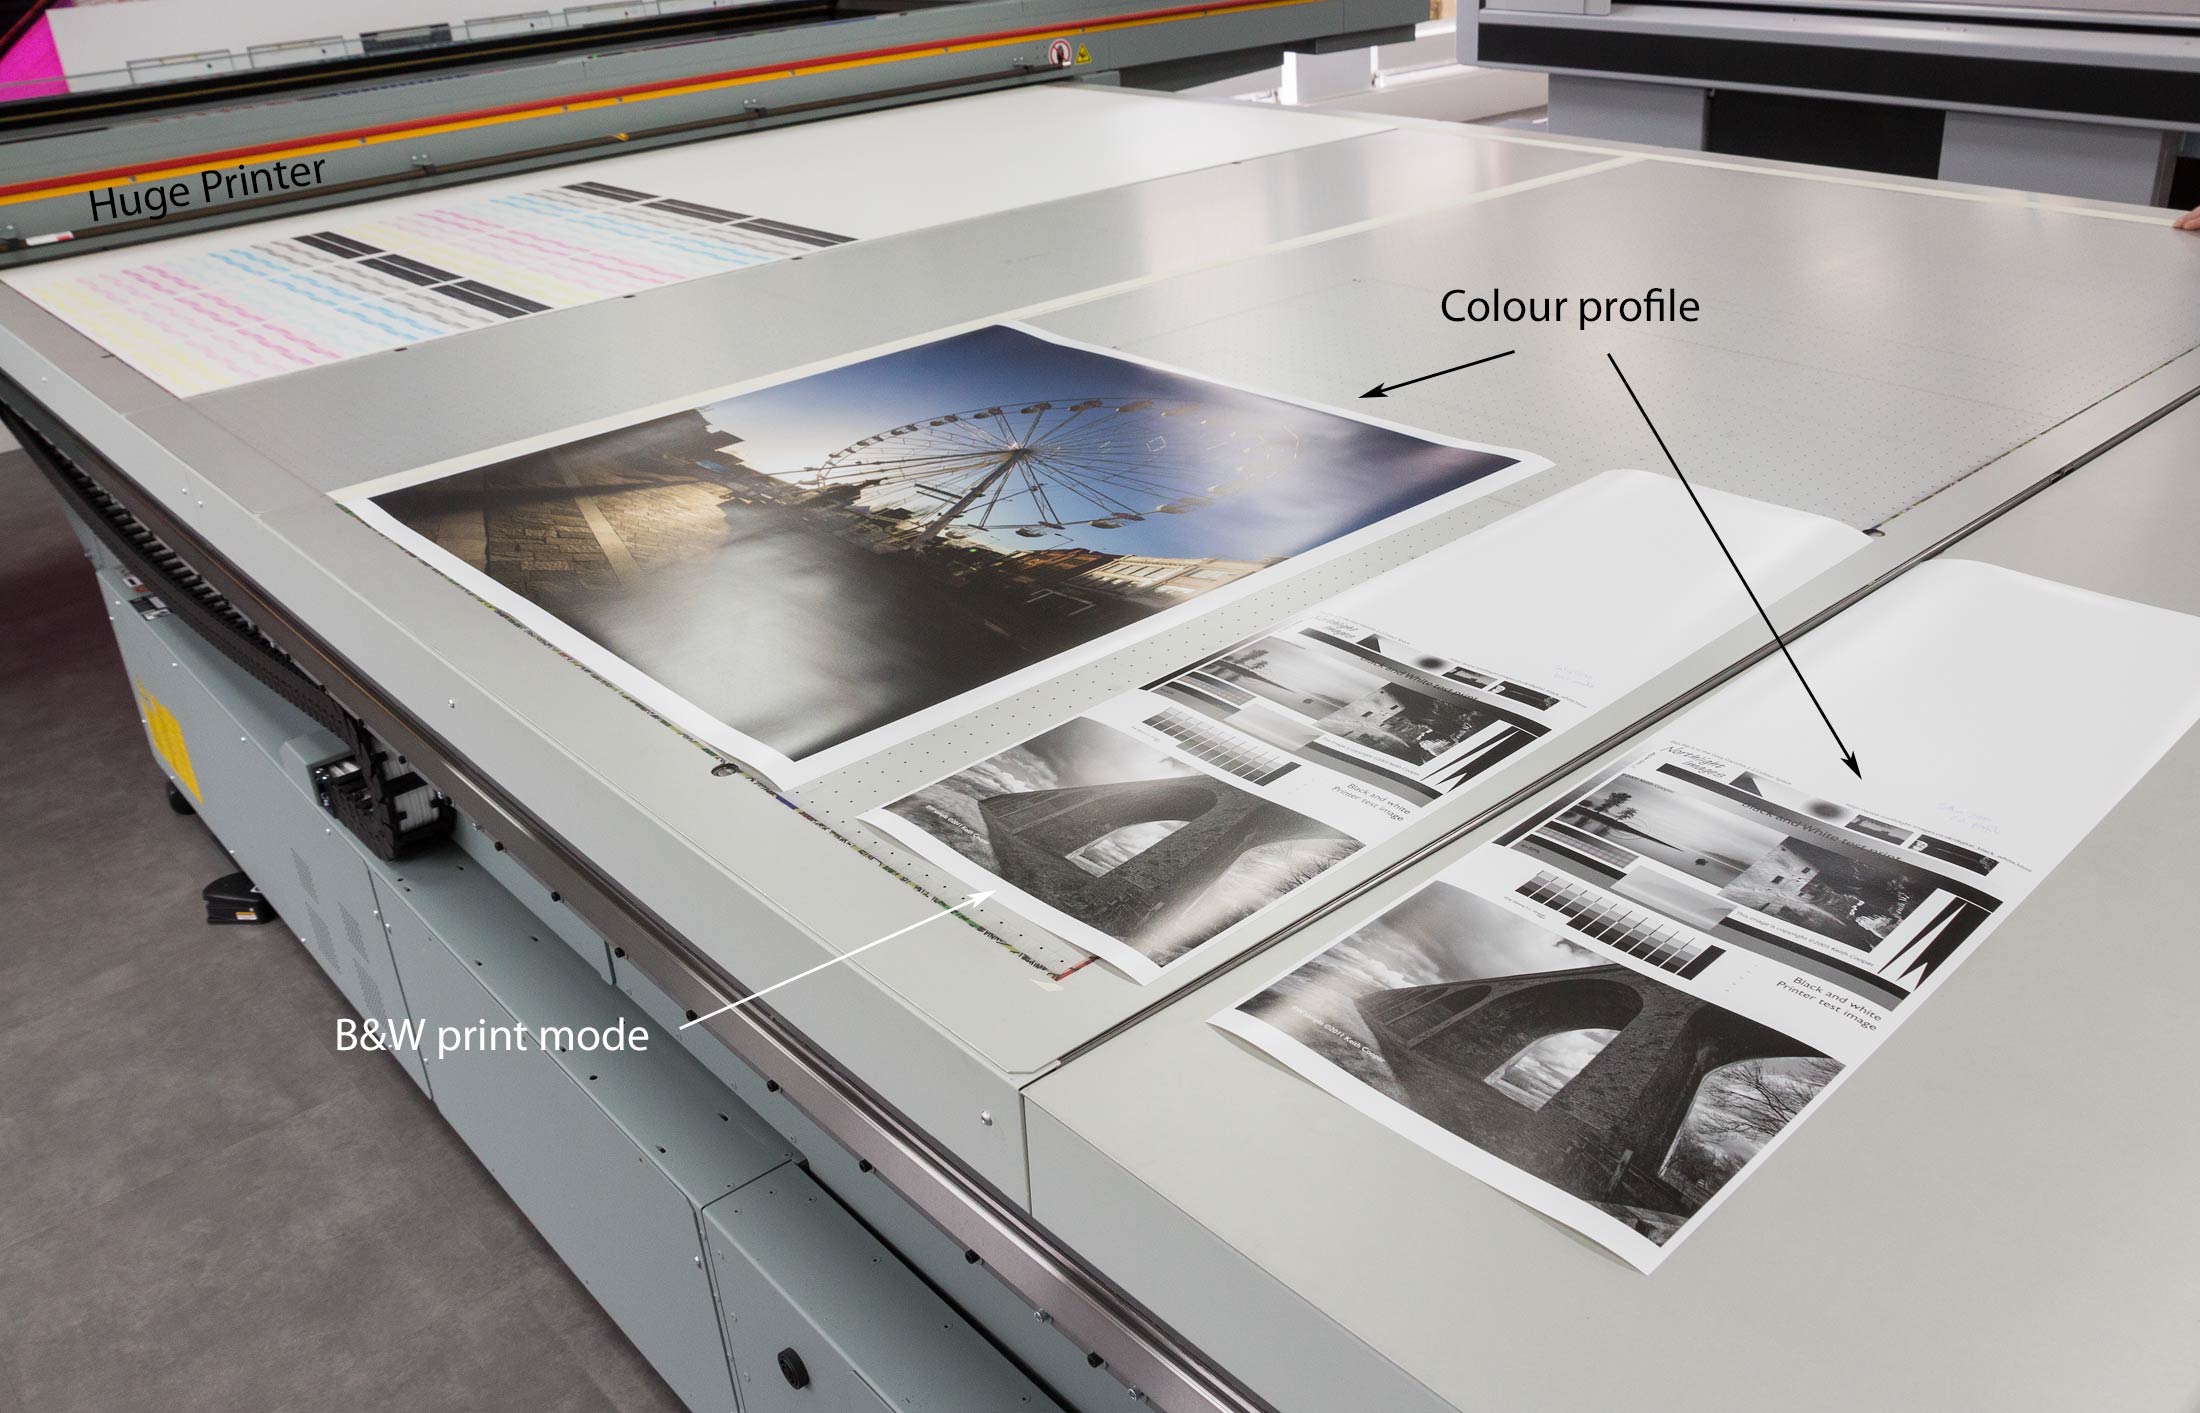
The B&W prints are one of my standard test images. One print uses the printer driver’s B&W print mode, and the other uses my custom profile.
An outdoor woodland scene has a lot more dark foliage colours that challenges a 4 colour printer.

Once again, the Gamut Warning shows up potential problems in light grey.

This is one of those things that can catch out the unwary.
The gamut warning feature is a useful, but fairly blunt tool. Everything out of gamut is shown, no matter how slightly. It’s one of the reasons I try and encourage people to really look at prints, rather than rely too much on soft proofing.

An actual print however shows none of these horrors. Sure, if I put it next to one from the nearby PRO-4000 and carefully compared the two, I’d see some deep shadow detail and dark colours that just weren’t there on the TX-4000 print.
Back in the real world, people just see an interesting 36″ square print, and if they live near Leicester, many will recognise where it was taken from.
An architect client, provided some drawing files in PDF format that I printed on plain paper. [click to enlarge]

Some of the prints.

As expected, printing was quite rapid and the lines were very sharp. Not bad for what was a plain paper with no special coatings.
If you enlarge the image above, you can also see how the ink looks on the satin photo paper – there is some visibility of the ink on the paper surface in the reflected light, but nothing I’d call bronzing (a serious issue with some media I’ve seen used in HP printers).
A quick look with my USB microscope shows two views of text on plain paper. The number ‘1’ is around 0.7mm high

A higher magnification clearly shows the ink dots and lack of bleed.

This was at ‘high’ print quality.
The printer uses 5 picolitre ink droplets. The 2400 x 1200 dpi output is claimed to give fine lines that are accurate to ±0.10% and as thin as 0.02mm
A CAD image of the NASA 2020 Mars lander has some good strong colours and let me try some different print modes. This is printing using ‘Printer manages colour’ in Photoshop.
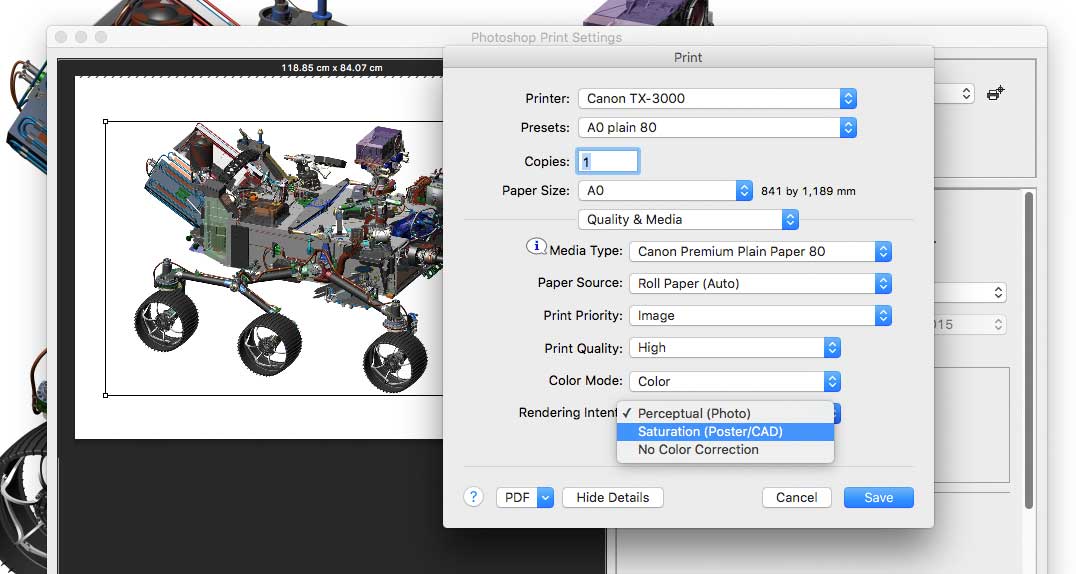
There is a range of workflow related software available from Canon, but that’s outside the scope of this particular review. Canon also supply some basic layout software that can be of use for placing multiple images on a sheet.
I’d use Imagenest for my photo layout or possibly Mirage (both tested on the PRO-2000).
Whilst I didn’t try it, there are borderless print options available, as with the PRO-2000 I tested a while ago.
A photo of the architectural drawings and coloured CAD print on plain 80gsm paper. [click to enlarge]

Here’s the lander image printed on plain paper and the waterproof self adhesive one I mentioned earlier.

Canvas
I popped a roll of matt cotton canvas into the printer and tried two images that I know work quite well on matt media.
The first is the dusk light at Cannon Beach in Oregon.
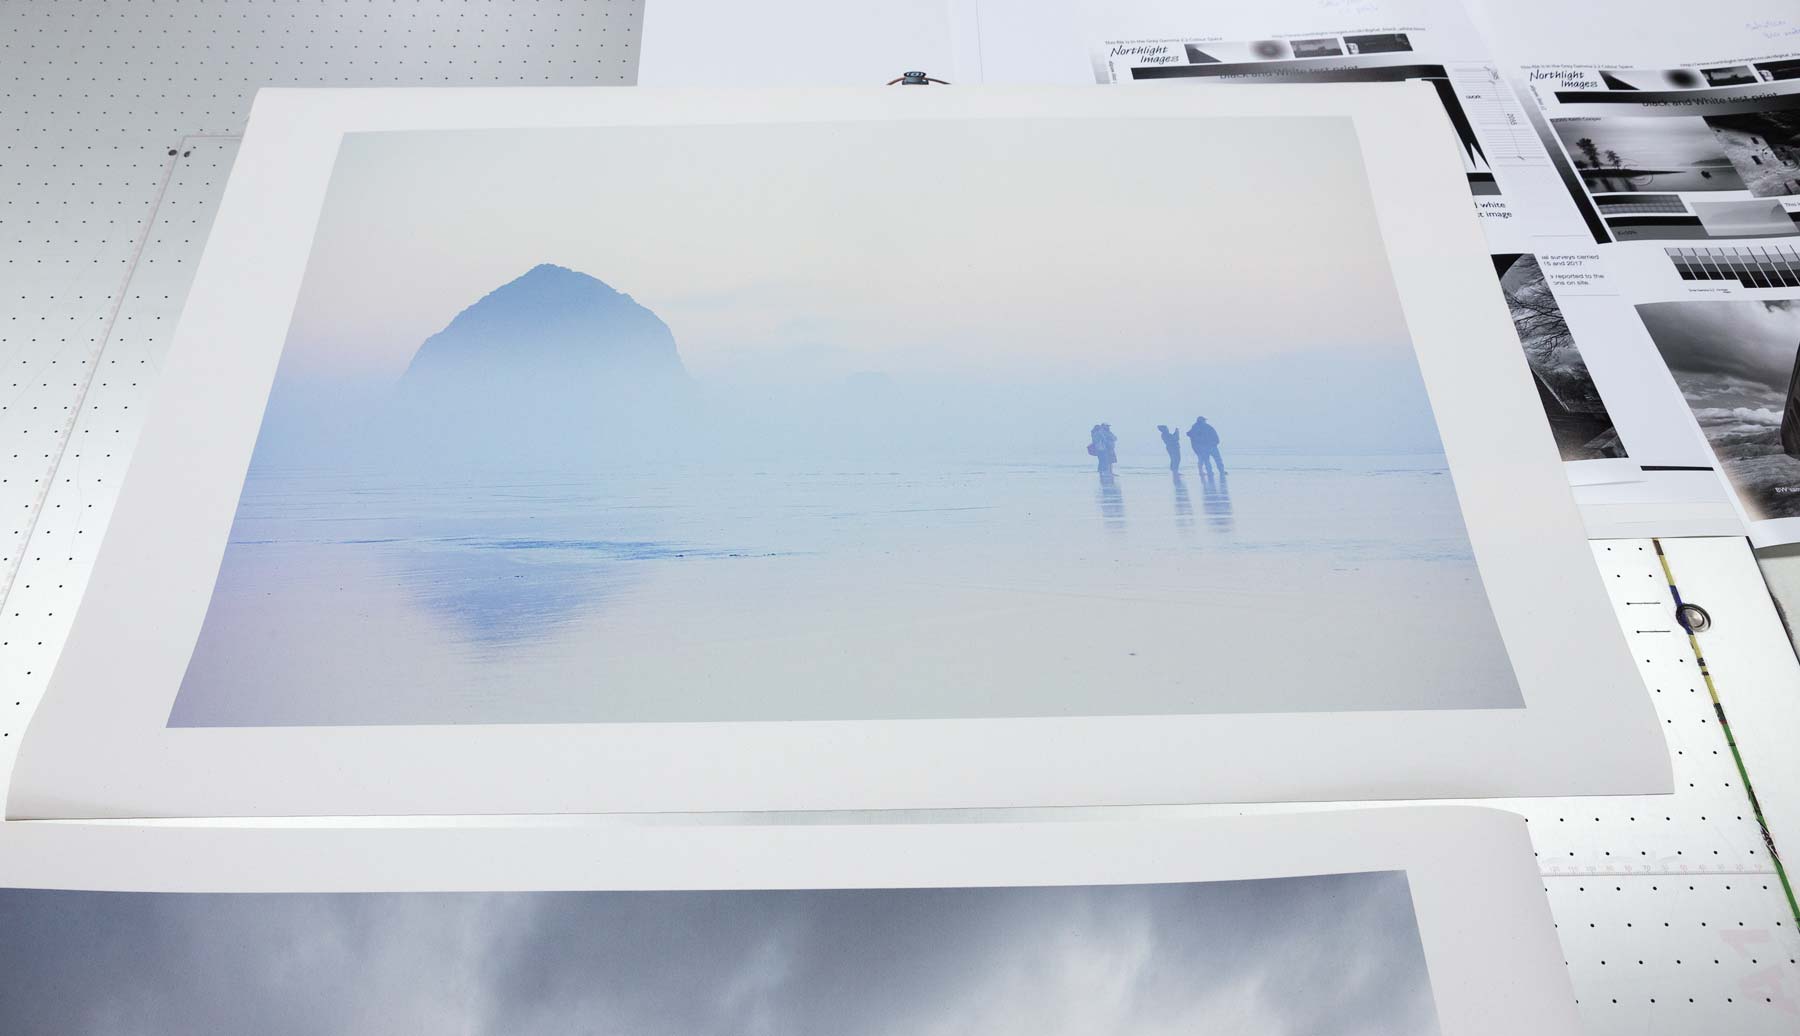
This would look good with a coat of varnish, although as a ‘natural’ cotton canvas it has rather too many dark specks in it, for my taste.
The second print of a very cold winters day at Snape reed beds in Suffolk works well with the more muted tones available on a matt surface like this.
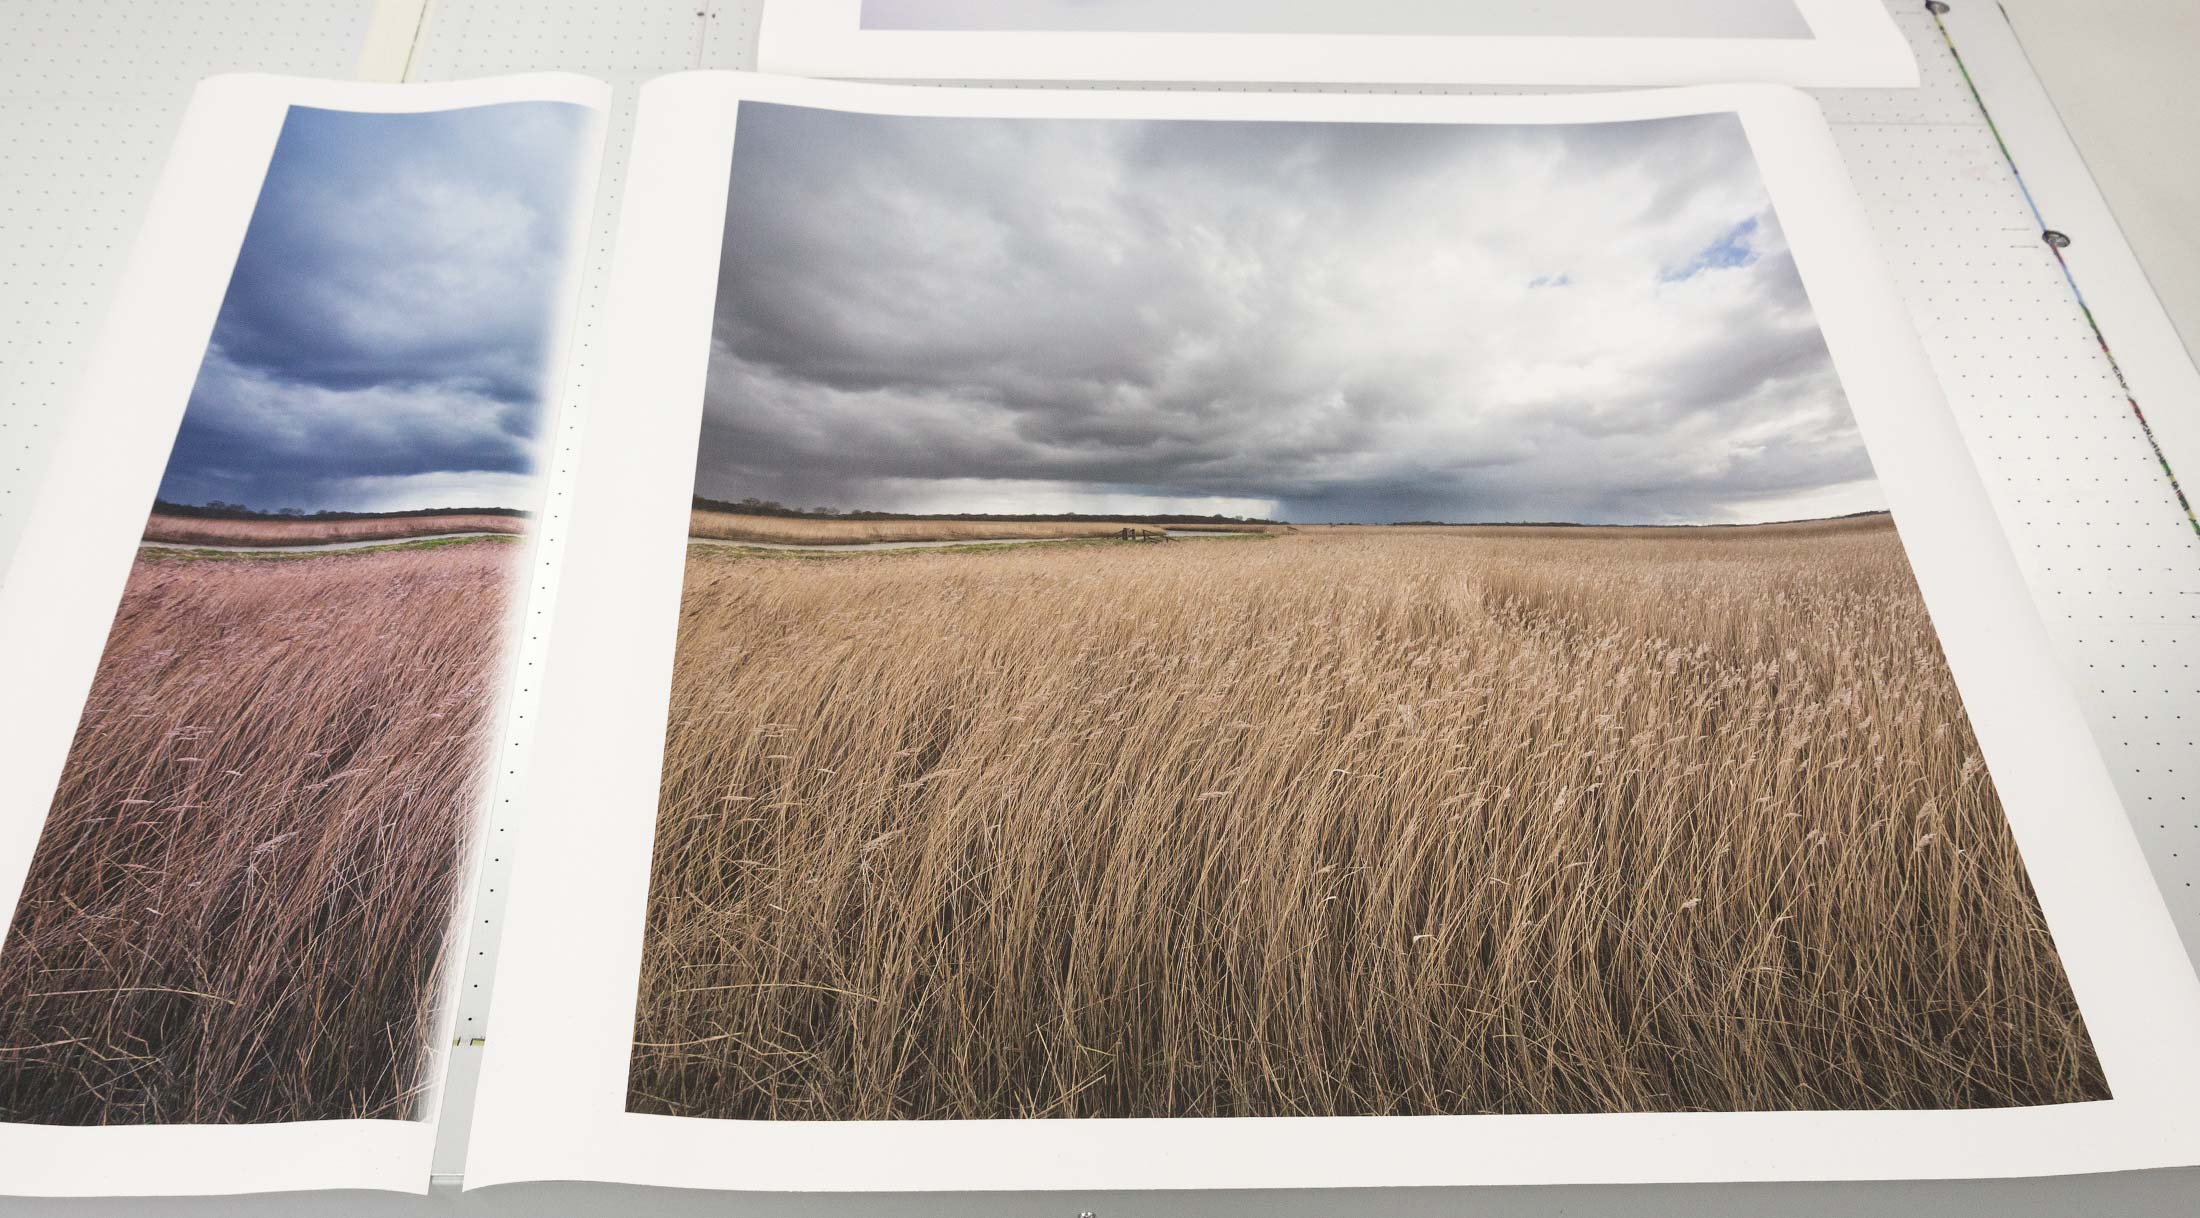
Note too the ‘double profiled’ reject partial print at the left, reminding me to take care with printing dialogs when media settings have profiles embedded in them.
Conclusions
I’ve looked at fairly specific aspects of using the TX-3000 and answered my main question about using it to make the odd photo or poster print.
The photo quality of the four inks was never going to match the PRO series, but I was pleased at how good the large prints looked, especially on better quality media. I’ve only shown a selection of the ones I made, and many passed the ‘Would I want my name next to it, if it was on someone’s office wall’ test.
Colour profile handling was a slight issue, from the cryptic Canon profile names to a couple of instances of double profiling. Not a big concern, since I was using a new printer from scratch, with only the day to test it. I realised that when I’ve tested all of Canon’s other printers I never embedded profiles in the media files. I’m sure it works well with many applications, but take care.
Monochrome printing
If you’re looking for large black and white photo prints then be careful to see how they look under different lighting.
With just the one black (Mk or Pk) many would say that you shouldn’t expect to get any quality from B&W prints.
Well, from printing my test images I can confirm that both the B&W print mode of the driver and printing B&W images via a custom profile produce broadly acceptable prints. However you should be aware that the two techniques can both leave a slight residual colour tint, that depends on the media used and the lighting.
If you are really serious about B&W, then you’d get one of the PRO printers – I’ve lots more about B&W printing in the reviews.
I would note though that if you know the specific type of lighting you’ll be using, it’s perfectly possible to correct the residual tint with a bit of experimentation. I’ve an article about this: Removing colour tints in B&W prints
Overall performance
The TX-3000 works rather well, and with sufficient care in image editing, there is no reason that a architect’s practice or design company couldn’t produce very nice looking large prints of photos or renderings, as well as all the line drawings, posters and charts they might need.
Quality on plain paper is good, and with the water resistance of the inks, your drawings are not going to run when it rains on a site visit.
For a print shop, offering prints of people’s photos on canvas or paper, I’d personally want more inks, but then again high end printing and photography is my business, so I would say that ;-)
The range of media available make short term outdoor prints a viable option, with backlit media and other display options for graphic and display use.
The TX-3000 is a good all round printer – I’d personally pick the PRO-2000 or 4000 for my work, but then again I run an architectural and commercial photography business, not an architectural practice or design house.
Canon TX-3000 details [Canon UK | Canon US ]
–ooOoo–
Related printer articles/reviews
- Canon PRO-2000 review
- Canon PRO-2000 install/setup
- Moving your PRO large format printer
- Canon iPF6450 review
- All of Keith’s detailed printer reviews
Thanks to Canon UK’s printer showroom in Birmingham for the help in facilitating this short review.
Questions/comments? Please feel free to ask directly, or use the comment form at the foot of the article.
Specifications
Info from Canon UK
| Printer Type | TX-2000 5 Colour – 24″/609.6mm TX-3000: 5 Colour – 36″/914.4mm TX-4000: 5 Colour – 44″/1117.6mm |
| Print Technology | Canon Bubblejet on Demand 6 colours integrated type (6 chips per print head x 1 print head) |
| Number of Nozzles | Total: 15,360 MBK: 5,120 nozzles C, M, Y, BK: 2,560 nozzles each |
| Print Resolution | 2,400 x 1,200 dpi |
| Nozzle Pitch | 1,200 x 2 includes Non-firing nozzle detection and compensation system |
| Line Accuracy | ±0.1 % or less |
| Ink Droplet Size | 5 Picolitre per colour |
| Ink Capacity | Bundled Starter Ink: 330ml (MBK, BK,C,M,Y) Sales Ink: 160ml/330ml/700ml |
| Ink Type | Pigment ink: 5 colour MBK/BK/C/M/Y |
| OS Compatability | Microsoft Windows 32 Bit: 7, 8.1, 10, Server 2008, 64 Bit: 7, 8.1, 10, Server 2008/R2, Server 2012/R2 Apple Macintosh: OSX 10.10.5 – 10.11, MacOS 10.12 |
| Printer languages | HP-GL/2, HP RTL, PDF, JPEG – for details check specifications |
| USB Interfaces | USB B Port: Type: Built in (Hi-Speed USB) Mode: Full Speed (12 Mbit/sec), High Speed (480 Mbit/sec), Bulk transferConnector Port: Series B (4 pins) USB A Port: USB Memory (Direct Print) |
| Ethernet | IEEE 802.3 10base-T IEEE 802.3u 100base-TX/Auto-Negotiation IEEE 802.3ab 1000base-T/Auto-Negotiation IEEE 802.3x Full Duplex |
| Protocol: | SNMP (Canon-MIB, HTTP, TCP/IP (IPv4/IPv6), ftp |
| Wireless LAN: | Standard: IEEE802.11n/IEEE802.11g/IEEE802.11b |
| Security: | WEP (64/128bit) WPA-PSK (TKIP/AES) WPA2-PSK (TKIP/AES) |
Memory
| Standard Memory | 128GB (Physical memory 2GB) |
| Expansion slot | No |
Printing Speed
| CAD Drawing | Plain Paper (A0 Roll) 0:37 (Fast Economy Mode) 0:40 (Fast) 1:10 (Standard) |
| Poster | Plain Paper (A0 Roll) 0:42 (Fast Economy mode) 0:42 (Fast) 1:26 (Standard) Heavy coated Paper (A0 Roll) 1:43 (Fast) 2:37 (Standard) |
Hard disk
| Capacity | 500GB (Encrypted) |
Paper handling
| Media Width | Roll paper: 203.2mm – 1118mm (3000: 917mm | 2000: 609.6mm) Cut sheet: 203.2mm – 1118mm( 3000: 917mm | 2000: 609.6mm) |
| Media thickness | 0.07 – 0.8mm |
| Minimum Printable Length | 203.2mm |
| Maximum Printable Length | Roll Paper: 18m (varies according to the OS and application) Cut Sheet: 1.6m |
| Maximum Media Roll Diameter | 170mm |
| Paper Feed Method | Roll Paper: Front loading, front output Cut Sheet: Front loading, front output (Manual feed using media locking lever) |
| Borderless Printing Width (Roll Only – 44″ shown) | [Recommended] 515mm(JIS B2), 728mm(JIS B1), 1030mm(JIS B0), 594mm(ISO A1), 841mm(ISO A0), 10″, 14″, 17″, 24″, 36″, 42″, 44″ [Printable] 257mm(JIS B4), 297mm(ISO A3), 329mm(ISO A3+), 420mm(ISO A2), 8″, 12″, 16″, 20″, 30″, 300mm, 500mm, 600mm, 800mm, 1000mm |
| Maximum Numbers of delivered prints Multi-position Basket | Standard Position : 1 sheet (any image) Flat Position : 20 sheets (A2 landscape, any image, plain paper/coated paper) |
| Maximum Numbers of delivered prints Stacker | Basket Position : 1 sheet (any image) Folding Position : 100 sheets (A0/A1 portrait, CAD drawing, plain paper) Stacking Position : 100 sheets (A1/A2 landscape, CAD drawing, plain paper) |
Dimensions and weight
| Physical Dimensions and Weight | Printer unit with basket open and printer stand: TX-4000 1593 x 984 x 1168 mm (Basket Open) Weight: 114 kg (including Roll Holder) TX-3000 1389 x 984 x 1168 mm (Basket Open) Weight: 105 kg (including Roll Holder) TX-2000 1110 x 984 x 1168mm (Basket Open) Weight: 91 kg (including Roll Holder) |
| Software Included | imagePROGRAF TX-Series Printer Driver, Quick Utility Toolbox, Print Plug-in for Office, Extended Survey Program and Poster Artist Lite other software is available to download from Canon’s web site. |
Power and operating requirements
| Power Supply | Input Power: AC 100-240 V (50-60 Hz) |
| Power Consumption | Power consumption (using wired LAN): 107 W or less (3000: 105W or less | 2000: 91W or less) At sleep mode (using wired LAN): 3.6 W or less At sleep mode (using all ports): 3.6 W or less At the power off: 0.3 W or less Default setting for the time to enter the Sleep mode: 301sec |
| Operating Environment | 15 – 30°C, 10 – 80 % (Condensation free) |
| Noise Level | Operation : 51dB(A) or less (Plain paper, line drawing, standard mode) Stand by : 35dB(A) or less (Measured on ISO7779 standard) |
| Regulations | Europe: CE, Russia: EAC |
| Certificates | ENERGY STAR (WW), TUV, CB |
What’s included
| What’s in the box? | Printer, Roll Unit, 1 x Print Head, 1 x Maintenance Cartridge, 3” Paper Core Attachment, EU & UK Power Cable, 1 Set of Starter Ink Tanks, Set Up Guide, Safety/Standard, Software CD-ROM (OSX/Windows), PosterArtist Lite CD-ROM, EU Biocide Sheet, Eurasian Economic Union Sheet, Important Information Sheet, Quick Guide and Print head Alignment Sheet |
Options
| Optional Items | Roll Unit: RU-44 (3000: RU32 | 2000: RU22) Stacker: SS-41 (SS31 | SS21) 2/3″ Roll Holder: RH2-45 (RH2-34 | RH2-27 TX-2000 Stand SD-21 |
Consumables
| User Replaceable Items | Print Head: PF-06 Ink Tanks: PFI-110(160ml), PFI-310(330ml), PFI-710(700ml) Cutter Blade: CT-07 Maintenance Cartridge: MC-30 |
Ink supplies
| 160ml Cartridges | 2363C001AA – PFI-110MBK 2364C001AA – PFI-110BK 2365C001AA – PFI-110C 2366C001AA – PFI-110M 2367C001AA – PFI-110Y |
| 330ml Cartridges | 2358C001AA – PFI-310MBK 2359C001AA – PFI-310BK 2360C001AA – PFI-310C 2361C001AA – PFI-310M 2362C001AA – PFI-310Y |
| 700ml Cartridges | 2353C001AA – PFI-710MBK 2354C001AA – PFI-710BK 2355C001AA – PFI-710C 2356C001AA – PFI-710M 2357C001AA – PFI-710Y |
Security related features
Secure Storage:
- Self-encrypting and decrypting of image data while printing.
- Encryption of all data on the hard drive
- Secure file erase
- Secure disk erase
Secure communication:
- 802.1x Authentication
- SNMPv3
- SSL/TLS
- IPSec
Secure Management:
- Operation panel lock via remote user interface
- Remote user interface multilevel
- Hide IP from panel
- Panel access control
- Job storage and PIN printing
Secure interfaces:
- Disable USB drive port
- Disable firmware update via USB drive
- Disable interface panel
- Disable internet connection
- Disable protocols
-- --
Never miss a new article or review - Sign up for our Newsletter (2-4 a month max.)More print related information from Keith
...or use the search box at the top of any pageReference pages and test images
- Printer Test Images
- B&W printer test image
- Printer cleaning
- Paper reviews
- Printer info/news/speculation Canon | Epson
We're an Amazon.com affiliate, so receive payment if you buy via Amazon US