


Fujifilm GF 30mm TS f/5.6 review
Fujifilm GF 30mm TS f/5.6 tilt/shift review
Fujifilm medium format tilt/shift lens

No more Google ads. Too many deceptive and irritating adverts.
Any ad links left are non tracking, to companies we know, trust and we've worked with for years [Park Cameras]
Ads helped pay for site running costs, so if you found something useful, please
...Make small KoFi donation?
...Subscribe to Keith's YouTube Channel
...Get Keith's book about how to use tilt/shift lenses
Our site contains affiliate links - these help support the site. See our Advertising policies for more
Keith Cooper looks at the Fujifilm GF 30mm TS f/5.6 G mount tilt/shift lens
This Fujifilm G mount ‘perspective control’ lens gives up to 8.5º of tilt and ±15mm of shift.
The lens was tested on Fuji GFX100S and GFX 100 II medium format cameras [~102MP 33mm x 44mm sensor]
It gives a similar field of view to a 24mm lens such as the Canon TS-E24mm F3.5 L II or Nikon PC-E24mm on 35mm ‘FF’ sensors.
Note that there is also a review of the Fuji 110mm TS F5.6 lens, launched with the 30mm TS

Keith’s book about using tilt/shift lenses is now available.
If not in the UK check for import issues and just try any good local bookshop.
Publisher info: ISBN: 9781785007712
This review is one of over 50 articles on this site that Keith has written about tilt/shift lenses. There is also an index page specifically devoted to the subject, including all Keith’s articles, reviews and videos.
There are two video reviews. The first covers phyical and usage aspects of the lens. The second looks at how it performs.
Another video looks at making two prints form some of my test images
Review: Fujifilm GF 30mm TS F5.6 tilt and shift lens
The Fujifilm 30mm TS lens was launched in September 2023. It gives a wide field of view and large enough image circle to allow for ±15mm of shift. on a 33mm x 44mm medium format sensor.
It has a field of view roughly equivalent to a 24mm lens on 35mm ‘full frame’ and there are some brief comparisons with Canon’s TS-E24 in an appendix to this review. [TS-E24 review fyi]
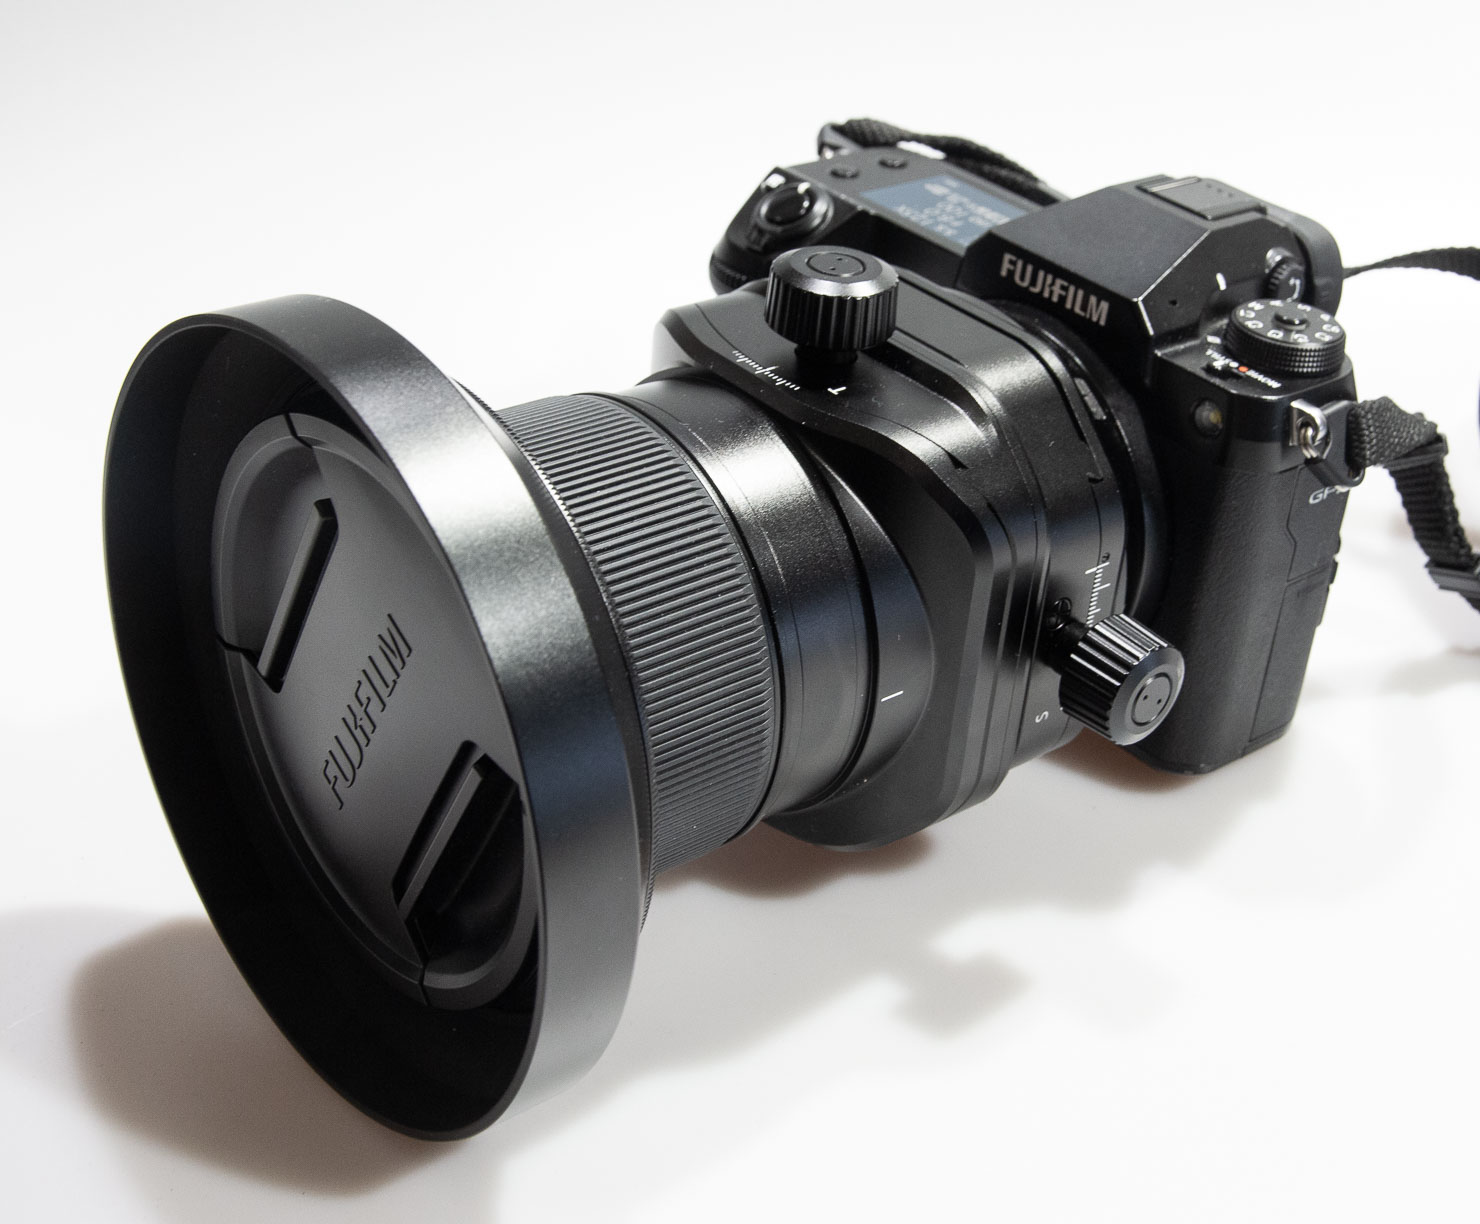
Click on images to see larger versions.
I’m mainly testing the GF 30mm TS lens with the Fujifilm GFX100S camera, although I was able to see how well it worked on the GFX 100 II camera, launched at the same time as the lens.
It’s a hefty lens and comes with an optional tripod collar mount/foot.This affects some aspects of using the lens, which I’ll address later.

Tilt/shift/swing/rise/fall
In all my articles I refer just to lens shift or tilt along with the direction it is in. You may sometimes see vertical up/down shift referred to as rise or fall, and left/right tilt as swing. These terms are familiar to anyone coming at lenses like the GF 30mm TS lens from a view camera background, but I prefer to be more consistent for readers coming from a 35mm camera background. My apologies if you’re a long time large format camera user, but you should already know all this stuff ;-)
GF 30mm TS f/5.6: Basic specifications
| 30mm TS specifications | |
|---|---|
| Lens type | Prime lens |
| Max Format size | Medium Format (44x33mm) |
| Focal length | 30 mm |
| Lens mount | Fujifilm G |
| Aperture | |
| Maximum aperture | F5.6 |
| Minimum aperture | F32 |
| Aperture ring | No |
| Number of diaphragm blades | 9 |
| Aperture notes | Rounded aperture blades |
| Optics | |
| Elements | 16 |
| Groups | 11 |
| Focus | |
| Minimum focus | 0.30 m (11.81″) |
| Maximum magnification | 0.21× |
| Autofocus | No |
| Focus method | Internal |
| Distance scale | No [indicated on camera display] |
| DoF scale | No |
| GF 30mm TS f/5.6: Physical aspects | |
| Weight | 1340 g (2.95 lb) |
| Diameter | 87 mm (3.43″) |
| Length | 139 mm (5.47″) |
| Filter thread | 105 mm |
| Hood supplied | Yes |
| Tripod collar | Yes |
The GF 30mm TS f/5.6 is a solidly built lens, no external movement of parts as you focus [internal focus].
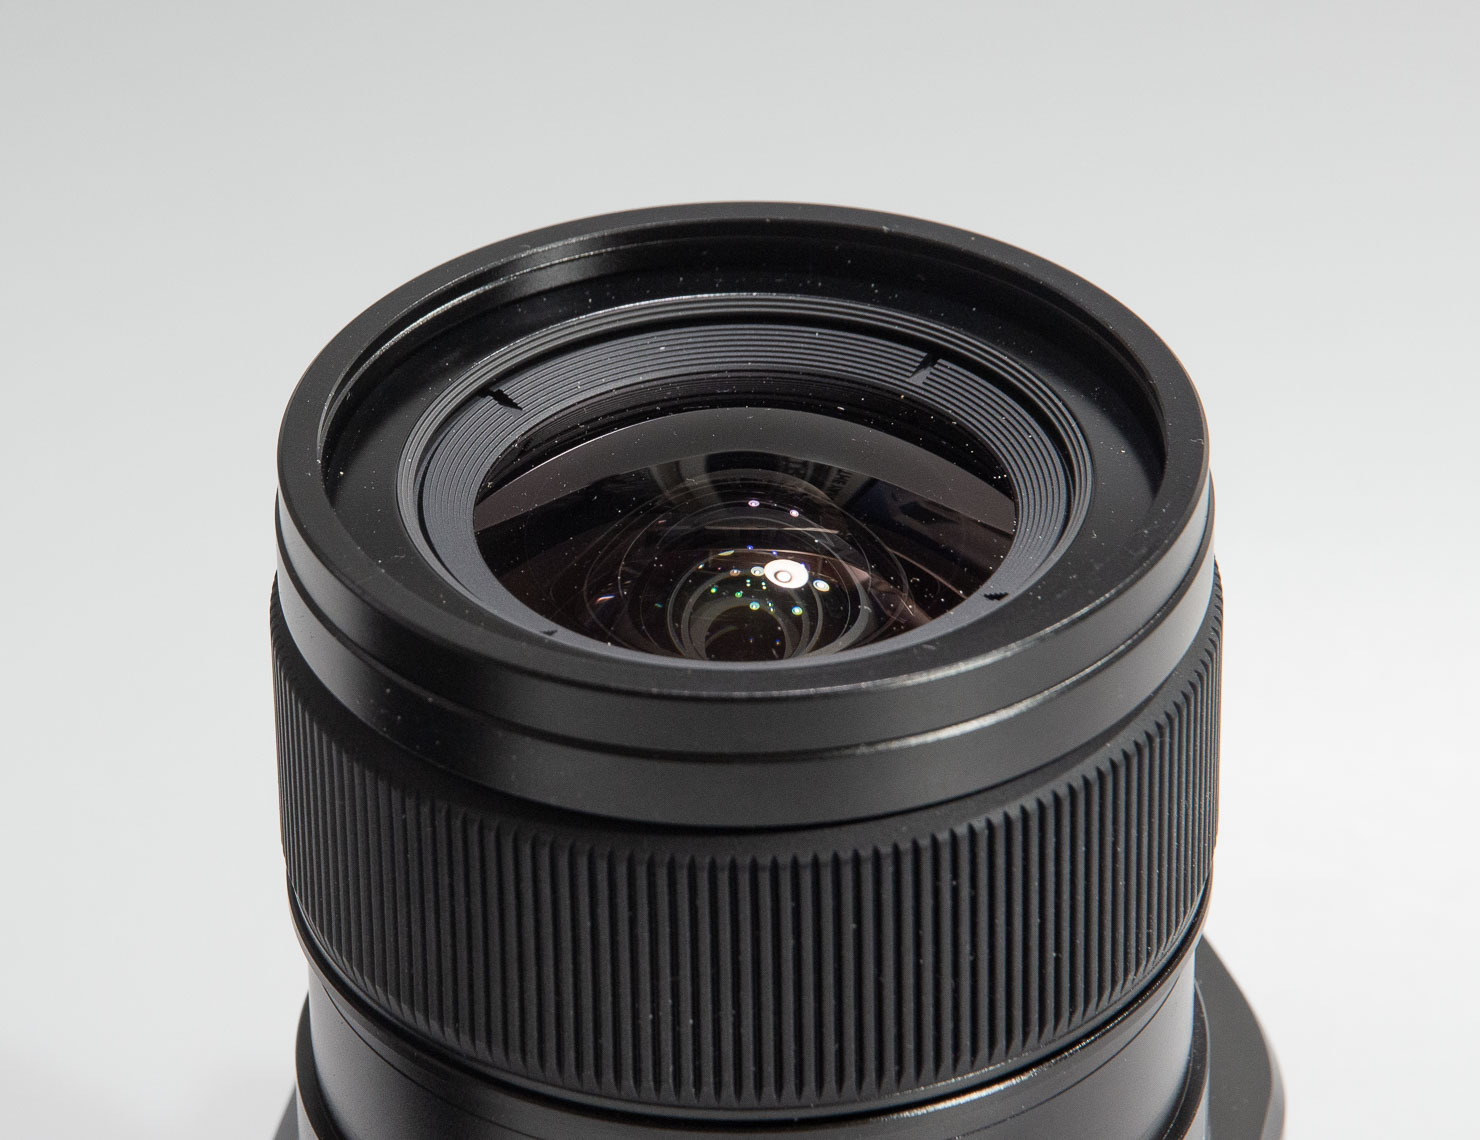
Note the 9 blade aperture. It is decidedly circular looking. which means that sunstars are definitely not a prominent feature.

Here’s the GF 30mm TS lens internal construction detail. There is a lot of glass inside it.

The GF 30mm TS lens is designed to give a huge 85mm image circle
MFT at 10/20/40 lpm [figures from Fujifilm]


The focus throw is ~100 degrees, giving a good range for both near and far focus. The focus is direct.
The focus of the GF 30mm TS seems to extend just a bit past infinity*. This is a good thing since it gives an increased flexibility in setting the plane of focus when using tilt. It does however mean that you do have to focus on objects rather than just trust the focus end stop.
*Note that the lens was loaned to me for a few weeks and went back to Fuji before I was able to test this in more detail, so it needs further testing to be sure.
As a fully manual lens the focus peaking [set at minimum] and ability to zoom in via the EVF or screen is very useful. In testing the new GFX100 II, with its high res EVF, I didn’t notice it making focusing any easier, but that could be my eyesight and the fact that I use a lot of manual focus lenses.
The lens requires careful focusing if you want to get the very best out of it. Even some basic testing showed its immediate superiority over any other wide tilt/shift lens I’ve looked at.

The red peaking is visible here.
The camera records focus distance as well as the amount of lens shift and the direction of lens shift. In the view above, you can see it’s shifted 15mm [the maximum] to the left [shown as -90º].
Note that older GFX cameras need a firmware update to show/record the shift data. Tilt angle is not recorded.
GF 30mm TS f/5.6: Lens movements
The shift and tilt are controlled by small knobs, with locking knobs on the opposite side. The tilt axis also has a ‘no tilt’ lock for shift only use. There is a detent at the zero settings making it easier to feel when movements are zeroed.
The shift knob [L] and smaller tilt lock knob [R] can be seen]

The view from the other side shows the mount rotation lock nearest the mount.
This allows the lens to be rotated ±90º with respect to the mount.
Below the shift scale [±15mm] is a lock for the shift movement – take care with such lenses not to over-tighten it. This is a major cause of faults with hired tilt/shift lenses I’m told. I just treat any £3900 lens with care ;-)

To the left of the shift lock is the release tab for rotating the tilt axis with respect to the shift axis.
Here are two views of the lens at full tilt – note that the tilt axis is at 90º to the shift axis.

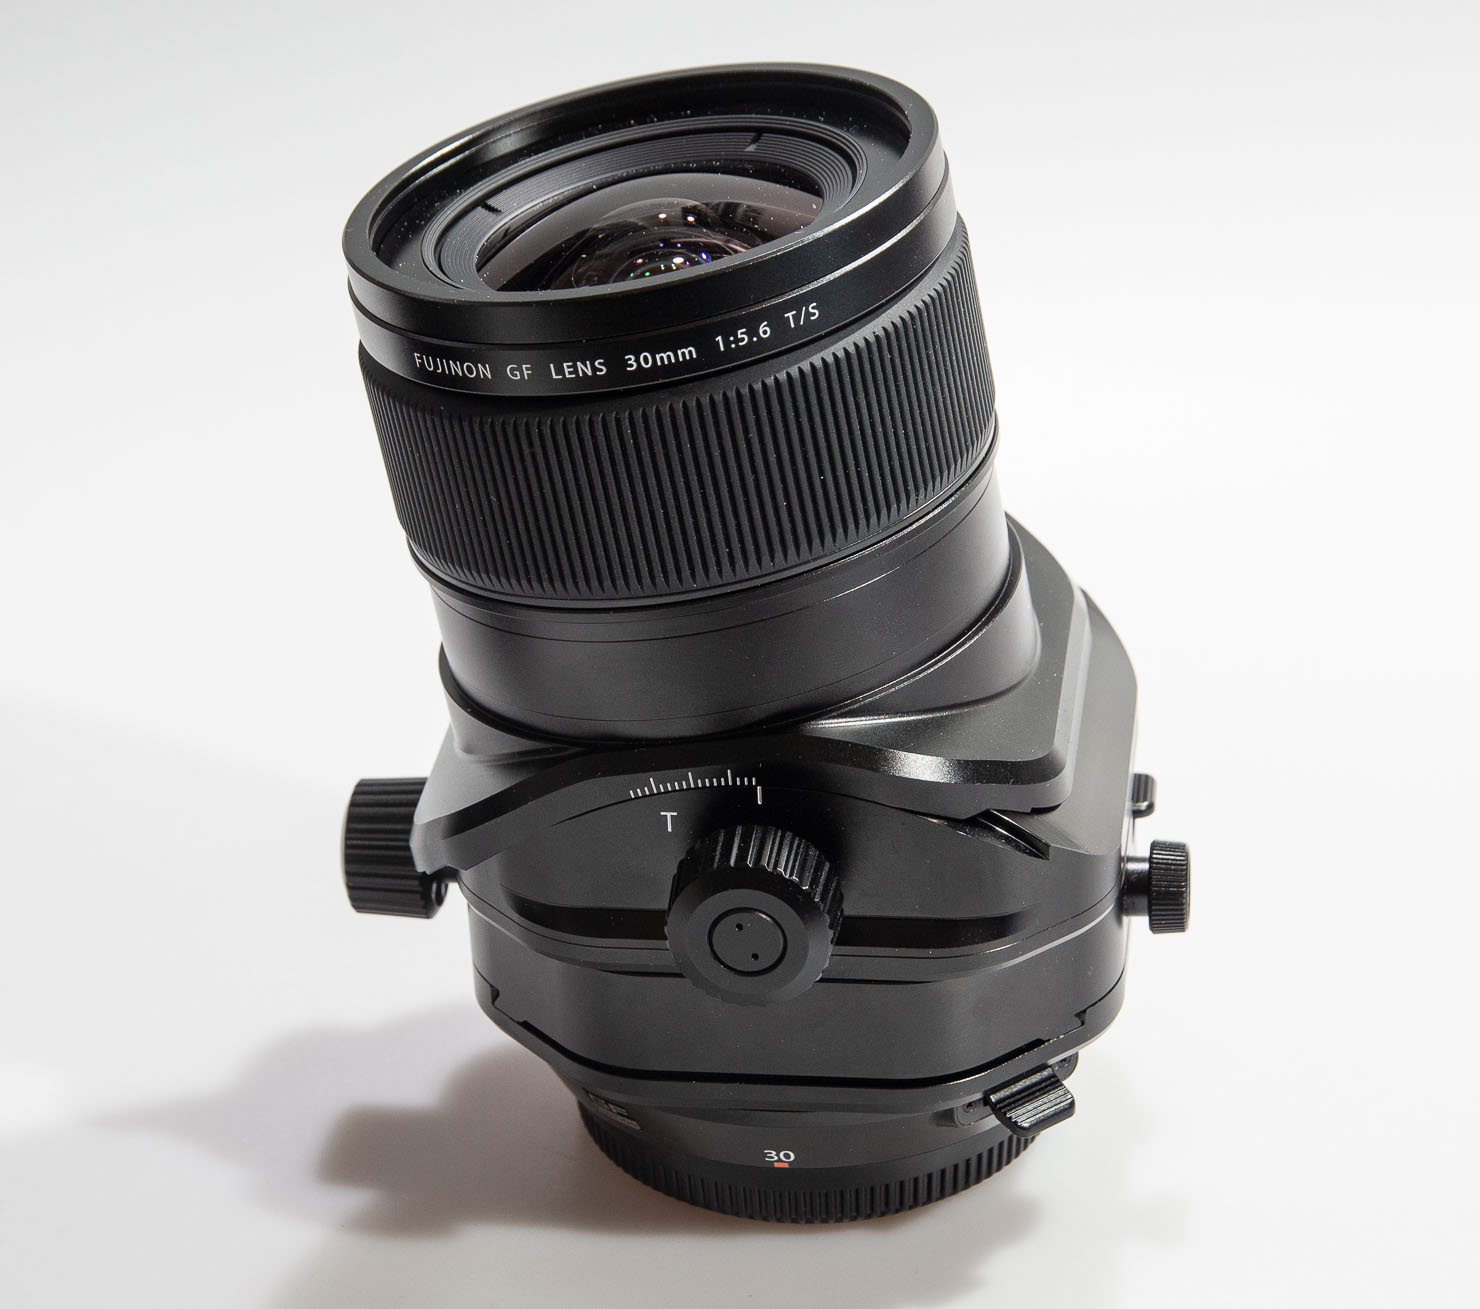
Combining tilt and shift.
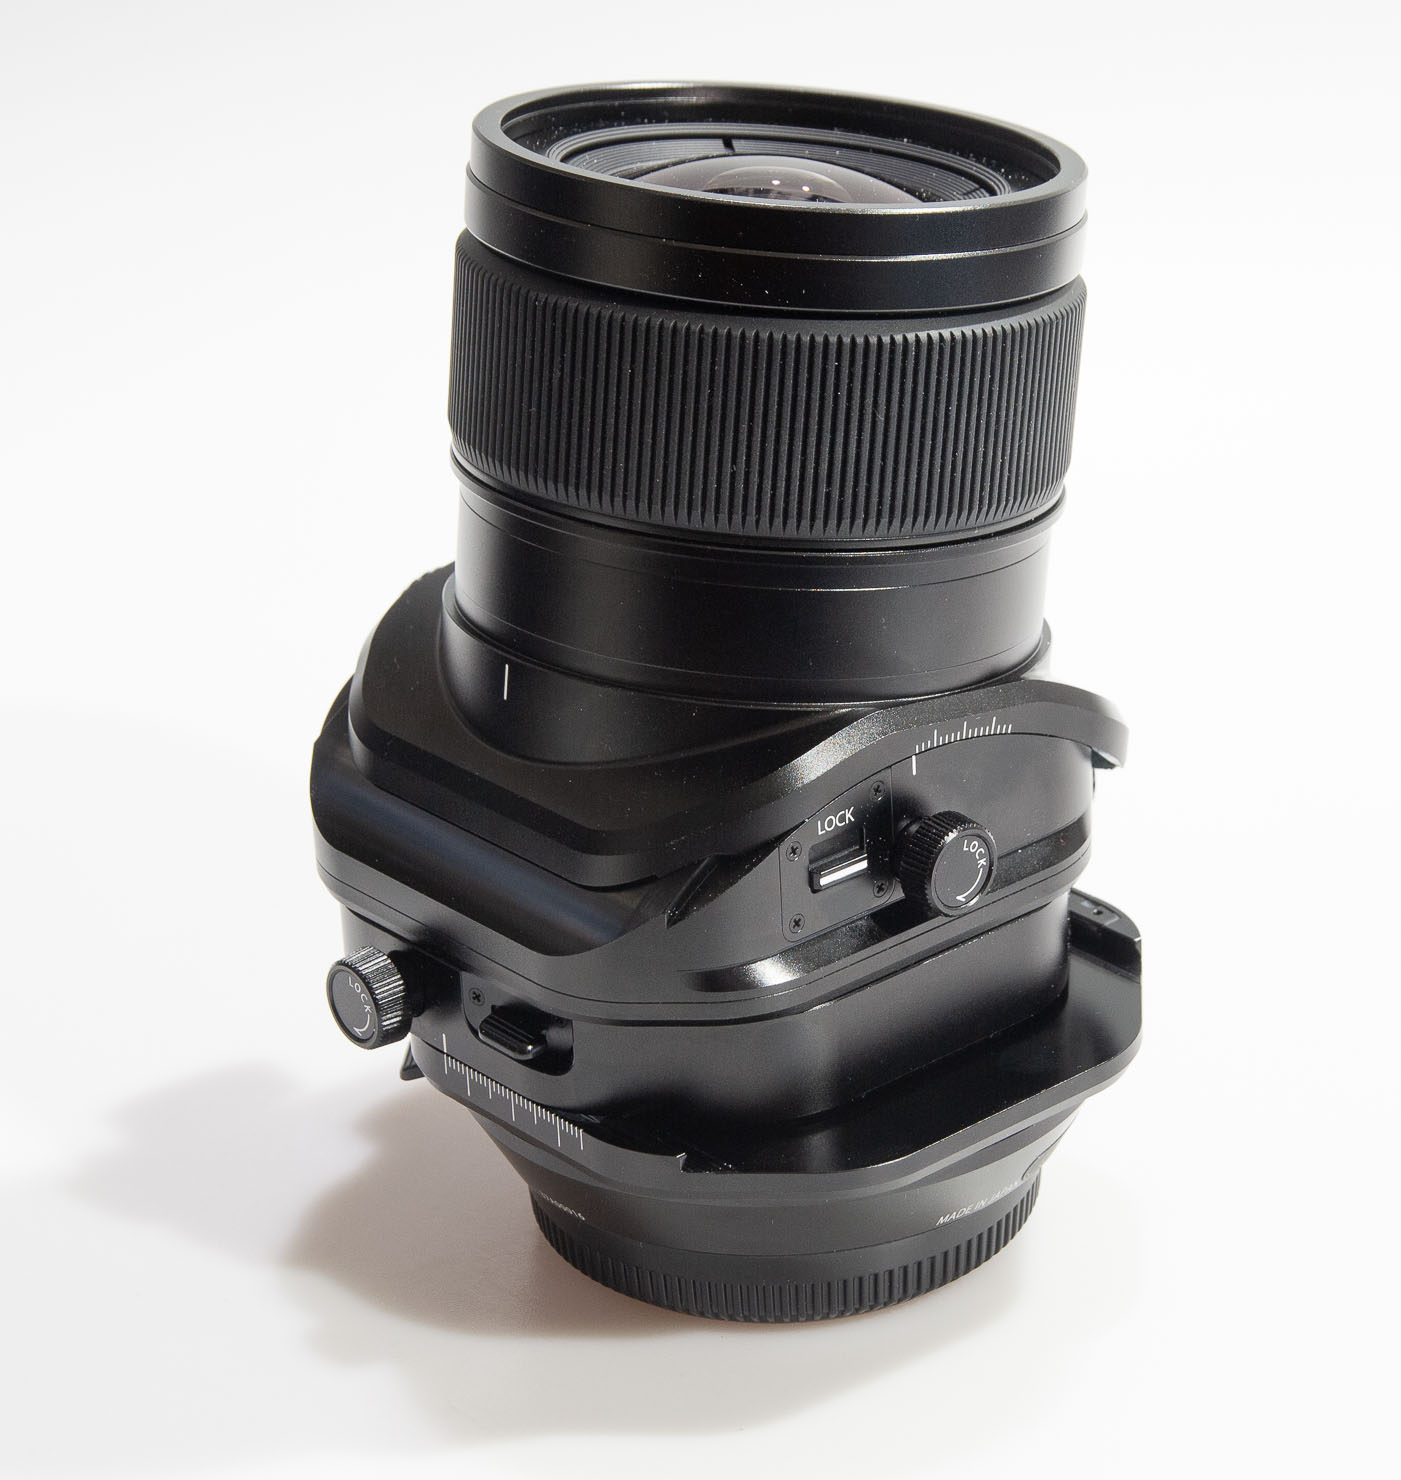
GF 30mm TS Tilt/shift axis rotation
Here’s the tilt axis rotated by 90º
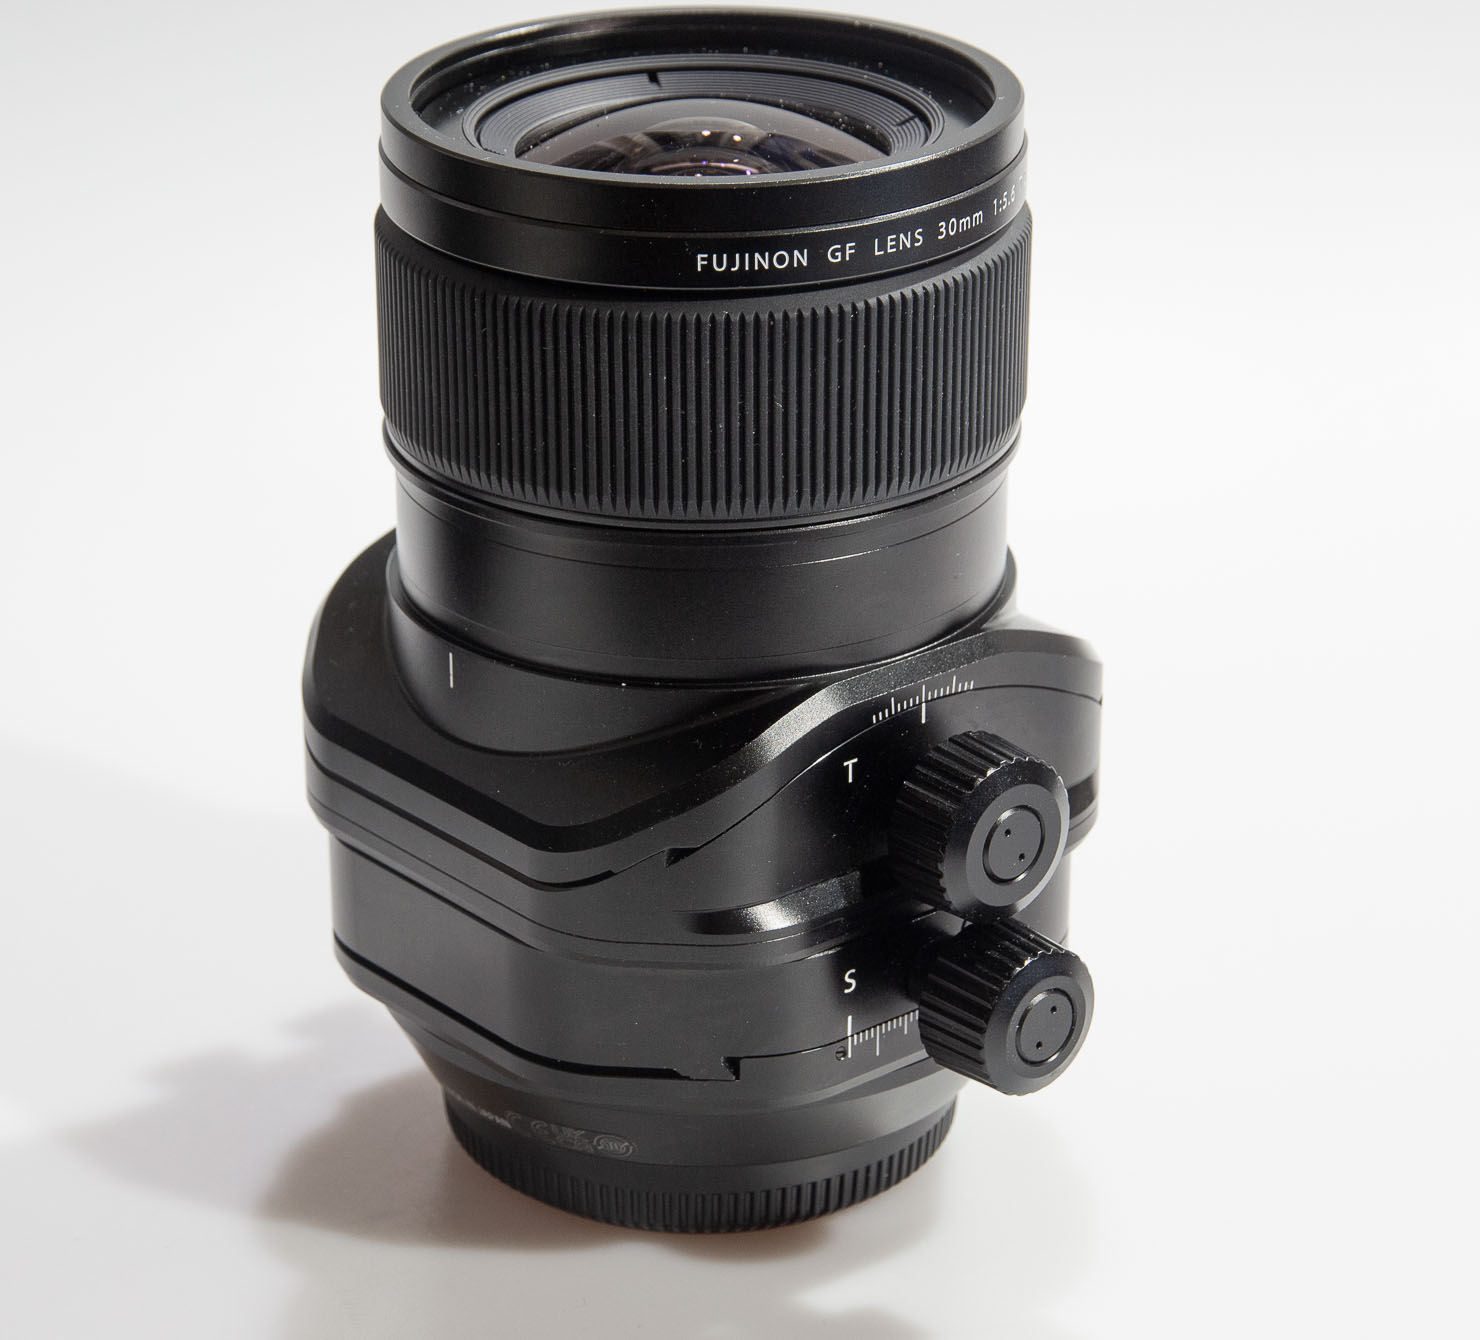
Tilt and shift in this configuration.

The knobs can be close in some set-ups but I didn’t notice any significant issues in using the lens, but I do have long thin fingers, so YMMV.
Getting used to the GF 30mm TS lens
The complexity of the adjustments can feel daunting, but in my teaching I always start with shift and no tilt. First vertical, then horizontal and then mixing them for diagonal shifting.
Once shift is mastered, it’s time to work through the basics of tilt, such as how to run the plane of focus along the ground or a wall.
I’ll have some examples later…
Filters and the tripod collar
The lens comes with various attachments for filters and lens hood

Note how in the view above, the front element and part of the inner lens barrel protrude slightly.
There is a ring which attaches before you can use the smaller lens cap [see the tilted lens shots earlier for another view].
There is also an extender ring which allows the lens hood and 105mm filters to be used. The small ring/lens cap must be removed before this is fitted.

Fujifilm lent me a 105mm clear filter for the lens, which was enough to show that a basic filter causes no vignetting, but I simply don’t have any 105mm filters about to test anything more.
No doubt the big filter makers will have something available for this lens at some point…
The tripod collar
Another accessory is the tripod collar which attaches round the lens.
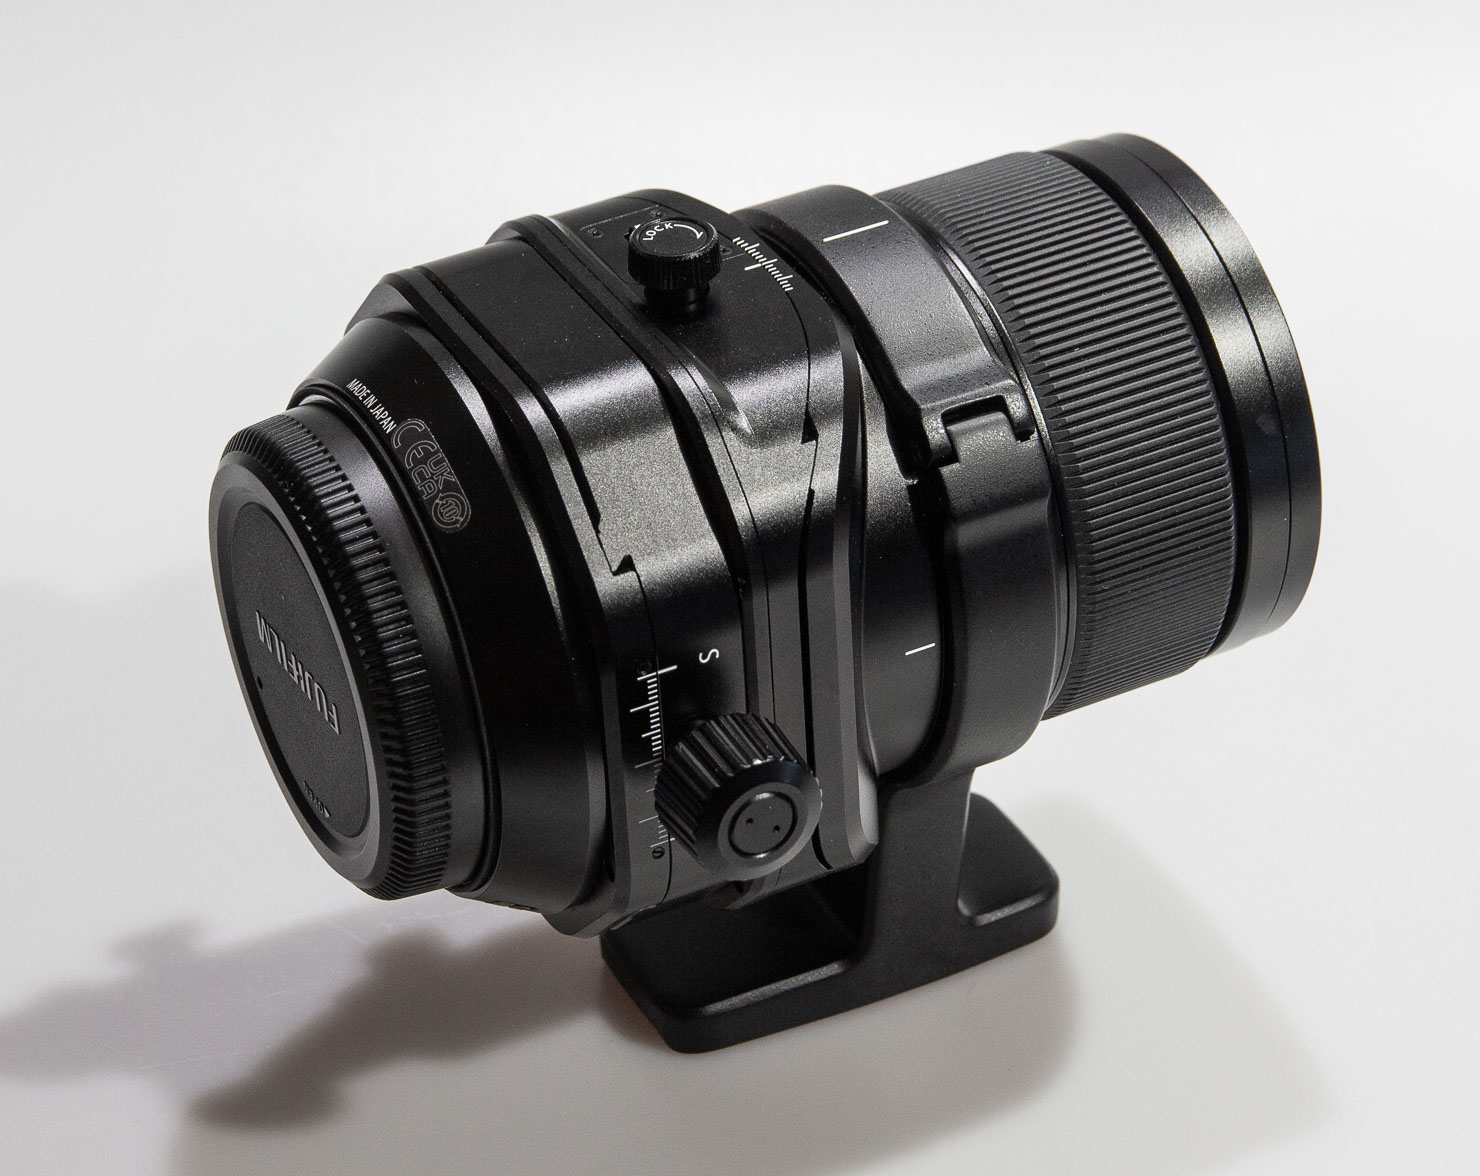
The lens can freely rotate in the collar, so you can see up/down shift above and left/right shift below.
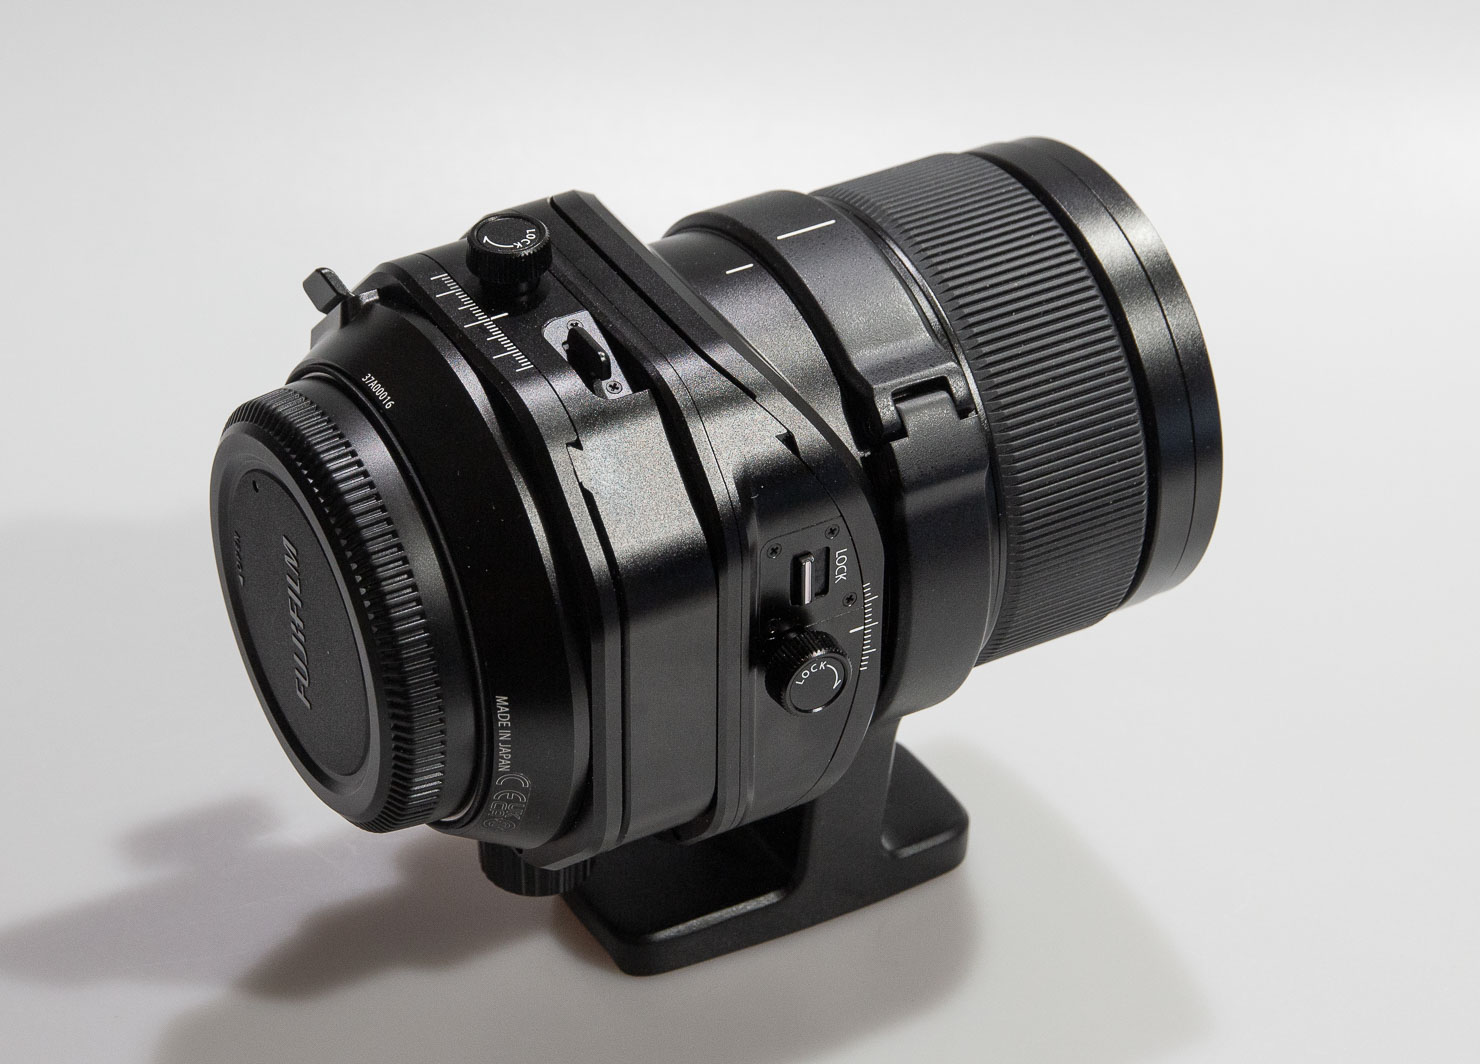
Note the alignment mark on the collar.
The hinged collar clicks into place, and can be tightened with the knob.
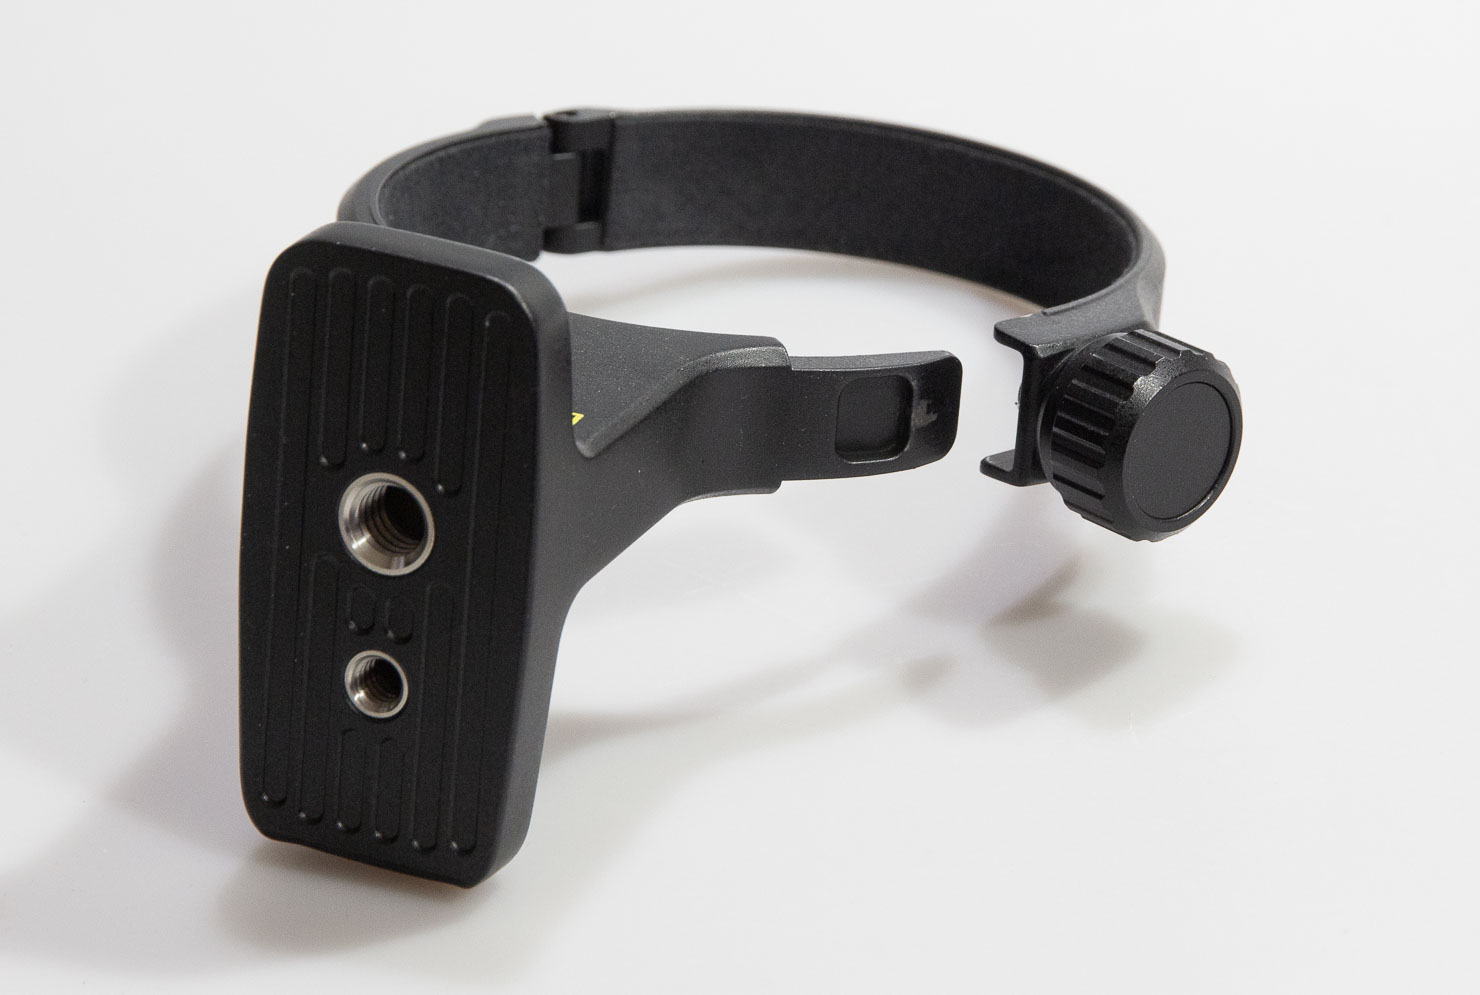
A nice feature is that you physically have to pull the knob to fully open the collar.
This means that you can slacken it to rotate the lens without worrying that the collar will open and dump your kit onto the ground.
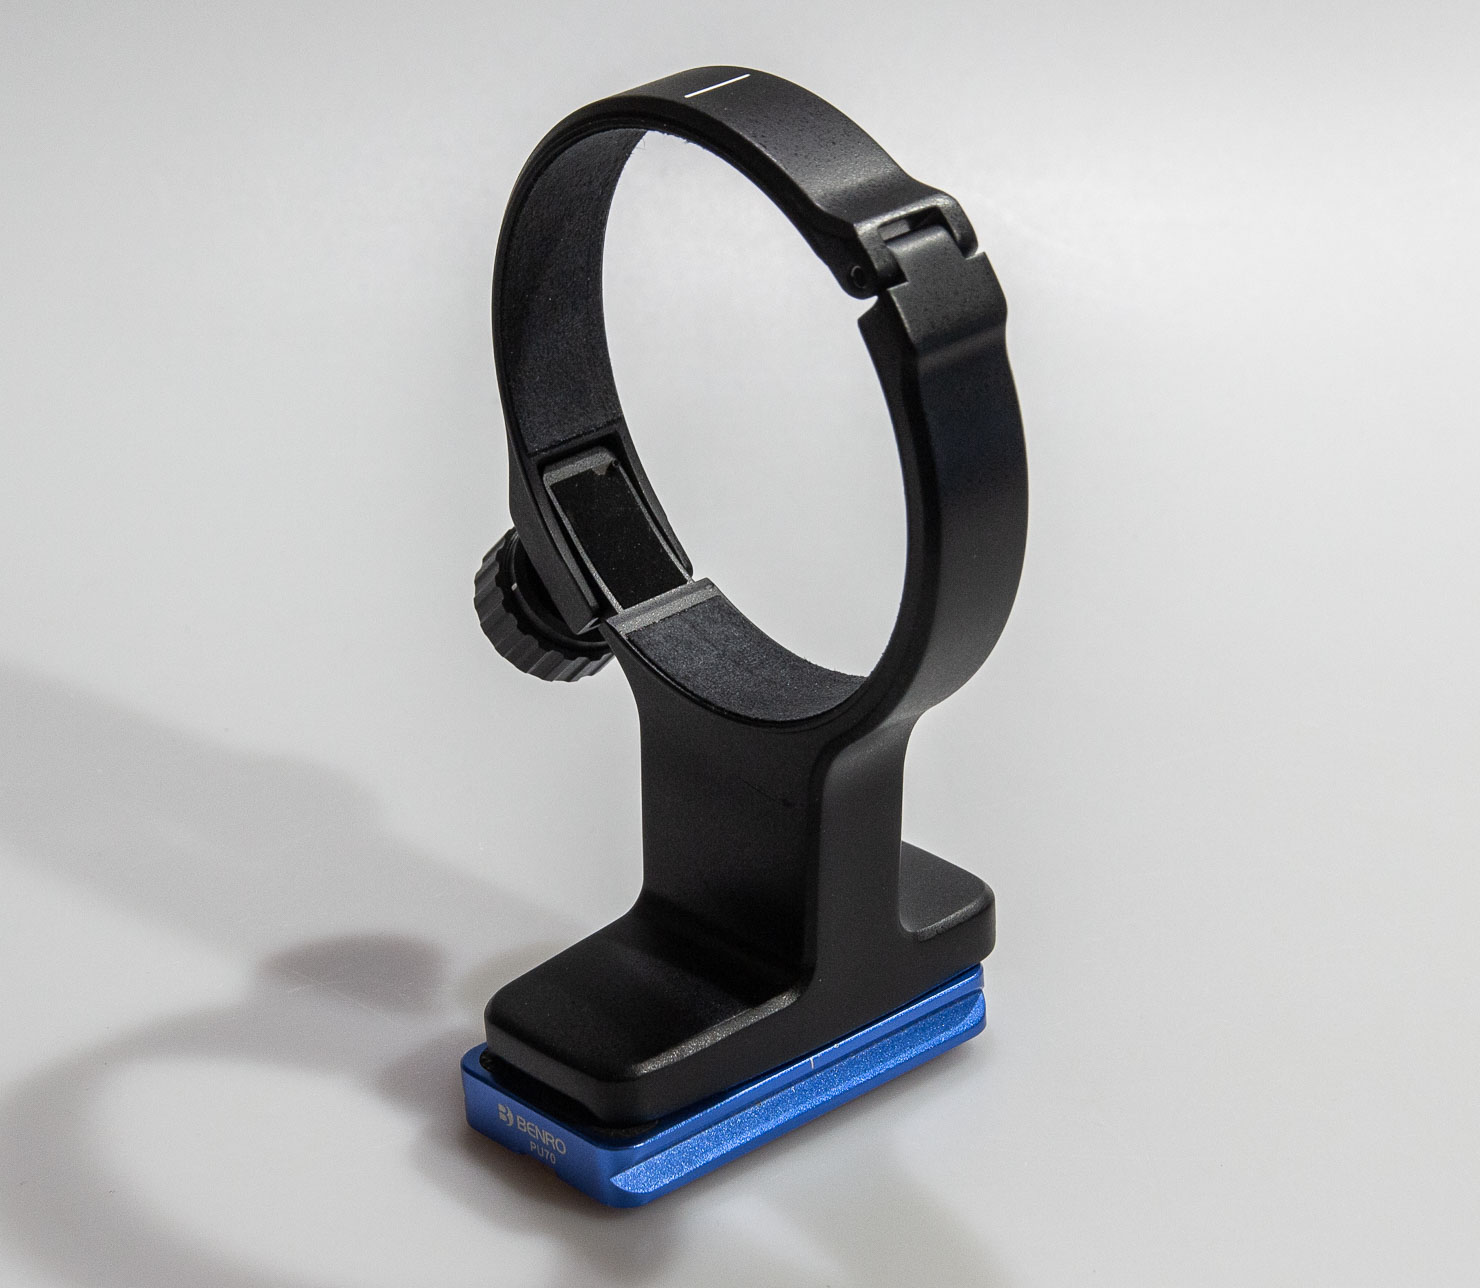
Note the blue plate attached. This is an Arca Swiss style baseplate, making it easy to fit the lens to my RG-1 geared tripod head [more RG-1 info].
Why not have the grooves on the collar? Perhaps a licensing or material strength issue – I don’t know?

I made sure to attach the blue plate very firmly – using an Allen key rather than coin…
 .
.
GF 30mm TS f/5.6: Flare and distortion
Flare is pretty minimal in this view (f/8).
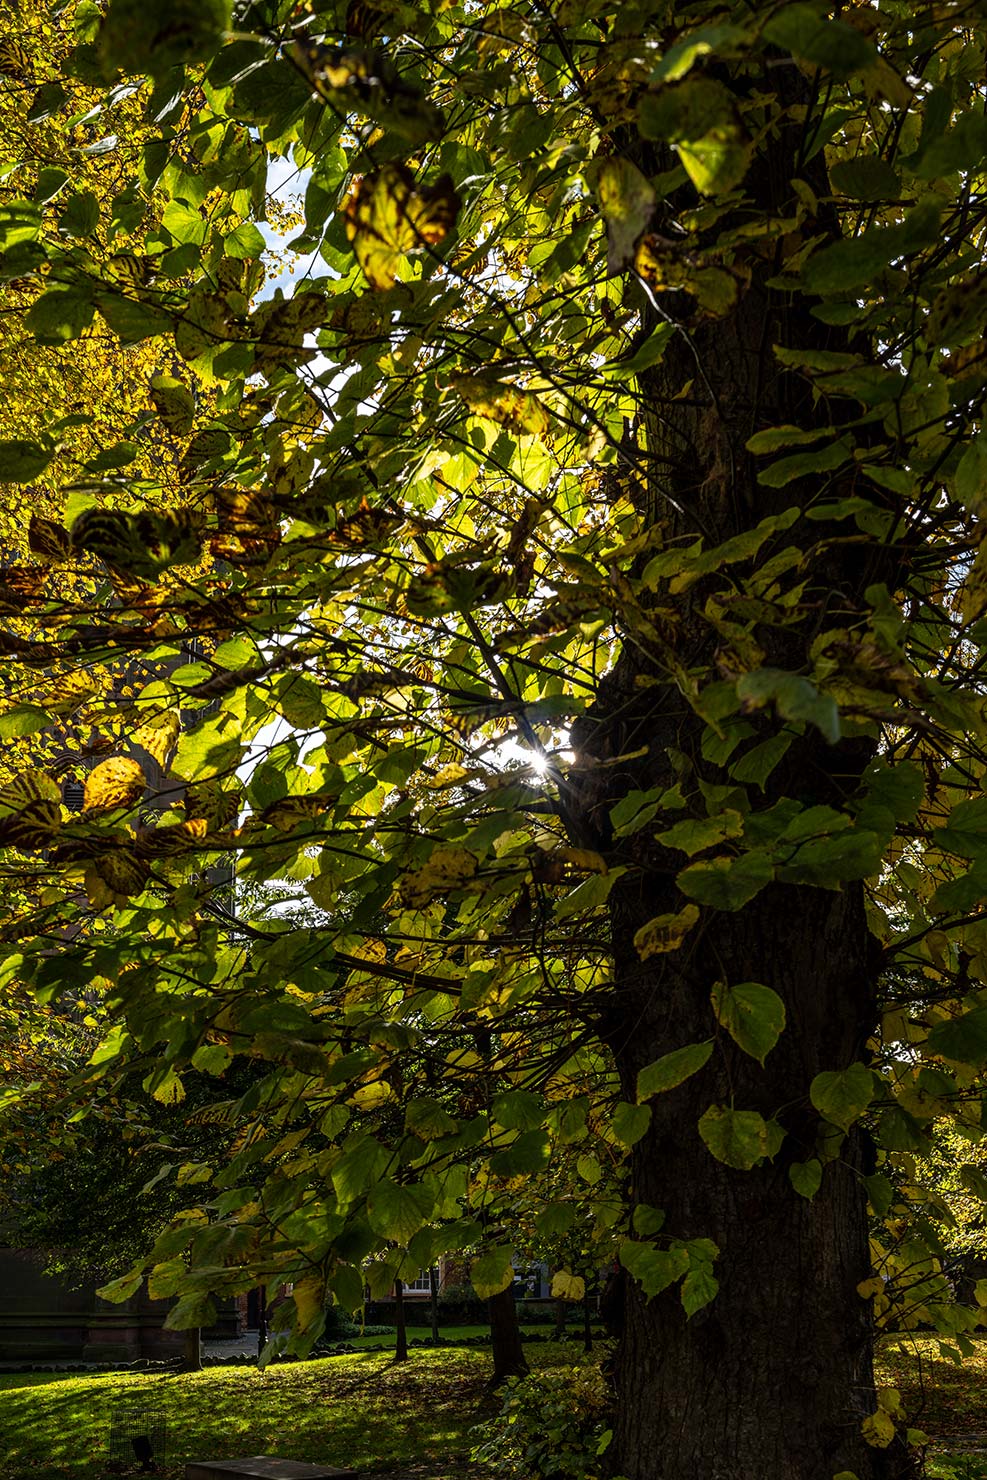
The image was shot in crop mode [~60MP] just 36x24mm of the sensor used, so the view is what you’d get if you had an G>RF or G>Z adapter with a good mirrorless adapter and the 30mm TS lens.
A detailed full res zoom [click to enlarge]
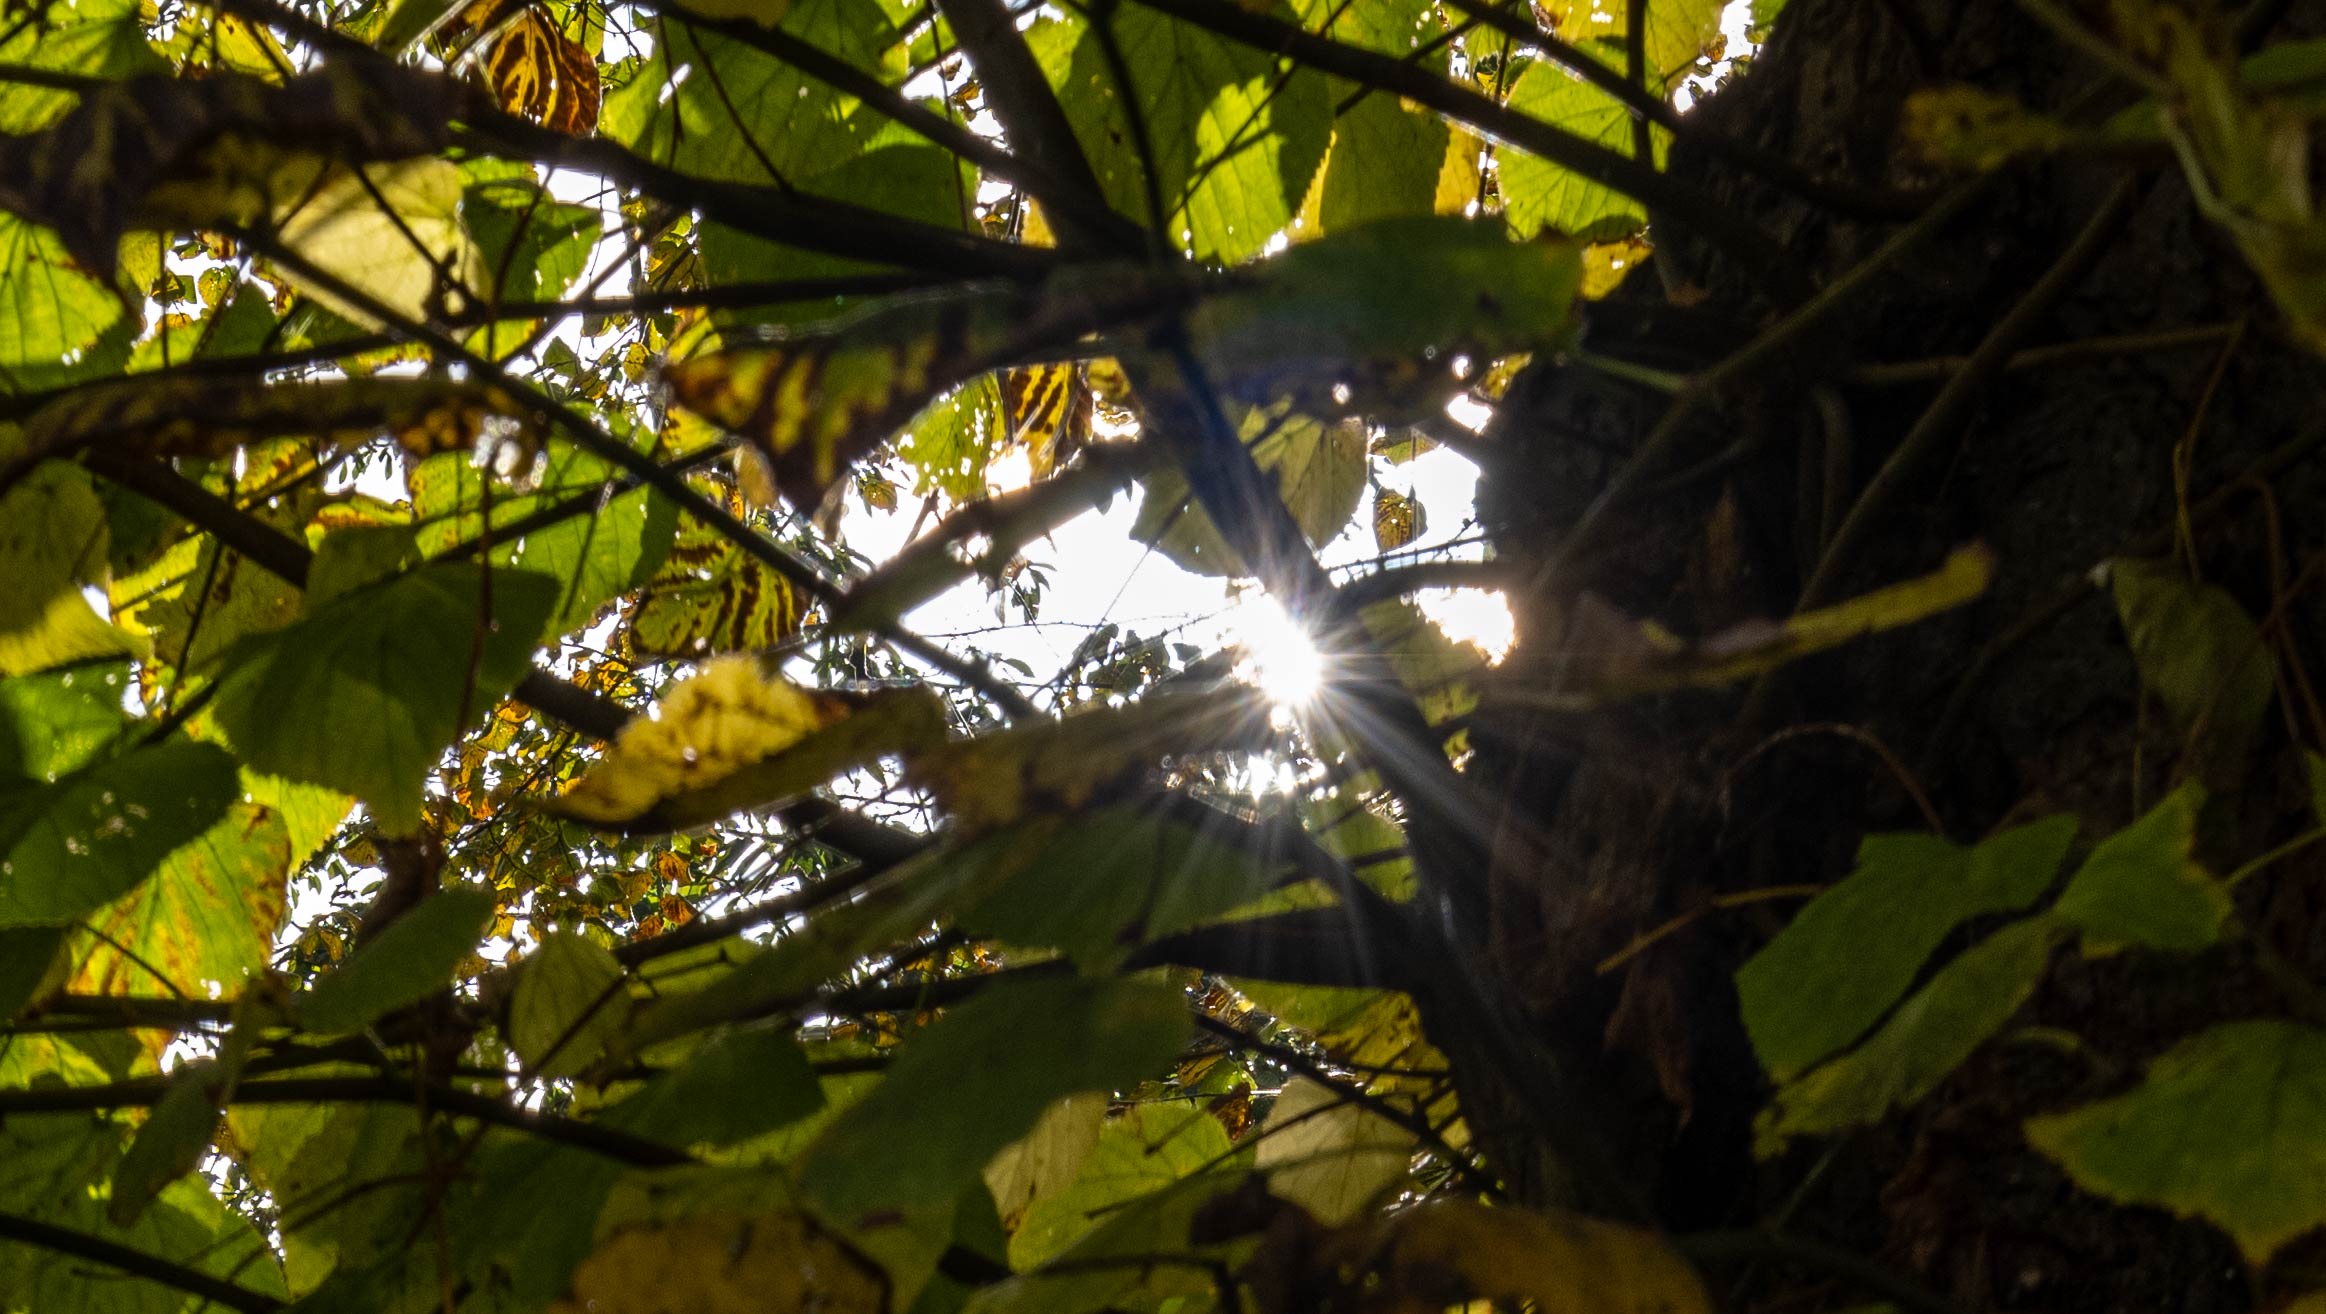
Keeping direct sun off the front element is very advisable but the lens is pretty good in this respect.
This image has been processed to maximise the visibility of the slight veiling near the hazy sun. There is not a lot of contrast reduction.
GF 30mm TS f/5.6 Aberrations
The lens exhibits slight barrel distortion, but at a level that can be hard to spot.
So, in looking at this image [f/8 15mm vertical shift], is the slight curvature at the right edge showing distortion, or have I just not been careful enough in levelling the shot?
This next diagonally [up and right] shifted image is about the worst case, combining slight softness, vignetting and distortion.
The top right of the building is pretty close to the edge of the image circle and has fine detail.
I’ve shot this at f/8 but with such extreme shift f/11 or even higher might be good for an image with such strong detail in the far corner.
[remember – click to enlarge images]
This is detail from where the lens is actually pointing.

Top right
Top right after using Topaz Sharpen AI

Now, there are ways of correcting some of this. Having the shift+direction info in EXIF is a big step in automating this, which I’ll come back to later.
GF 30mm TS f/5.6: CA?
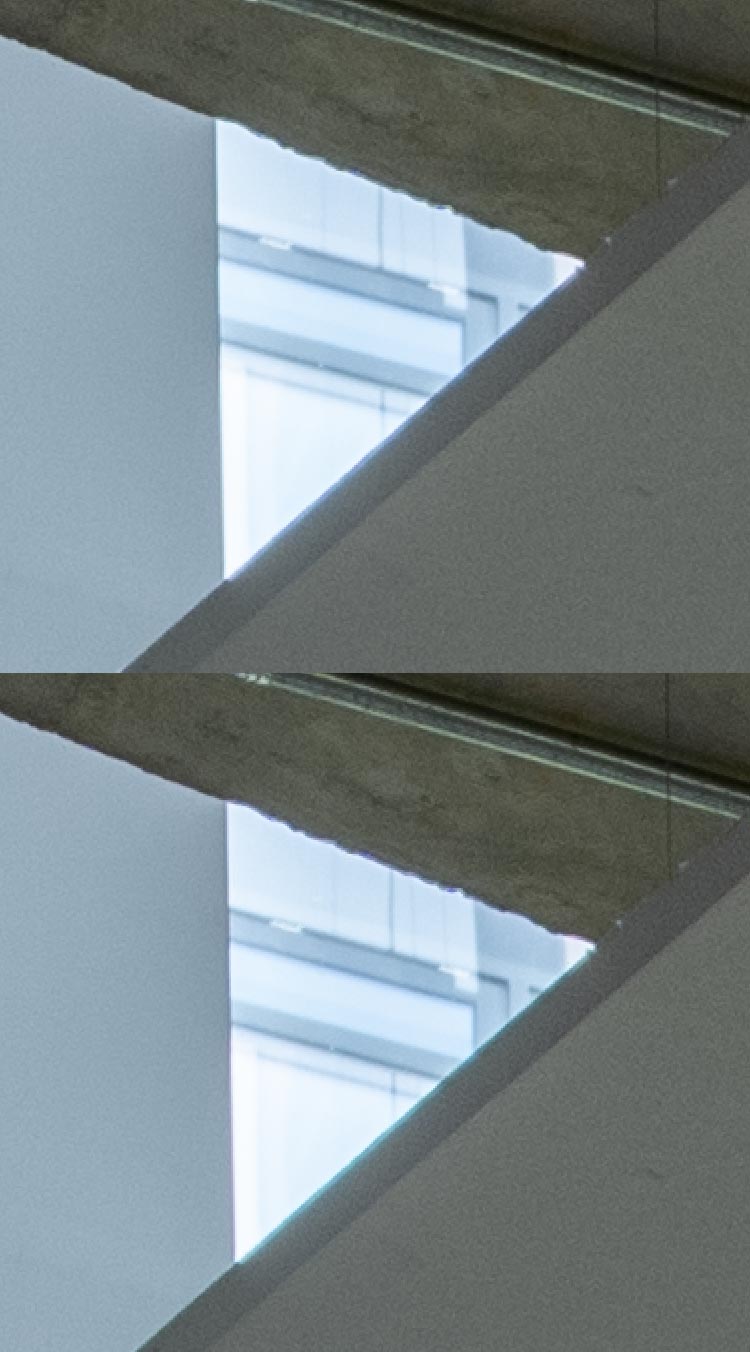
Yes, the lens does have a small amount of chromatic aberration – I had to look hard to see it though.
Here’s an image with a small sample viewed at 200% with and without the automatic CA correction of ACR applied.

It’s not much…
GF 30mm TS f/5.6: Vignetting
All lenses exhibit some vignetting – it’s basic optics. However some show it far more and some introduce secondary vignetting from the lens/camera mount.
To test for vignetting in more detail I photograph an old light box. The focus is set at infinity and I step through apertures.
Just to be clear this is very much a qualitative test – wait long enough and someone will publish detailed charts and numbers for this lens. However I have neither the kit for carrying out such testing and, this is important, neither the patience to do it ;-)
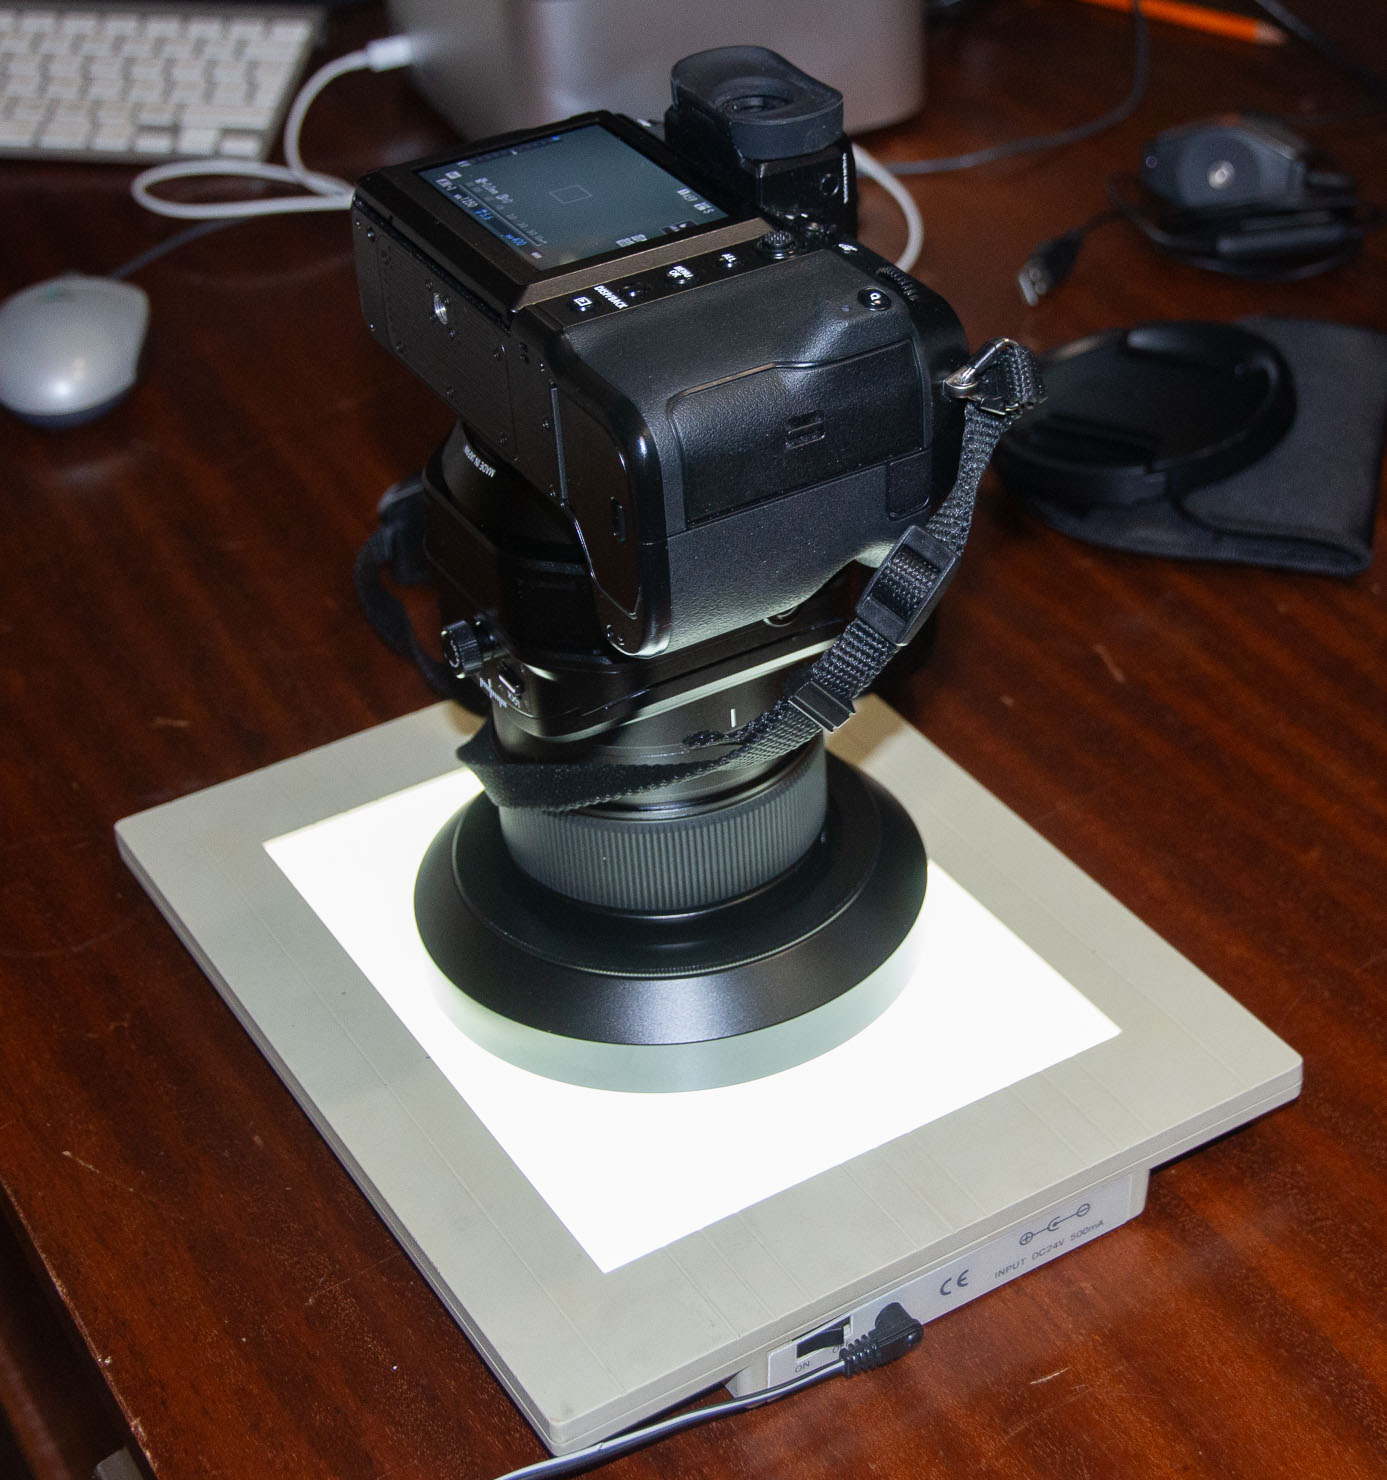
These are shots of the rear screen showing some example lens settings
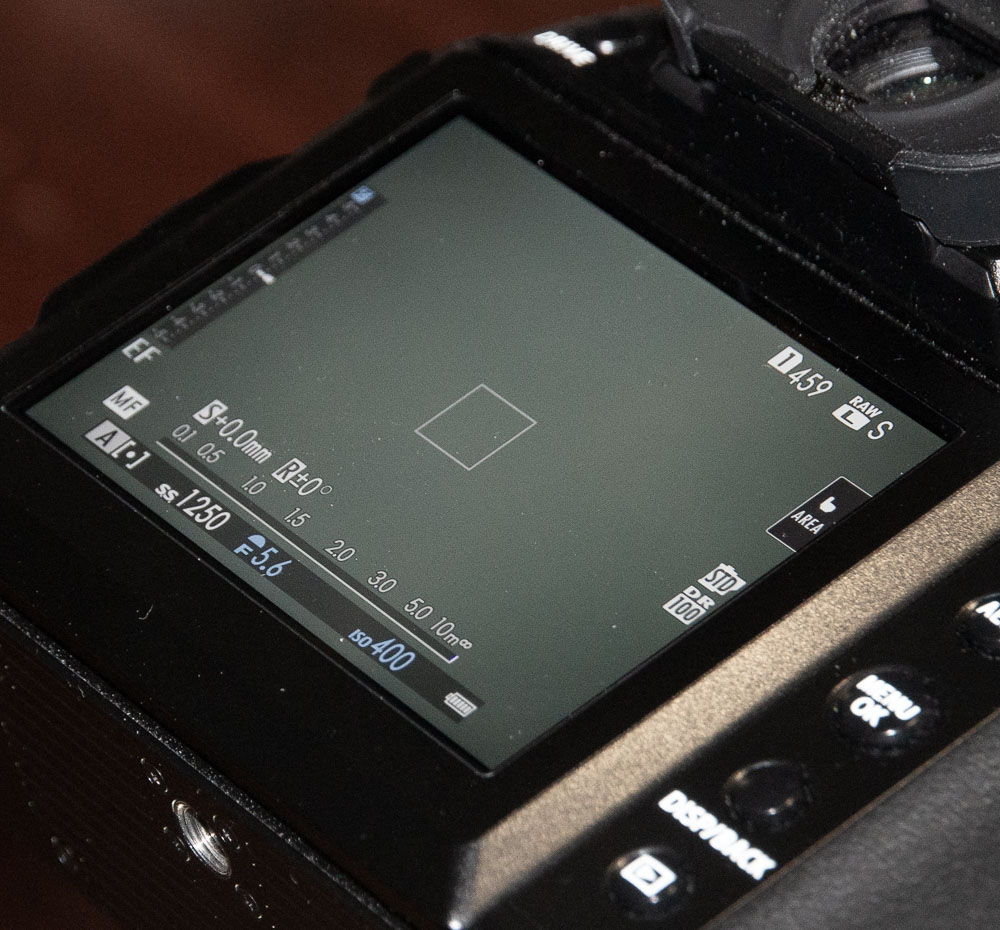

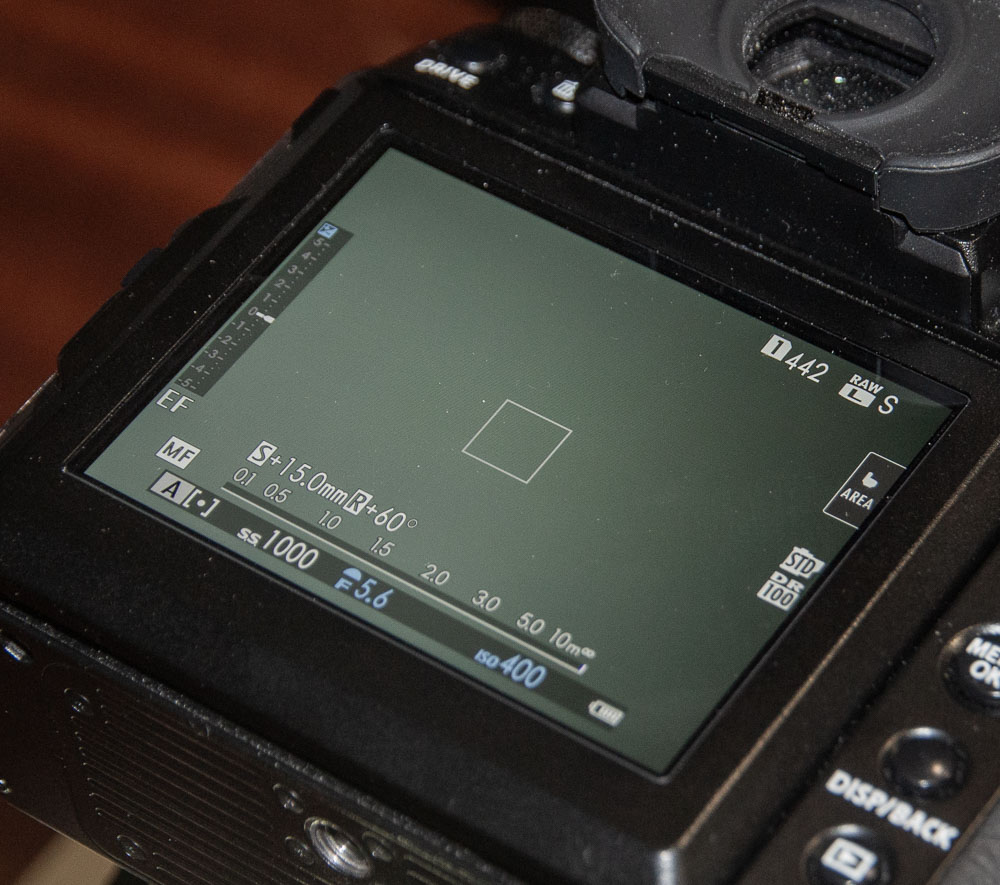
That shift/direction data is very helpful…
Here’s an annotated screen shot showing much less fall-off of vignetting than I normally see when doing this test. The second version has been posterised to give a better view of the fall-off.
This suggests that the lens vignetting is much more the result of fundamental optics than design/cost/mount constraints.
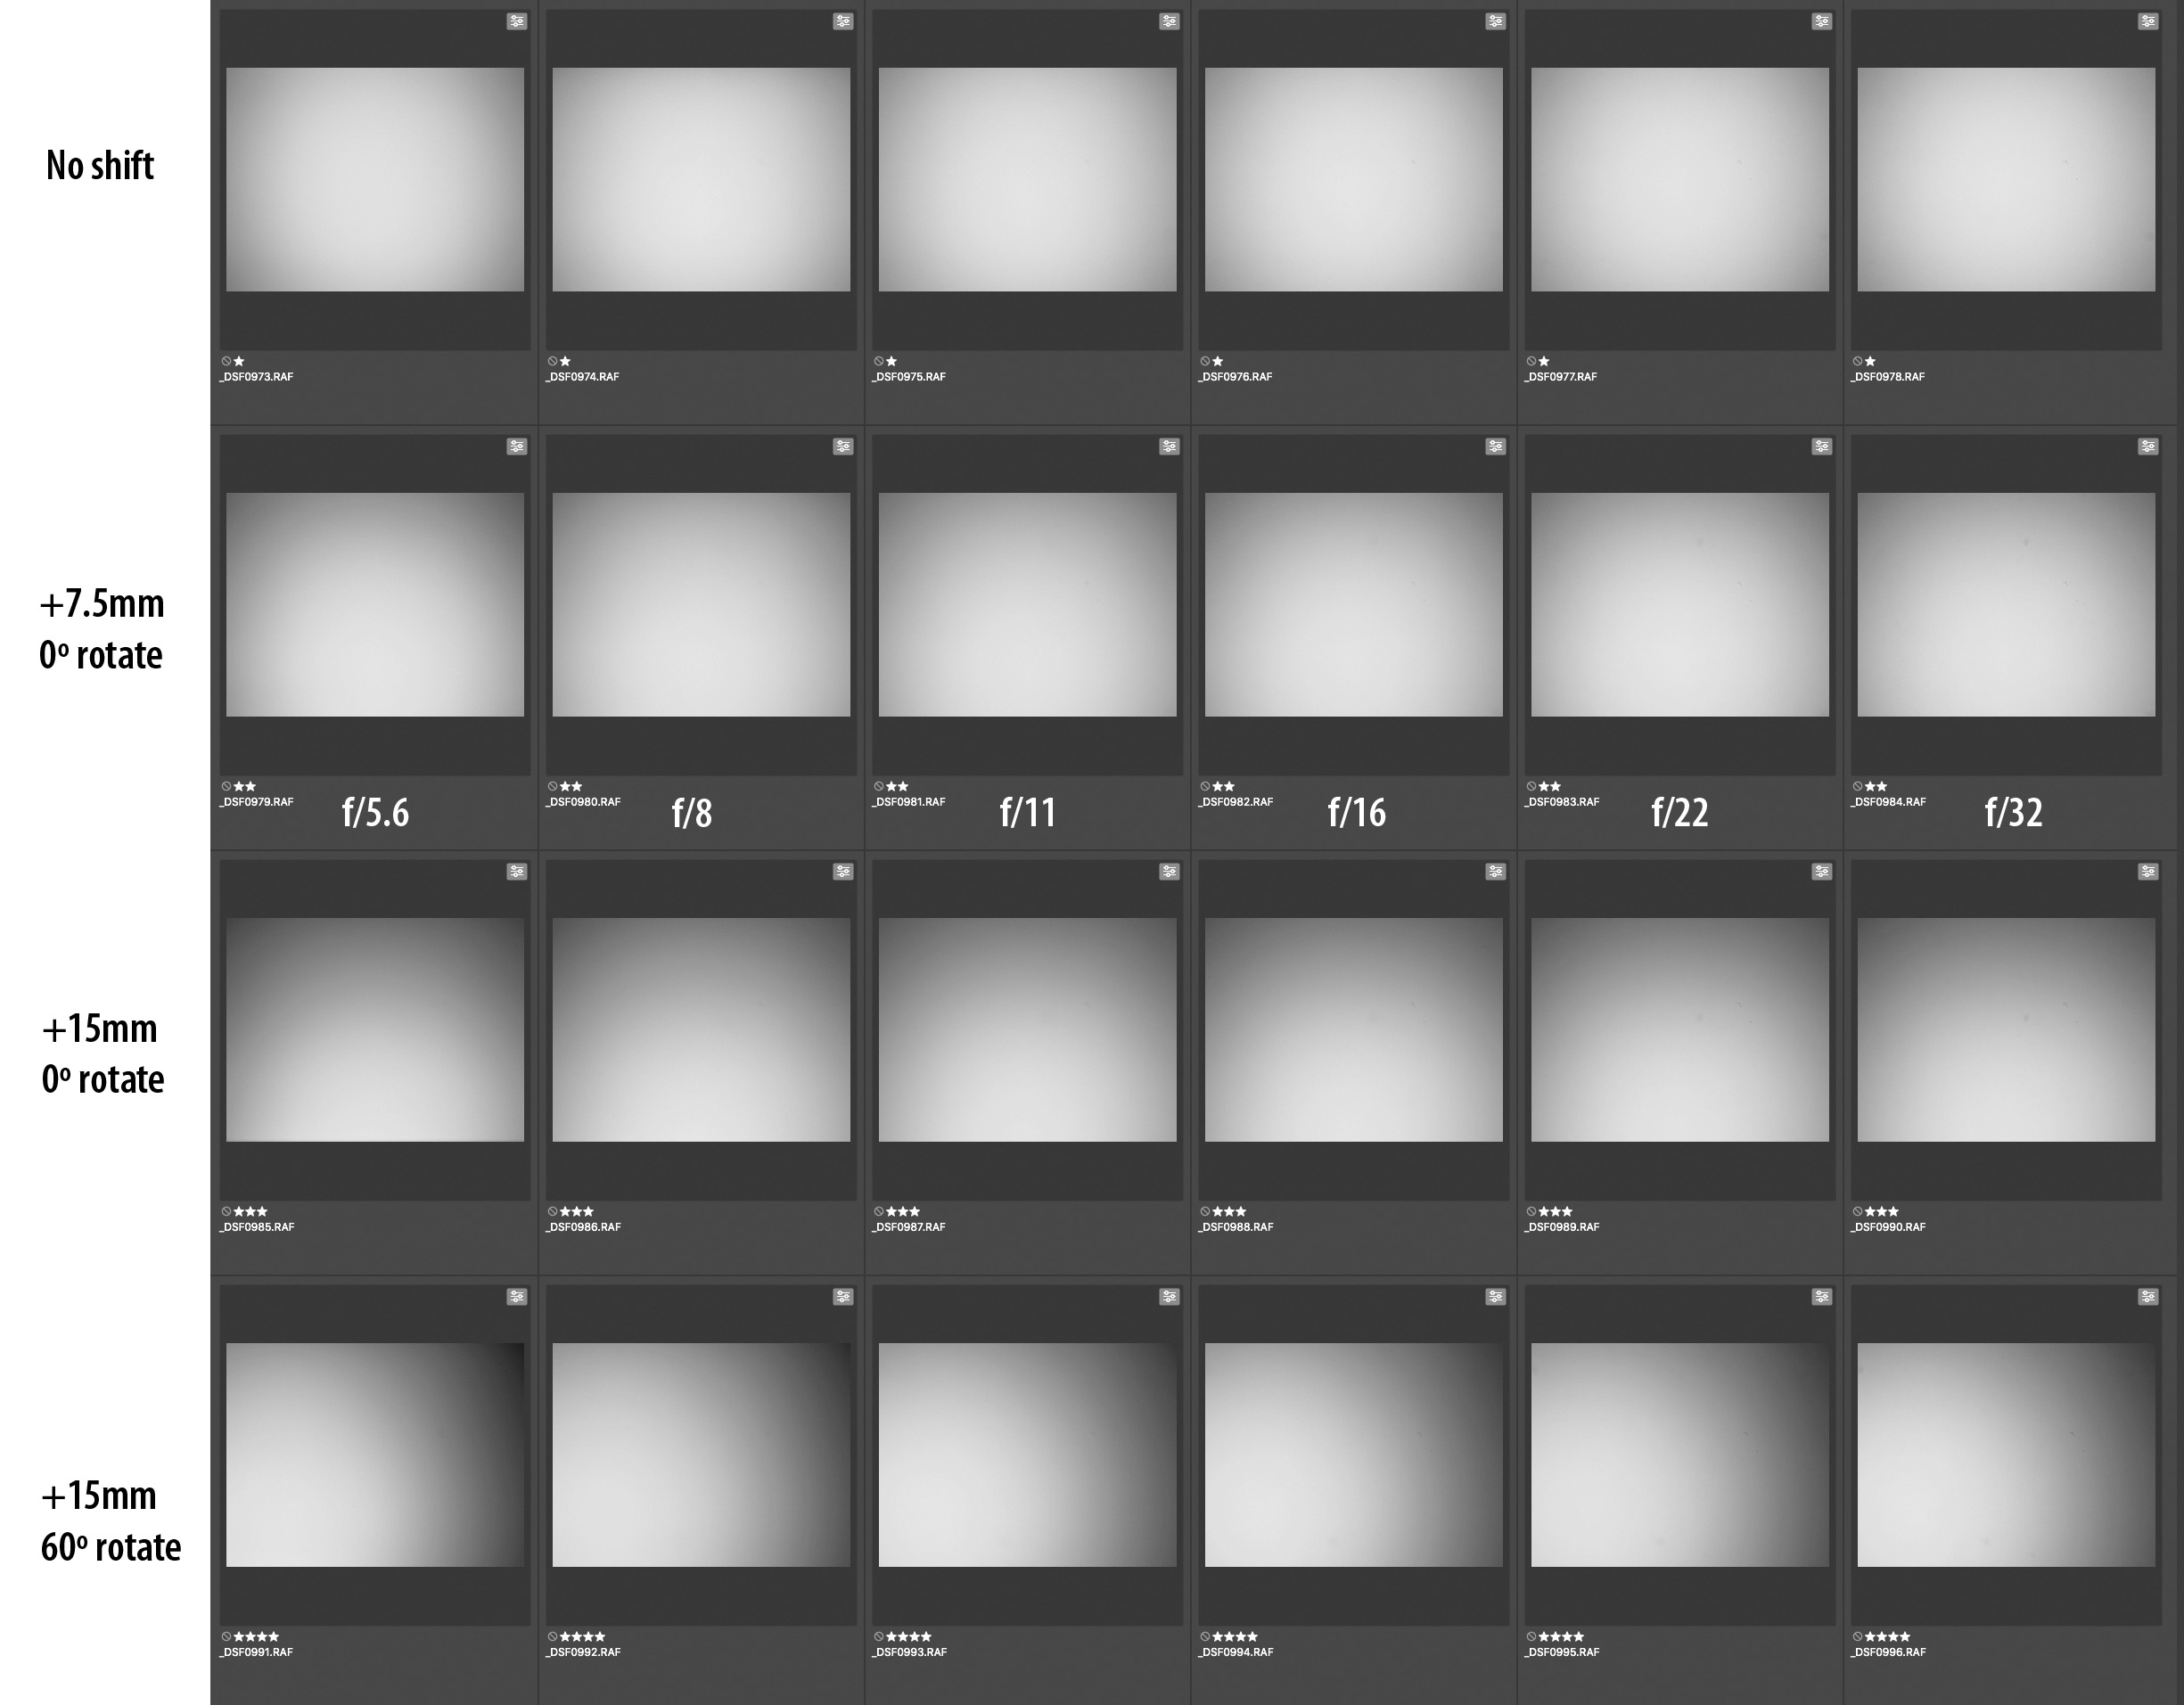
In particular I notice a lack of secondary vignetting caused by the mount shadowing in the opposite direction to the shift.
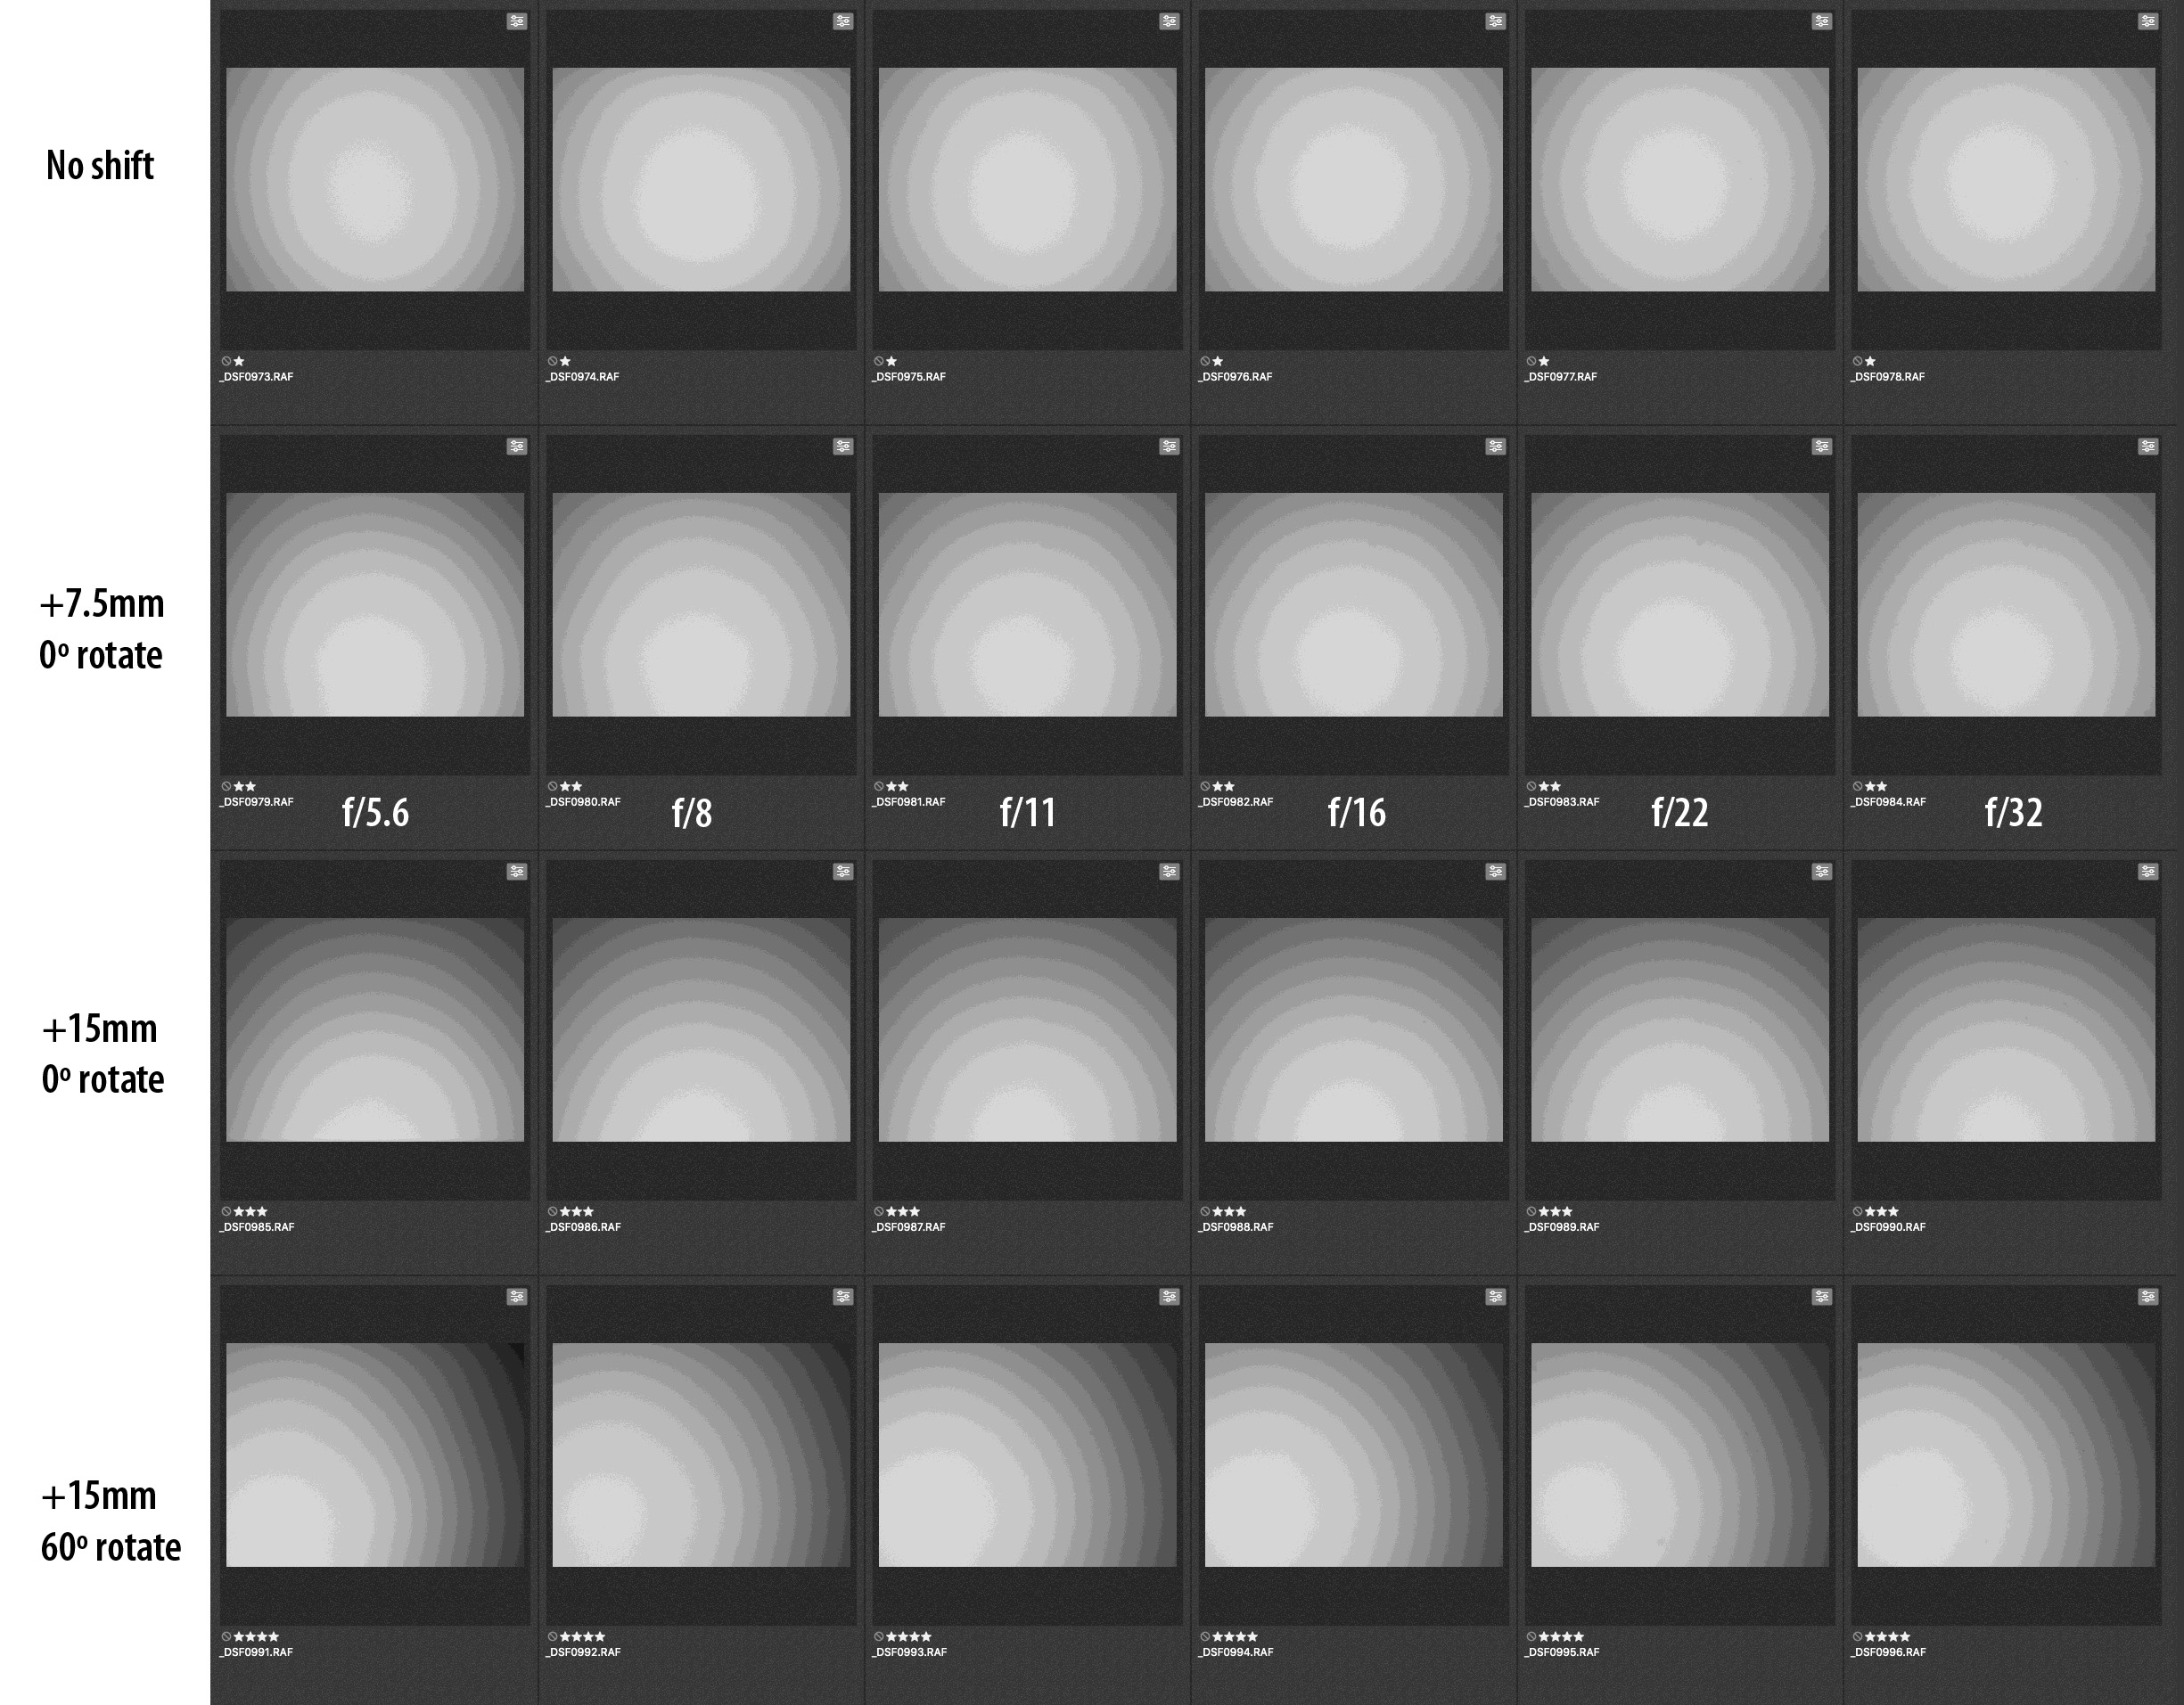
What does this secondary ‘shadow’ vignetting look like?
Here’s an example from my testing of the Laowa 15mm shift lens on the GFX100S, where I’ve shifted upwards beyond the recommended amount for this lens. [See my 15mm review for much more and why it’s an excellent lens if used well]
Some barrel distortion is obvious, and if you look in the upper corners of the images you can see a bit of vignetting, which gets less as you step aperture through the images from top left to bottom right,
The ‘shadow’ vignetting is at the bottom, and becomes sharper as you reduce aperture. This is shadowing caused somehwere in the optical path – most likely the lens mount.
The Fujifilm GF 30mm TS f/5.6 is the first tilt shift lens I’ve tested which shows no obvious ‘shadow’ vignetting. This makes stitching of shifted images a bit easier, as well as suggesting more aspects of the design of this lens were aimed at the ‘as good as we can reasonably get’ as opposed to keeping the costs down…
Auto correction for the GF 30mm TS f/5.6?
With the EXIF data including shift and direction, it should be possible to automate lens corrections, since all that the software needs to do is offset the assumed optical axis by the shift amount.
Ah, I say ‘all that’ in the way one of my past careers in software development immediately spots as potentially non-trivial…
Developers for raw file processing software could comfortably assume that the optical axis was in the centre of the frame and apply corrections accordingly. The only raw processors which allowed for image shift were Phocus [which I tested with the Hasselblad HTS T/S adapter] and Capture One [C1].
My two raw processors of choice ACR and DxO PhotoLab [ex. DxO Optics Pro] do not support offset corrections. I have been asking DxO about this since 2008, so I’m hopeful that with the two Fujifilm TS lenses including shift info, we may see movement there…
ACR – well I hope it works soon. The CA correction in ACR has long worked with shifted images.
I’d just note that when Canon and Nikon finally bring out T/S lenses for their mirrorless systems, they will include shift and maybe even tilt in EXIF.
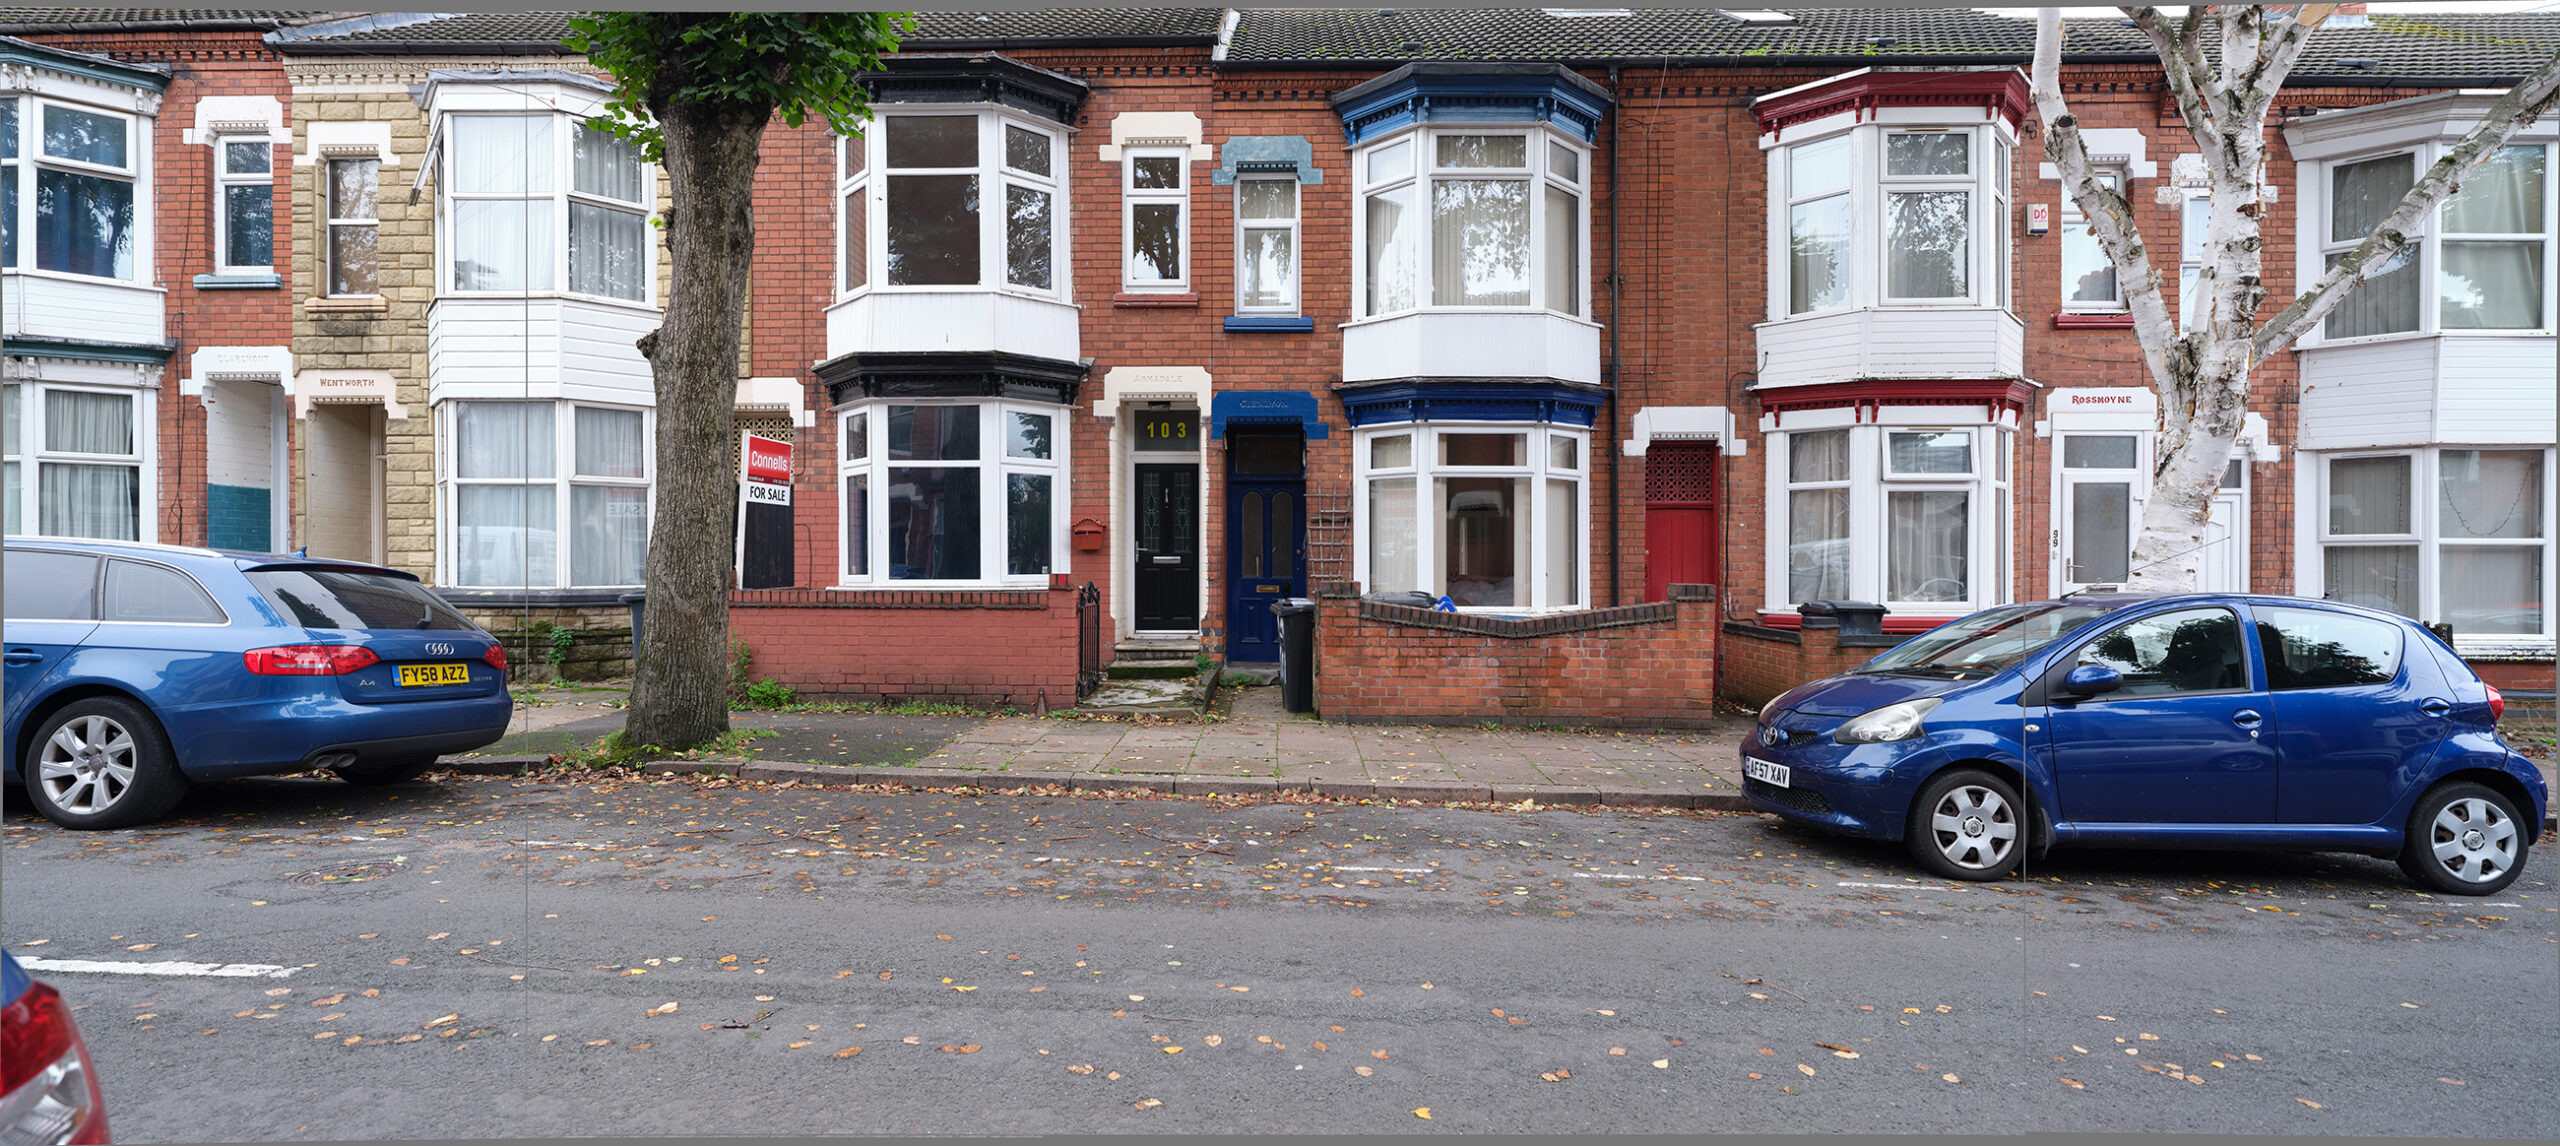
A helpful member of the DPReview medium format forum, took some early raw files from me and applied C1 corrections.
I shot 3 images at +15 / 0 / -15mm of horizontal shift.

These were processed in C1 for vignetting and lens distortion and stitched
This image [click to view full size] has grey areas at the top and bottom showing where the slight barrel distortion of the lens has been corrected.
It is possible to use manual lens correction in Photoshop – you just need to extend the canvas by double the shift, to place the optical axis in the middle of the new frame.
Here’s single shot shown with the extension and an application of corrections

The grey canvas extension makes it easy to see the vignetting correction.
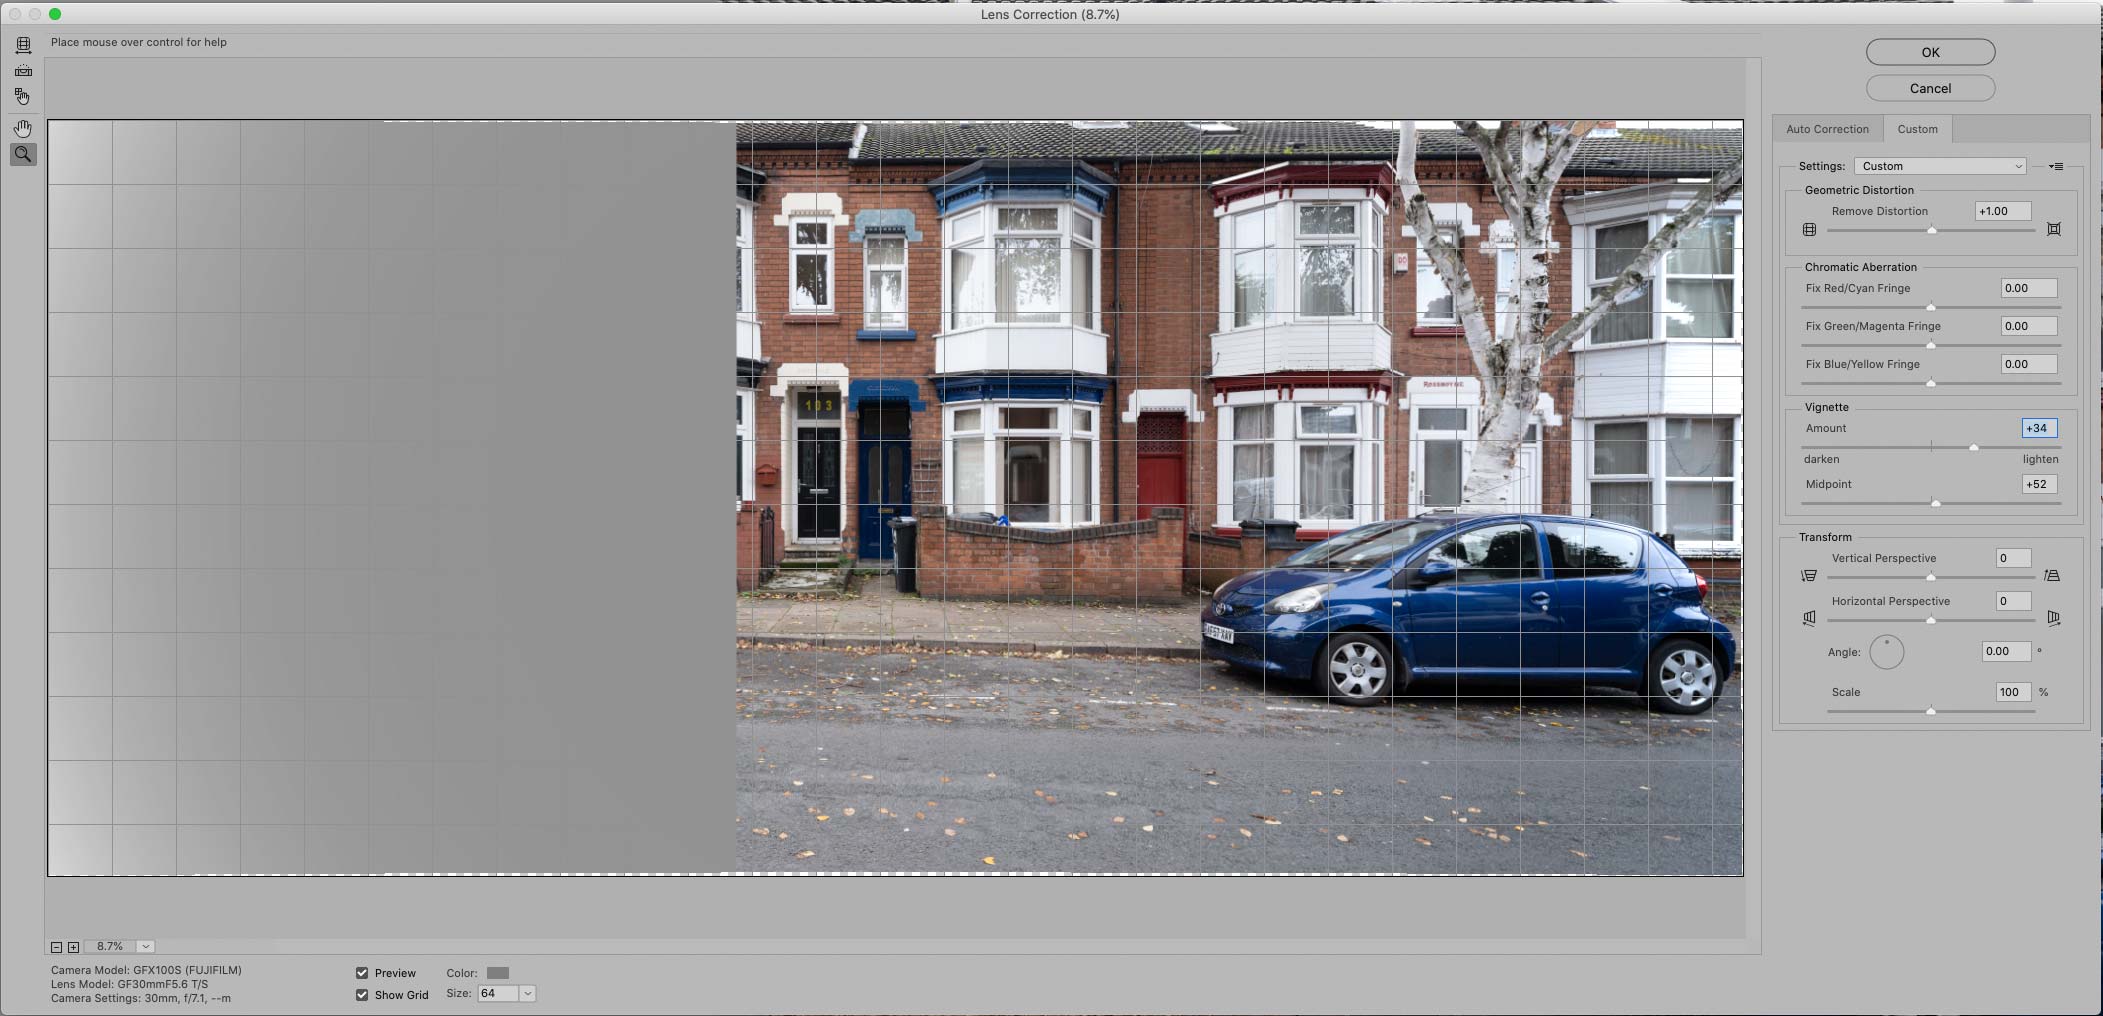
This technique was one I first tried when reviewing the Samyang 24mm tilt/shift lens, and is also included in my book about tilt/shift lenses.
It’s clunky, but it works… ;-)
GF 30mm TS: Aperture selection
When testing such lenses I normally produce a set of images showing the lens sharpness at differing apertures and where the sweet spot in performance lies. Once again those wanting charts and number will need look elsewhere ;-)
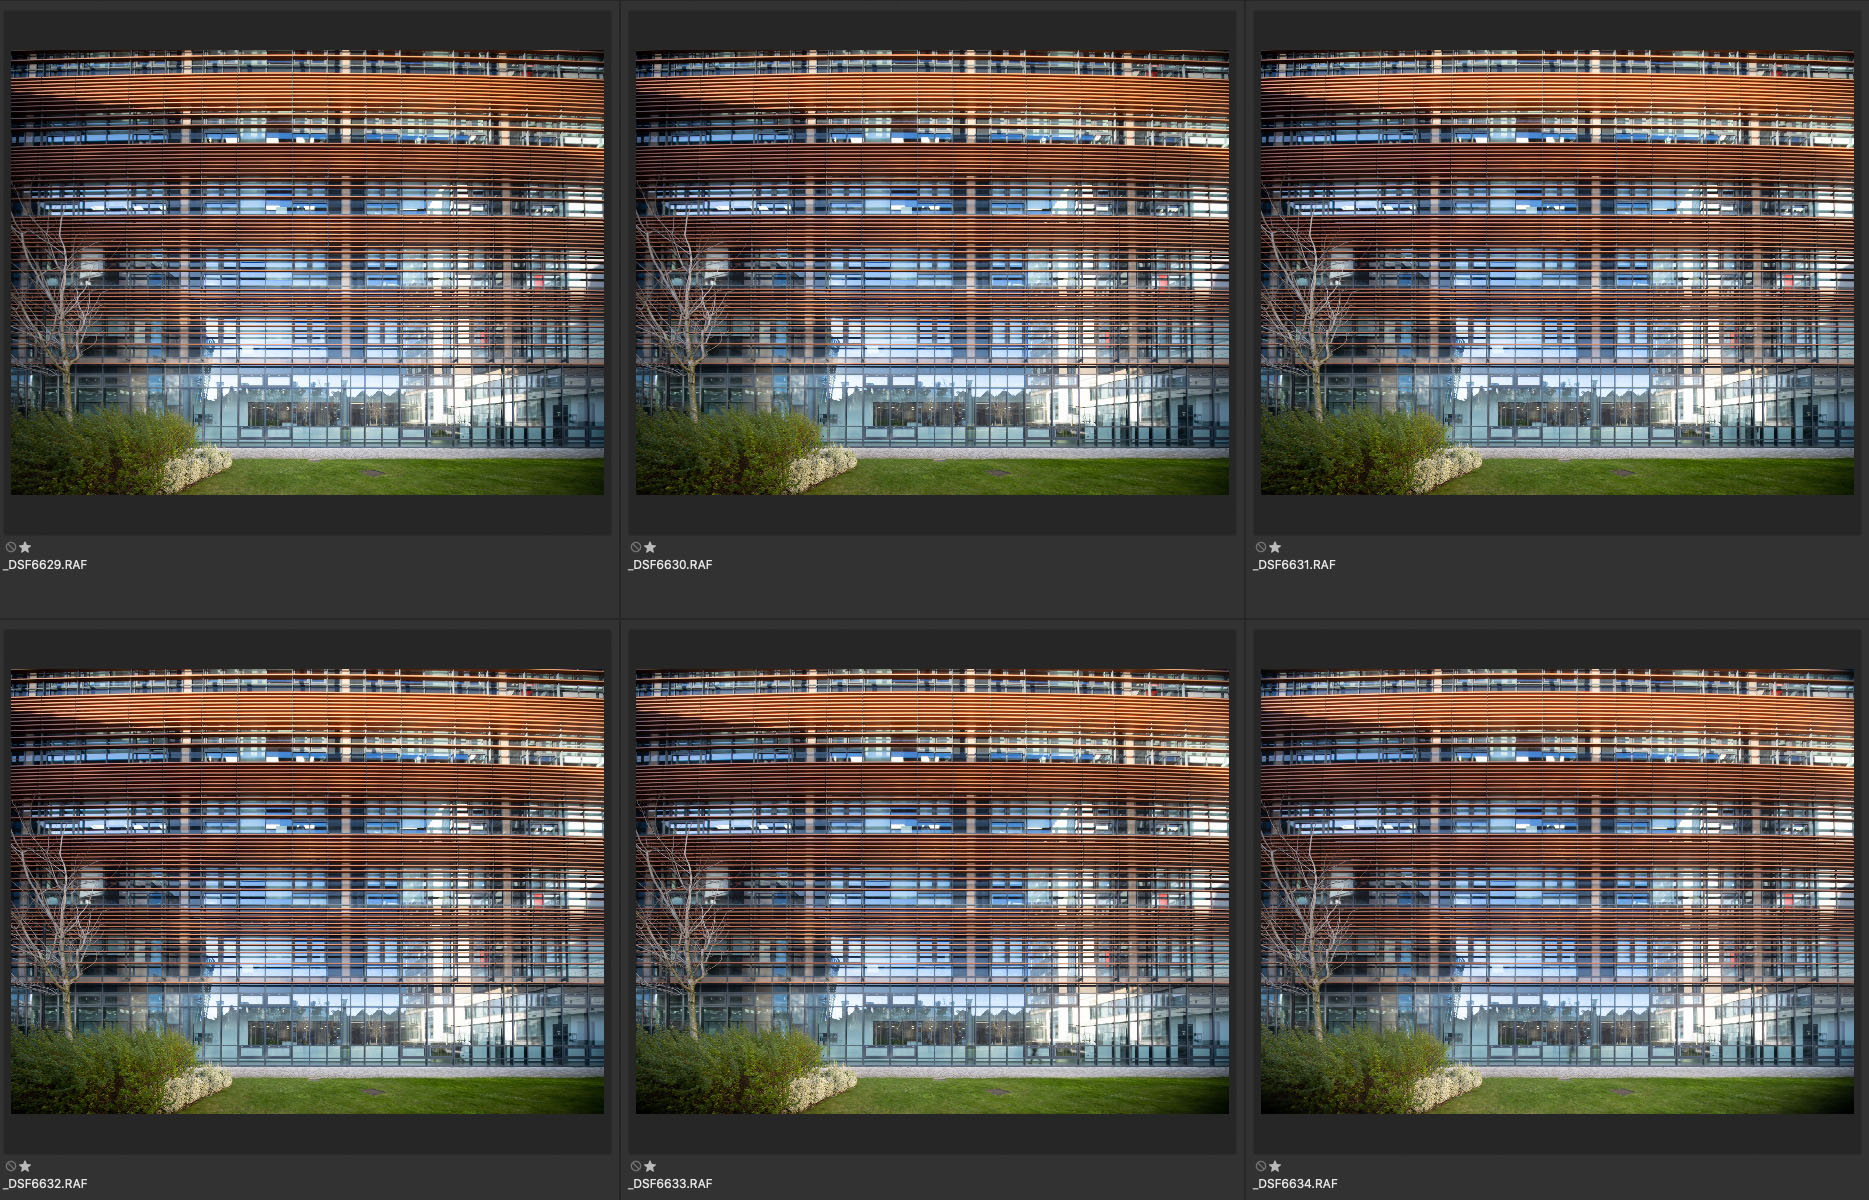
Here’s a set of views taken with ~8mm of vertical shift from f/5.6 to f/32 – I can maybe see a bit of vignetting at f/5.6 but that’s about it.
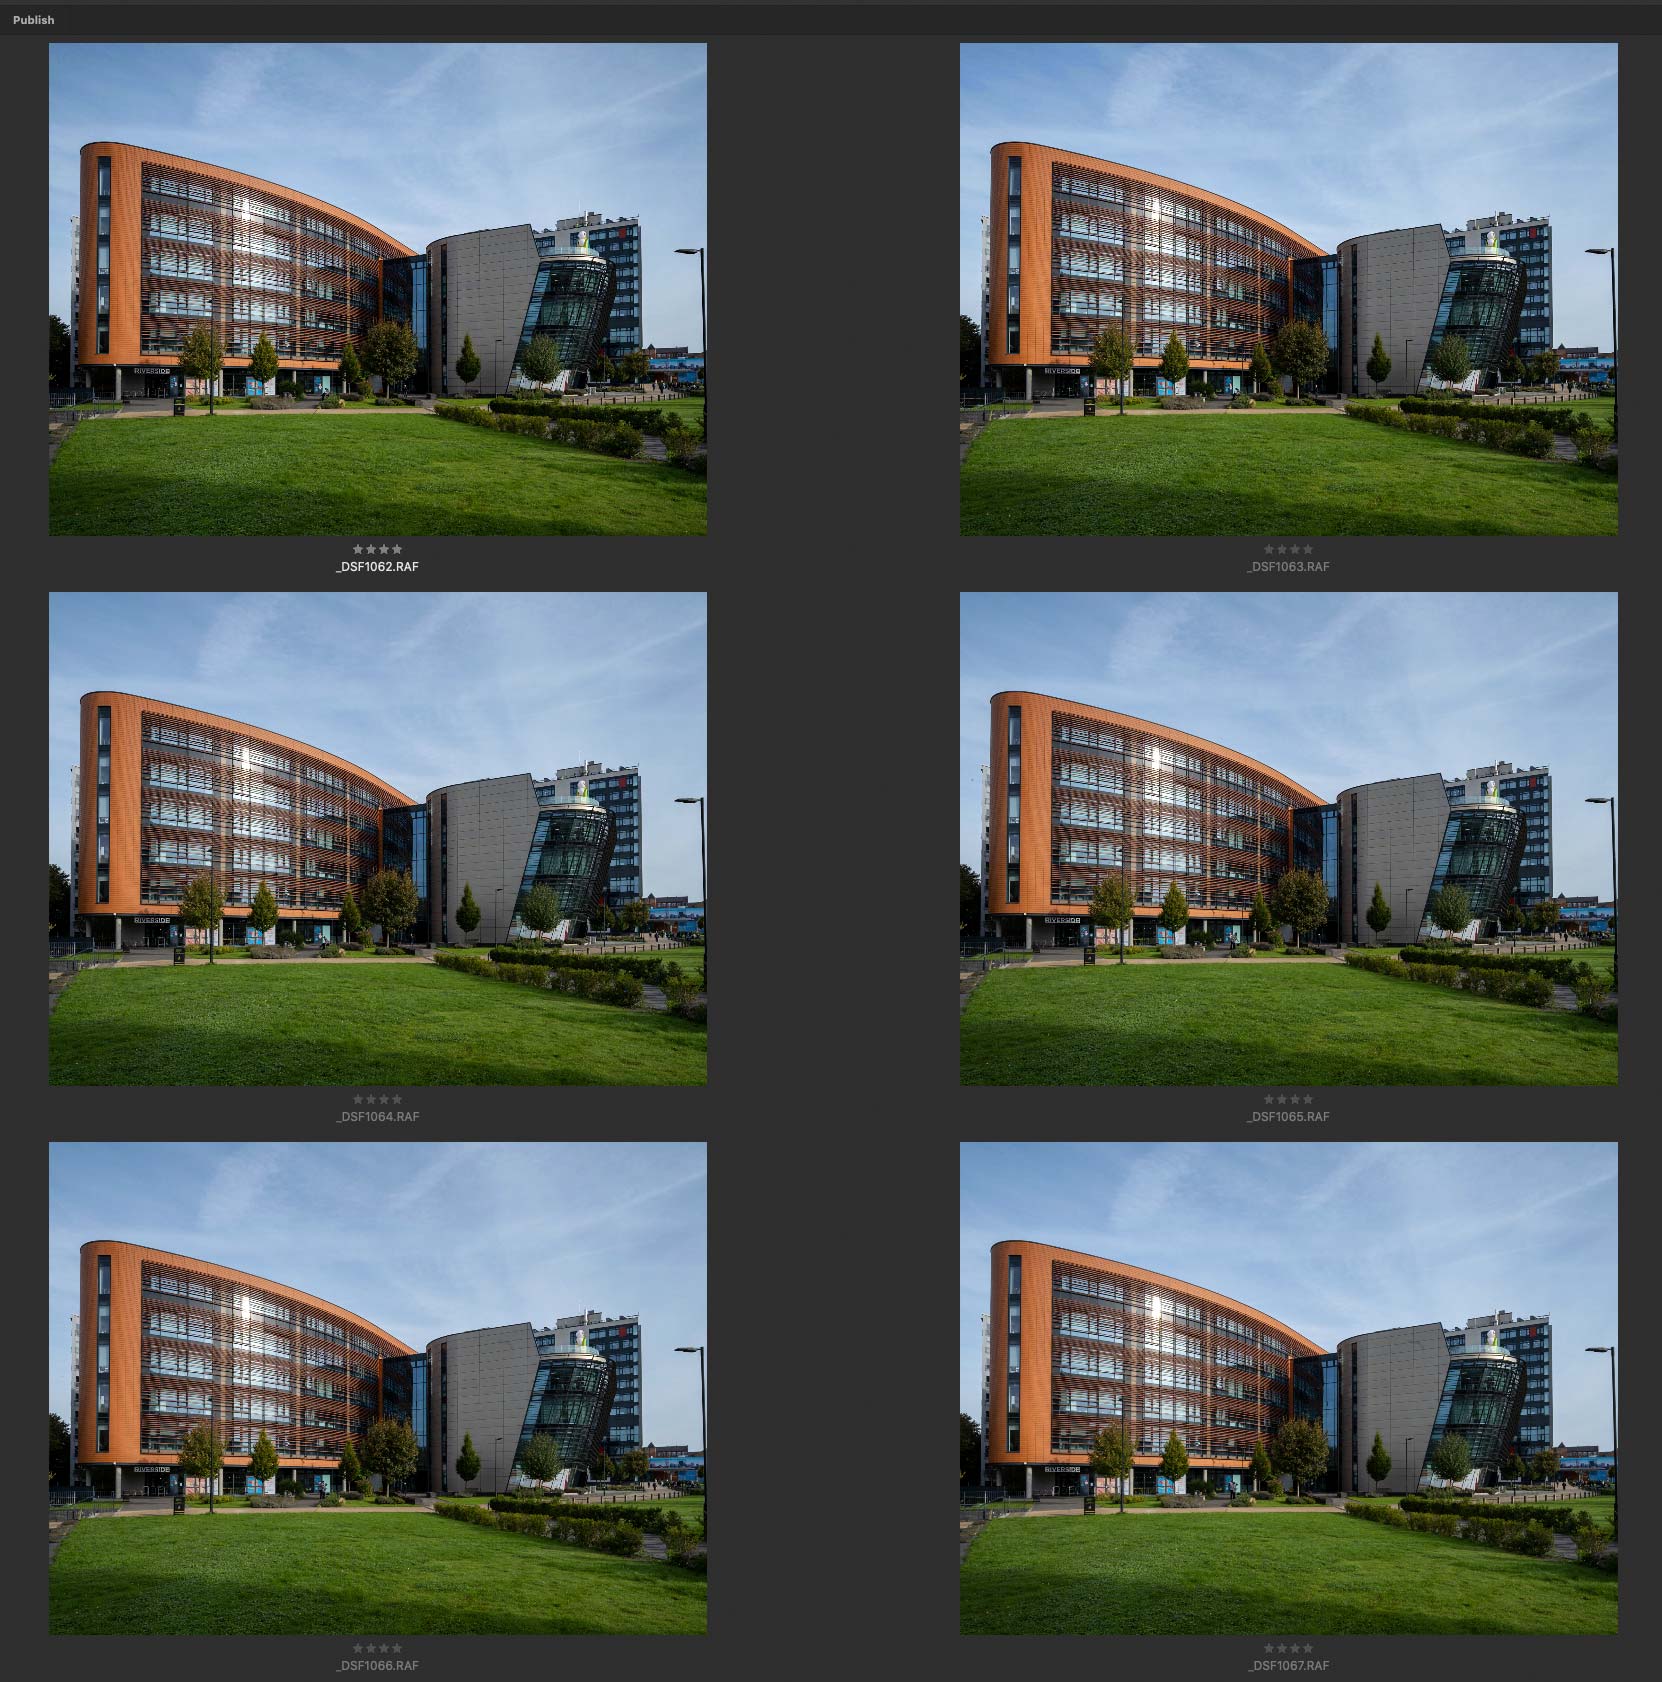
What about detail? These 100% crops show detail towards the top of the building.

f/5.6
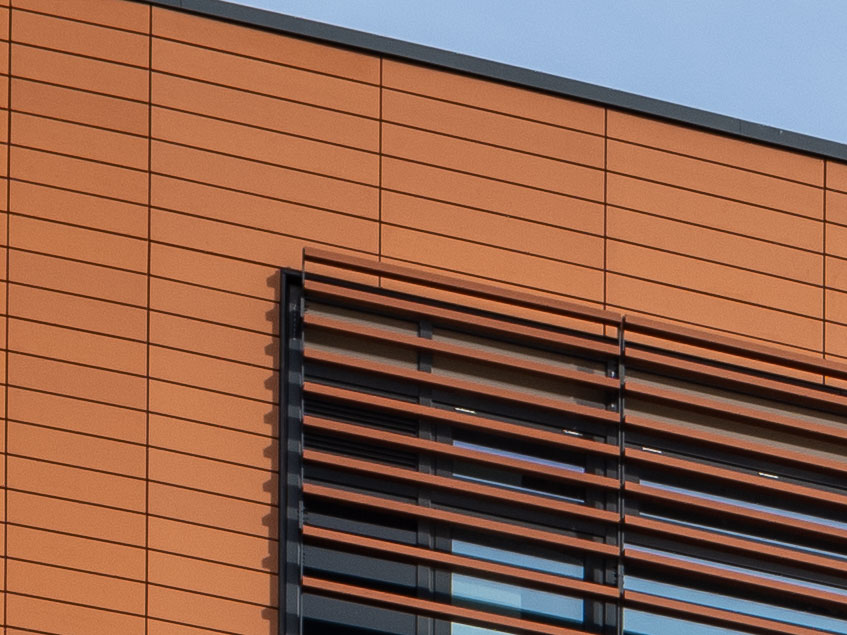
f/8

f/11
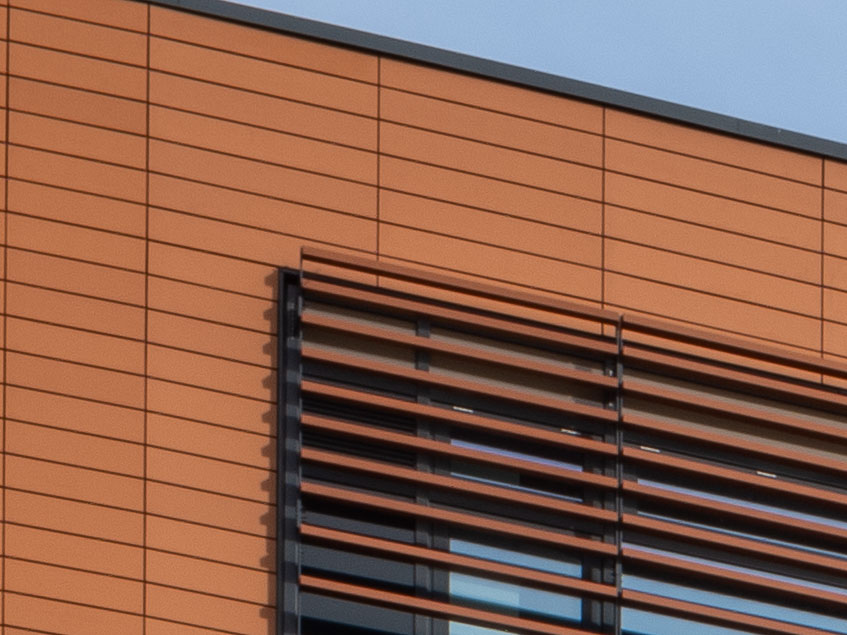
f/16

f/22

f/32
So. what can I say about choosing apertures?
My approach to using this lens, based on this testing, would be to pick the aperture you need for the depth of field.
f/8 reduces vignetting and improves sharpness in corners if shifting much. At very strong shift I’d be looking more to f/9/10/11 if I had important detail in the corners.
Wide open f/5.6 is a fully circular aperture, so potentially better with point light sources. Don’t expect soft OOF areas with this lens unless you want to include tilt in your options. Even then, f/5.6 isn’t going to be heavy in the ‘artistic softness’ areas.
If I need the depth of field then f/16 would be no concern – at f/22 and f/32 I know I’m going to be needing some extra processing in sharpening.
A view of highlights and OOF areas at f/5.6 at a local garden centre…

Some detail…

100% crop – click to enlarge
GF 30mm TS lens image quality
The lens EXIF data is not [yet] used internally in the camera to provide vignetting and other corrections.
For many images though, it’s just not an issue.

The lens handles well enough, that with the stabilisation of the GFX100S, I was quite happy, when visiting Coventry cathedral to shoot hand held [tripods not allowed inside]. I’d like to say the improved IS of the GFX100 II made this easier – I can’t though, since I’ve no meaningful way of testing such specifications…
All shots were taken at f/8 unless otherwise noted.
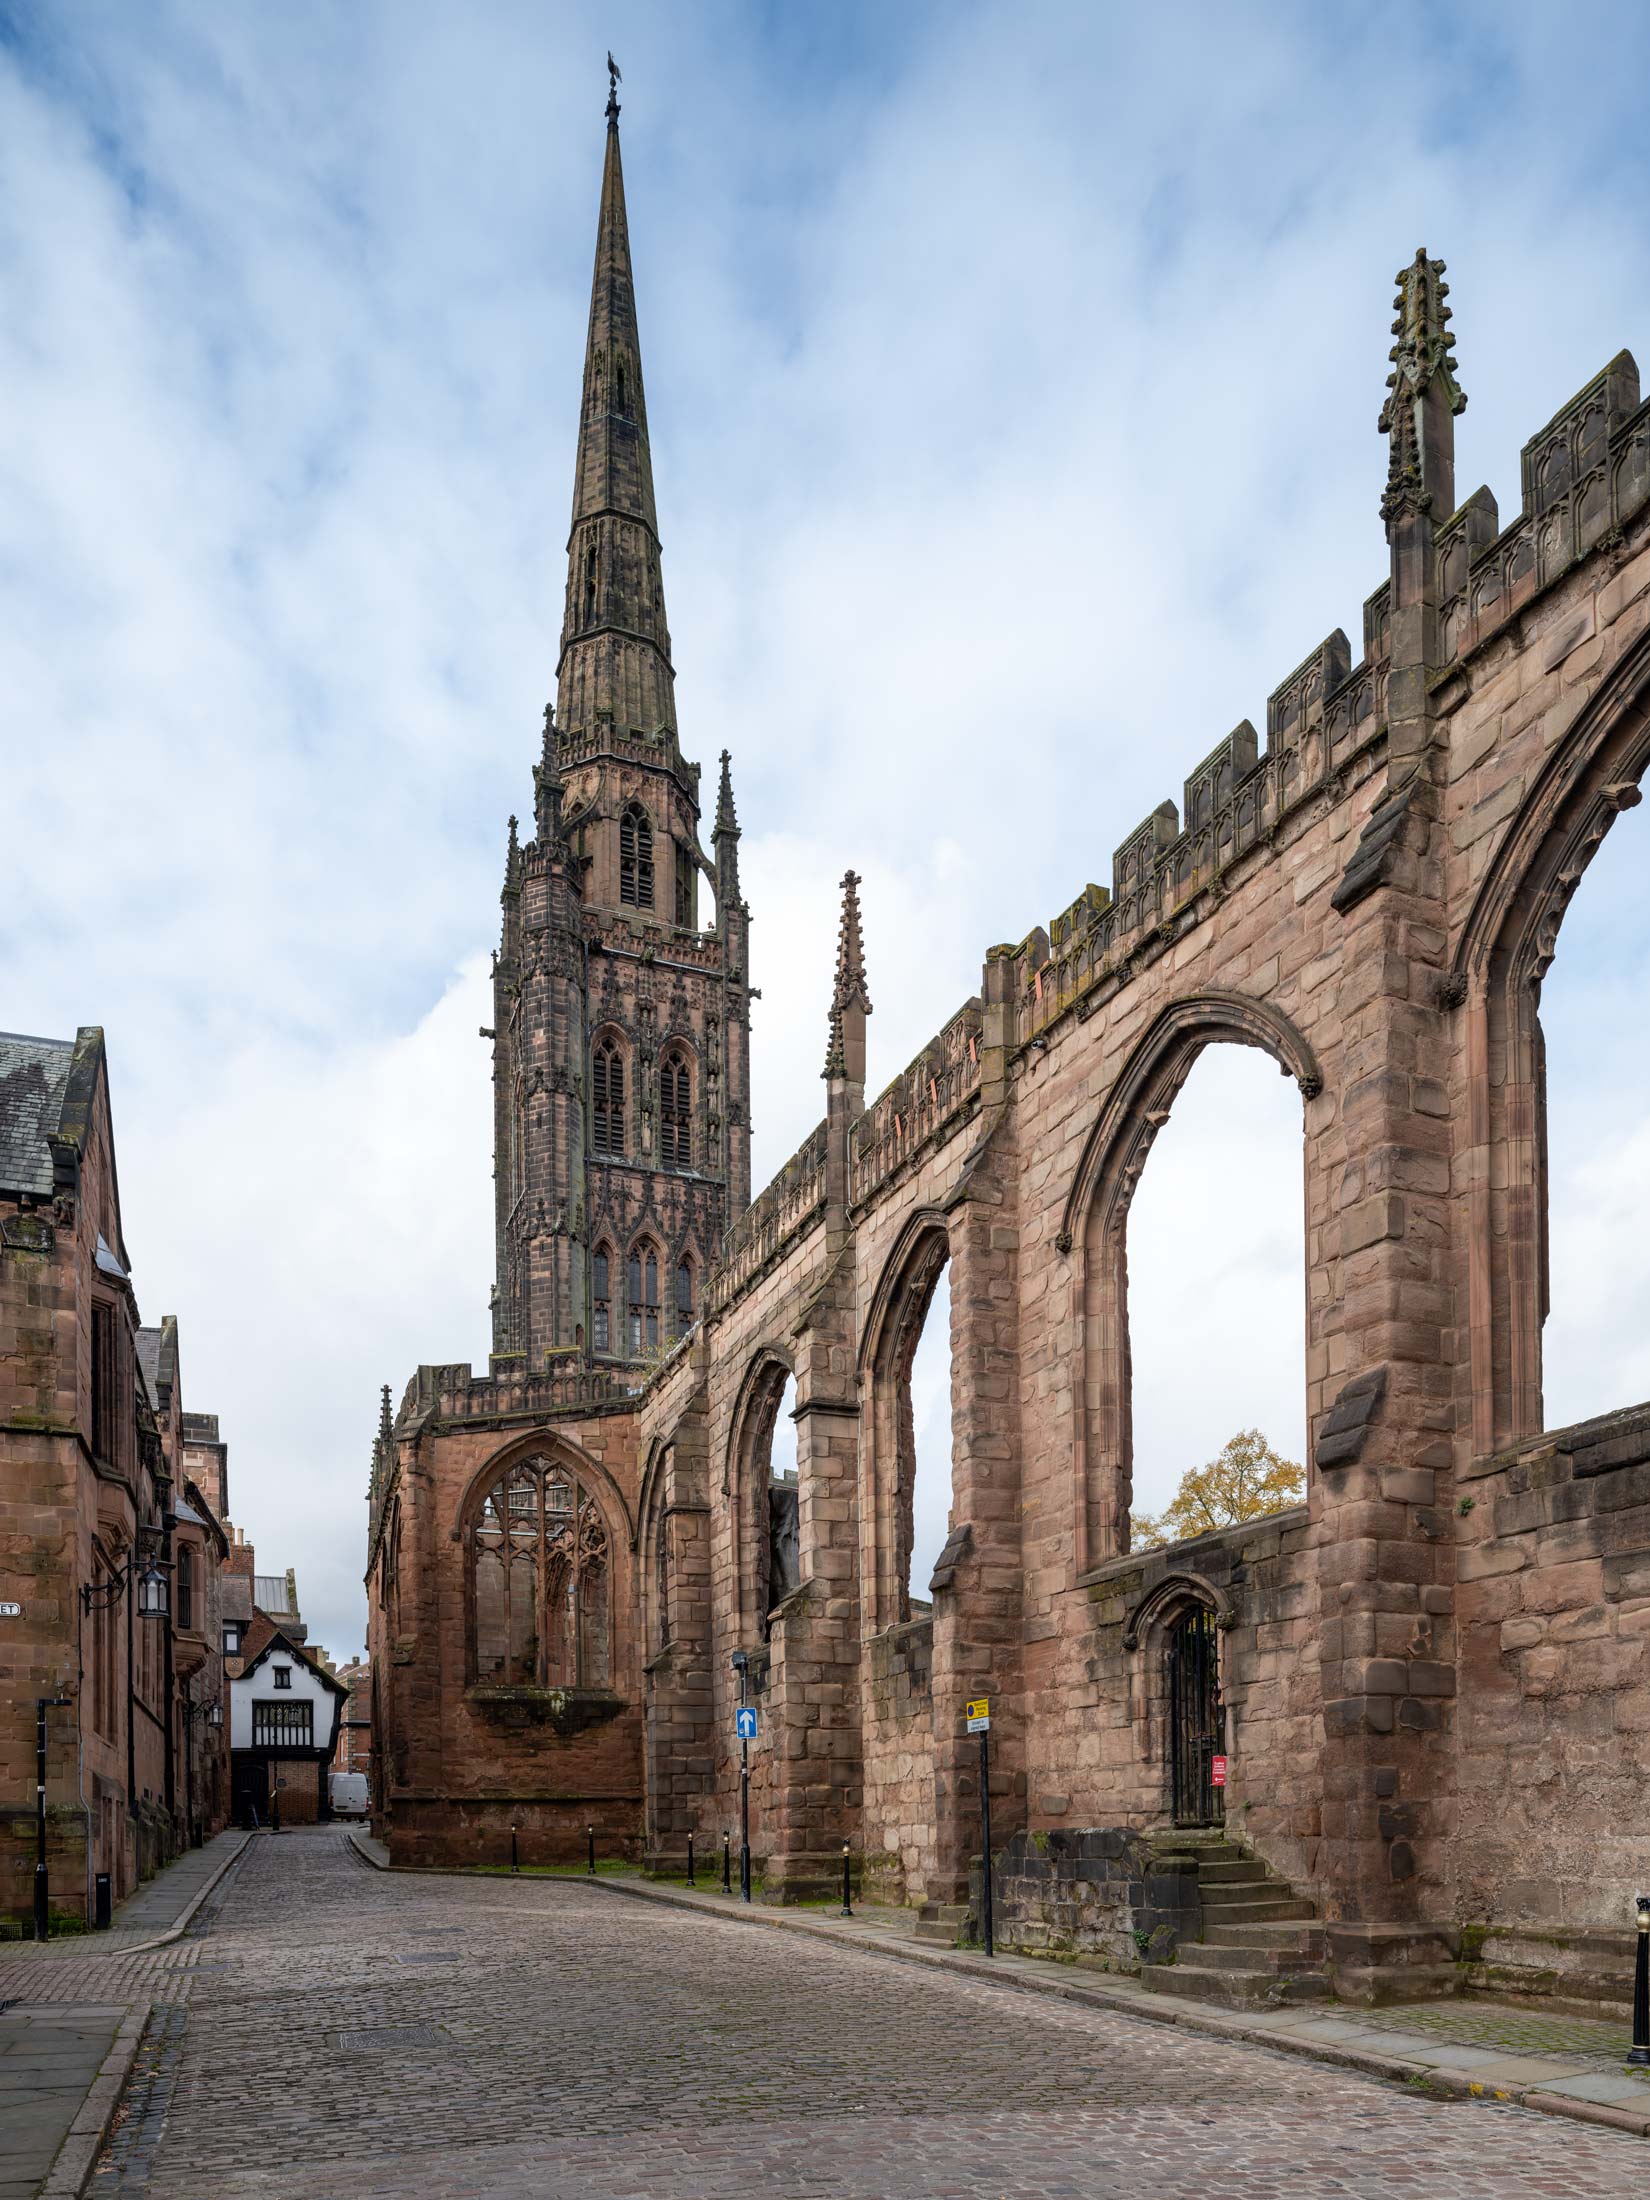
The old Coventry cathedral [bombed in 1940]
Detail from the first shot.
The new Cathedral [cons. 1962]
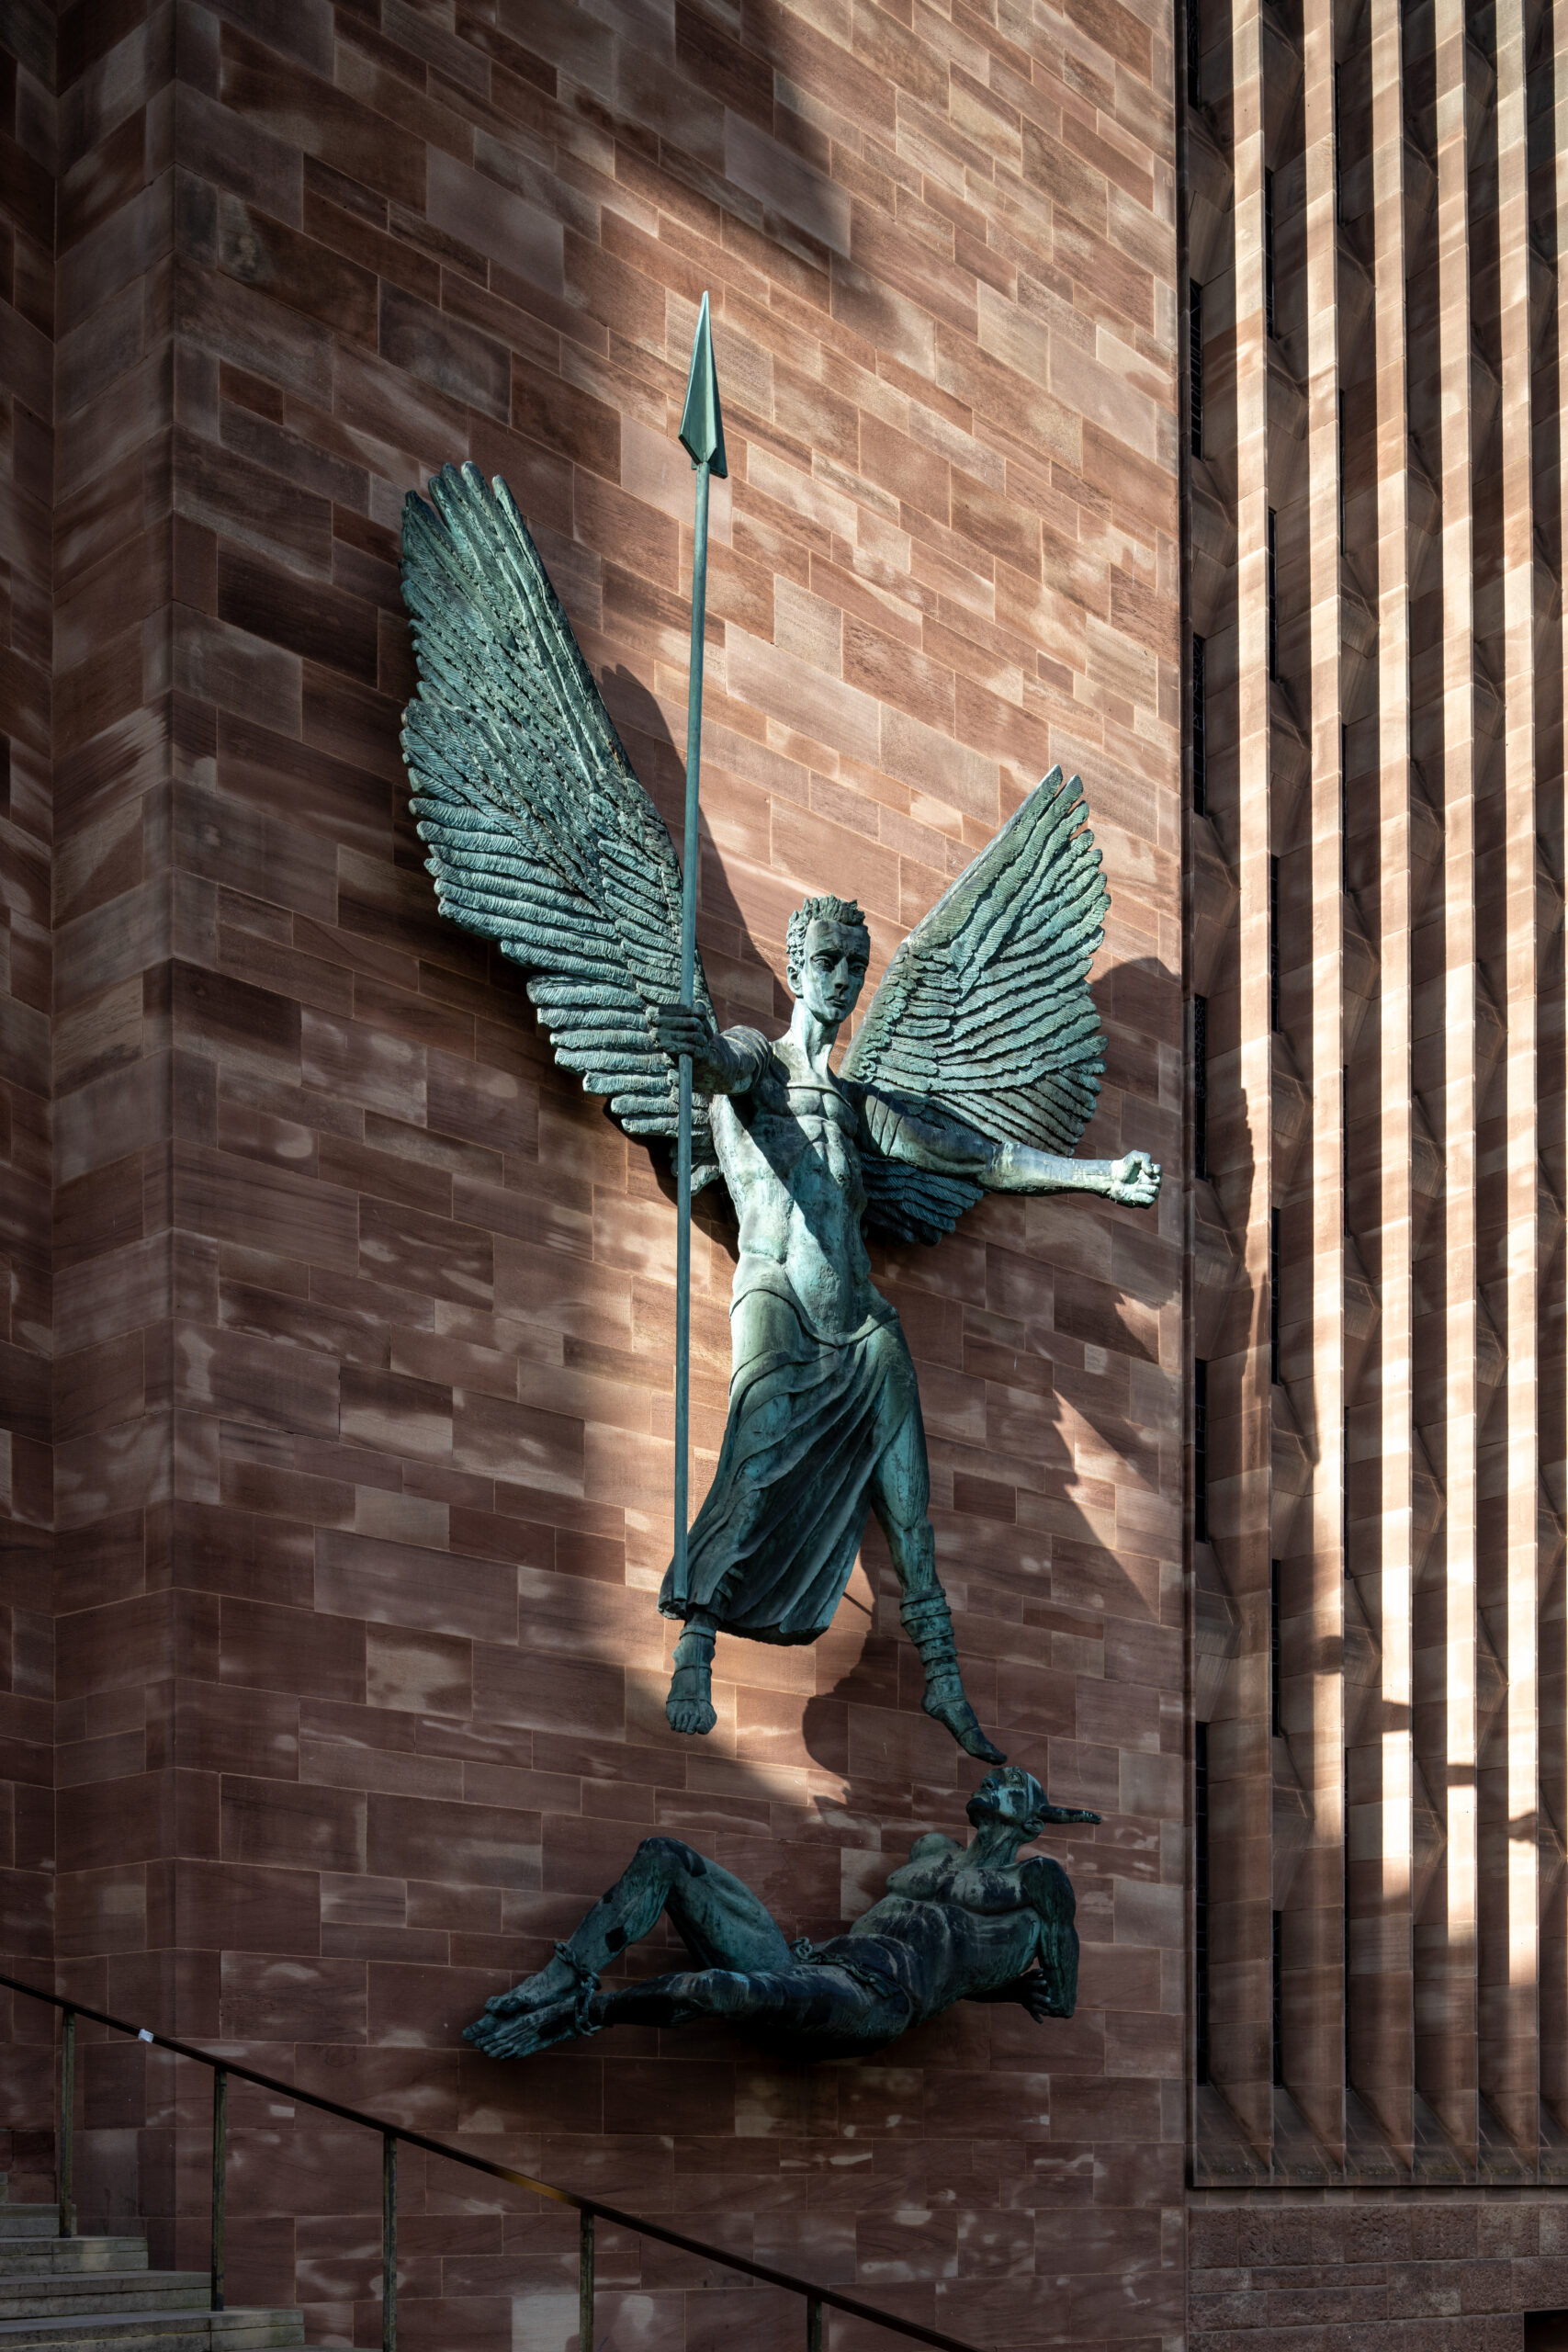
St Michael’s Victory over the Devil. Sculpture by Jacob Epstein.
The Baptistry window

By the altar [heavily lightened – note the slight flare from the over exposed widow lights]
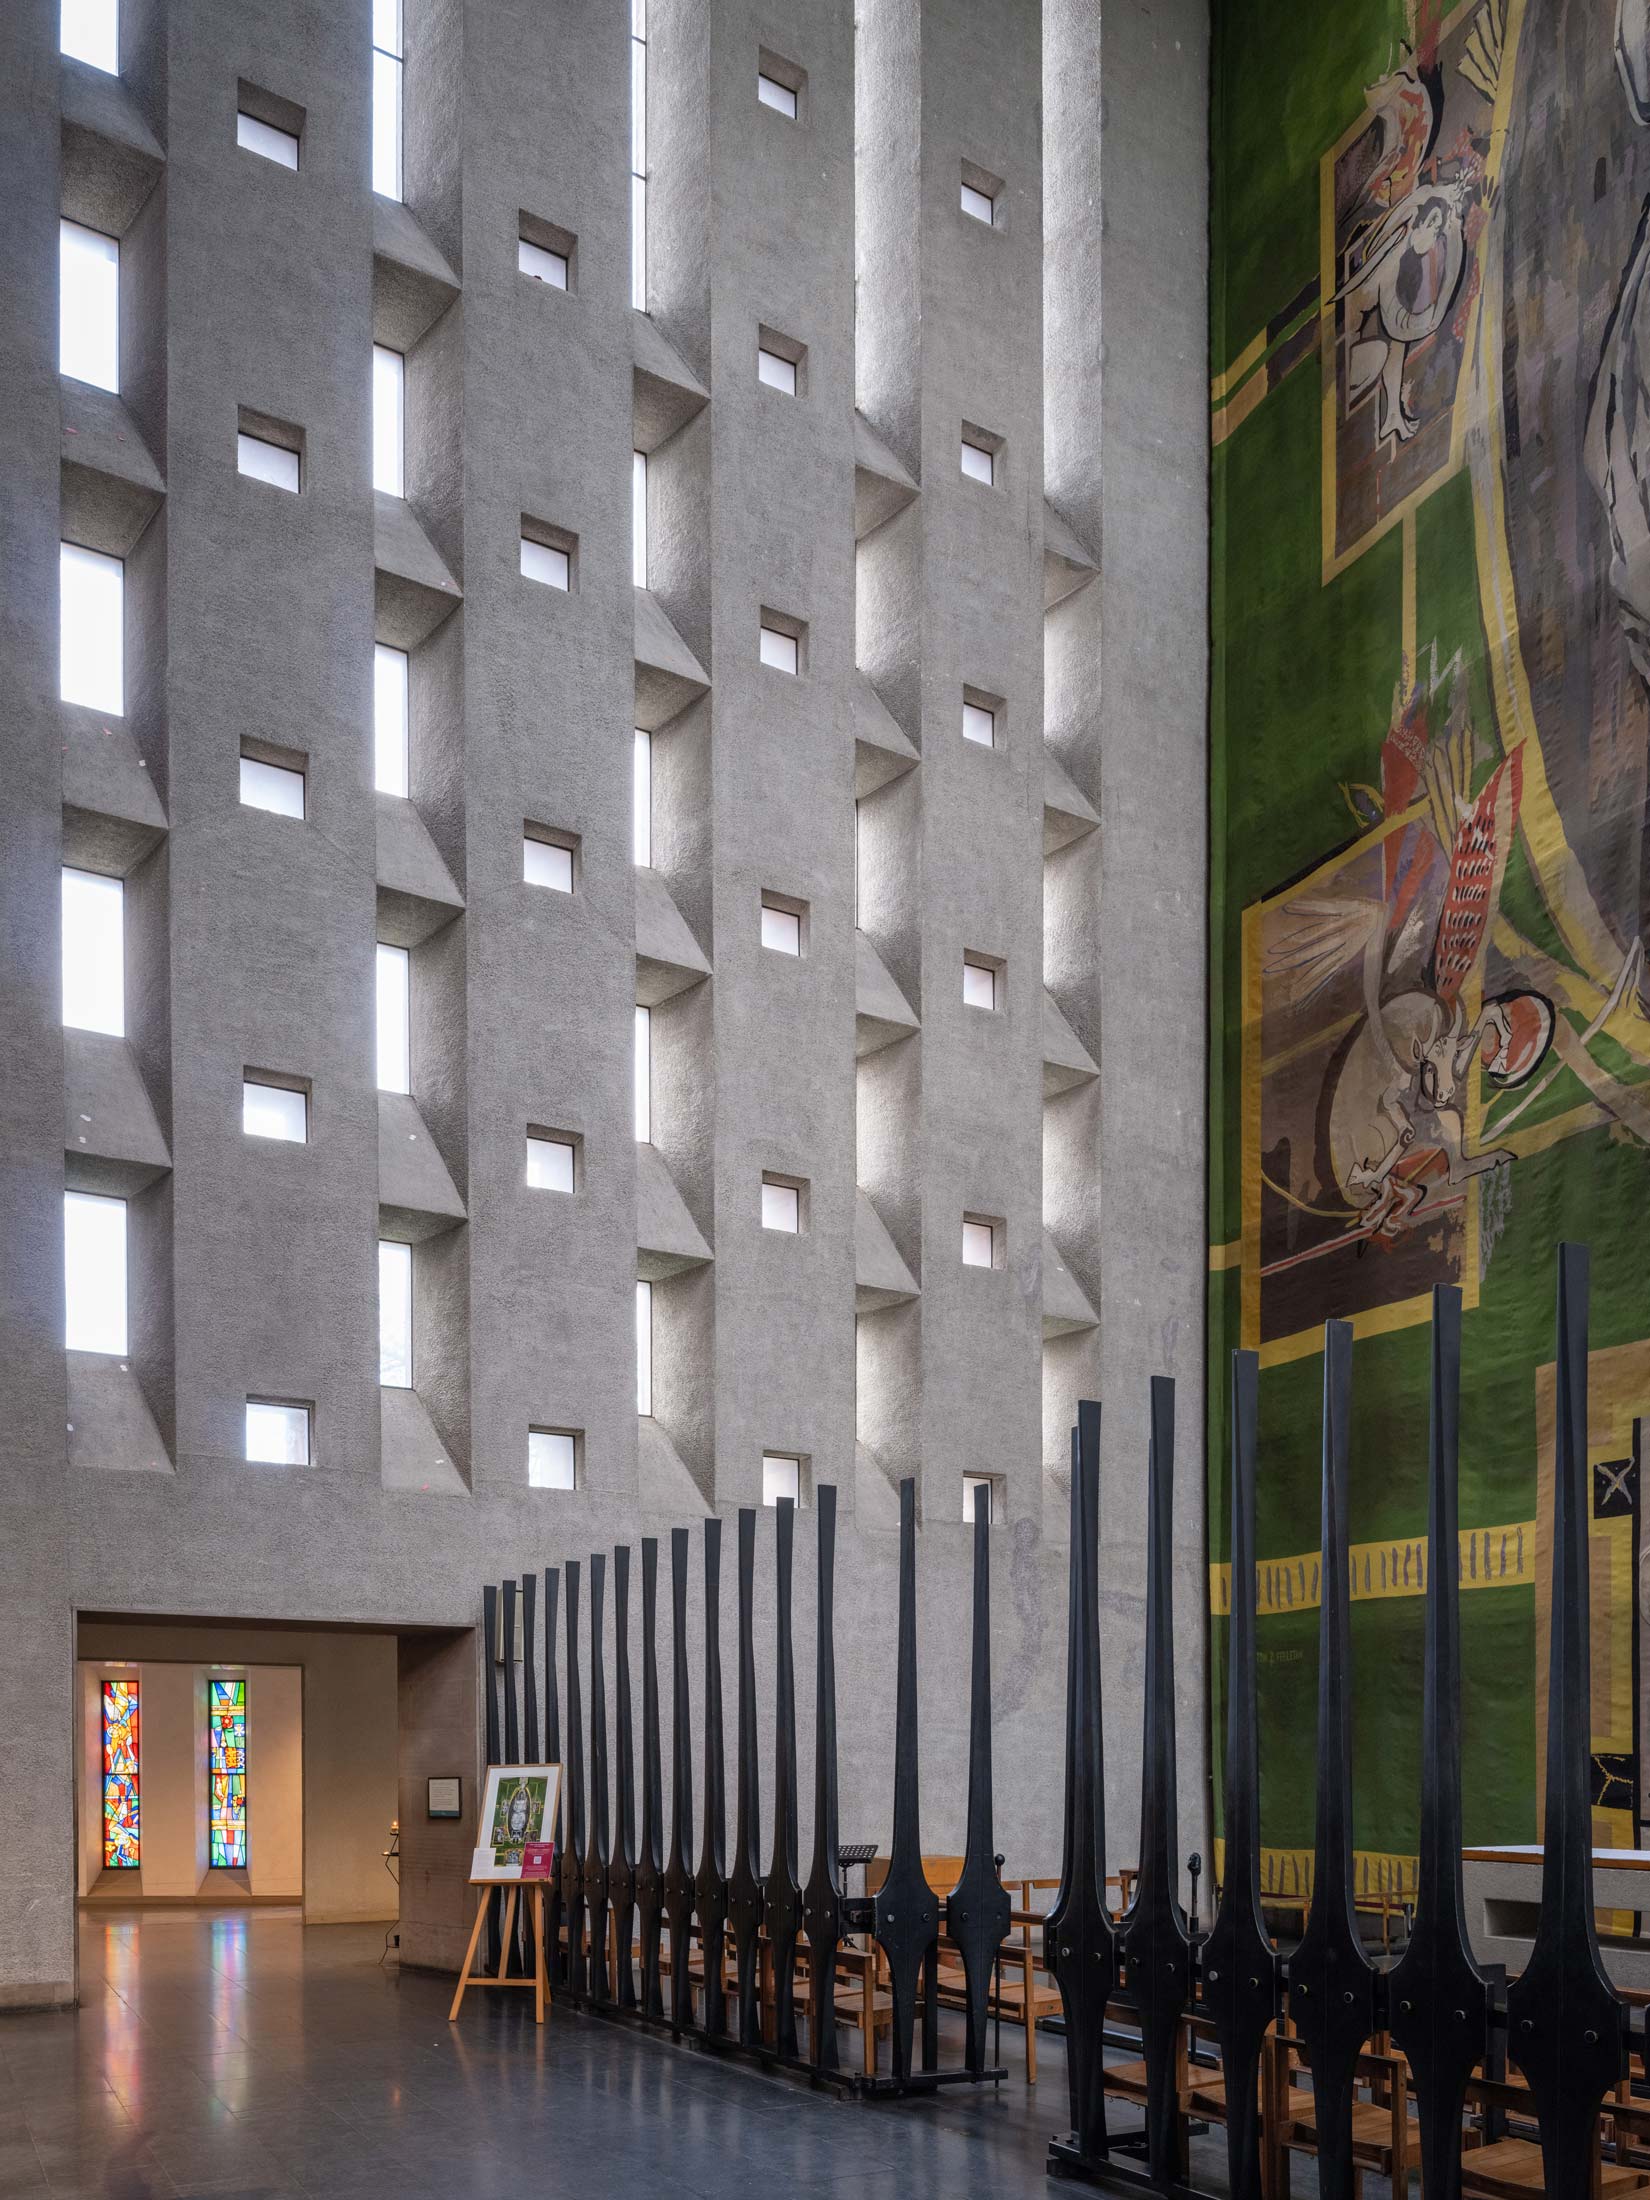
Cathedral interior

Chapel
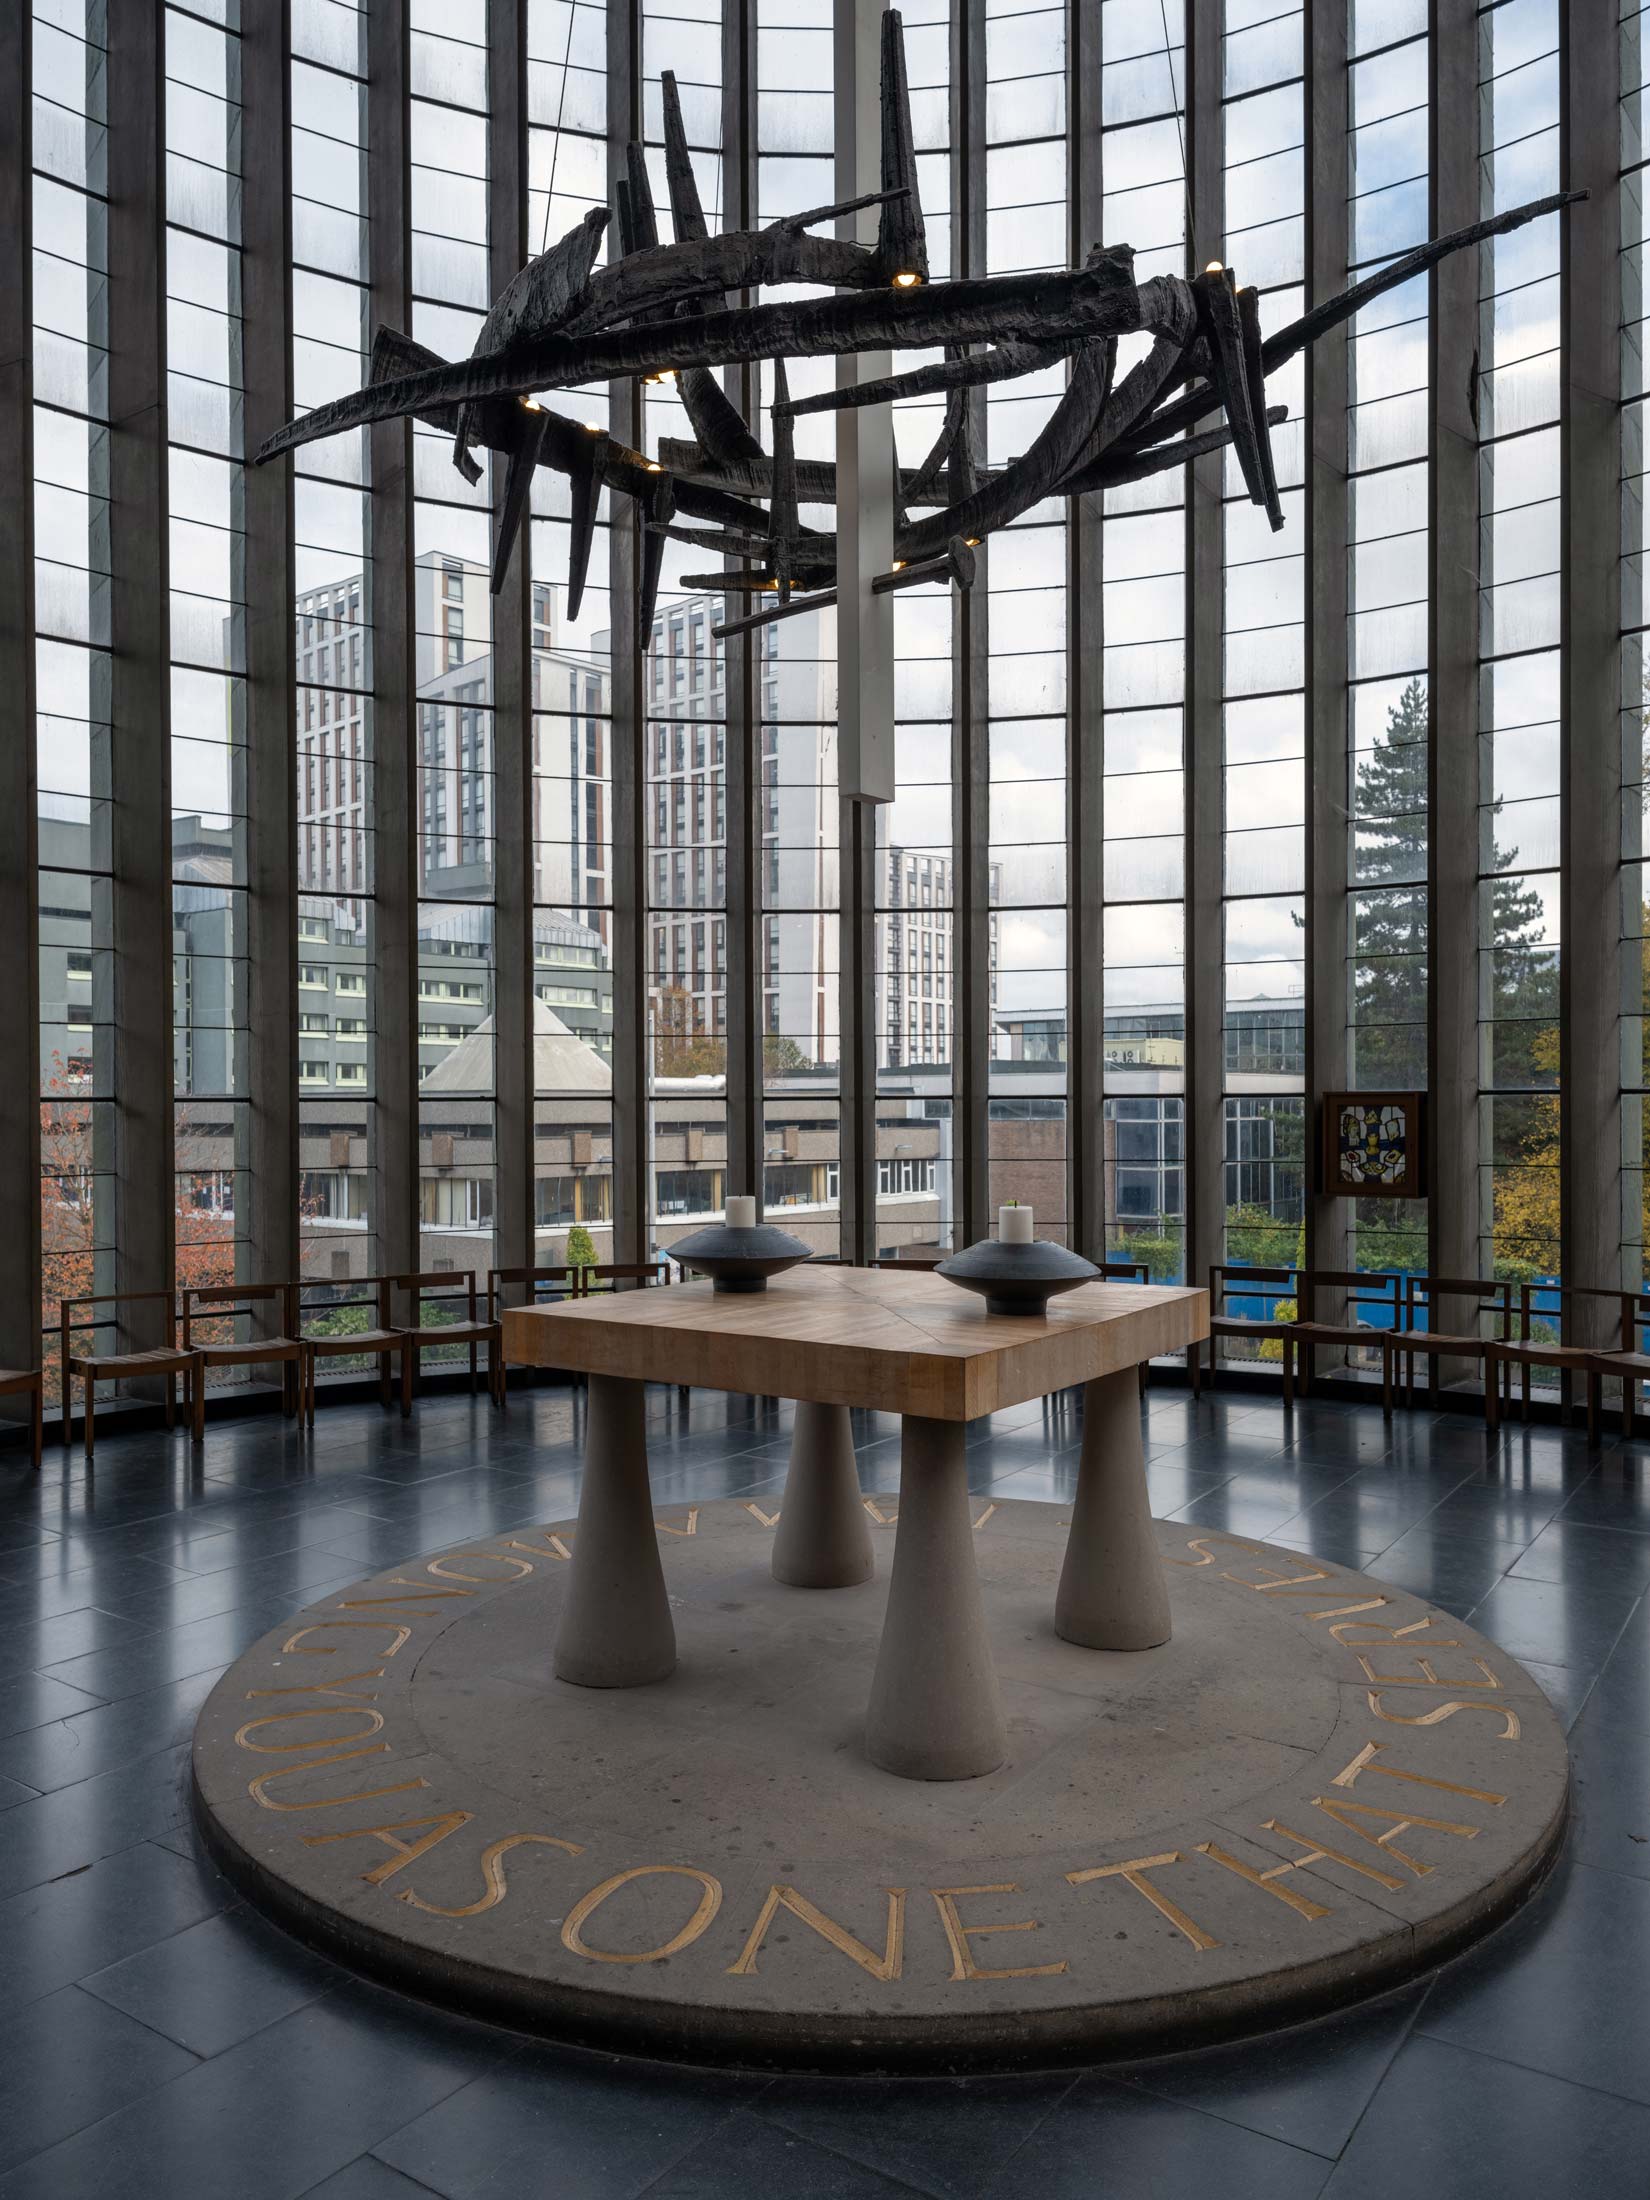
Fine detail – Multishot?
Whilst you’ll have to wait for someone else to work out the detailed resolution numbers for this lens/sensor combination, finest detail suggests that if the GFX multishot super resolution mode was a little more usable, you would definitely see benefits from it.
Given the testing I did with the Panasonic S1R high resolution mode a few years ago, using the TS-E24 II and TS-E50, I’d love to be able to get 600MP+ stitched images for some super size prints. As ever though, the biggest problem with such prints is finding a wall for them to go on [I still have a 46 foot long canvas rolled in a tube].
Shift
My own most common use of shift is a simple vertical shift – as in most shots above…
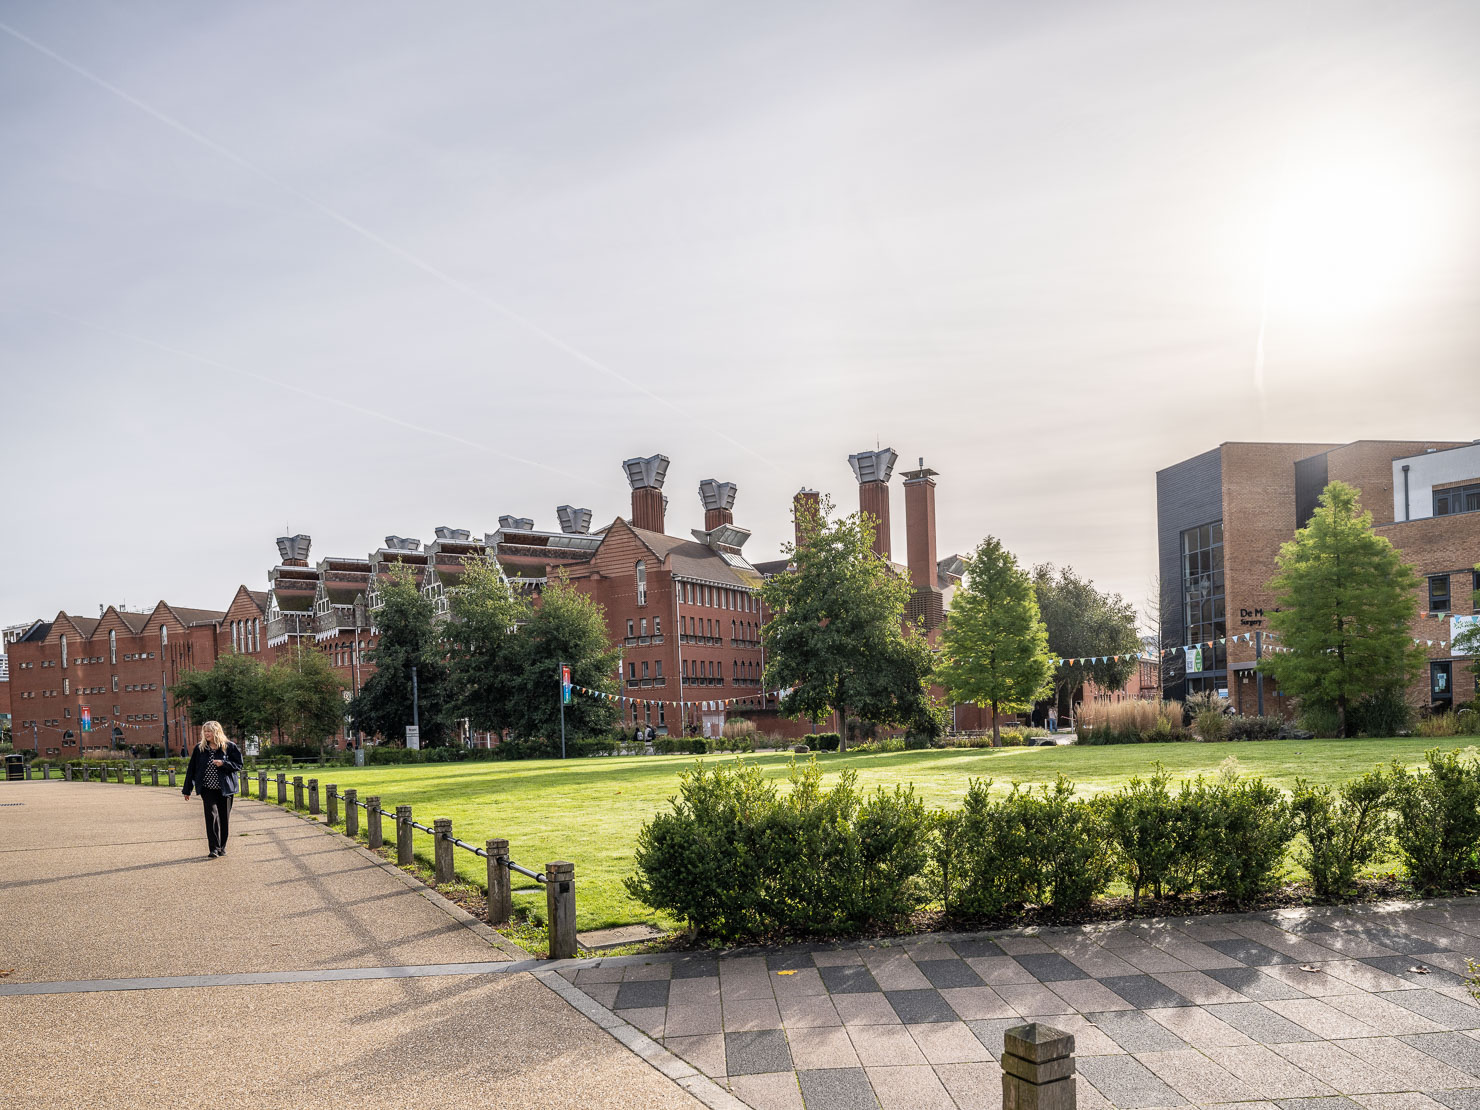
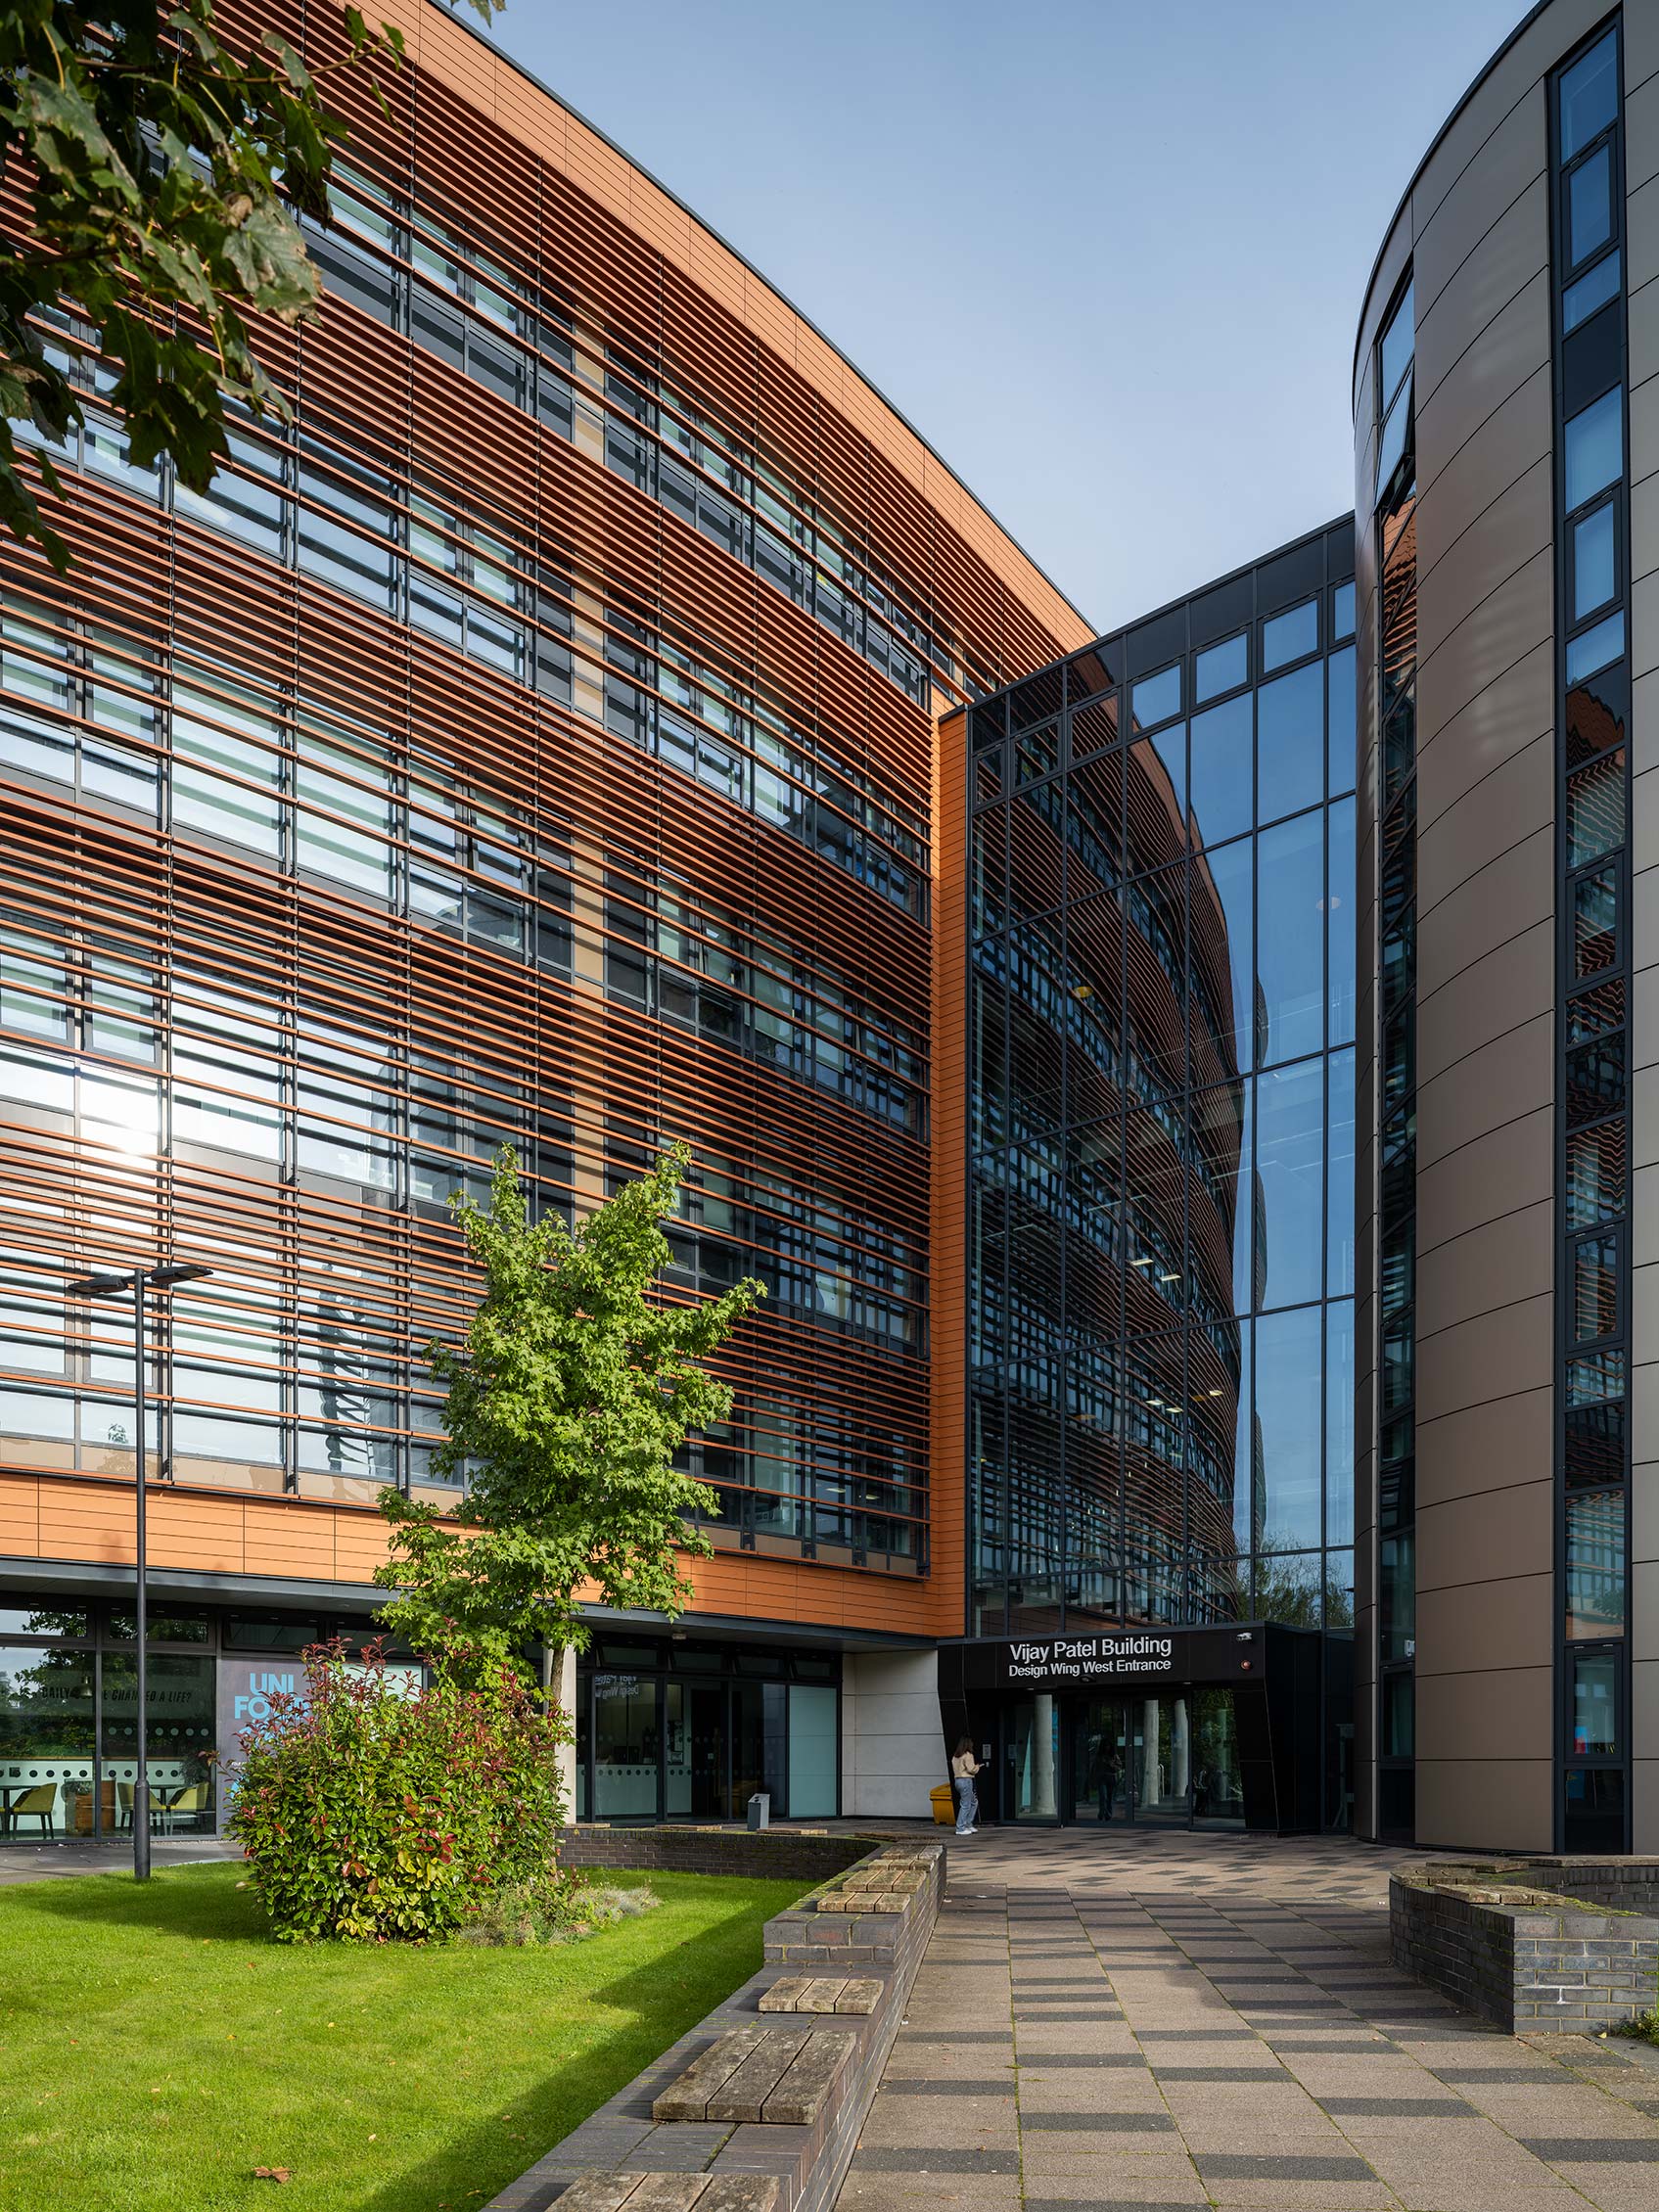
A view of Coventry University – taken after accidentally setting the camera in crop mode for a few shots…
The vertical shift keeps the verticals true.

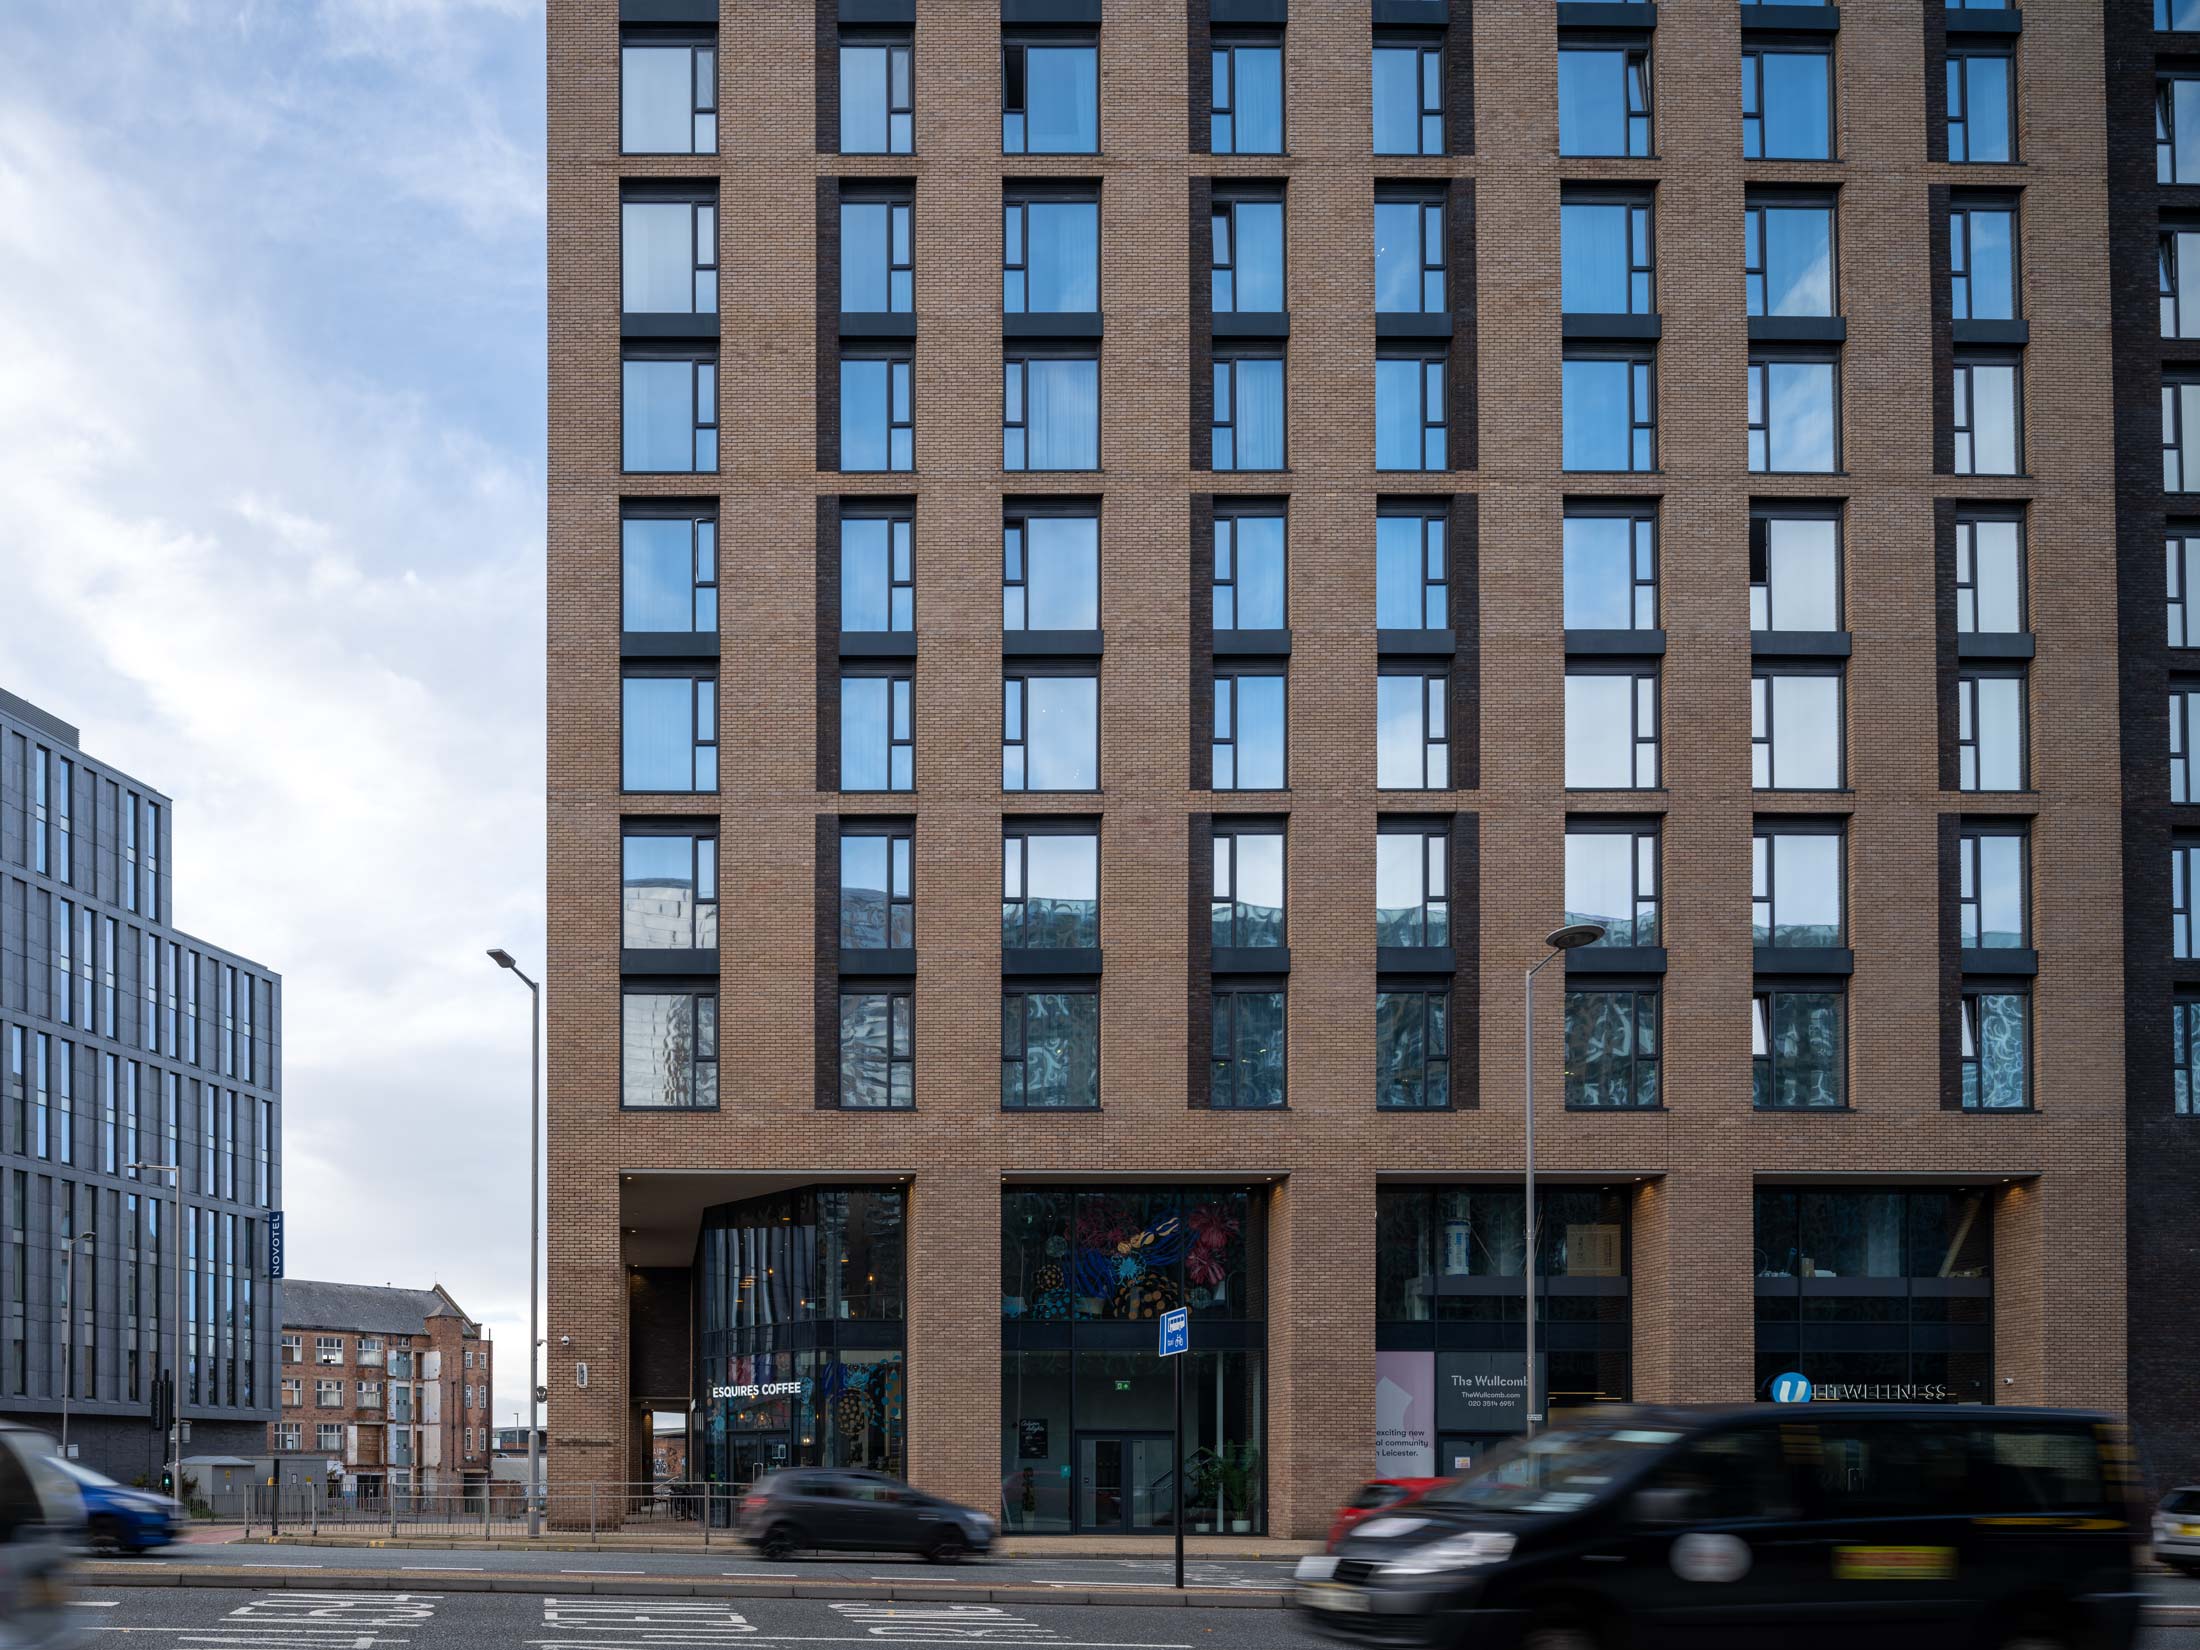
A vertical shifted view of the Wulcombe building in Leicester.

With shifted shots, you can estimate the amount of shift, knowing that the camera is level. However with the 30mm TS lens, you’ve got the info in the EXIF data too.
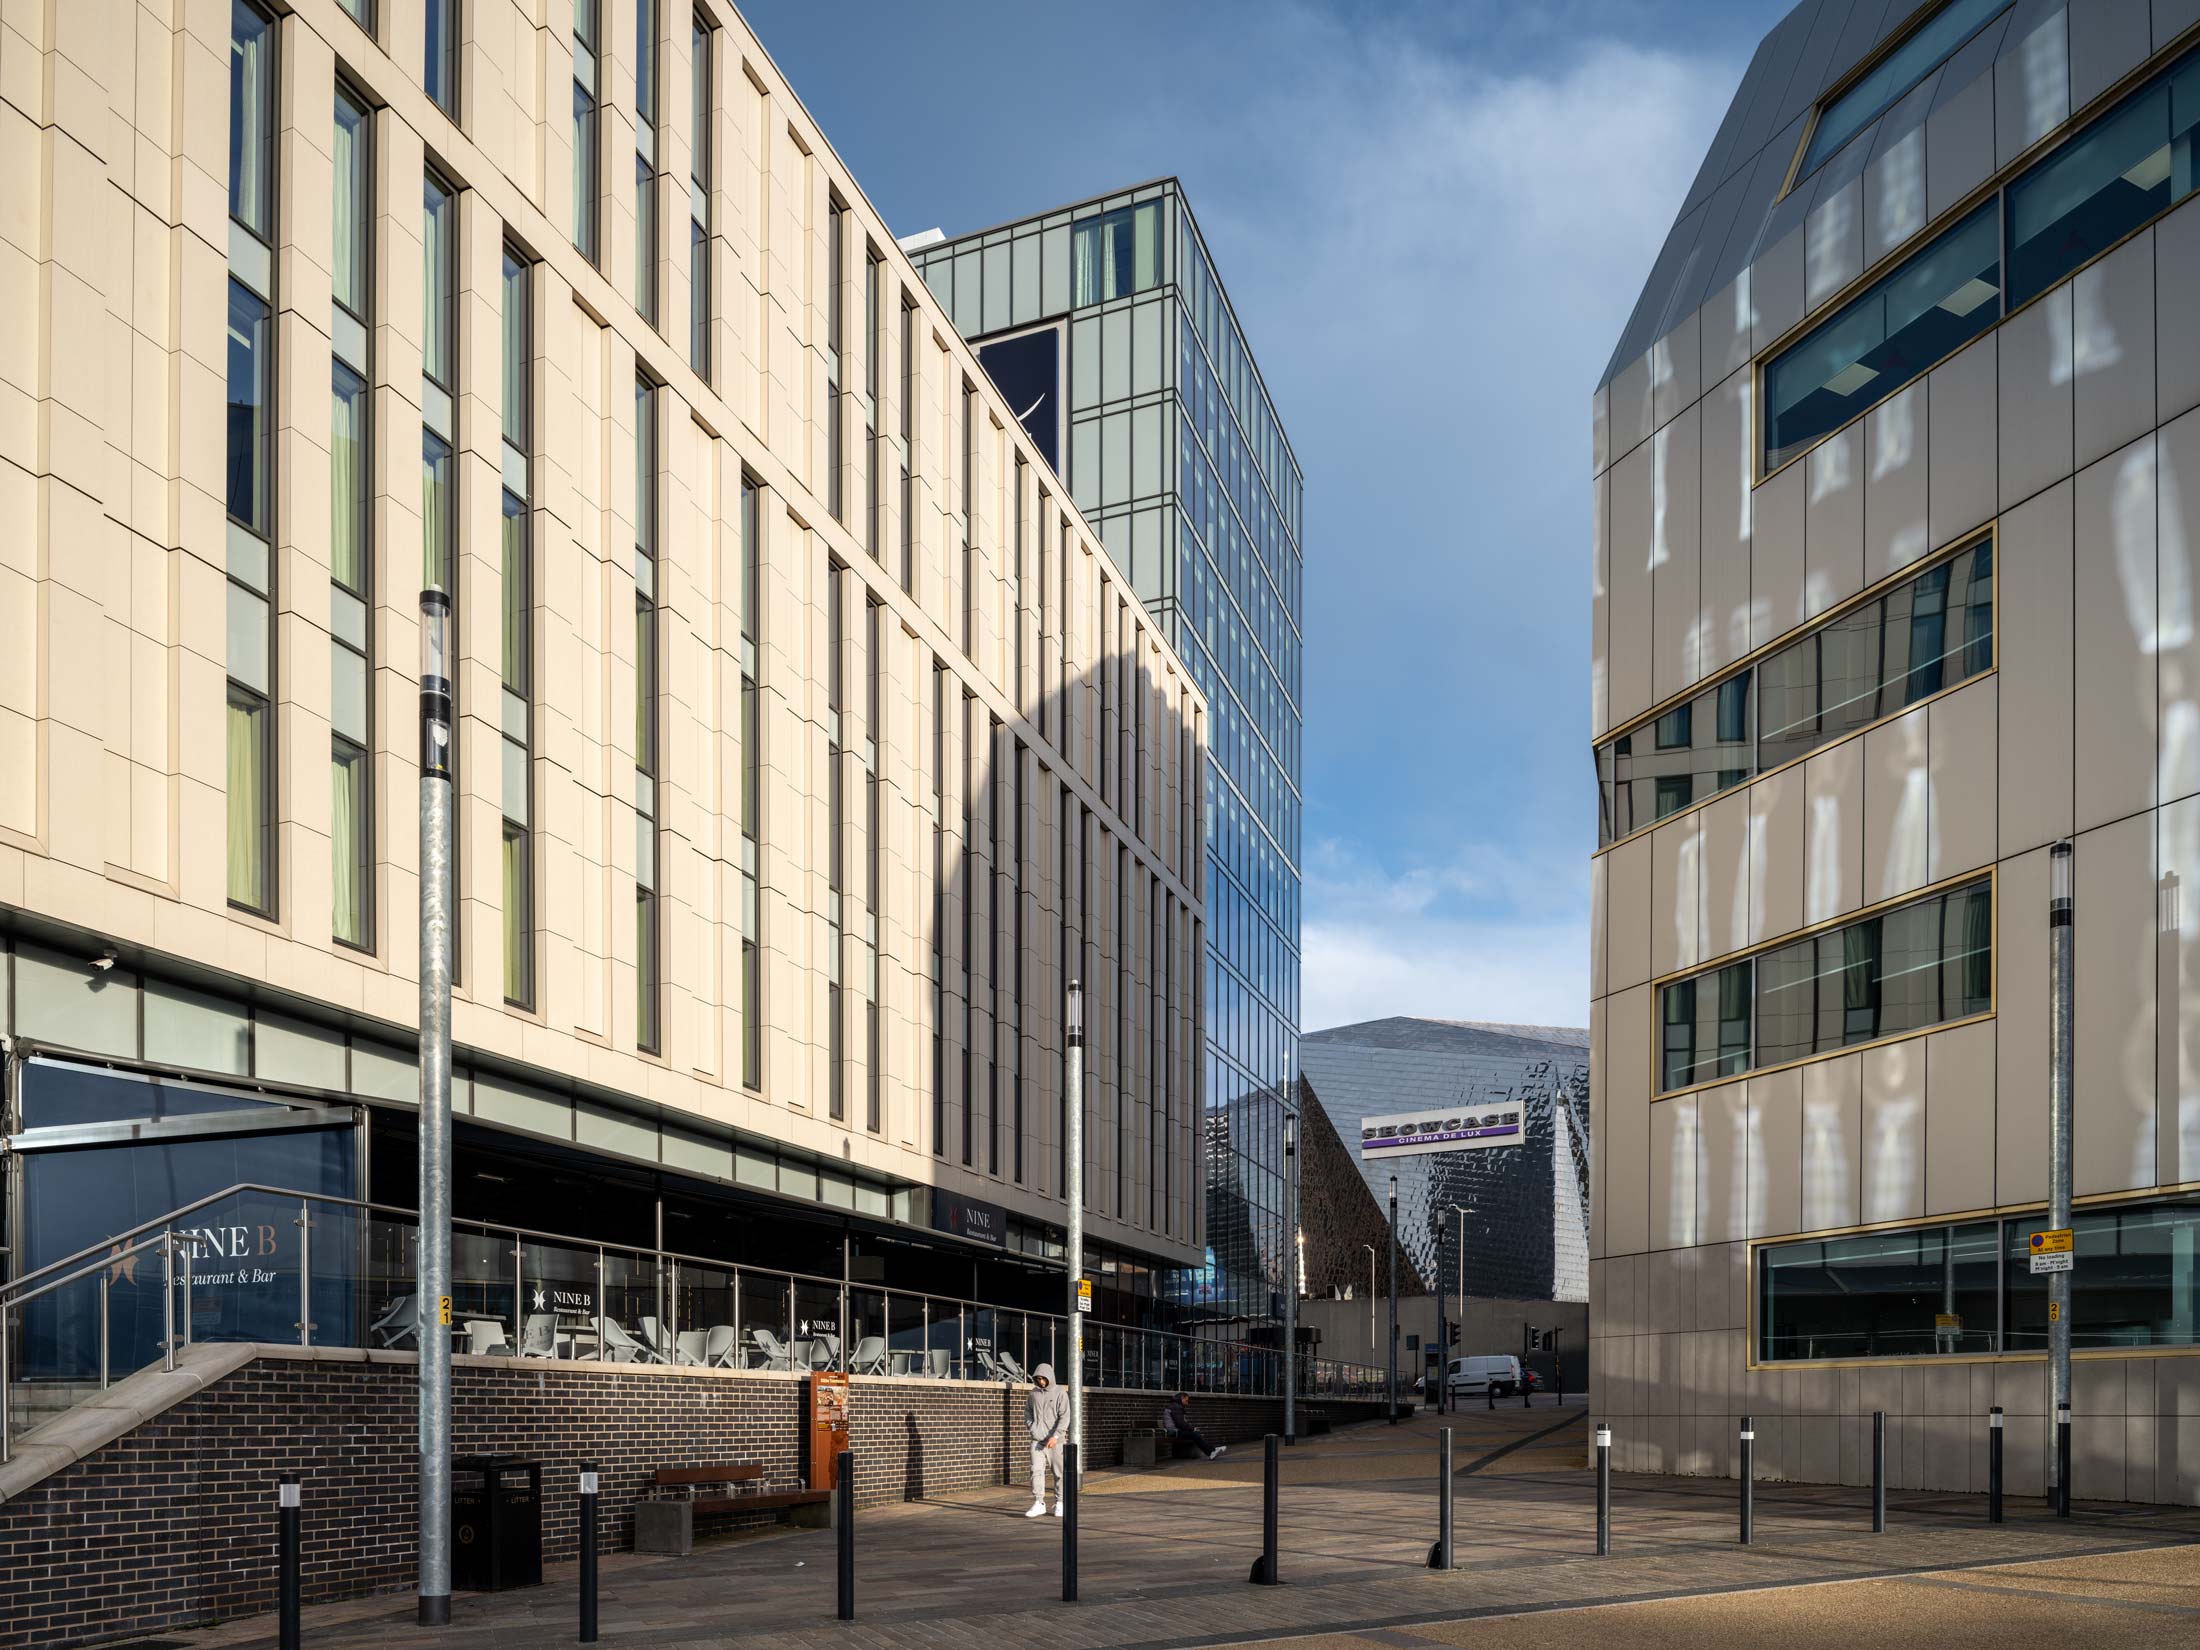
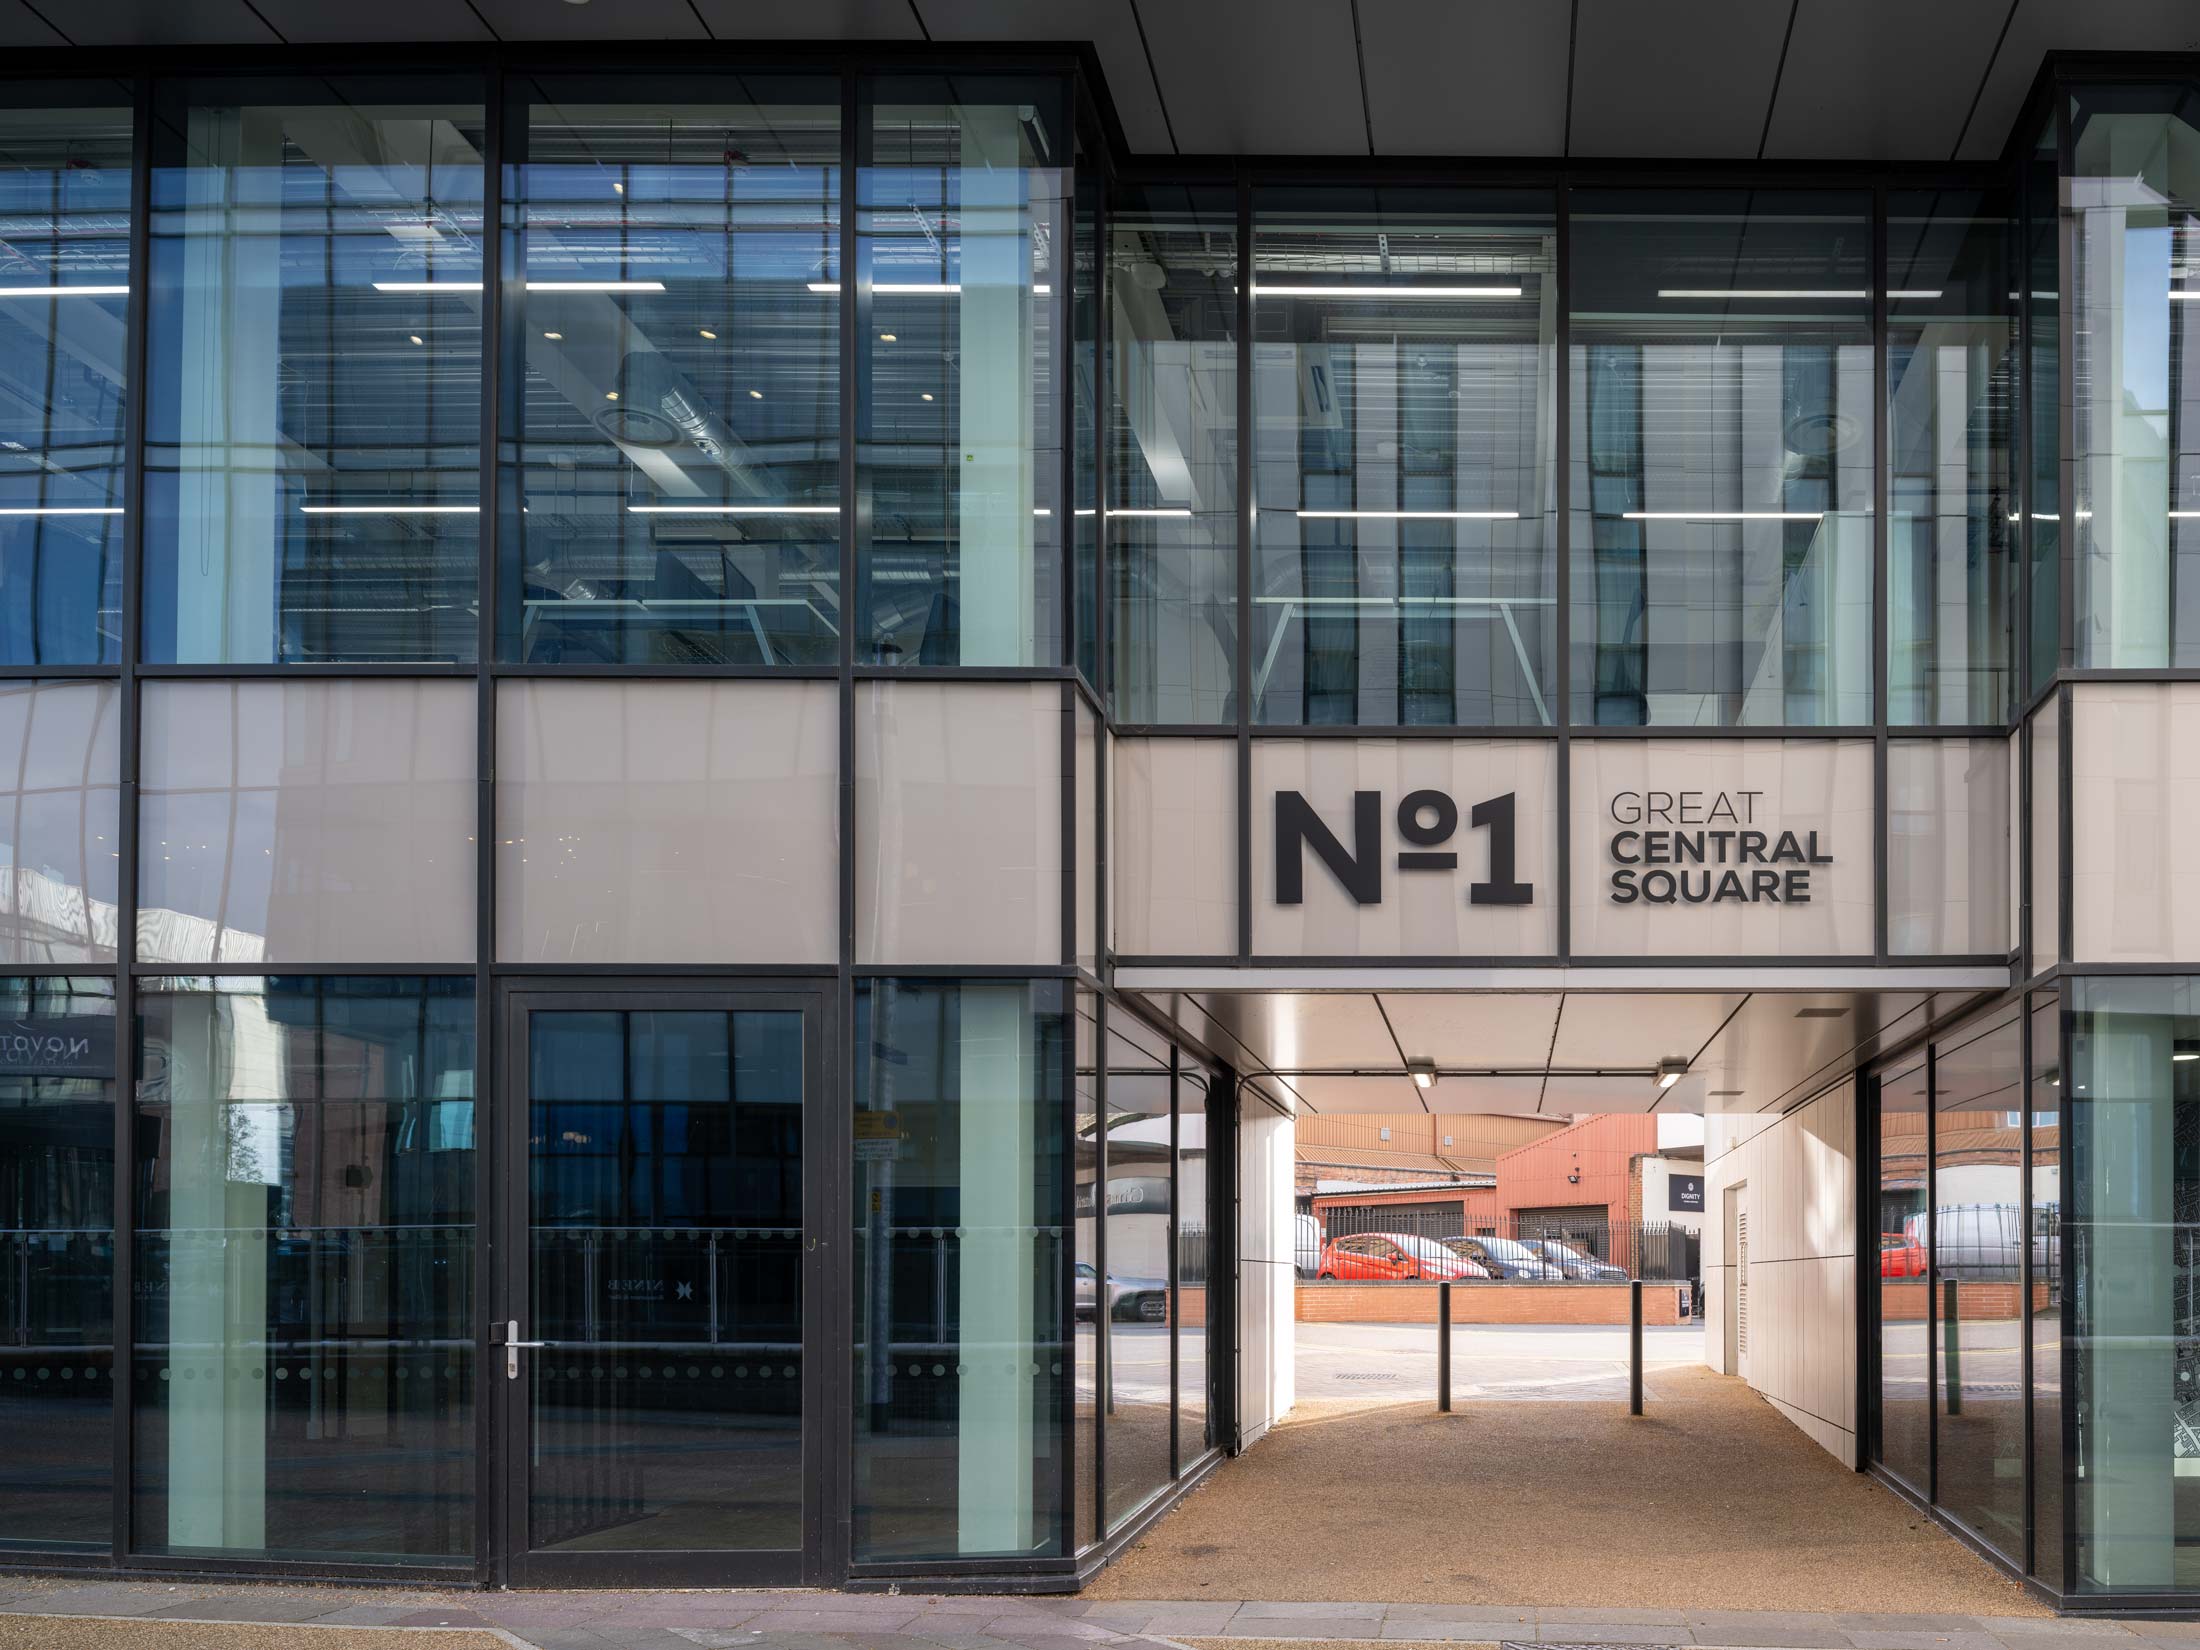
Outside the old Great Central Station.
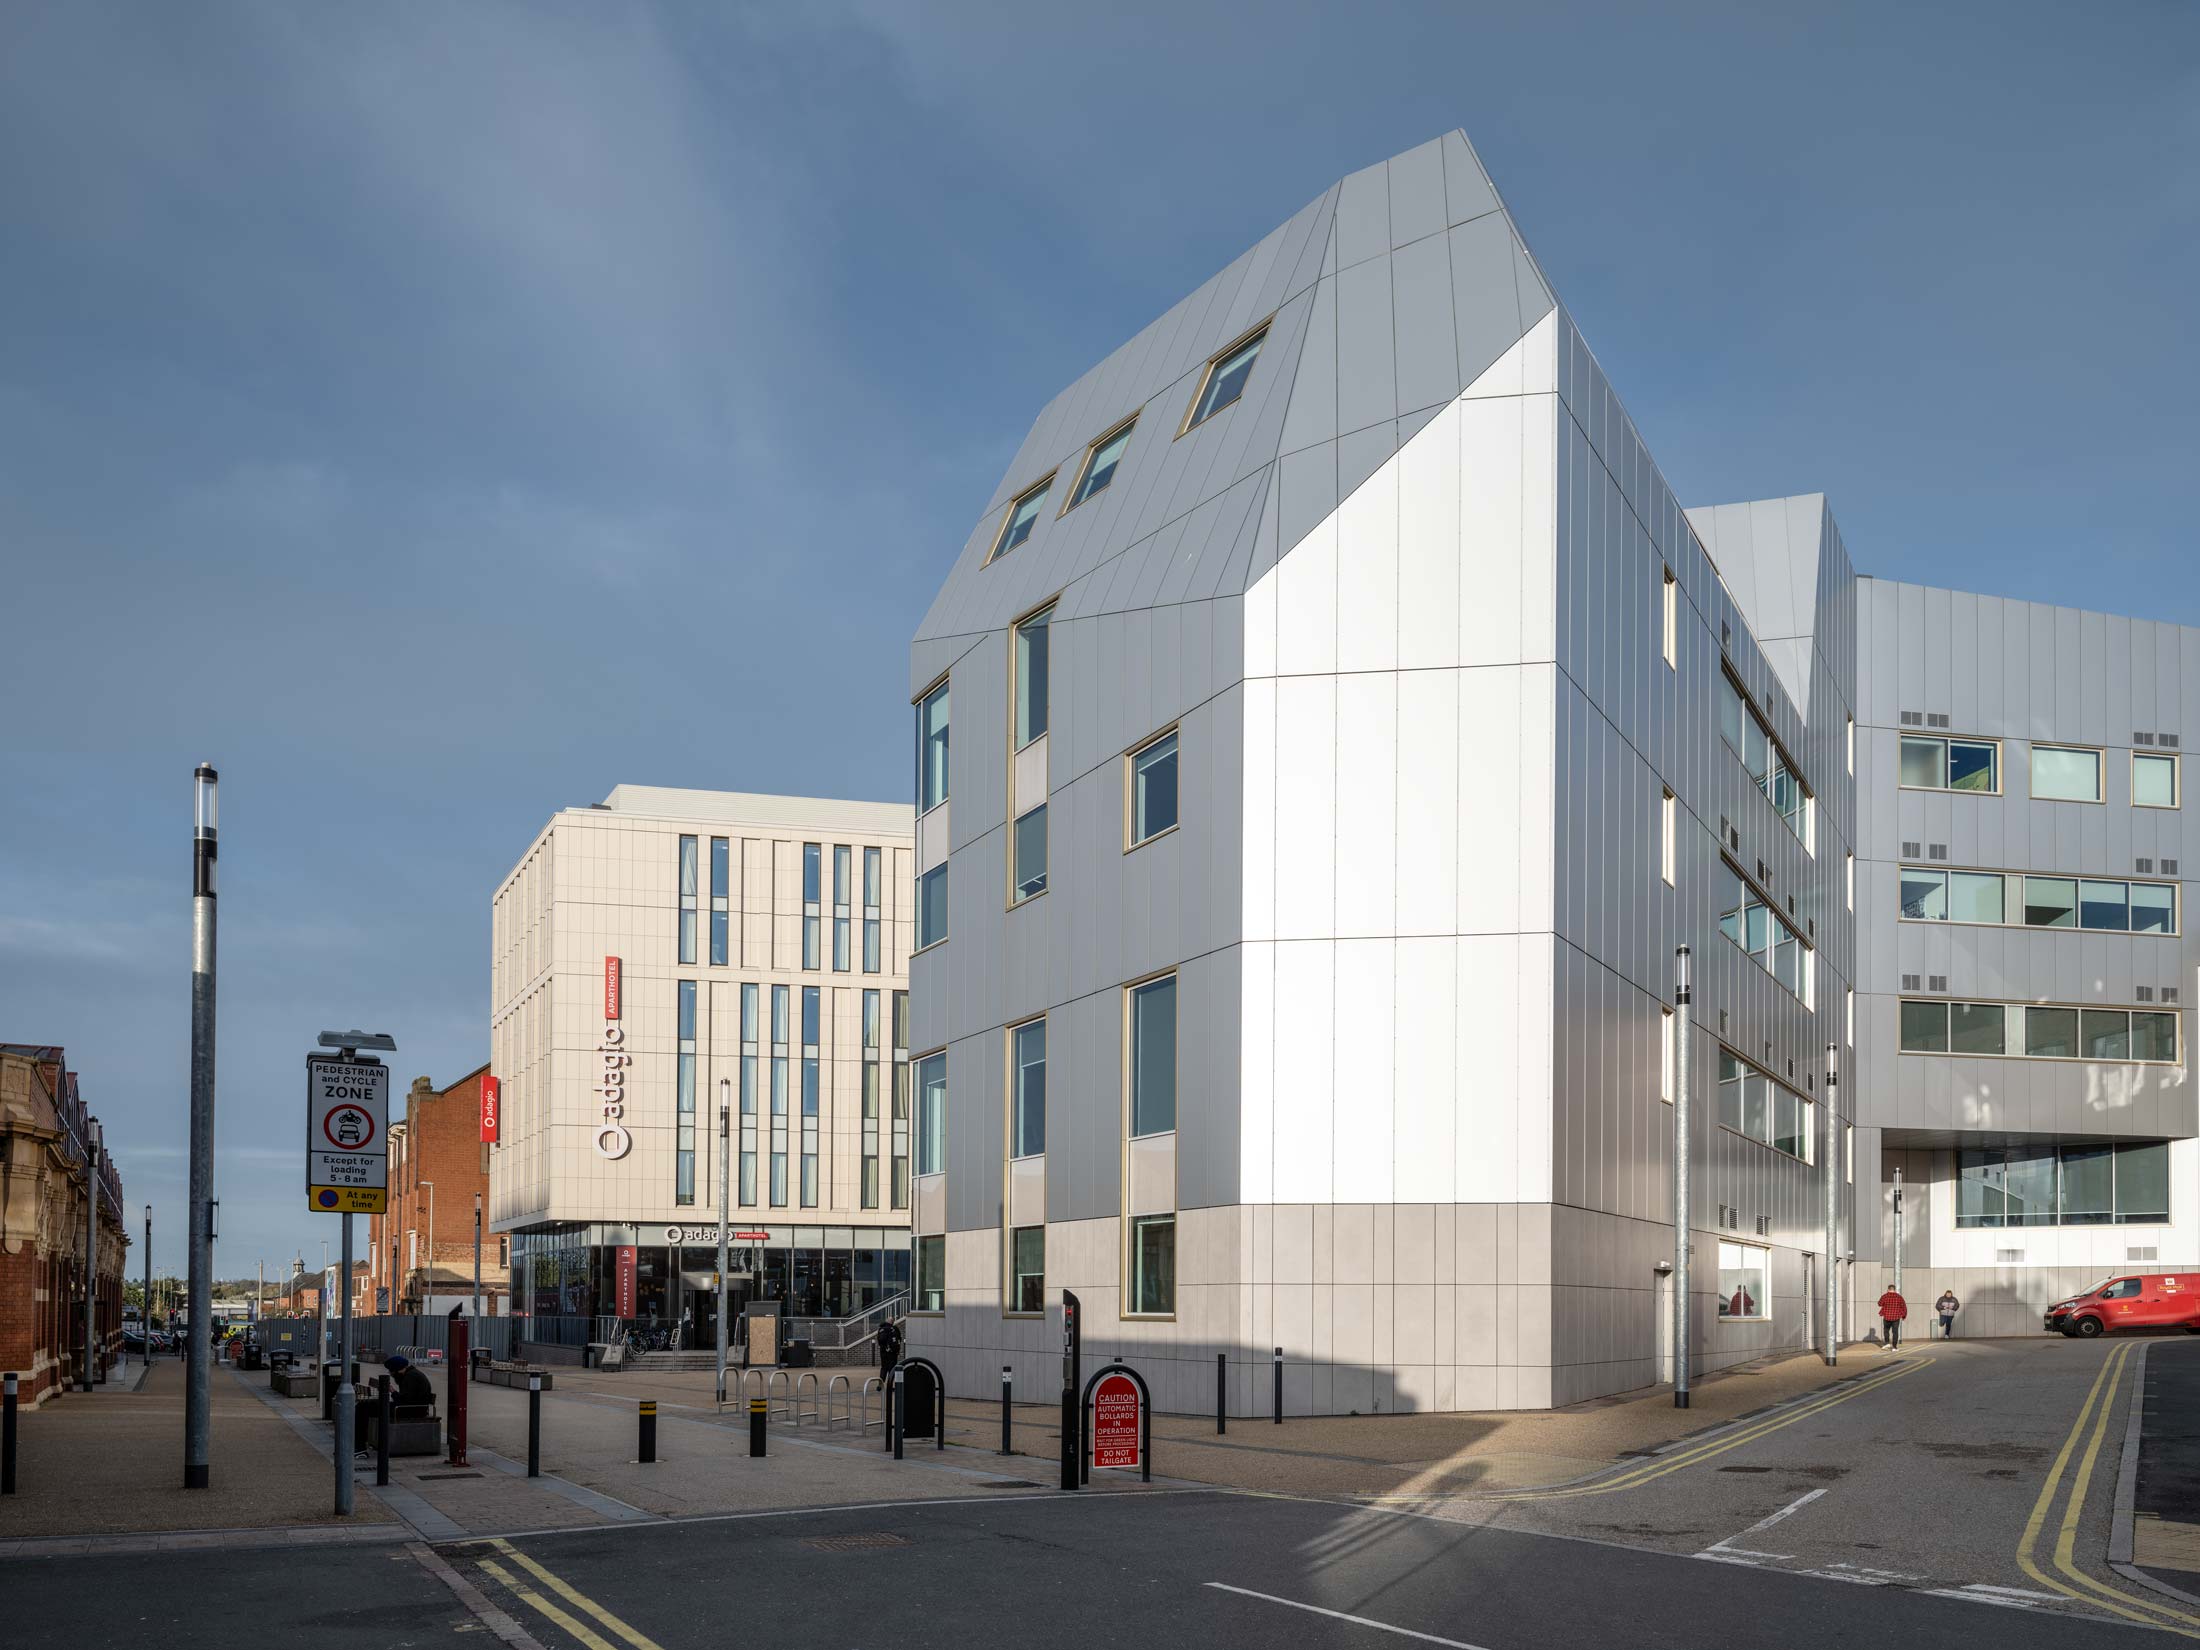
Vertical orientation and shift.
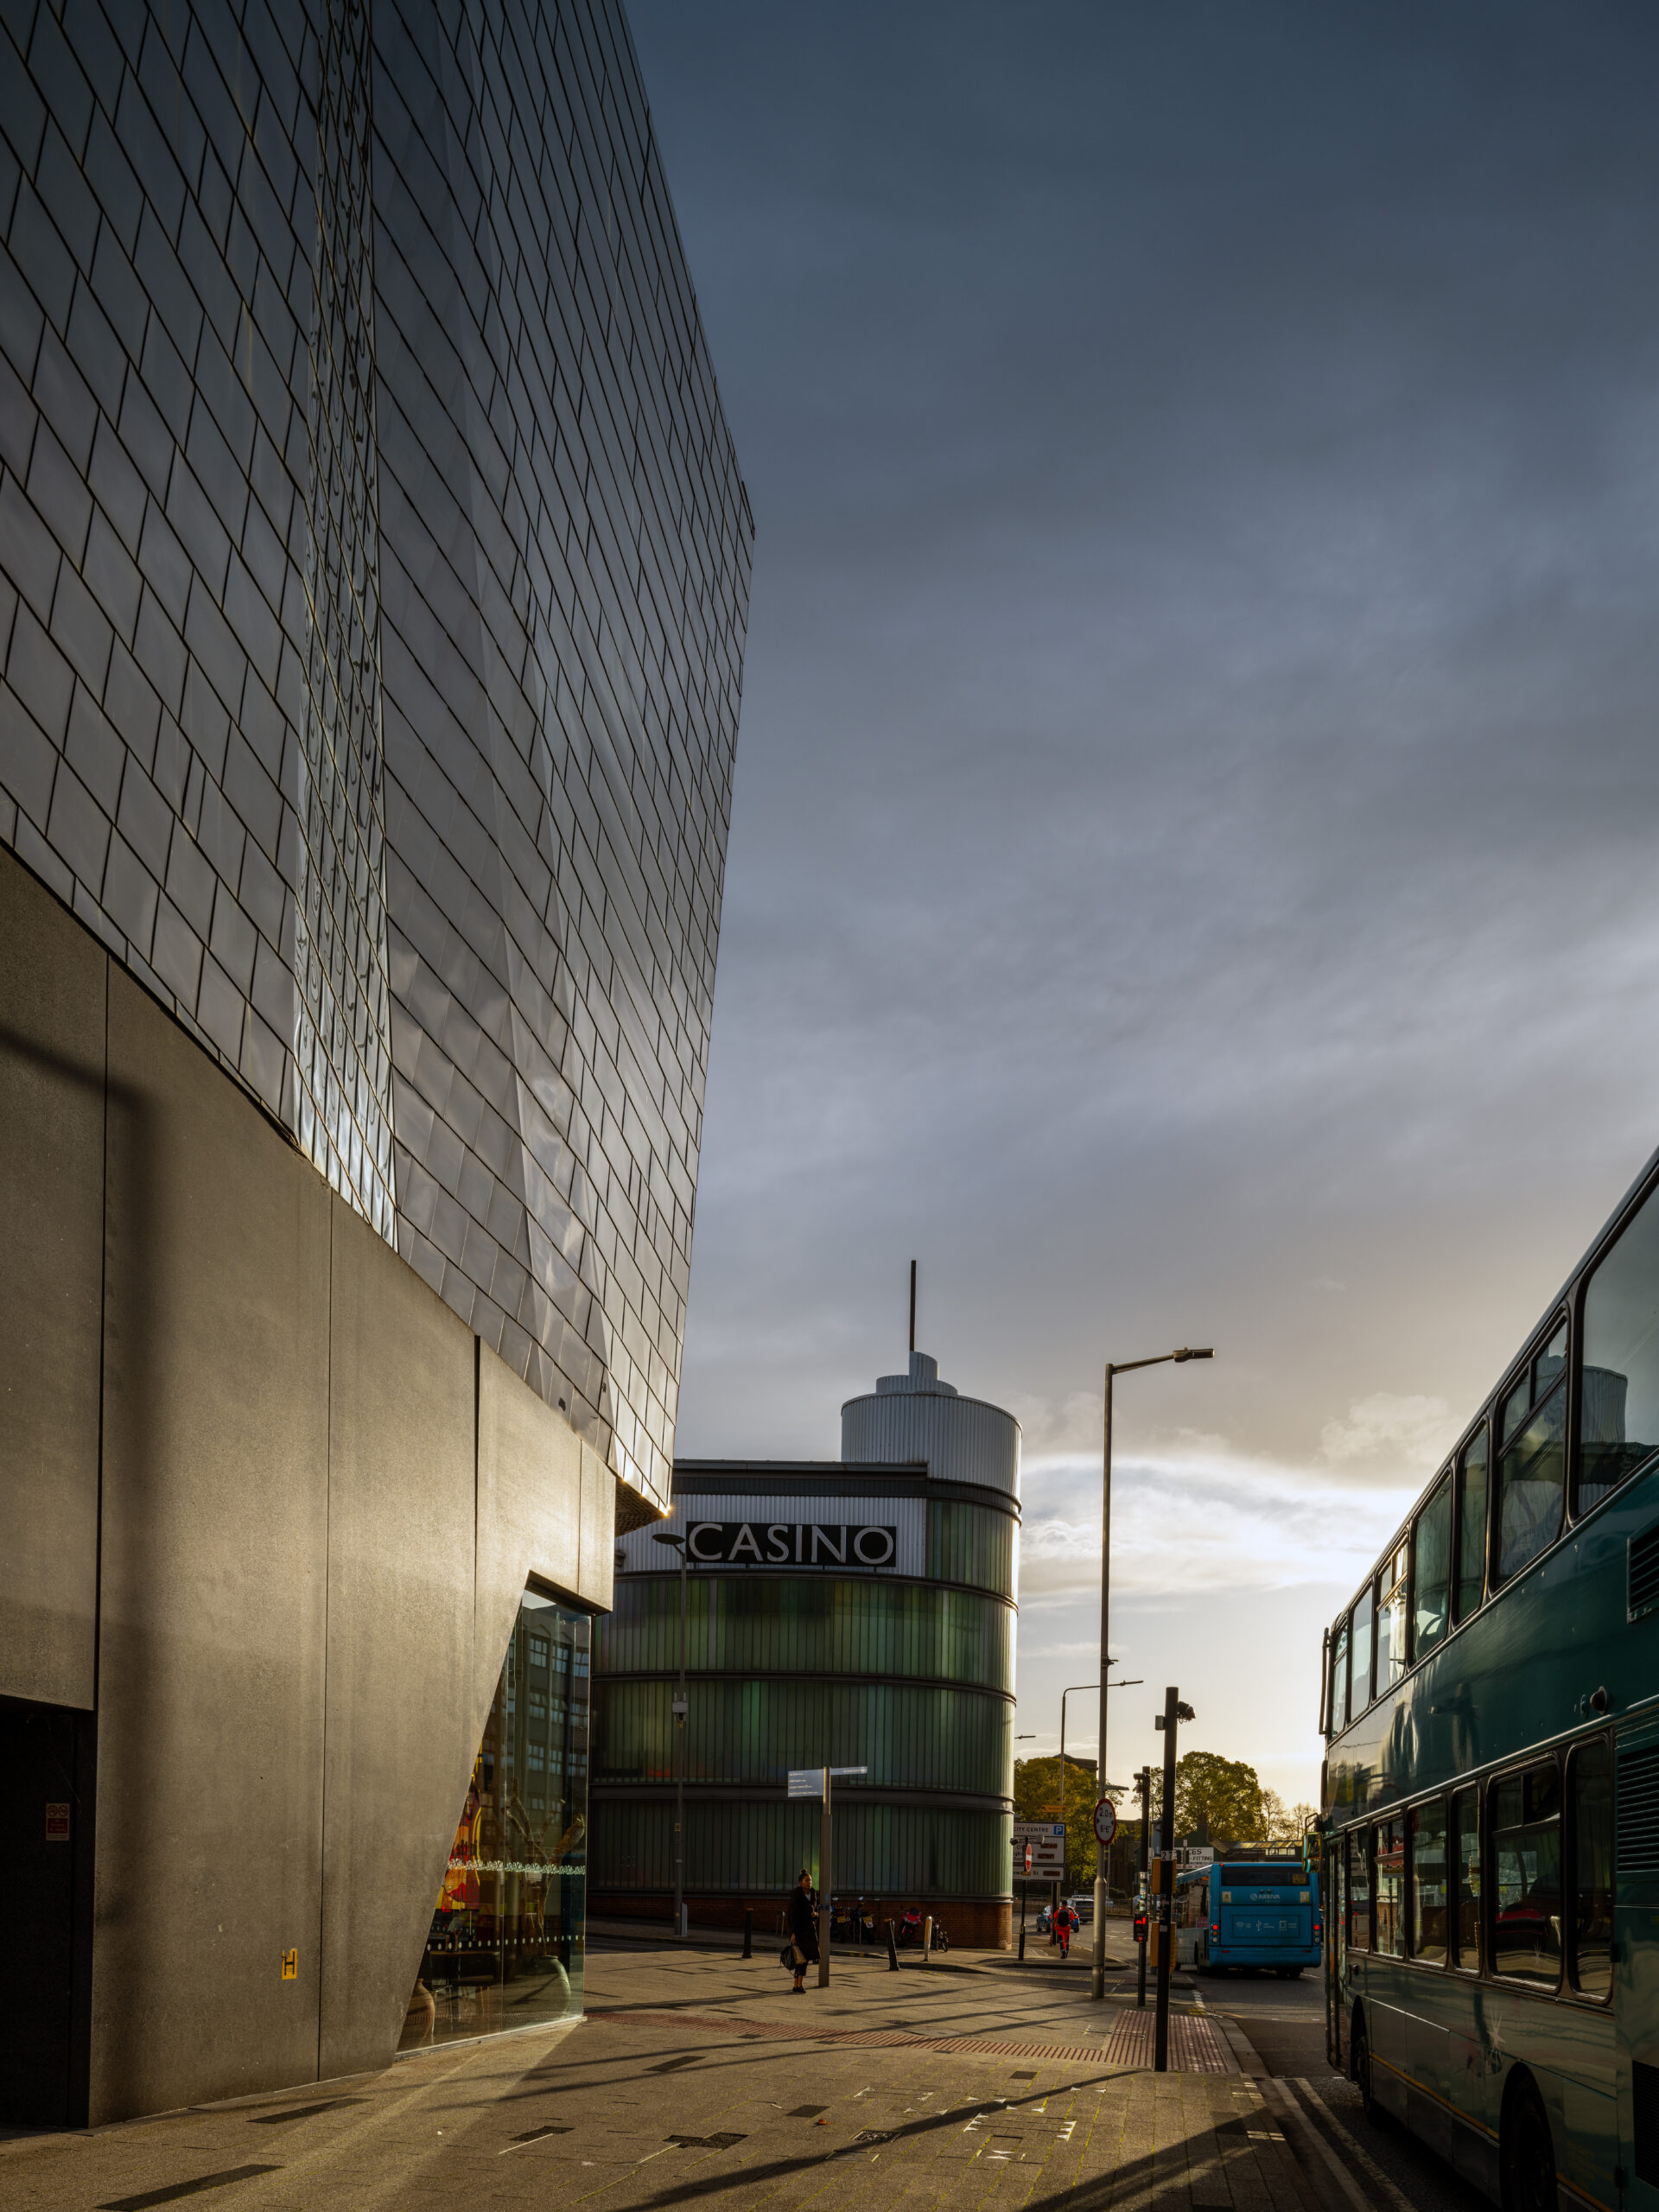
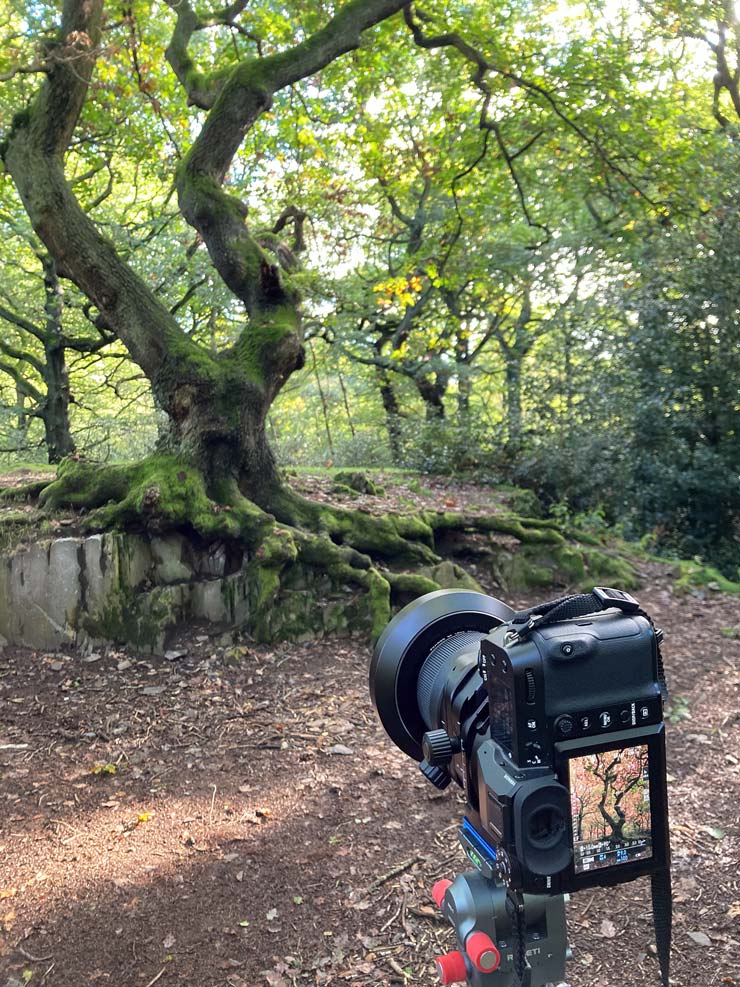
Here’s an image of a tree which I’ll likely be using next time I have a big printer to test.

It’s not processed for print here at all – I’ll definitely do a video about it when I do…
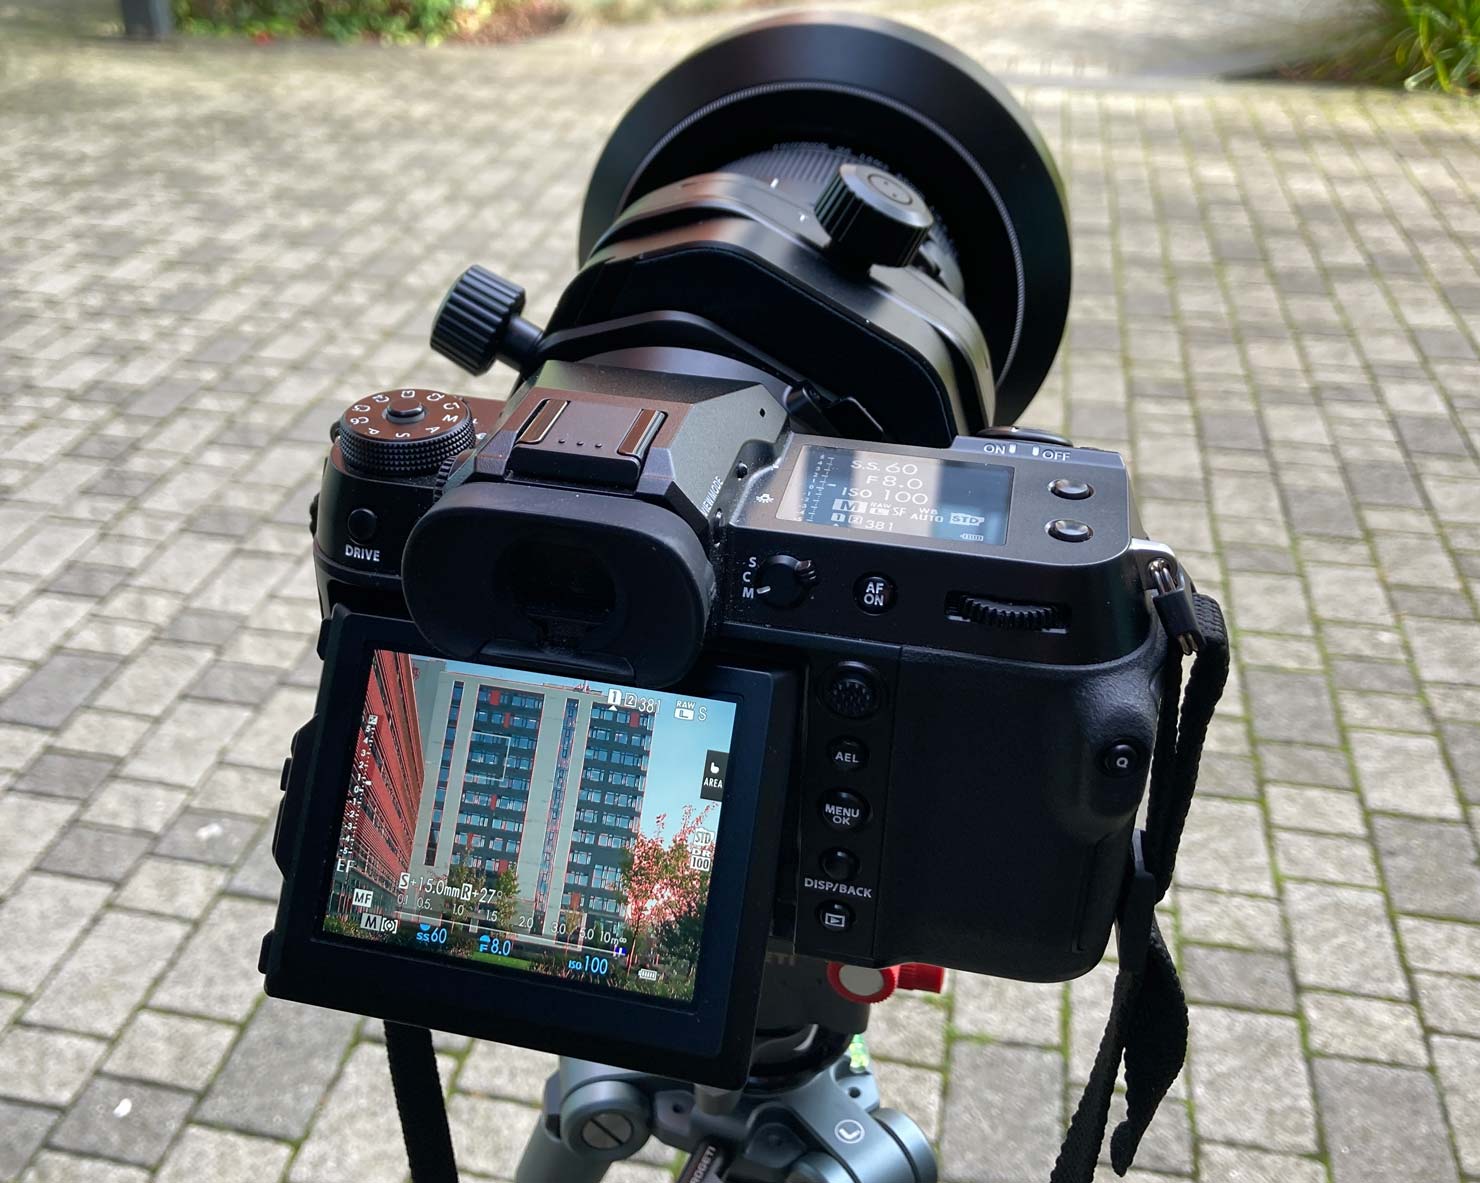
Here’s the camera set up.

and the view on the screen

Diagonal shift
Just as horizontal and vertical shift moves the camera view direction away from the centre of the frame, they can be combined for diagonal shift, where the camera view direction is moved to one corner (lens shifted the opposite direction).
The screen shows the shift and direction.
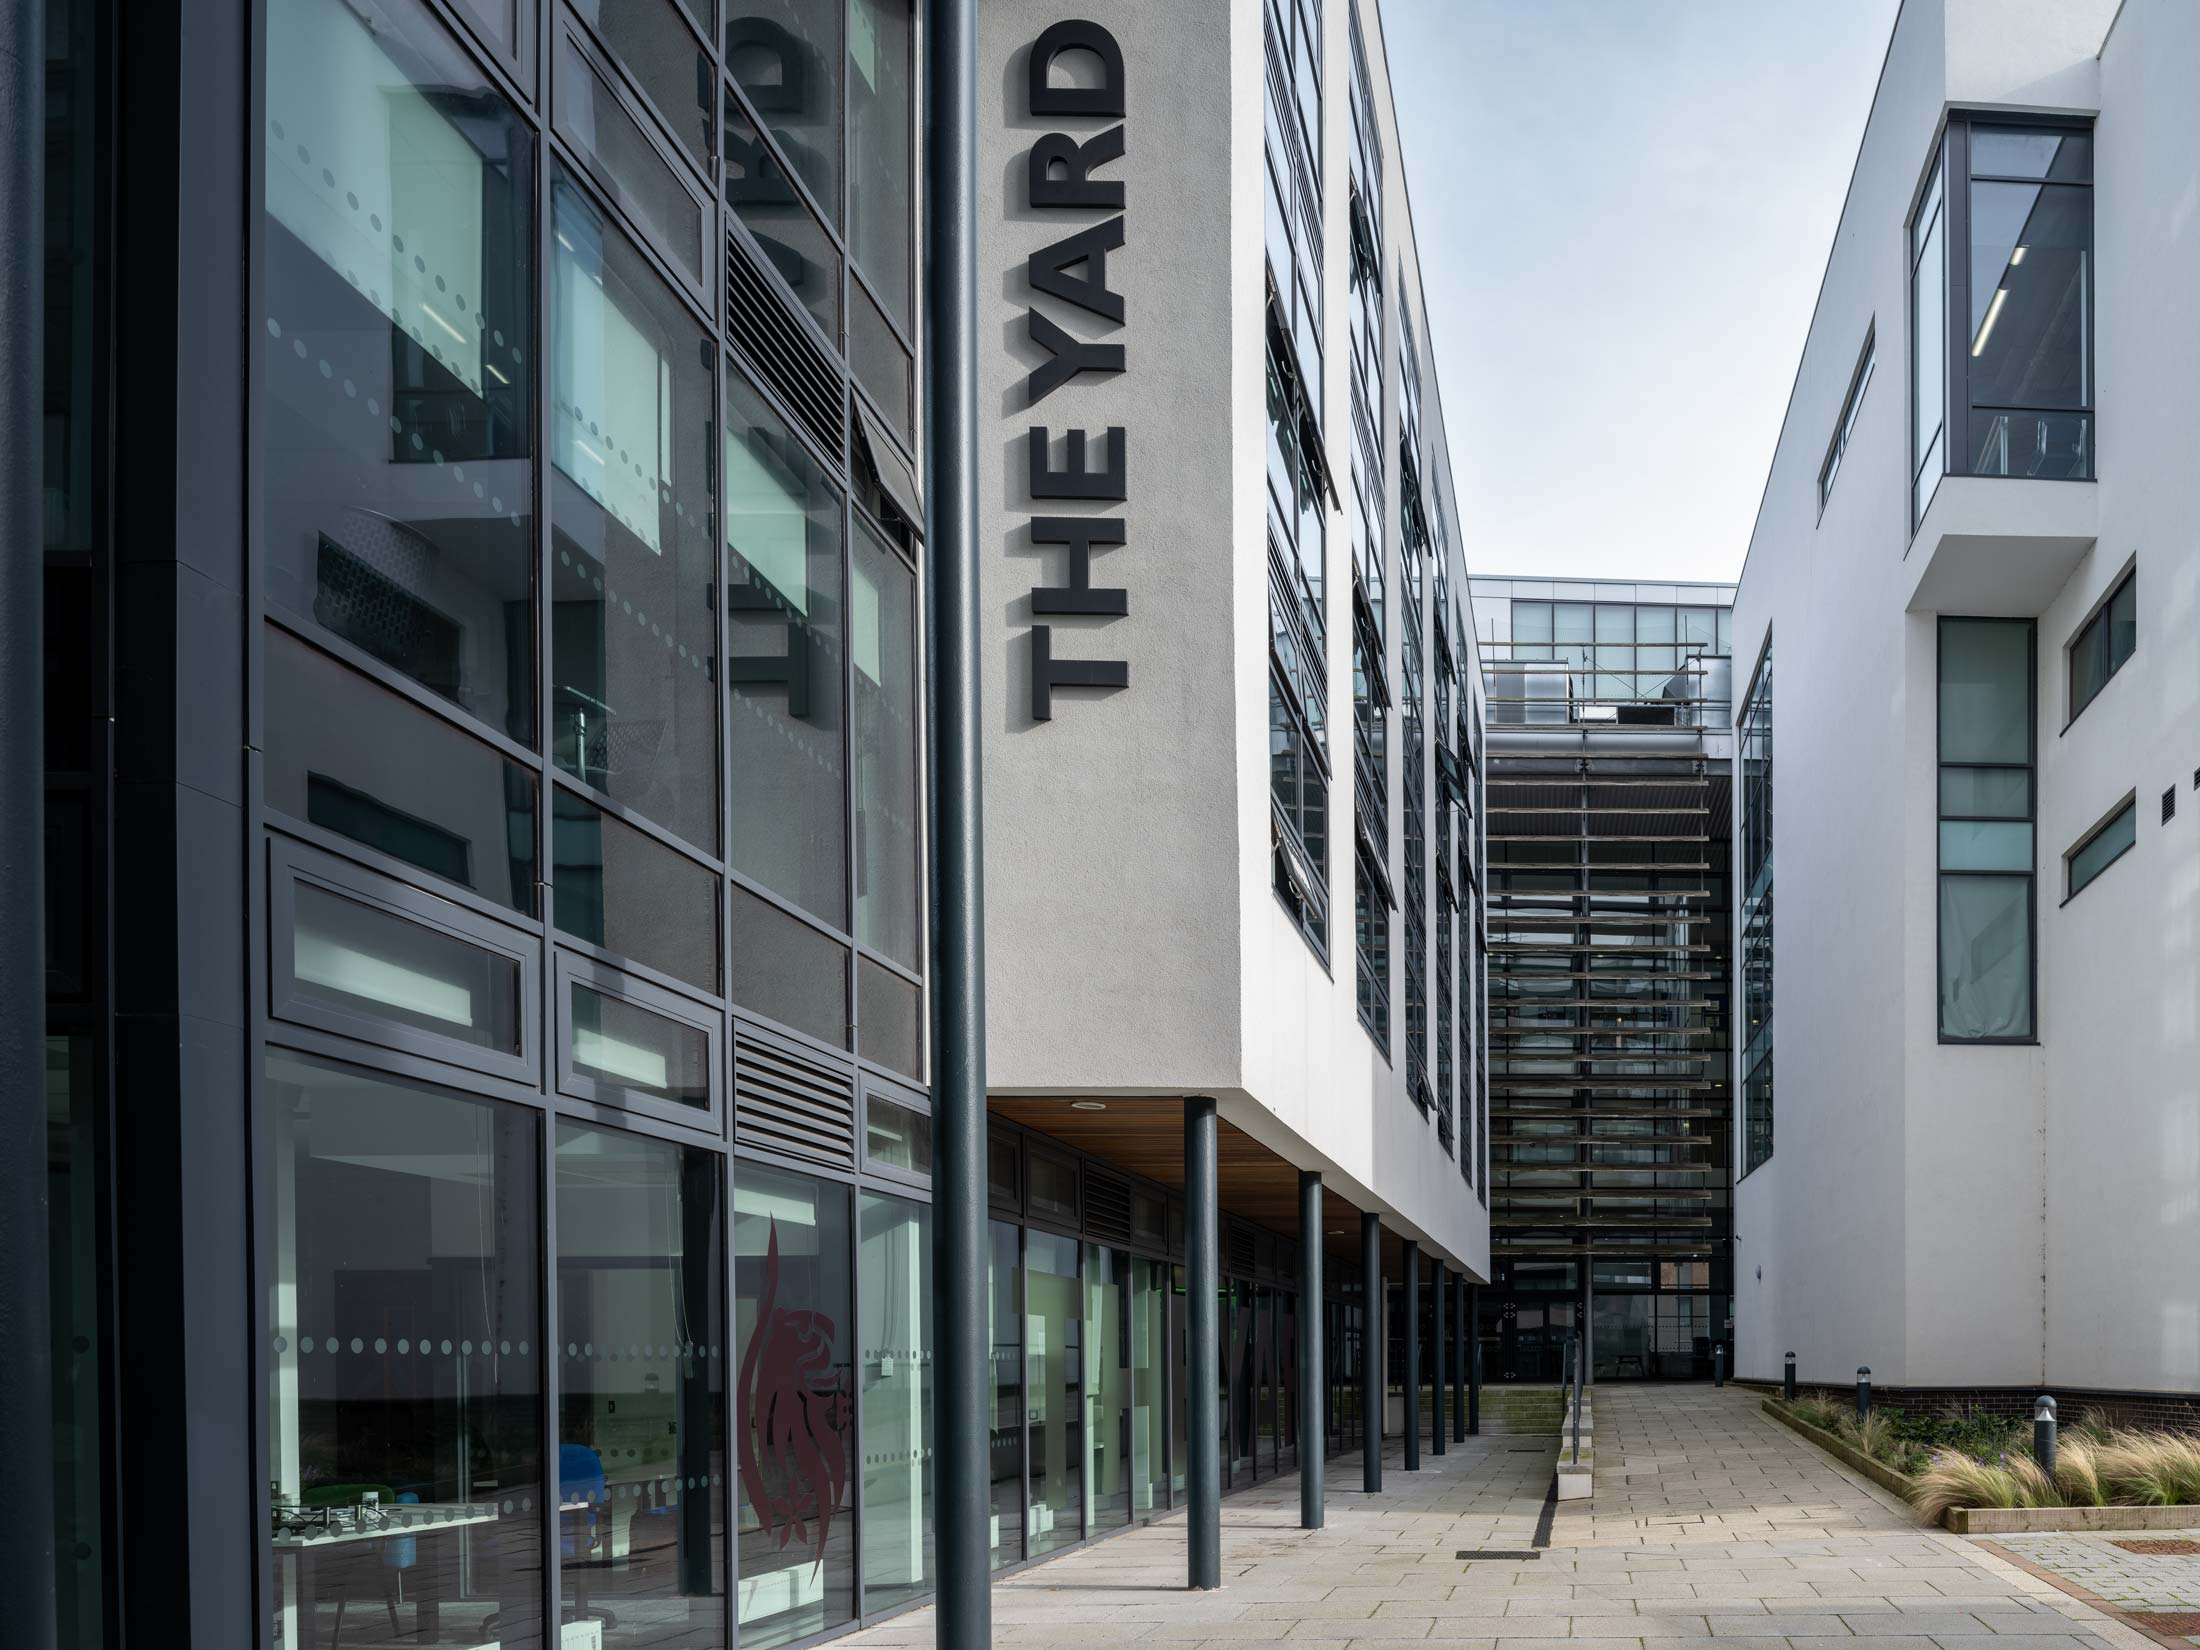
I’m using the lens collar, so aligning the images is a combination of setting enough shift in the right direction and then rotating the camera on the mount to get it level.

With this example the camera is pointing down the corridor. The lens is shifted left and up.
Since the camera is square on to the building the horizontal and vertical elements show no convergence.
The camera is level and square on to the far part of the building. That makes sure the dark sun slats show no convergence.

The resulting image.
An alternative, panning the level camera to the left a bit but with only vertical shift.
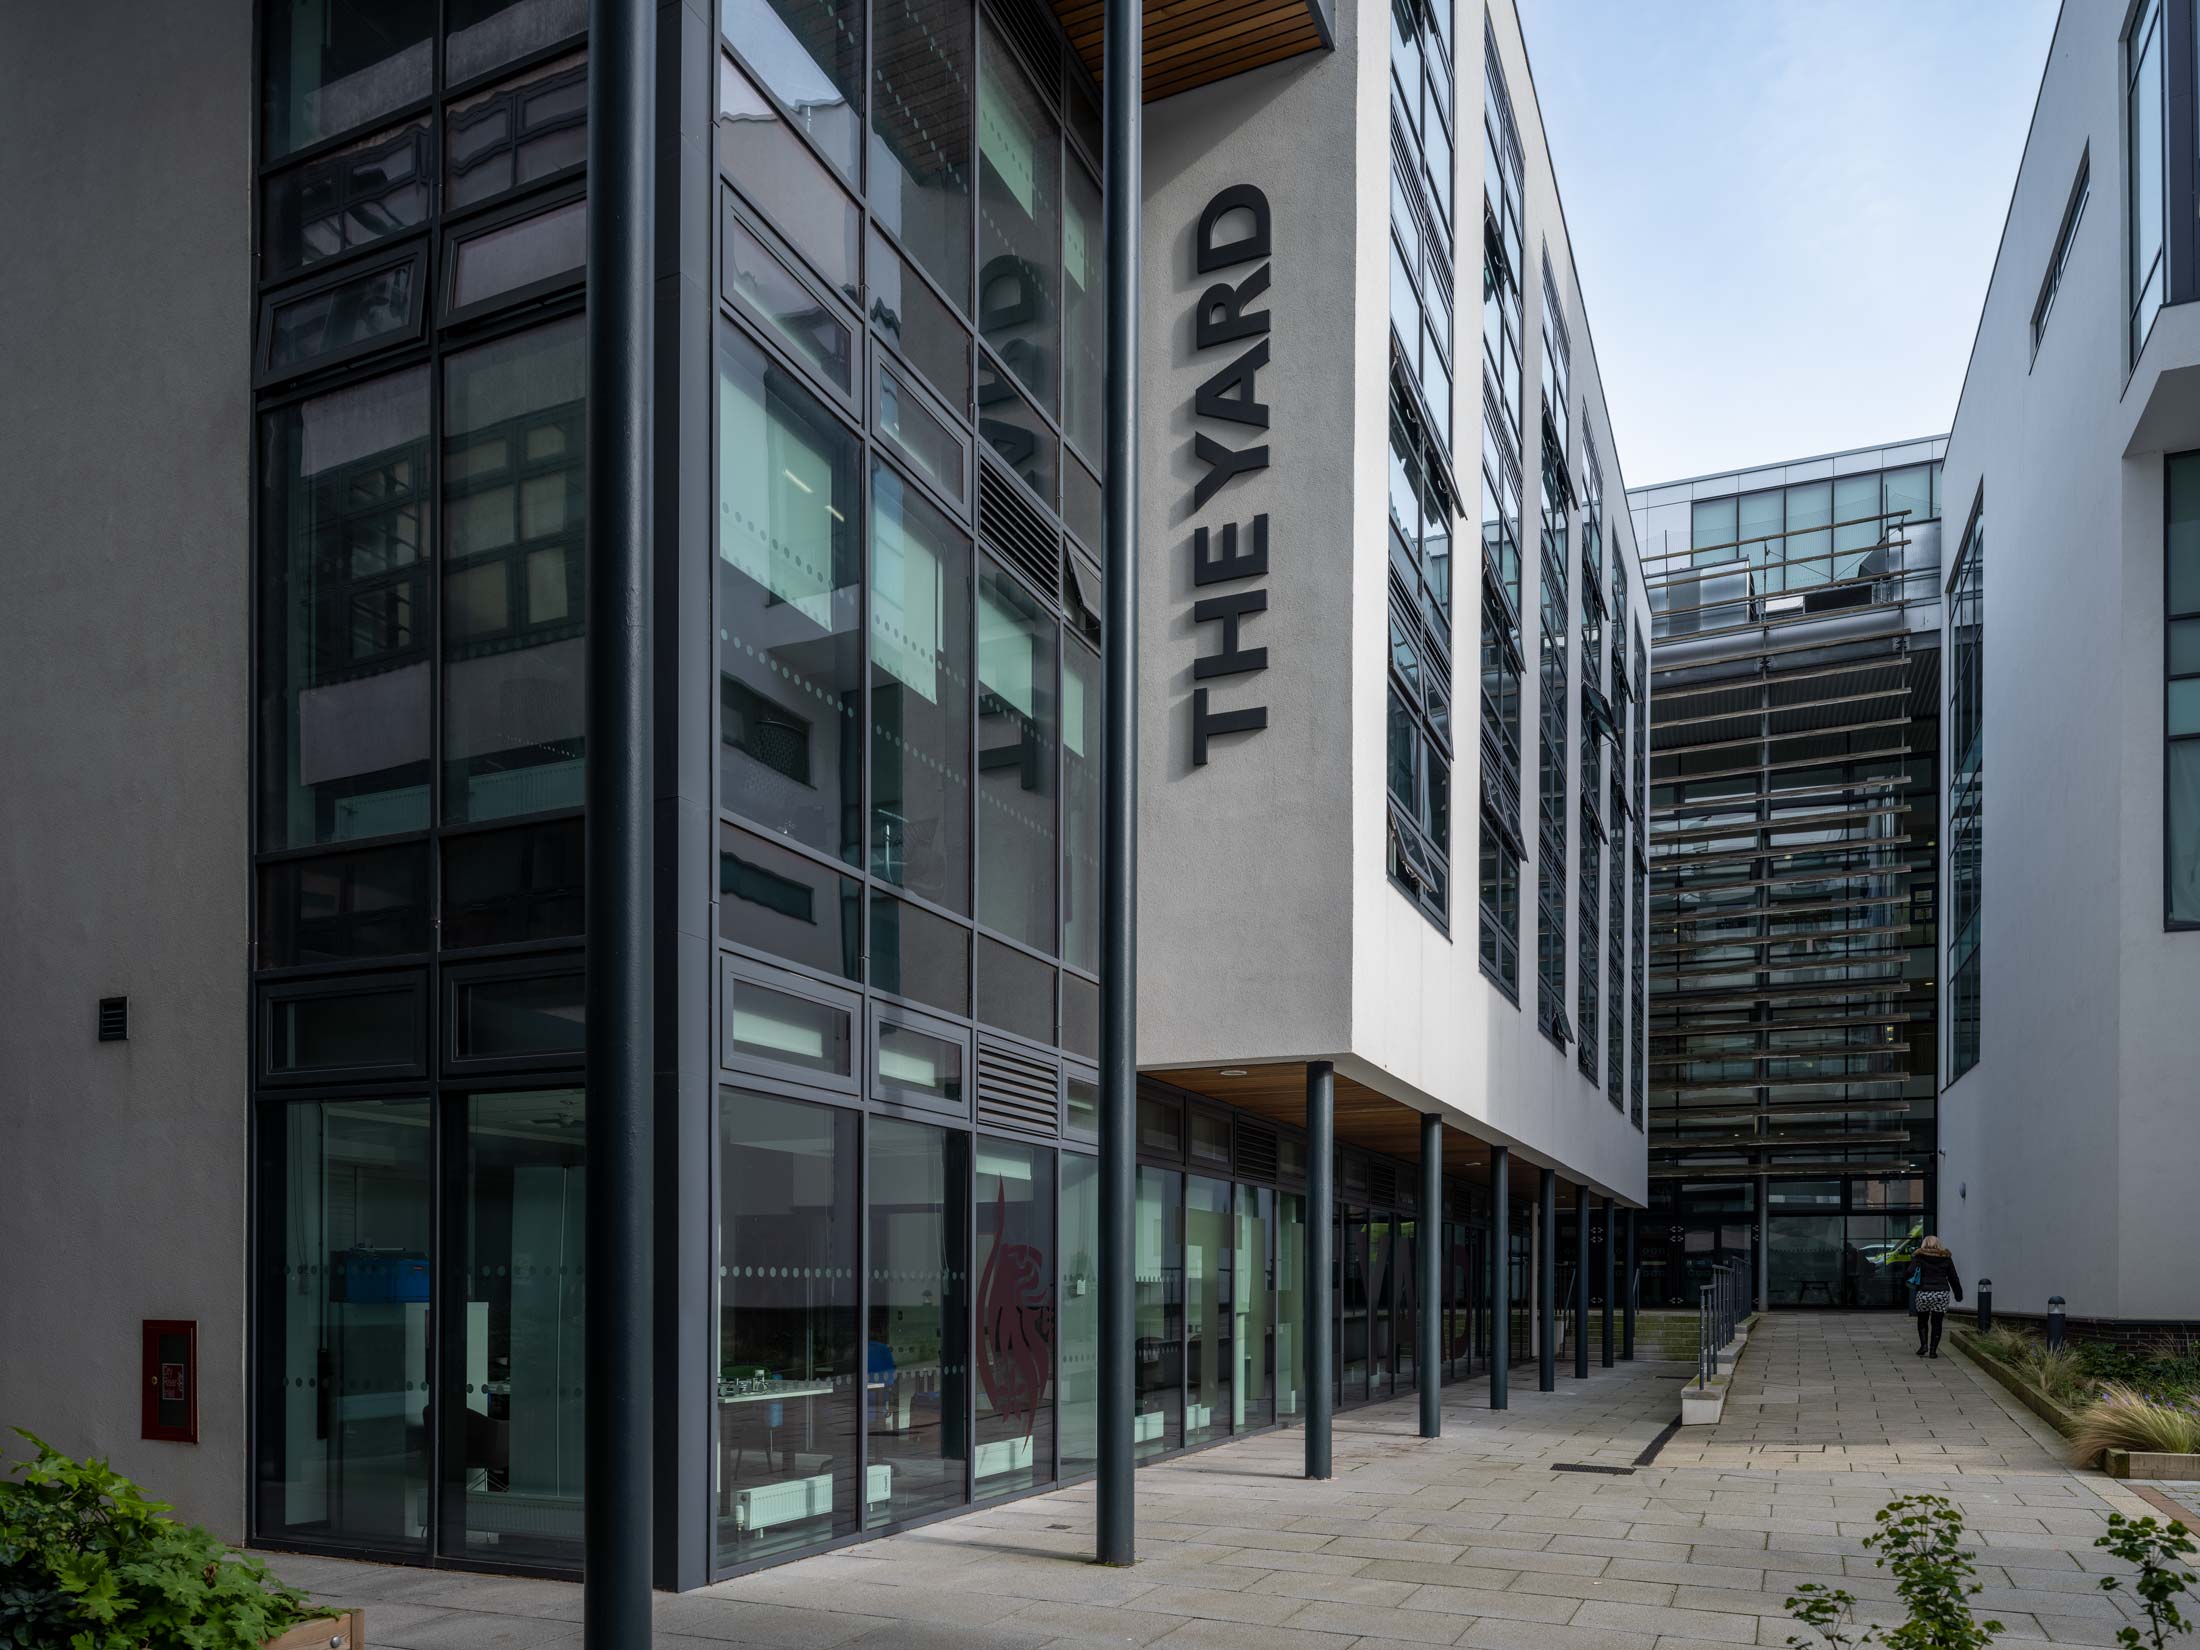
Diagonal shifting is less intuitive in its use, but practice will mean you see chances to use it more often.
Tilting the lens
Whilst I’ve found that most photographers pick up the idea of a shifted lens quite readily, the same is not so with tilt.
My personal explanation is that with shift you can focus as normal, and then just add some shift for composition.
With tilt, the effect is given by a combination of the lens tilt angle and the lens focus setting. This places the plane of focus in a certain position and orientation in space. The distance markings on the lens/screen have no direct meaning and the amount the plane of focus is tilted doesn’t seem to relate to the physical amount the lens is tilted.
Now, I’ve written quite a lot about using tilt in quite a few articles (and my book) so don’t worry if it’s not clear to you here. The best place to start is with some of my introductory articles on the tilt/shift index page
One simple way to see the effect of tilt is to tilt the lens fully left or right and then adjust the focus setting. The plane of focus will be a vertical plane that runs beside you and out into the distance. Focus peaking does help here, as does setting the aperture as wide as it will go.
In this view, lens tilted to the right, I’m running the (vertical) plane of focus through the bikes.
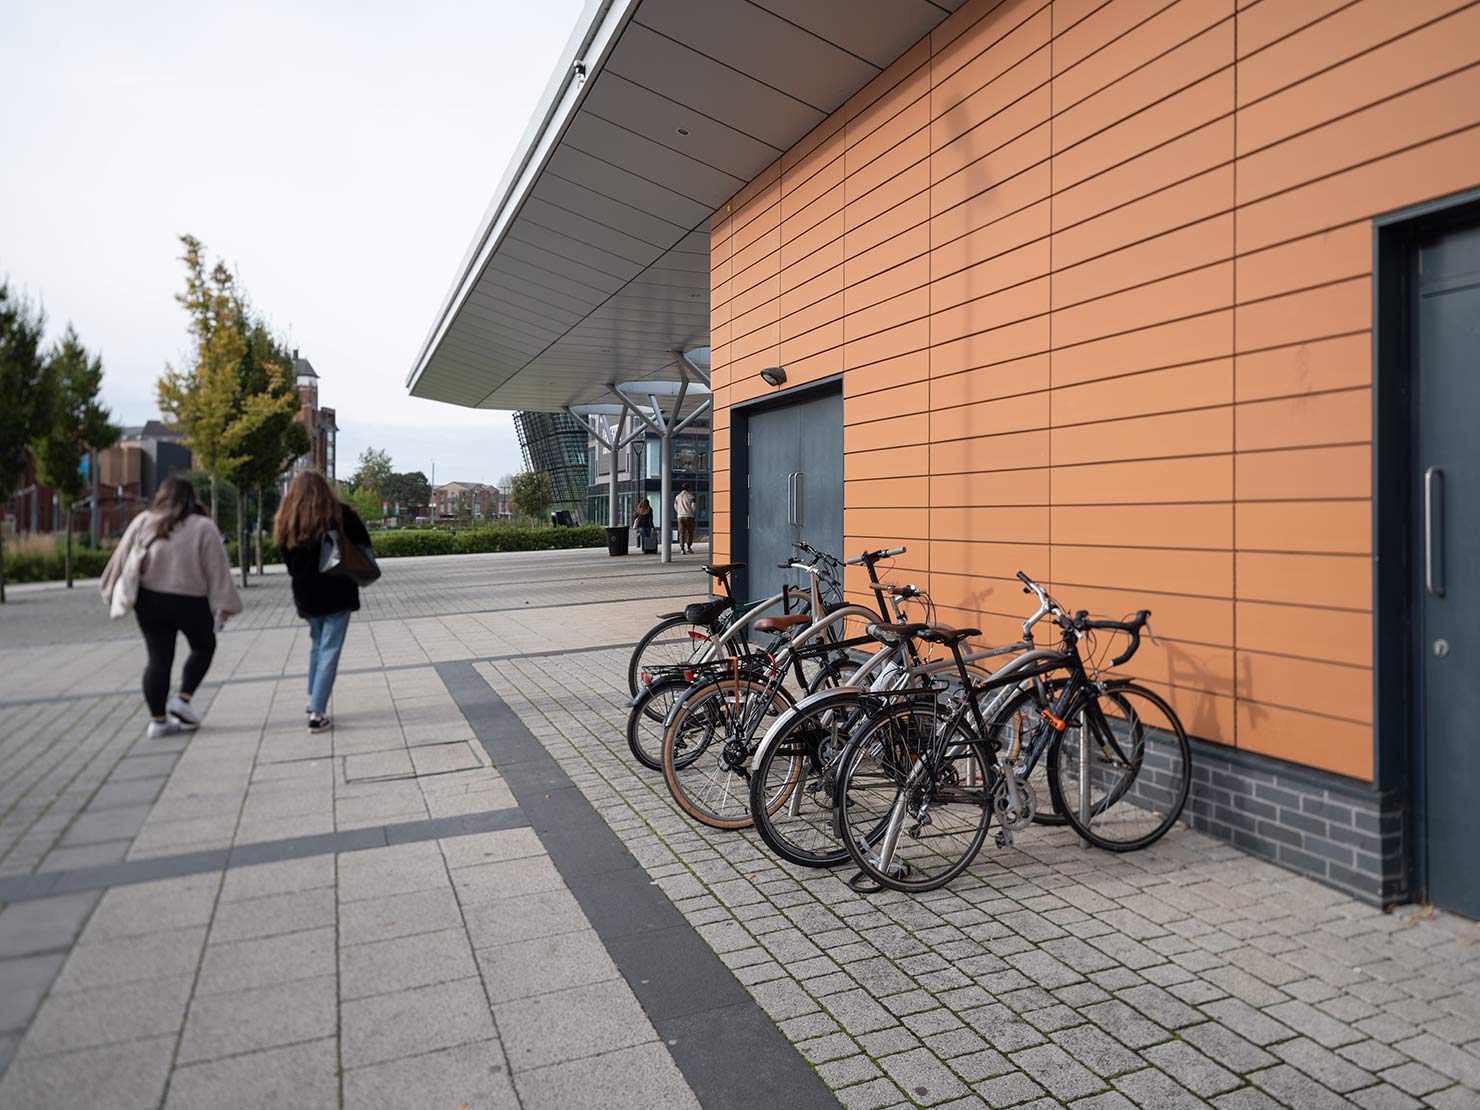
If you want to produce soft out of focus areas, this f/5.6 lens really isn’t for you.
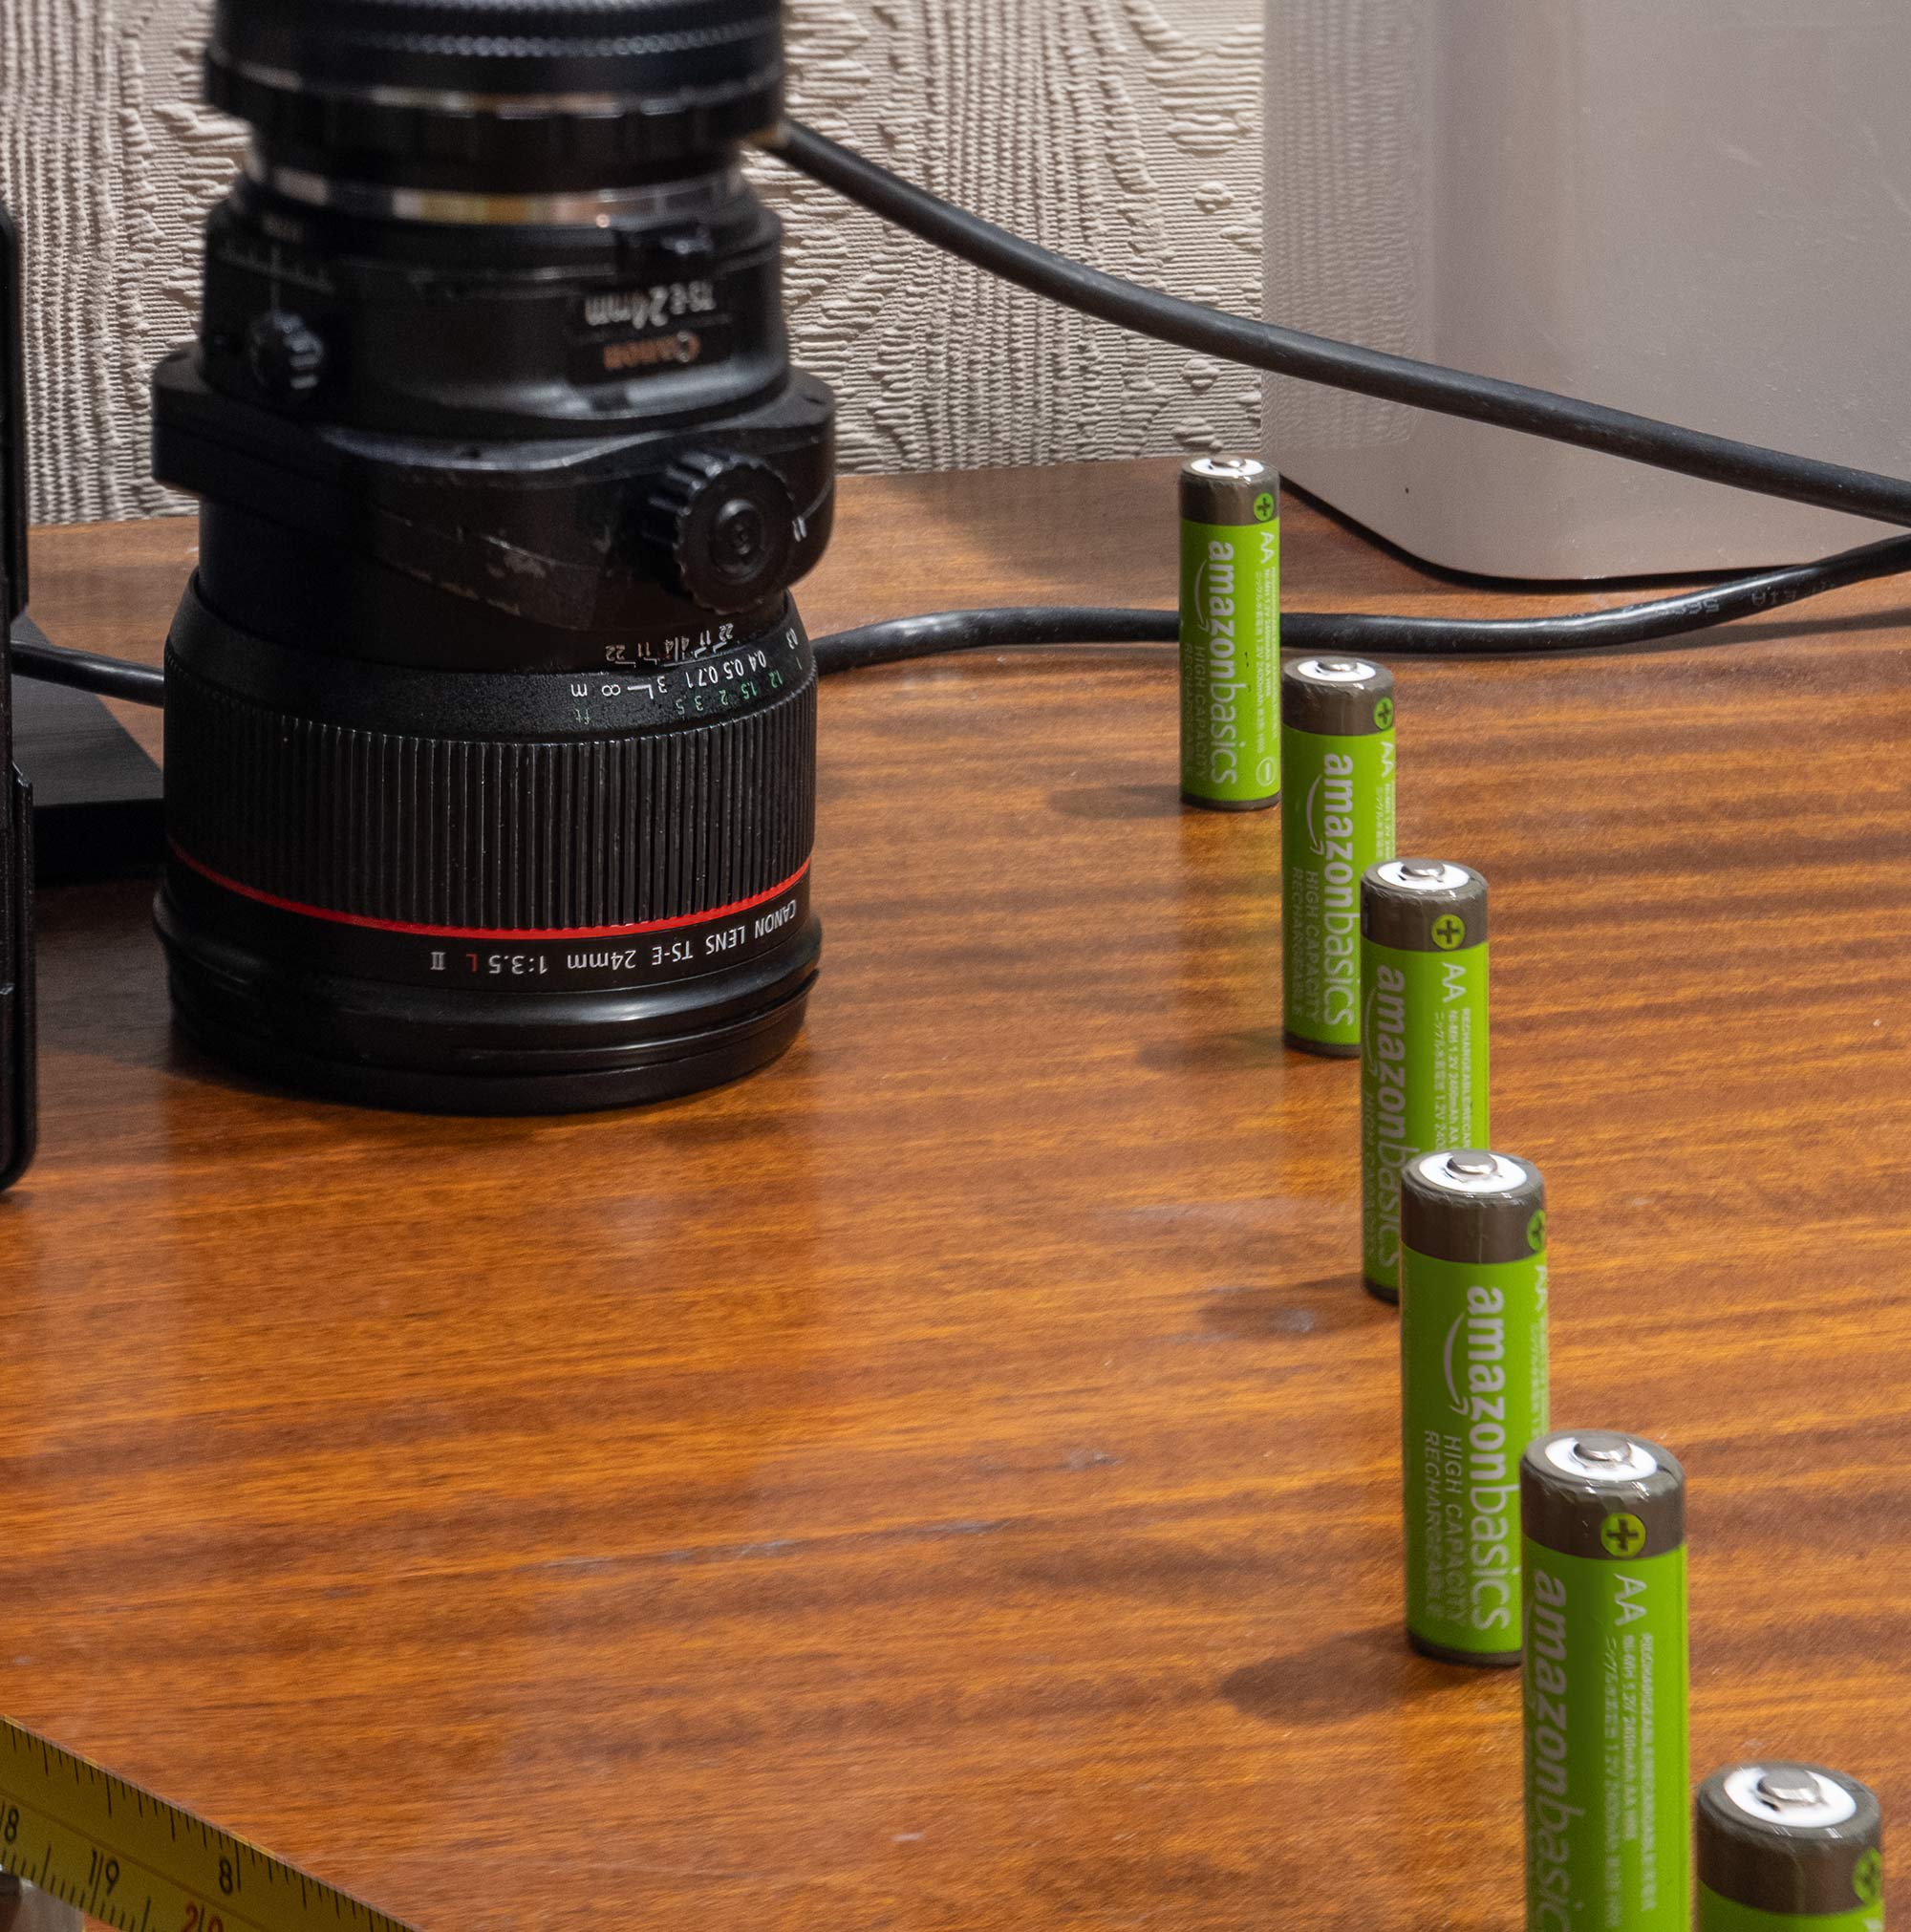
However, the level of detail along the plane of focus is excellent. This is a 100% view [click to enlarge]

How do I know the value of tilt to set to get the plane of focus along that wall?

I have a simple printed/laminated sheet in my camera bag with tilt tables. These are discussed in more detail elsewhere, but they allow you to set your plane of focus knowing just the ‘J’ distance of your camera.
This is a tilt table for the GF 30mm TS I made for testing this lens
The table shows that with for the GF 30mm TS lens, and a tilt of 3º, the plane of focus passes around 60cm from the camera.
If you have a level camera about 170cm above the ground, a tilt of one degree downwards is all that’s needed to run the plane of focus along the ground [lens at ∞].
Before you get too carried away with setting the tilt to such accuracy, remember the mechanism you are adjusting. If you can get to within half a degree you would be doing well.
In the explanatory articles and videos there are downloads and a spreadsheet you can use to create your own version
- Focusing the tilted lens [includes Keith’s tilt table spreadsheet (zipped file)]
If you’re looking for the ‘miniature world’ look then try strong upwards tilt and then use the focus setting to place the plane of focus through the view in front. Use a wide aperture and try and look down on the subject. 30mm is perhaps a bit wide for this, and the f/5.6 widest aperture of the GF 30mm TS doesn’t give a strong blur.
It’s very much an experiment as to what it comes out like – personally I’ve tried it a few times, ticked the ‘Done that’ box and moved on. It’s very dependent of the material in the scene as to whether the miniature look is convincing. I keep it in the range of effects I can do, but no-one has ever commercially asked me for that look ;-)
Out of focus look
This shot has strong rightwards tilt and a f/5.6 shows how OOF areas look and highlights are handled.

100% crop [click to enlarge]

The off-axis highlights are much less distorted than I often see with strong lens tilt.
This is another area where I get the feeling that the lens design looks to have been very much pushed towards image quality. Corners have not been cut where many would never even notice…
Close up and tilt
At such short distances, the tilt tables become less useful and an iterative focus technique is easier to use.
I’ve more detailed close up info in an article looking at focus with close-up tilt.
This example, on my desk shows the camera level, with the lens fully tilted downwards. This means the plane of focus [lens at ∞] should run out across the desk top.

Checking the rear screen
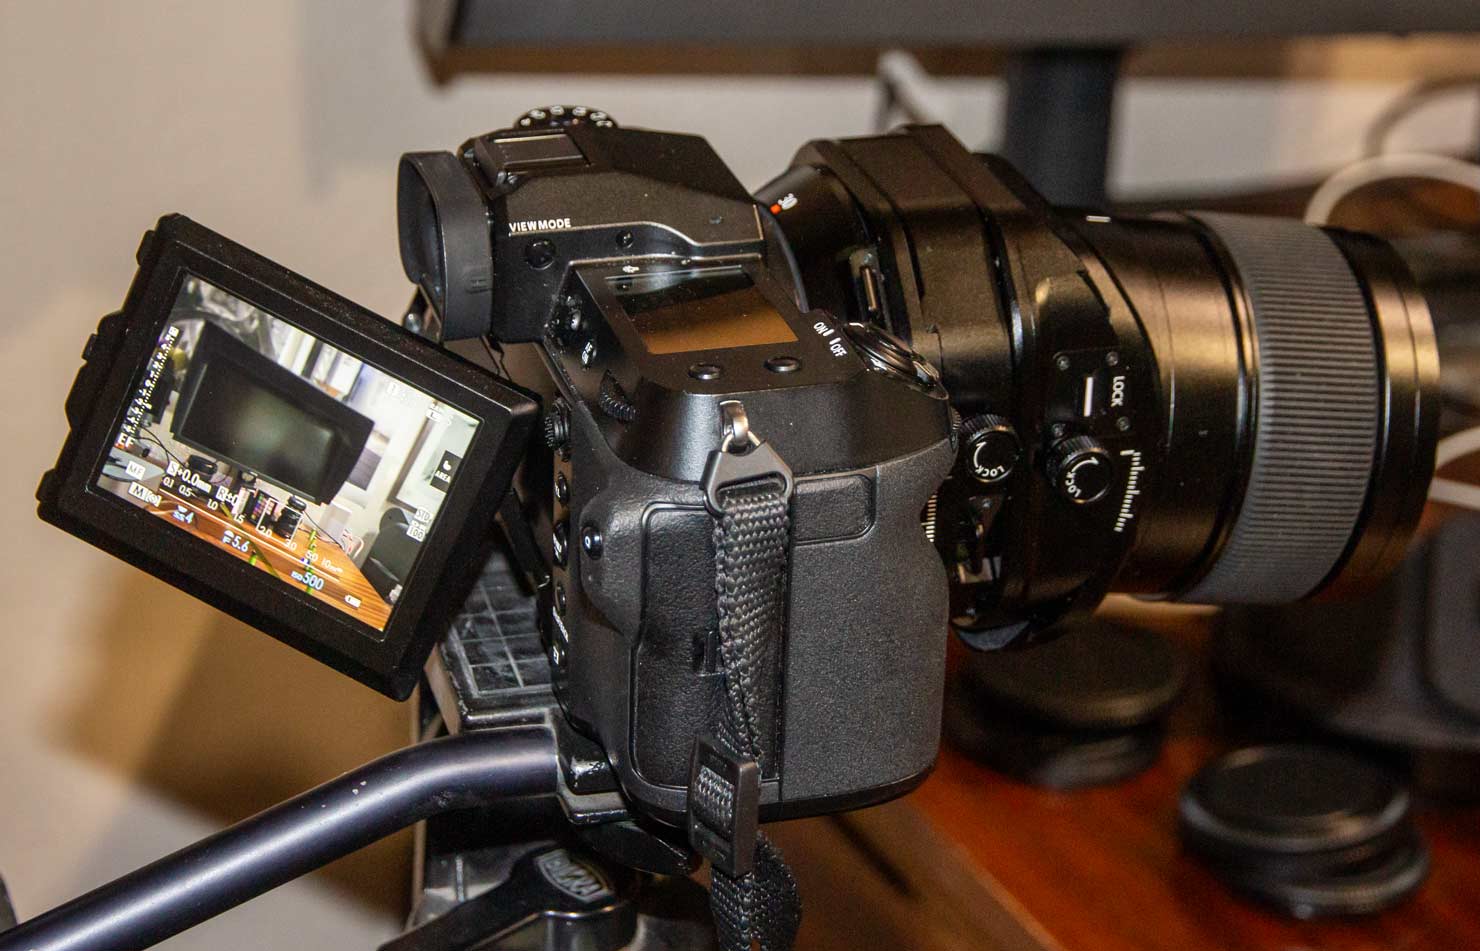
Note that shift and tilt knobs are on the same axis – tilt can introduce some image shift, which can be offset with shift.

The tilted photo
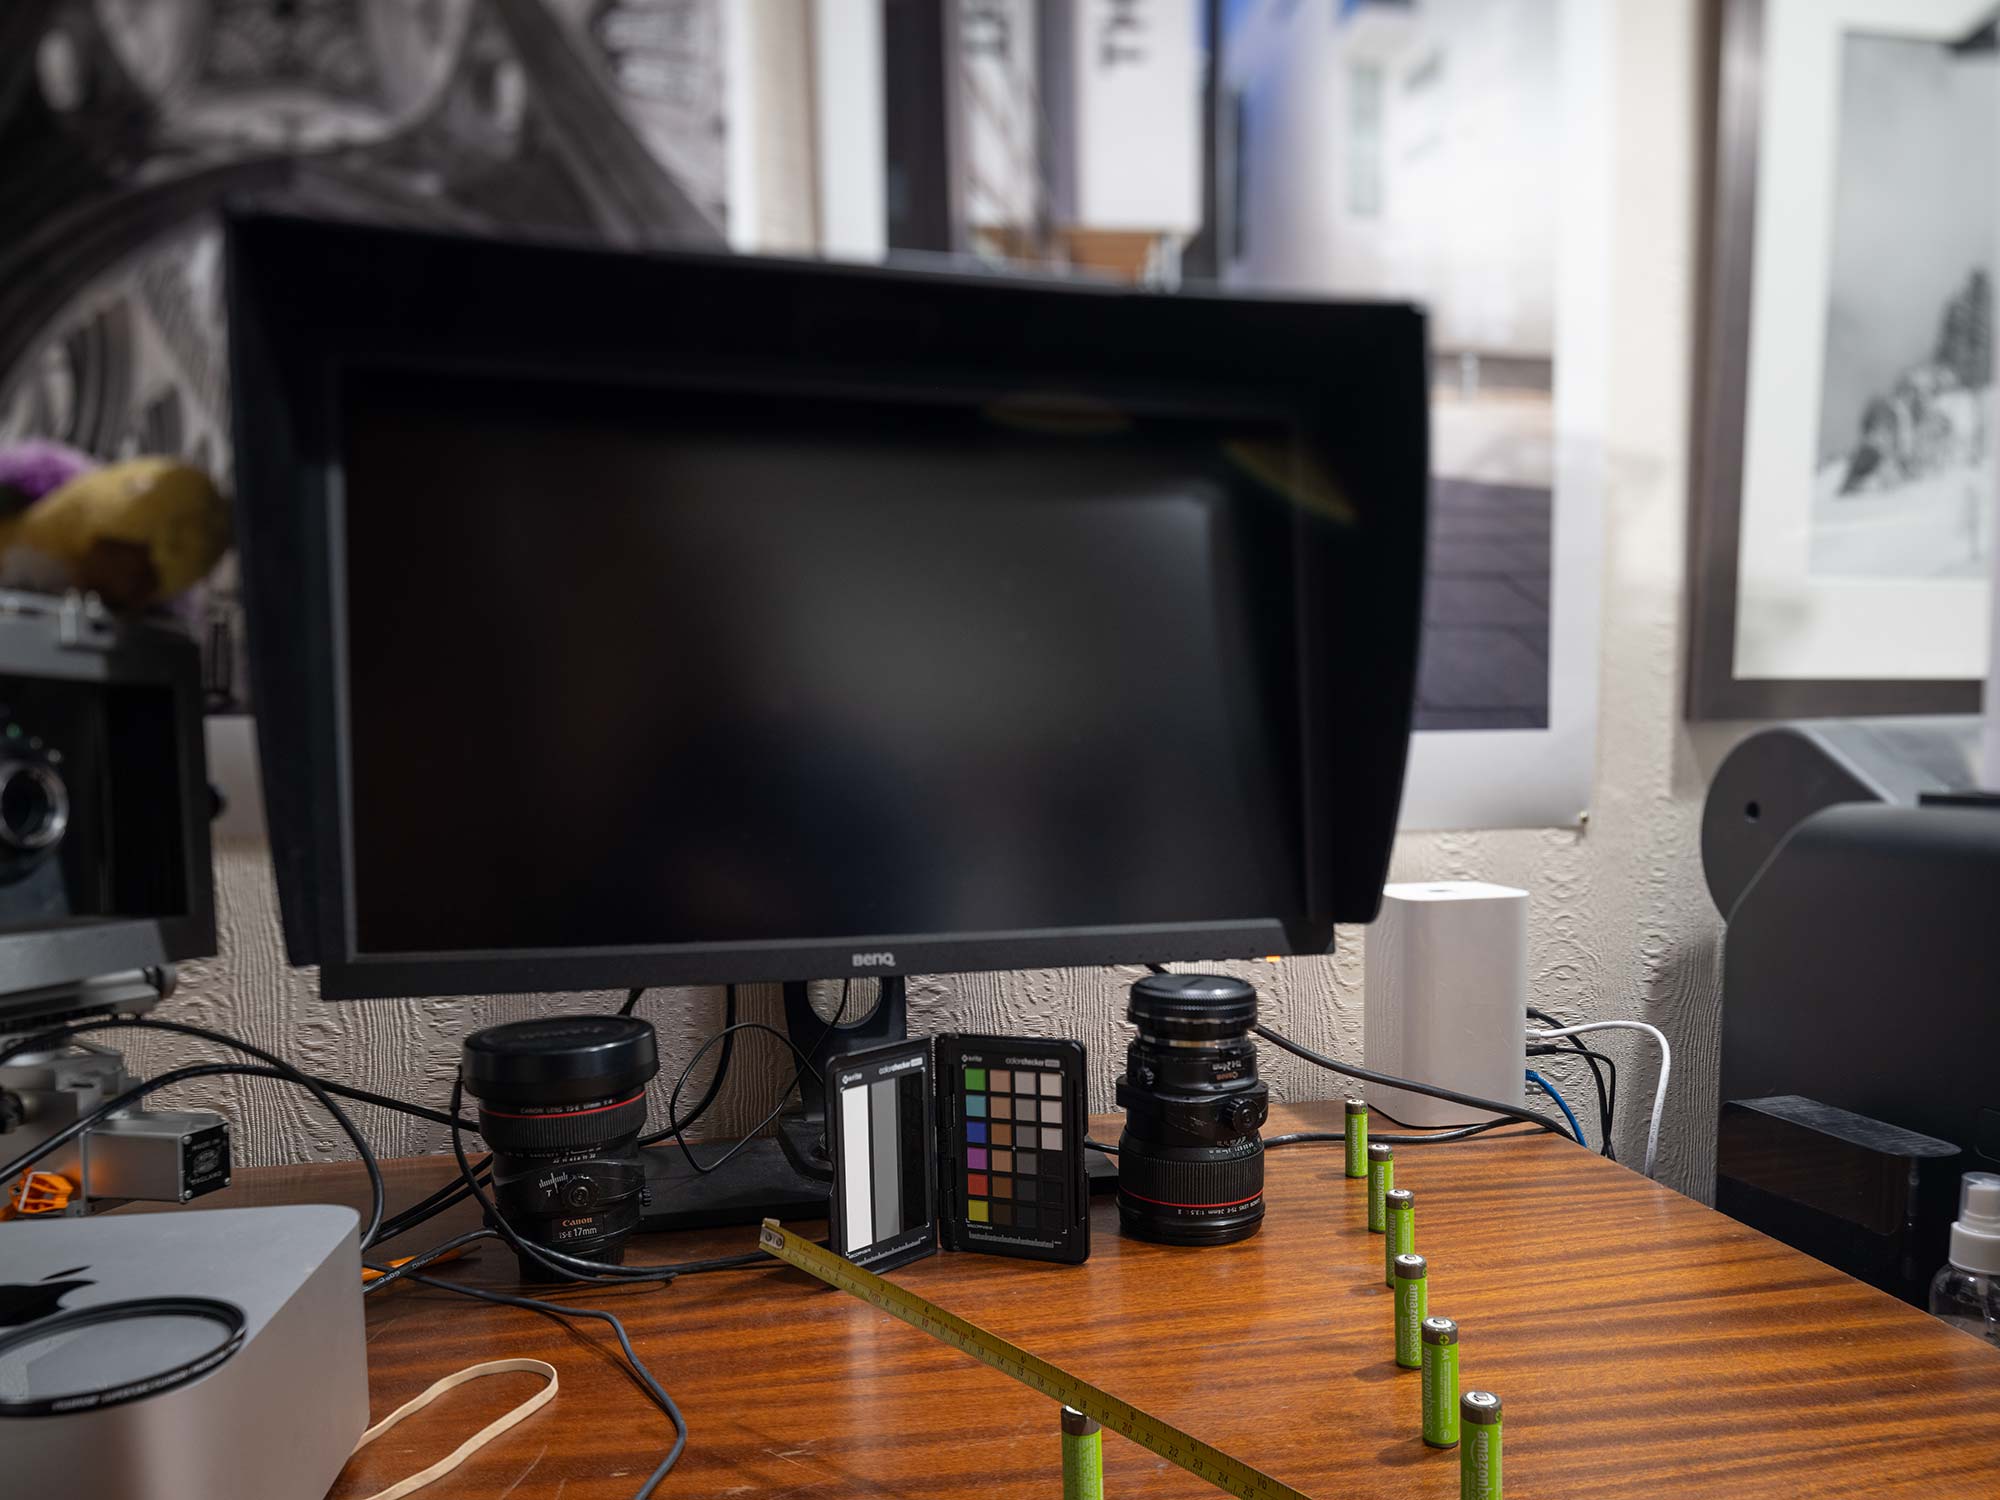
A view of the horizontal plane of focus.
It’s more difficult to show images outdoors where tilt really matters, with wider lenses.
With this view I’ve used ~3º of downwards tilt and an adjustment of the focus setting to get the plane of focus run up the bank, and on into the trees. Note the small amount of vertical shift applied as well.

I’ve used f/13, since the plane of focus is actually a wedge and gets very thin closer to the camera
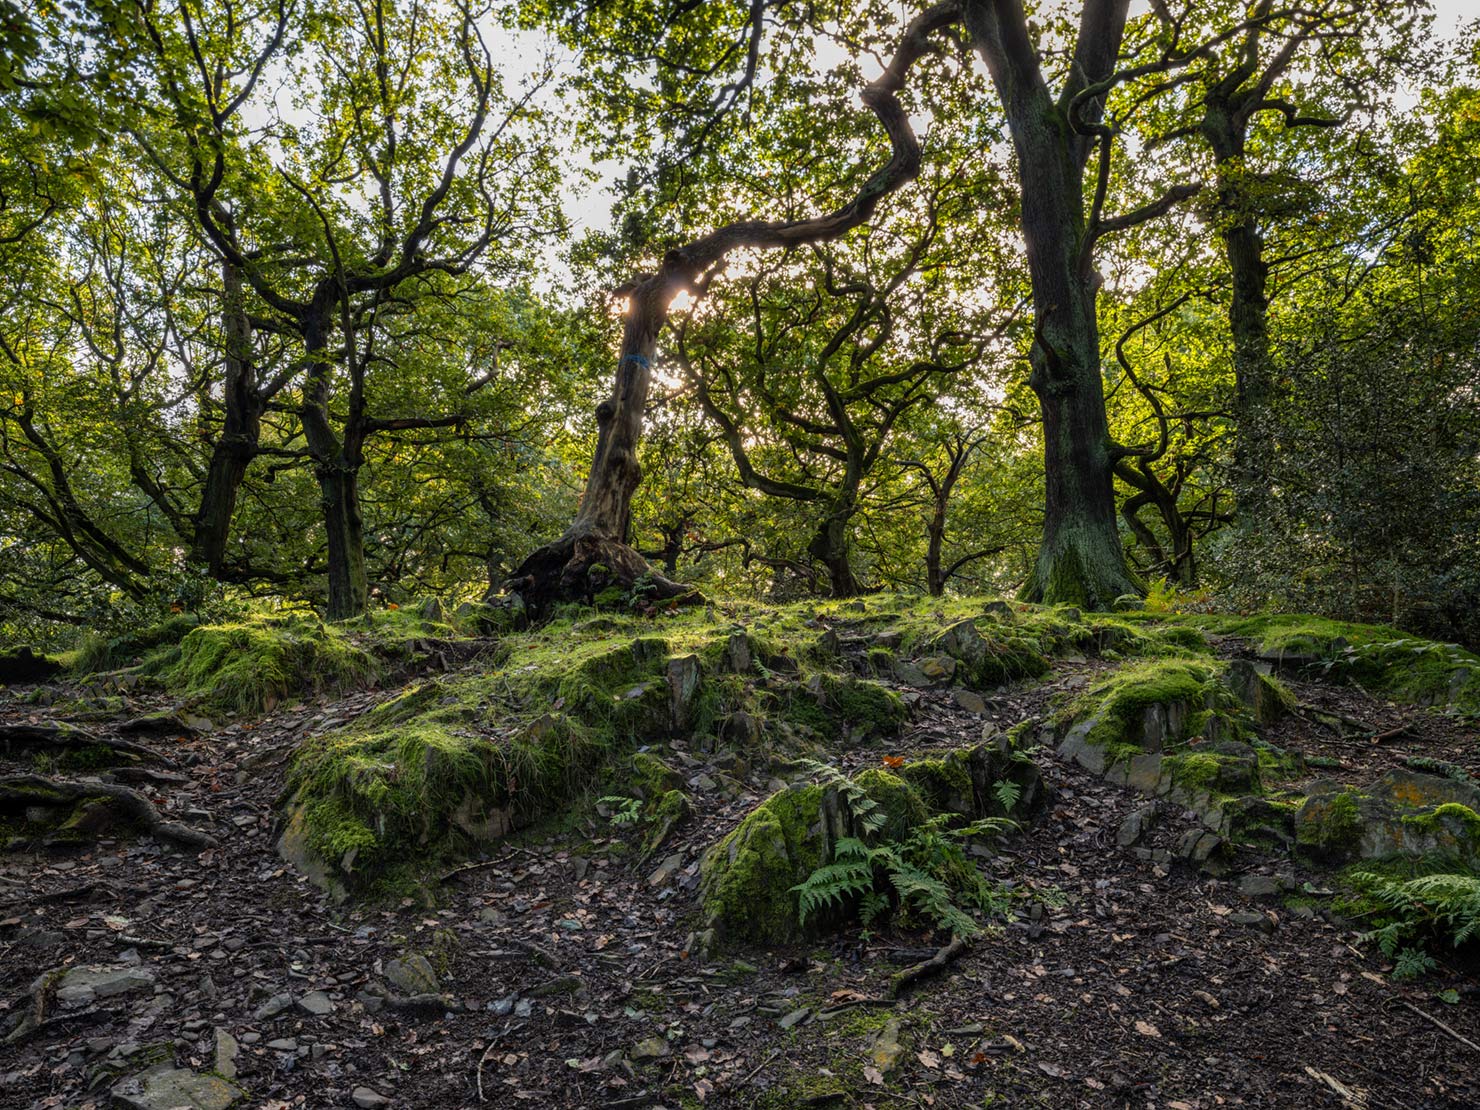
Good use of tilt should often be un-noticeable from my POV – that makes examples rather tricky in an article like this.
The point is that I want it to contribute to the image, not to yell ‘hey I’ve got a til/shift lens’.
However, this crop from the top of the mound shows distant sharpness as well as a slight softening of the top of the near tree
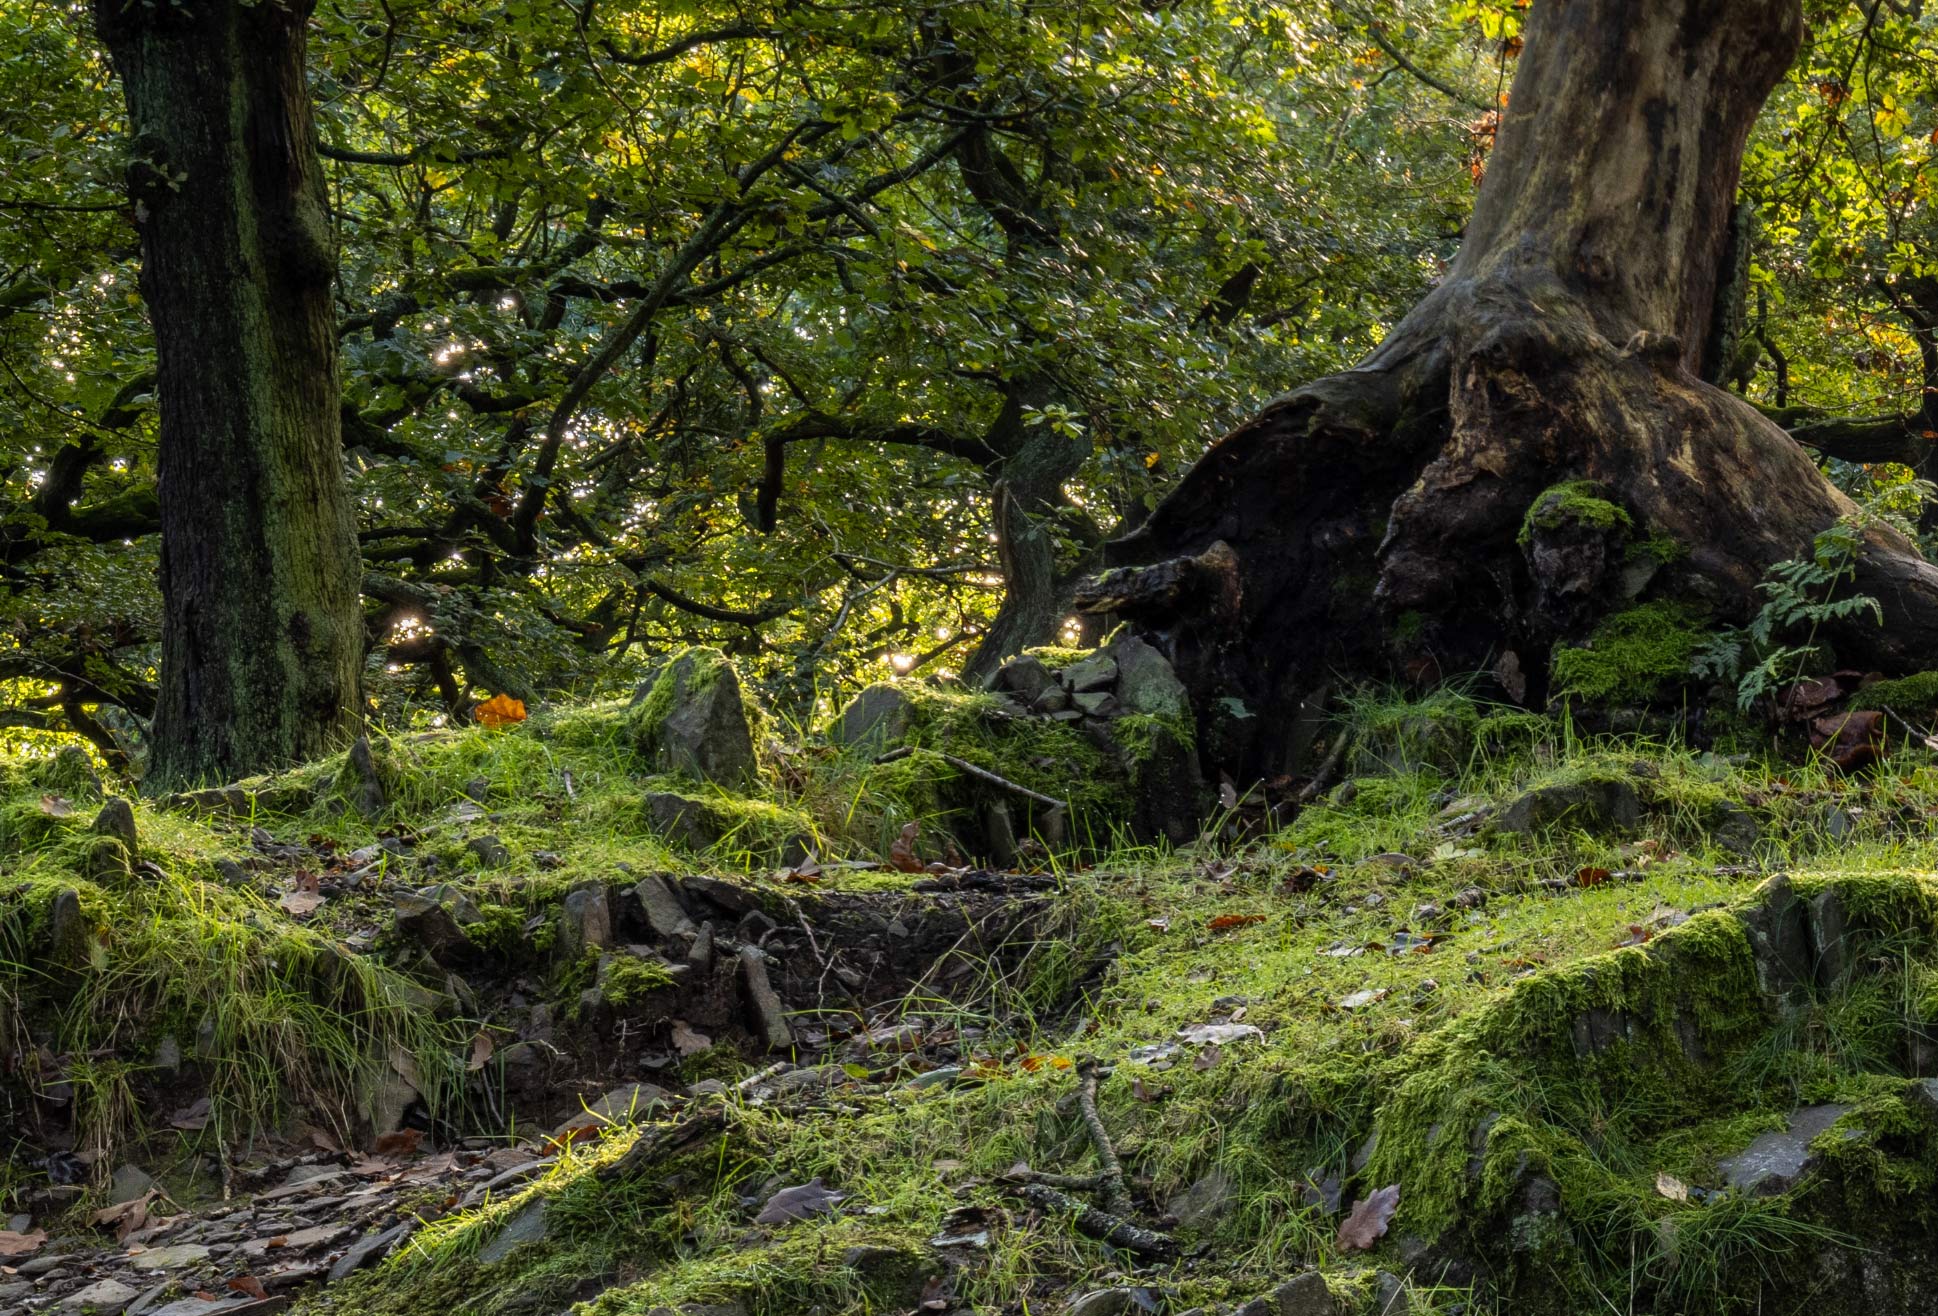
and some closer detail

Stitching with the GF 30mm TS
The large image circle of the lens needed to provide the shift function is much larger than the camera sensor. That means you can take photos with different amounts of shift and stitch them together,
The shift can be any direction. The lack of shift vignetting of the GF 30mm TS makes stitching very simple.
This up/down stitch was hand held in the Chapter House at Coventry Cathedral.

Similarly, and up/down stitch of the tree shown earlier – converted to B&W, this looks excellent at 24″ square. I’m just waiting for my next big printer to test.

An up/down stitch giving a square image probably around 130MP

Or of course, you could just take a single shot from further back…
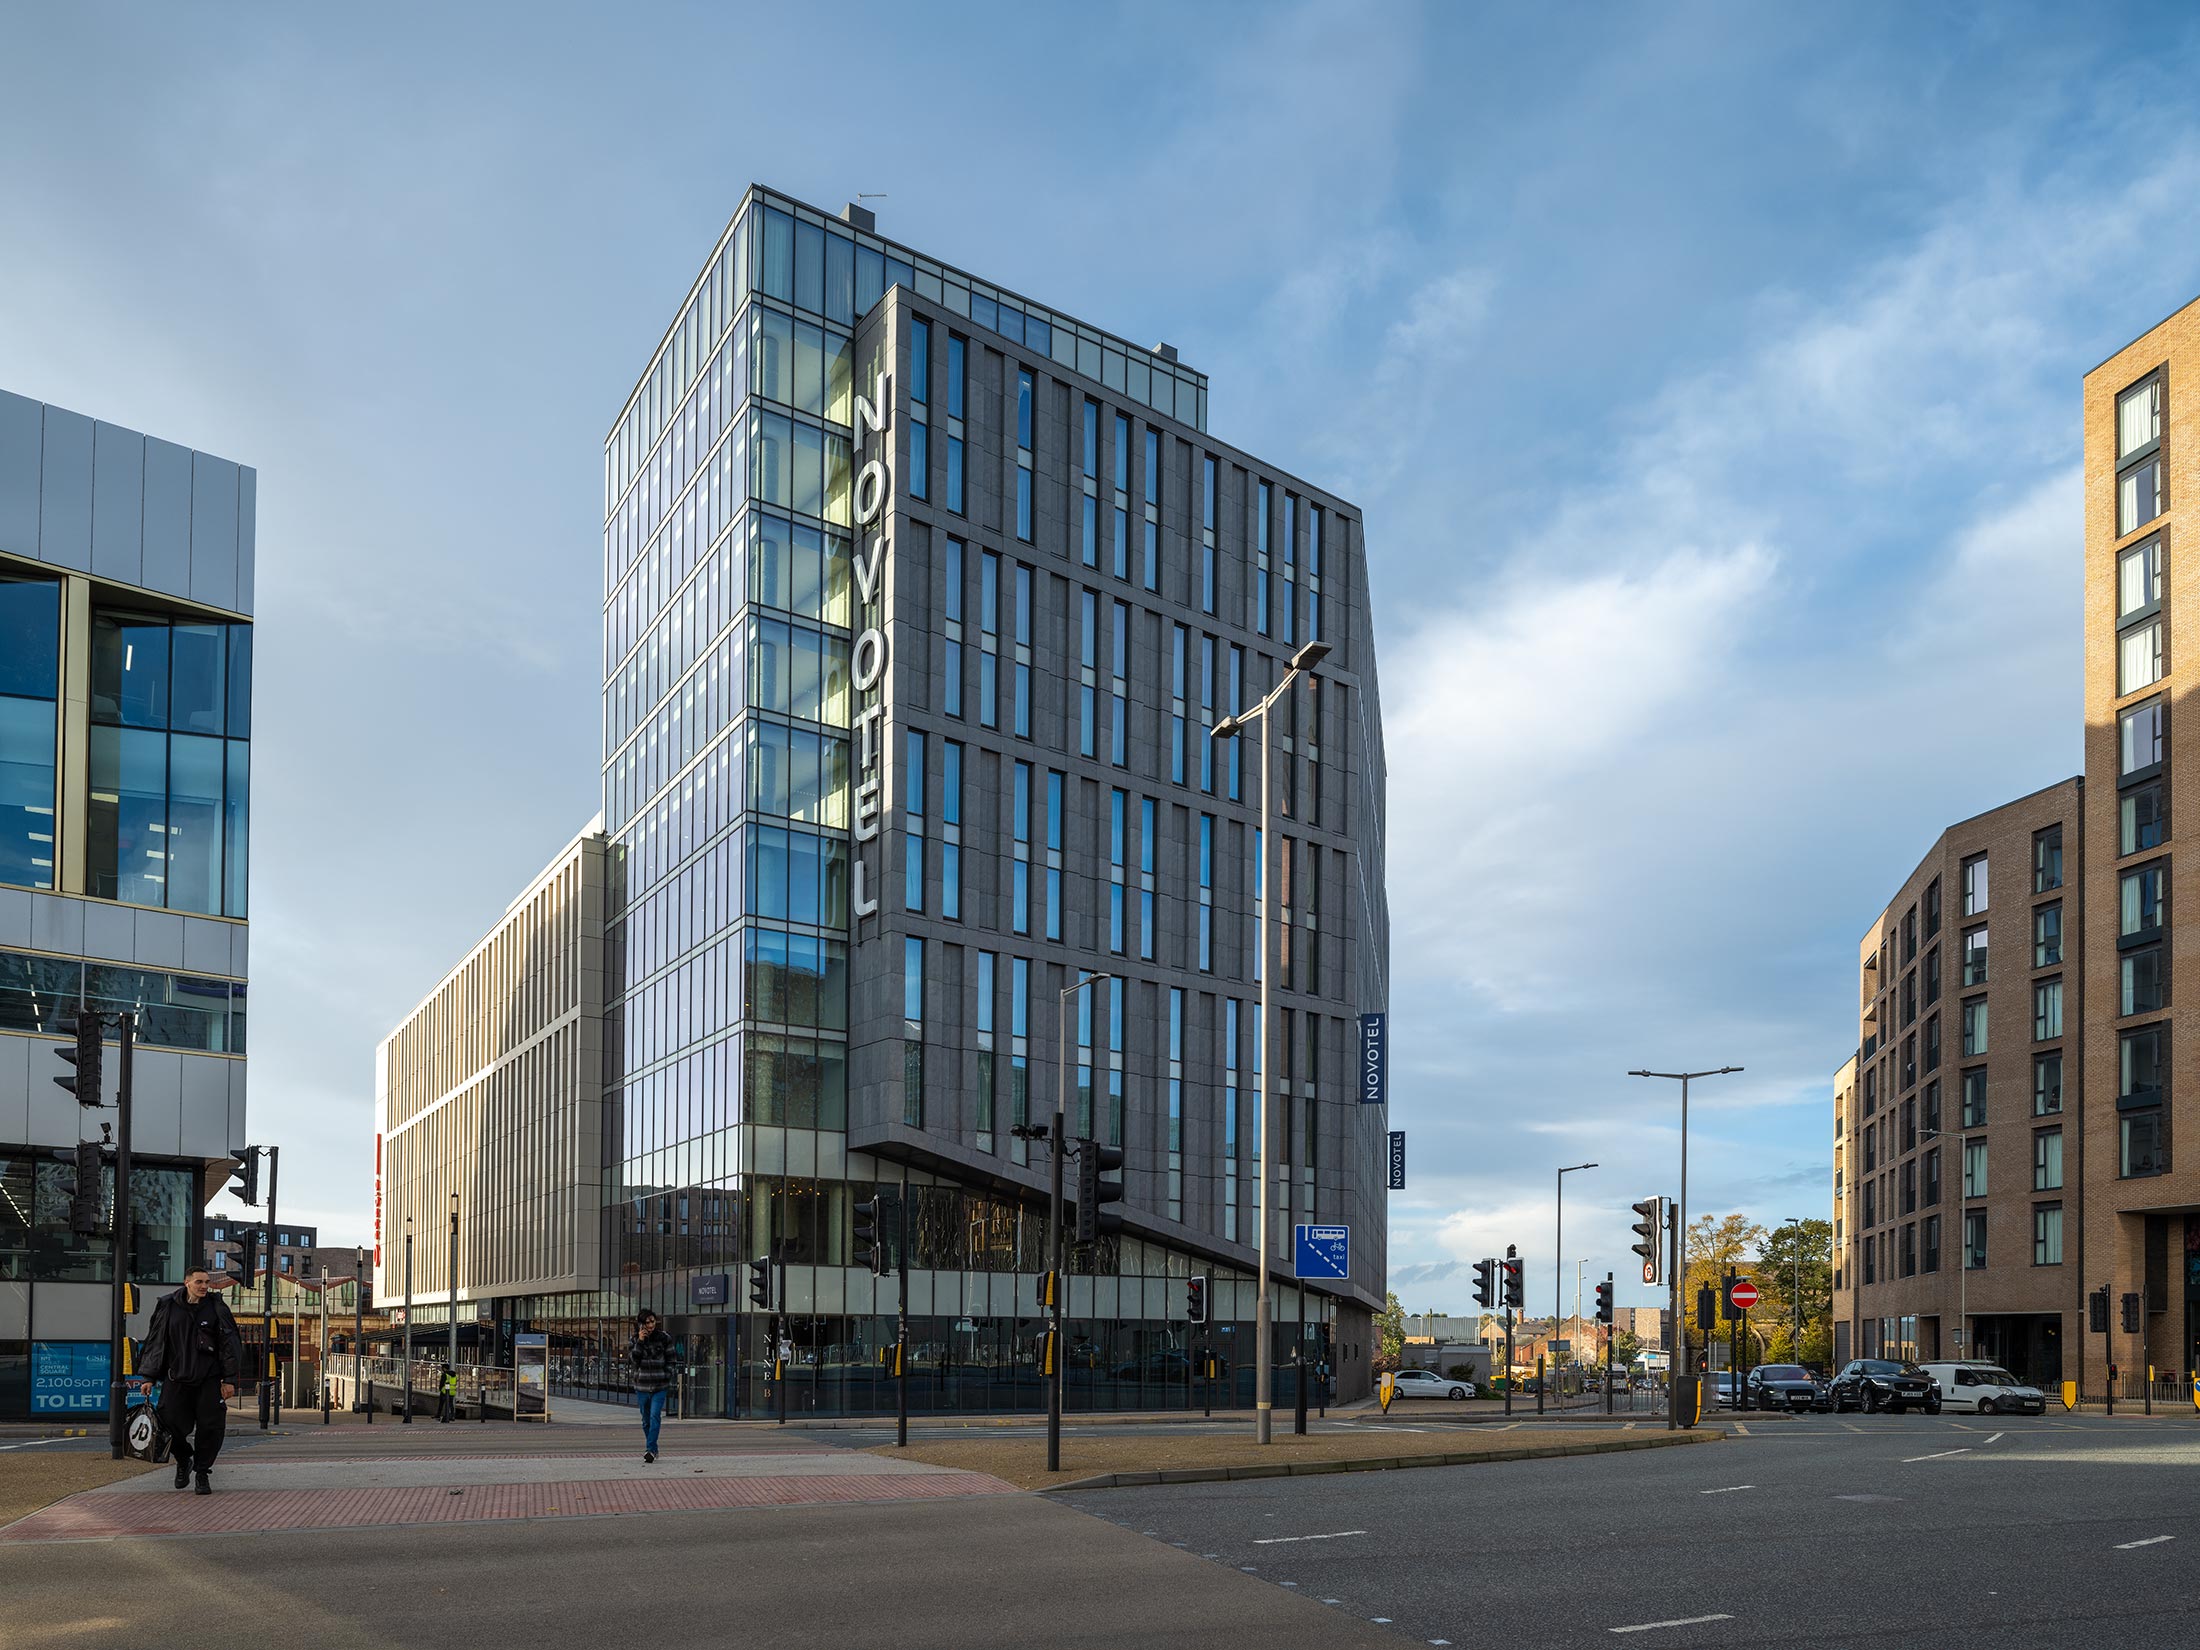
Parallax and the GF 30mm TS lens collar
One potential issue is that in taking the pair (or more) of photos, the camera is fixed and the lens moves. Ideally, the lens should be fixed and the camera moved to capture different parts of the image circle. This is what the lens collar allows.
Technically this can be seen as camera [rear standard] shift and any tilt you use, as tilting the camera not the lens.
At distances such as the grassy bank, the differences are minimal and it’s easy just to think of lens tilt for purposes of deciding the J distance from the table I’ve shown earlier.
If you want to be more precise in setting lens tilt, then dial in the tilt and tilt the lens until the camera tells you it’s level – easy enough to do with the geared head [Rogeti RG-1] I’m using.
Remember that with all current tilt/shift lenses the lens is being slightly shifted as well as tilted – this is even more so if you’re using lenses with a tilt/shift adapter. This means that application of tilt will shift your composition, which may need adjusting with shift.
Basically, the closer you work, the more all these things interact and the more adjustments you’ll end up making.
Remember too that the closer you are working, the less effect the lenses range of tilt will gave on the movement of the plane of focus – something which often catches out people wanting to use tilt for close-up or macro. The close up magnification of the GF 30mm TS lens may only be 0.21x, but the change of focal plane tilt is applicable there too.
I’ll look much more at these aspects when I get to test the Fujifilm 110mm TS lens. but I’ve covered it in several of my other tilt/shift lens reviews.
A wider angle
One popular use of shift is to make ‘panoramic’ style images with strong left/right shift. Normally you notice distinct fall off in quality in the corners. The GF 30mm TS lens shows this much less than many, as you can see in the correction image earlier in the article.
When using left/right stitching it may be worthwhile using a diagonal shift, so that the two images have an element of vertical shift in them as well as the desired left/right shift.
You can just use vertical shift and stitch multiple overlapping images as you pan the camera.
Here’s a hand held stitched interior from Coventry Cathedral. The original image is ~25k x 10k pixels
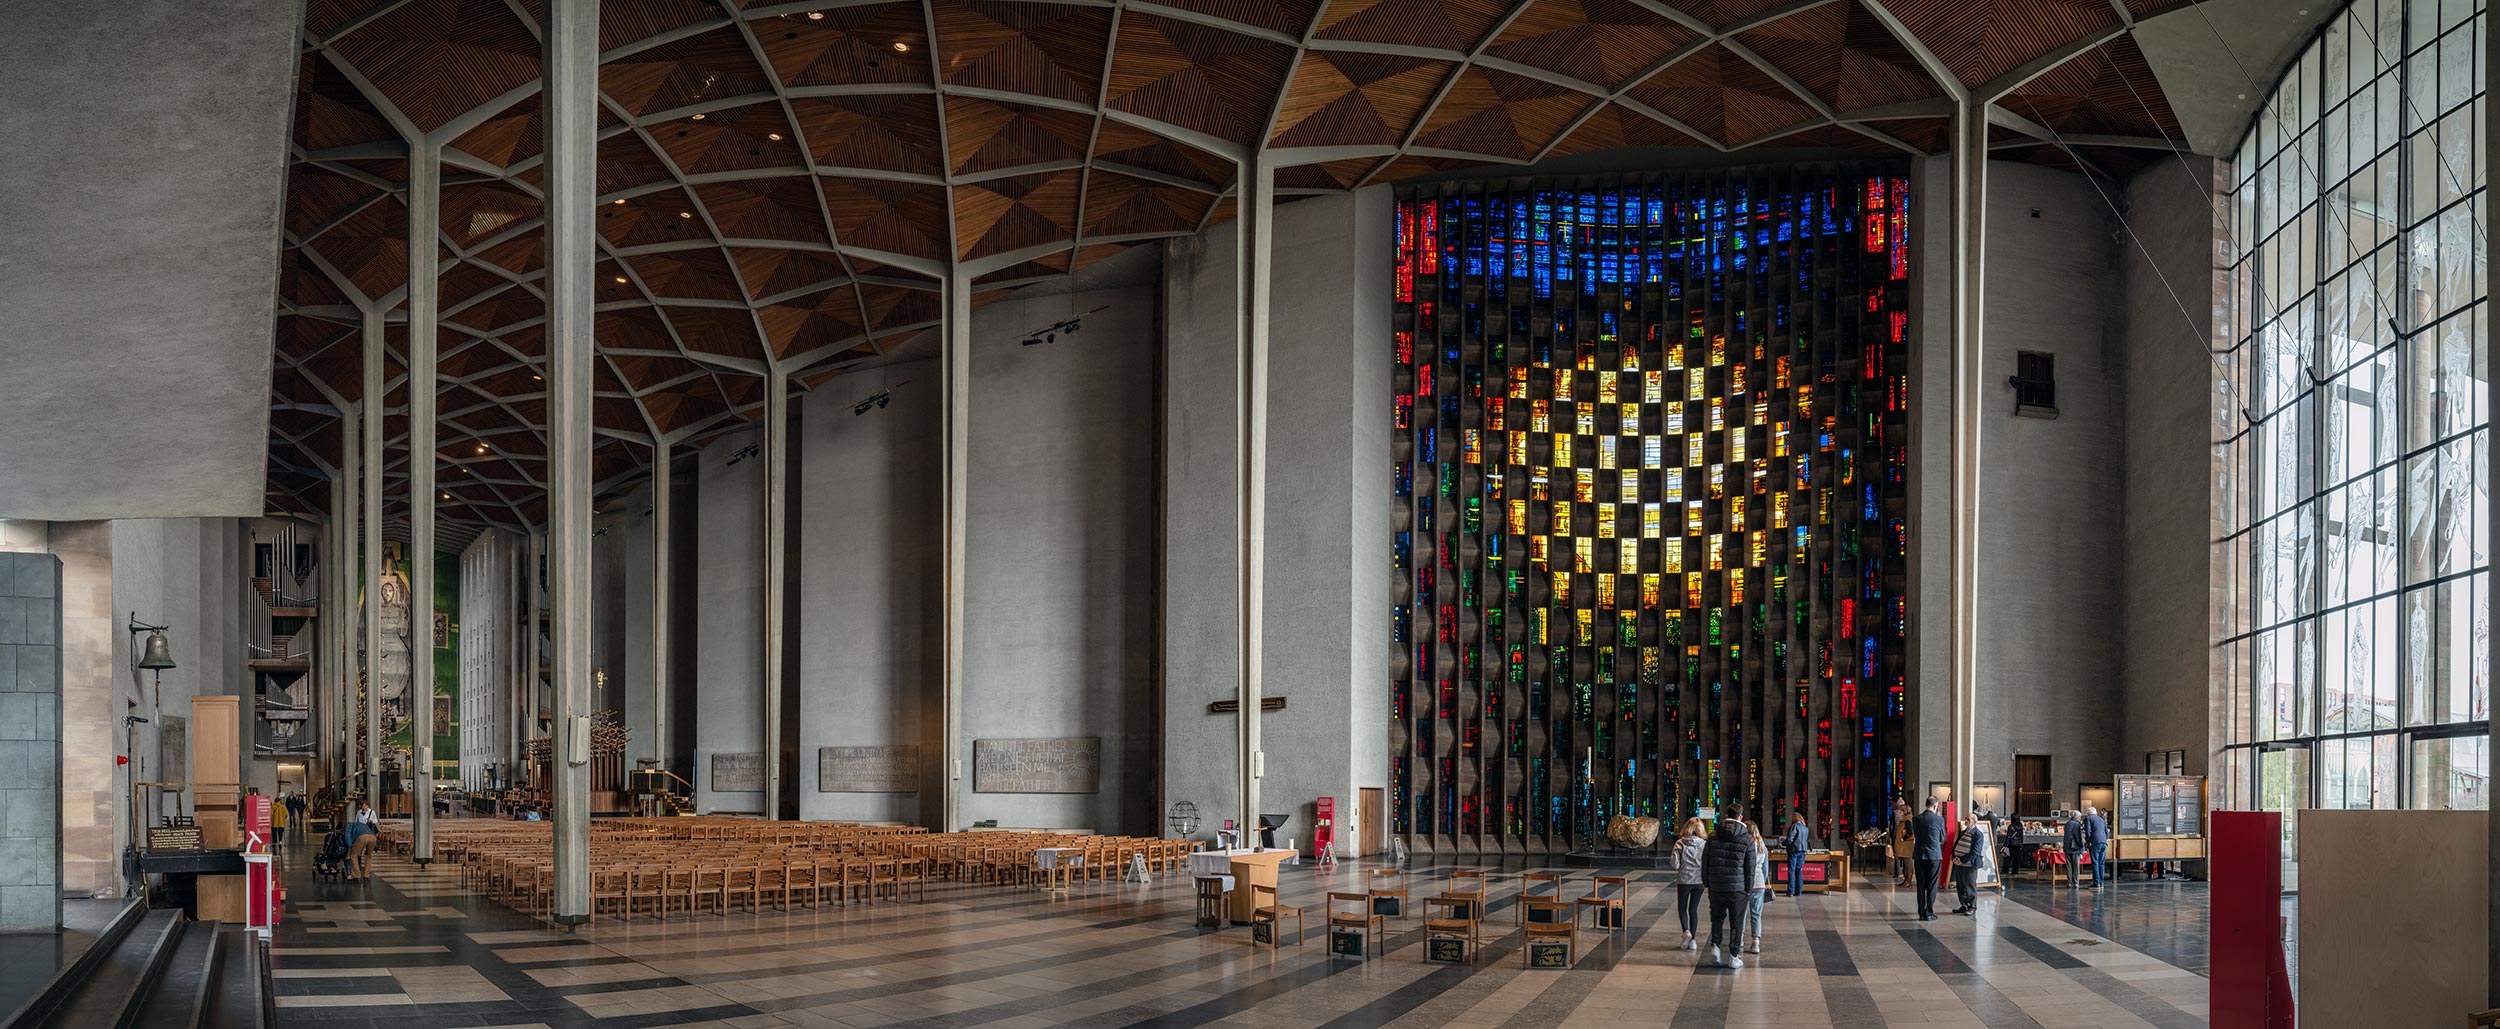
Conclusions: Fujifilm GF 30mm TS F5.6 tilt and shift lens
What a nice lens…
This lens shows just how much optical design has advanced in recent years. It’s by far and away the best wide tilt/shift lens I’ve tested to date.
There is some basic vignetting and a slight overall distortion – mainly a slight barrel type. Sharpness falls away a bit in extremely shifted corners, but it’s very amenable to improving with modern sharpening tools. It’s also not noticeable with many images.
Some have asked about the relatively small maximum aperture of f/5.6 – my feeling is that this allowed the lens to be optimised towards overall performance. These lenses tend to be used at smaller apertures – making the lens f/4 or even wider would have introduced a lot of extra glass [expense and weight] at apertures you don’t use much.
It’s the first shift lens I’ve tested with no obvious secondary mount vignetting
The inclusion of EXIF data for shift and direction should allow for easy correction of geometry and vignetting, once more raw processing software developers get round to supporting it.
Tilt, with this lens, feels like it’s meant for the purpose of placing a sharp plane of focus where you want it, not for wacky out of focus ‘miniature world’ effects. I almost hesitate to say it, but it feels meant for ‘serious’ uses… Then again, at the price it’s going for, it’s perhaps not one for casual experimentation.
What it really shows as well is the age of current wide tilt/shift lenses from Canon and Nikon [EF and F mount]
Fujifilm GF 30mm TS f/5.6 image quality?
Always a tricky one since you’re seeing processed photos on a web site. I’ve already seen some ultra-picky people dismiss the lens as showing too much distortion and fall off for ‘serious use’ – you wonder just who these people are and what, and at what cost, they normally use to take photos. As I’ve said, if you want numbers, look elsewhere, I can’t offer charts and such data.
If you are seriously looking at spending nearly £4000 on a lens, then try and hire one to check how it matches your own standards.
For myself it is by far and away the best quality wide tilt/shift lens I’ve ever tested – note I say ‘wide’ there since the TS-E90 and TS-E135 Canon T/S lenses are superb [the 50 is pretty good too]. I look forward to testing the Fujifilm 110mm TS in due course, which I expect to be excellent too.
People have asked me how it compares with the [2007] TS-E17 and TS-E24mm II? These are lenses made for a 36x24mm sensor, both of which I’ve used for years – of course it trounces them. BUT they are wider older lenses. Both work well on my 50MP Canon 5Ds, but put them on the GFX100S and they show their limits.
There is a brief TS-E24 comparison appendix to this review.
A manual lens like this is, I’d suggest, a good choice for anyone looking to develop the ‘slower’ side of their photography – it’s not a choice for sport/action shots but one where the creative use of shift and tilt can teach a lot.
Is it worth it for you? Depends on the depth of your pockets and what you want to use it for…
I hope the review has been of interest – please do feel free to ask (email, YouTube or the comments below) if you’ve any specific questions. Thanks to Fujifilm UK for the loan of lens and GFX 100 II camera.
If you’re buying any equipment, then using one of our links to B&H or Adorama or Amazon US will help our site.
Lens at: B&H | Adorama | Amazon US
Appendix – What about the TS-E24 F3.5L II ?
The TS-E 24 works fine on the GFX100S with an adapter.
If you’re curious about the lens, see my TS-E24 review
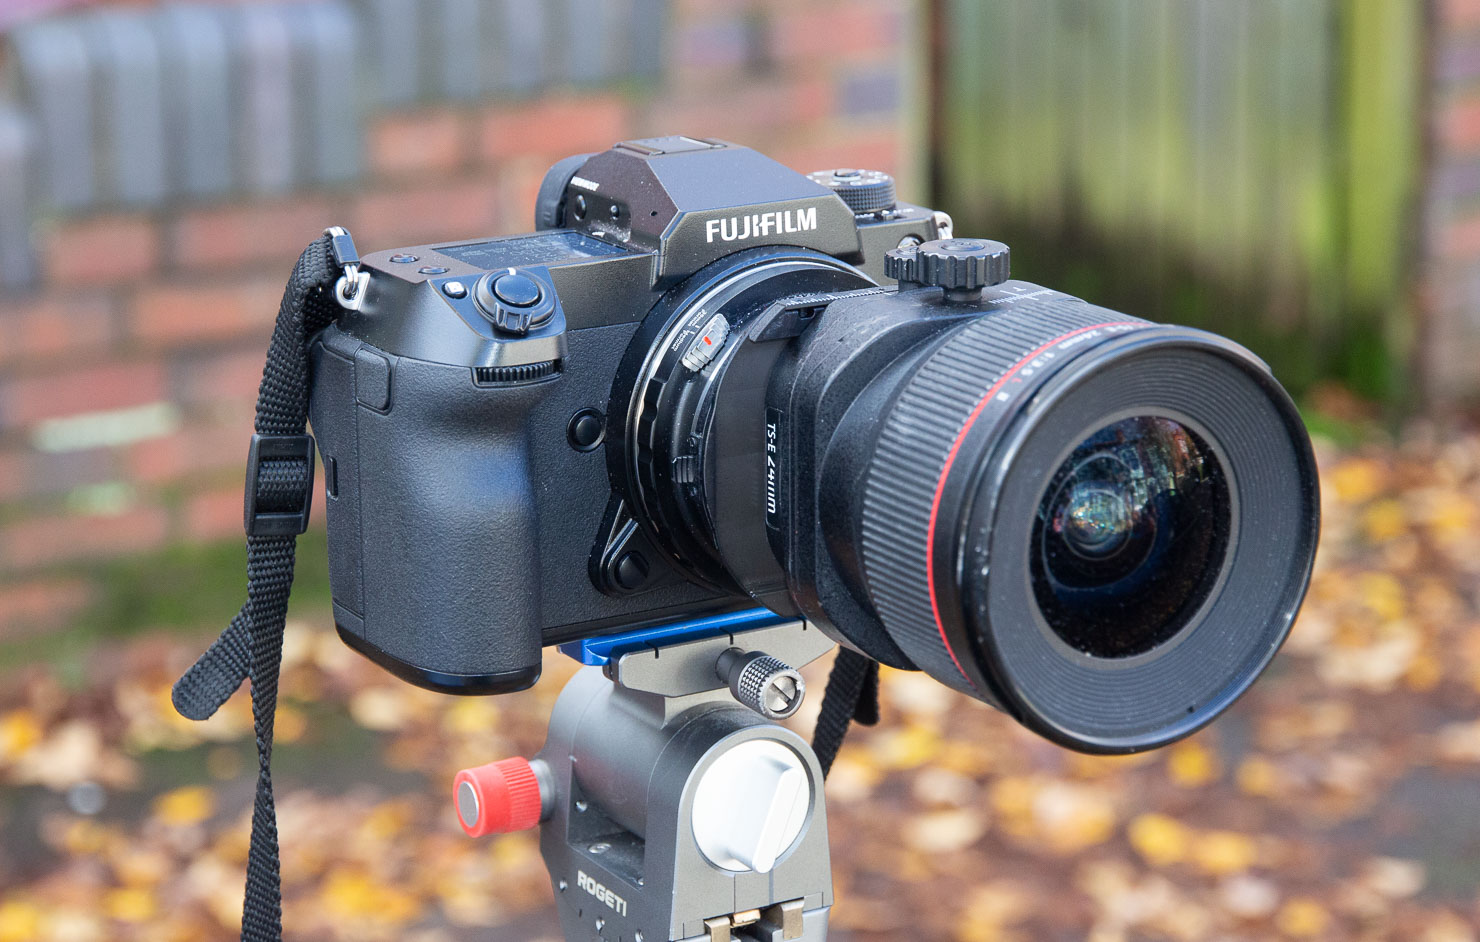
As s 24mm lens on a 33×44 MF sensor it obviously shows a wider field of view [FOV] than it would on a ‘full frame’ 36×24 sensor.
Here’s the MF view – equivalent to the FOV of around 18-19mm for my EOS 5DS for example

The GFX100S has a 35mm crop mode, where not all the sensor is used – this reduces the image to ‘just’ ~60MP
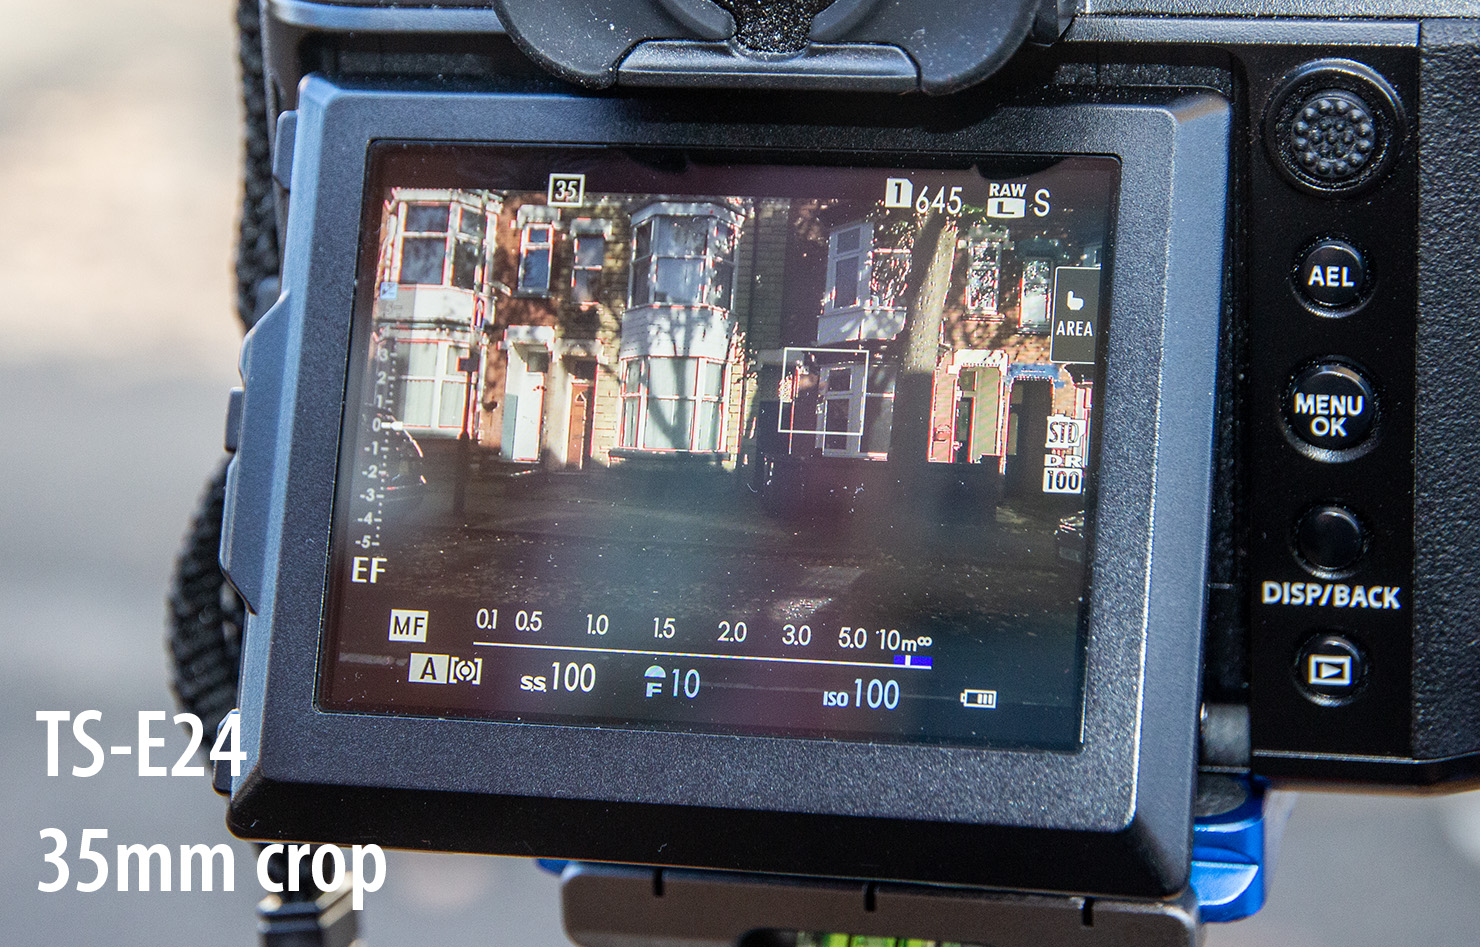
The adapter means I get normal EXIF data for the image, but no shift data.
The problems in any comparison…
Fundamentally it’s the focal length difference. If I compare cropped images from the 24 with the 30 at the full 33×44 I’m using the sensor size the lens was designed for, however I’m comparing a 60 MP version with a 100MP. I’m also comparing a slightly different aspect ratio too.
Unshifted examples show me that the TS-E24 has softer corners and a more obvious amount of [fixable] CA. best results for the TS-E24 are around f/8 or f11/16 with more shift.
If I compare unshifted examples using the full 33×44 frame for the 24mm, then the corners are somewhat softer and f/10 seems a better option
At strong shift, the images form the 24 fall apart more rapidly, and an asymmetry in this suggests that I do really do need to get my 15 year old TS-E 24 serviced.
It might be thought that the TS-E24, as a shift lens, should be fine when shifted with the larger, sensor, since it has a big image circle and that I’m just seeing the a bigger sample of it with the 33×44 sensor.
However it’s not that simple, since the 24mm, even when shifted, is only meant to capture a 24x36mm section of the image circle.
I’ve two examples with shift fully left with TS-E24. The first is in crop mode, the second with the full 33×44

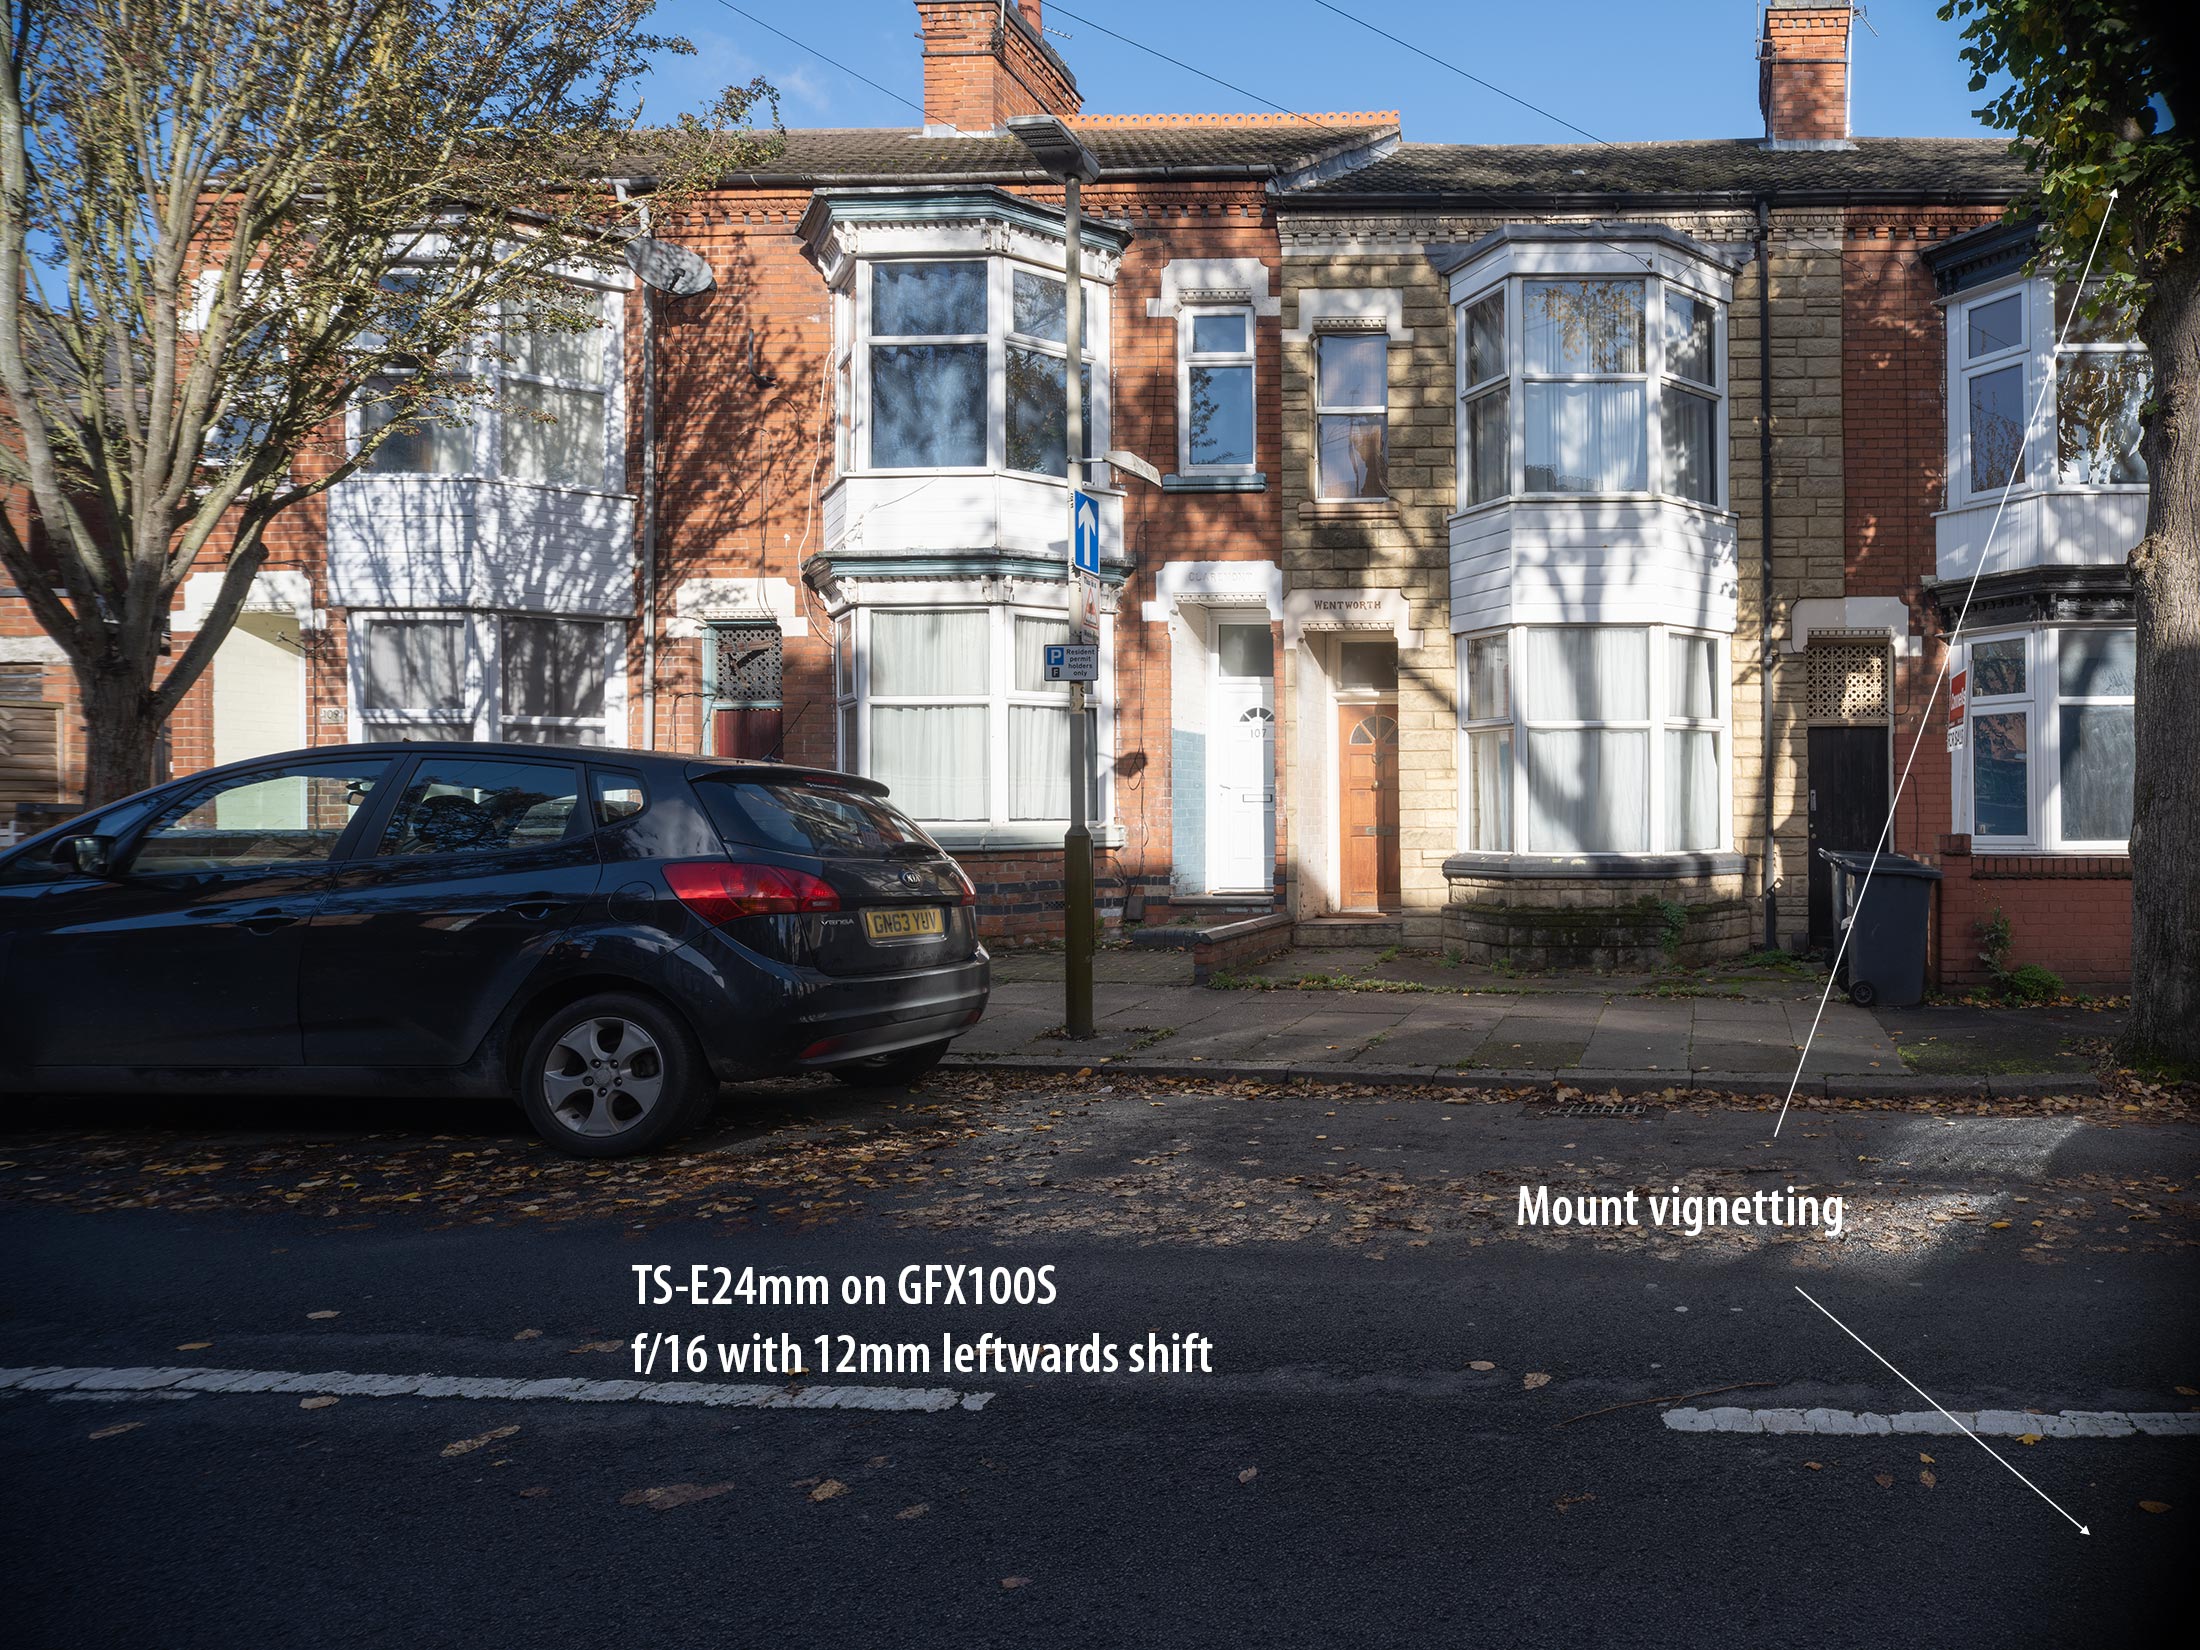
The 33×44 shot, with the larger sensor, captures an area close to the edge of the image circle [left corners] where quality drops off quite fast. However, the right edge of the image covers an area which isn’t included in the 24×36 frame. The hard vignetting you see is shadowing from the lens mount.
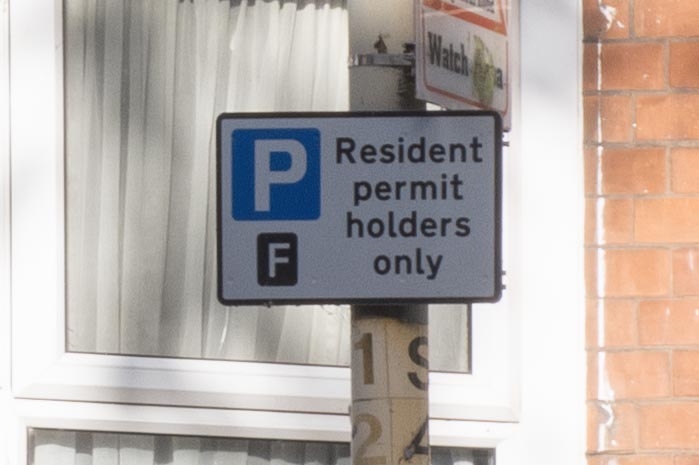
Just in case I was giving the impression that the TS-E24 wasn’t up to scratch, here’s a small [100%] detail from this shifted shot.
What does this mean in practice?
I’ll happily use the TS-E24 F3.5L II on the GFX100S in non crop mode, but I’ll typically shoot at f/10. I’ll also limit shift to ±7mm unless I don’t mind doing quite a bit of processing on the image. The best sharpening tool for processing shifted image I’ve got [at the moment] is Topaz Sharpen AI, where the off axis distortions [that tree in the top left for example] respond well to fixing ‘camera shake’.
Back to the real world… The TS-E24 is an excellent 24mm shift lens, but it shows it was designed over 15 years ago for a 24x36mm sensor. I still use it for my work, with care – it has earned a good chunk of my income since 2008.
Don’t expect it to compete with the GF 30mm TS lens!
Never miss a new article or review - Sign up for our occasional (ad-free) Newsletter
and please do subscribe to Keith's YouTube Channel

Other areas of our site that may be of interest...
All the latest articles/reviews and photo news items appear on Keith's Photo blog

Keith explains tilt and shift lenses
Keith has written a book that looks at the many ways that tilt/shift lenses can benefit your photography from a technical and creative point of view. If not in the UK check for import issues and maybe try an on-line bookshop. Keith has no connection with sales of the book.
ISBN 9781785007712
There is also a specific index page on the site with links to all Keith's articles, reviews and videos about using tilt and shift.
We've a whole section of the site devoted to Digital Black and White photography and printing. It covers all of Keith's specialist articles and reviews. Other sections include Colour management and Keith's camera hacks - there are over 1200 articles/reviews here...
Adverts removed
Keith | Nov 5, 2025 at 3:45 pm
No – that’s an issue with longer lenses where the torque at the mount is higher
Thomas Kyhn | Nov 3, 2025 at 3:14 pm
Thanks, this was helpful!
I see that the plate you use for the collar foot has no anti-twist stop. Do you ever find this to be a problem, or isn’t that something you should worry about?
Thomas