


X-Rite i1Photo Pro 3 plus review
Review:X-Rite i1Photo Pro 3 Plus
Using the i1Pro 3 Plus spectrophotometer with i1Profiler

No more Google ads. Too many deceptive and irritating adverts.
Any ad links left are non tracking, to companies we know, trust and we've worked with for years [Park Cameras]
Ads helped pay for site running costs, so if you found something useful, please
...Make small KoFi donation?
...Subscribe to Keith's YouTube Channel
...Get Keith's book about how to use tilt/shift lenses
Our site contains affiliate links - these help support the site. See our Advertising policies for more
The i1 Pro 3 Plus spectrophotometer from X-Rite is available in a number of different kits, with accessories enabling a wide range of measurement options.
The i1Profiler software is supplied with the i1Pro 3 Plus spectrophotometer with different levels of functionality: i1Basic | i1Photo | i1Publish
In this review Keith is looking at what you get with the i1Photo Pro 3 Plus kit – which would be the version of most use to photographers wanting to profile their own printers/papers.
2020: The i1Pro3 device [review] has been released. Its workings with i1Profiler are identical to the i1Pro3+ as described here but with a smaller minimum patch size and no polarised measurement options.
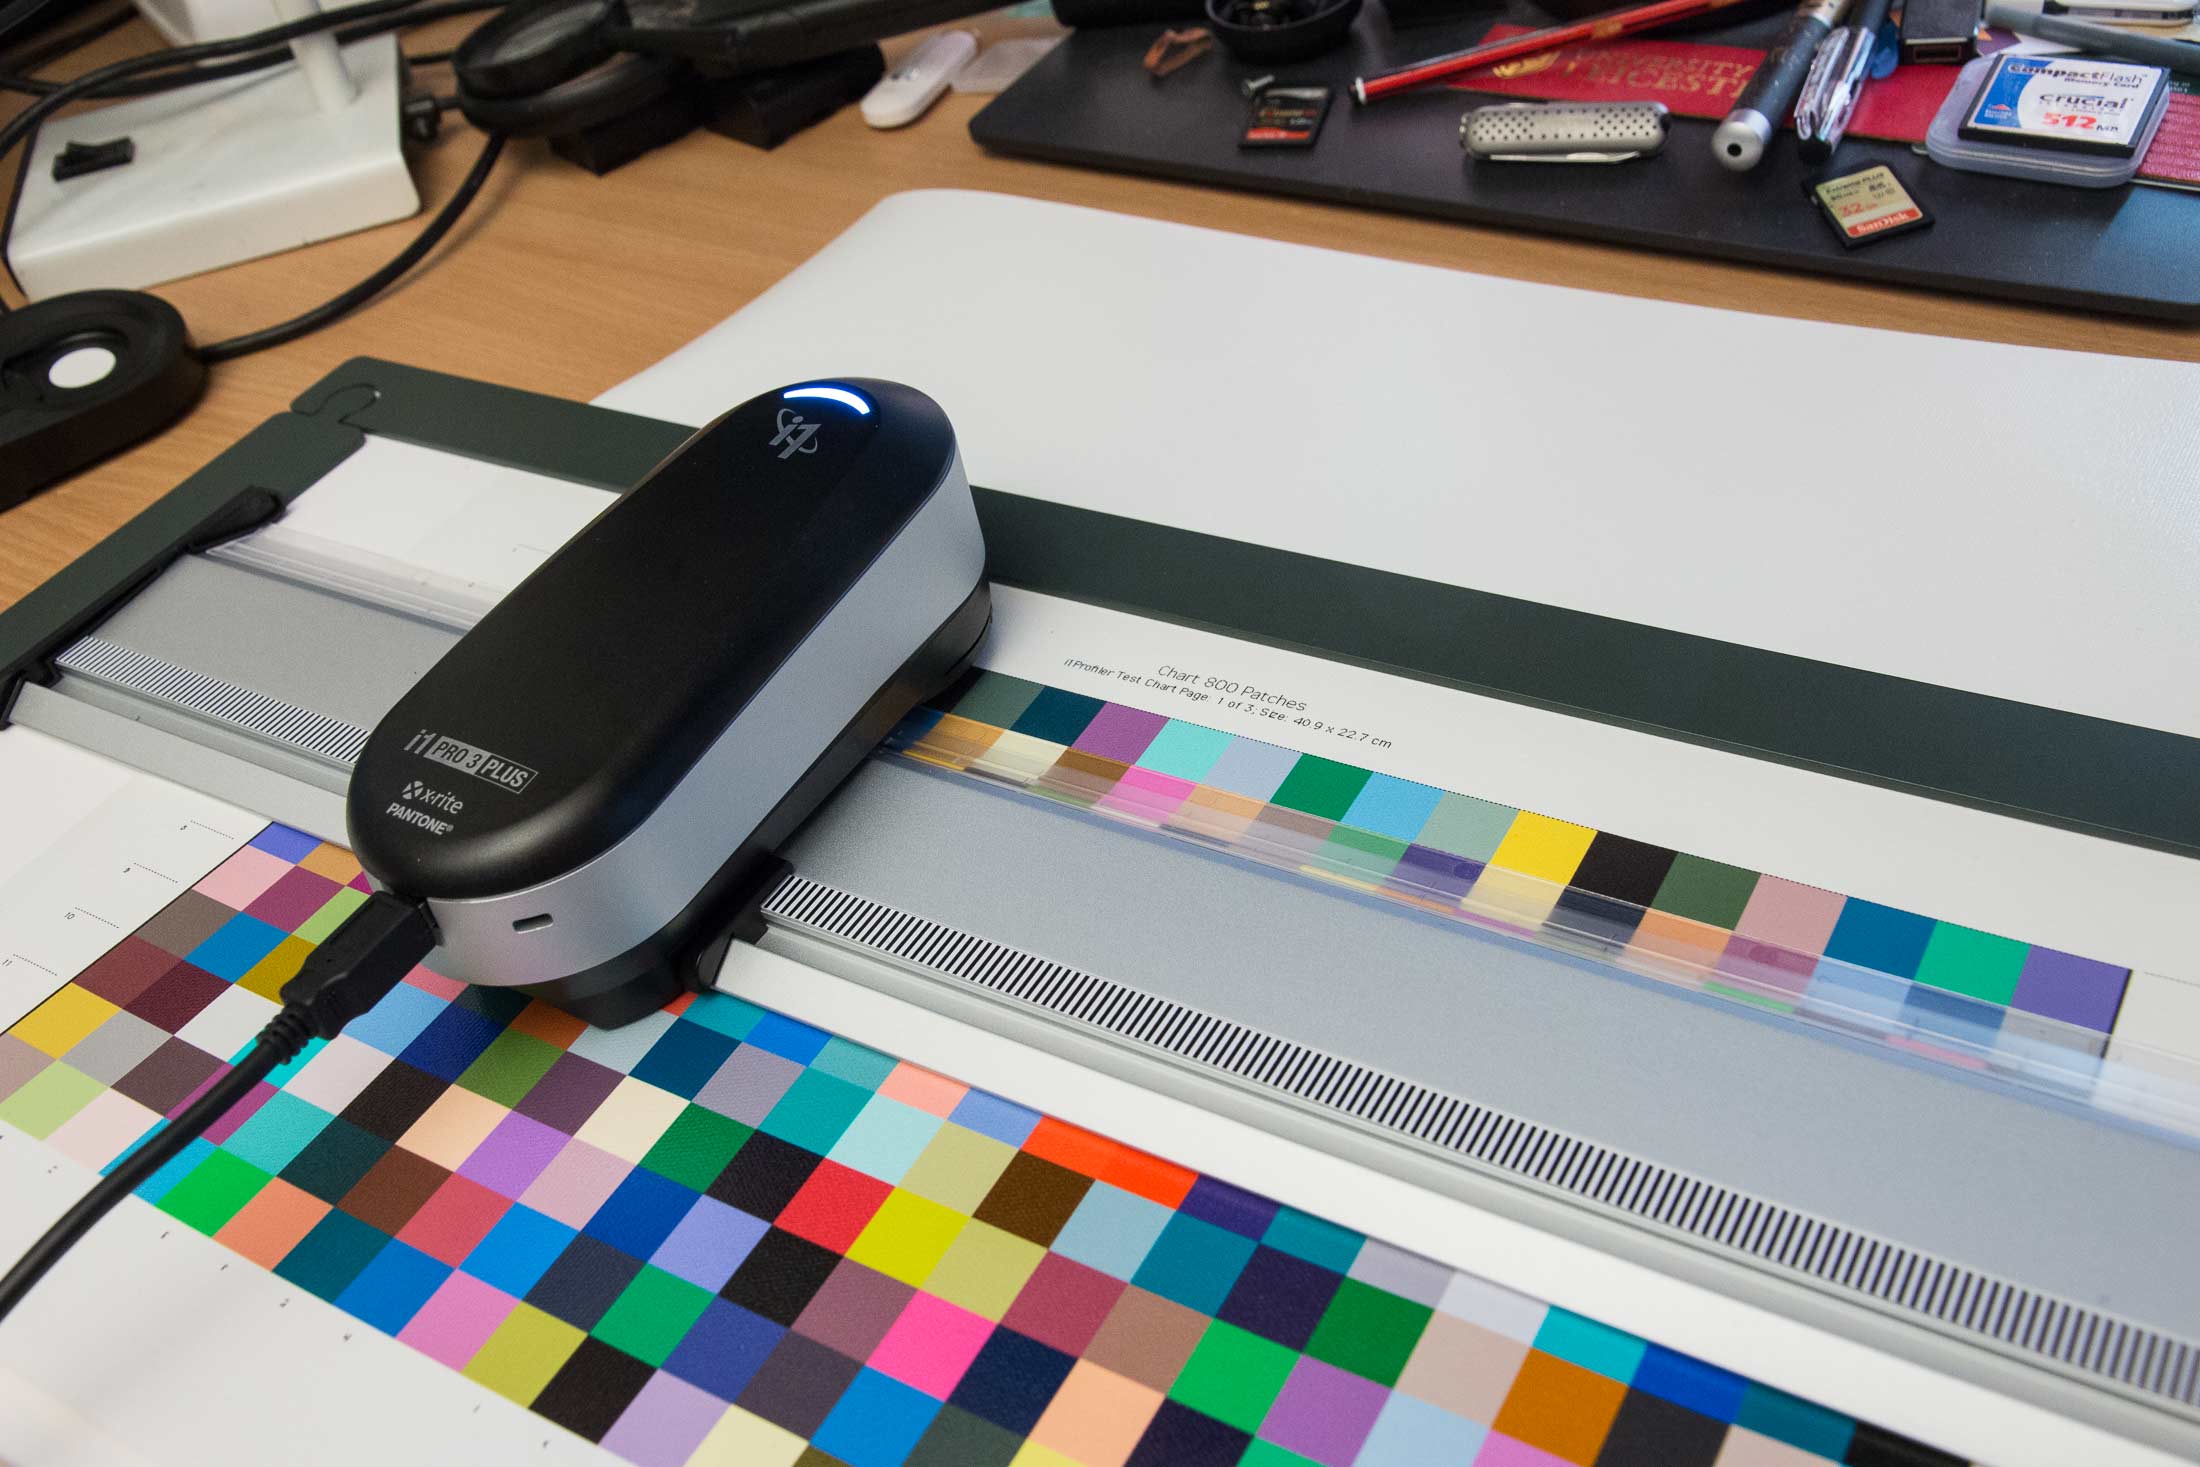
This is a long review and includes links to other reviews where Keith has looked at specific i1Profiler functionality in more detail.
Most photos and screenshots can be enlarged if you click on them.
The i1Photo 3 Plus is available from X-Rite.eu and distributors.
The i1Photo Pro 2 is available from B&H for ~$1650
New with the i1Pro3 Plus spectrophotometer
The i1Pro3 Plus kit you get with the i1Photo 3 Plus package is a fairly major change from the i1Pro 2 version, even if the kit components do roughly similar things.
The difference is size between the carry cases (shown here on one of my sofas) is considerable.
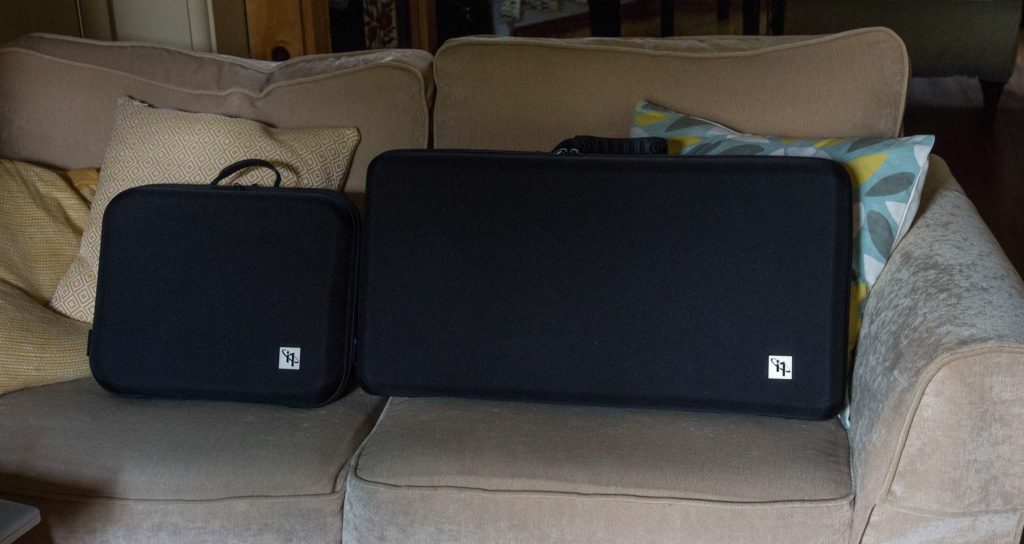
The new one weighs quite a bit more too.
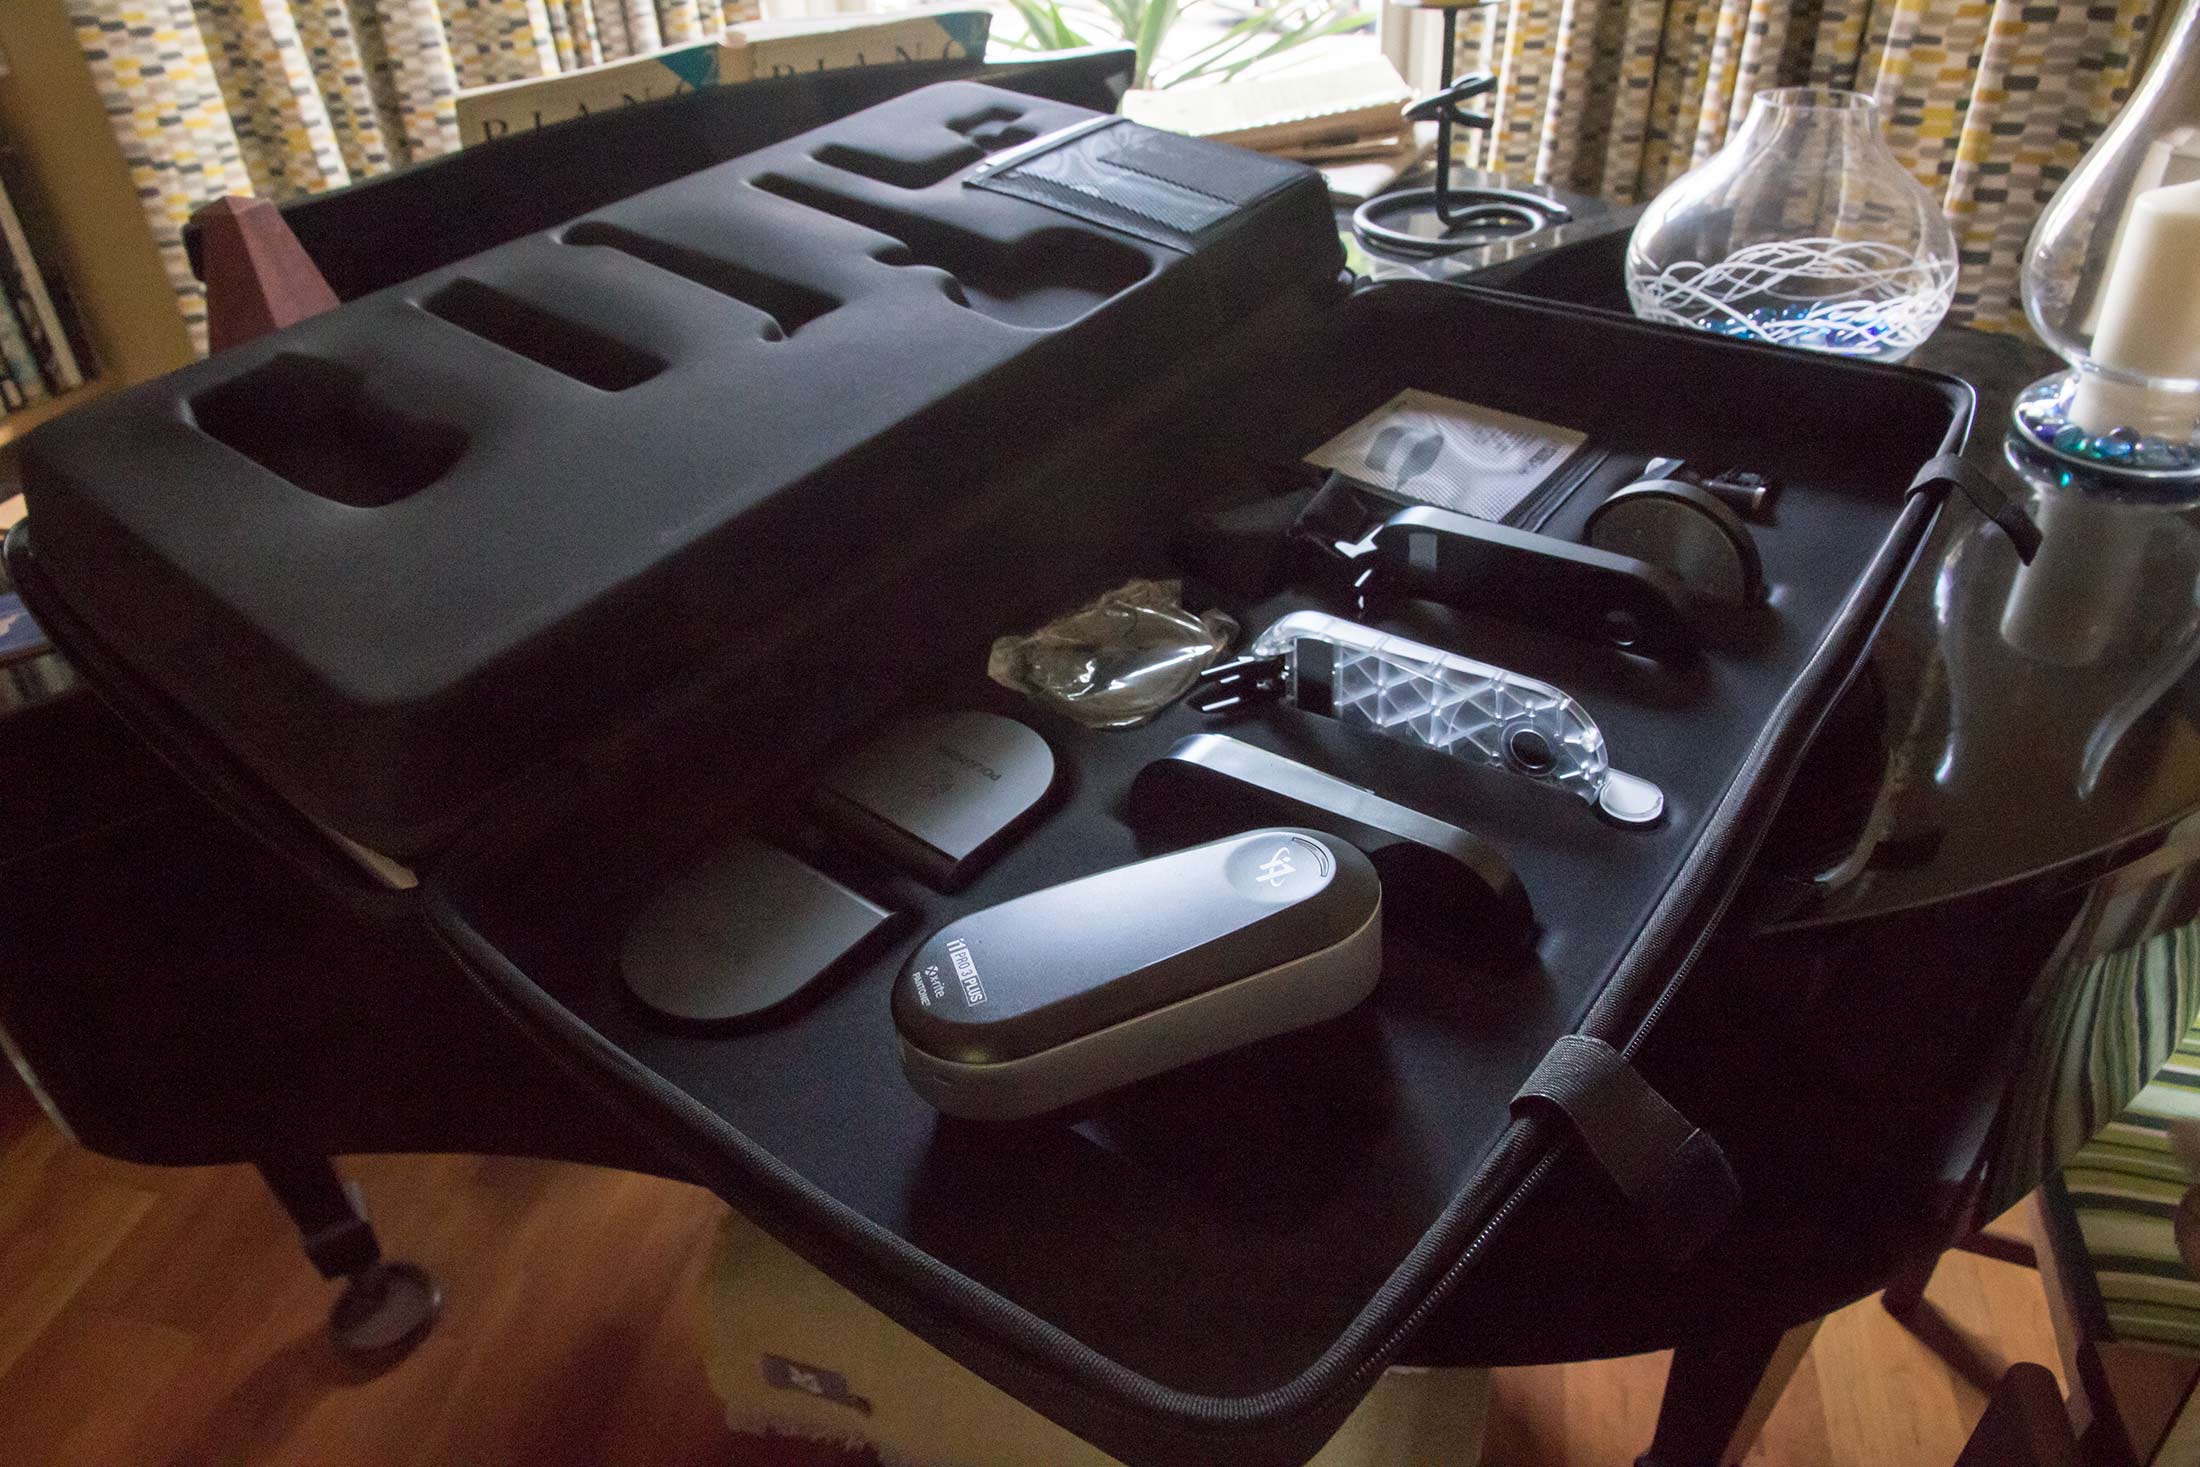
The official list of changes from X-Rite is:
- i1Pro 3 Plus spectrophotometer with large aperture (8mm) providing more accurate results with better repeatability
- Polarising filter for improved profiles on textured and glossy photo media to reduce unwanted specular highlights, enhance blacks for better shadow detail and get richer colours on unique surfaces
- LED illumination enables increased reliability with single scan M0, M1, M2, and M3, saving time and improving accuracy
- Supports profiling of transmissive (backlit) materials in RGB printer workflow
- 5000 nit support for calibrating and profiling high brightness displays
- Larger Ruler to accommodate the larger patches when printing on wide format paper
- Kensington Lock port for increased security
I’ll be looking at some of the functionality of the i1Photo Pro 3 Plus package in this review.
i1 Profiler is X-Rite’s profiling software package, with V3 appearing specifically to support the i1Pro 3 Plus, as a jump from the previous V1.8 (V2.x never happened). It’s a free update and your existing i1Pro equipment and license will still work.
A short note for users of the original i1Pro
If you’re using the original i1Pro then you should get a copy of i1Profiler V1.8 before going up to V3. Your license should work just fine for display and printer profiling. I’d also note that the i1Pro hardware is getting on and like most old kit probably won’t be supported for ever. I mention this since I know a lot of photographers happily hold on to older kit and have no desire or the means to regularly send kit away for calibration, or buy new kit when their old stuff still works.
Obviously that’s for enthusiasts – if you’re still using old kit for your business, then think seriously about an update!
The i1Photo package is limited to RGB ICC printer profiles – not CMYK. Note that RGB profiles are what you use with normal inkjet printers – even if they do have CMYK inks. The i1Publish version of the kit is needed if you want to make CMYK and device-link profiles (not something I ever need here)
The new spectrophotometer is distinctly bigger than the old i1Pro2

The base plate, with calibration target shows the different footprint.
It even has holes in it, should you feel the need to screw it to a desk. The calibration targets are matched to particular spectrophotometers, so this isn’t only an anti-theft feature. like the locking slot on the spectro.
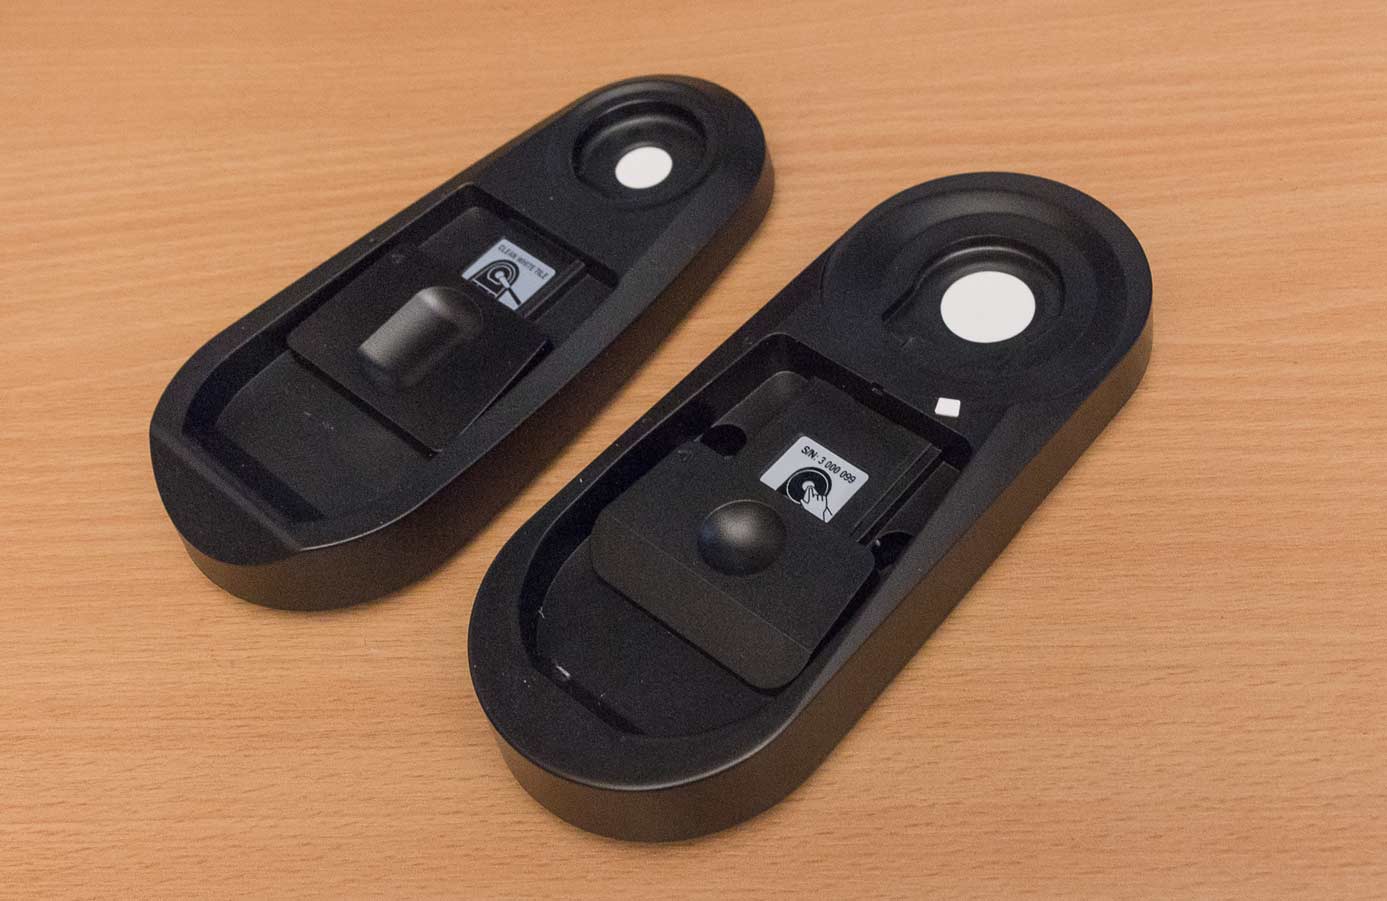
The same USB connector, but a security lock hole is added.

Here’s the normal measurement head for the i1Pro 2.
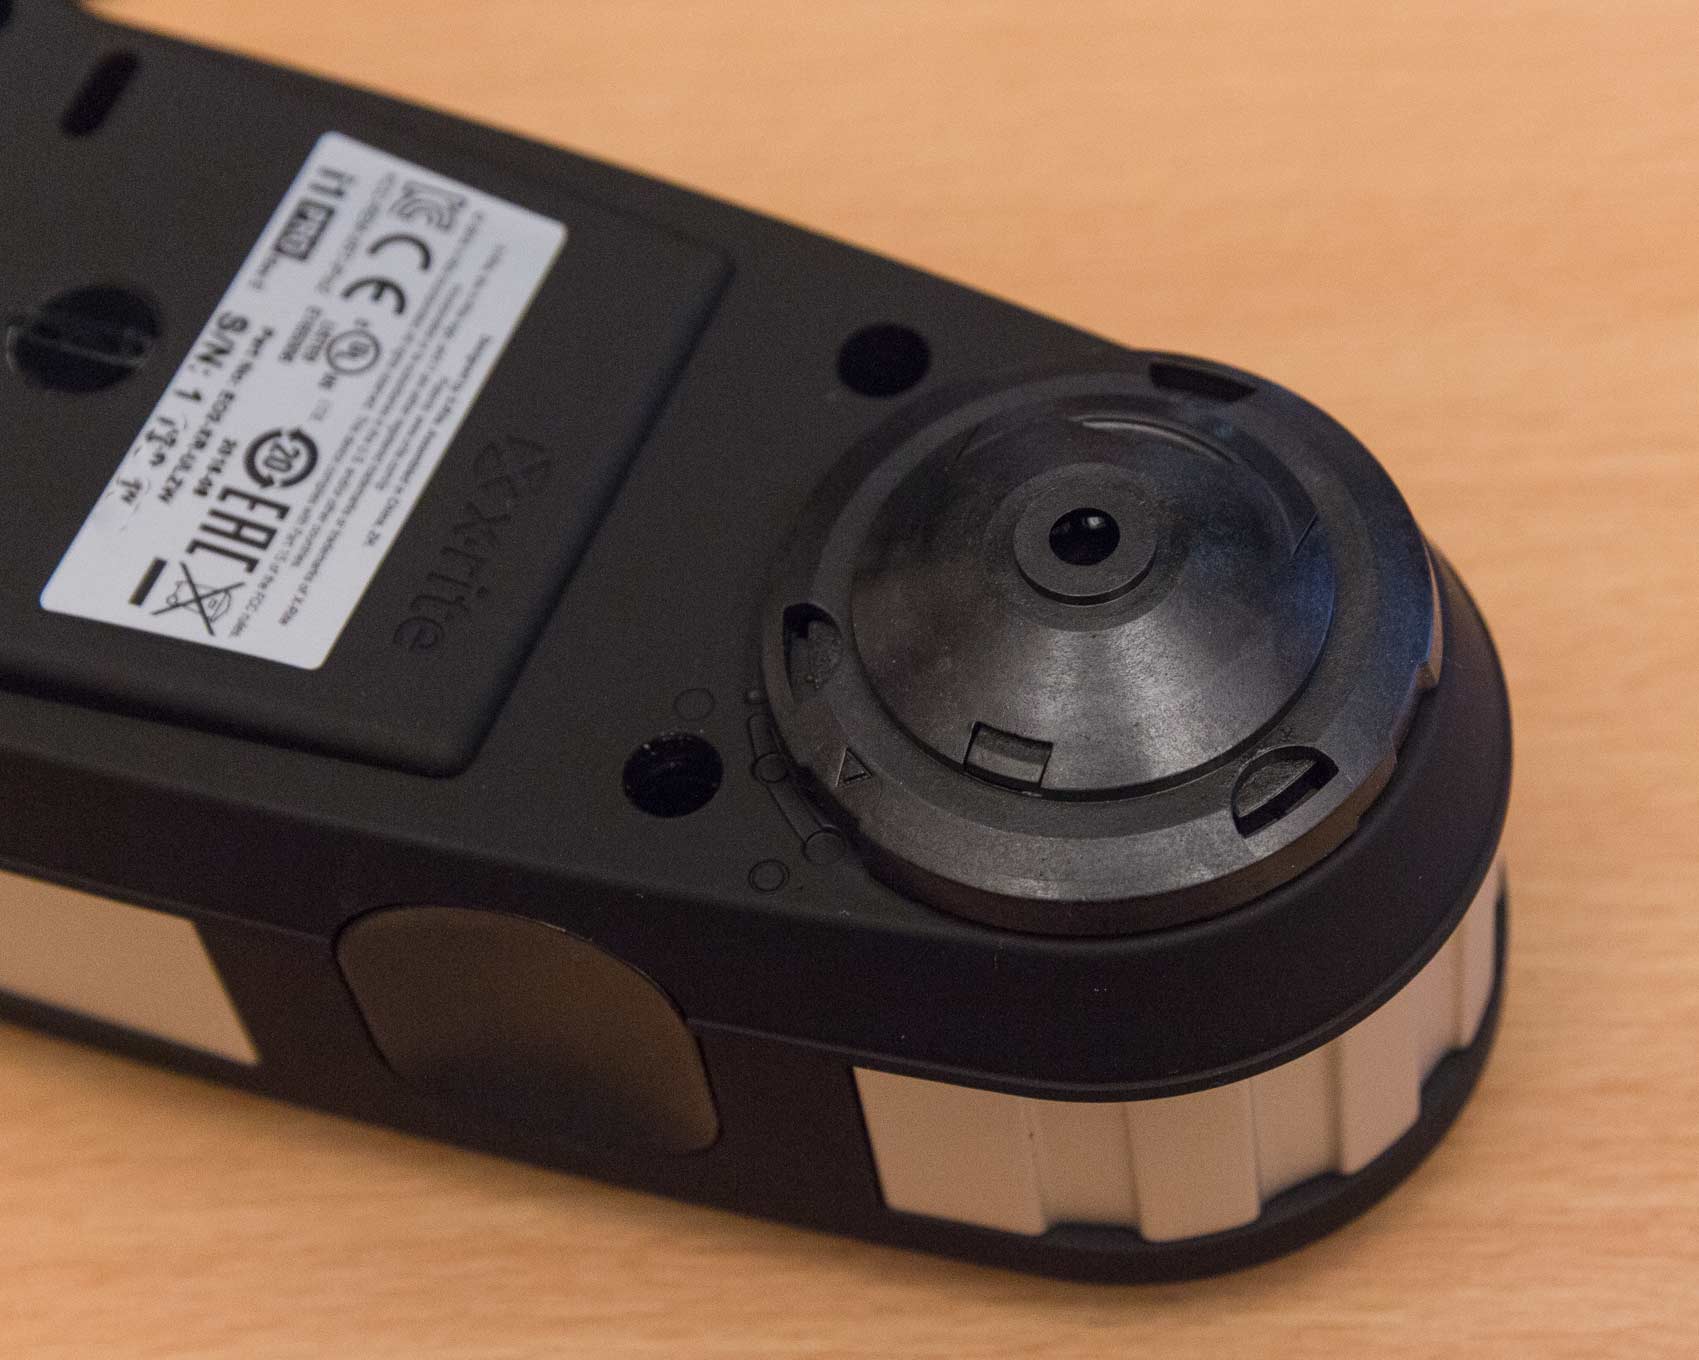
The aperture for the i1Pro 3 Plus is much larger.
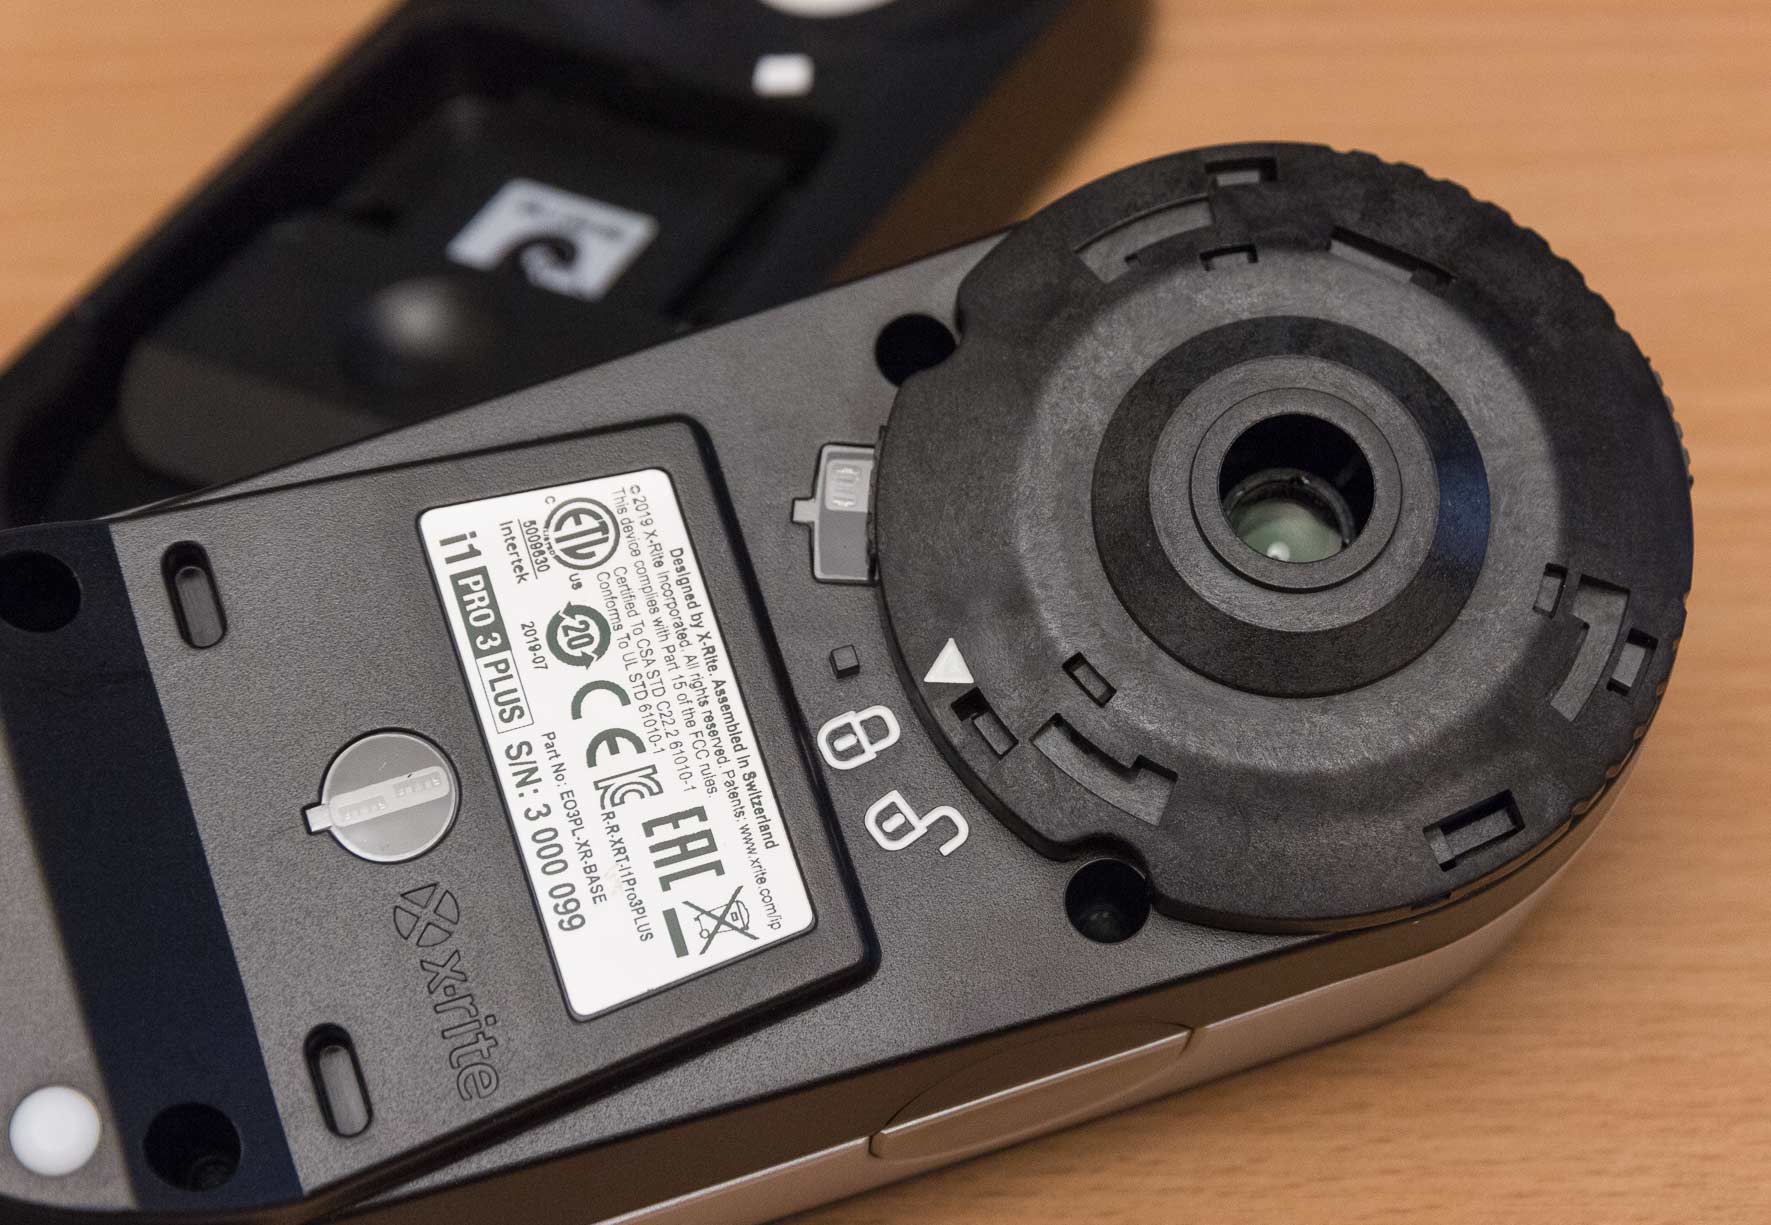
Note the small sensor aperture just above the lock symbol. This is how the device detects which measuring head is fitted.
Removing the normal measuring head shows the measurement unit (centre) and the light reflecting box, which illuminates whatever you are measuring (for reflective measurements)
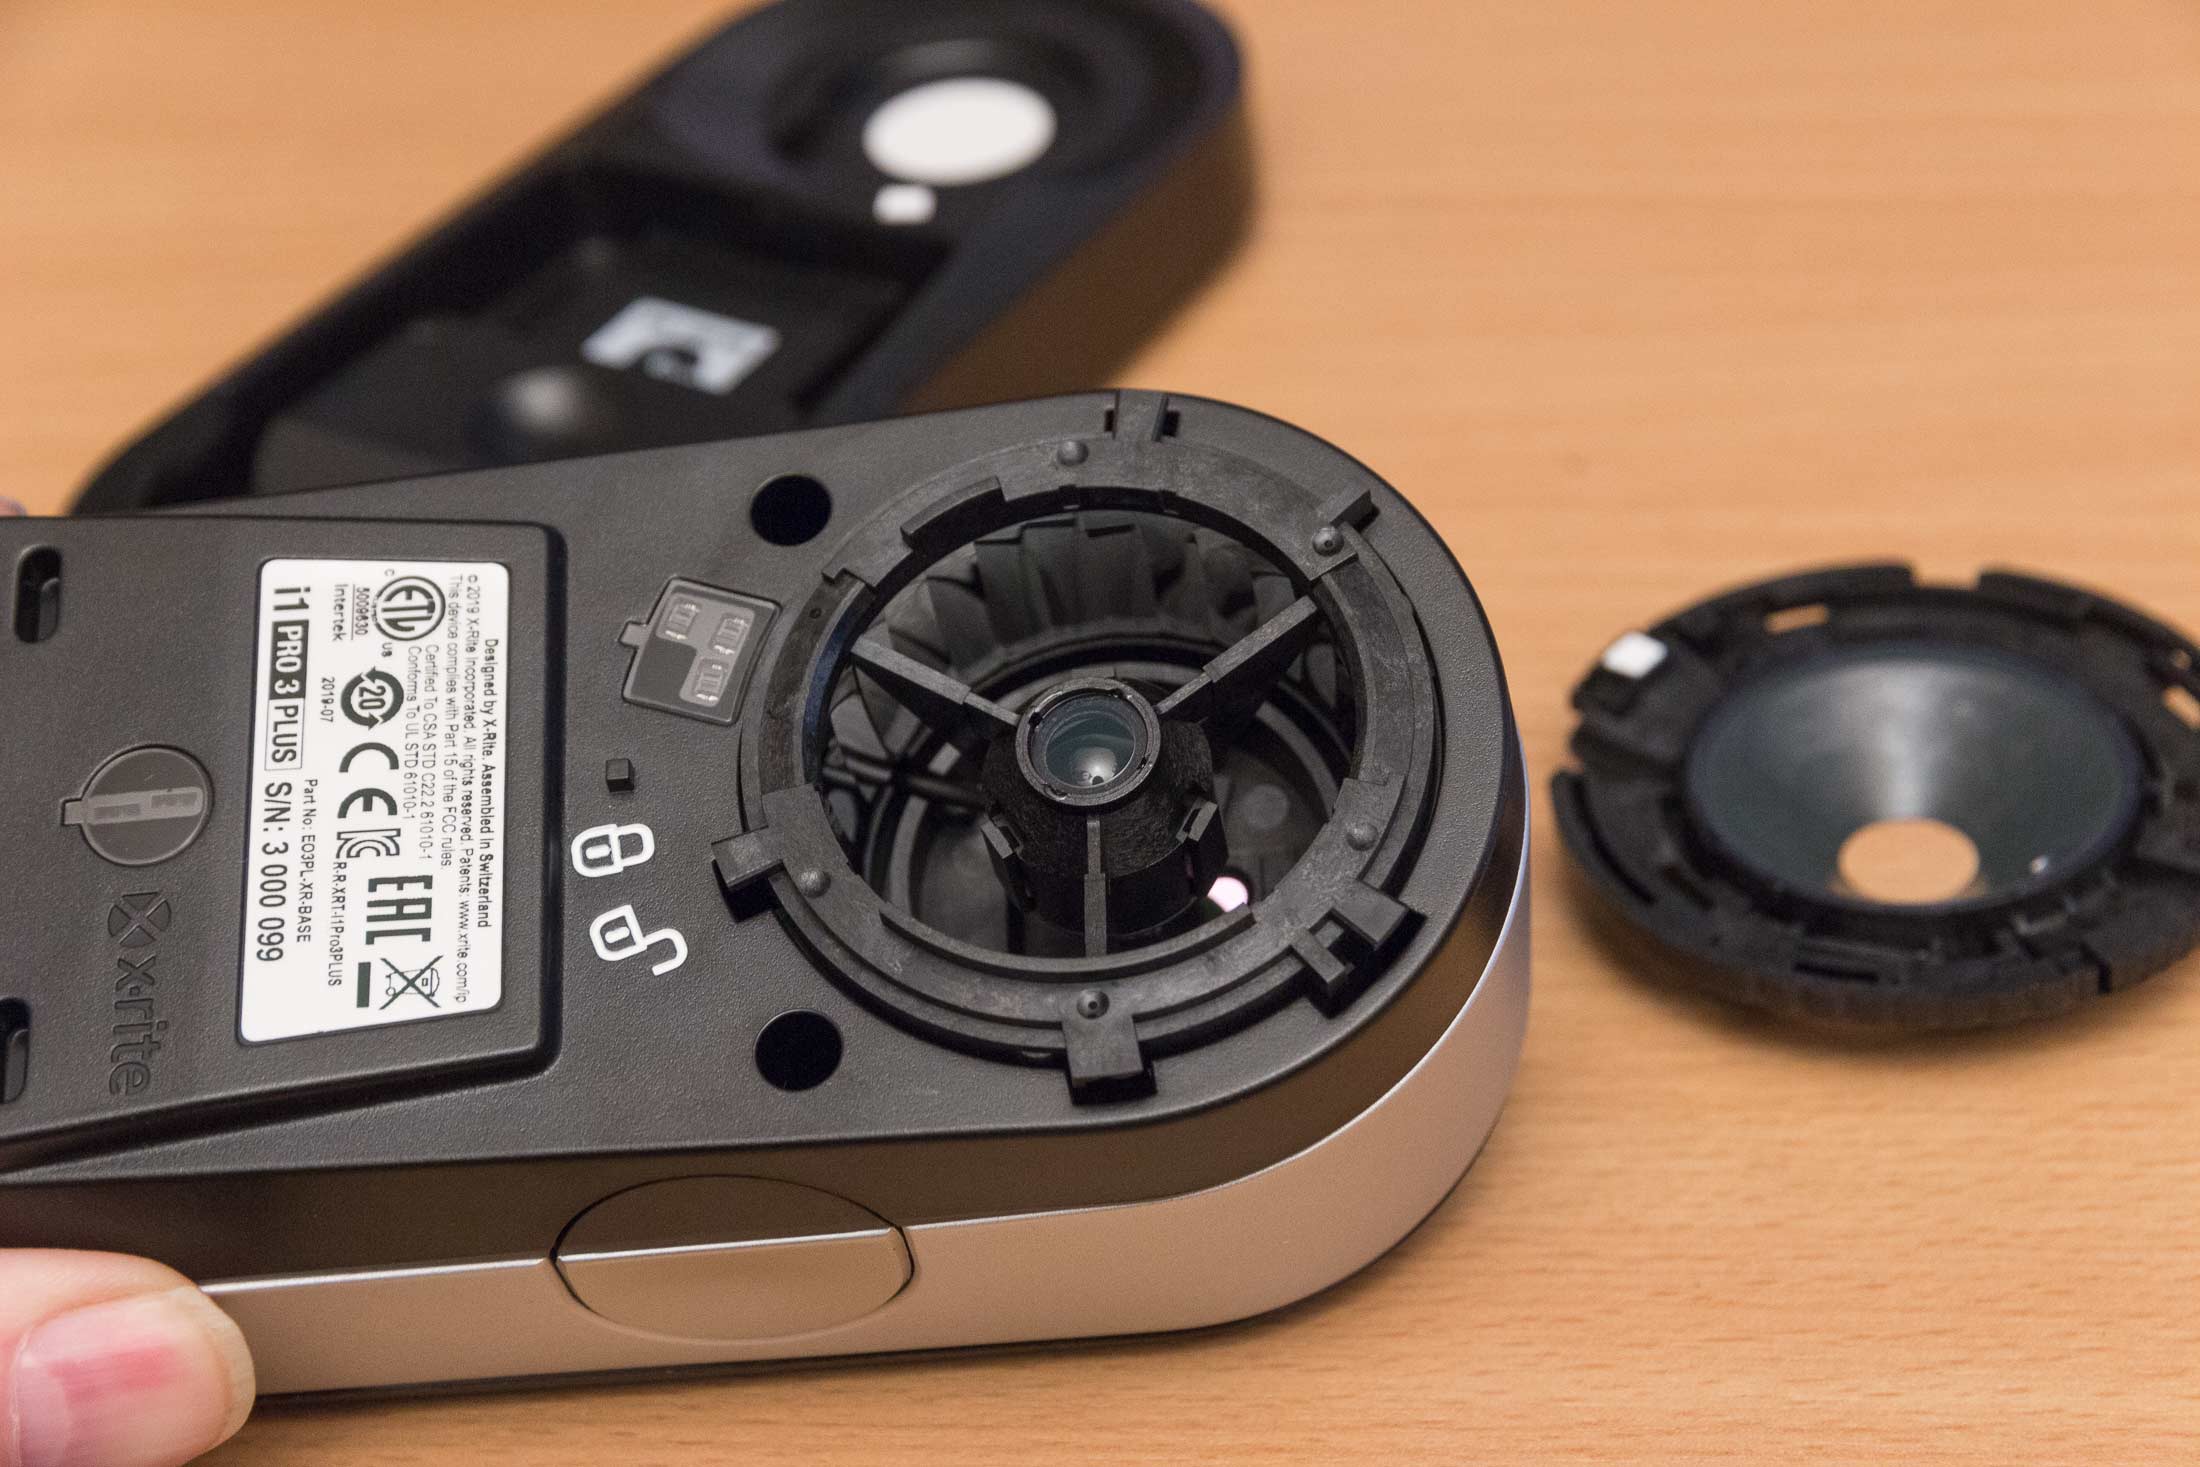
The normal measuring head has a thin glass cover to keep out dust.
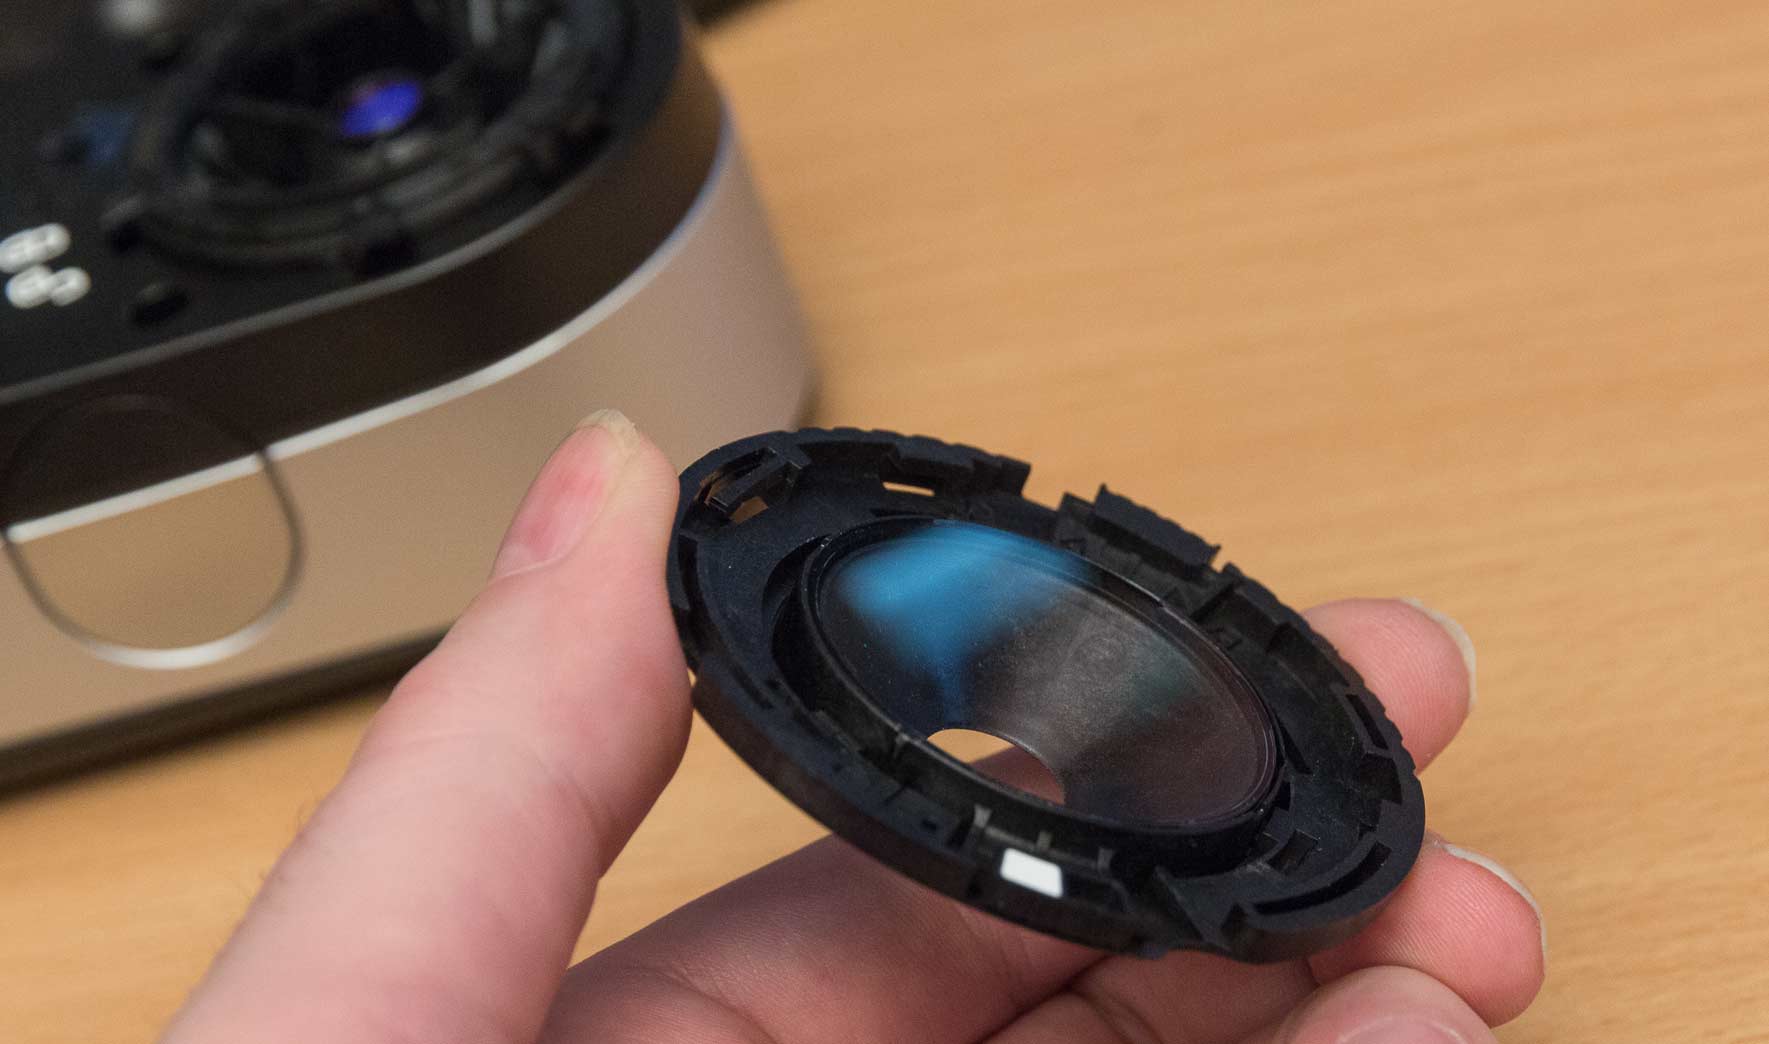
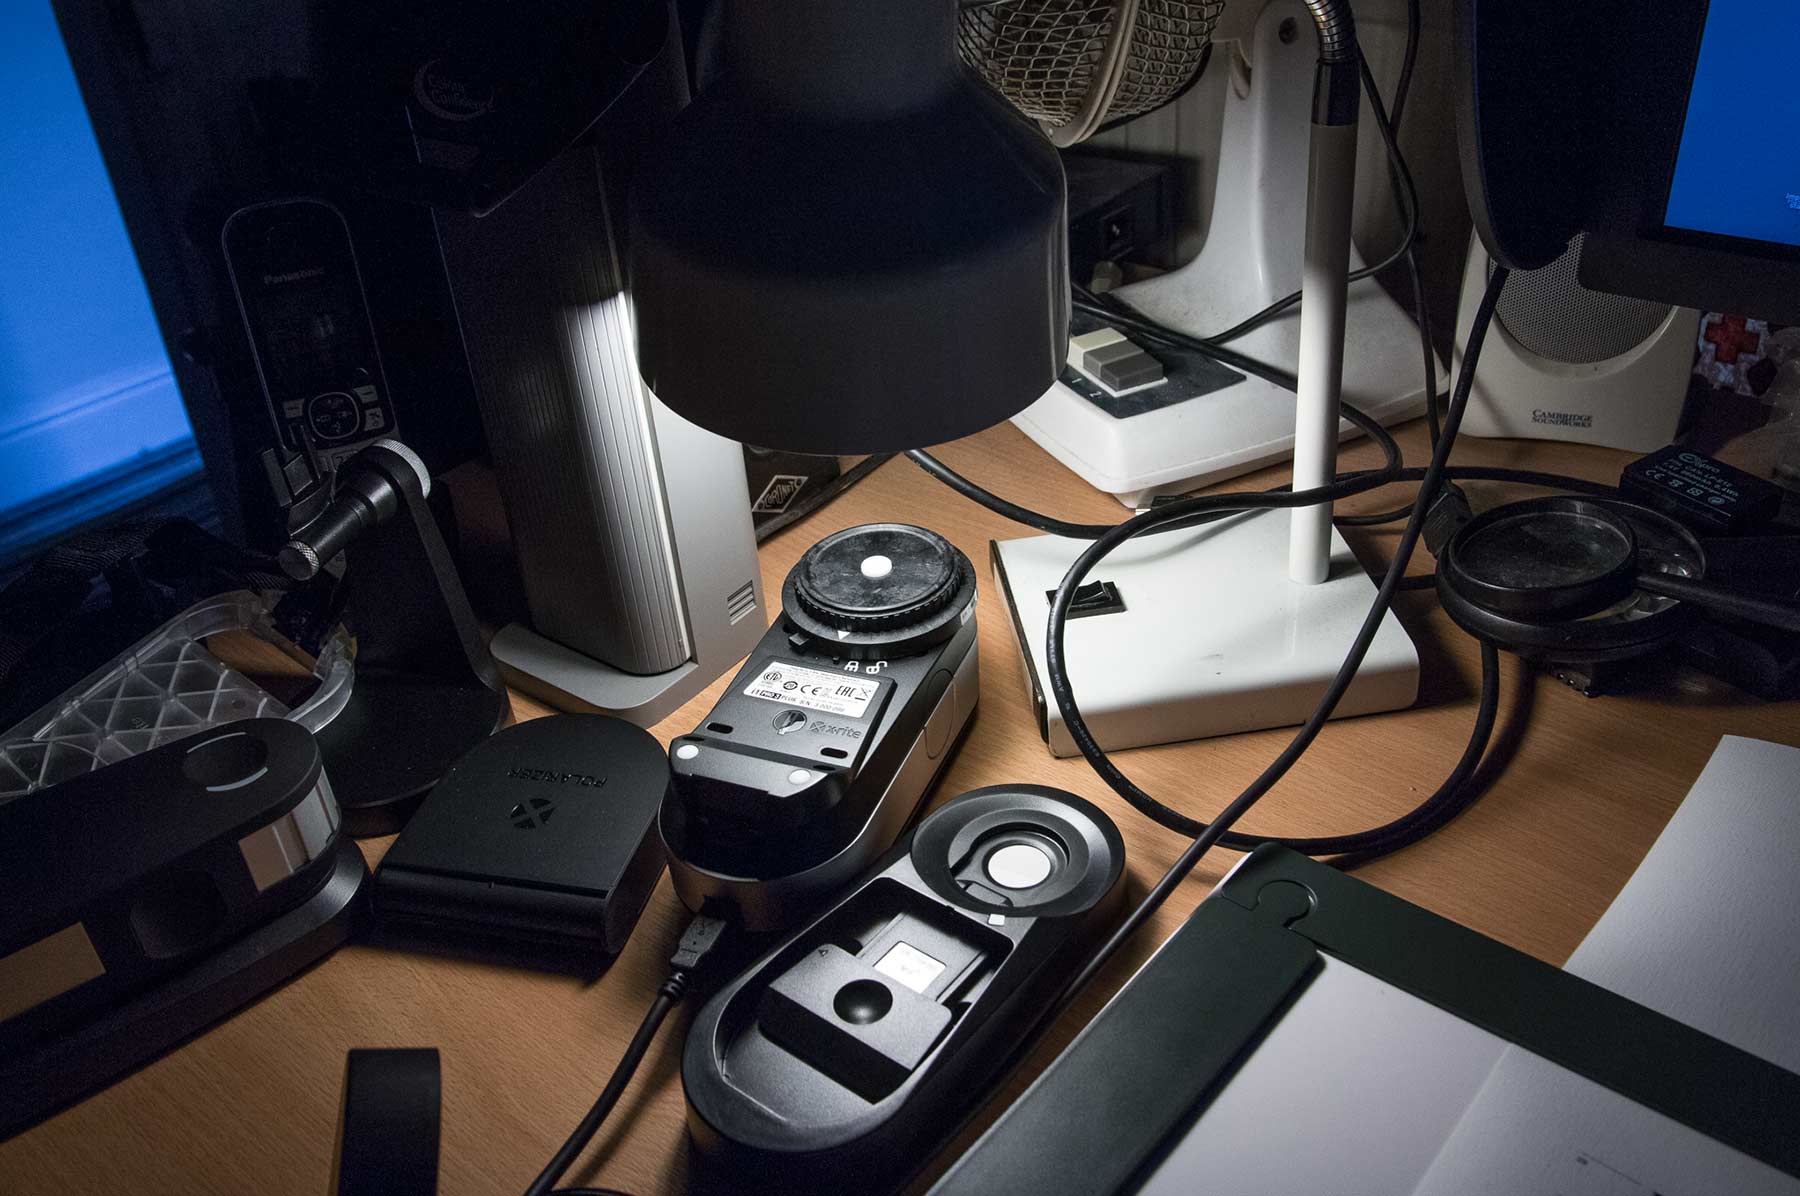
Here’s the spectro with the polarising light measurement head and the ambient light measurement diffuser.
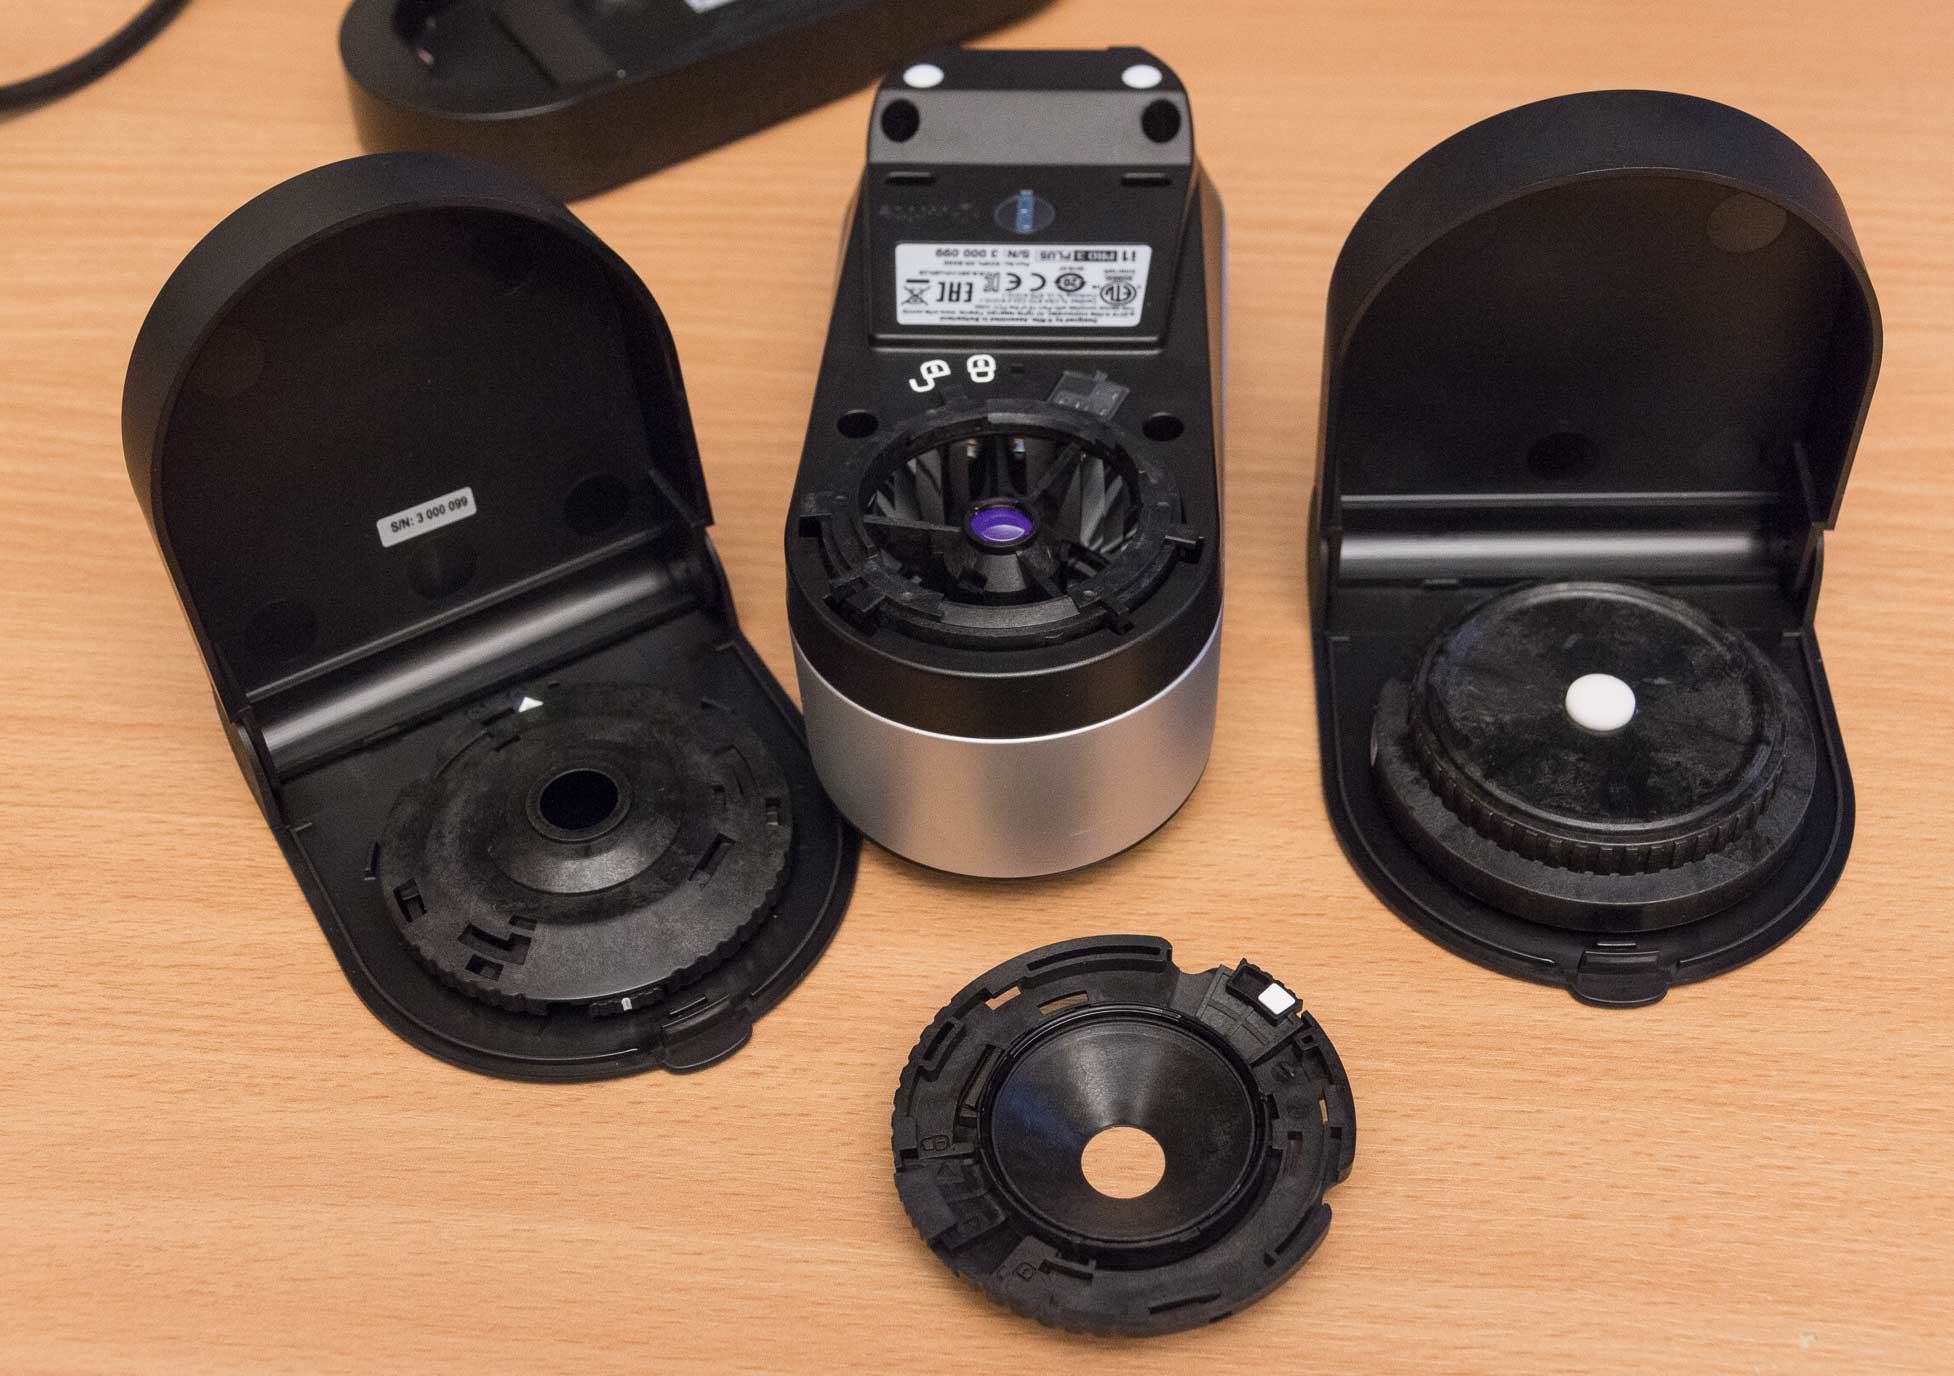
The diffuser lets you measure ambient lighting for profiling purposes.
Note that I’ve also used this for measuring lighting CRI with some free external software

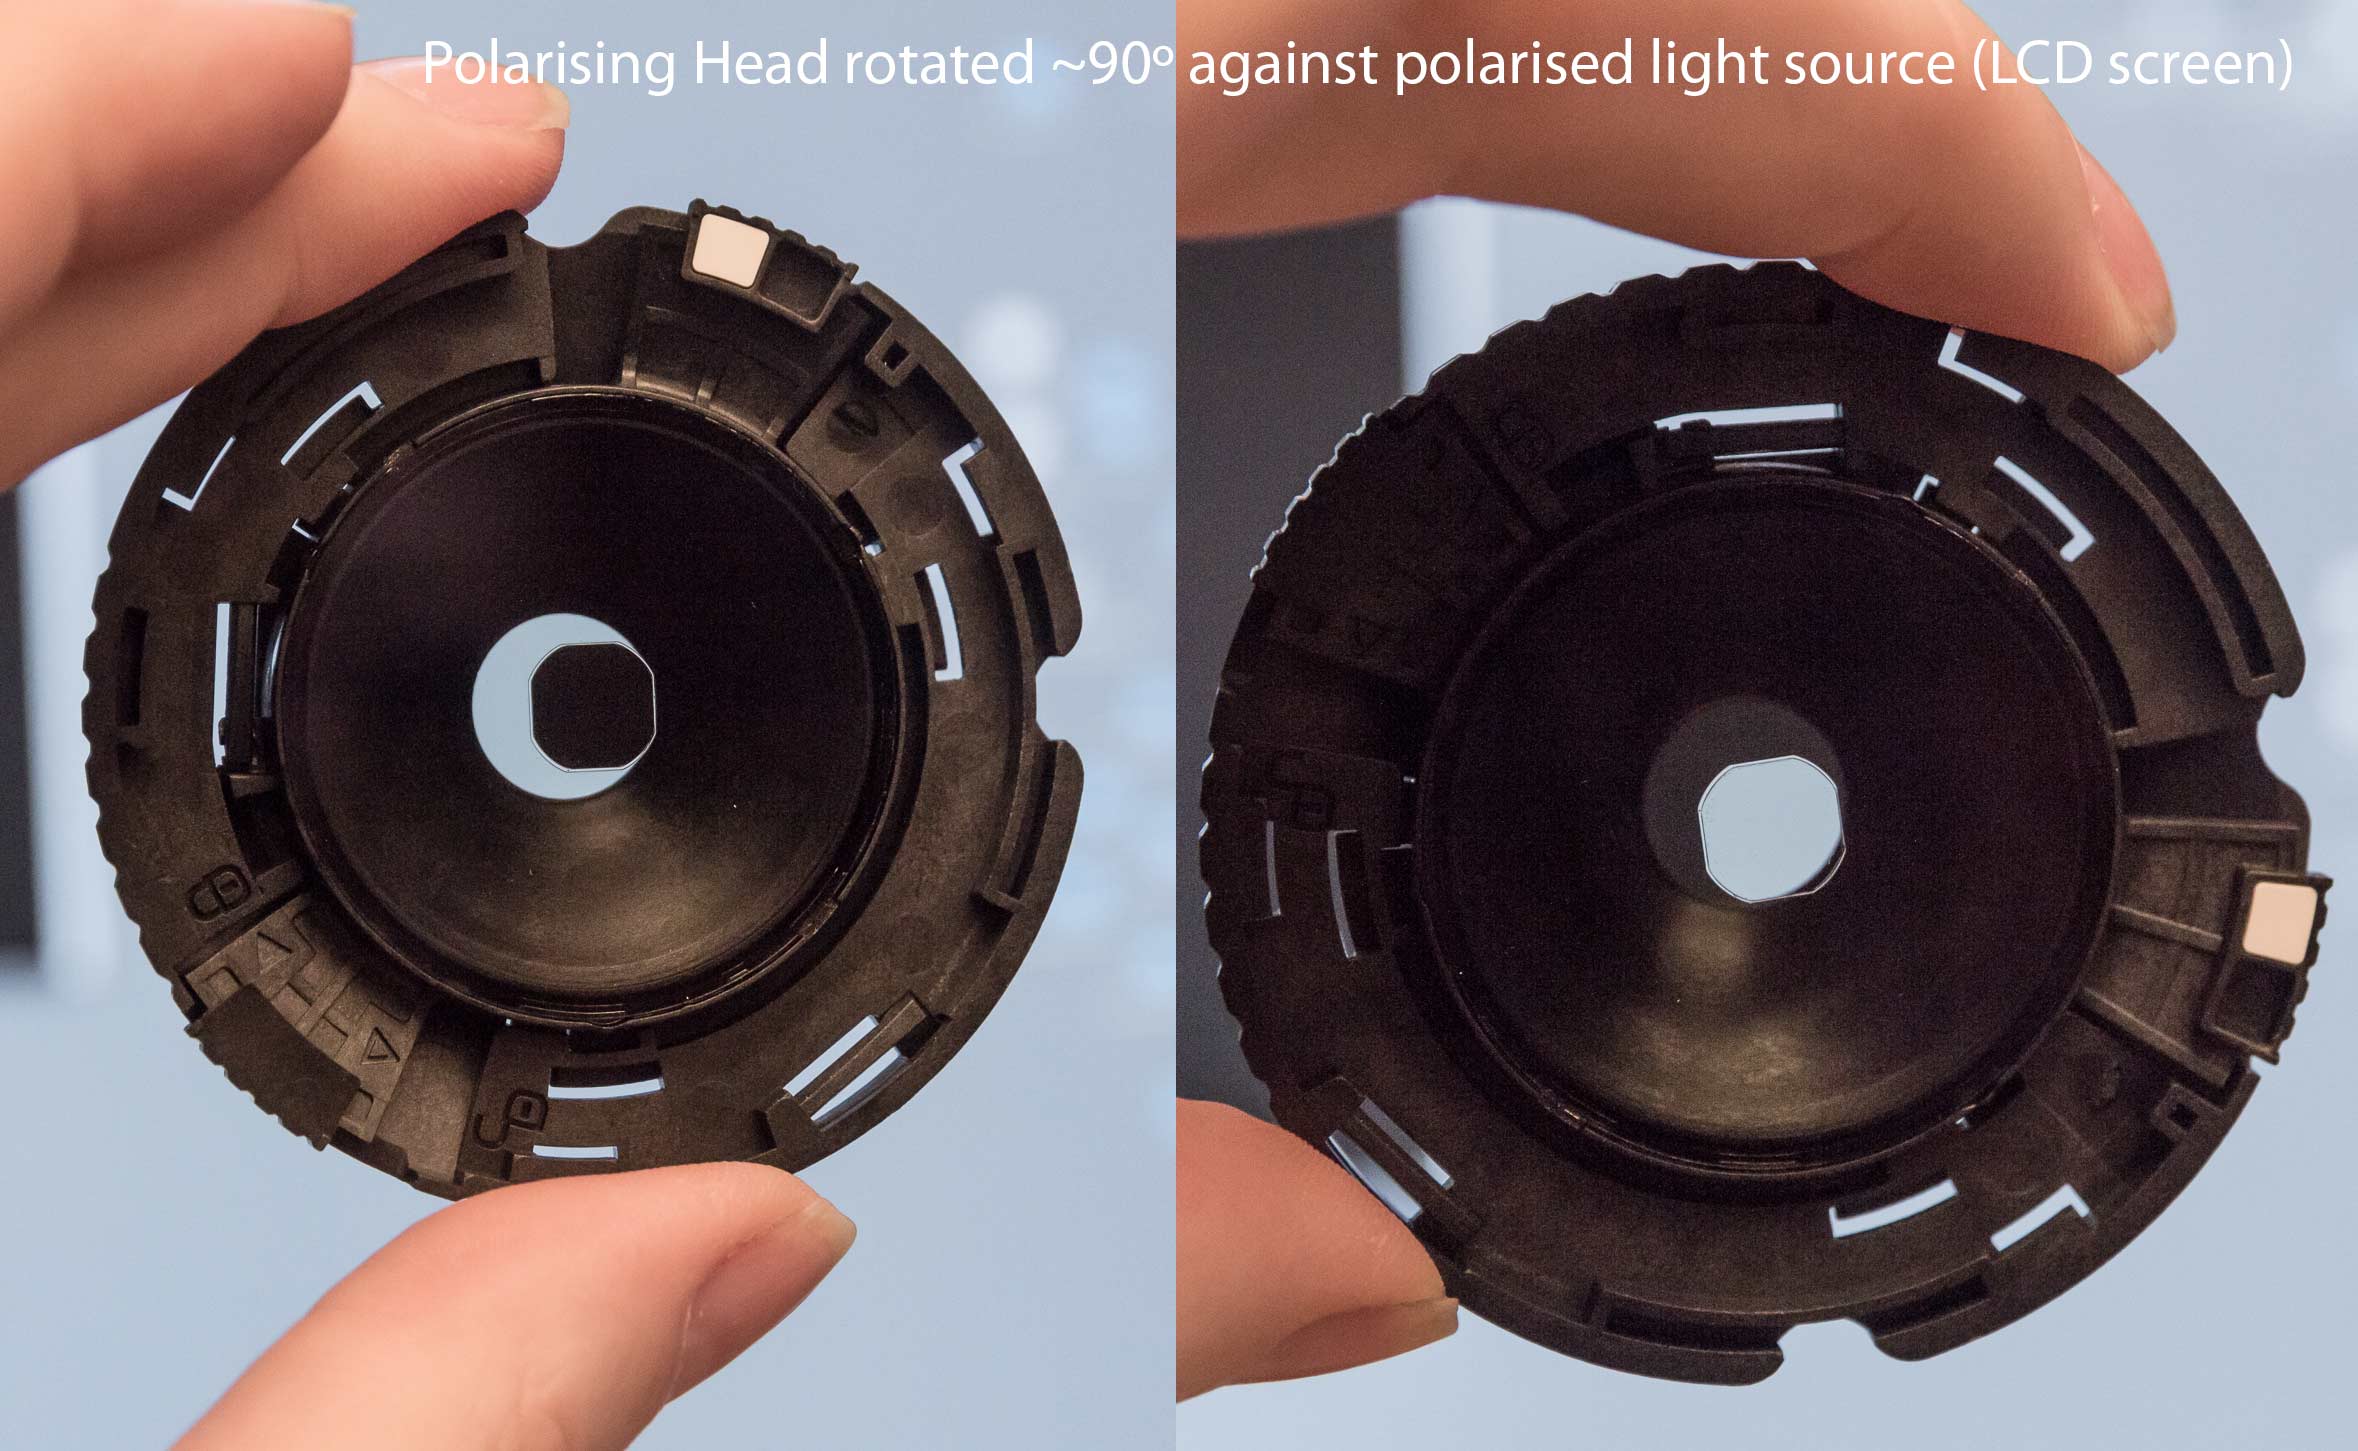
The polarising head has a glass filter with polarisation for outgoing light, and a centre patch with crossed polarisation for light coming back into the device. You can see this by looking at a source of polarised light such as an LCD monitor, and rotating the measurement head.
Everything about the new kit just feels heftier. Even the base of the support stand for projector profiling is a big chunk of steel.
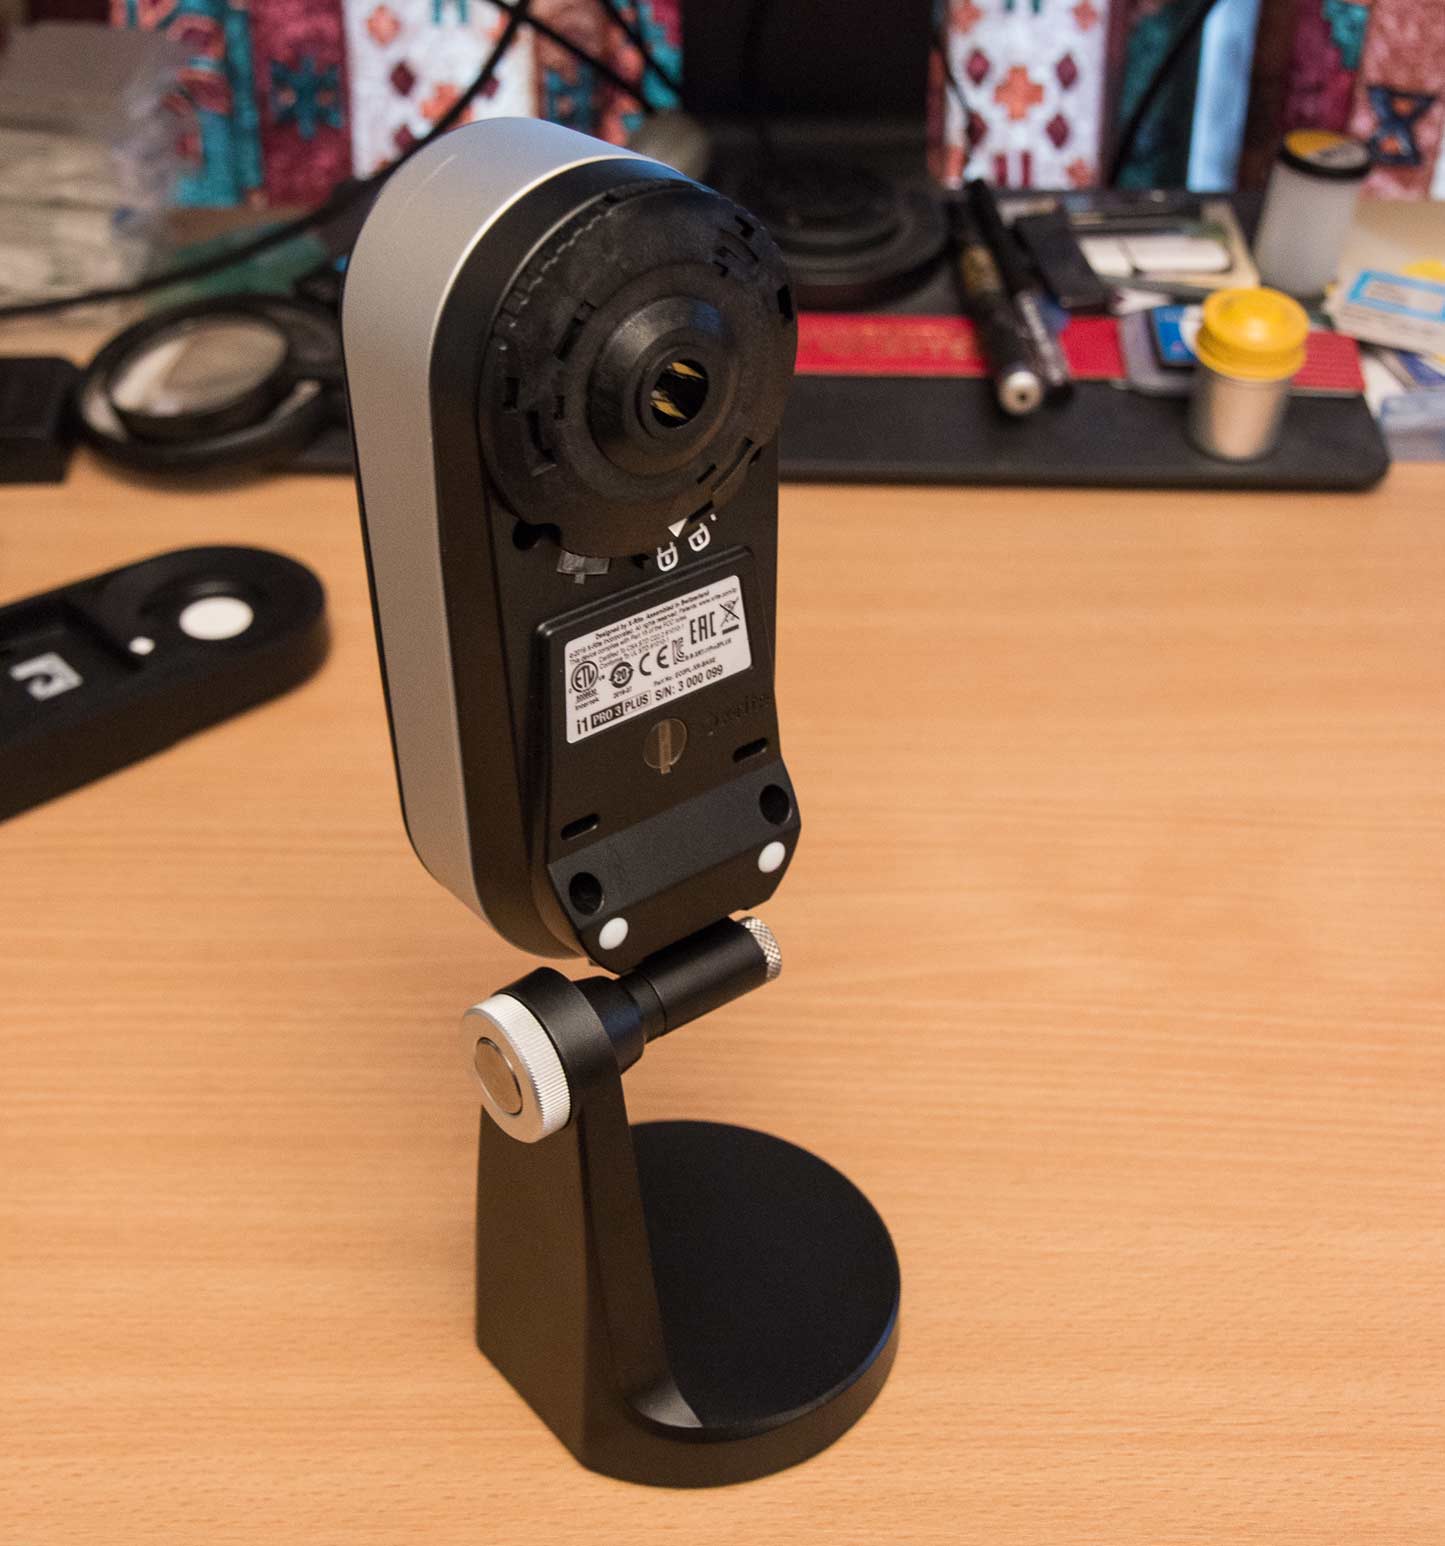
This isn’t going to blow over in the wind…
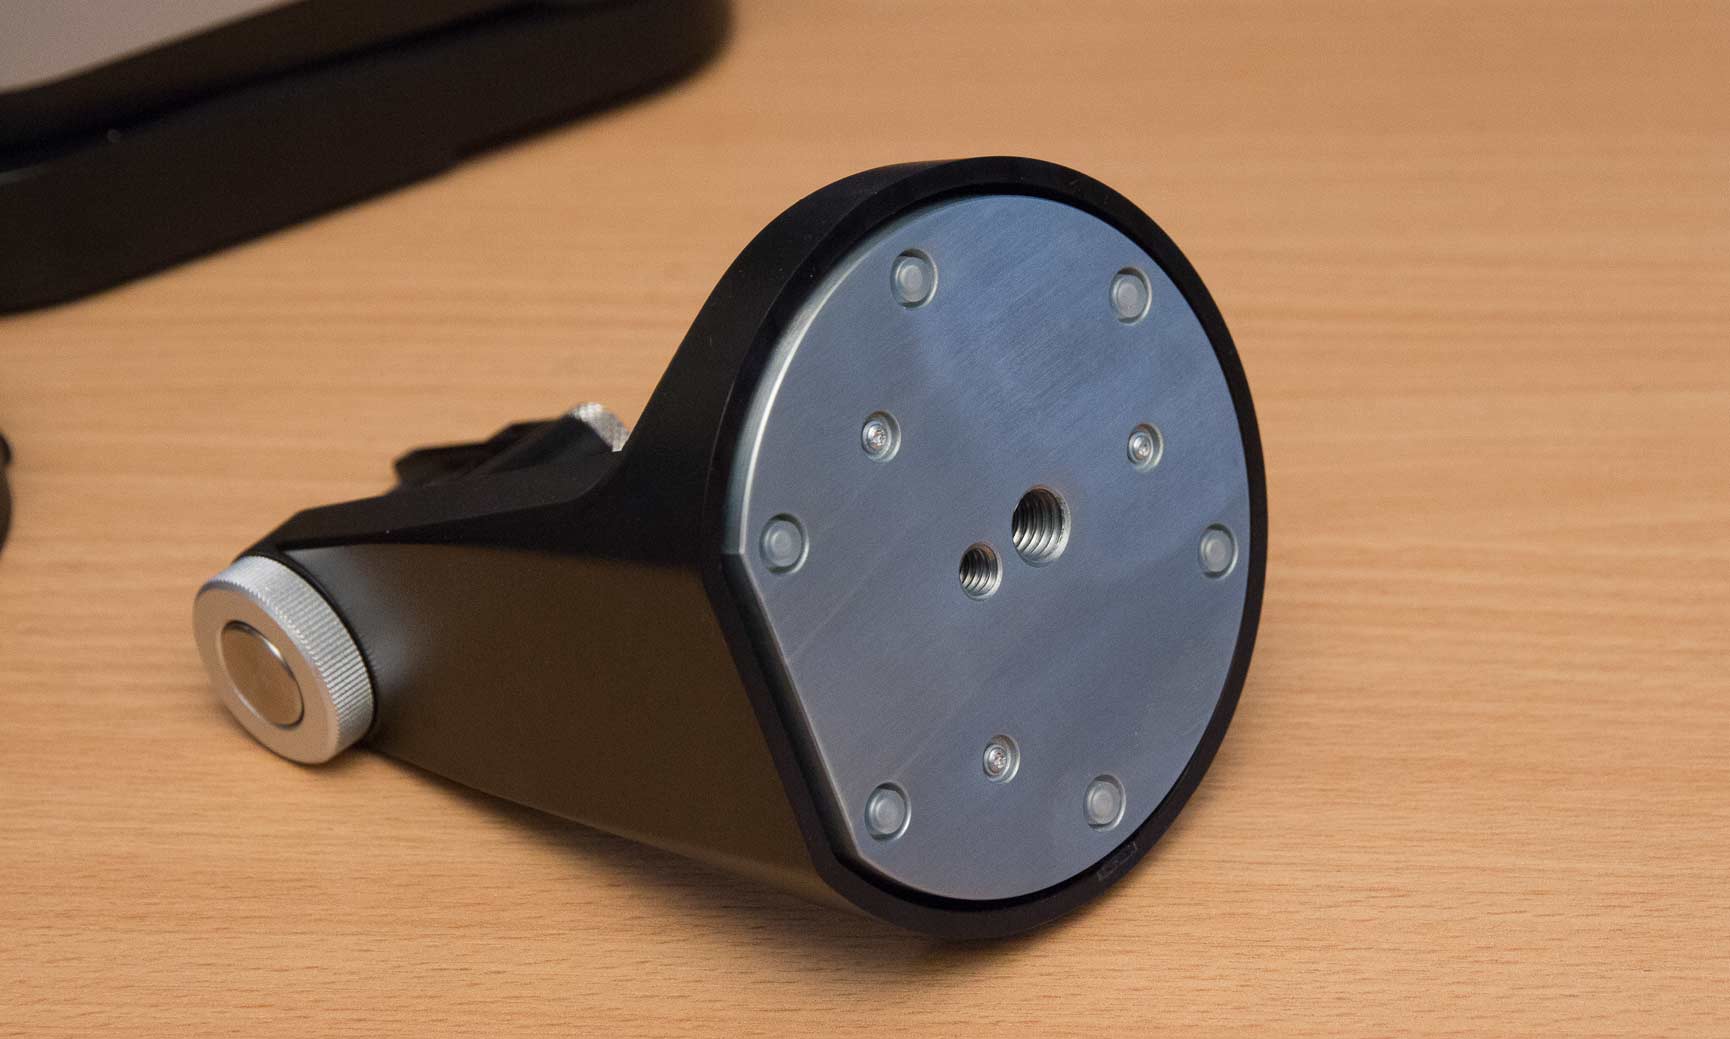
There is a spot measurement holder, which clips into the back of the device.

The two fit together for actual measurement.
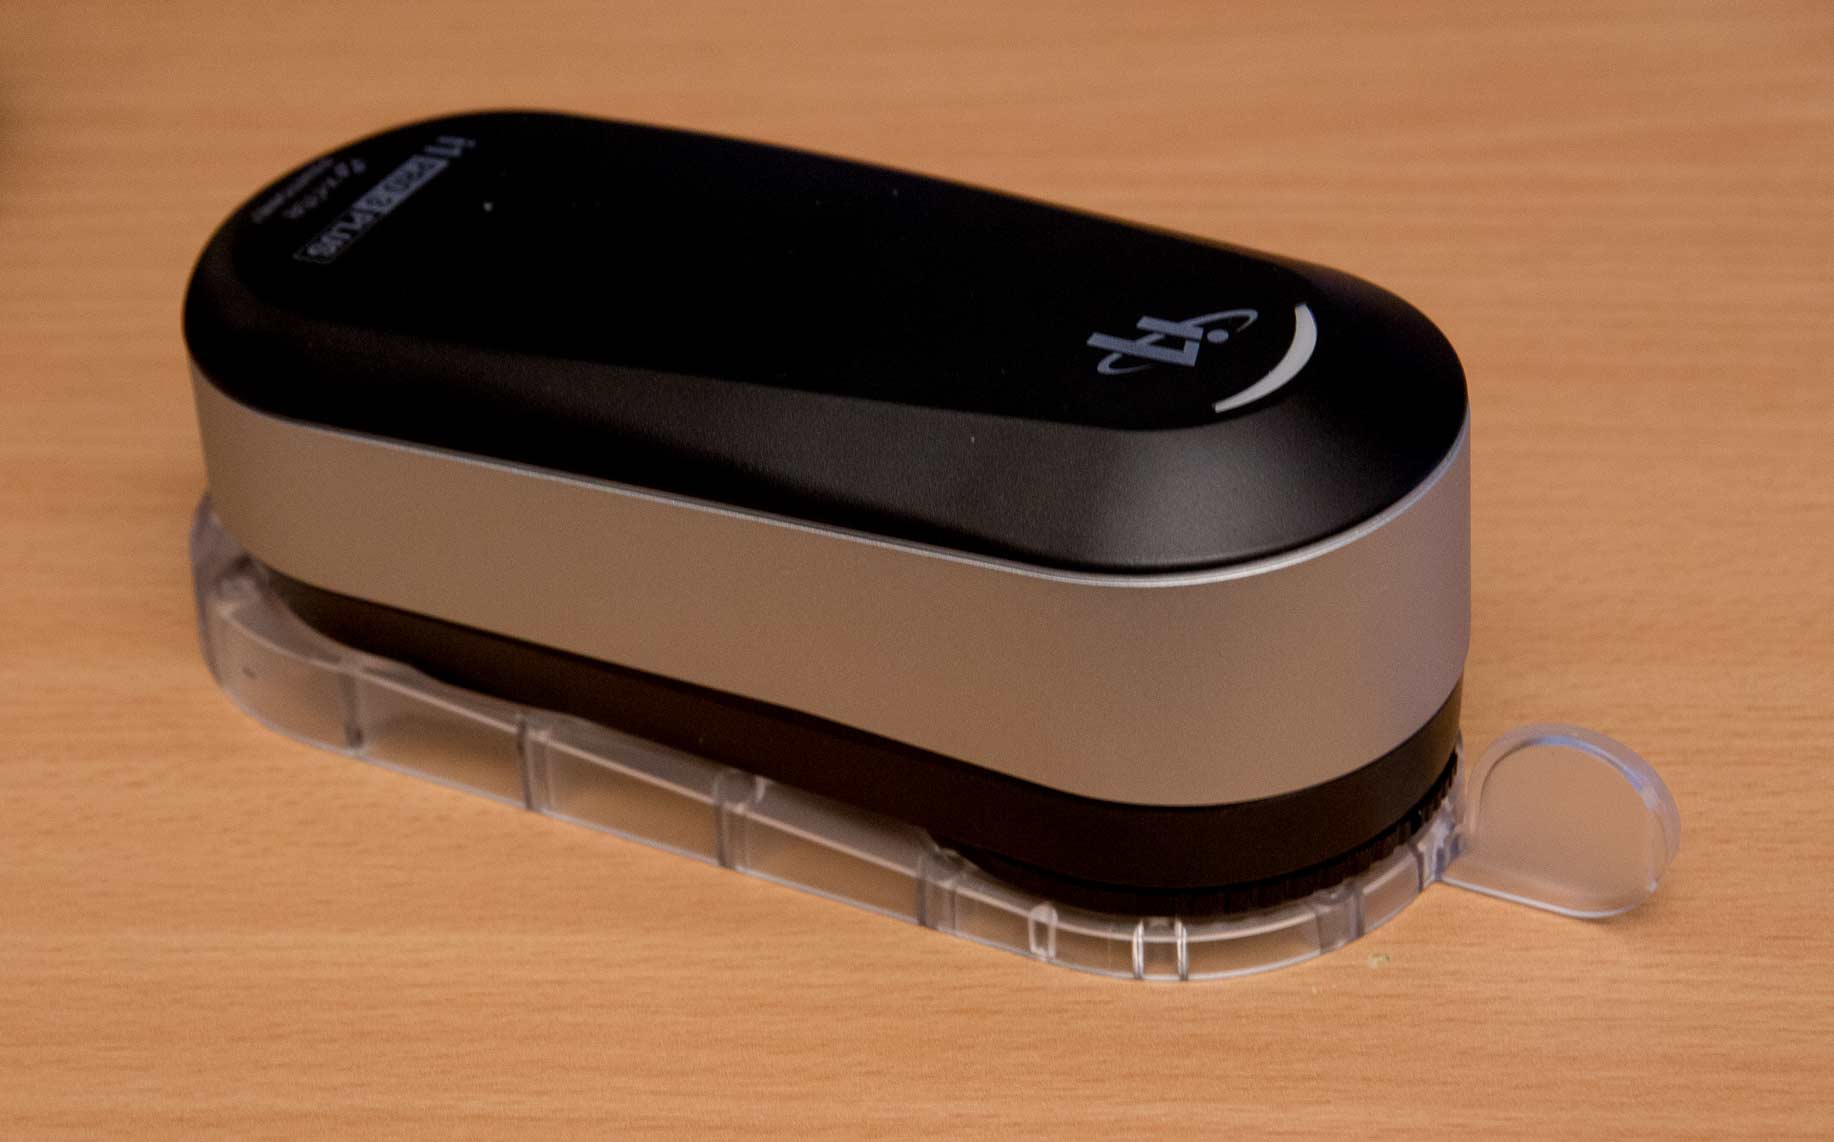
For screen profiling/calibration there is another holder that has a counterweight, enabling you to hang the i1Pro over your screen.

As you can see here though, the i1 Pro 3 Plus is simply too large for my laptop screen, it’s actually much easier to tip the laptop onto its screen back and let the spectro rest flat on the screen.
In case you’re wondering, the room is lit by a halogen uplighter with a colour temperature of ~2800K, whilst the screen is at ~6500K – I’ll come back to this when looking at light source measurement.
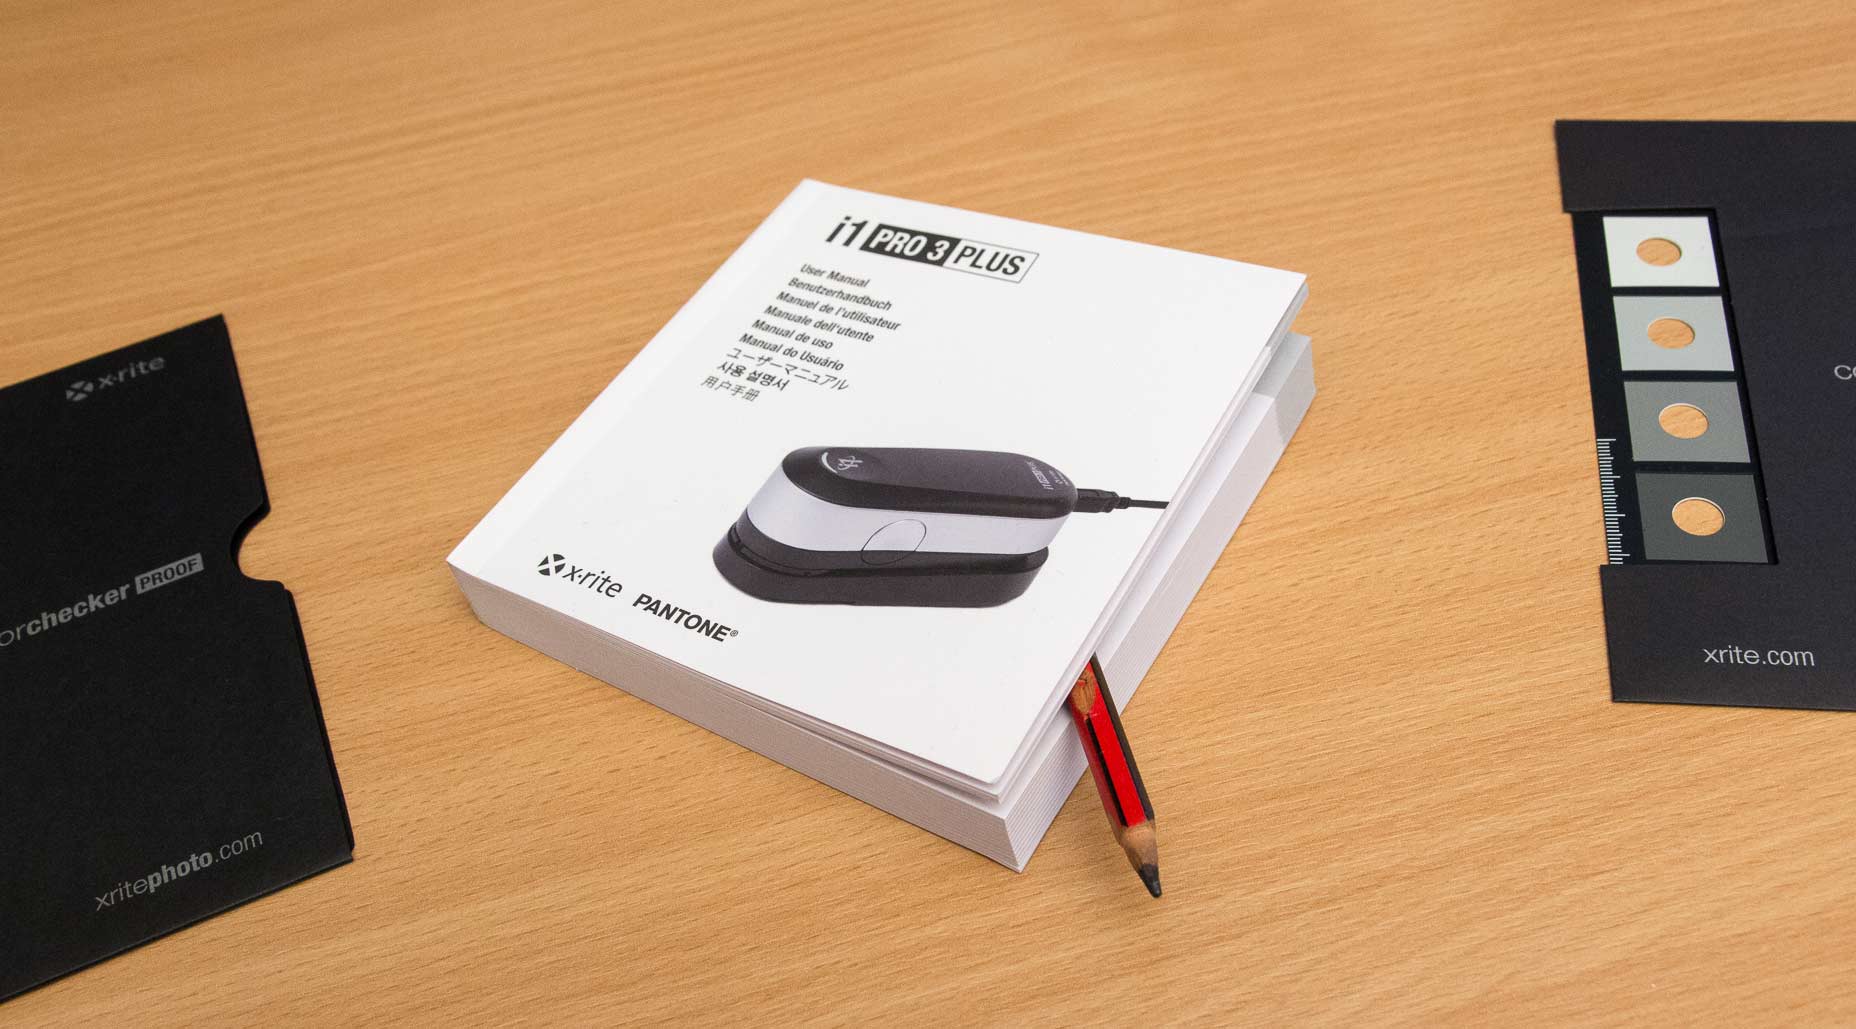
There’s a hefty manual too – although less impressive when you note that it’s lots of different languages (the pencil marks the end of the English section.
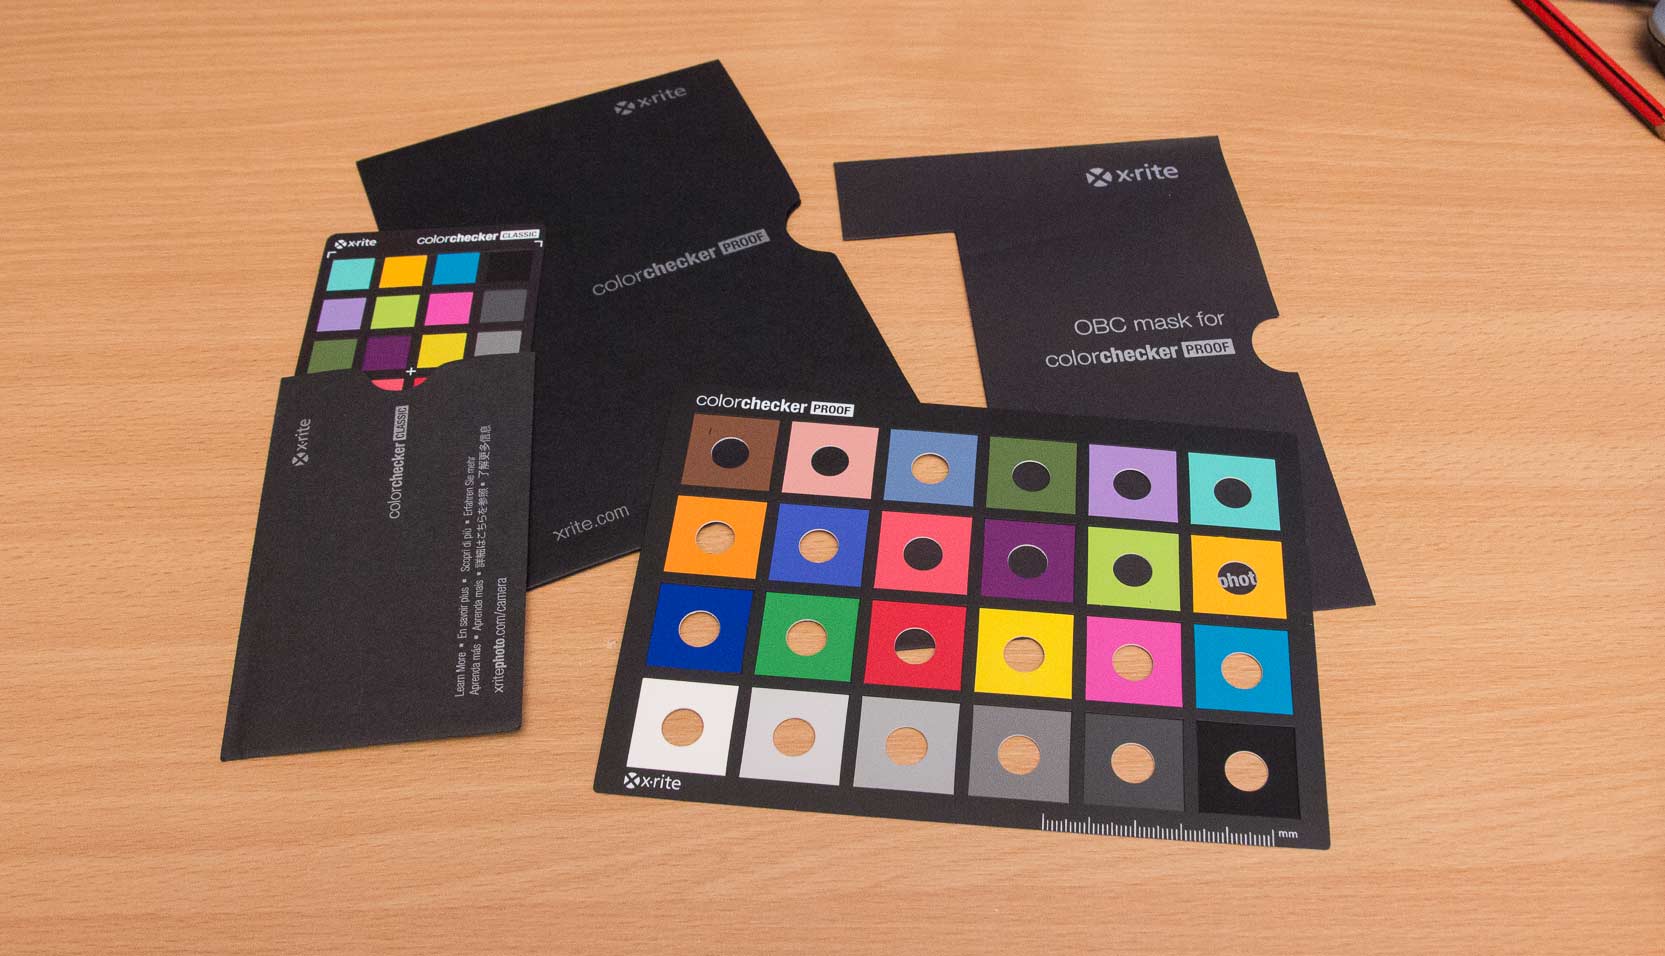
There is a collection of measurement targets.The small ColorChecker card can be used for camera profiling and general photography.
The larger card with the holes in it is for the ColorChecker Proof function in i1Profiler, which I’ll show later.
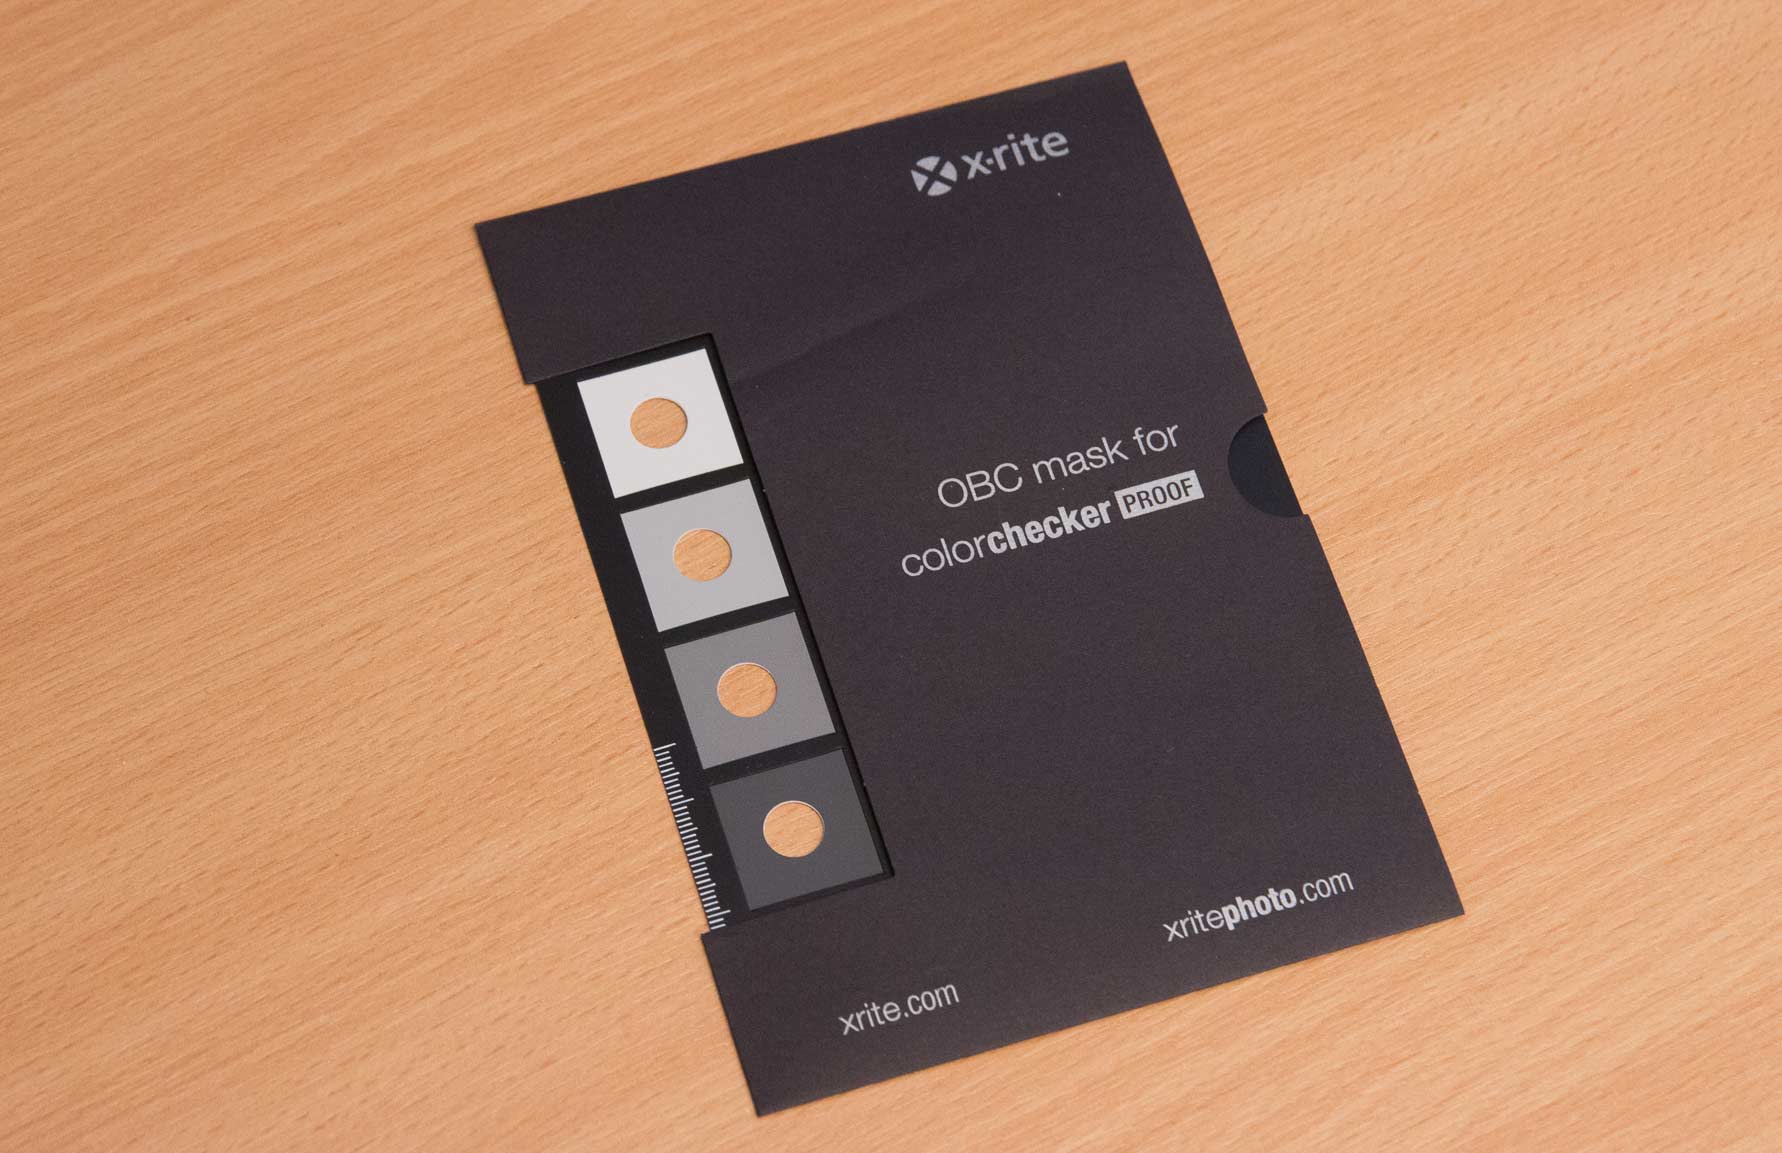
There’s also a mask for use with the OBC profiling workflow (can compensate for the presence of optical brighteners in papers).
For measuring targets, there is a new design of backplate, which has three steel bars to hold your profiling target in place.

These steel bars are held in place by very strong magnets on the reverse of the backplate.
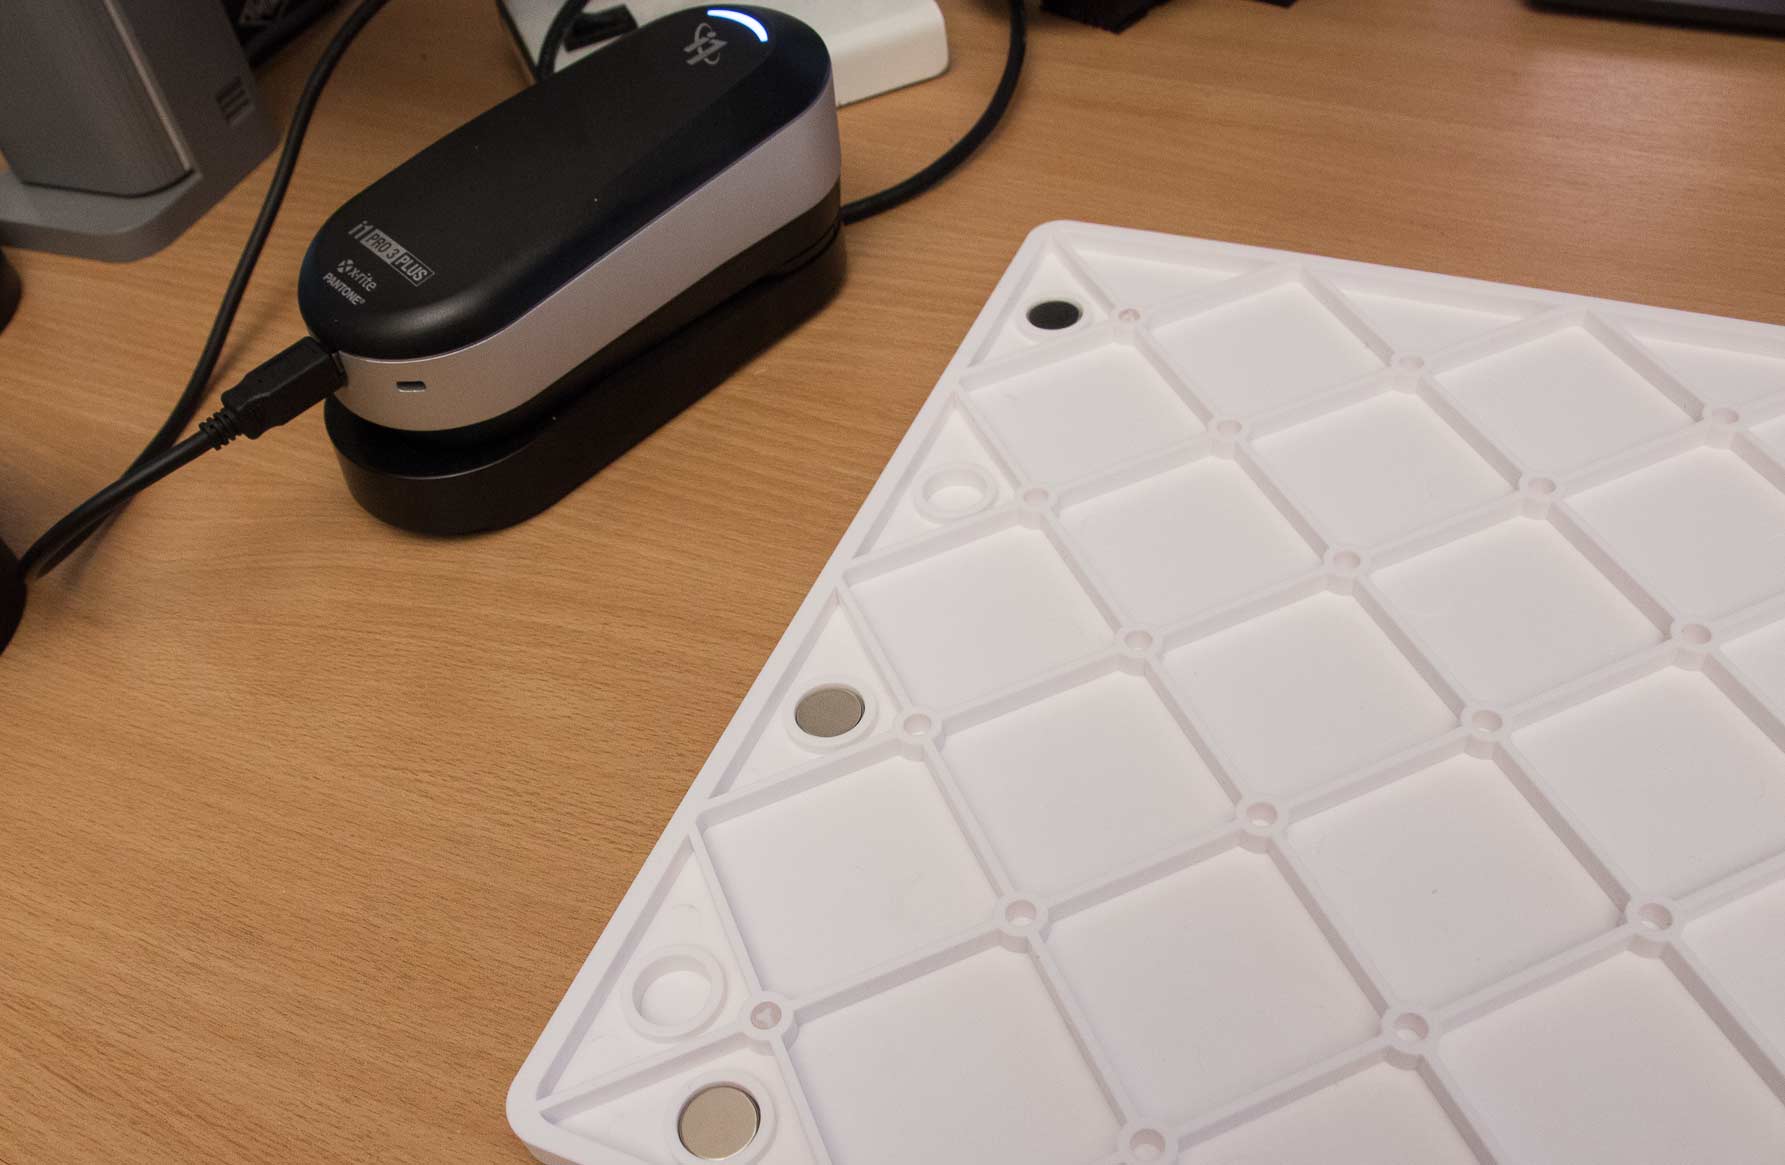
How strong?
Well, keep your credit cards away from them, and be very careful in positioning the steel strips. They snap in place with a force that broke two fingernails before I mastered the technique.
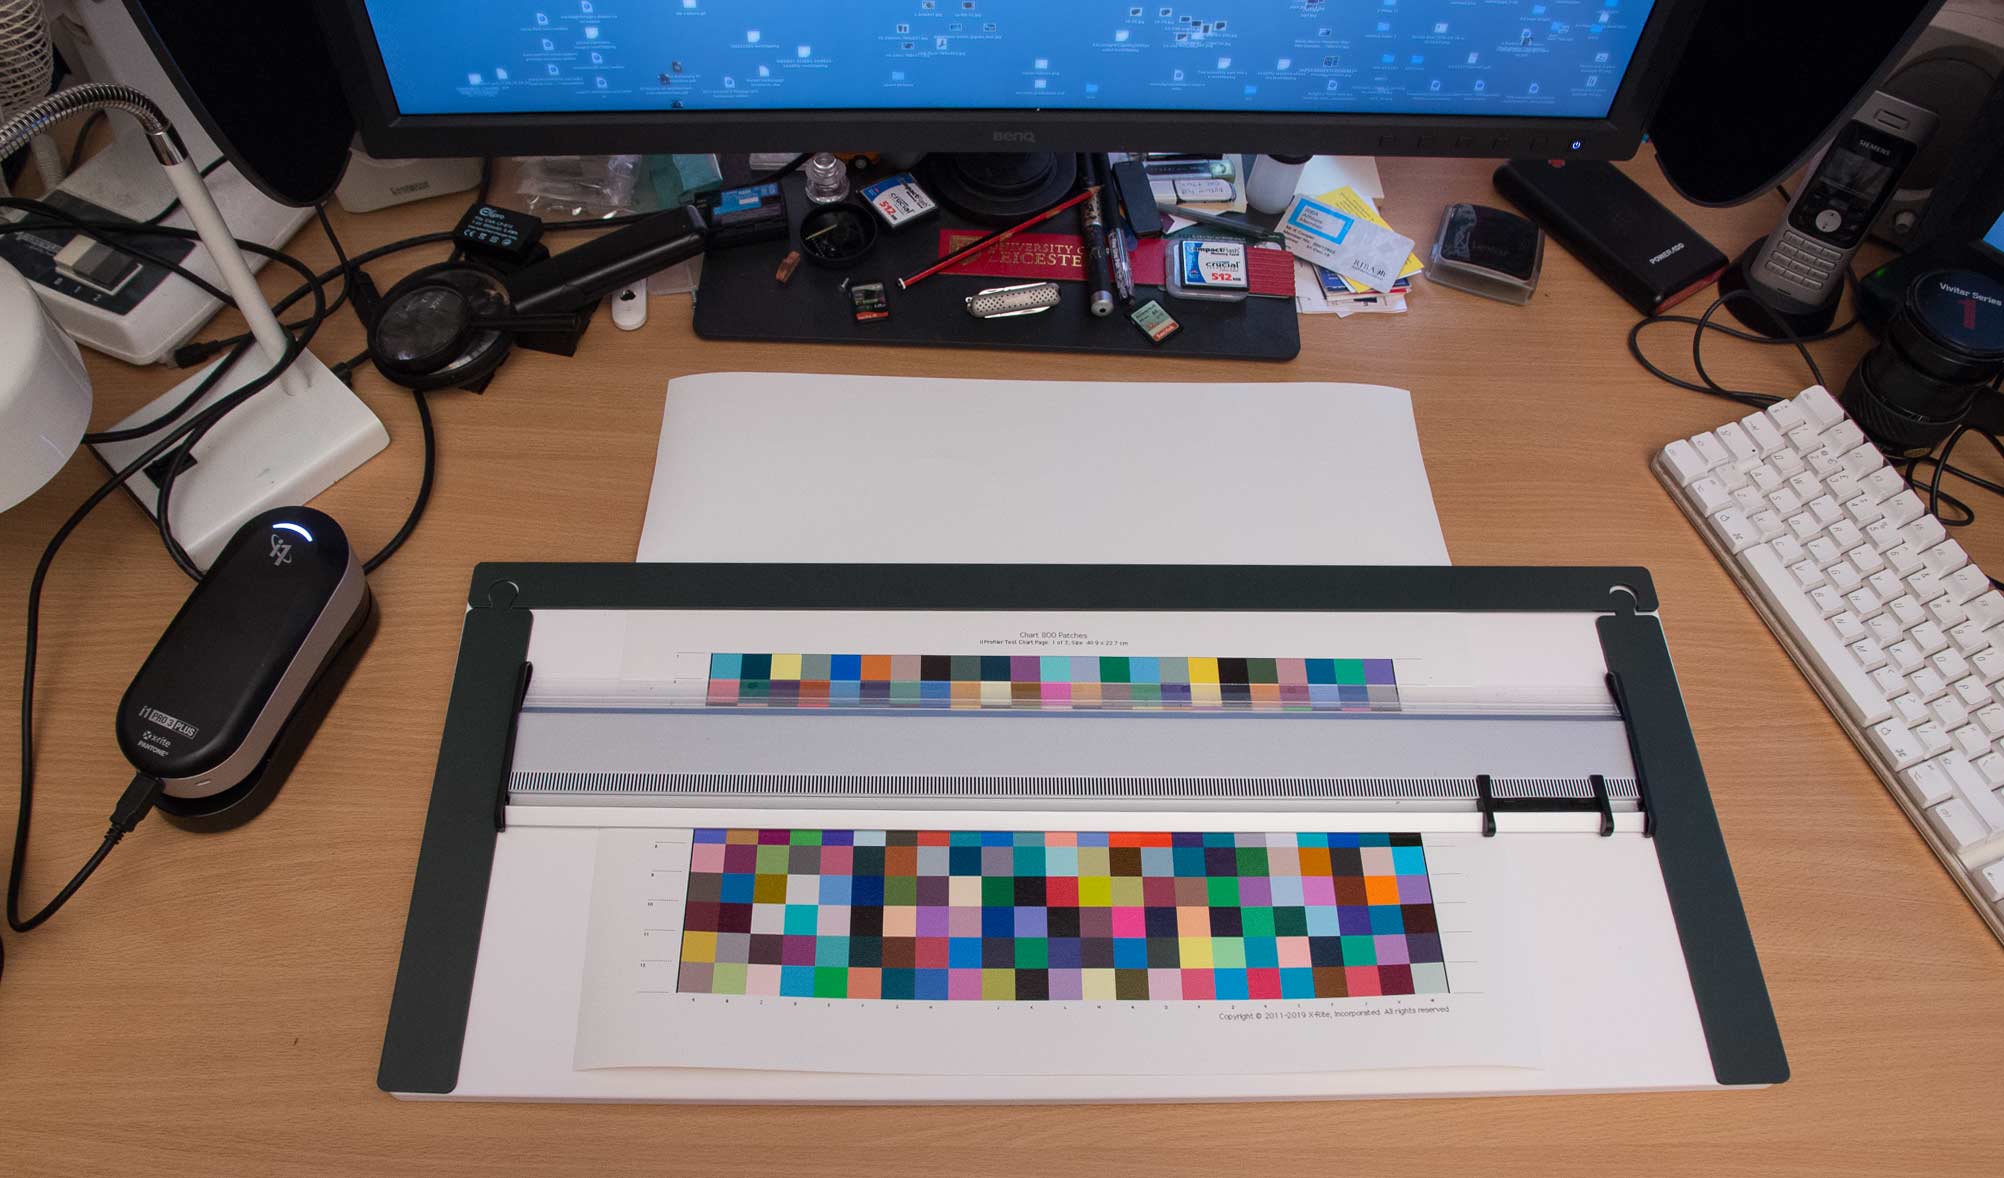
Once in place, the scan guide rail can fit between the side strips and move up and down the target as you scan it.
The stripes on the rail are detected by one of the sensors under the spectro and ensure more accurate readings when scanning by hand.
i1Profiler software
V3 of the i1Profiler software add a few specific features
- This update to i1Profiler adds support i1Pro 3 Plus and i1iO for i1Pro 3 Plus, it is also recommended for use with i1Pro 2, i1iO2, i1iSis 1 and i1iSis 2 family.
- i1Pro first generation devices are still supported in Monitor and Printer profiling workflows. However license upgrades or transfers with i1Pro1 devices are no longer supported.
- i1Pro 3 Plus new supported features include
• Support for polarization filter (M3)
• Support for single pass scanning for M0, M1, M2 modes.
• Support for displays up to 5k cd/m2
• Support for transmission hand scanning
The software offers a basic and advanced mode of operation.
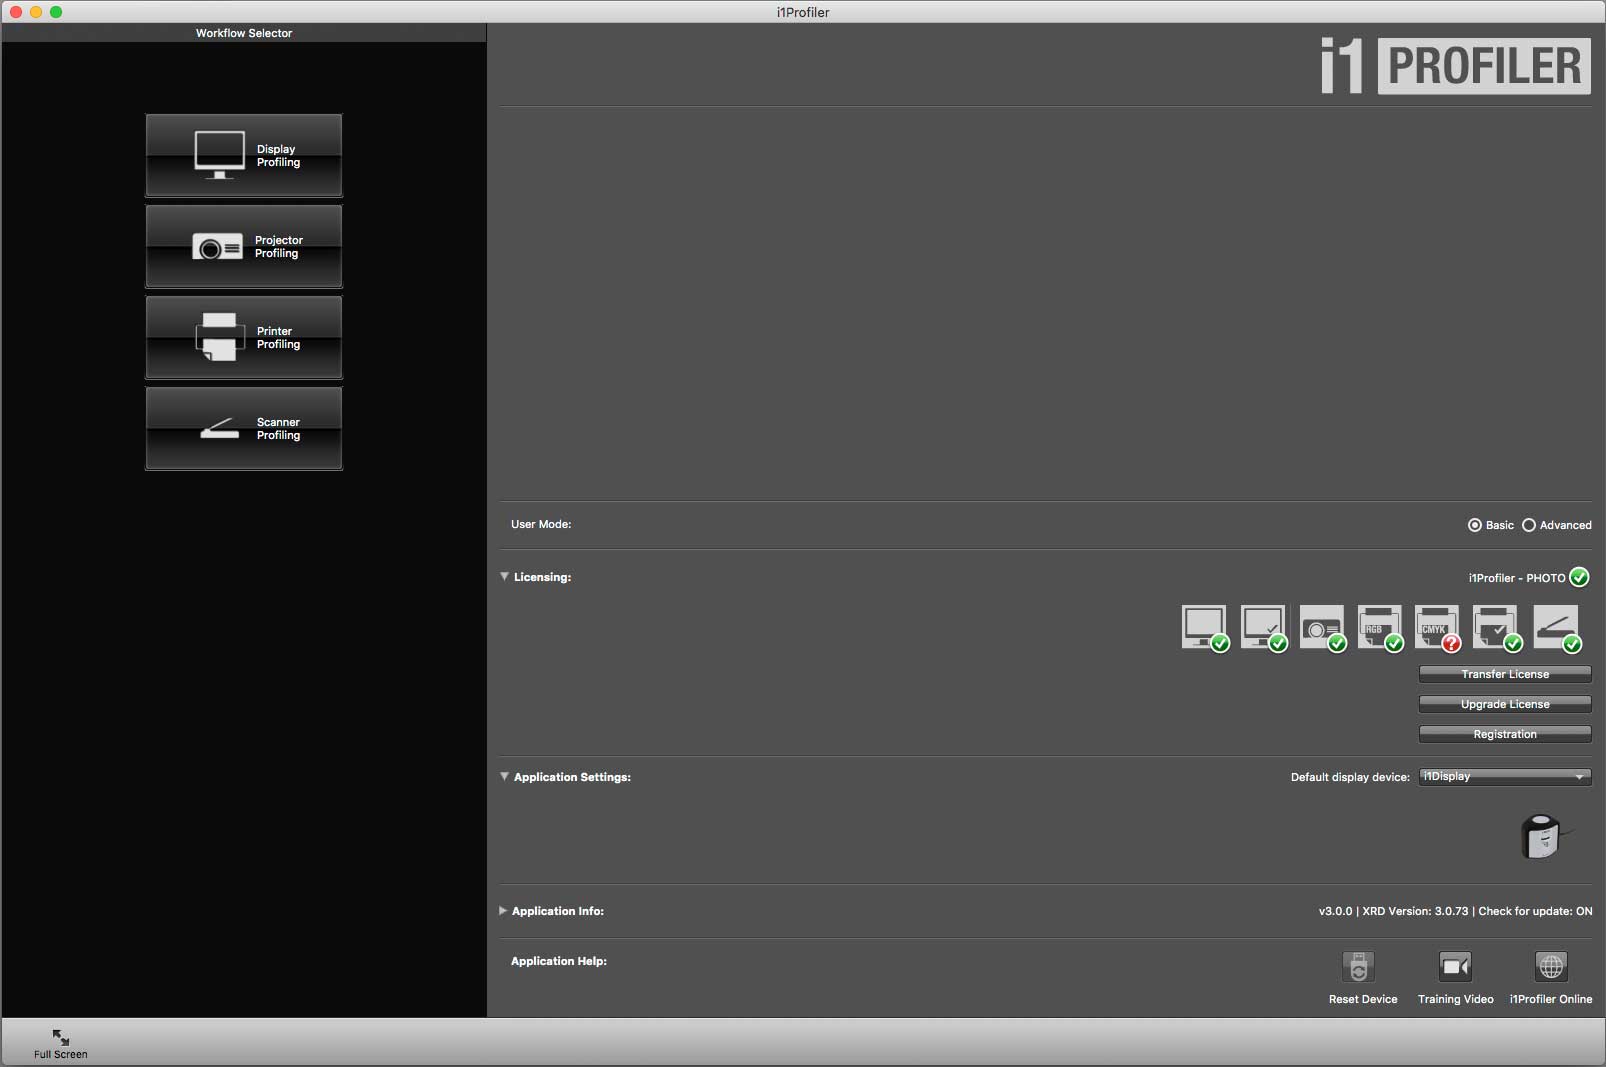
In the basic mode, there are simple workflows (left) for screen/projector/printer and scanner profiling.
The coloured tabs show which licensed functionality is currently enabled for your copy of i1Profiler. the red box shows that CMYK printer profiling is not licensed – I’d need i1Publish for that.
License information is held inside the i1Pro devices, or, if I’m using my older i1iSis device, a separate USB Dongle.
Switching to advanced mode gives a lot more detailed options for the software.
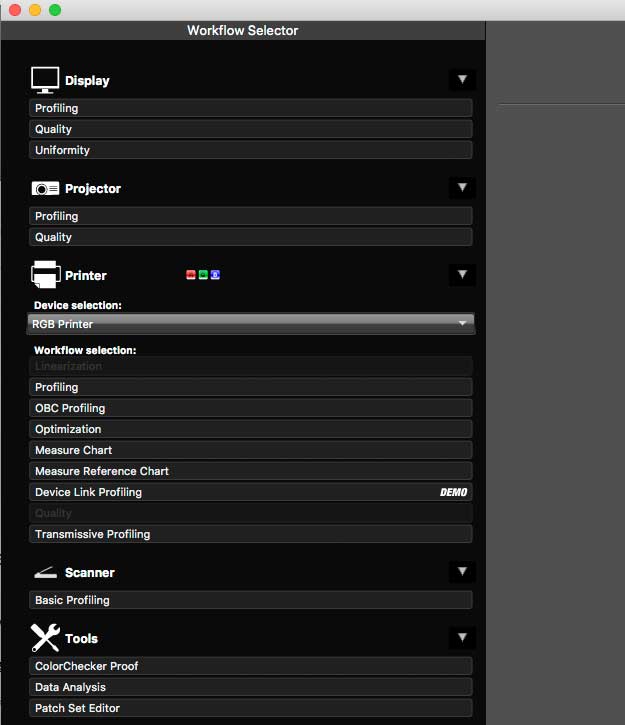
It’s possible to save your common workflows to make things easier and less error prone.
These can contain specific targets/settings that you use regularly

For some settings there are various help panels, with a basic overview of what functions do.
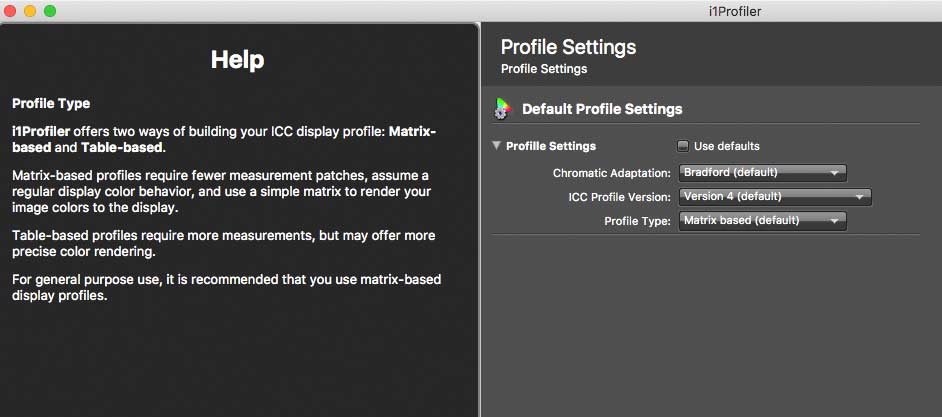
There are also links to video resources.

Unfortunately these require Adobe Flash, so won’t be accessible to anyone (like ourselves) who have removed Flash from all computers, for security reasons. As I noted when i1Profiler V1.0 first came out years ago, there just isn’t any detailed manual for the software. It’s packed full of functionality that you may wonder about (if you find it) but you’ll find no manuals or guides. I’ll show some of the functionality in basic and advanced modes here, but there are still settings that i’ve no more idea of what they do now than when I first tried out i1Profiler.
Now, don’t take this criticism as implying the software doesn’t work – it does and produces excellent results, it’s just that no-one has written the manual yet ;-)
Monitor Calibration
I’ll show the basic screen calibration process, along with some of the more advanced options. There is more about this in my i1Display Pro review.
I’d note that the display calibration makes no reference to any display hardware calibration capabilities, so if you have a high level monitor, such as the BenQ SW320 in the background to several photos, you may wish to use the manufacturer’s OEM software in preference to i1Profiler, even if you are using your i1Pro 3 Plus spectrophotometer (which will likely soon be supported by the OEM software).
[Click on any pictures to enlarge]

The basic screen calibration process just requires a few settings and takes some ten minutes or so.
There are more settings (as I’ll show in some of the ‘advanced’ options, but in general, take the view that if you don’t have a reason to alter something, then the default setting is probably OK.

Since I work in relatively low light conditions I’ll often set my monitors to around 100. 120 is OK, but the 160 standard is just too bright for my office, particularly since I do my own printing, and one of the surefire ways to get dark prints is to have your monitor set too bright.
See – Why do my prints look wrong for more about print problems
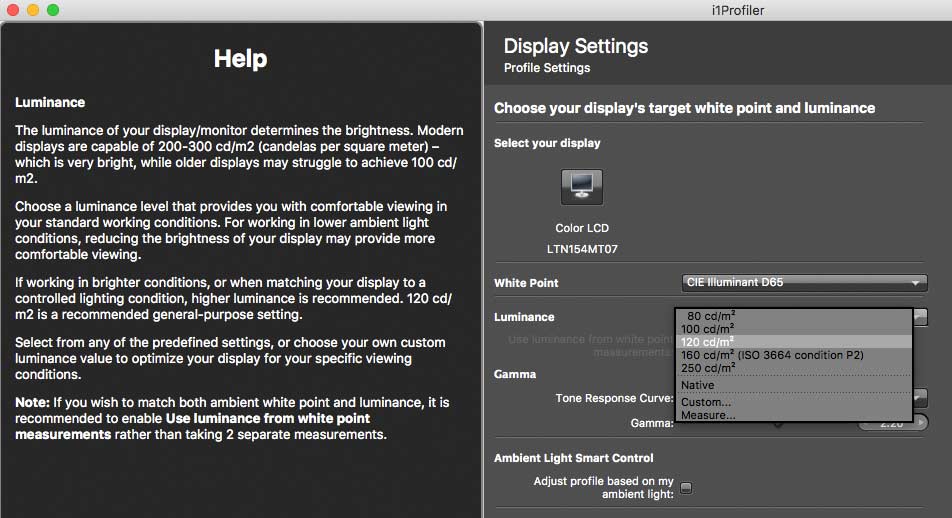
The i1Pro3 plus lets you calibrate very high brightness displays, but I don’t have anything in this category to test. This might be of use for outdoor displays, where the following option might be of some use?
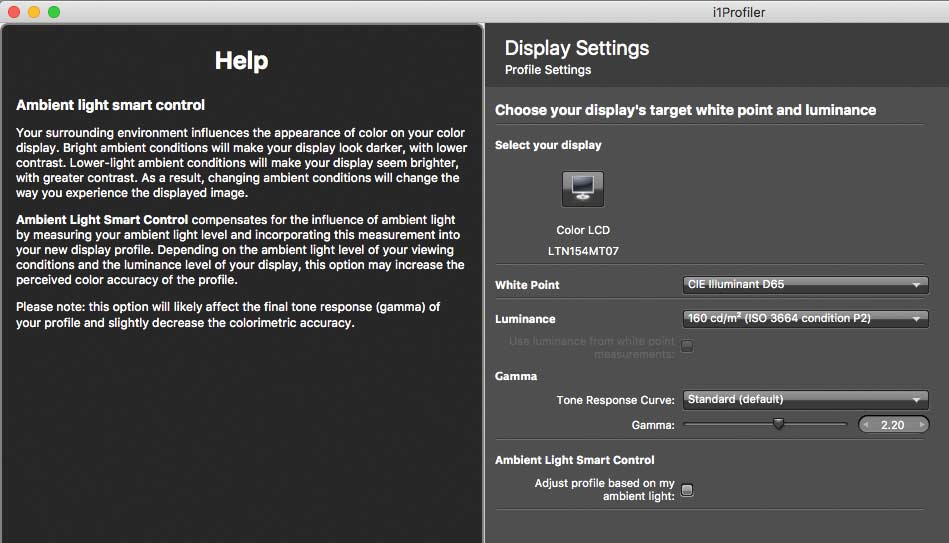
One feature I personally don’t care for is the option to base your profile on measured ambient lighting – it would help if there was some information about just what was being adjusted, but there isn’t.
The basic mode offers just the one target size option – it works fine for most people.
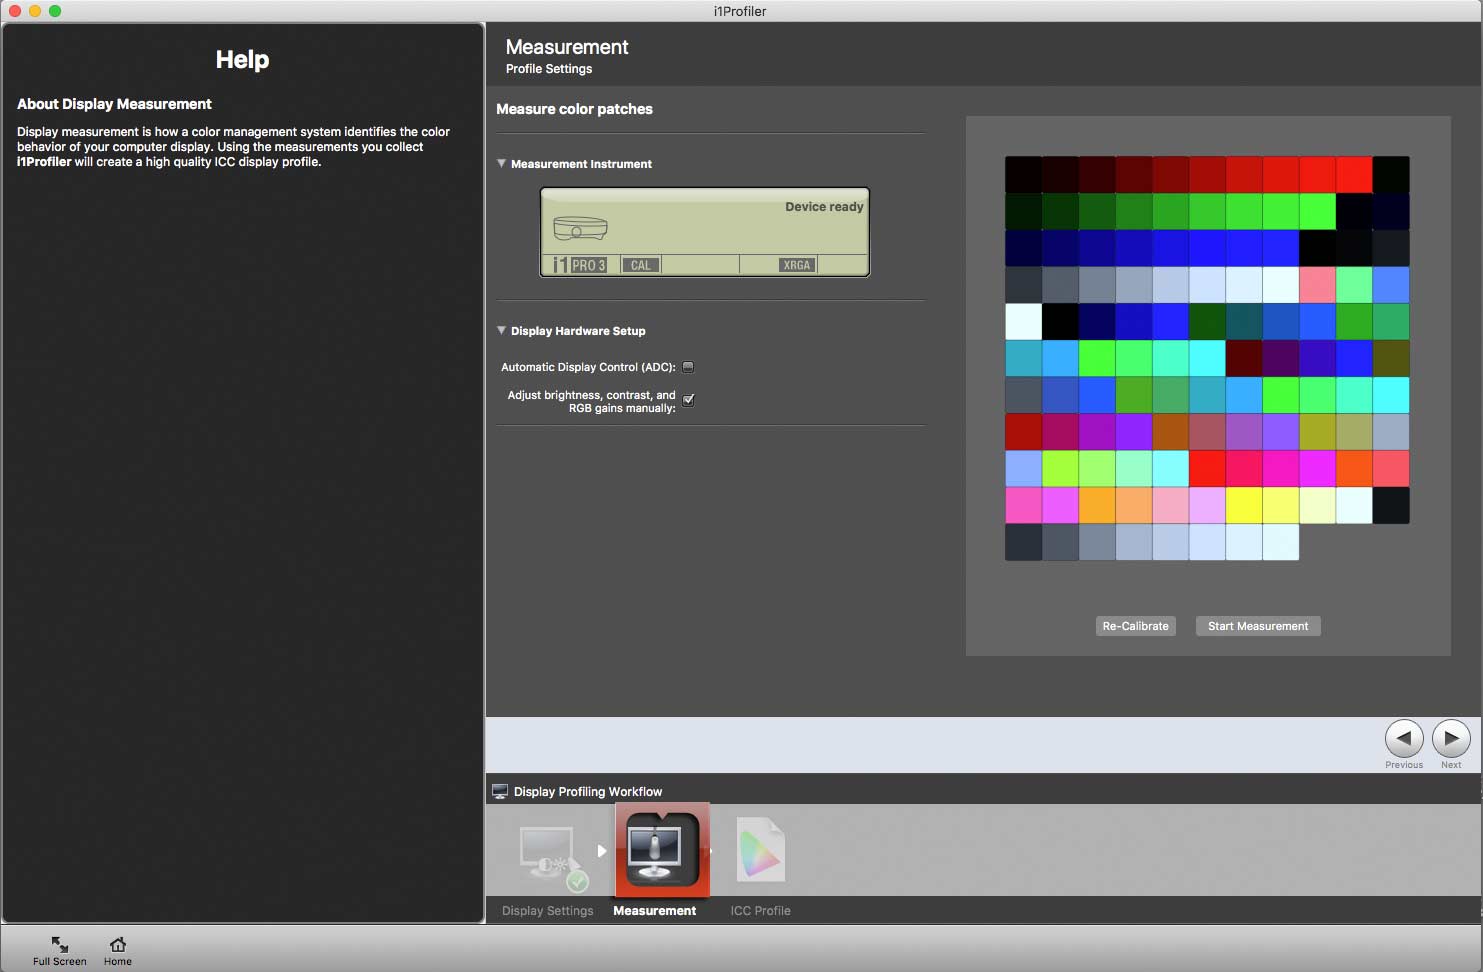
The device needs calibration first.
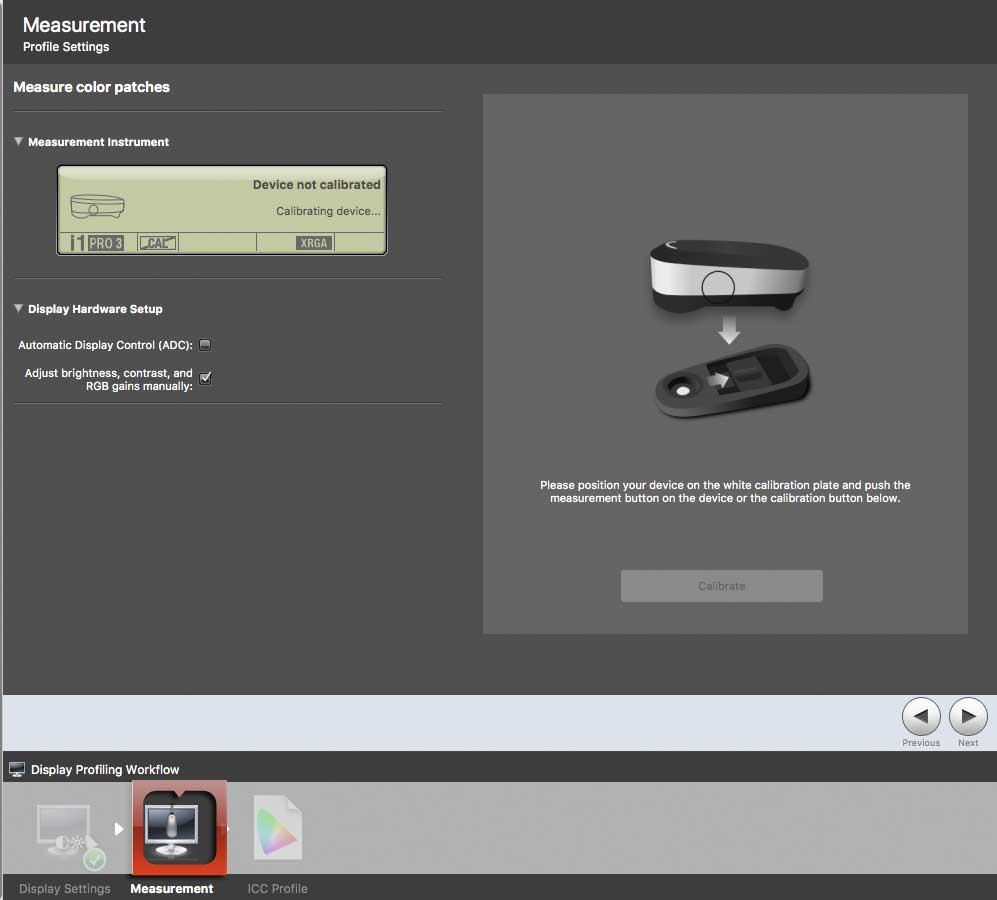
You then attach the screen calibration base and hang the device over your screen.
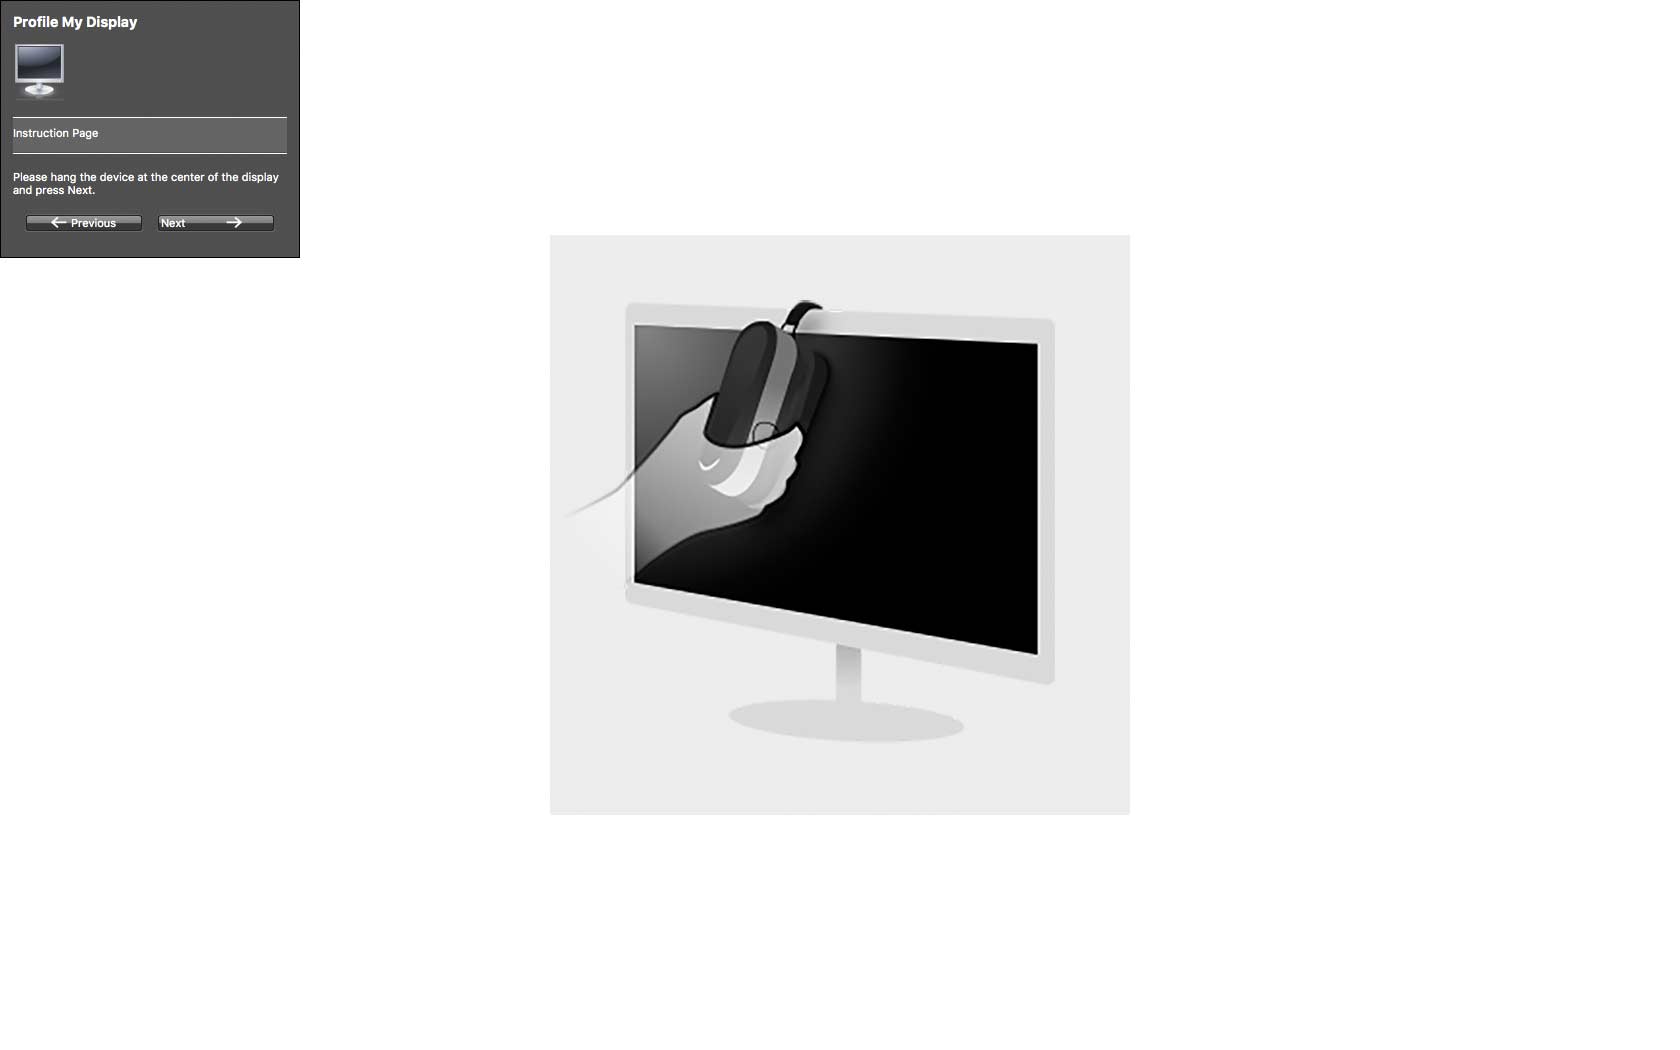
Or some other way, if your screen is too small.
The green screen is one of the measurement steps showing target colours.

After all measurements are completed, the display shows target and measured patches of colour.

You now get to create a screen profile.
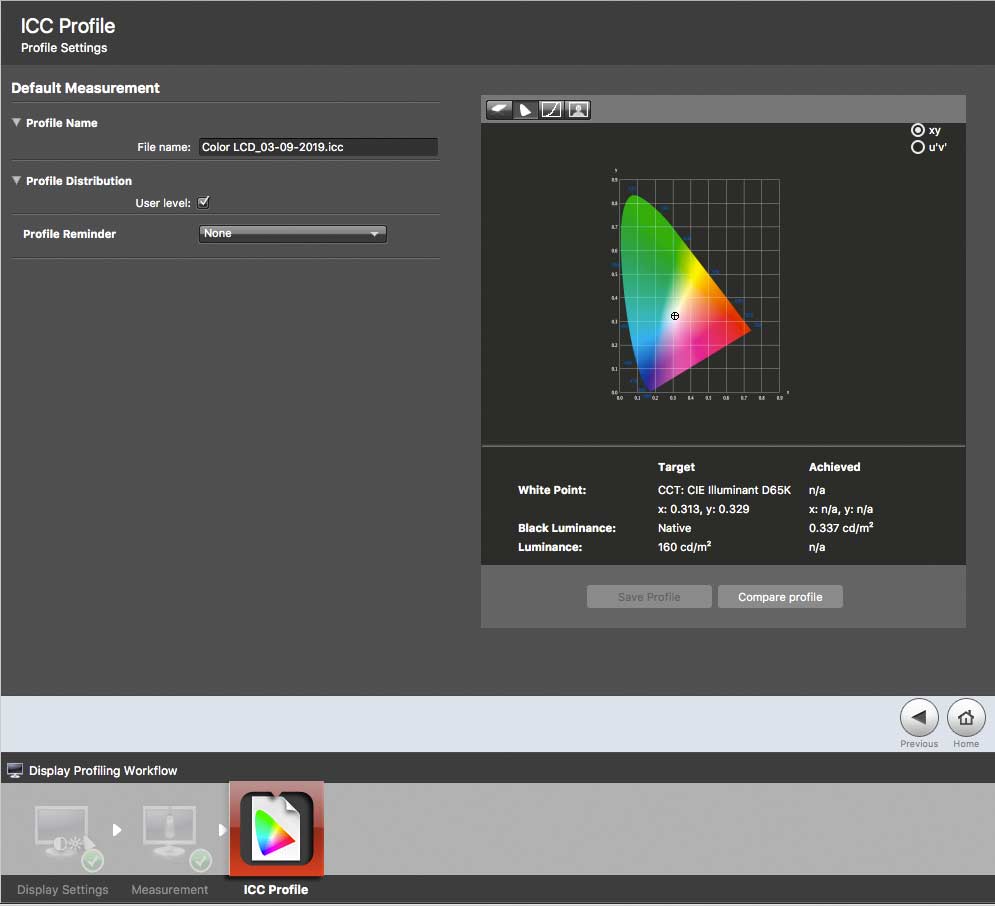
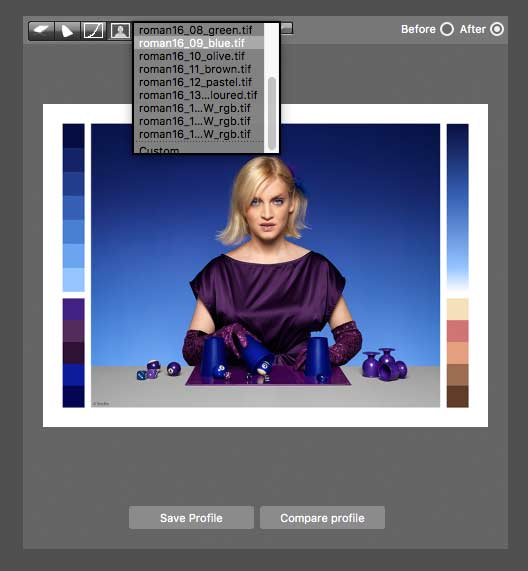
A range of sample images and profile data is available for the curious.
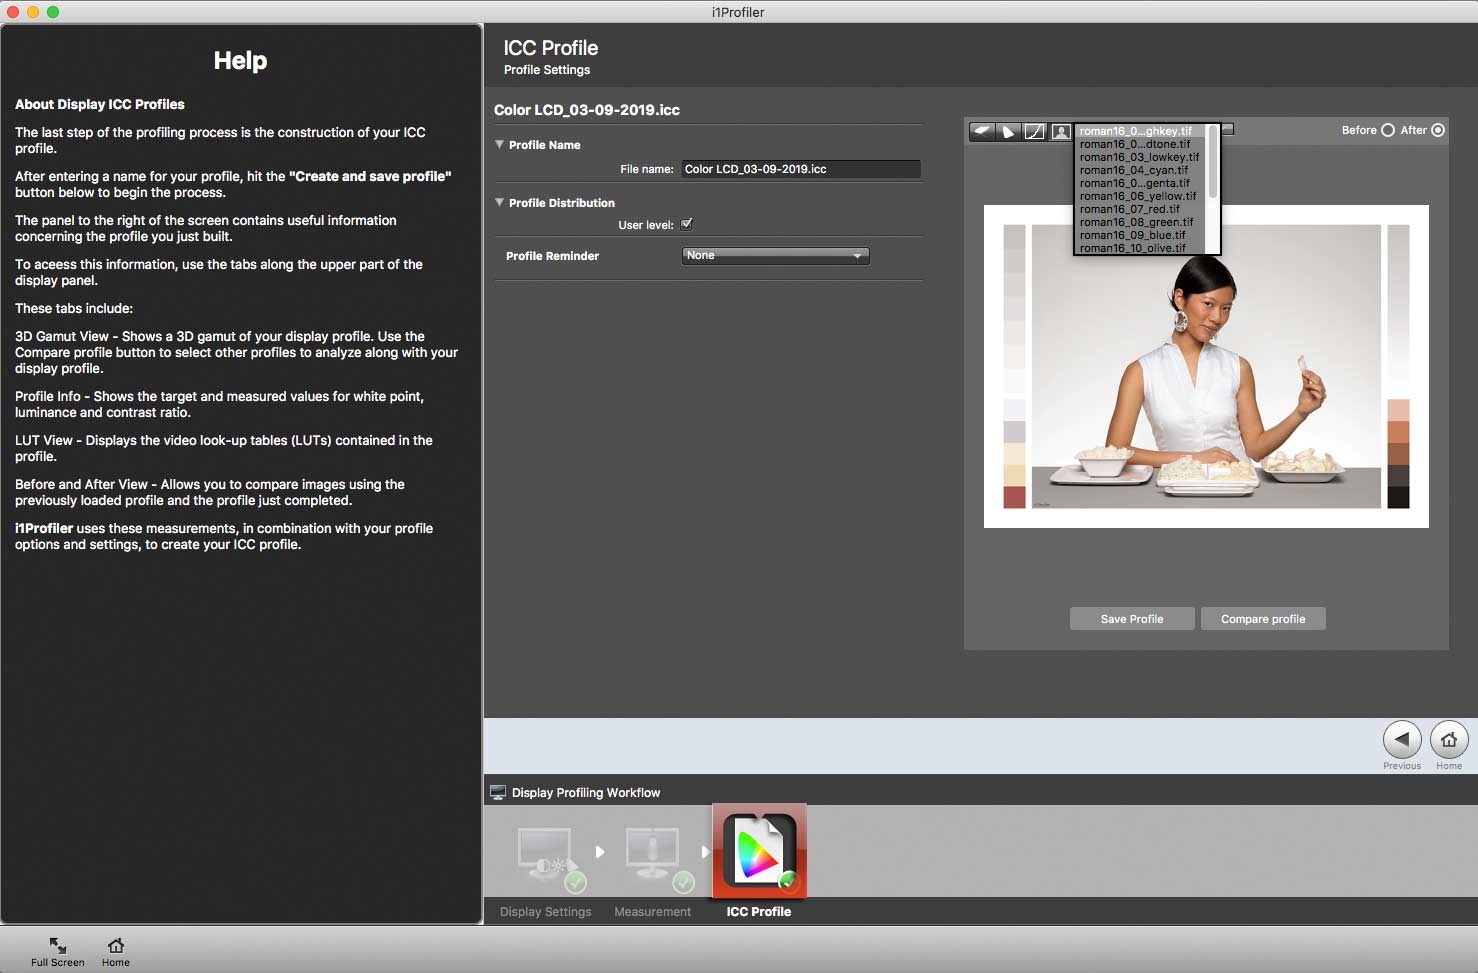
The set of ‘Roman’ images cover a very wide range of colour ranges – it would be helpful if there was a better visual way of exploring them than just a set of file names.
More advanced calibration
There are a number of settings you can change when using the Advanced mode
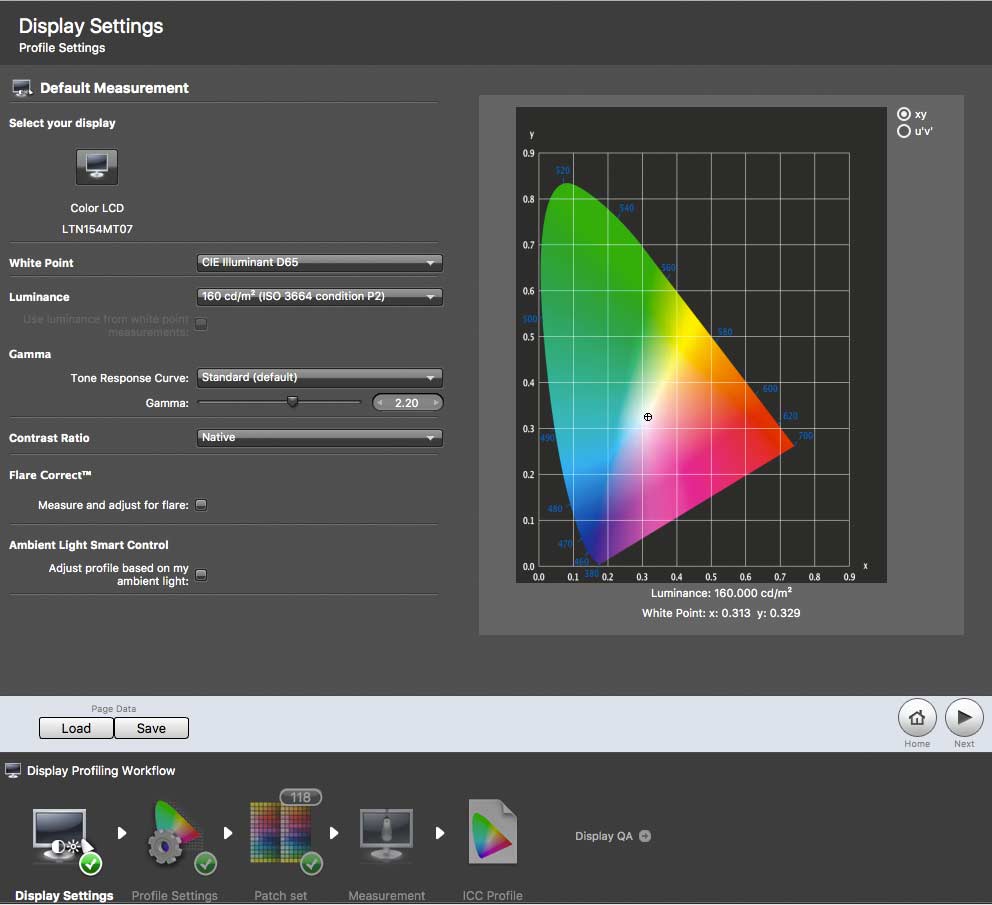
Note for example the Flare Correct. It compensates for light reflected off your screen from the environment.
I’ve looked at this in the past and it sort of works – but I’ve no idea what’s going on or how it changes what’s on my screen. As such, it introduces uncertainty into a process that I’m largely doing to reduce uncertainty and unpredictability in my workflow.
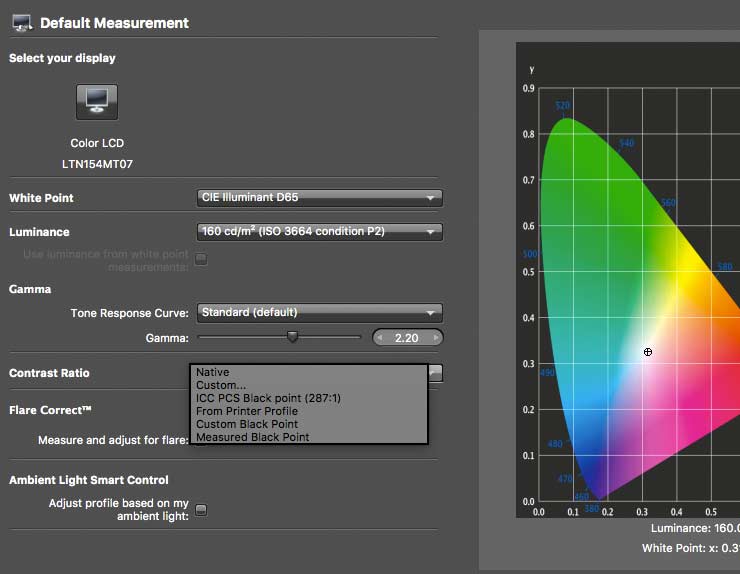
You can set arbitrary black points and contrast ratios if needed, but I’d suggest that unless you have a reason to do so you leave these settings alone.
You can even use much larger target sets, and import spot colours or colours extracted from images.
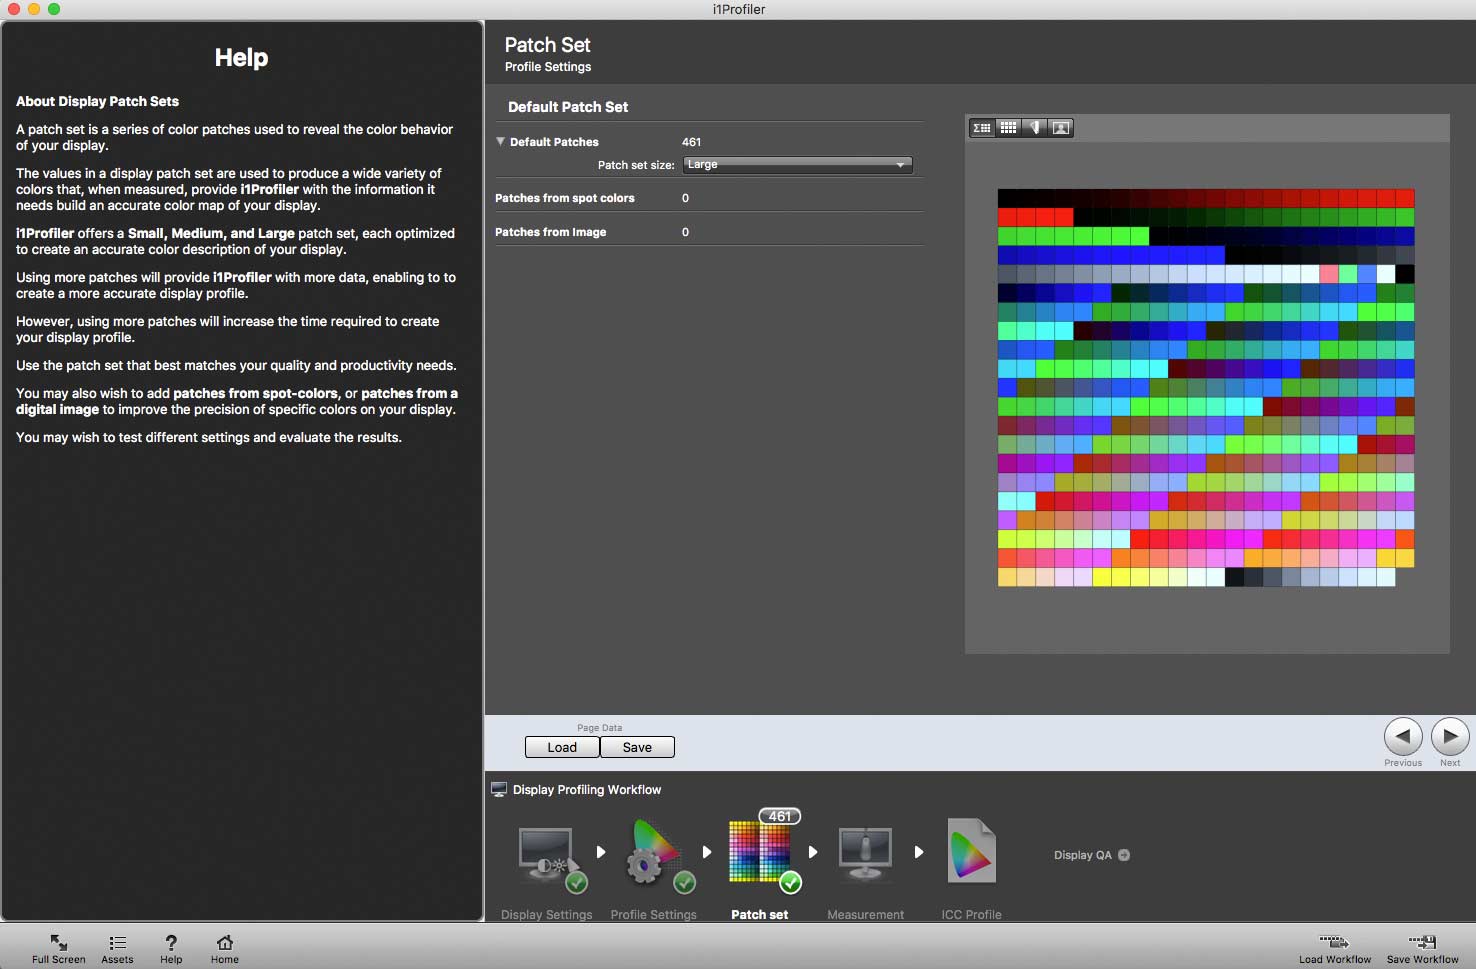
After measurement (which can take a while if you go for really big targets), the profile is created.

As before there are lots of info displays available.
I’ll show just the one, the correction curves being applied to my laptop screen.
It would be nice if the R/G/B lines were more linear – but this is on old LCD laptop screen. I’d never use it for serious editing anyway.
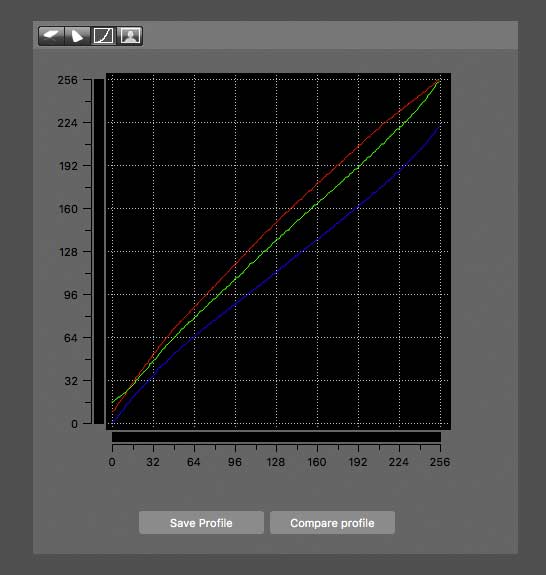
As well as the graphs, there is a screen QA function that lets you analyse results even further.
Screen QA
This is a workflow that can be accessed either from the main menu or at the end of profiling.
There are various target options available, but I’ll show the basic ColorChecker card set.
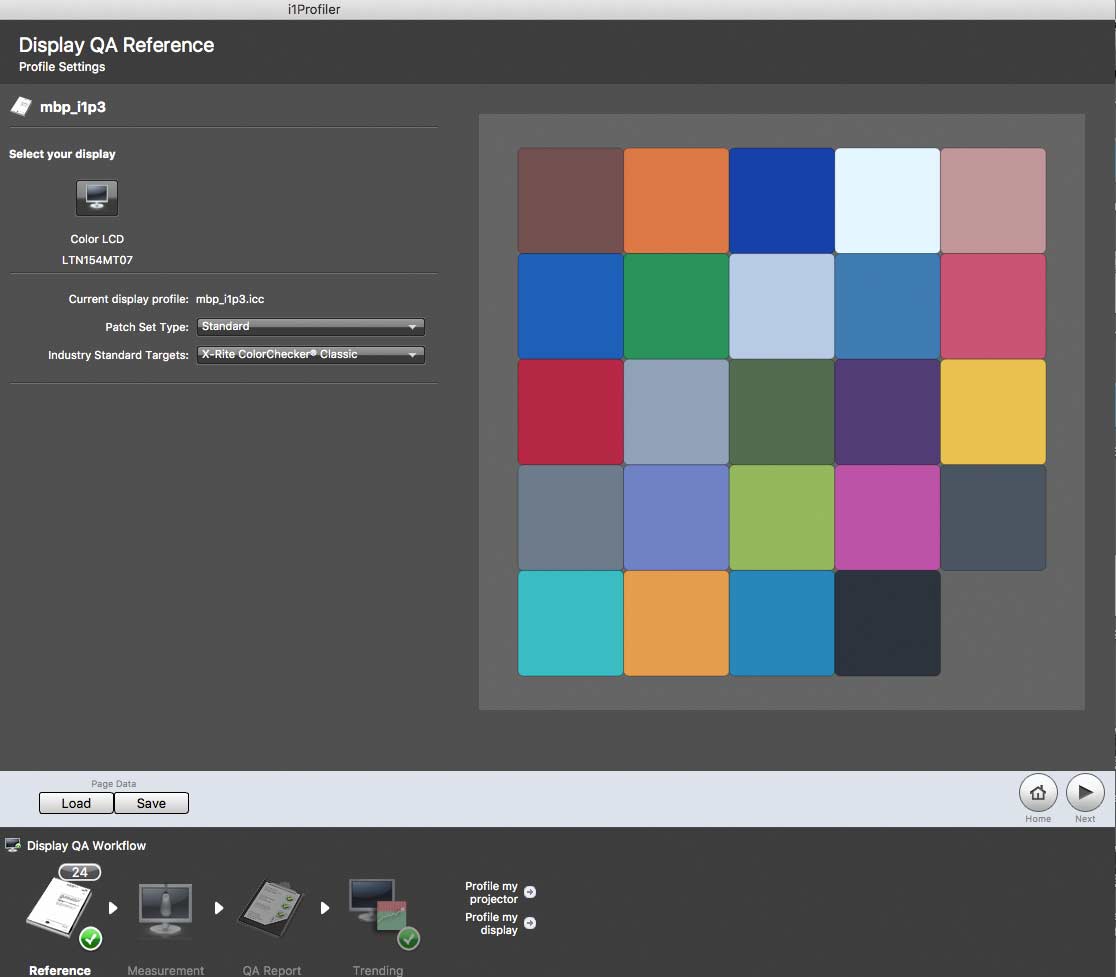
The patches are measured the same way as a normal profiling target.
The results (predicted vs. actual) are shown, along with the colours that are the best and worst reproduced.
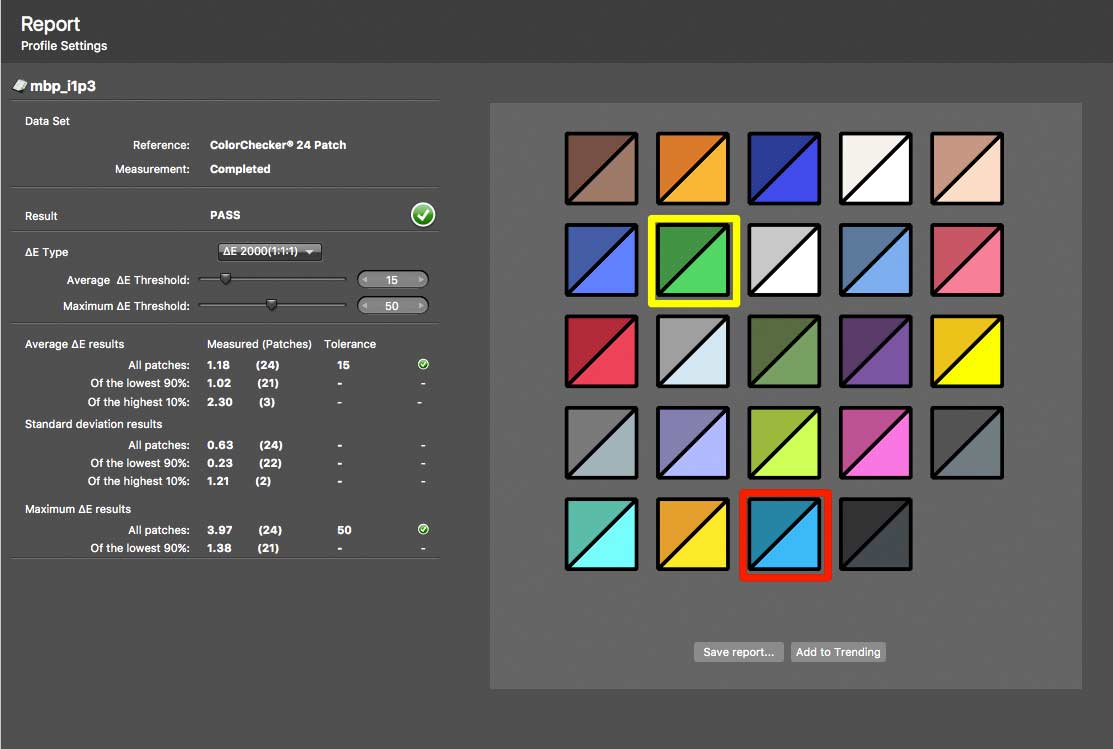
Beyond curiosity, I leave the interpretation of the numbers as an exercise to the user.
They can show a bad profile, and if you take regular measurements show any changes in a display over time.
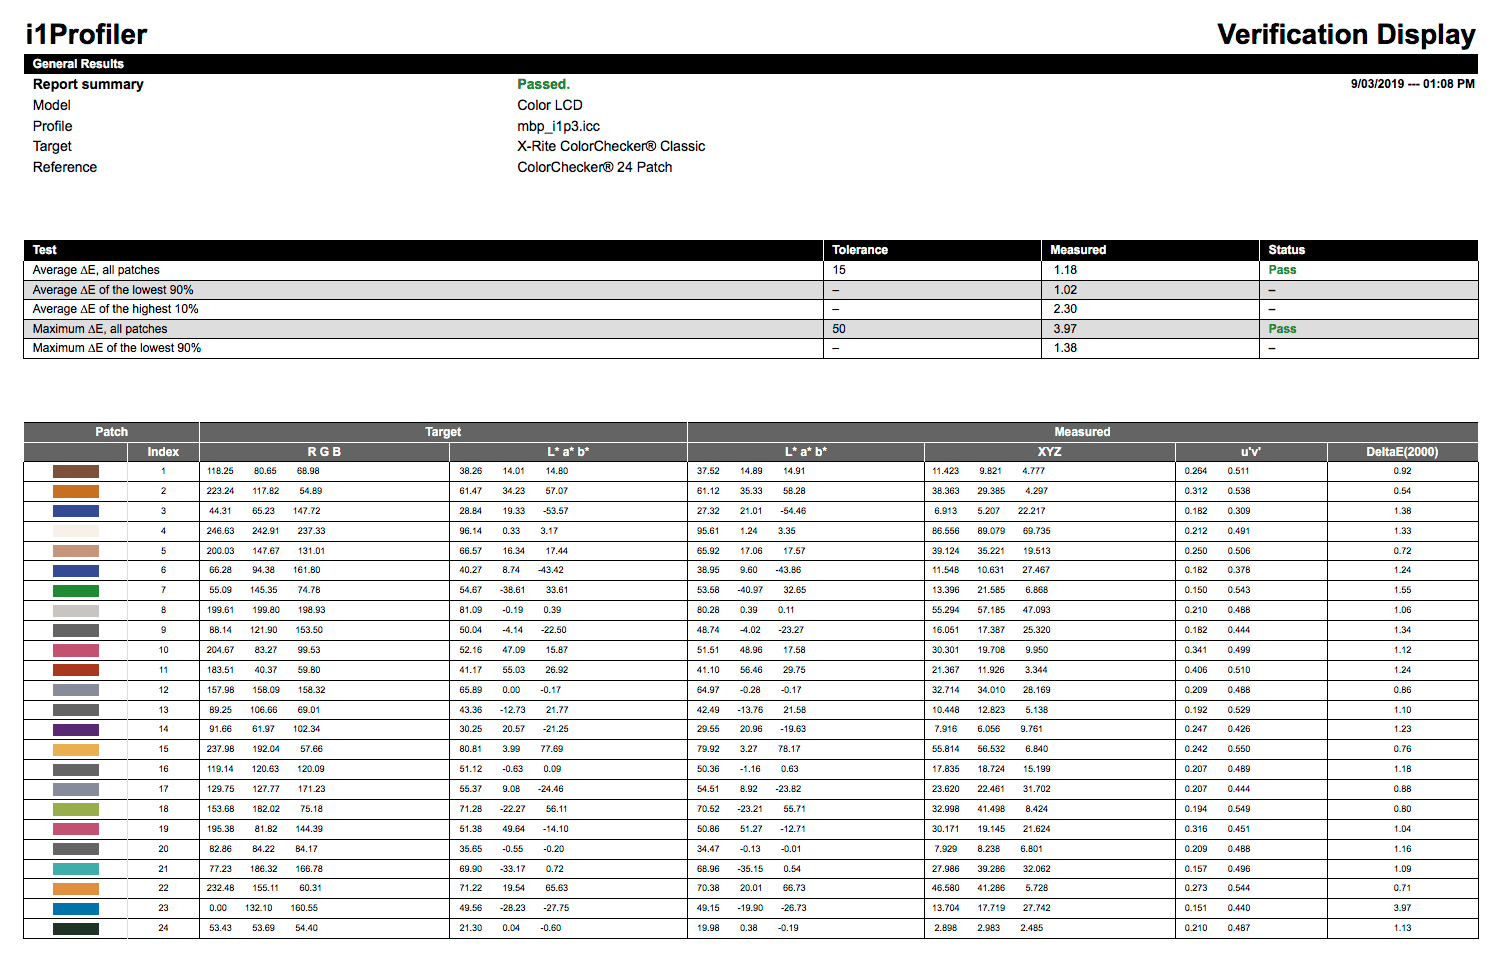
Back in the days of big CRT displays, the fall-off in performance over time was a real thing and I did actually keep notes of settings, but today with modern large wide gamut LCD screens I’m much less worried about such drifting.
Of course, you may be working in a strict quality controlled environment where such record keeping is relevant…
Projector profiling
This is just like monitor profiling, although you may want to adjust projector settings before profiling. With my own projector I found that trying to get the best looking display by eye to start with, made profiling easier. That’s just with my old Sony projector, yours may not have many adjustments.
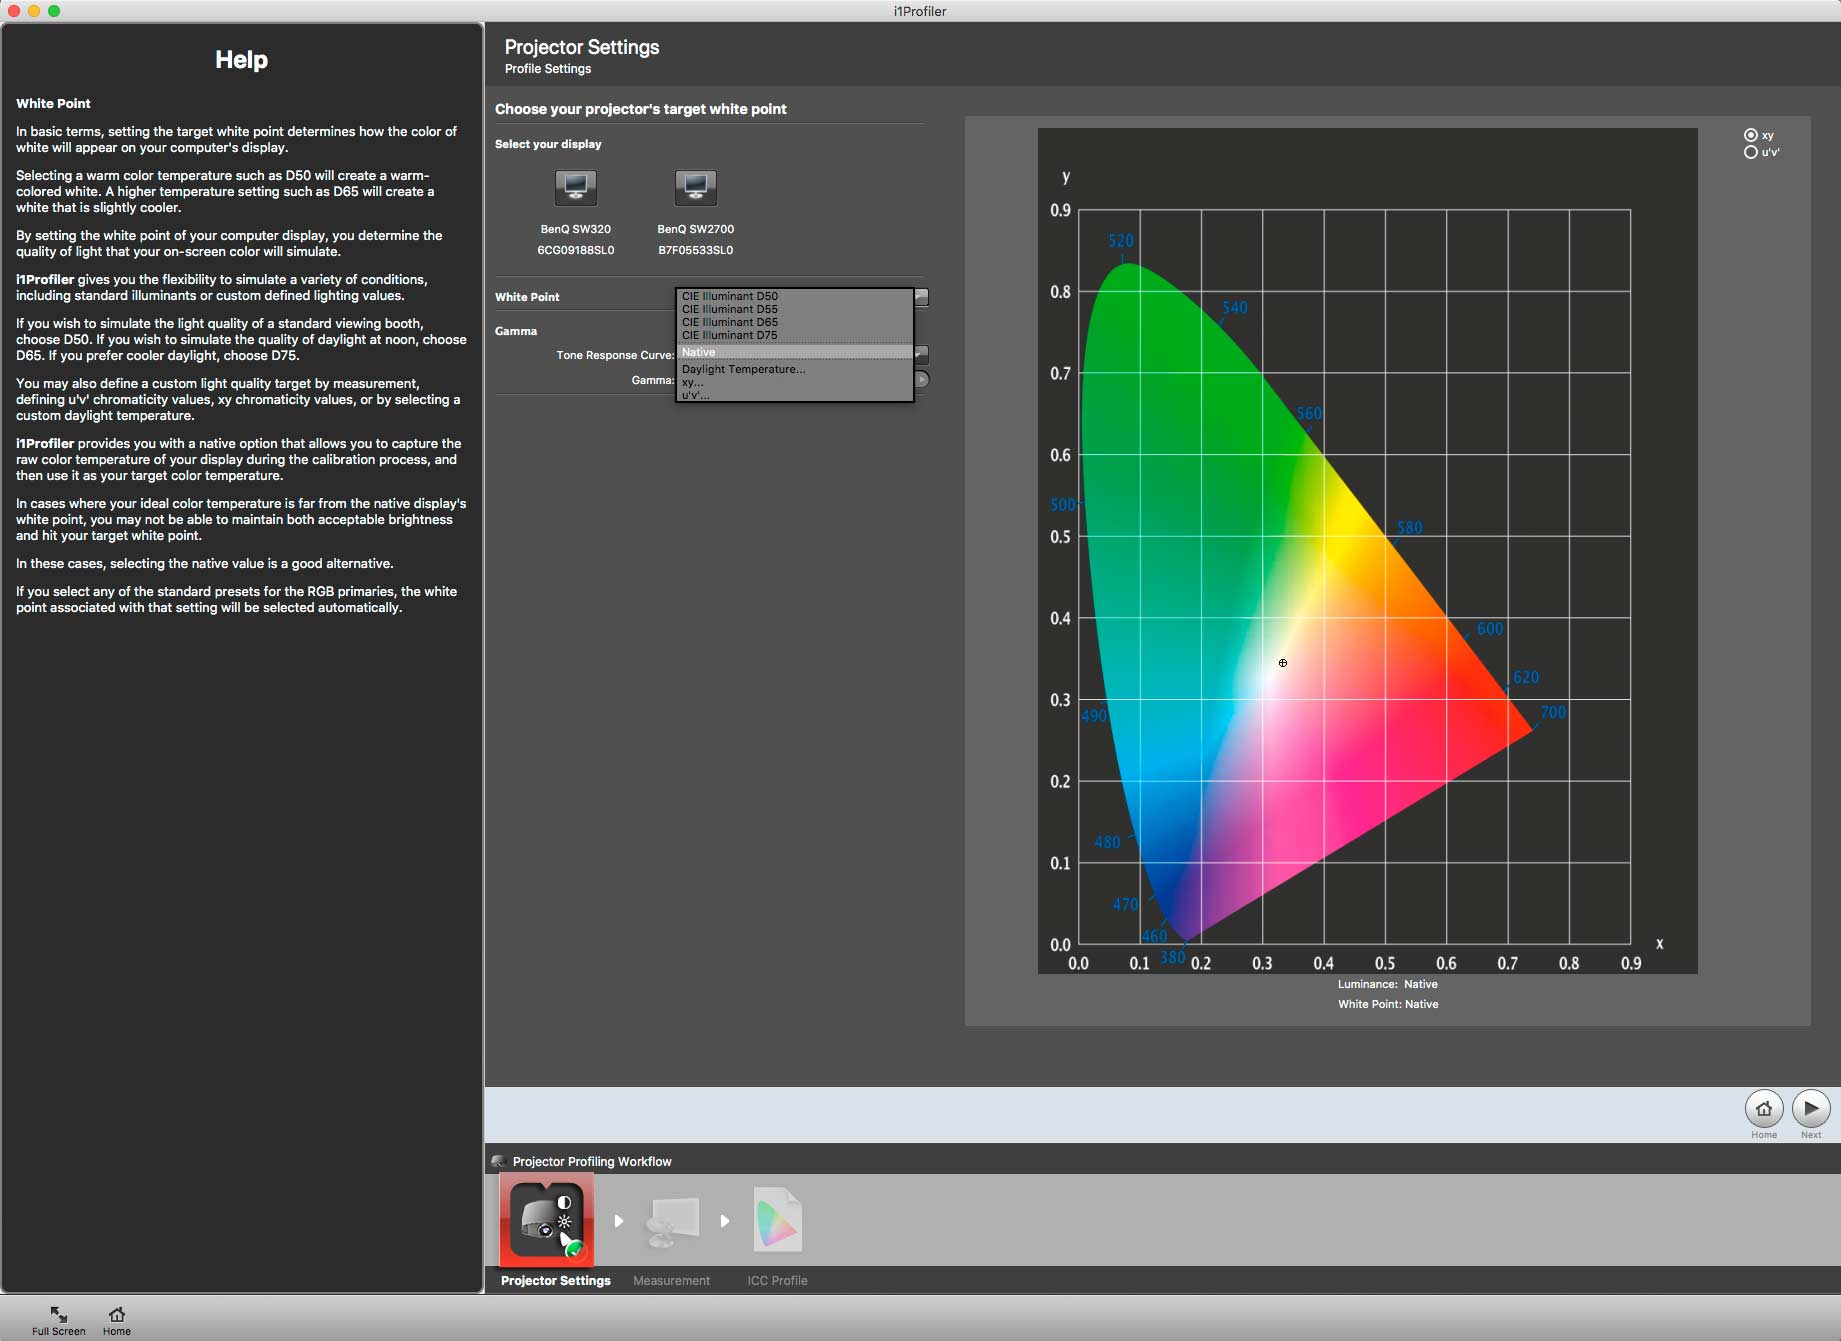
For projectors, you just point the sensor at the screen.
I’ll almost always go for the native whitepoint, since it makes for smoother gradations of tone and viewer’s eyesight quickly adapts to the often quite high colour temperature of the ‘Native’ setting. You might choose a warmer whitepoint in some lighting conditions to better fit in, but once you are operating a projector out of a darkened environment, things start getting a little less predictable.
Printer profiling
Printer profiling is the function that I suspect most people will be looking at the i1Photo Pro 3 Plus package for.
There are basic and advanced workflows, along with the ability to create your own bespoke workflows.
I’m only looking at RGB profiling here – so for CMYK for RIPs and press work, you’ll need the i1Publish Pro 3 Plus package.

The basic printer profiling workflow offers three patch sets. I’m using the ‘medium’ 800 patch target for the i1Pro 3 Plus

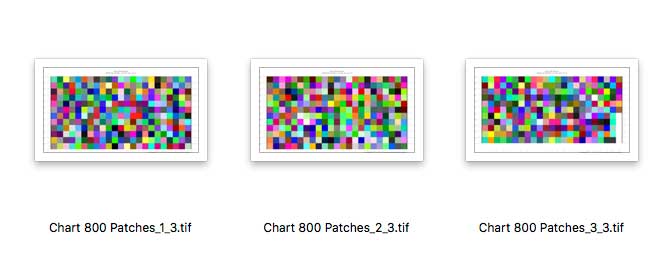
The number of sheets required to print the target depends on the paper size.
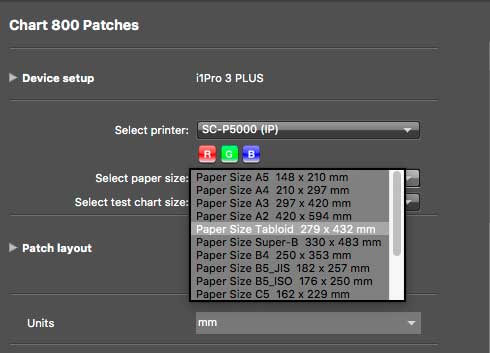
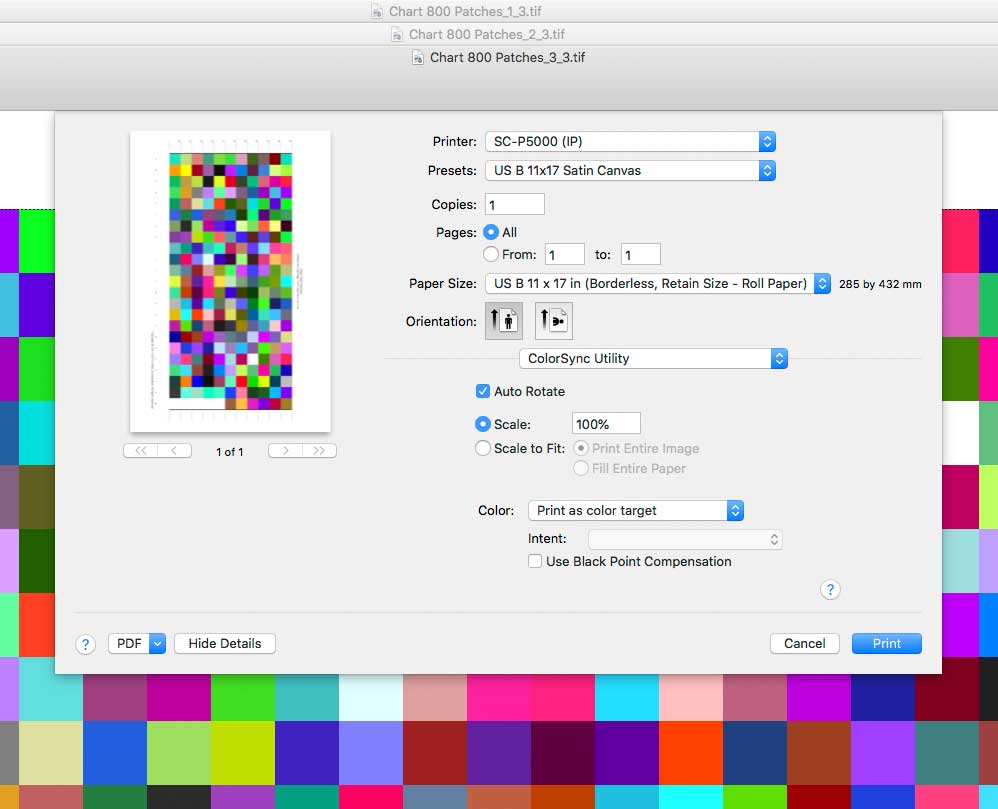
Whilst you can print from within the i1Profiler application, I prefer to save the target files as TIFFs.
I can then print these using my Mac’s ColorSync Utility, so as to guarantee they are printed without any colour management (note the ‘Print as Color Target’ option). There is free software from Adobe (Adobe Color Printer Utility) specifically for printing targets (Mac and Win).
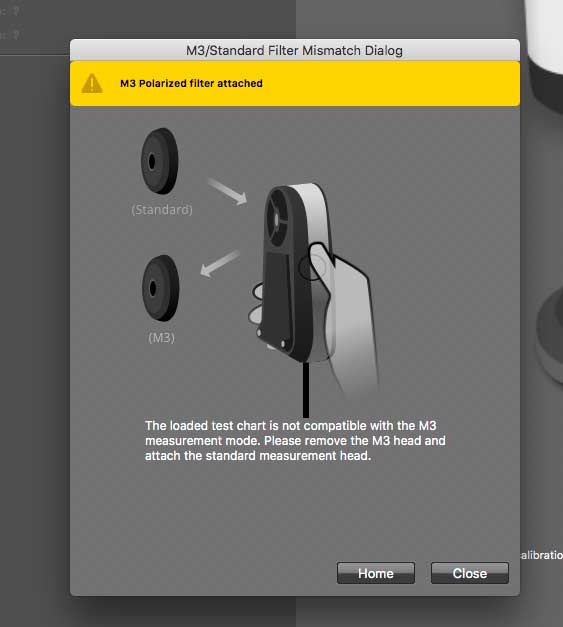
Moving on, the software pointed out that I had the M3 (polarising) head on the spectro, so would need to change it.
The i1Pro 3 Plus needs calibrating on the white tile.

A quick guide shows how to scan the target.
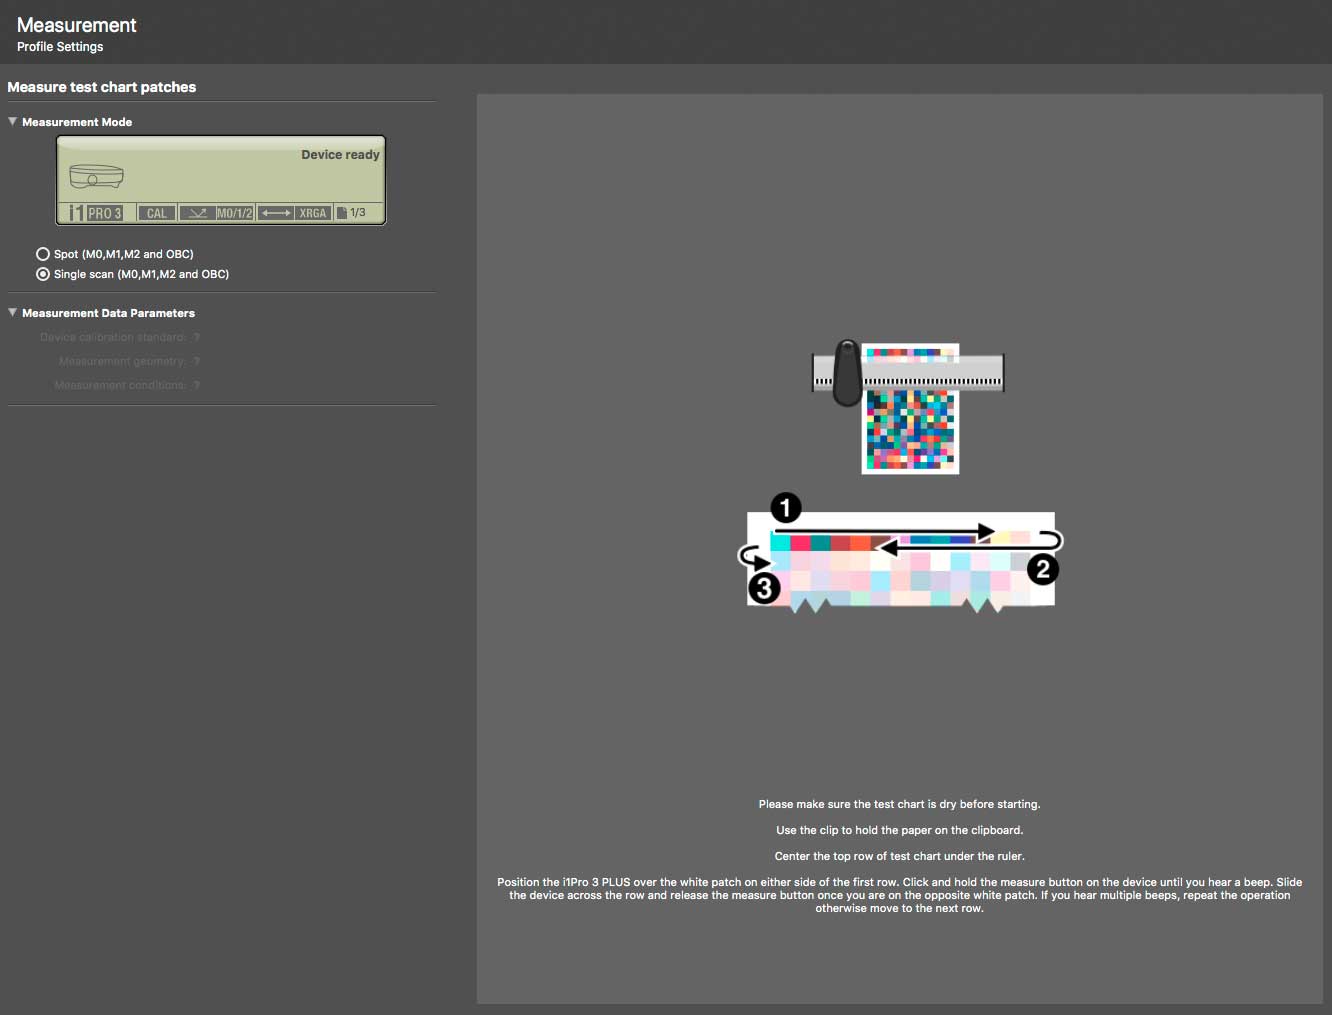
Scanning is very easy with the new larger slide rail, but watch out for those steel bars and the strong magnets.
After completing the scan, the next step is to decide on what illuminant the profiles are to be built for.
I’ll come back to this in a bit (for the advanced options) but suffice to say, unless you know why you need a different setting, take the default.
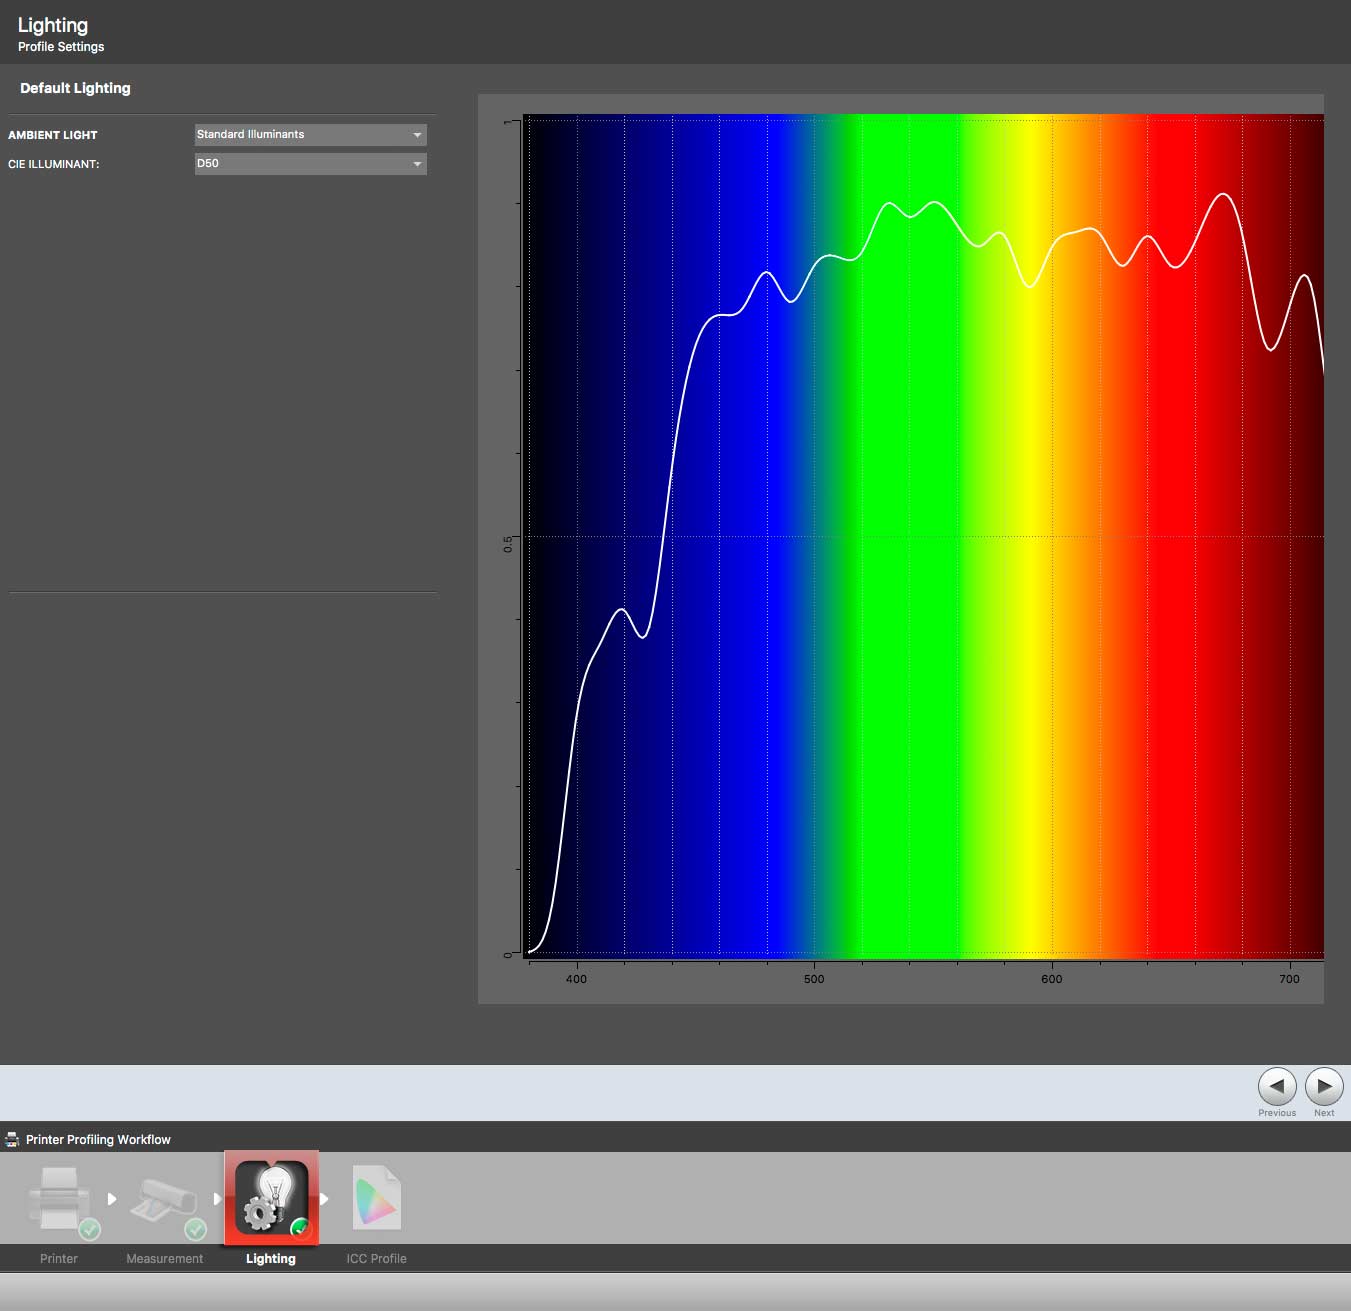
It’s then time to build the profile.
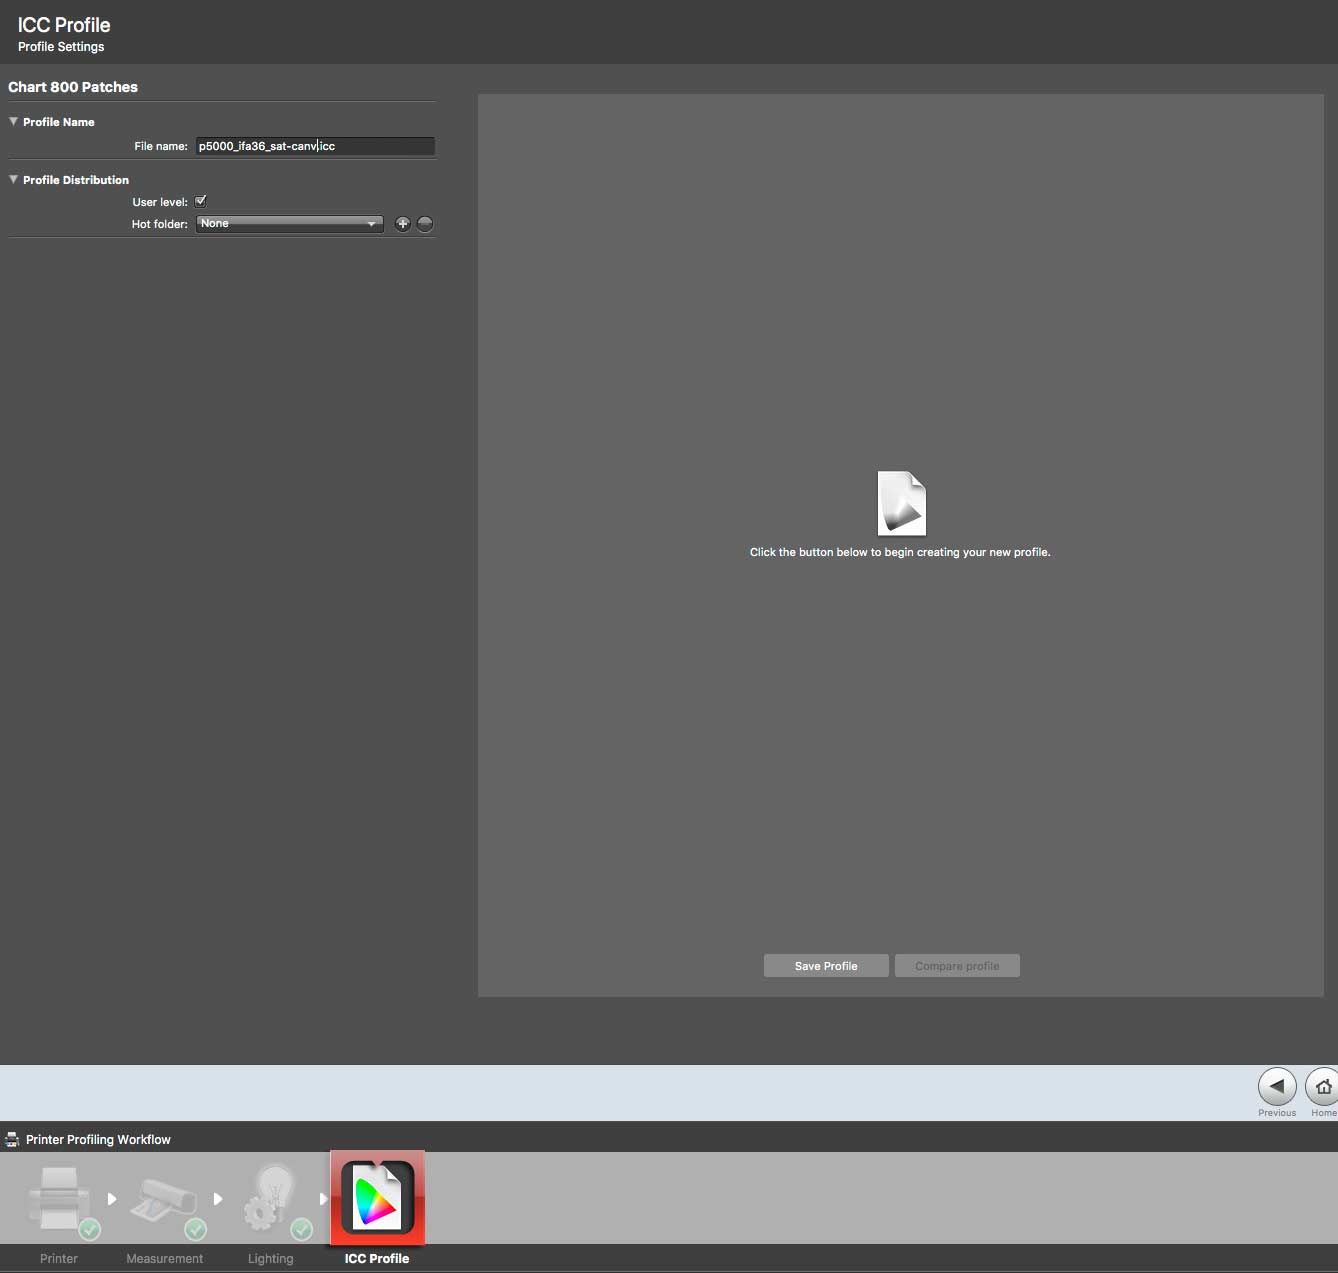
Do remember to give the profile a meaningful name.
 I normally include the printer name, the media name and the media settings used to print.
A profile where you’ve forgotten what settings were used is not usually a very useful profile.
The profiling seemed to take longer than with older version of i1Profiler, but then I looked carefully and noticed that the progress indicator seems to have been fixed (a minor bug in all previous versions of the software), so the time increase was likely imagined…
After generation, a wireframe shape indicating the profile gamut is displayed.
As long as it doesn’t show notches, bumps or holes it’s likely OK to test.

You can compare the profile with other (i1Profiler) ones.
The red outer shape here shows the larger gamut and contrast range available with a good baryta paper compared to the glossy canvas I’ve just profiled. [Innova IFA36 FYI]

Advanced profiling
Switching to advanced mode gives me several profiling related workflows.

Right from the start I’ve more flexibility in setting profiling options and parameters.
I can used predefined targets, or can design my own custom ones.
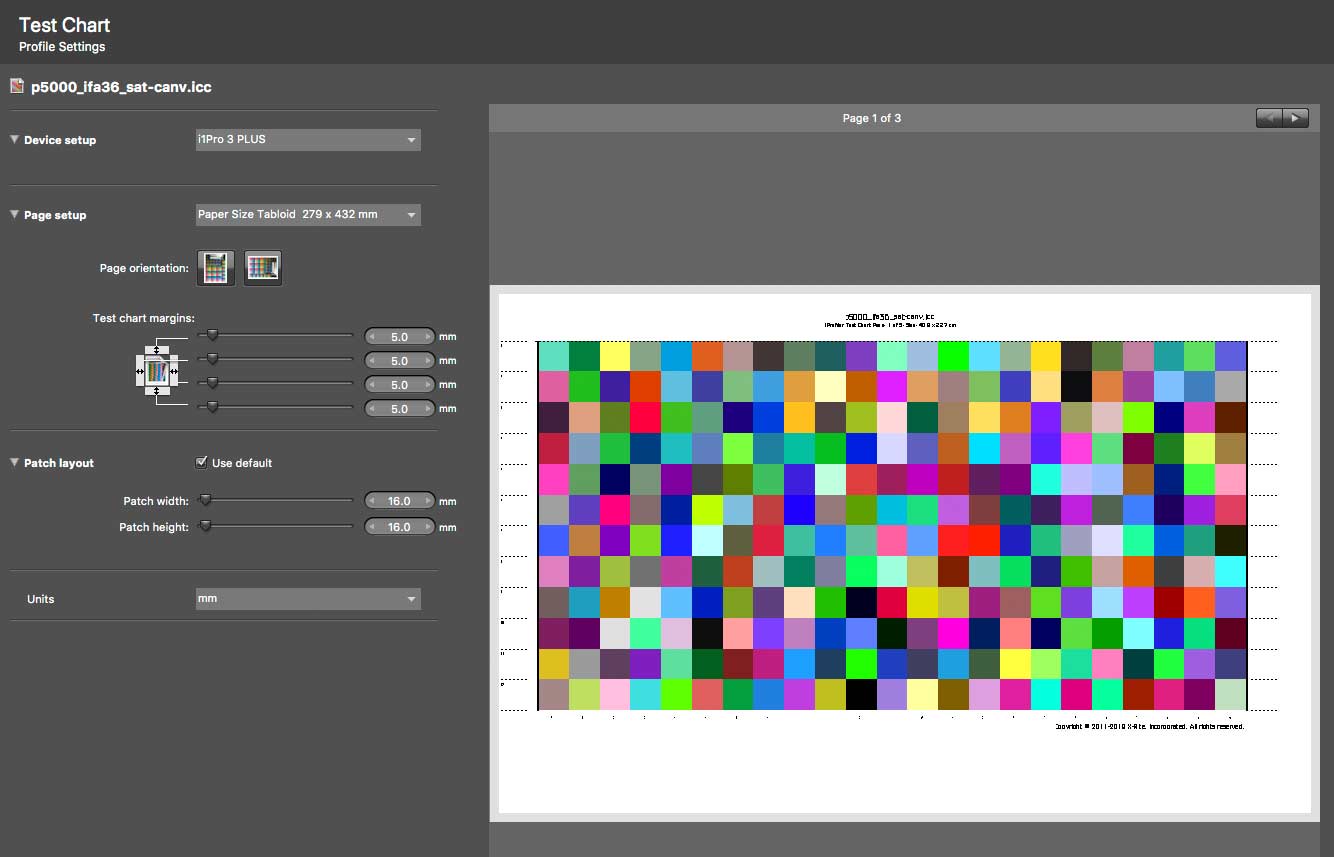
For an example, here’s my custom single A3+ sheet target for use with my i1iSis.
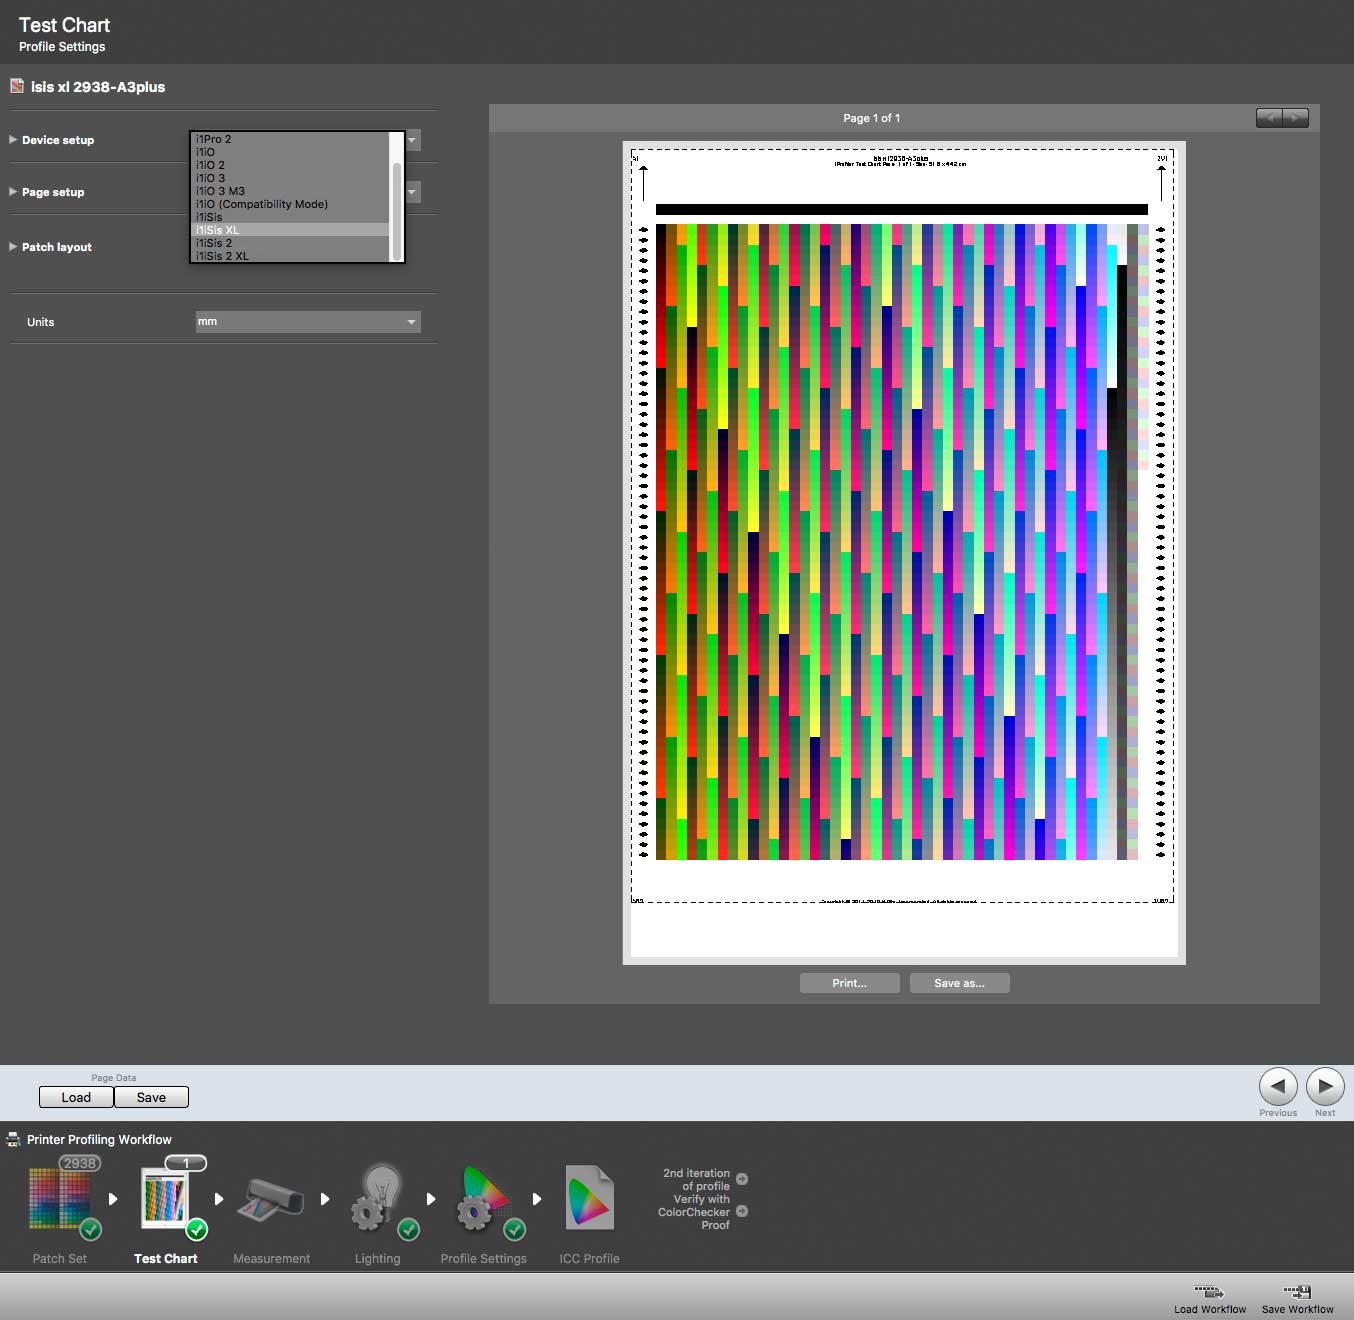
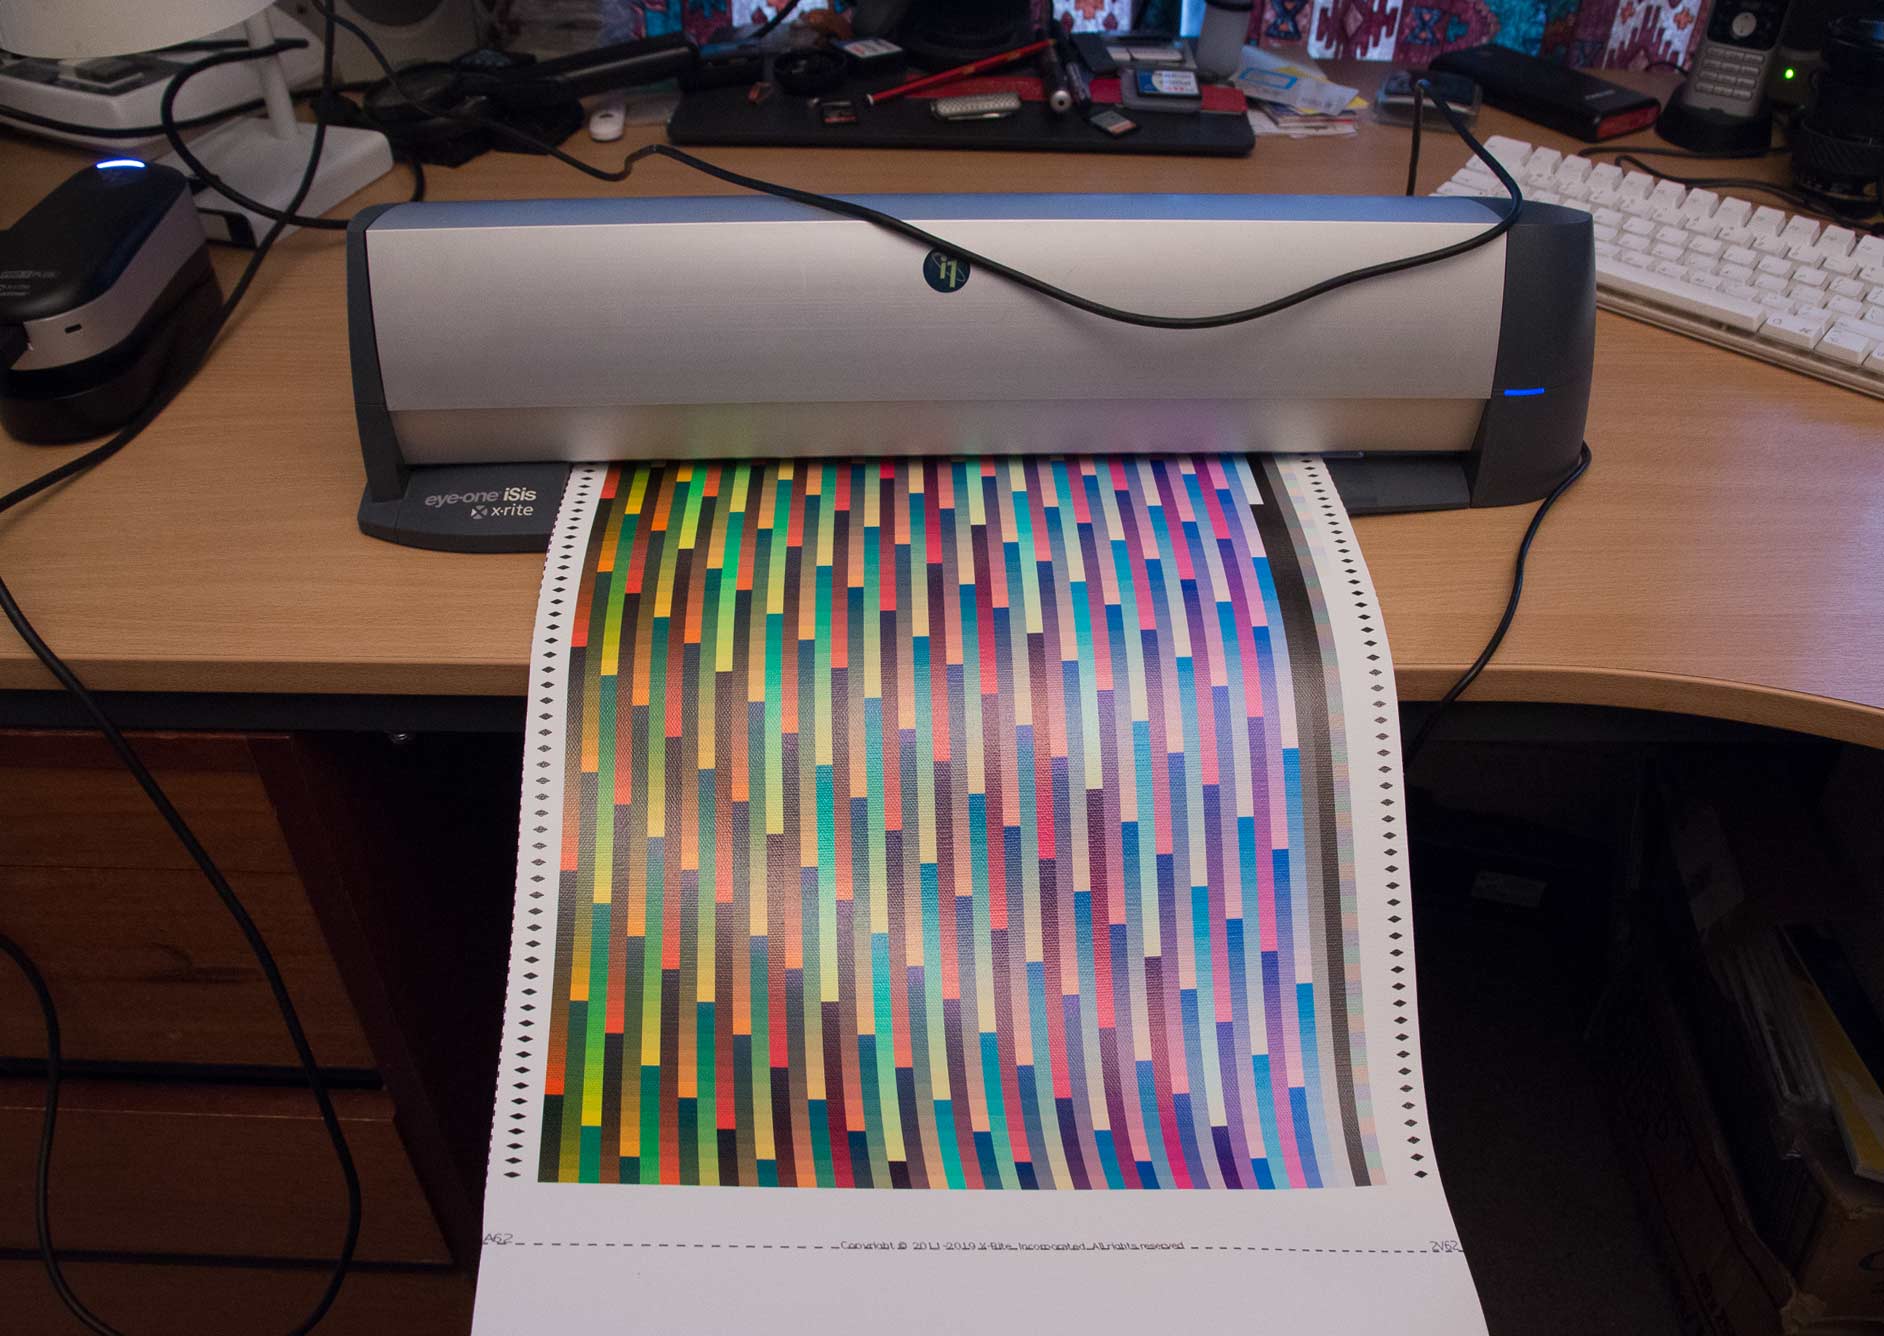
The single sheet is read in one go (M0 and M2)
Here’s the data from the scan.

Looking at the curves, I can see a bit of a peak from optical brighteners in the Canvas coating. I’ll return to this in looking at the OBC profiling workflow.
In the basic profiling section I noted that the default choice of illuminant is OK for most profiles, but what if you know that a print is going to be seen under a particular light?
You can use various preset options, or you can measure your own light source.
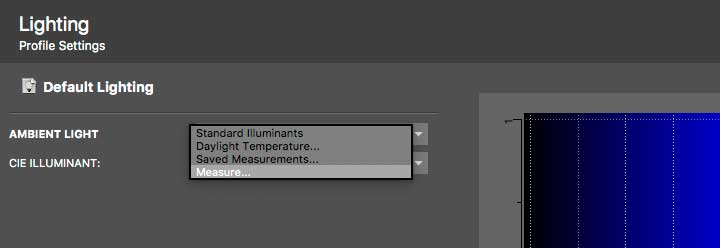
If you choose a custom illuminant when making profiles then it’s best to use the UV free M2 measurement option or a paper that’s OBA free. An example would be making prints for LED based lighting which have virtually no UV emission and won’t activate the brightening agent.
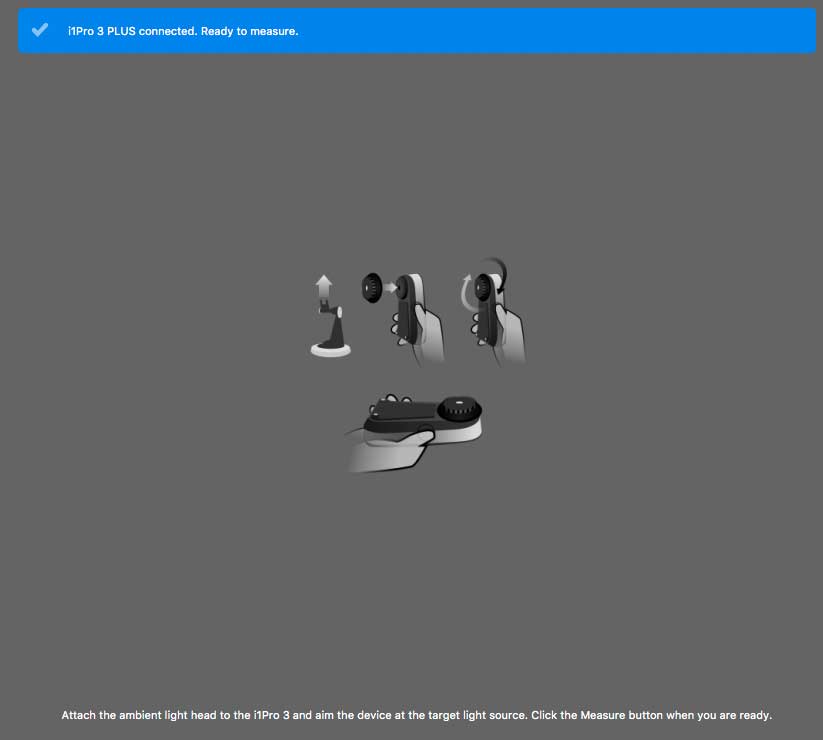
The spectro needs the ambient head fitting.
Here’s the very warm spectrum of the halogen uplighter in my office. At 500W it’s only used for when I need a bright diffuse light (or warming the office).
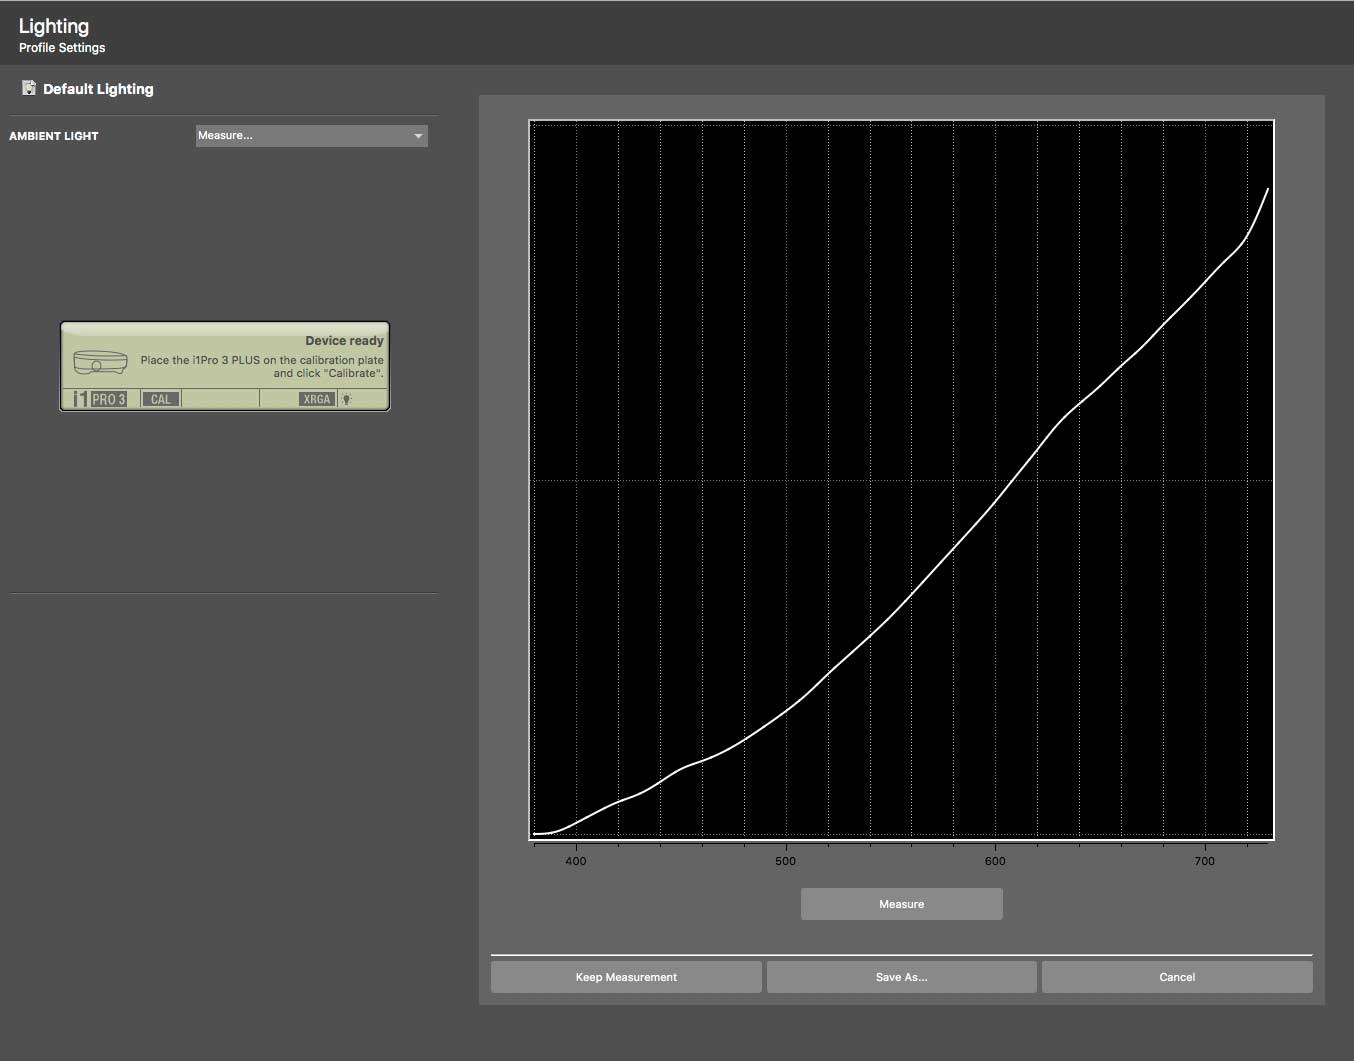
It coincides to a colour temperature of ~2800K and as you can see is very strongly peaked in the red (actually the peak is in the IR)
Virtually no UV means that papers with OBAs in them won’t light up.
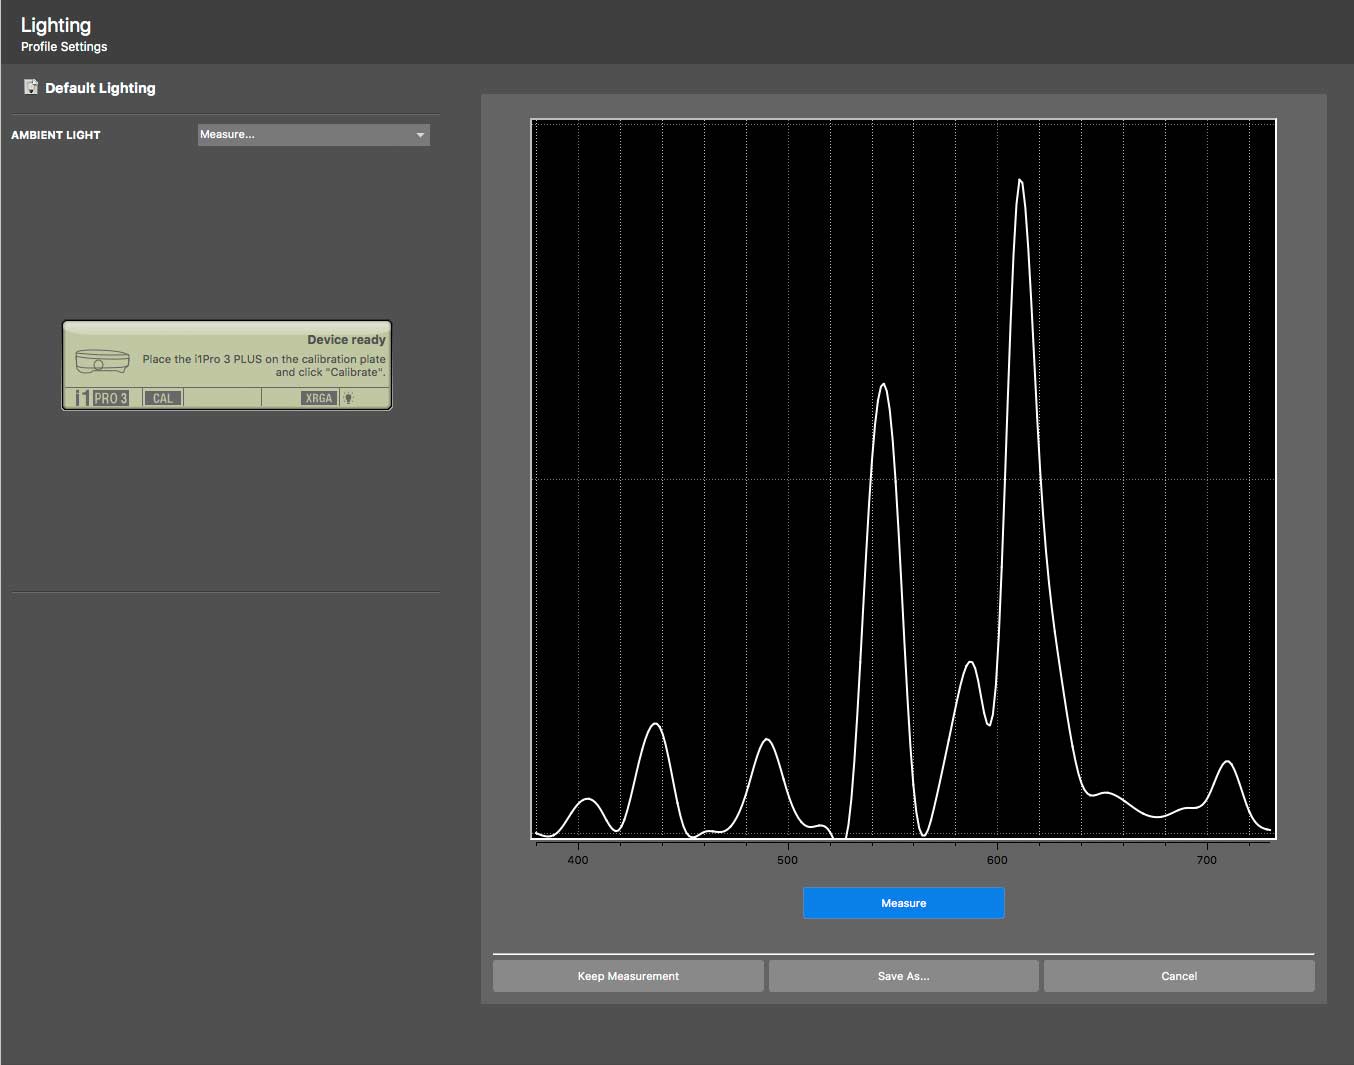
A cheap CFL energy saving lamp shows a spectrum of peaks and troughs that can play havoc with consistent colour rendition
This photo with a CFL lamp was white balanced for the lamp. Note how blue the far daylight and screen corner look.
Using my Ott-lite based desk lamp instead [Grafilite review] shows a much better light source – albeit still with some bumps.
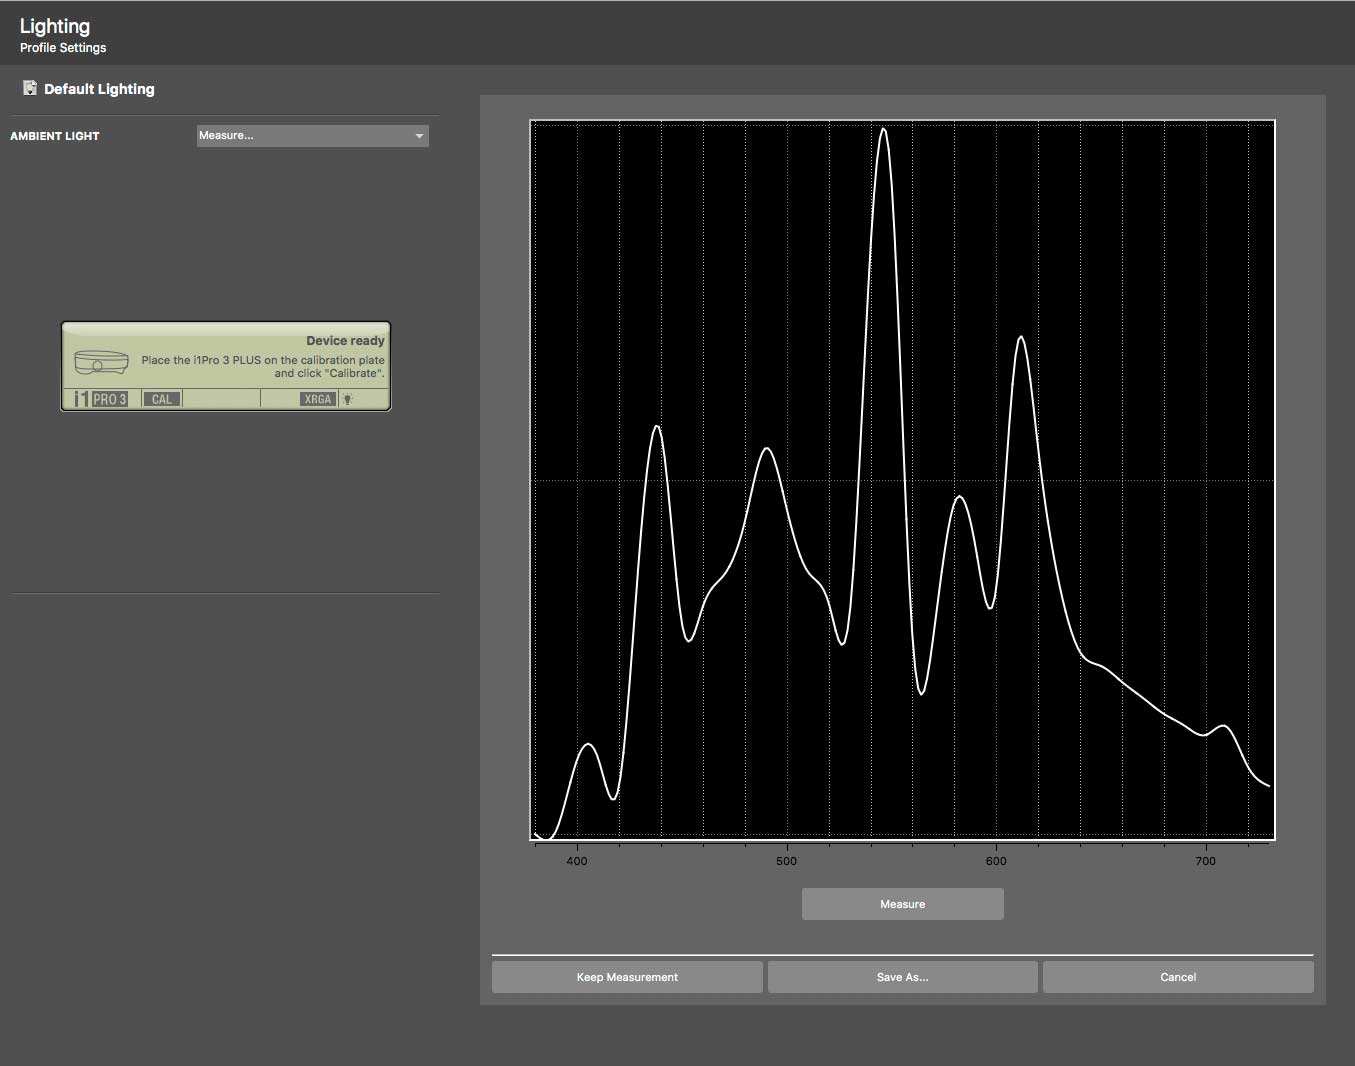
You can save these measurements – I’ve another article that looks at using them in much more detail for CRI and a number of other functions.
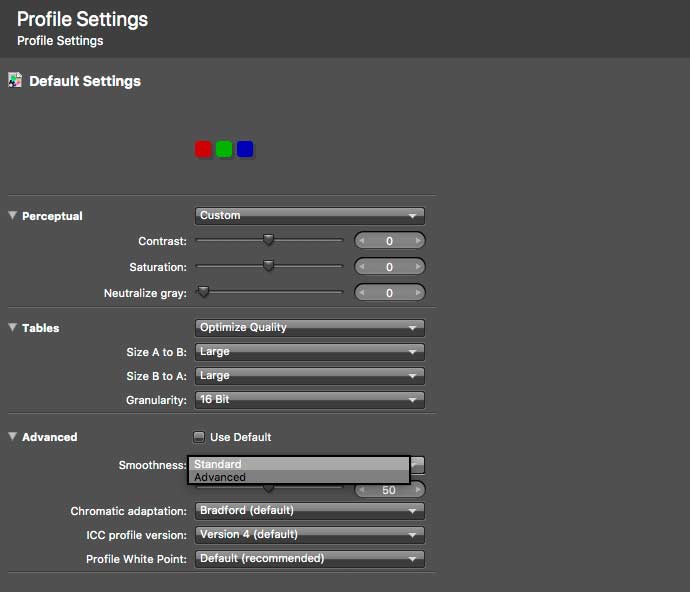
As well as lighting there are a whole load of parameters that you can change for profile creation
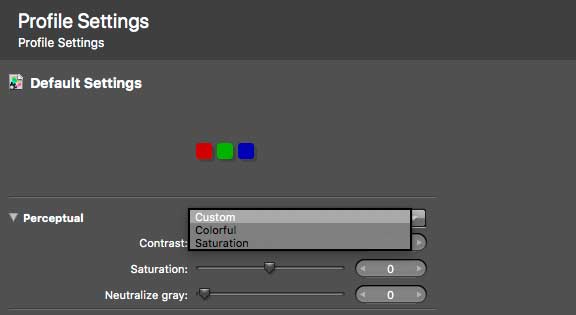
These are an expanded set of what you get in the basic workflow.
Whilst there are some help notes about just what the settings do there is till the lack of detailed explanation that I first noted with i1Profiler V1.0.
Any changes from the default options (named ‘Custom’ for some reason) can reduce print quality for many images. Changes to Contrast and saturation can lead to clipping.
I’ve looked at printer profiling with i1Profiler in some detail in my recent review of the i1iO robot arm from X-Rite if you’d like to see more examples. The new i1Pro3 Plus needs the new version of the i1iO to automate measurements. Whilst my original i1iO was upgraded to support i1Pro and i1Pro 2, this is not possible for the i1Pro 3 Plus.
By choice I go for the profile quality option (bigger profiles).
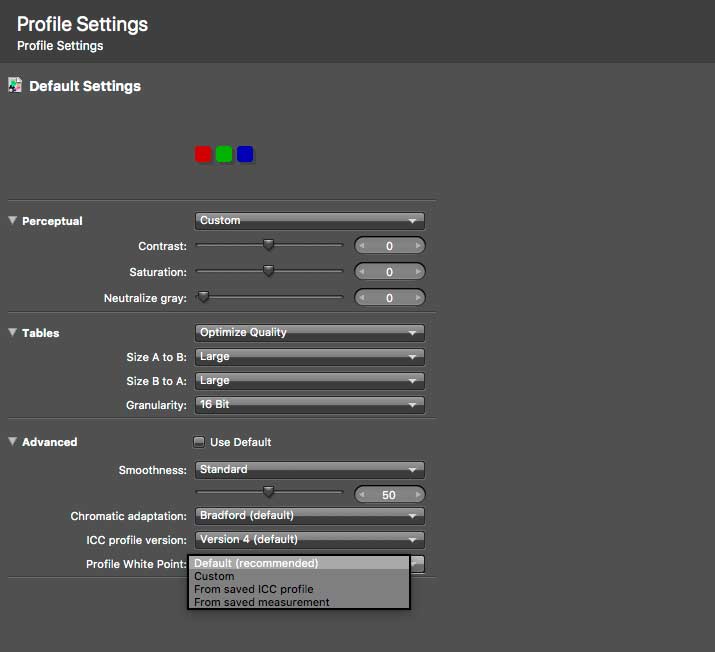
Smoothness is another of those ill defined sliders that I choose to leave well alone.
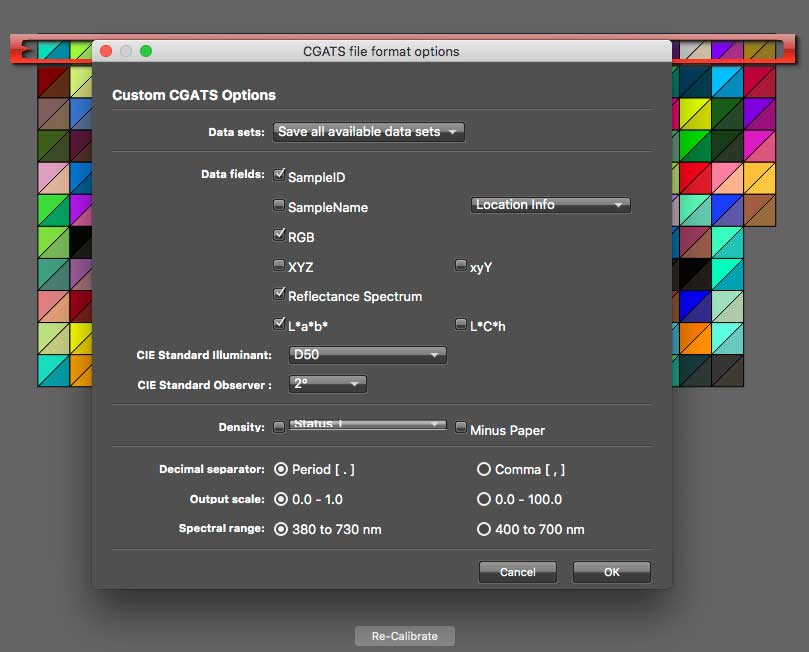
Any of the target measurement data can be saved for external applications or re-import for profile building and analysis.
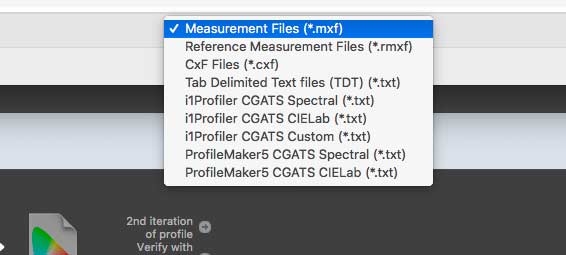
If I want, I can take data into my old copy of ProfileMaker 5 – where there will be one file per spectral measurement type that I’ve selected during measurement.
You can save profiles with embedded data for subsequent processing.
M3 (polarised UV Cut) profiling
To profile in M3 mode (polarising and UV Cut) you need a slightly larger patch size. I’m making a profile with just 400 patches to start with.
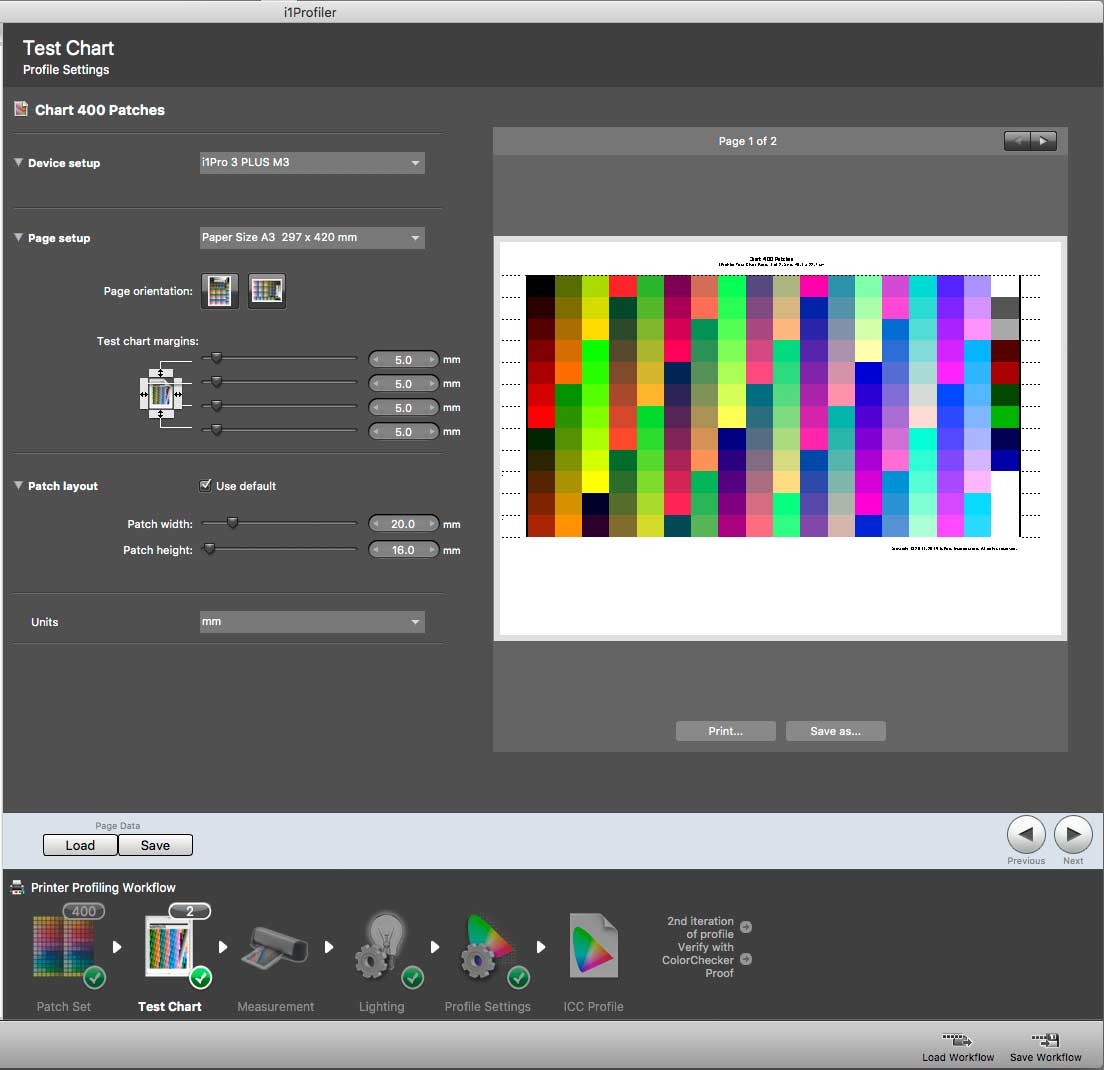
I’m reminded to fit the correct measurement head, and calibrate the i1Pro 3 Plus.
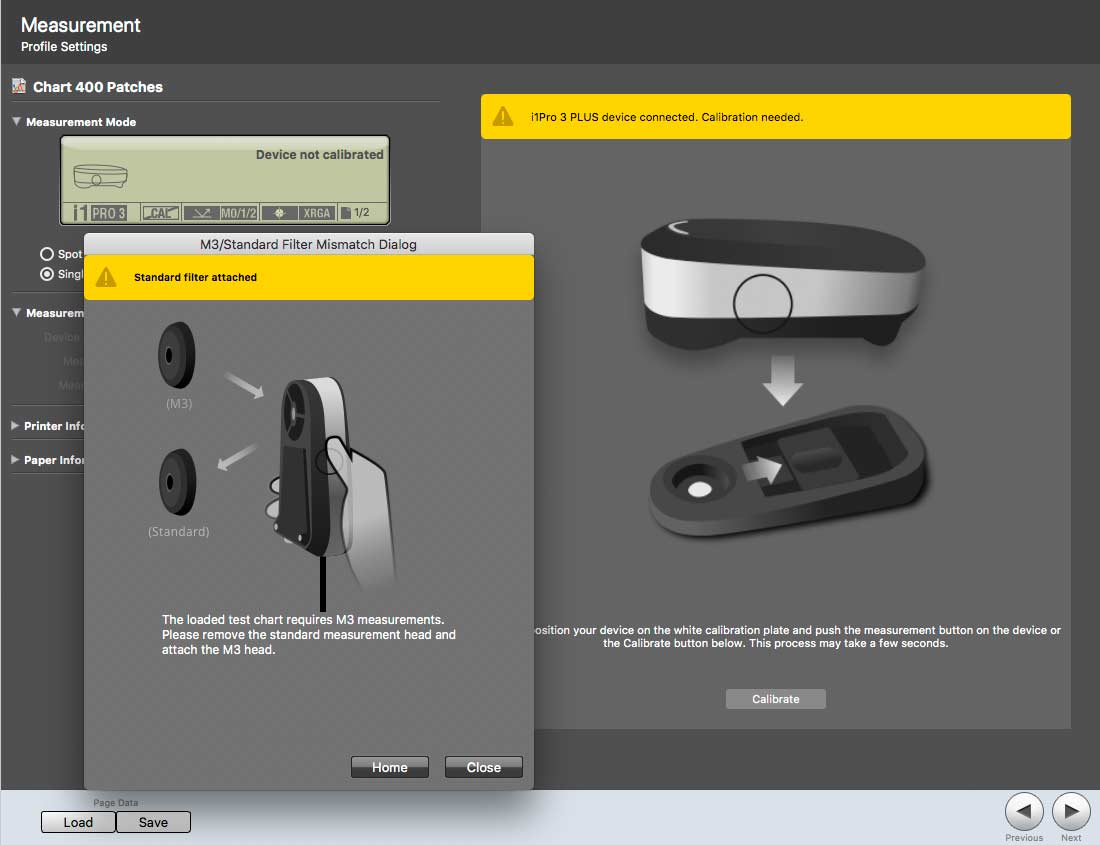
The scan is a single scan, measuring in M3 mode. The measurements are with no UV present. I’ll come back to OBC profiling later, but suffice to say, there’s not enough in this papers for UV Cut measurements to immediately concern me.
The measurement process seemed rather more picky than my previous (non polarised) attempt. Far more bad row measurements, requiring rescanning (perhaps 35%). I was glad I only picked 400 patched for this test…
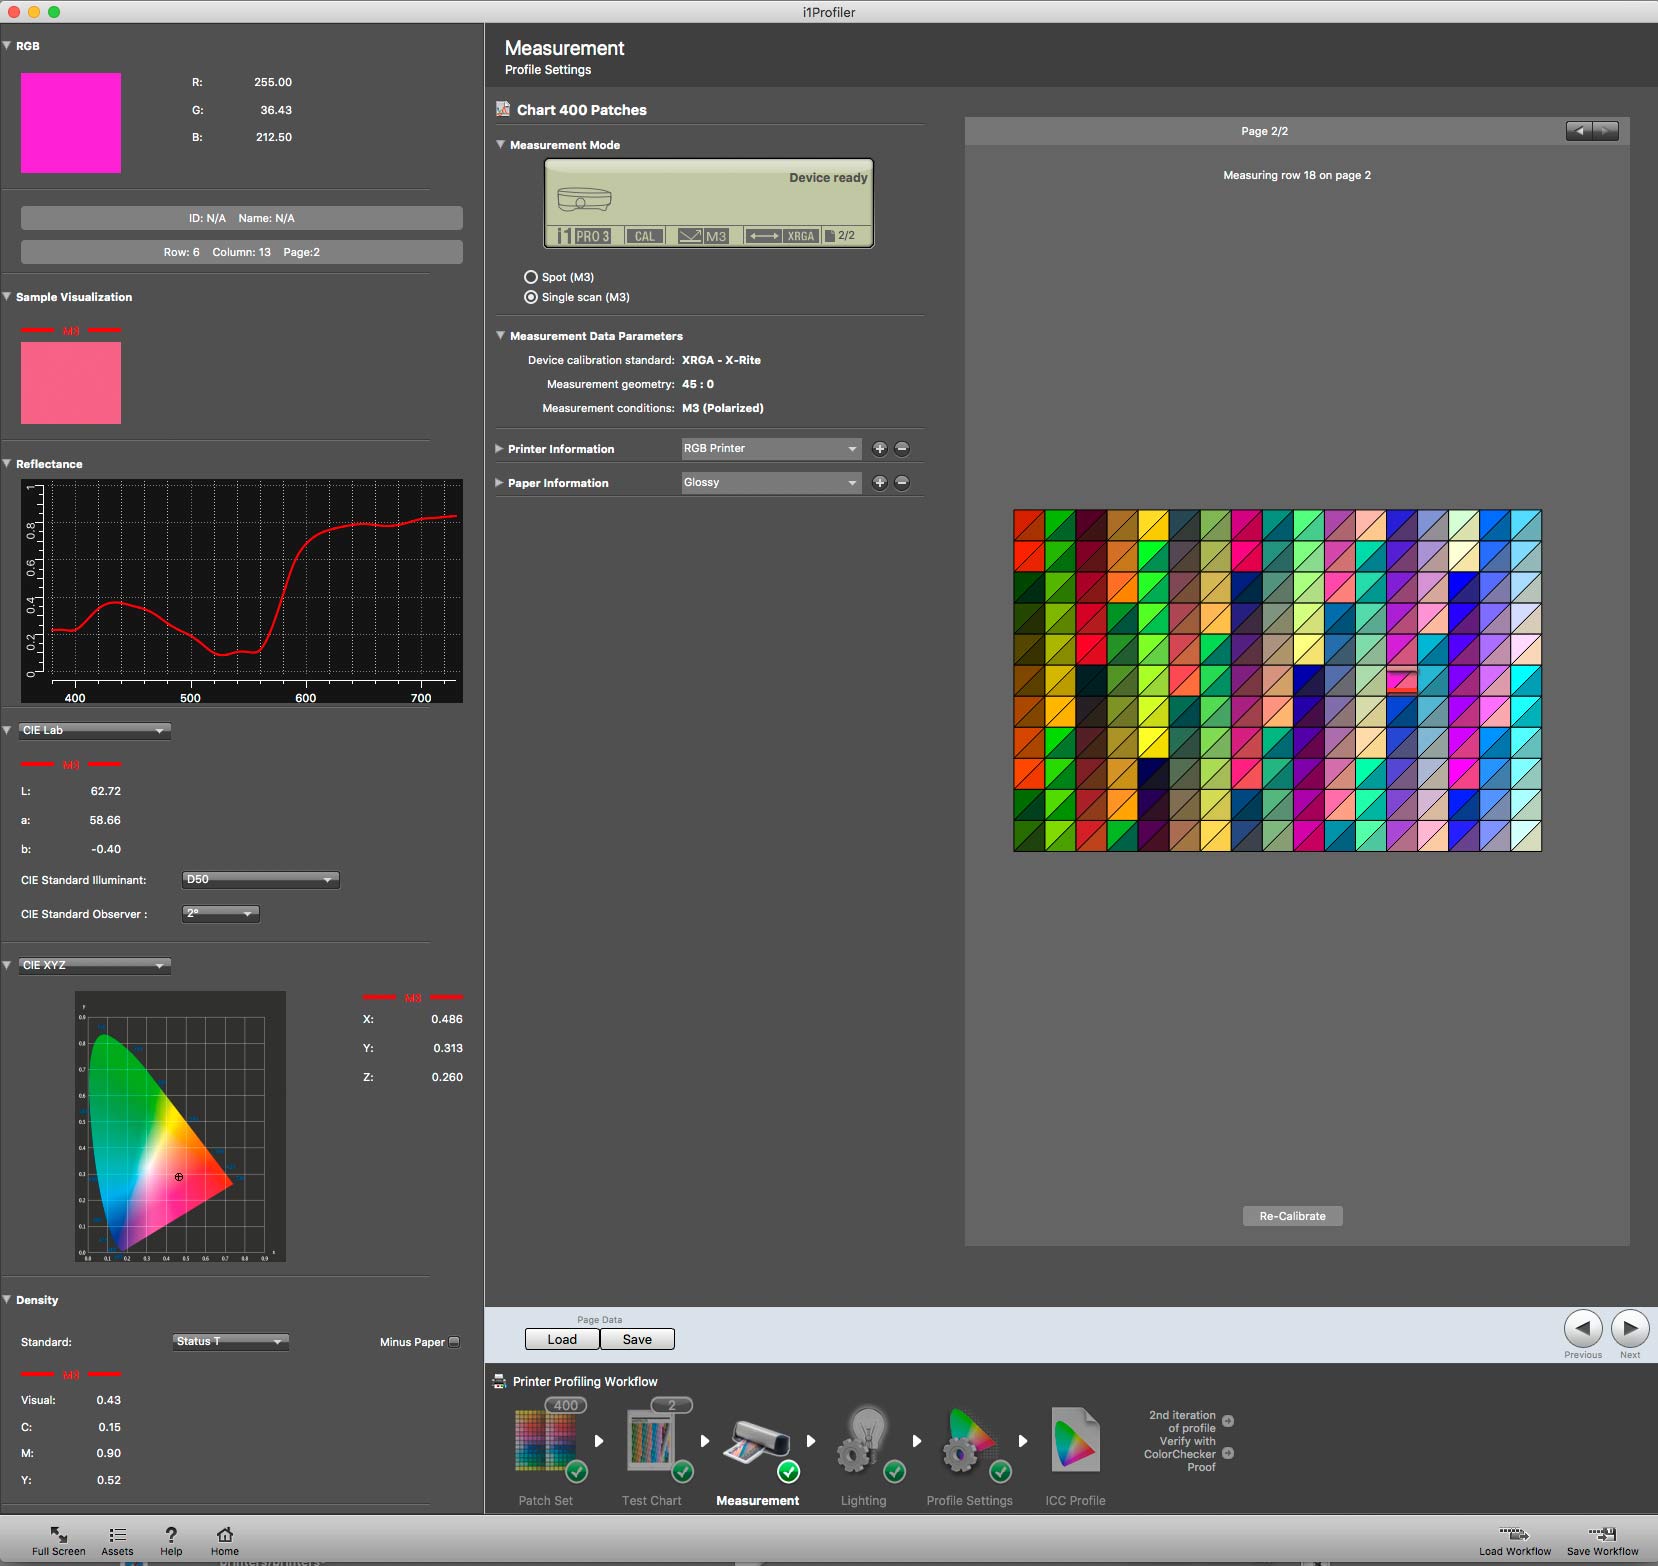
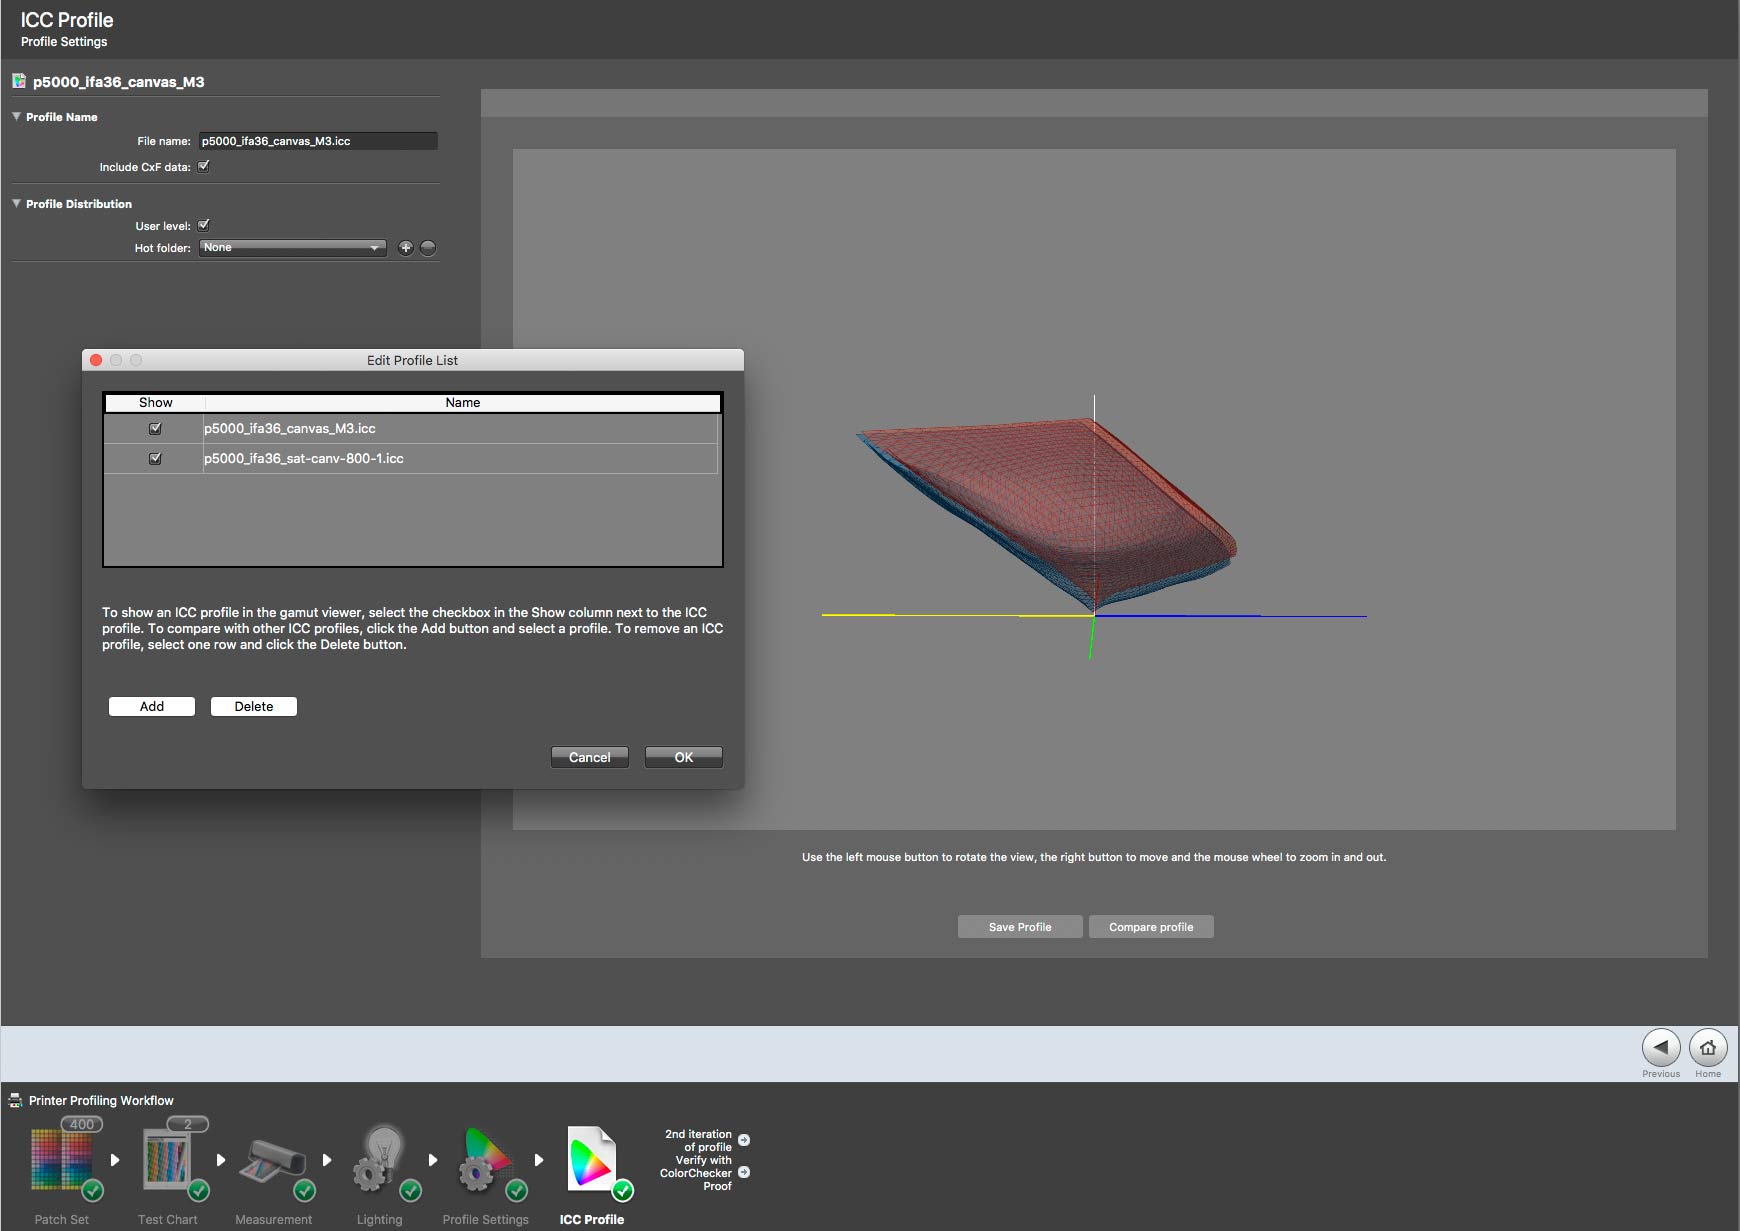
The profiling process is the same leading to my new ‘M3’ profile.
Here’s the gamut view (blue) compared to my 800 patch M0 ‘normal’ profile. Note how the M3 version sits lower down suggesting better dark colours…
A top down view shows a shift to the yellow – remember that the M3 process is a UV cut measurement set, as well as the polarisation.
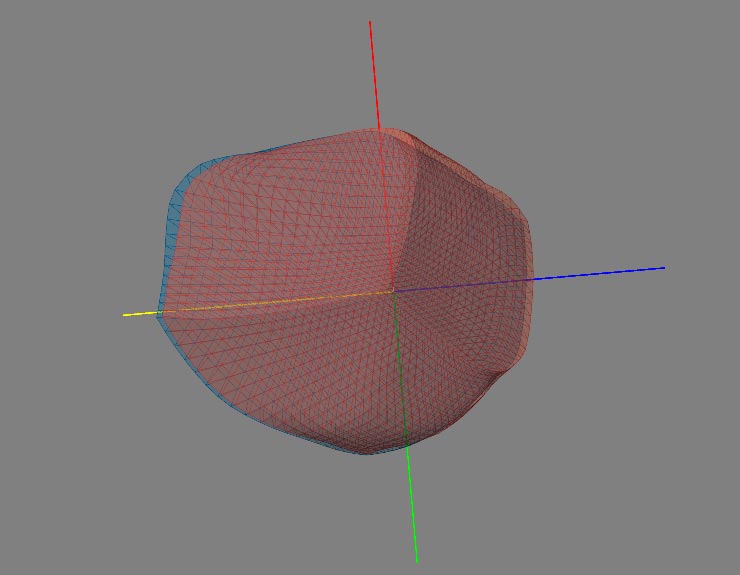
What to make of this? First up, it’s only 400 patches and hasn’t had the optimisation step which could make a difference. Probably a small difference – 400 patches gives relatively good profiles these days, modern with multi-ink printers and papers.
I’m going to have to leave any conclusions on this until more people get the chance to try M3 measurement on a wider range of media and get to evaluate results.
If anyone wants them, I’m happy to supply the profiles and measurement data I’ve created during my testing here. I’d obviously appreciate any observations/conclusions drawn… The i1Pro3 Plus is only a loan, so I’m afraid I can’t provide any new data.
Profile optimisation
Once you’ve created a printer profile, you can generate a second target, based on the profile and your original target.
This attempts to ‘fill in’ missing data or improve problematic areas, and create a new better profile.
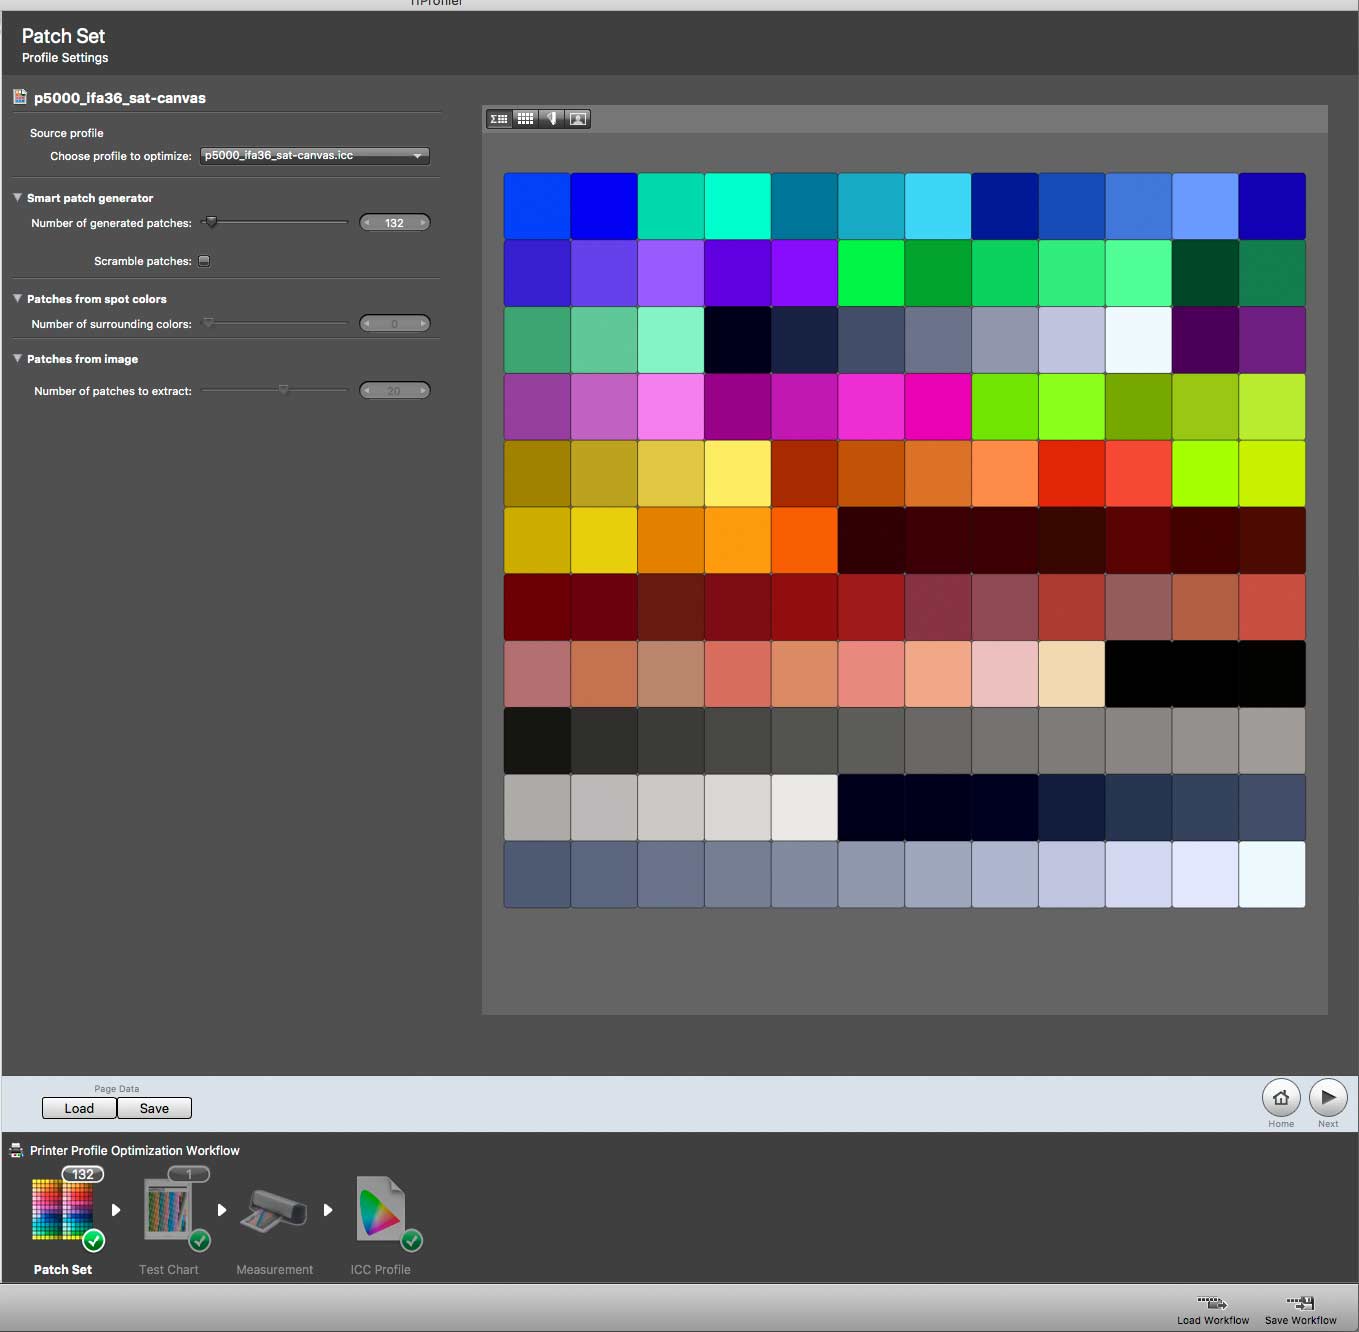
If your first target is only a few hundred patches, then the improvement may be noticeable.
You can use the auto generated patches and include spot colours and ones extracted from an image.
Over the years I’ve heard people say that yes you can see a difference sometimes for small initial patch sets, but I always wonder why they started with small patch sets.
Of course, if you’ve a chart reader like the iSis you can go overboard in the refinement.

Yes, I’ve tried it, and soon realised that if you have enough patches you quickly get into the region of diminishing returns and also that measurement errors/noise starts to impinge on the process. Oh, and thousands of patches need a lot of RAM for i1Profiler to run in.
ColorChecker Proof
It’s one reason that you get that ColorChecker card with the holes in it.
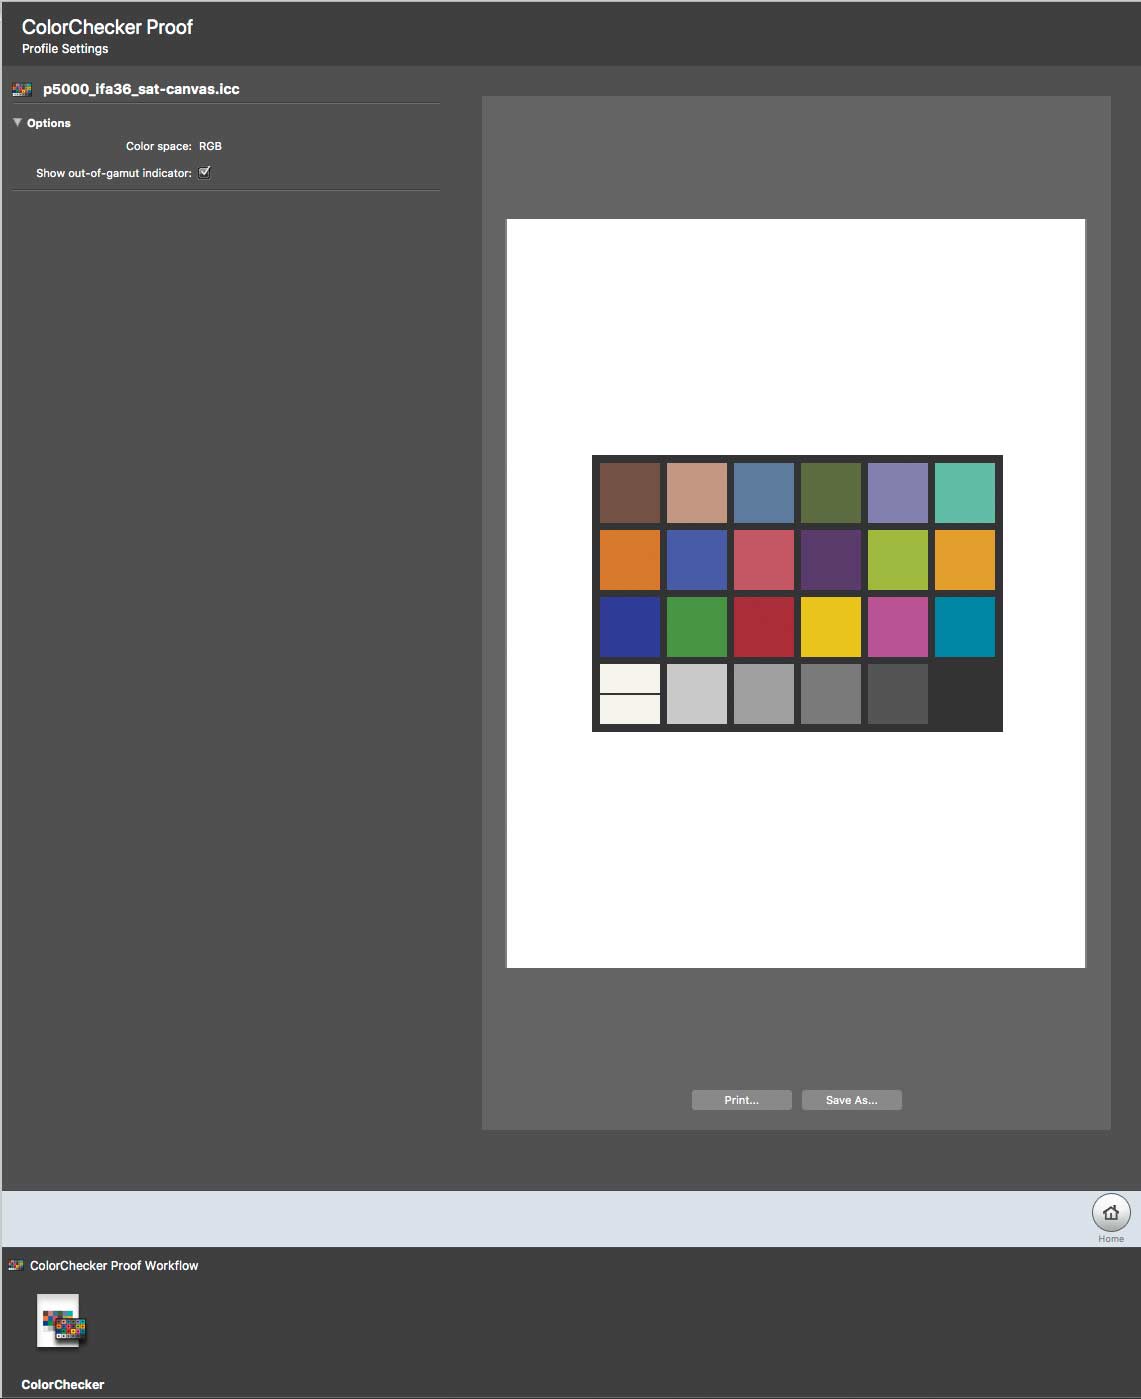
The idea is to print out a corresponding set of coloured patches and see how they look under your chosen lighting.
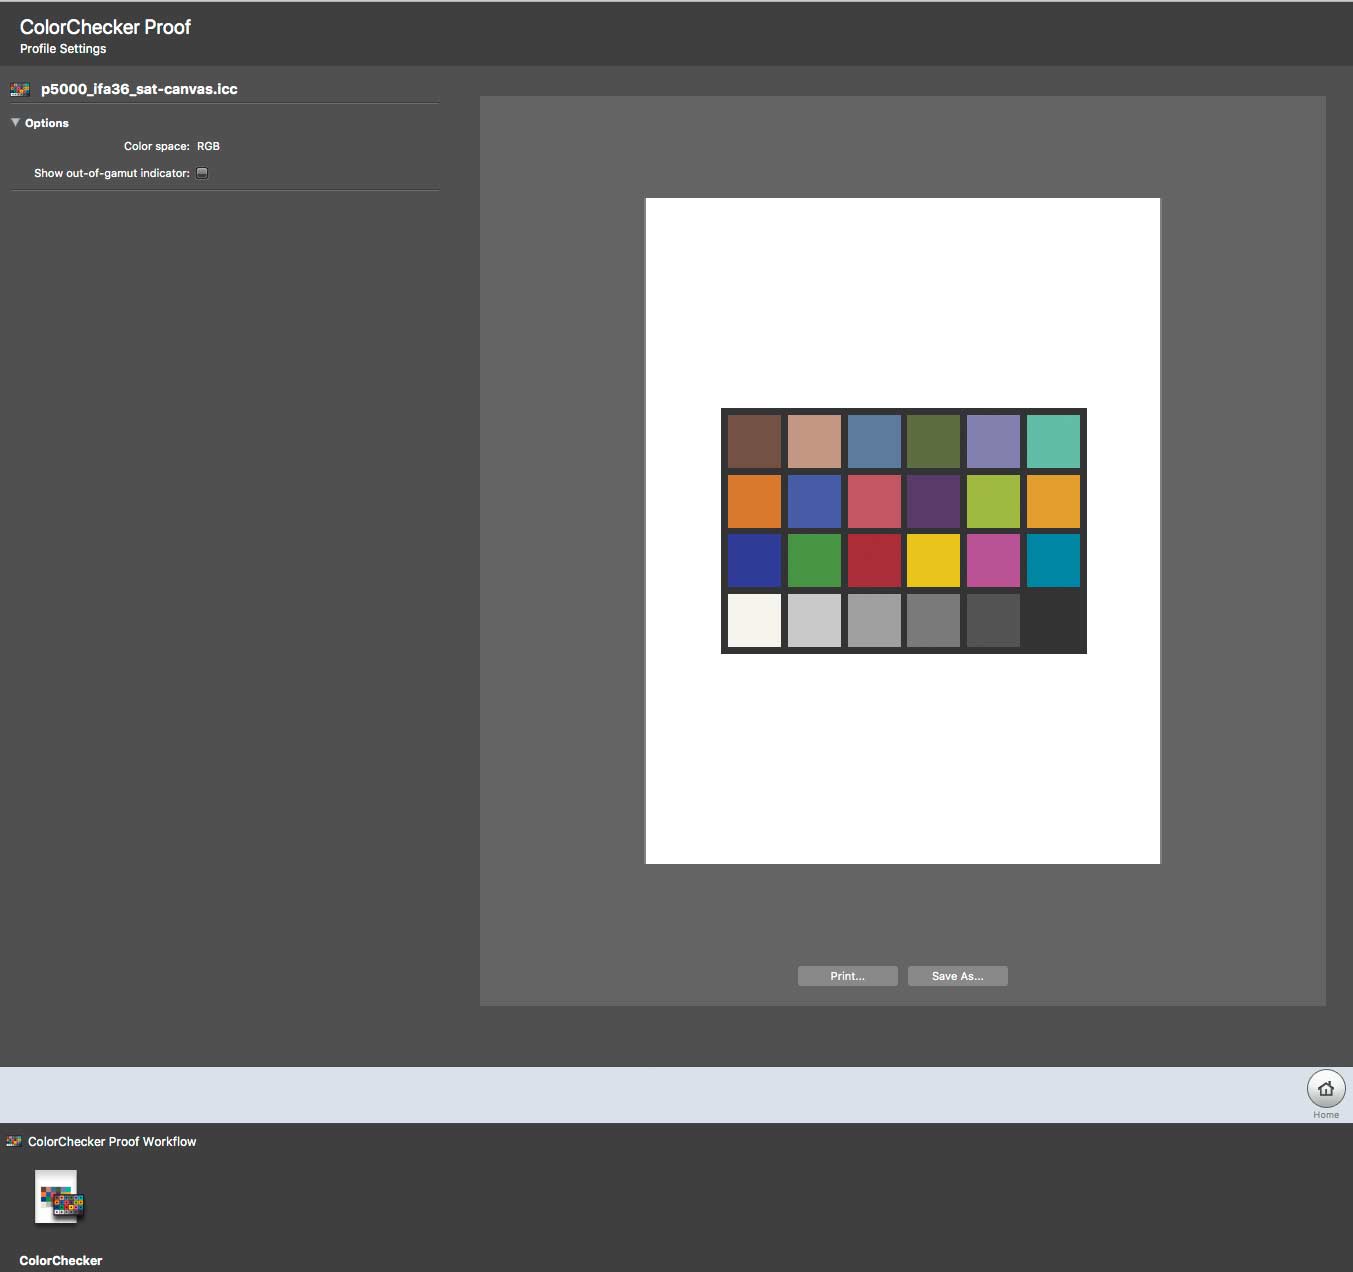
The idea is that the print and the card match.
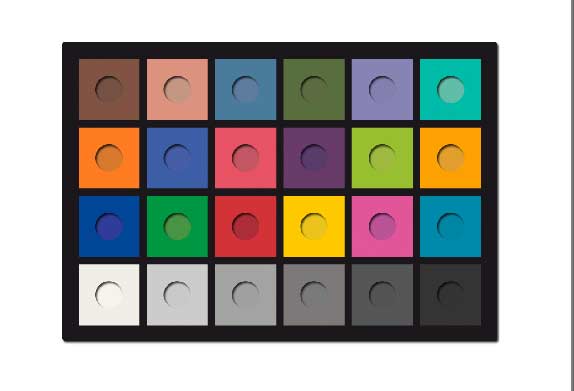
You can get an idea of which patches are unlikely to match (outside the gamut of the profile for example).
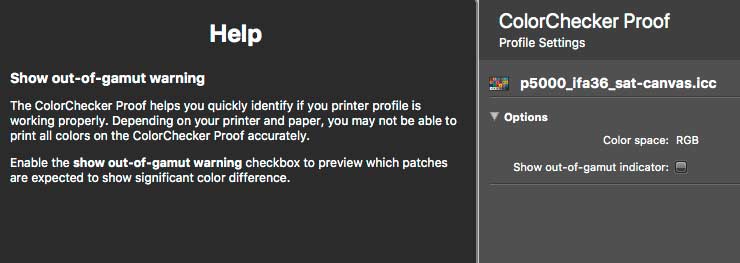
In this example, I’ve loaded the profile of a matt art paper.
I’m being told that the deep blue and red are beyond this paper/ink/printer combination.

For the canvas I’ve profiled, only the lightest neutral patch is unlikely to be matched – probably due to the canvas not being a really bright white.
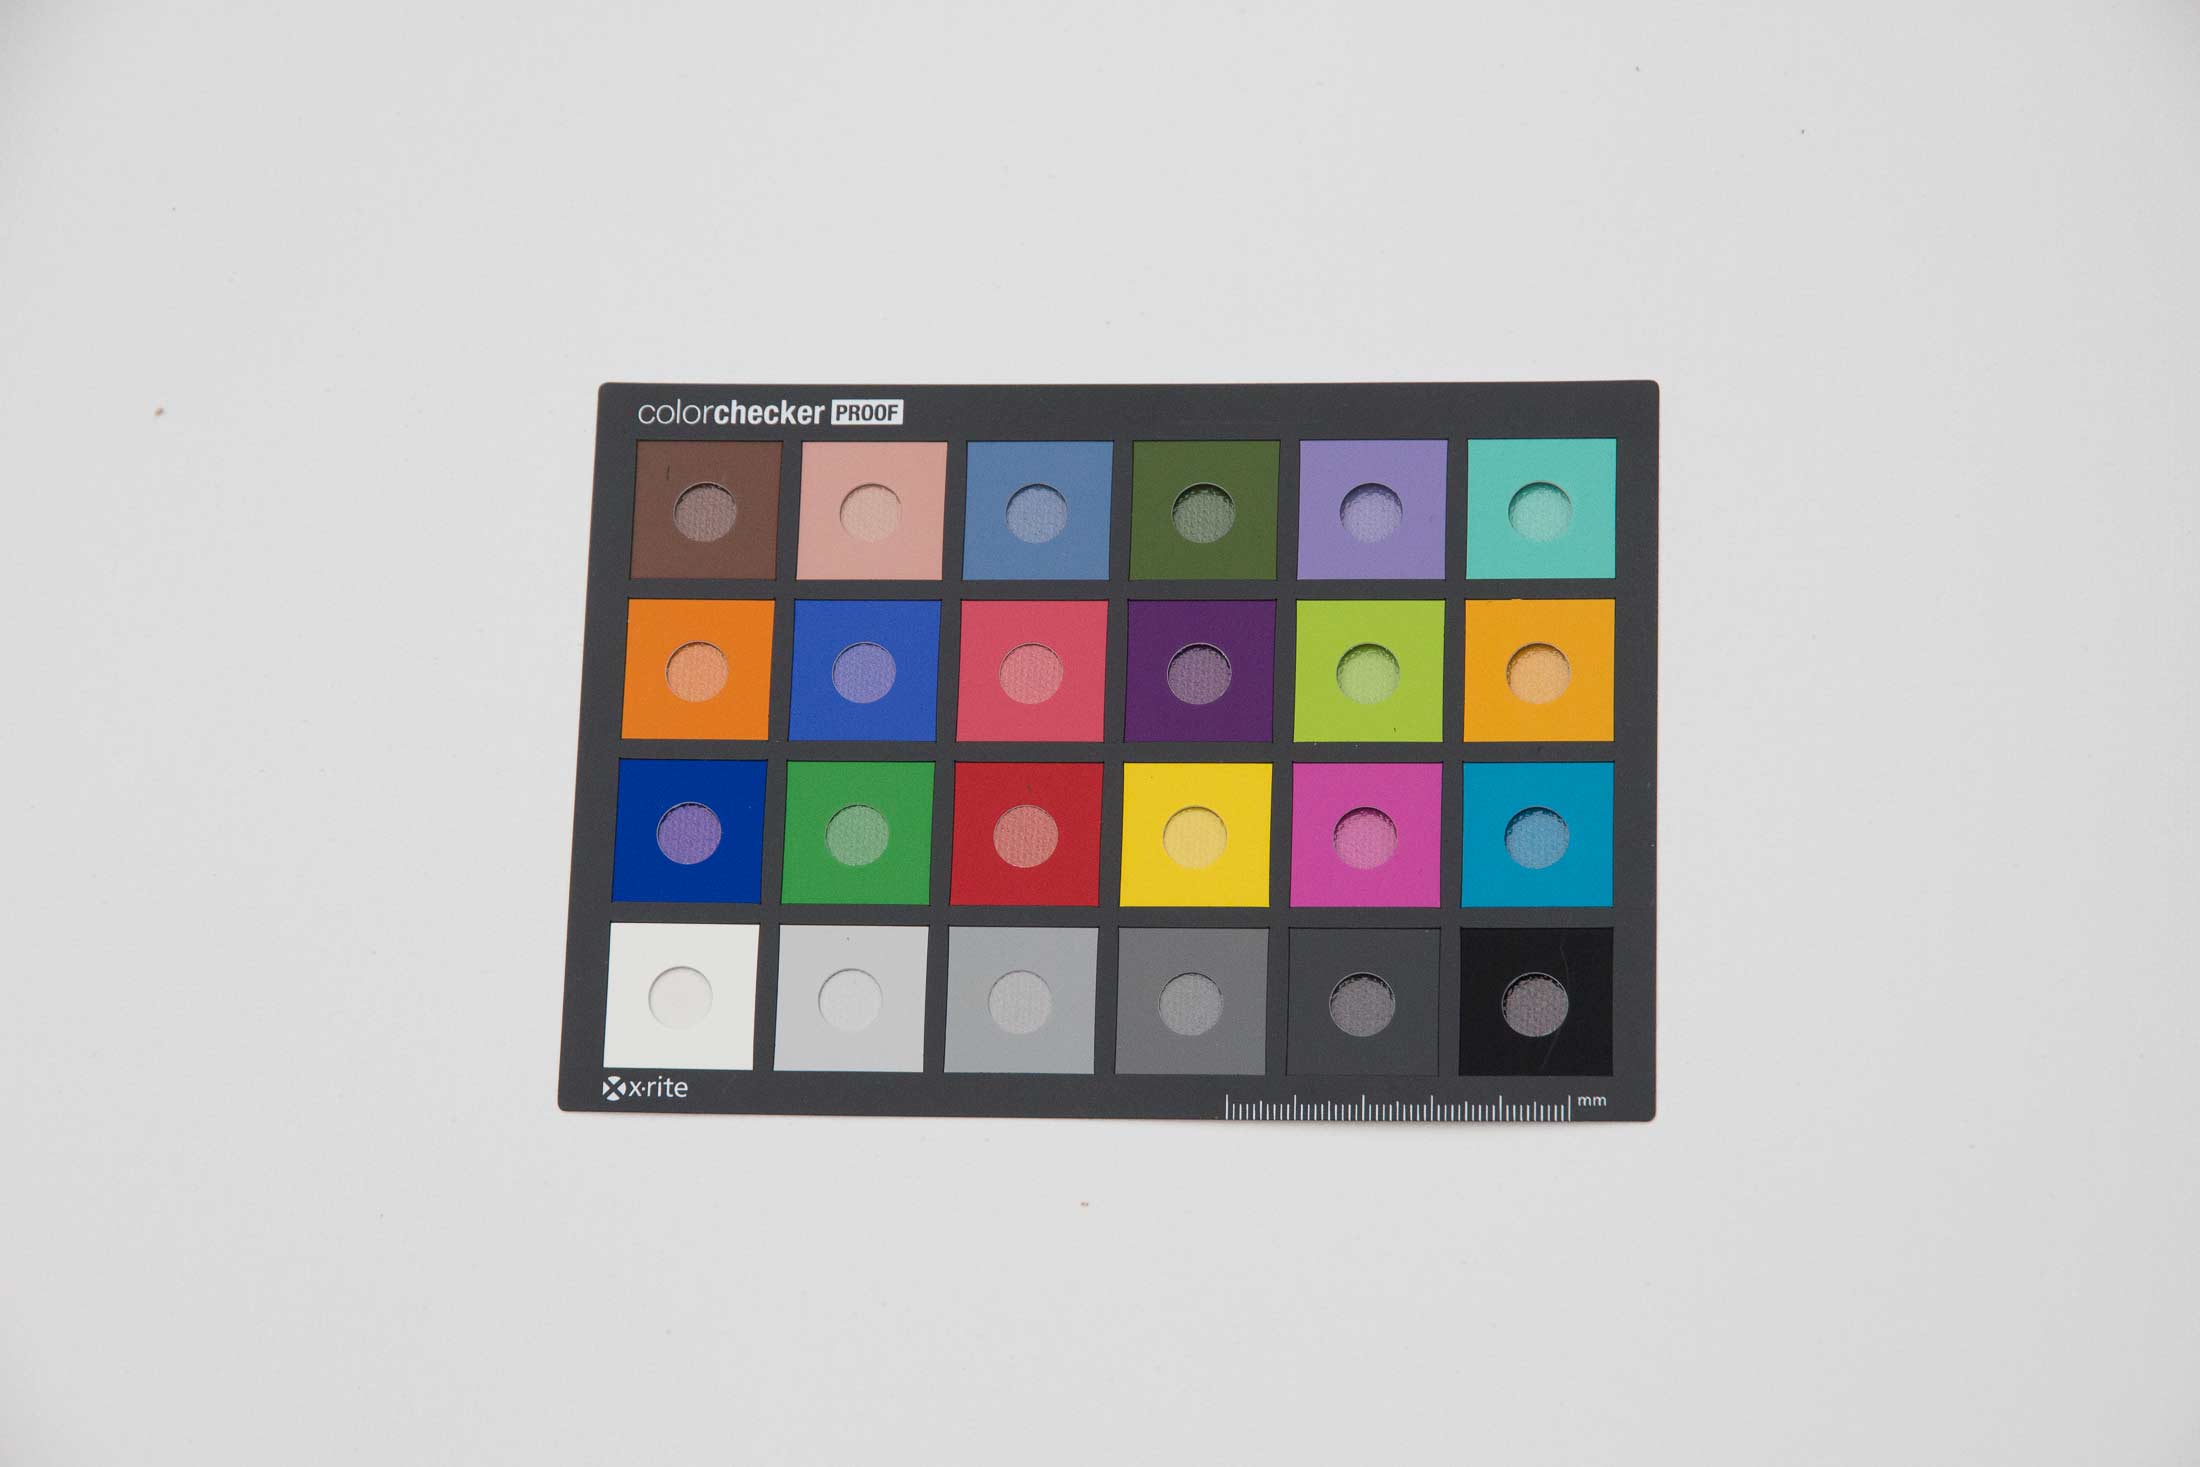
What about practical use?
This view on my desk (under halogen lighting) doesn’t look so good.
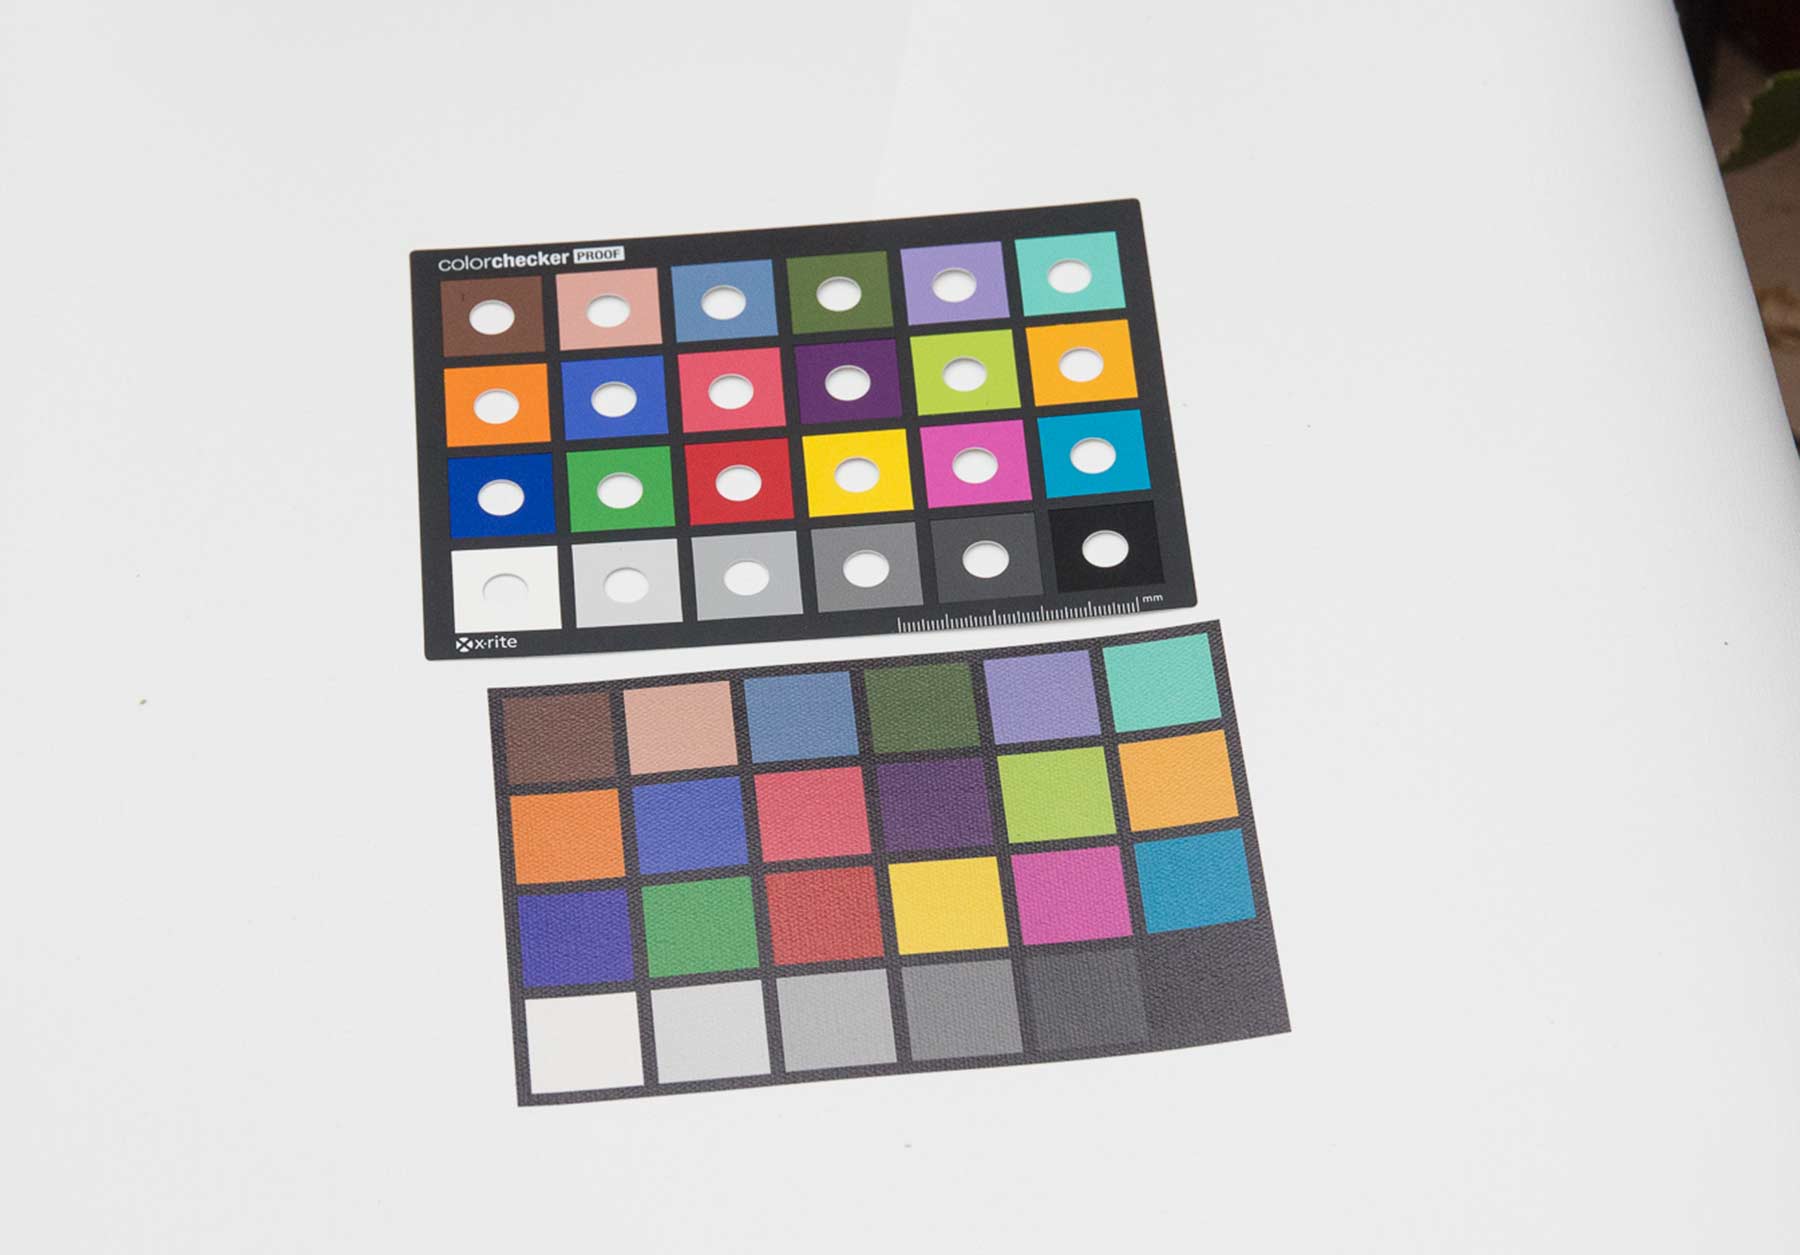
Hold on though – it’s a glossy canvas.
Move the card away and the loss of saturation and contrast from glare is more obvious.
Here’s the view under my Grafilite, where I’ve taken the shot from an angle to avoid glare.

Lastly, a view in daylight, with a dark room in front of me to eliminate glare.

Note the relative colour changes under different lighting sources.
Interesting, but not a functionality I’ve found a lot of use for over the years – sure it works, but what is what I’m seeing actually telling me and how can I make use of this?
OBC profile workflow
Optical brighteners can be a problem when profiling – their blue glow can easily throw profiling off. There are several ways of dealing with this, but i1Profiler also includes a specific OBC or Optical Brightener Compensation profiling workflow.
There is more about OBC in my i1Pro2 review. Some time ago I also wrote a review of the i1iSis workflow for creating printer profiles that compensated for OBA (Optical Brightening Agent) content in some papers.
It can be of help if you are using very bright papers in a known lighting environment where the glow of OBAs may cause problems. If you use custom illuminants for your profiles (LED or CFL lighting for example), the OBC method can yield better profiles (and soft proofing) for papers with OBAs (you could try the M2 [UV cut] measurements as well).
My simple test is to point a deep blue laser pointer at the paper – if it glows, then you know you paper has some OBA in it.
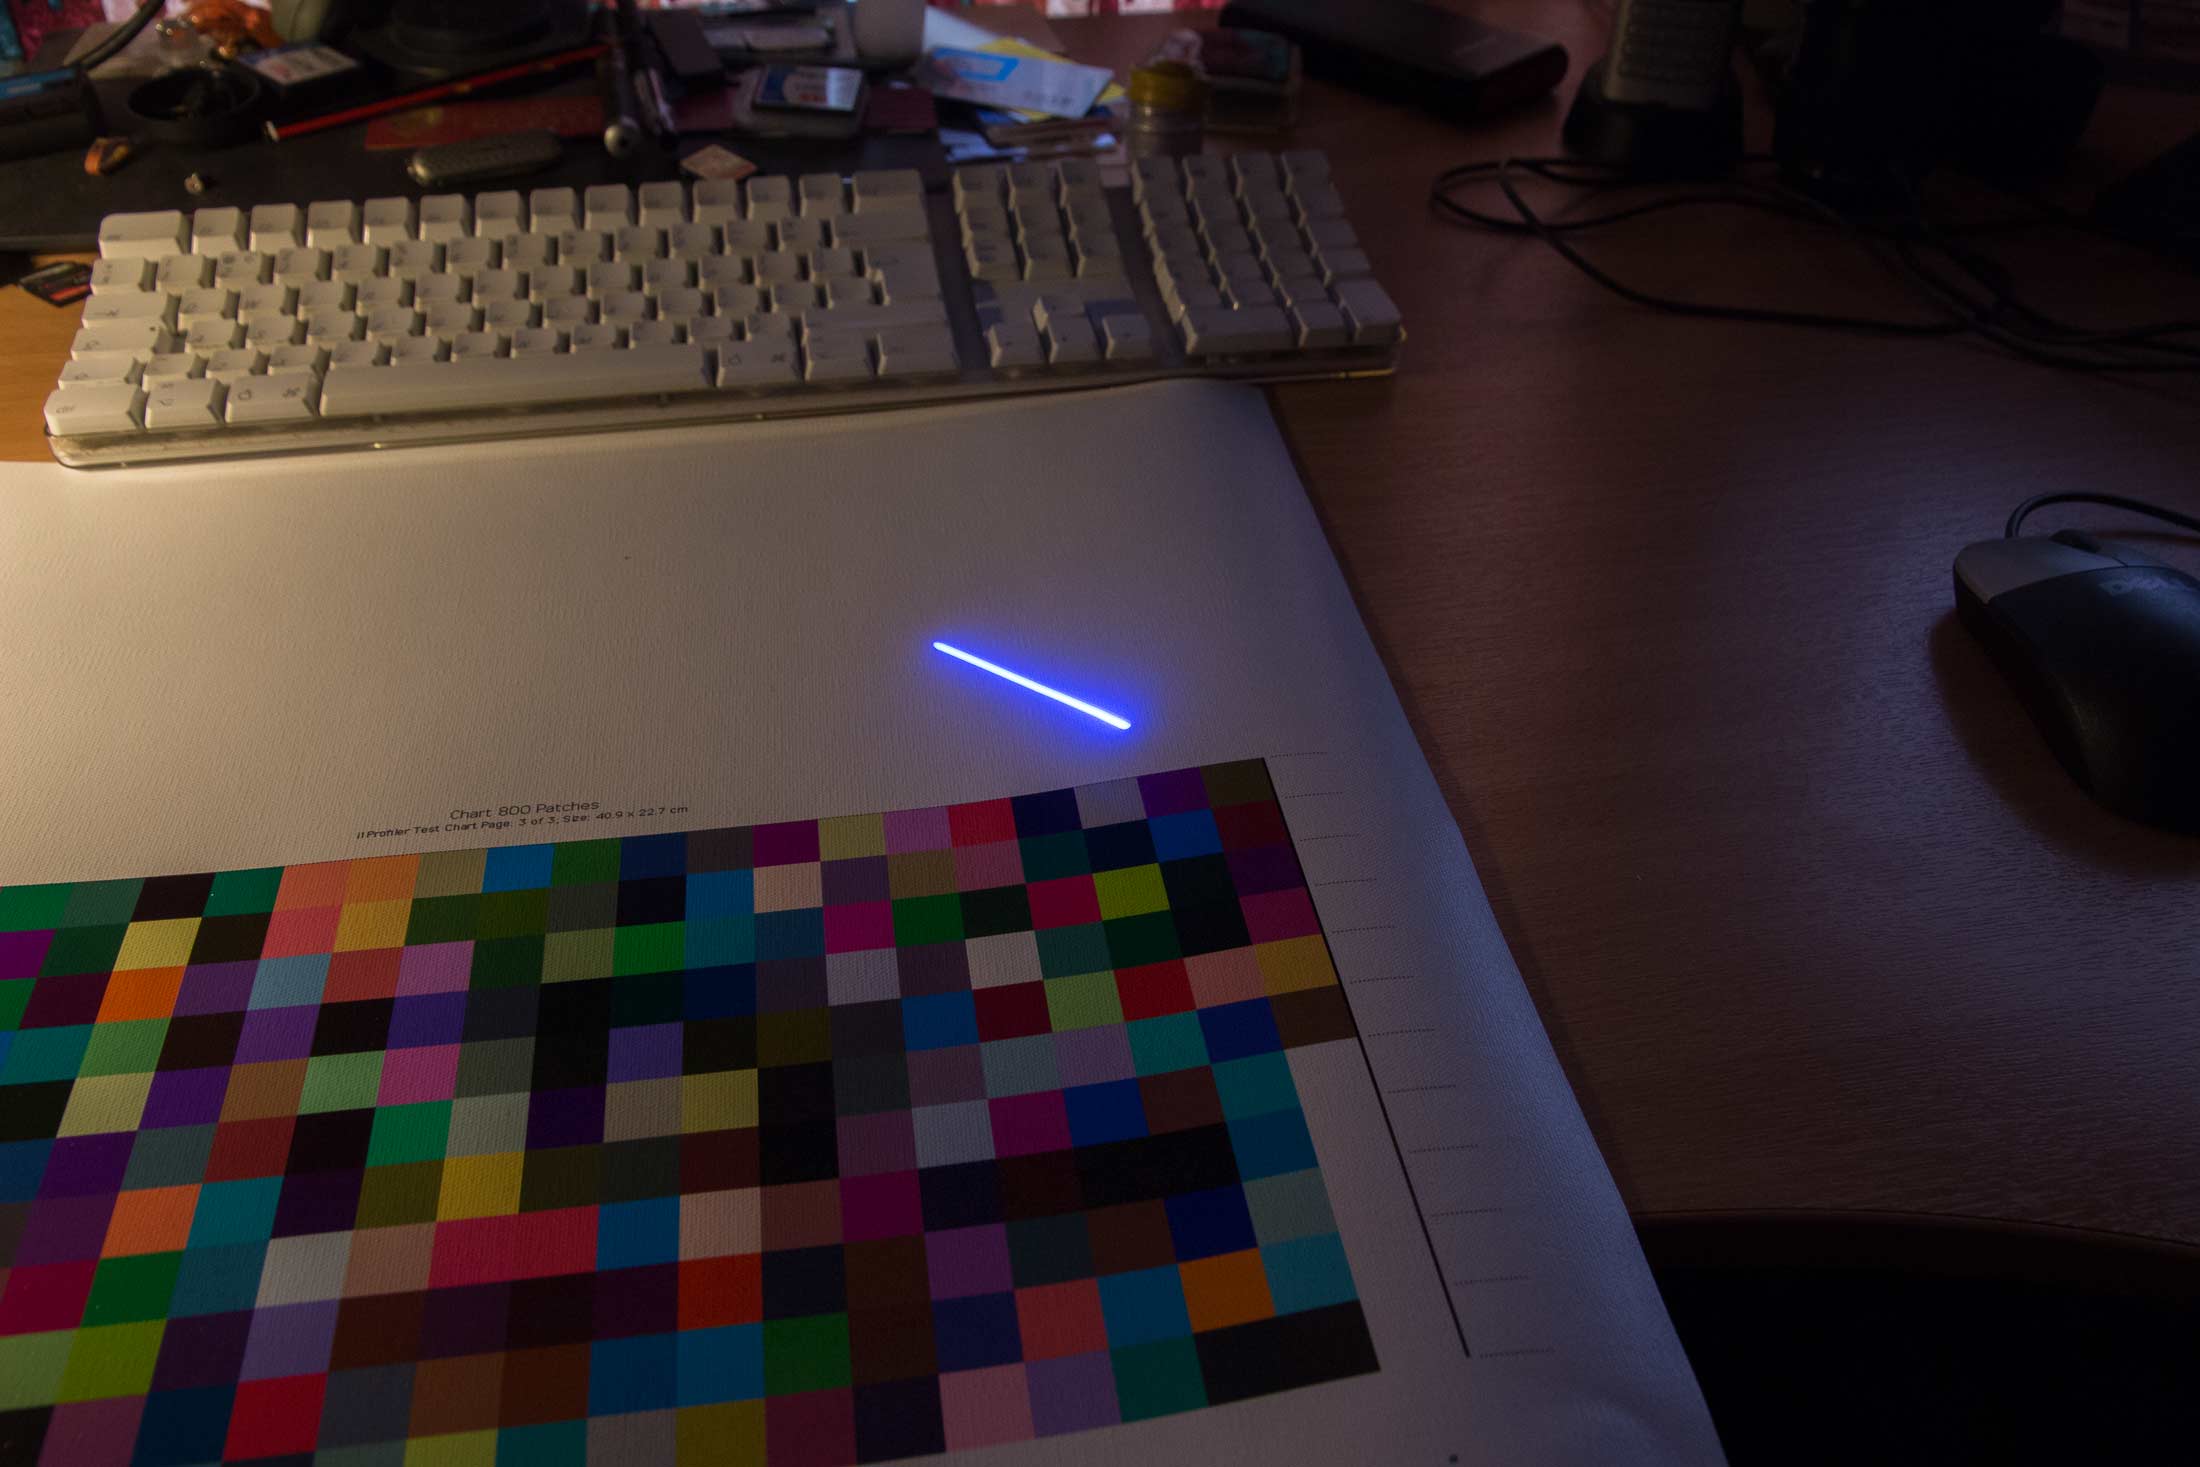
I don’t worry about moderate OBA amounts, but for archival purposes it can be more of an issue.
This Canvas doesn’t have much OBA, but it’s enough to show in the measurement data as a divergence of the curves at the blue end of the spectral data.

With some ‘super white’ media, the bump is much more obvious.
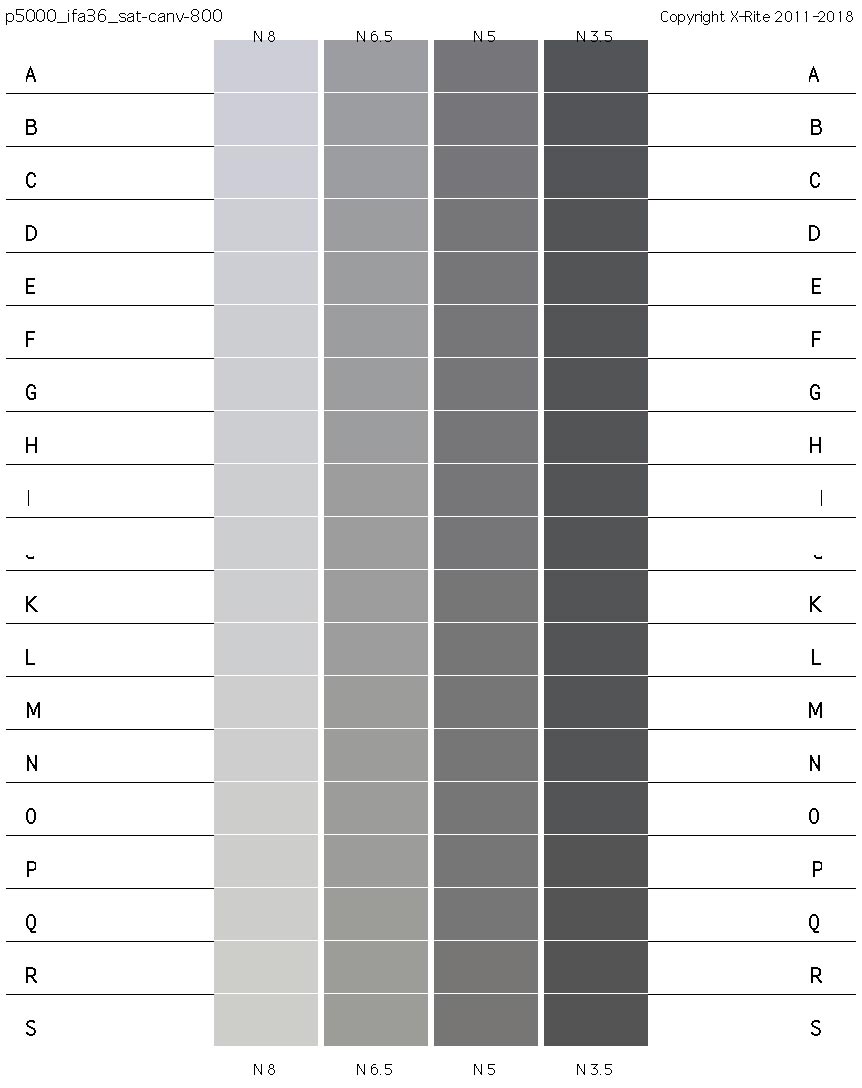
Profiling is carried out normally, but after chart measurement, a specific OBC test chart is produced, to be printed and looked at in the light you want to show the prints.
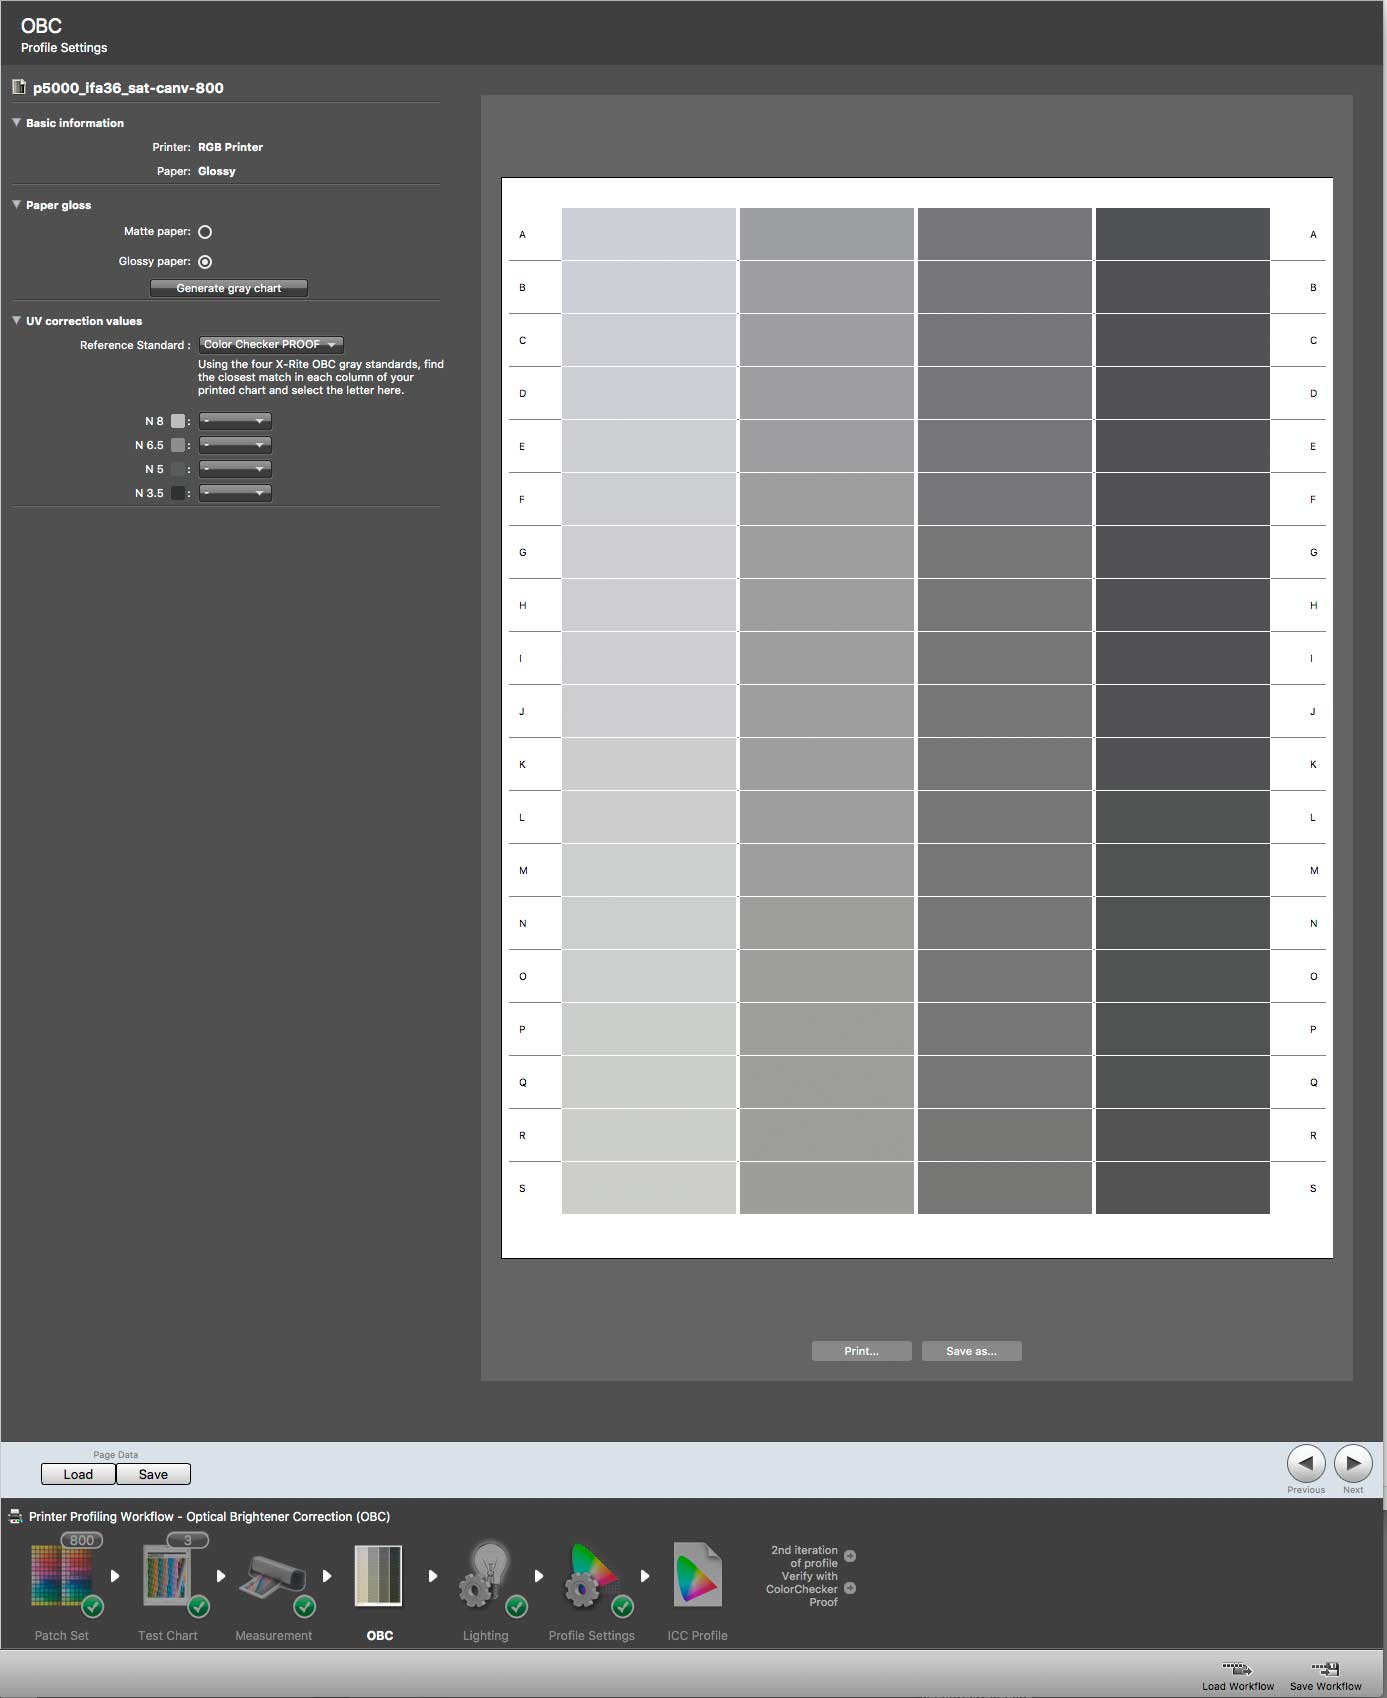
The grey patches have varying amounts of ‘warmth’ that will counteract the blueness from OBAs
Here’s the target for the IFA-36. It’s not got much OBA, so the tint isn’t strong.
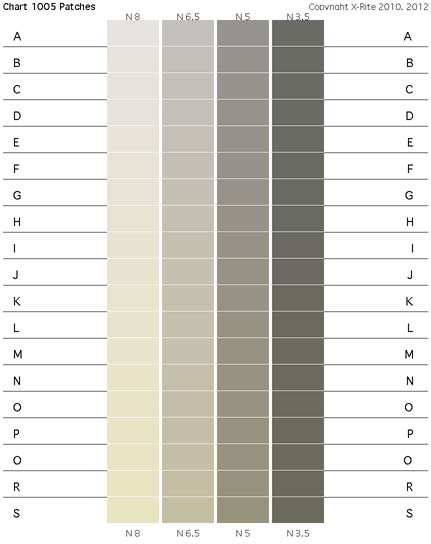
Here’s a version for a very bright paper from my previous review.
The warmth is much more noticeable.
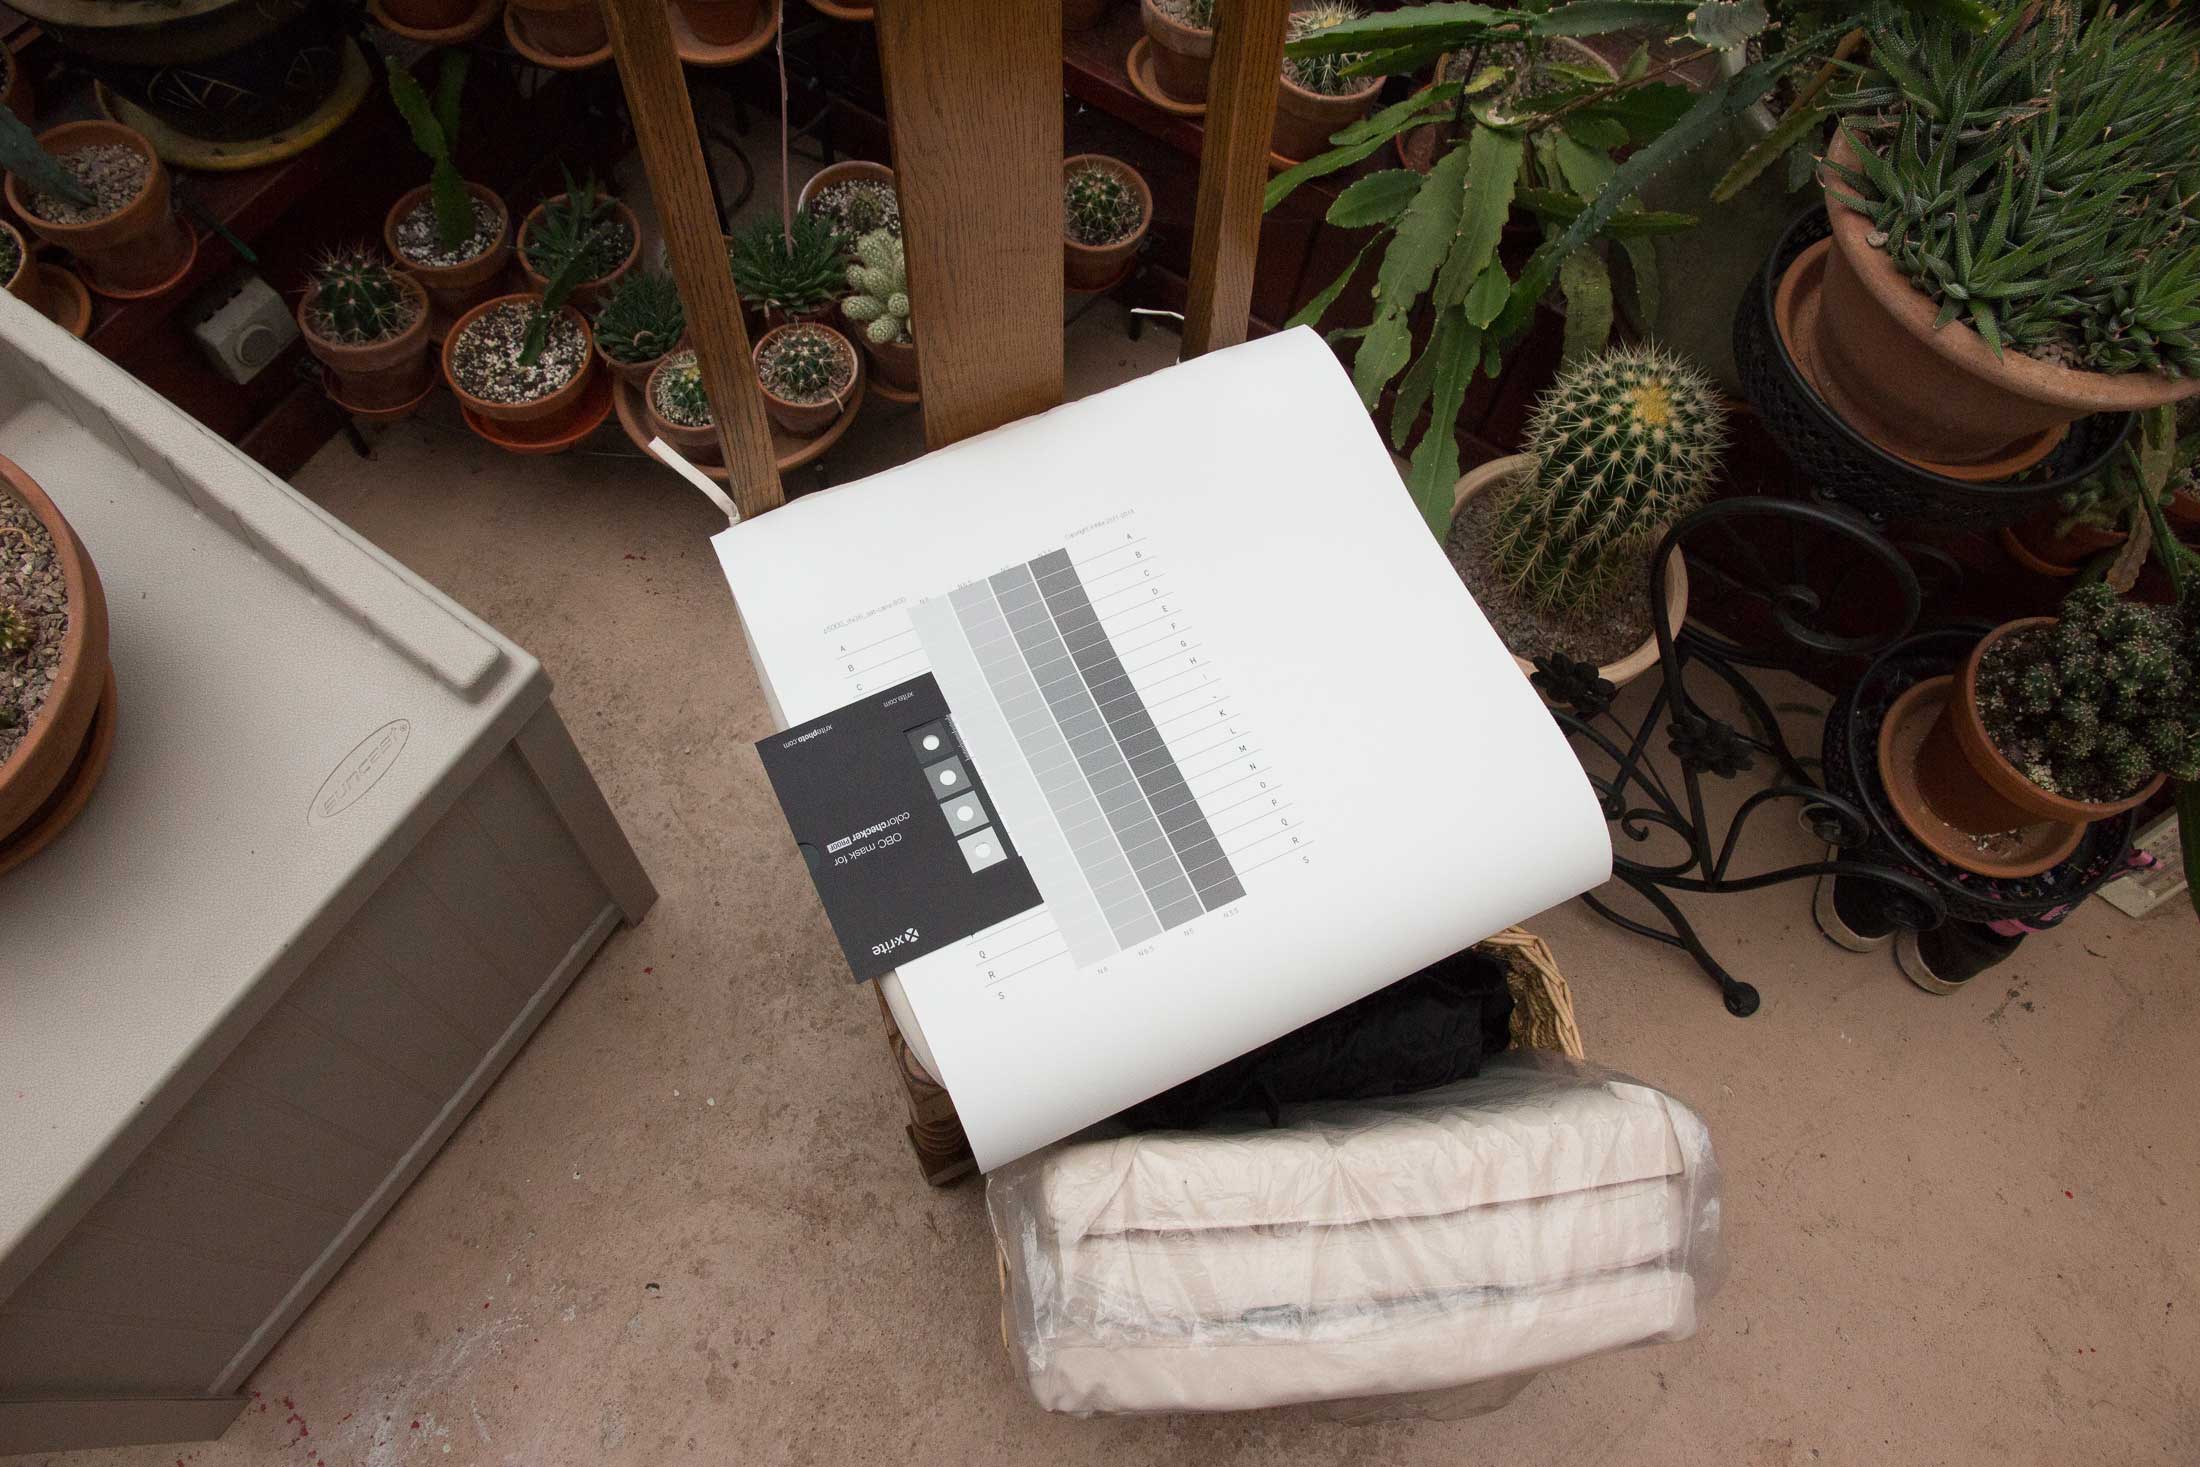
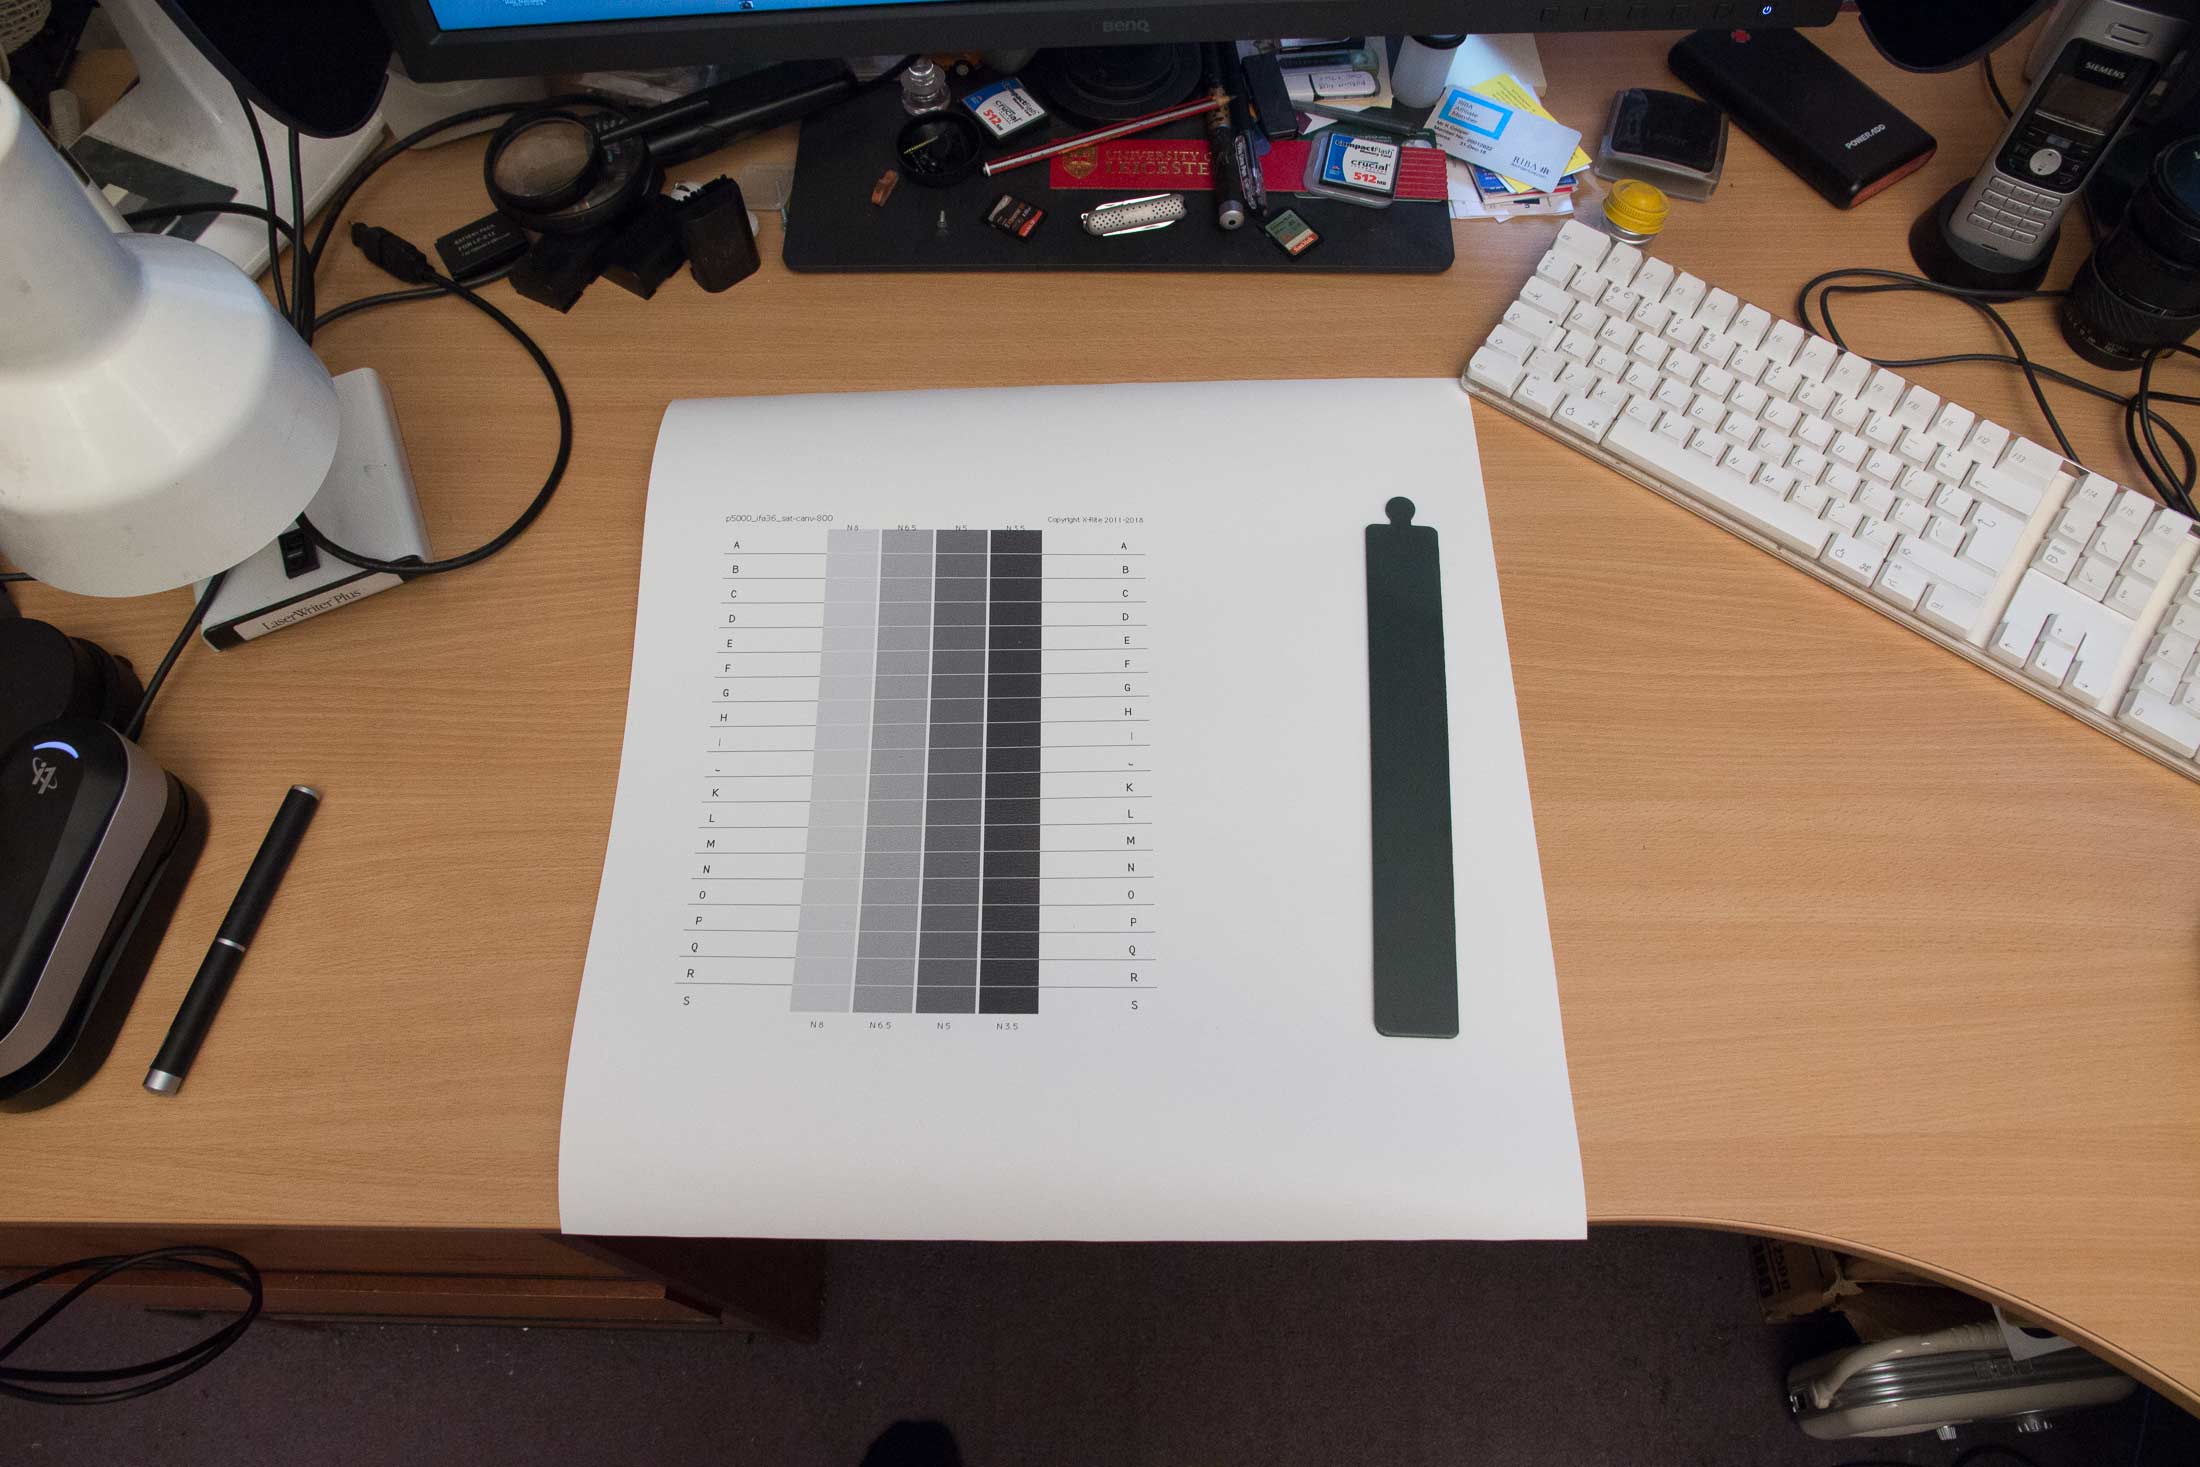
After printing, I’ve put the CC Proof card into the folder, leaving just the 4 grey patches showing.

Now comes the tricky bit – matching up which grey patch matches the target.
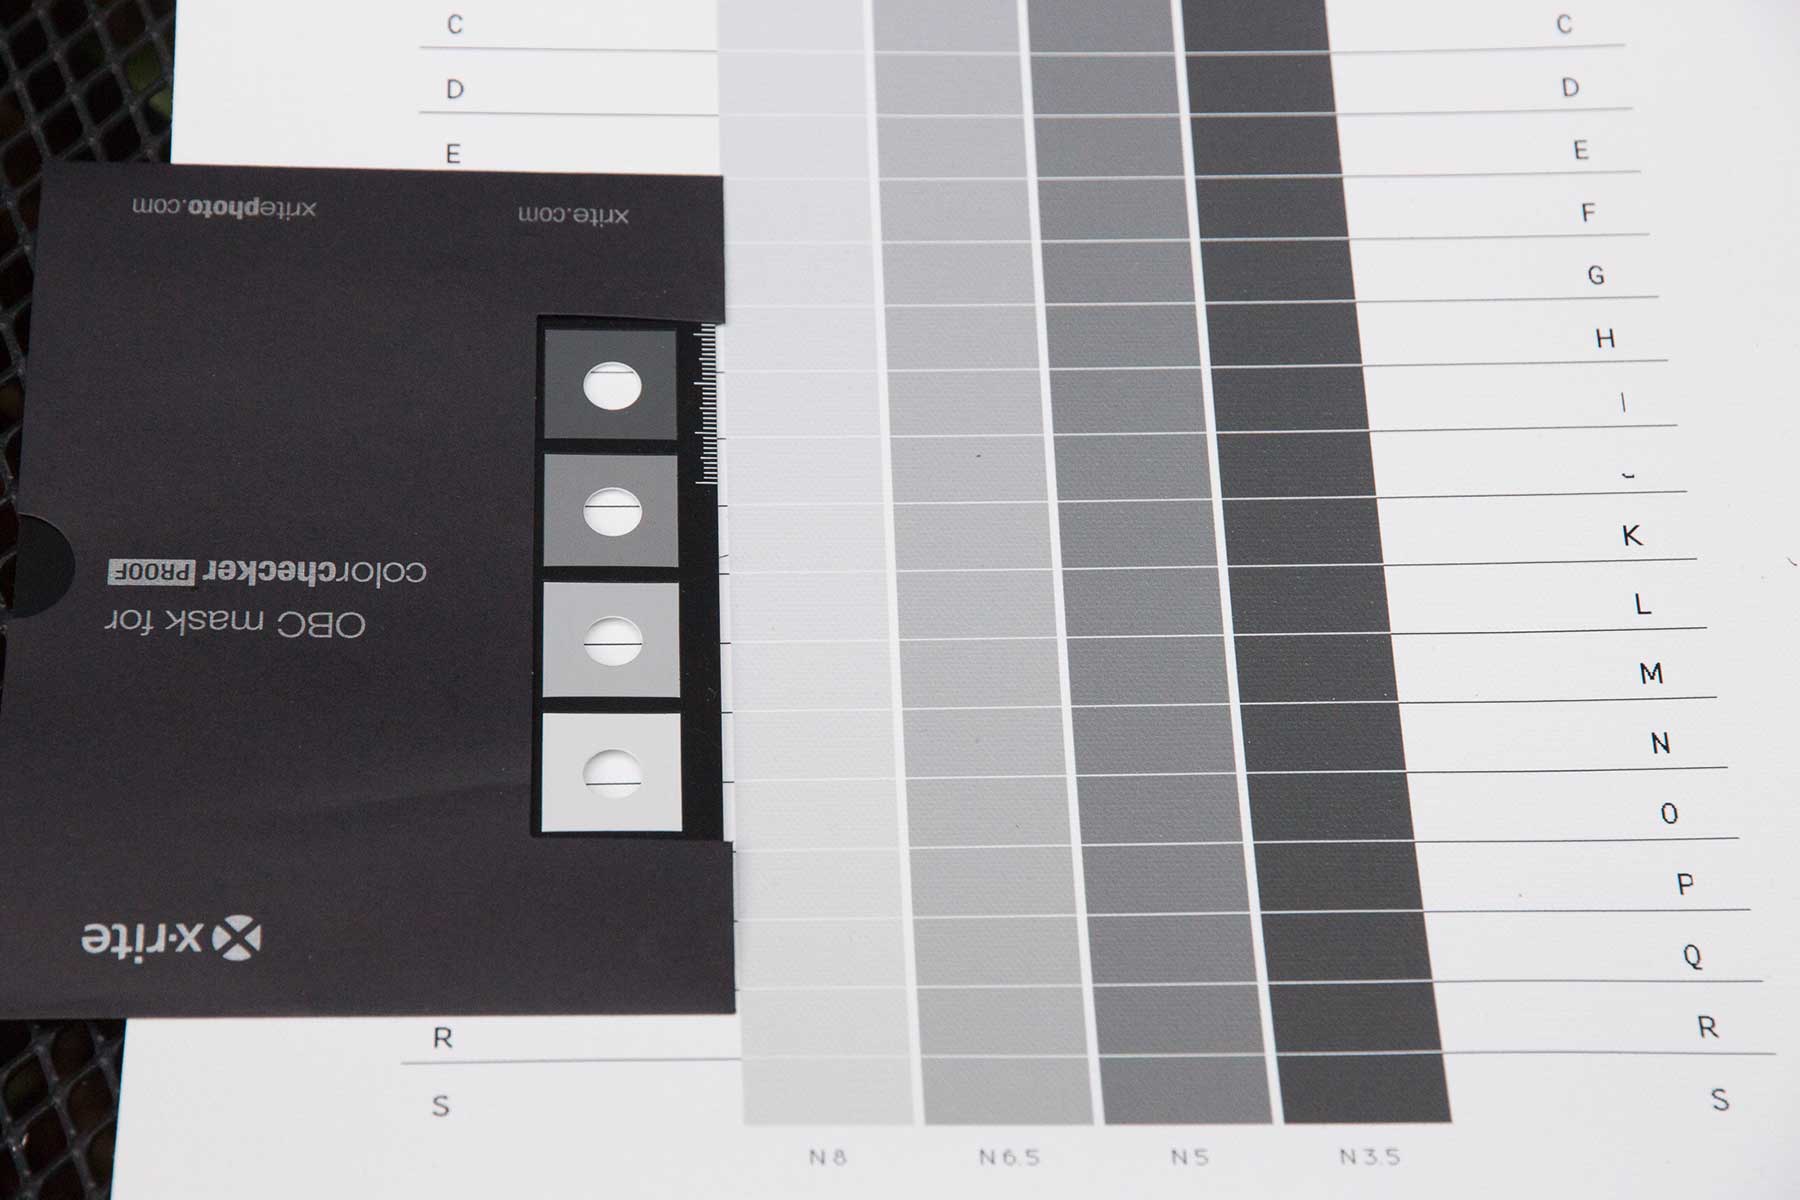
These photos are taken in diffuse daylight – there should be enough UV to light up any OBAs.

Now a photo under halogen lighting, where i know that UV is absent.
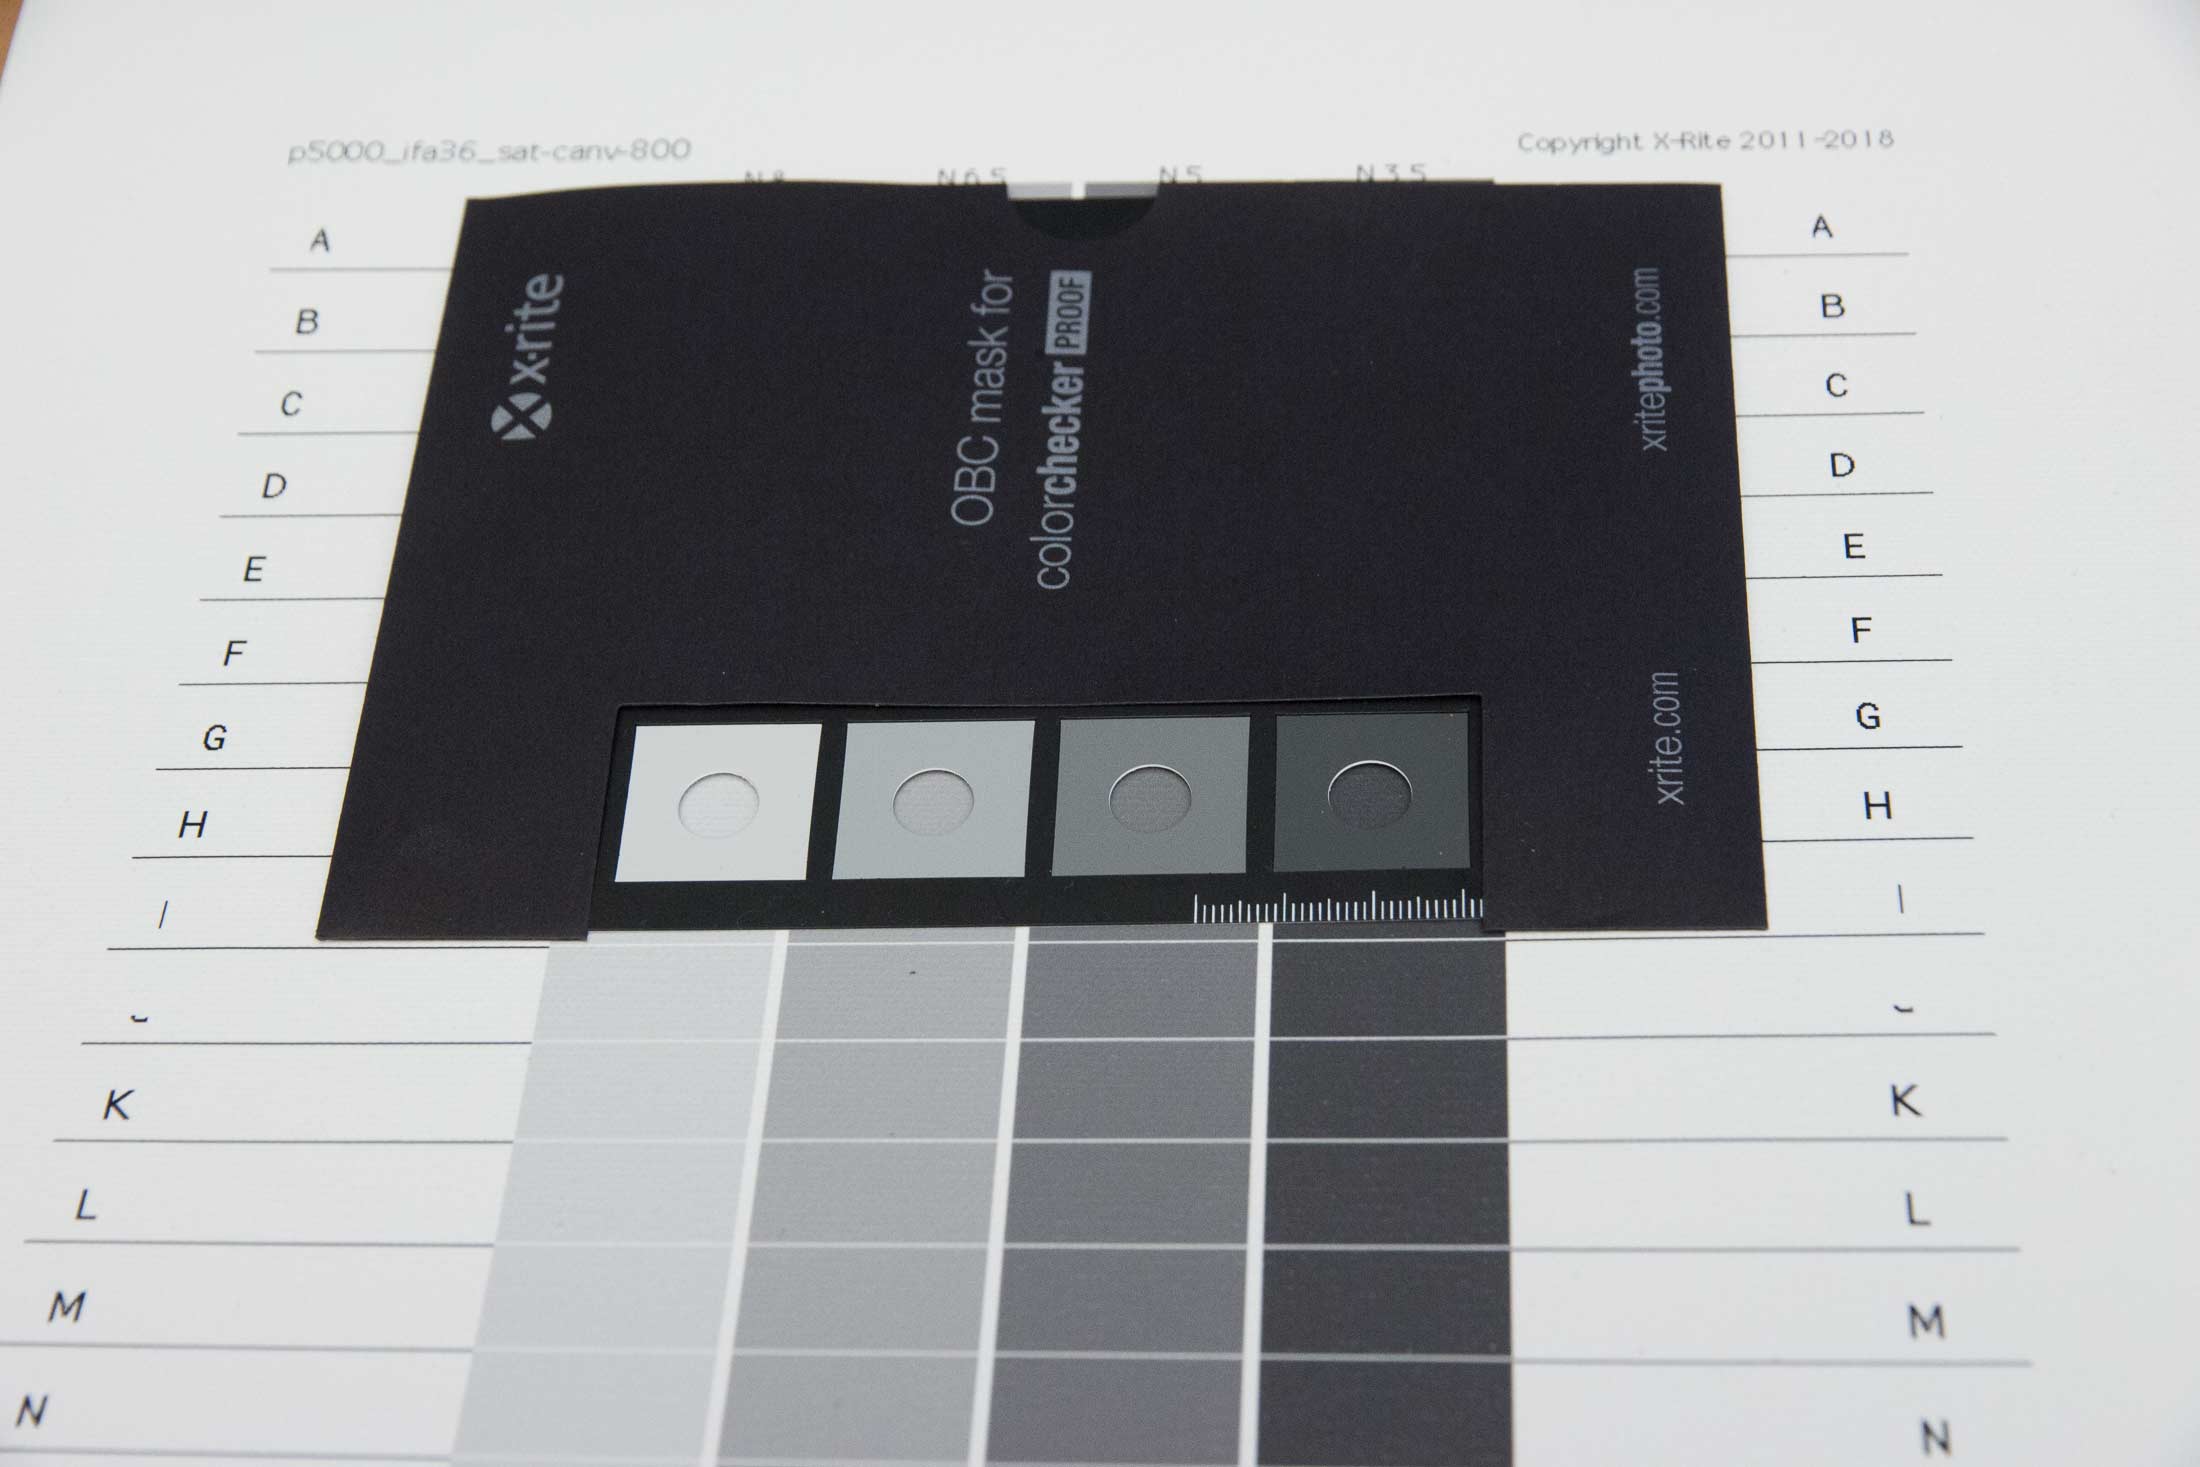
If you don’t see much variation and are having difficulty in finding the right match, take it as a hint that you probably don’t need OBC and a normal profile may be more relevant.
Another view, in my conservatory (diffuse daylight) – I could see some variation, but not a lot (it’s very difficult to show in such photos).
Similarly, in my office…
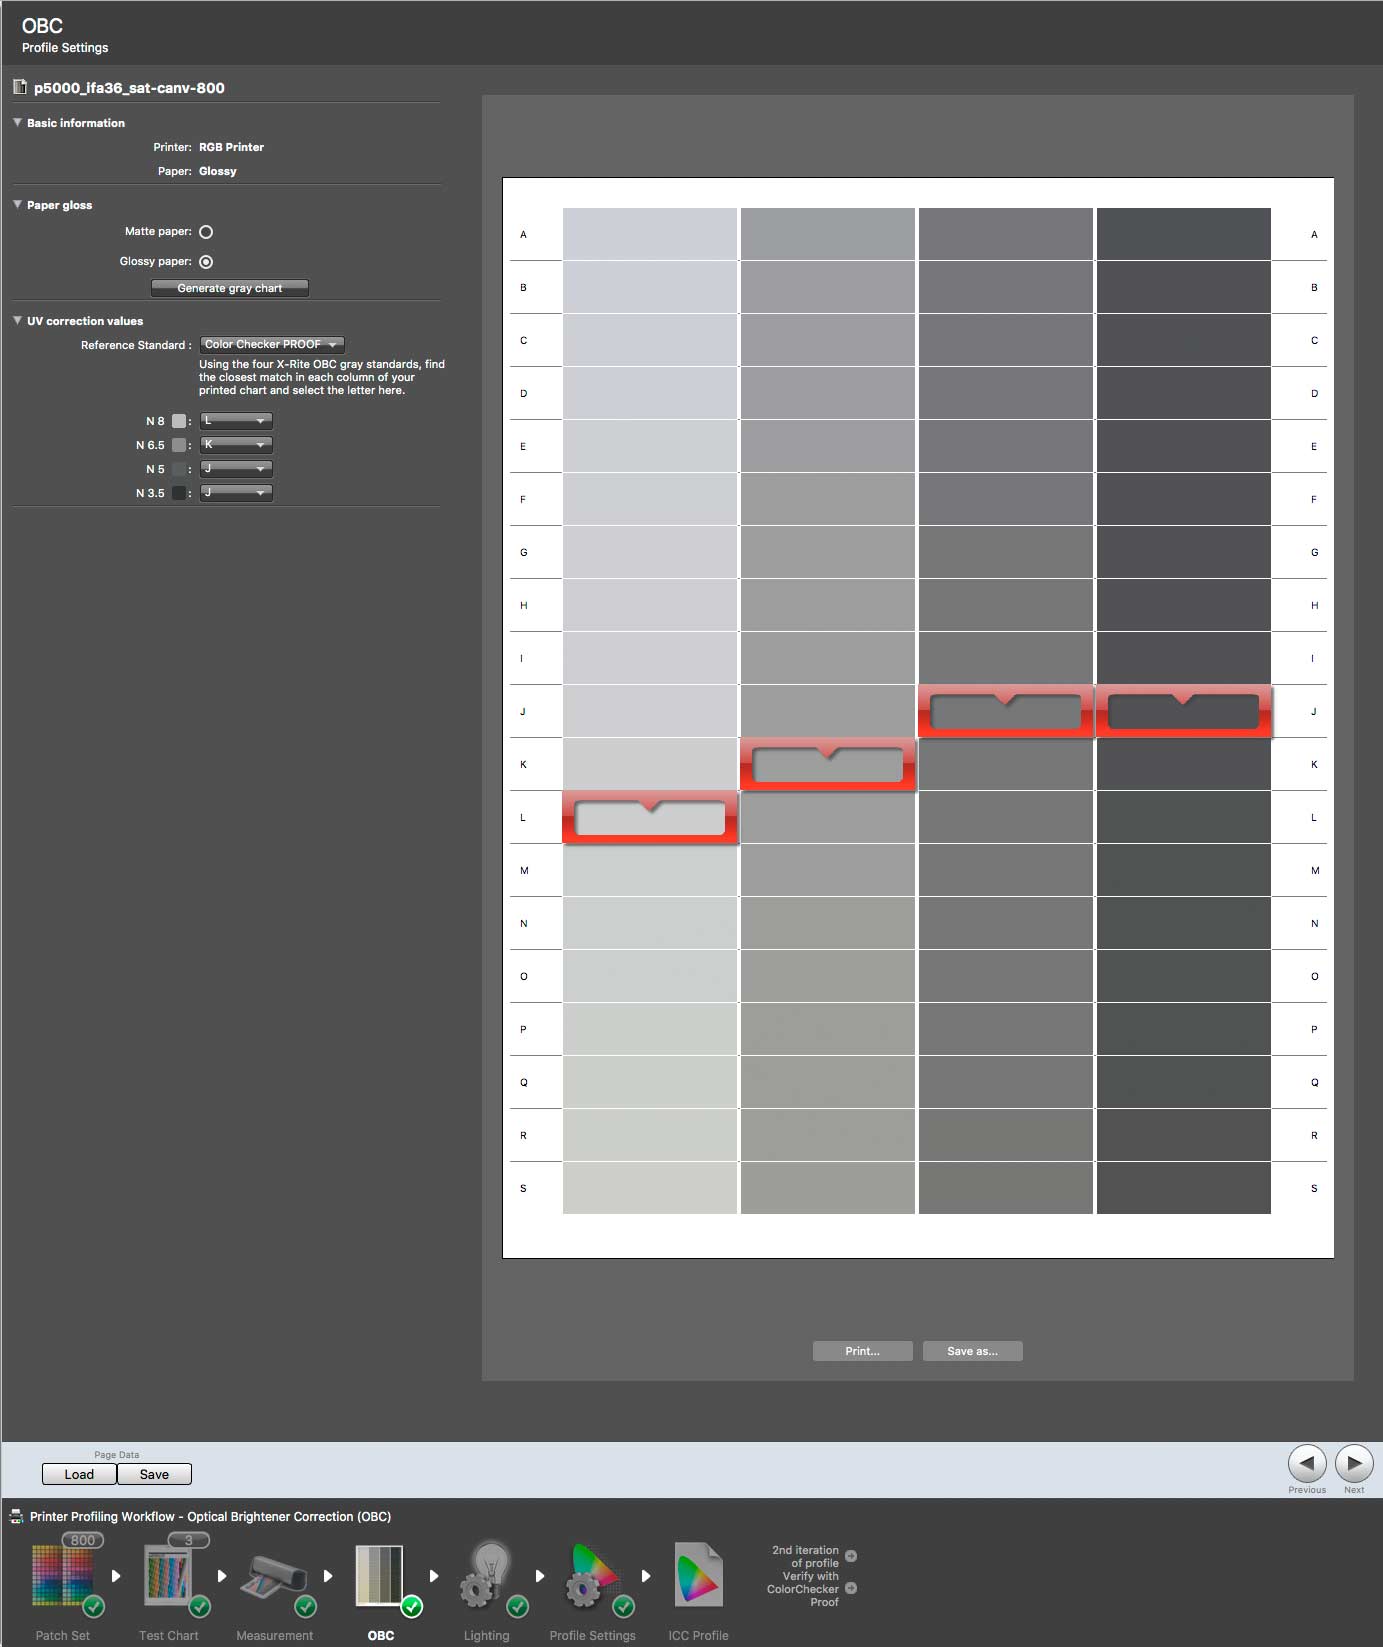
Once you’ve some matches, enter the matching patch numbers into the measurement screen.
You then go through the usual profile generation stages and create a profile for the lighting you used.
You might wonder if a custom light source measurement might be of help here? So might I – did I mention that there is no manual?…
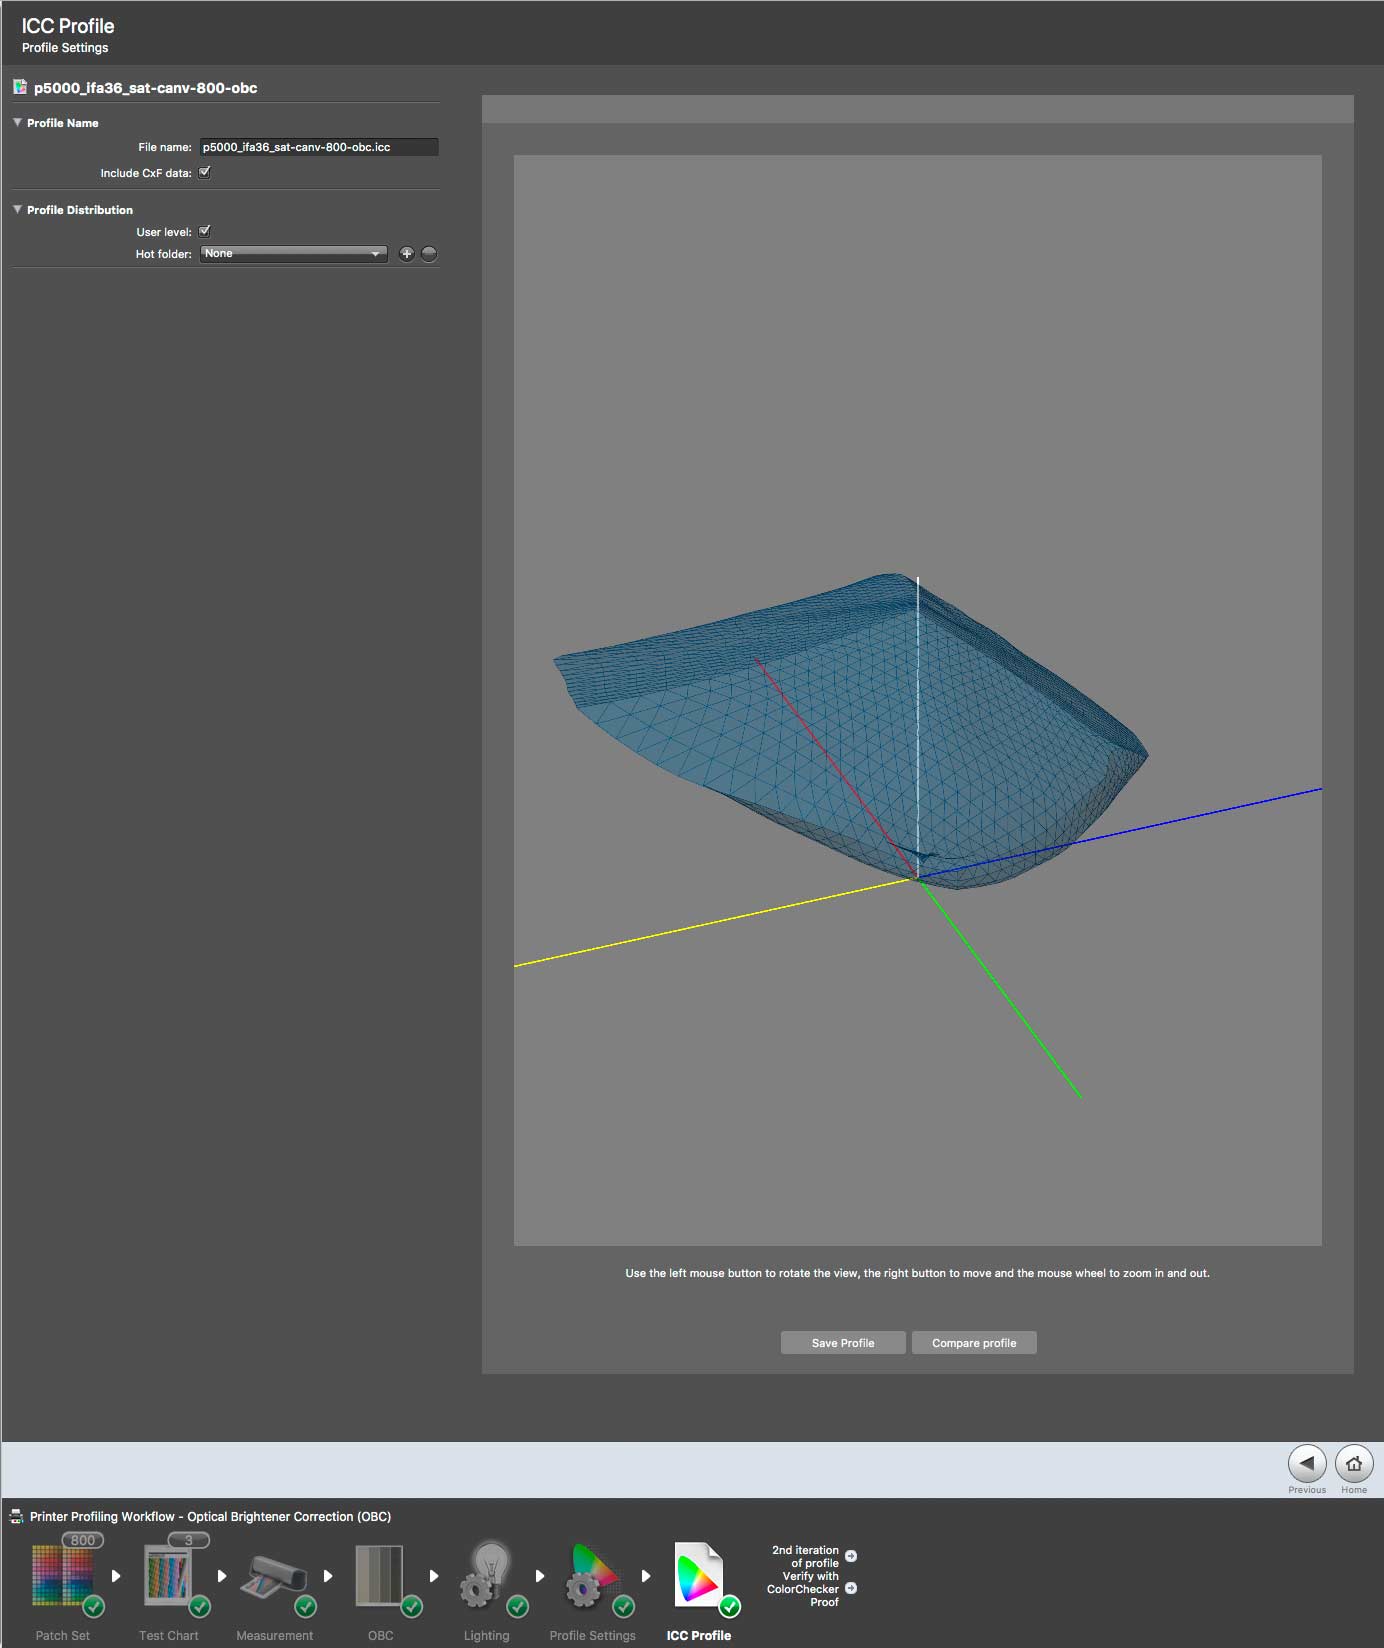
If you’re producing prints on very bright paper, the OBC profiles may help, but after having this function available for several years, it’s not something I’ve ever needed for my photographic prints – i simply don’t use really bright white papers.
Transparency profiling
The i1Pro3 Plus supports the measurement modes needed for profiling backlit transparencies and the lightbox they are to be shown on.
I’d love to have more details, but I simply don’t have a suitable lightbox here, even though I can print on transparency film.
The workflow is quite an involved one, requiring multiple measurements of the media and the lightbox.
However… there is actually a relatively detailed written guide to transparency profiling – [download PDF]
The targets have settings for printing on clear and transparent film, as well as textile.
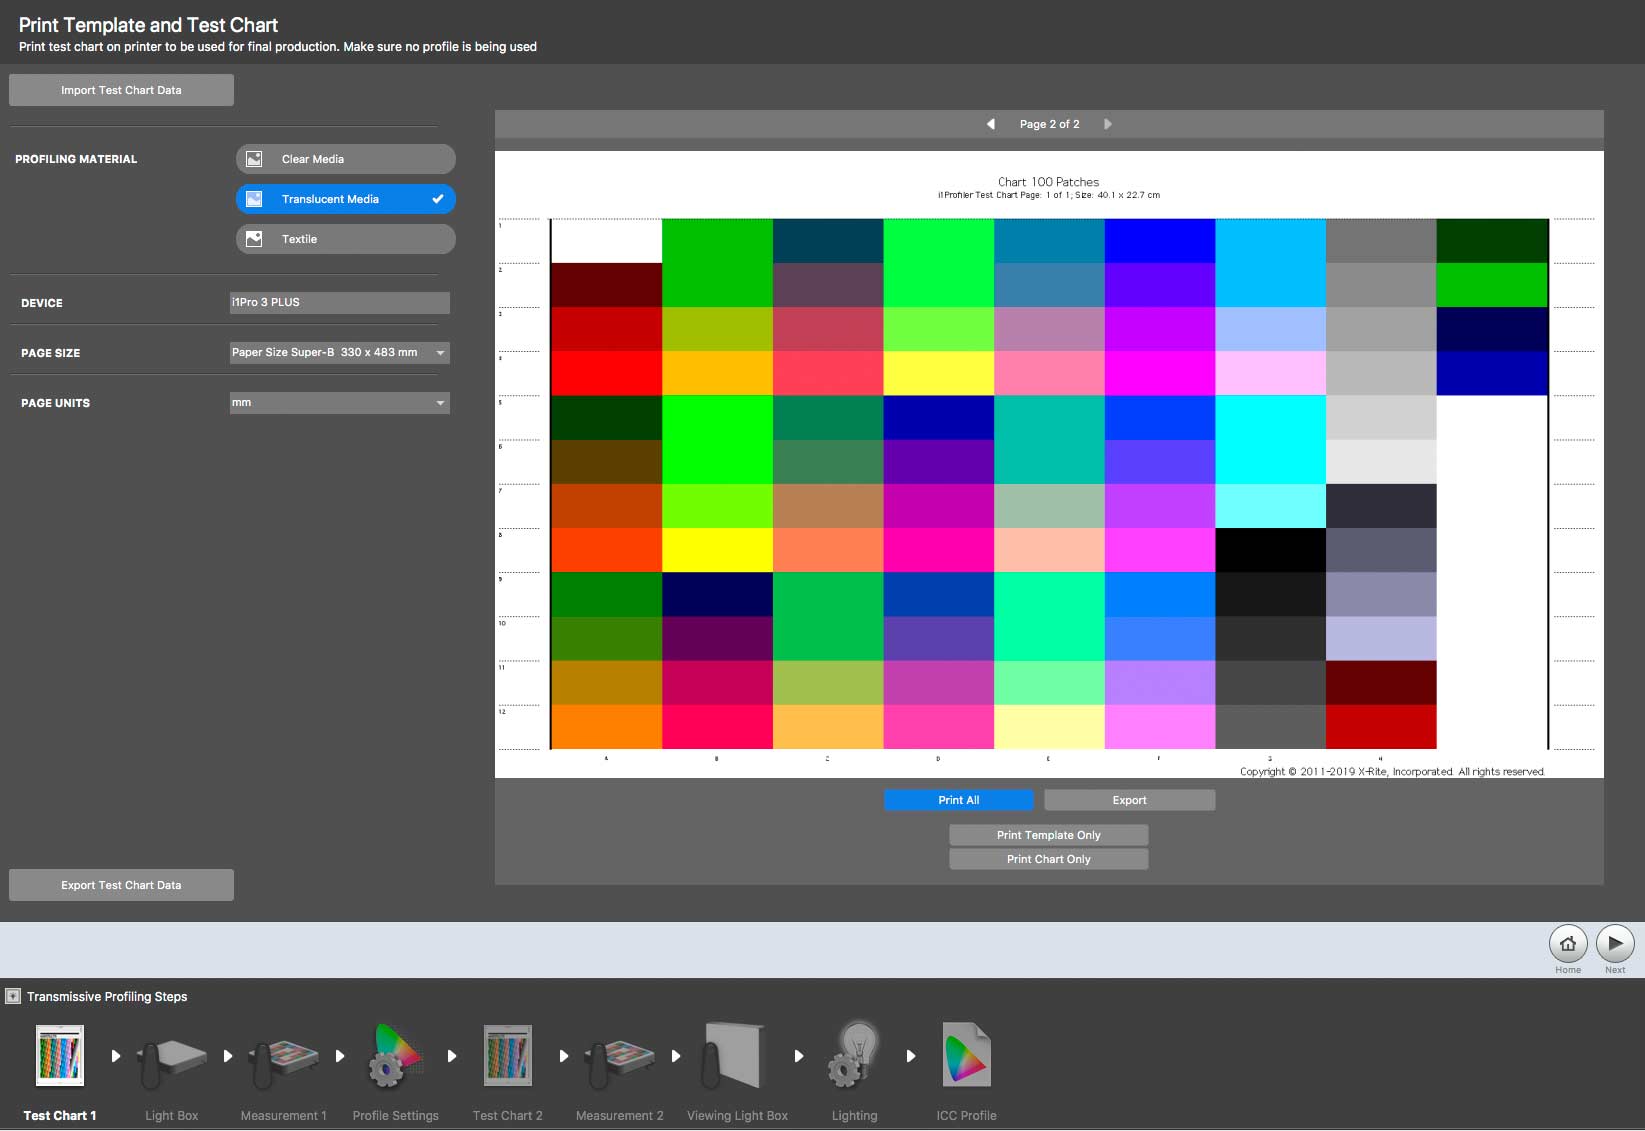
There is a print to cut out as a mounting template for measurement.
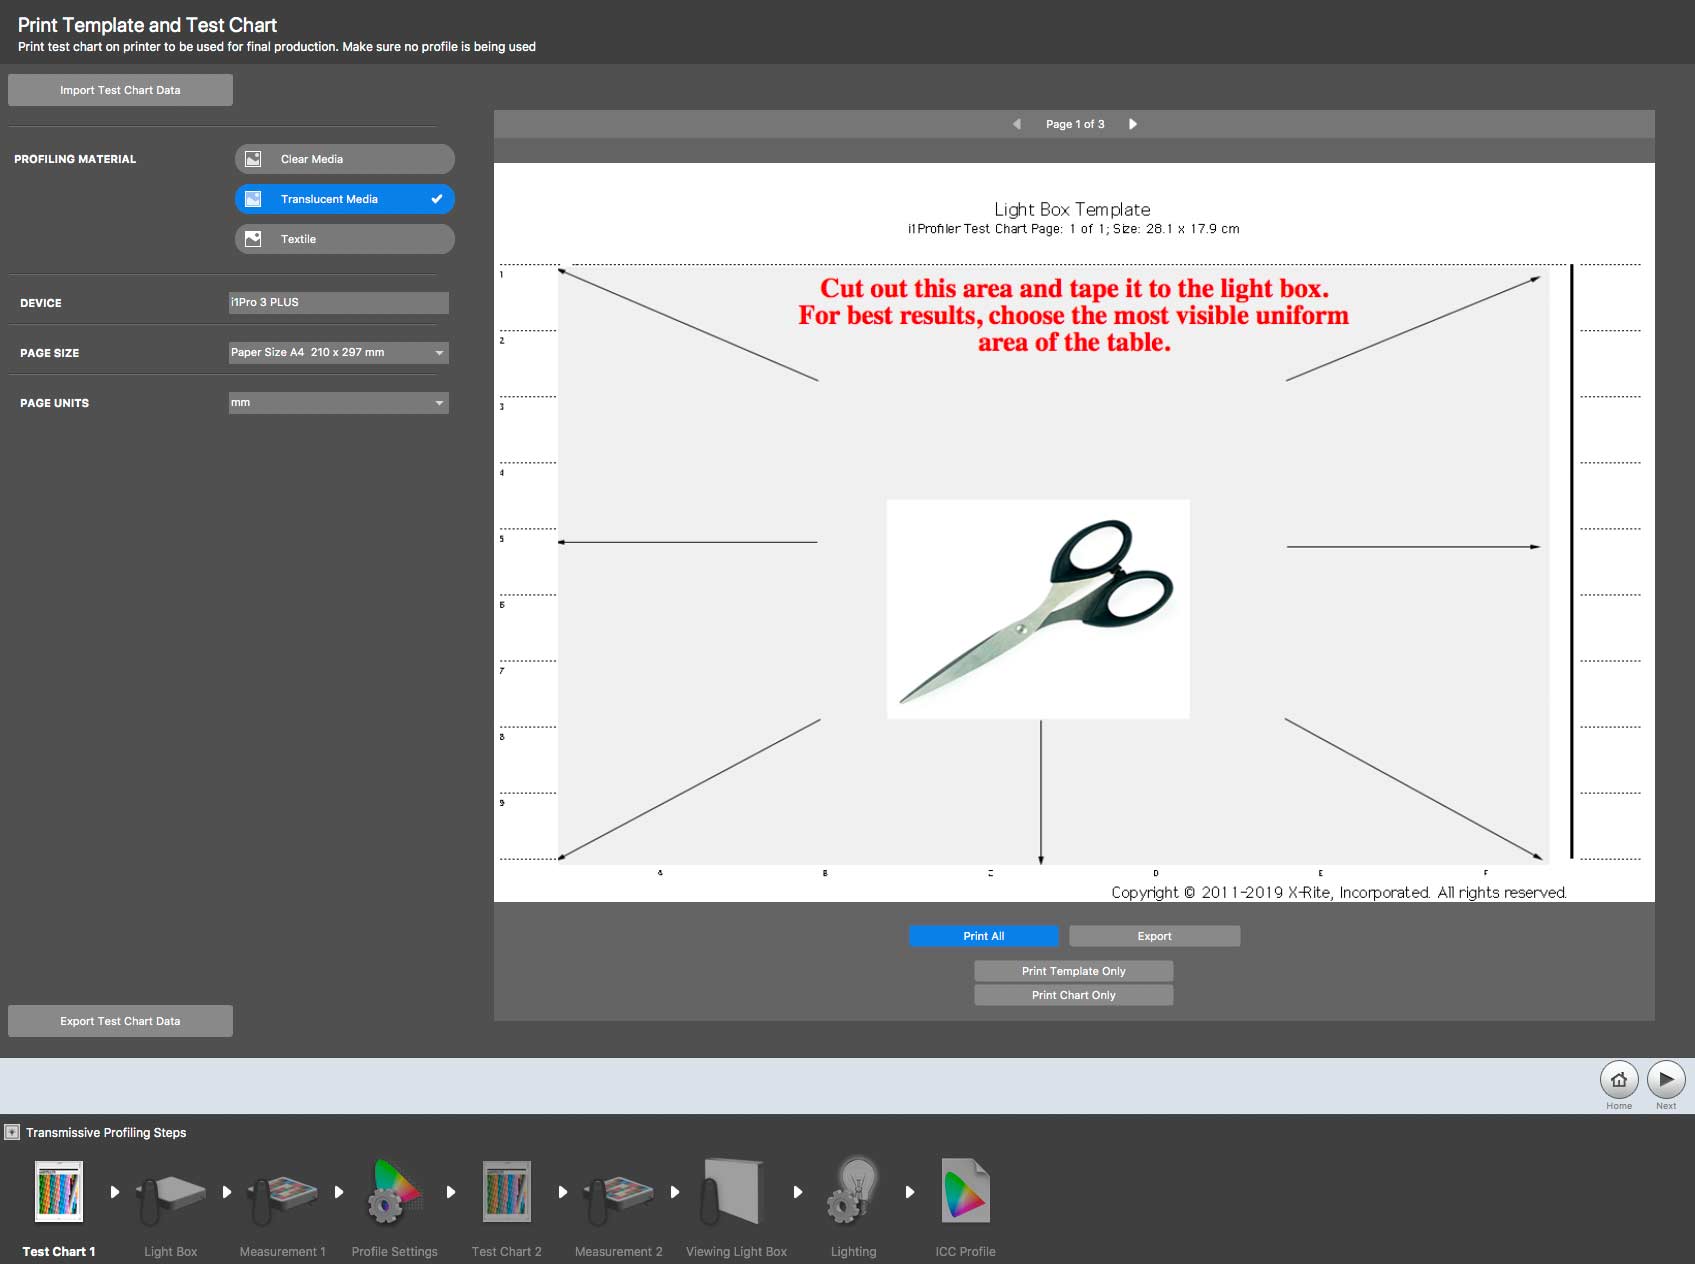
The template needs attaching to your lightbox.
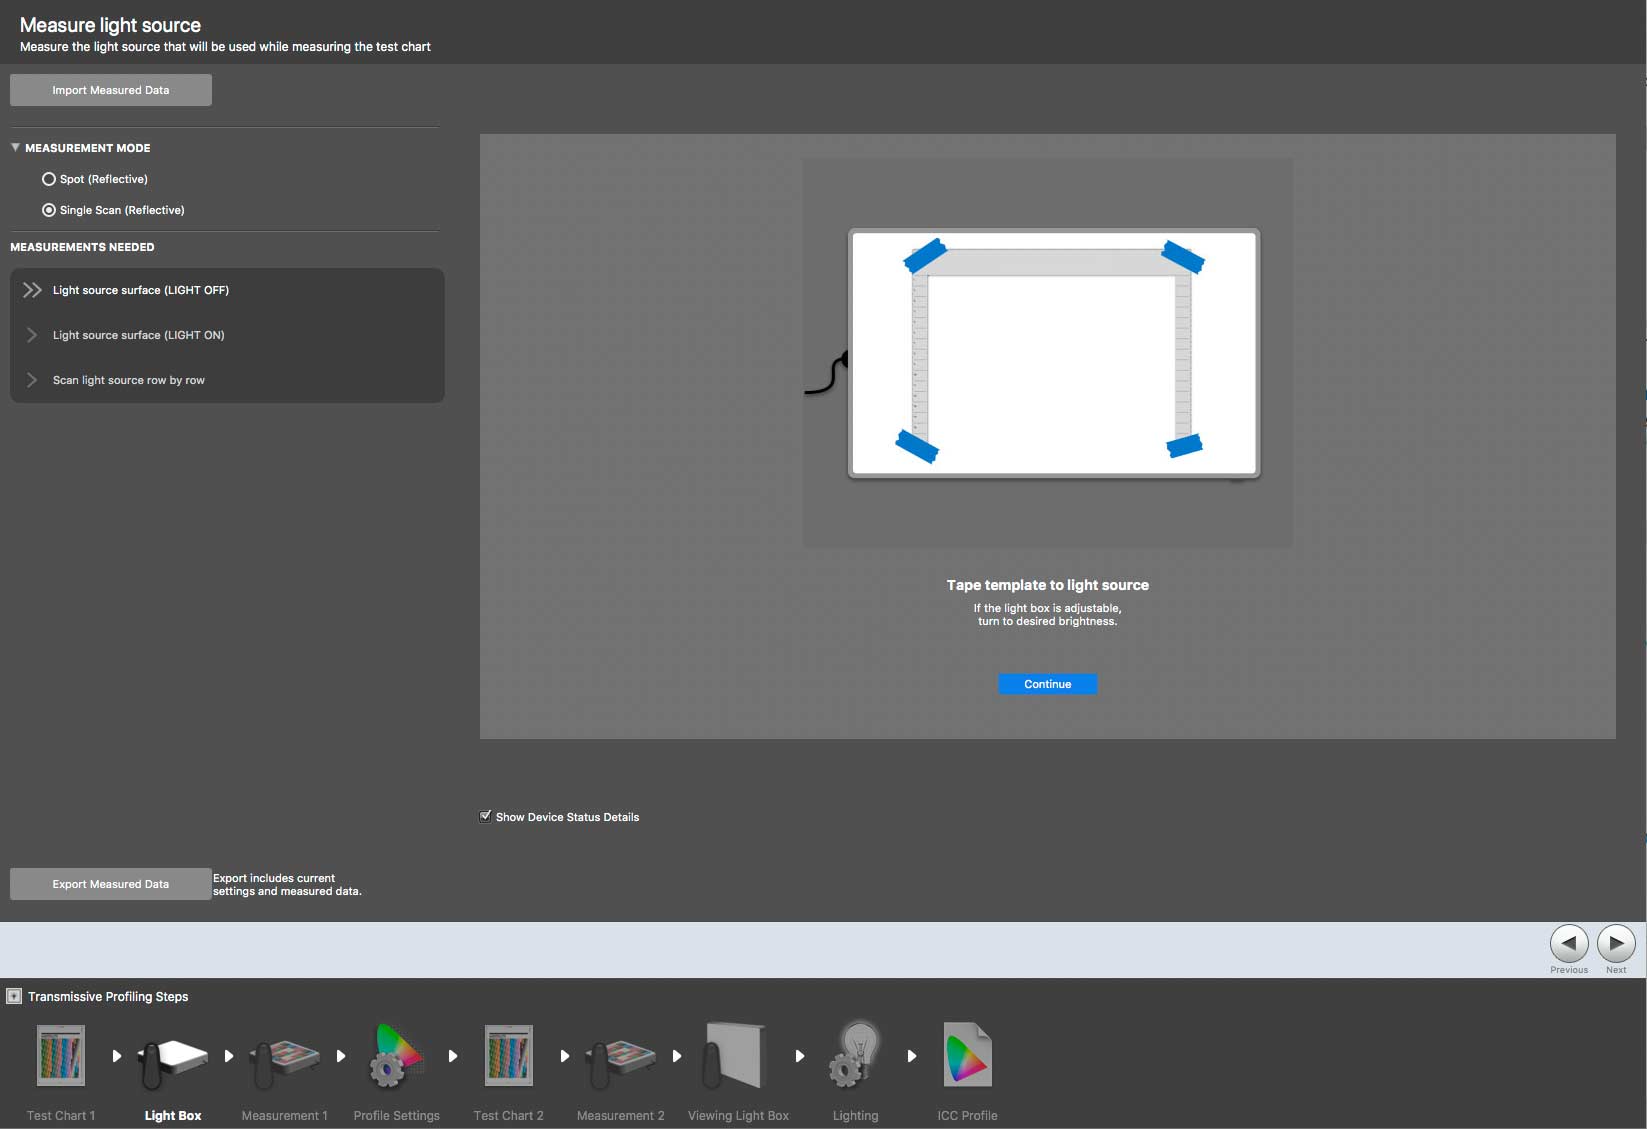
Scanning uses the slide rail to keep the spectrophotometer in place.
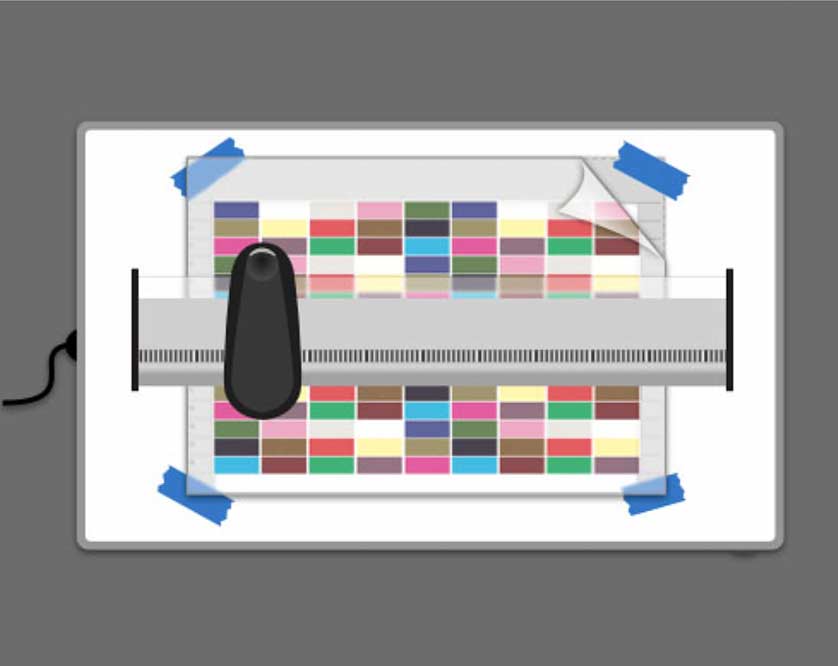
Sorry not to have examples, but hopefully there is enough info to see what it does.
-ooOoo-
That concludes my overview of the i1Photo Pro 3 Plus package – I’ve many more reviews looking at aspects of i1Profiler and the earlier i1Pro2 and i1Pro spectrophotometers. Here are a few:
- i1Profiler and the i1iO/i1Pro2
- i1Photo Pro 2 review
- Monochrome linearisation with i1Profiler and the i1iO (only the i1Pro needed)
- Lighting CRI measurement
- i1Profiler overview – info and links to all our older articles/reviews
- i1Profiler scanner profiling
- All our (60+) articles/reviews in the X-Rite category
So, the i1Pro 3 Plus adds a range of new features – how useful are they?

Conclusions
The differences between the i1Pro 2 Photo and i1Pro3 Plus Photo packages are instantly noticeable from the sheer size difference between the two – the new kit is appreciably heavier too.
If you need transparency profiling, calibration of very bright displays or measuring rough surfaces such as fabrics with polarised light, then the new i1Pro3 Plus brings a good range of new functionality.
However, in terms of basic functionality, calibrating my monitor and making RGB printer profiles for my photography, both versions pretty much do the same.
The new backplate is excellent for larger profiling targets, even if those viciously strong magnets and steel bars cracked a couple of my fingernails…
The new light source and larger measurement aperture should increase accuracy, but at the cost of significantly increased minimum target patch sizes (16mm vs 7mm). With the i1Pro2 it’s easy to create reasonable printer profiles from a sheet or two of A4 paper – not many i1Pro3 Plus patches fit on one of those.
So, an interesting update, perhaps more of specific relevance to commercial printers than fine art photographers like myself. The transparency profiling will be of distinct interest to printers looking for better quality backlit installations.
In reviewing the product. I may have been a little harsh over support in places, but that doesn’t take away from the fact that i1Profiler is my go-to solution for making my own printer profiles, and that they are very good ones at that.
Colour management for me is not about some spurious element of perfection – it’s about getting things ‘right first time’ more often and making my job of producing great photos and prints easier.
If you’ve any questions – please do ask. As I mentioned earlier, I have the profiles and measurement files from my brief testing, and would welcome informed observations/notes.
Update 2020: I have a companion review of the i1Pro 3
Getting the equipment
The i1Photo 3 plus is available from X-Rite.eu and X-Rite distributors.
The i1Photo Pro 2 is available from B&H for ~$1650
i1Pro3 Plus specifications
The i1Pro3 Plus is available in several kits, with different functionality
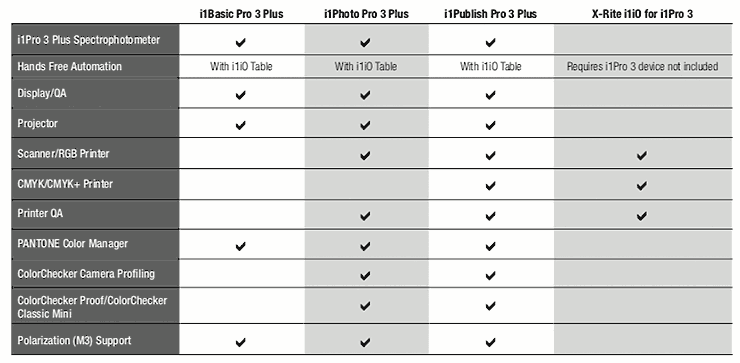
Comparing with the i1Pro2
[Click to enlarge]
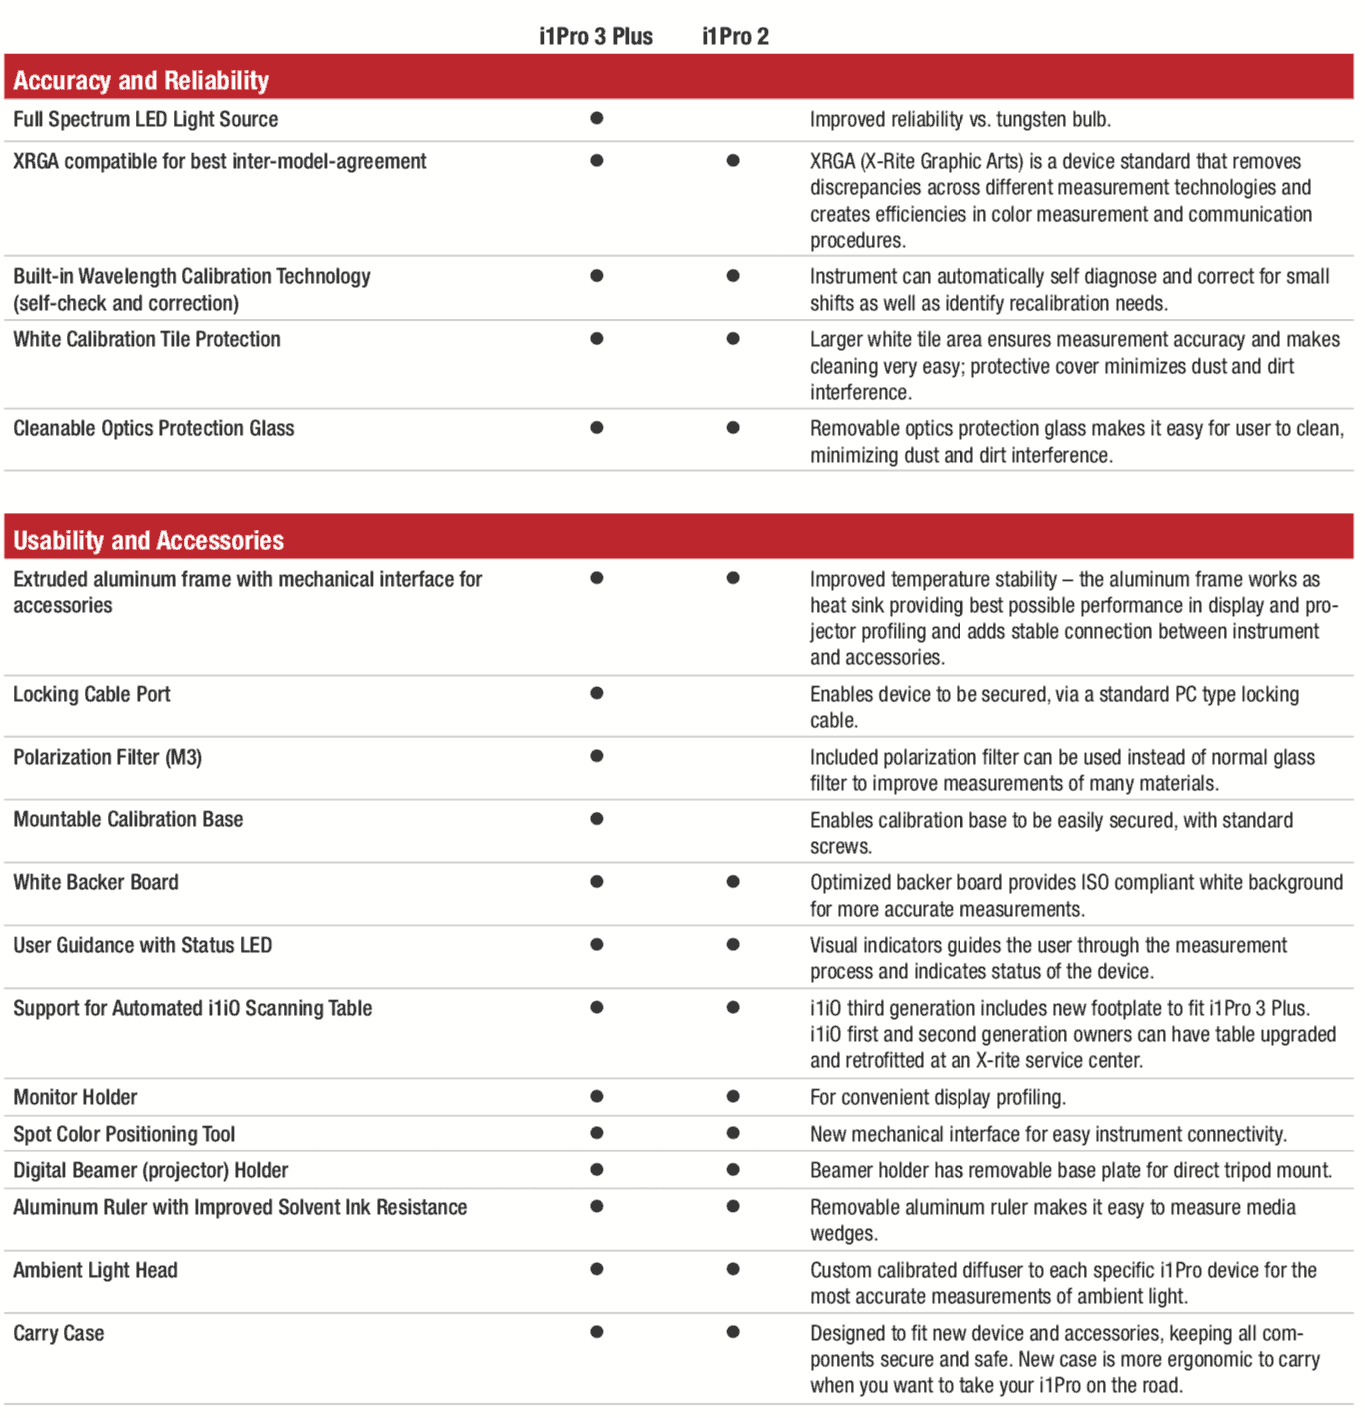

The i1Pro 3 Plus spectrophotometer

Keith’s connection with X-Rite
Thanks to X-Rite for lending me the i1Pro Photo 3 Plus kit to test.
I make a point of not selling hardware or software and have no financial relationship with X-Rite. I am a member of X-Rite’s Coloratti program, but make a point of testing and reviewing products from different competing manufacturers in as independent a manner as I can. (see our review policy)
If you’ve any questions, please do feel free to email me or ask via the comments below.
Never miss a new article or review - Sign up for our occasional (ad-free) Newsletter
and please do subscribe to Keith's YouTube Channel

Other areas of our site that may be of interest...
All the latest articles/reviews and photo news items appear on Keith's Photo blog

Keith explains tilt and shift lenses
Keith has written a book that looks at the many ways that tilt/shift lenses can benefit your photography from a technical and creative point of view. If not in the UK check for import issues and maybe try an on-line bookshop. Keith has no connection with sales of the book.
ISBN 9781785007712
There is also a specific index page on the site with links to all Keith's articles, reviews and videos about using tilt and shift.
We've a whole section of the site devoted to Digital Black and White photography and printing. It covers all of Keith's specialist articles and reviews. Other sections include Colour management and Keith's camera hacks - there are over 1200 articles/reviews here...
Adverts removed
Chris | Nov 30, 2023 at 3:33 pm
No problem Keith, and thanks again. I got the Epson P900 and ET-8550 and your reviews and guides have been and are really helpful. Very grateful for all the hard work you put in and kindly share your knowledge.
Keith | Nov 26, 2023 at 10:10 pm
Sorry, not a spectro I know…
Chris | Nov 26, 2023 at 9:49 pm
Thanks for helpful answer Keith. I create some Tungsten profiles which I don’t think there is any target reference data readily available. I am also looking at the Konica Myiro-1 spectrophotometer, which would cost me considerably less than the i1Publish Pro 3, now that the i1Photo version is apparently discontinued. Would you know if the Myiro-1 also does target patch measurements?
Keith | Nov 26, 2023 at 1:29 pm
Yes, you can use it for that, but it is a manual process, where you will need to create the data file.
The published target data is good enough for almost all uses. If you genuinely need better data, then creating the data should be a trivial operation.
Chris | Nov 26, 2023 at 2:27 am
Thanks for the fine review Keith. Does the i1Photo Pro 3 plus take reflective measurements of the patches of a Colorchecker SG, in order to make a reference file for camera profiling?
Bernhard | Nov 19, 2019 at 8:42 pm
Hey Keith
Thank you for your answer.
Yes, I’m really happy with my profile.
I just thought, as there is now an offer again, I have considered that I buy an I1 Pro2, but I think that I am rather disappointed, because the Colormunki produces such good profiles.
I mostly use matte Hahnemühle papers.
thus I stay with the Colormunki.
What is more, I think it’s more than enough for 95% of all customers.
Keith | Nov 19, 2019 at 12:13 pm
Well, the Colormunki can make pretty good profiles for photo printing on most media for the Pro-4000.
The i1pro2 system lets you make profiles with bigger patch sets and gives you (some, not a lot) more control over the profile creation parameters.
I use the same i1Profiler software with an i1iSis since it lets me do single sheet ~3k patch targets.
The profiles may well be better, but is anyone really going to notice for most images? I’m minded to say most wouldn’t.
The i1Pro setup lets me make CMYK and other specialist profiles, amongst other ‘features’.
My only personal dislike of the Colormunki was the rather clunky workflow and the huge targets (relatively speaking) you needed to print.
The question you need to ask is whether there is anything ‘wrong’ with your CM profiles? Do you actually need more?
Bernhard | Nov 19, 2019 at 10:28 am
Hi
I have a color munky and make my paper profiles for a Canon Pro4000 itself. And I’m actually happy with it.
The question is, is it worth an update on the I1 Pro2 or even on the i1 Pro3?
Are the profiles the better?
What is your opinion