


Epson SC-P5300 printer review
Epson SC-P5300 printer review [P5370]
Looking at the 17″ pigment ink printer

No more Google ads. Too many deceptive and irritating adverts.
Any ad links left are non tracking, to companies we know, trust and we've worked with for years [Park Cameras]
Ads helped pay for site running costs, so if you found something useful, please
...Make small KoFi donation?
...Subscribe to Keith's YouTube Channel
...Get Keith's book about how to use tilt/shift lenses
Our site contains affiliate links - these help support the site. See our Advertising policies for more
Keith has been trying out Epson’s new 17″ printer for his P5300 printer review. The printer is sold as the Epson SC-P5370 in the US and Epson SC-P5360 in Aus/NZ
This P5300 printer review includes many short videos looking at specific aspects of printer use, and a large collection of icc printer profiles has been produced.
Related printers: The 17″ width (A2) printer is effectively the chassis of the P5000 printer with the print head and inks of the Epson P900. The P5300 printer removes the need of the P5000 to swap black inks for matte and glossy papers (mk/pk switch).
It features a powered roll paper feed and built-in cutter for roll paper up to 17″ width. It also has a a paper cassette holding sheet paper up to A2, and a straight through print path capable of printing on poster board.
Prices UK £2175: US $2095
Buy via B&H in the US
…help support this site
Article Index
- Setup
- Connectivity
- Media handling
- Borderless?
- Colour management/BW
- Printing
- Epson software
- Conclusions
- Full Specifications
Black & White – see also the P700/900/5300 B&W printing article
The Epson SureColor SC-P5300 [P5370]
The P5300 is a 17″ pigment ink printer. It’s made for heavy daily use. It supports roll paper up to 17″ width, and has a paper cutter built in. It supports single sheet loading at the top, with a straight through print path [loaded at the front] supporting board up to 1.6mm. It has a paper cassette supporting sheet paper, which can take a whole pack of photo paper.
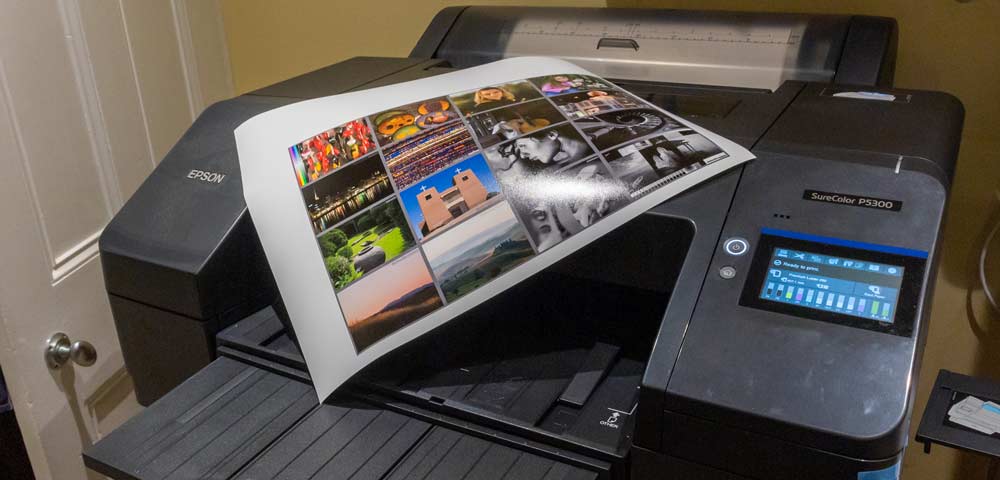 It will print borderless on roll paper, printing edge to edge, but cutting the paper for the top and leading edges.
IT WILL NOT PRINT BORDERLESS SHEET paper.
It will print edge to edge of some sheet sizes, but you will get a leading/trailing edge margin on sheet media. I emphasise this since some have misread the part of the online PDF Manual which covers borderless.
P5300 origins
The P5300 is based on the chassis of the P5000, so paper handling is exactly the same [see my very detailed P5000 review for more].
The print head and ink-set are those found in the P700 and P900 printers. This means print quality is pretty much identical to the P700/900, even to being able to use their icc paper profiles if needed. [P700 and P900 detailed reviews].
- The P5000 still needs a black ink swap for Pk/Mk papers – the P5300 doesn’t
- The P5000 does not like intermittent use – the P5300 is less concerned, but every two weeks at least is recommended
- The P700/900 will print fully borderless on sheets – the P5300 will not
- The P5300 minimum sheet paper size is 8″ x 10″
- The P5000/5300 take 200ml ink carts – much bigger than the P700/900 [25/50ml]
- The display of the P5300 is the same as the P700/900 [minor differences]
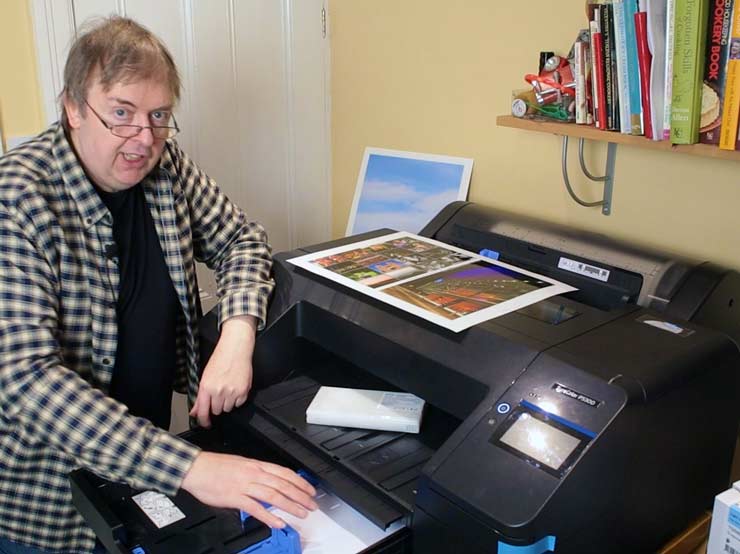
P5300 Printer review and set-up videos
- Epson P5300 review [P5370 in the US] 17″ pigment ink pro level printer, with roll and sheet paper
- Setting up the Epson SC-P5300 [P5370] 17 inch A2 pigment ink printer. Roll and sheet paper
- How to replace the maintenance tanks on the Epson P5300 [P5370] 17″ pigment ink printer
- How to replace the roll paper cutter blade on the Epson P5300[P5370] 17″ pigment ink printer
P5300 printer review videos: Media types
- Printing A2 poster board with the Epson P5300/P5370. Print on card with the straight print path
- Roll paper or sheet? Epson P5300/P5370 and roll paper use. Settings and what to watch out for.
- Printing canvas on the Epson P5300/P5370. Gallery wrap printing from roll canvas
- Epson P5300/P5370 borderless printing with roll paper and borderless print options
- Epson P5300/P5370 Print photos from the paper cassette up to 17″x22″. Pigment ink 17″ A2 printer
- Epson P5300/P5370 printing a large panoramic landscape print. Using roll paper and custom paper size
P5300 printer review videos: Using the P5300/5370
- Are metallic papers good for your prints? Hahnemühle Photo Rag Metallic 340. What images work?
- How to test a new paper for your art and photo prints. Testing and evaluation for a baryta paper
- Stop wasting ink. When are printer ink carts empty? Epson P700, P900, P5300 [P5370]
- Review: Hahnemühle Sustainable Photo Satin. A recyclable 220gsm plastic free photo paper
- Review: Hahnemühle Photo Rag Matt Baryta 308. Archival ultrasmooth OBA free 100% cotton Epson P5300
- Making a large B&W print Why and how. Photography and workflow choices. Image resizing and workflow
- Review: Hahnemühle Bamboo Gloss Baryta. Colour and B&W photos 305gsm photo paper 90% bamboo fibre
- Epson P5300/P5370 Making an A3+ black and white print on RR Baryta paper. Using the B&W print mode
- P5300/P5370 Making a colour fine art print on Innova Exhibition Cotton Gloss IFA45 – my favourite
- Epson P5300/5370 17×25 Fine art black and white printing. 17″ roll paper. Using a hemp/cotton paper
- New Epson P5300/P5370 arrives for review. 17″ pigment ink fine art/photo printer roll & sheet paper
Printer comparison guides
- Which is best? Epson P900 vs Epson P5300 [P5370] 17″ A2 pigment ink printer shootout
- Do you want a big printer? Do you need a big printer? P900 vs P5300/P5370 both 17″ but very different
- P900 or P5000?
Directly related articles
– due to using the same printhead and inks
Do note that the P5300 is a big printer – you need two people to move it. It needs a good solid desk.
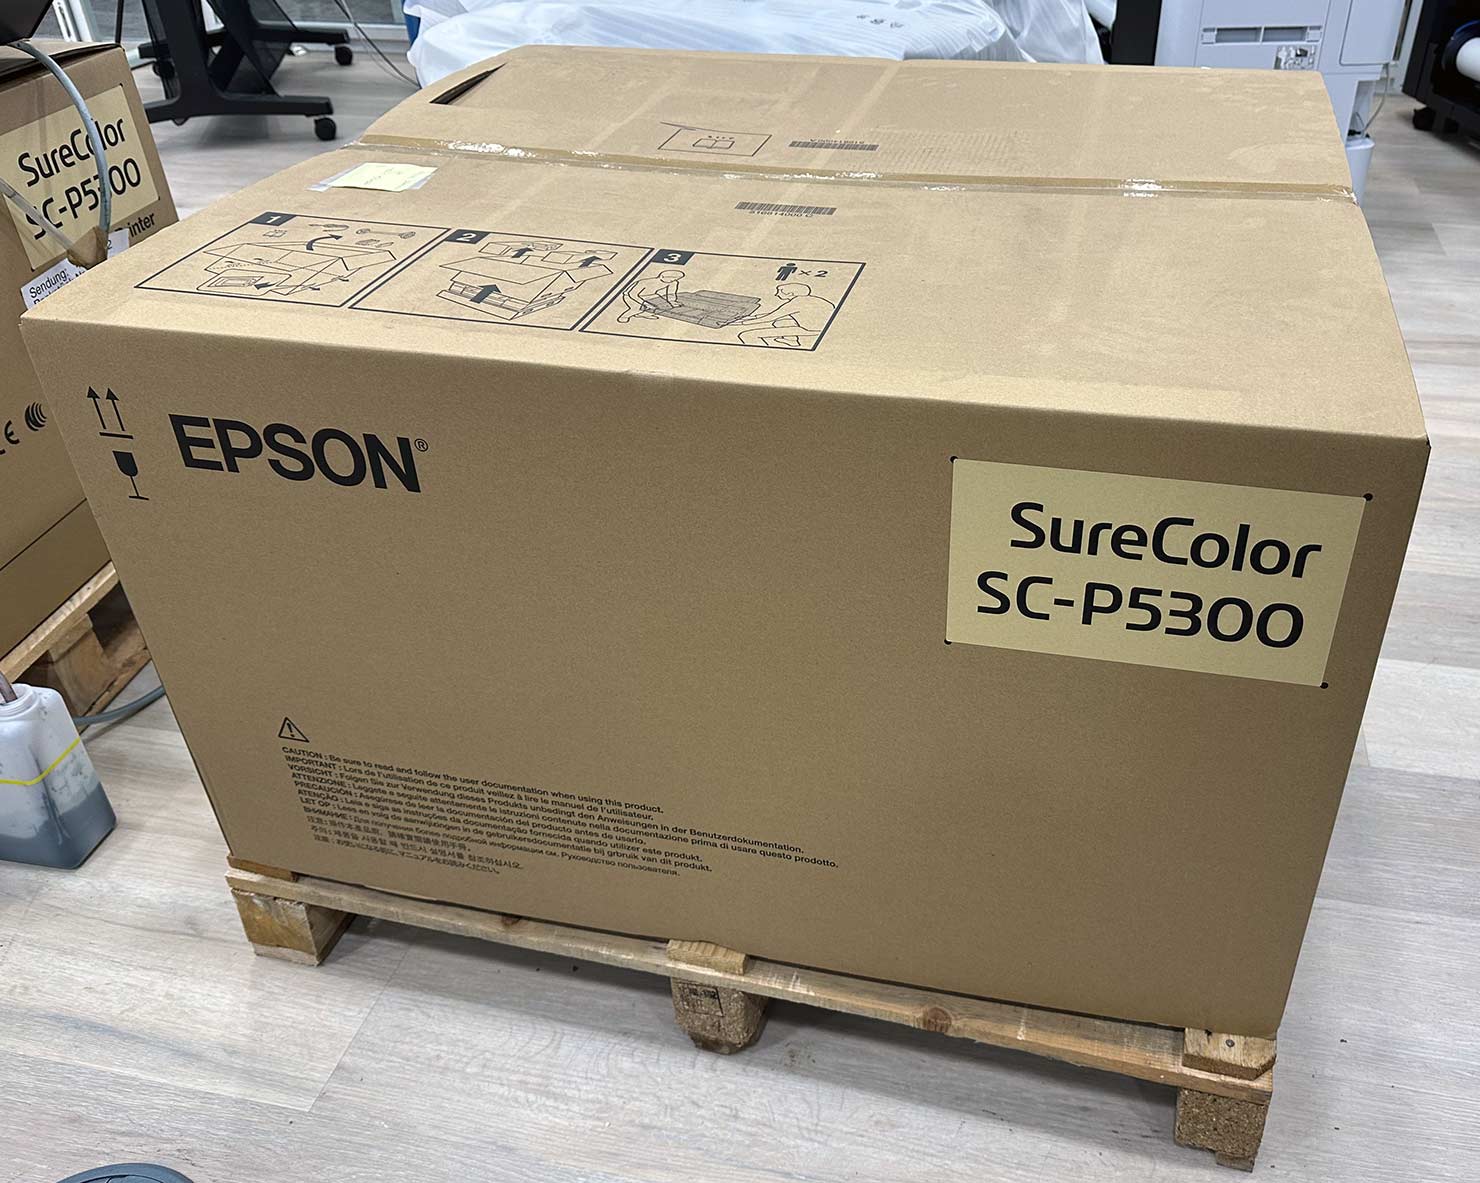
The was the printer for my P5300 printer review, arriving at Epson UK.
Here’s my P5000 arriving a few years ago – the P5300 is packaged similarly. Most carriers will only leave it at your doorstep. Have someone else ready to help unpack and move it inside.

Space for the printer
The printer needs space around it for paper feeding and output. These are the official size requirements from Epson.
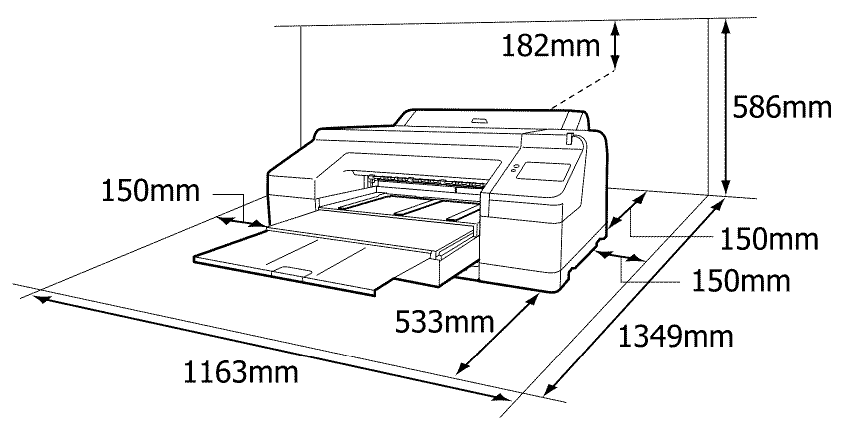
If you want to print on A2 poster board, you’ll need even more space at the back, since the board goes right through the printer at loading, and out the back.
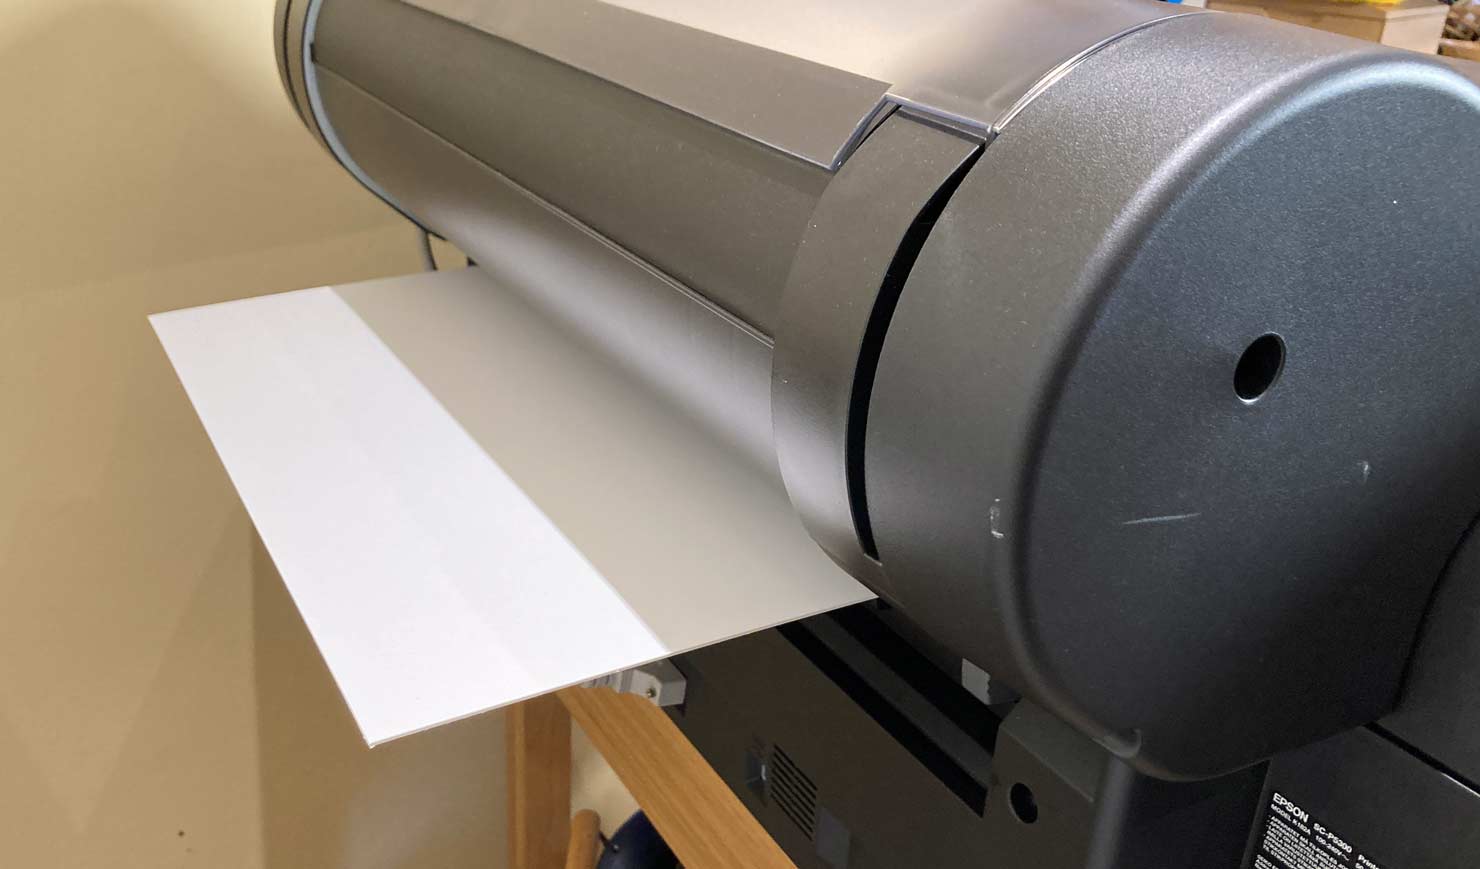
How far out of the back? [figures from the P5300 manual – take time to rad through it!]

What you get in the box
- Epson SureColor P5300 17″ Photo Printer
- Photo Black Ink Cartridge (80mL)
- Cyan Ink Cartridge (80mL)
- Vivid Magenta Ink Cartridge (80mL)
- Yellow Ink Cartridge (80mL)
- Light Cyan Ink Cartridge (80mL)
- Vivid Light Magenta Ink Cartridge (80mL)
- Gray Ink Cartridge (80mL)
- Matte Black Ink Cartridge (80mL)
- Light Gray Ink Cartridge (80mL)
- Violet Ink Cartridge (80mL)
- Roll Media Spindle
- 3″ Core Adapters
- Borderless Spacer
- Power Cord
- Limited 1-Year Manufacturer Warranty
Note: USB and Ethernet cables NOT included.
The spectroproofer spectrophotometer unit which fits on the P5000 is not supported. It’s seen here on front of the nearest P5000
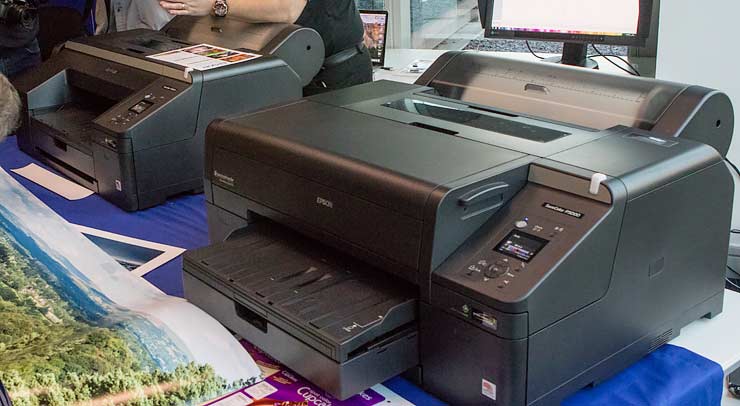
Note that the paper tray of the nearer P5000 extends out more. If you want to put large paper, such as A2 into the cassette, then it expands, and there is an extra plastic cover for it in that state. This is the same for the P5300.
P5300 printer review: Printer Setup
I’ve seen it suggested that you need a modern up-to date operating system to use this printer. Whilst I can’t speak for Windows PCs, I’d just note that the MacBook Pro you see me using in some of the videos is a 2010 model running OSX 10.13 and Photoshop CS6
I’ve covered the setting up of the printer in some detail in a video.
If you go to Epson.sn and enter the model, you will get a full step by step guide
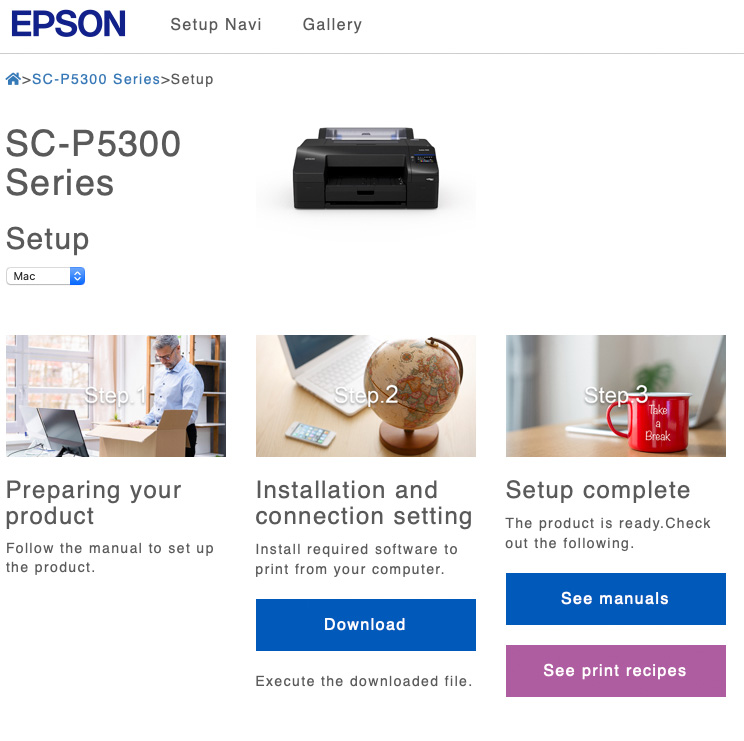
There is a printed setup booklet too, covering the basics.
First up, after getting the printer out of it packaging, there is a lot of blue tape to remove.

The paper spindle just fits into the rear roll paper area.
All those ink carts contain 80ml of ink, about 40ml of which is used up in setup.

The two maintenance carts are pre-installed and will not need changing for quite some time.
Loading inks
Plug the printer (devoid of all packing and blue tape) into the mains and start it up by pressing the button to the left of the screen. Don’t connect USB or network cables at this point.

The ink carts just click into place. They are physically keyed so that you can’t put the wrong ink in a slot.
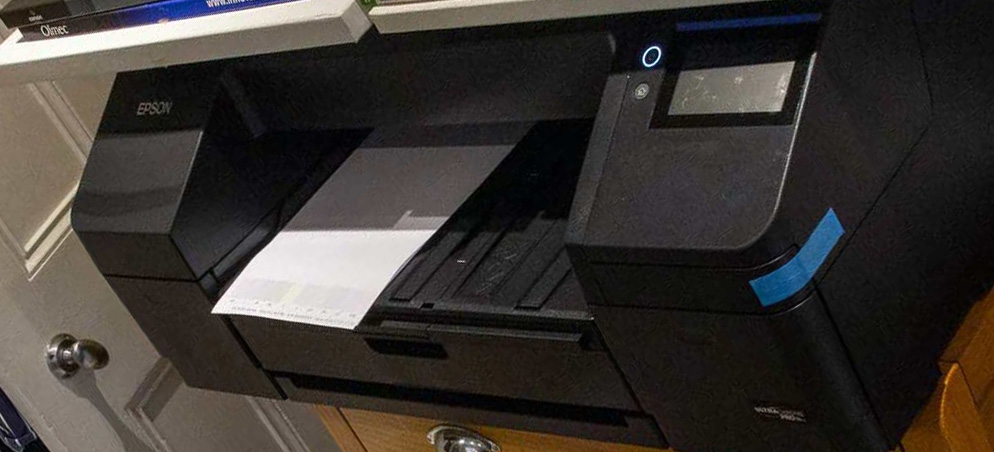
Note that bit of blue tape on the right hand side of the printer? This is holding the door to the RH ink carts shut.
Why?
I discovered with the P5000, that if the printer is fairly high up, as this one is, then leaning over the printer to look inside, it is possible to accidentally open the cover by lightly pressing on it.
Do this during printing or initialisation and the whole process stops, wasting ink/paper.
Quick checks
The printer does not need alignment on setup, but feed adjustments are worth doing once you’ve got the printer ready for use.
You can look through the printer menus for options, but I often do a quick nozzle check at this point with any new printer. A single sheet of plain paper will suffice.

During my P5300 printer review, I kept some A4 plain paper in the paper tray just for this and usage reports.
Here’s part of a status sheet print.
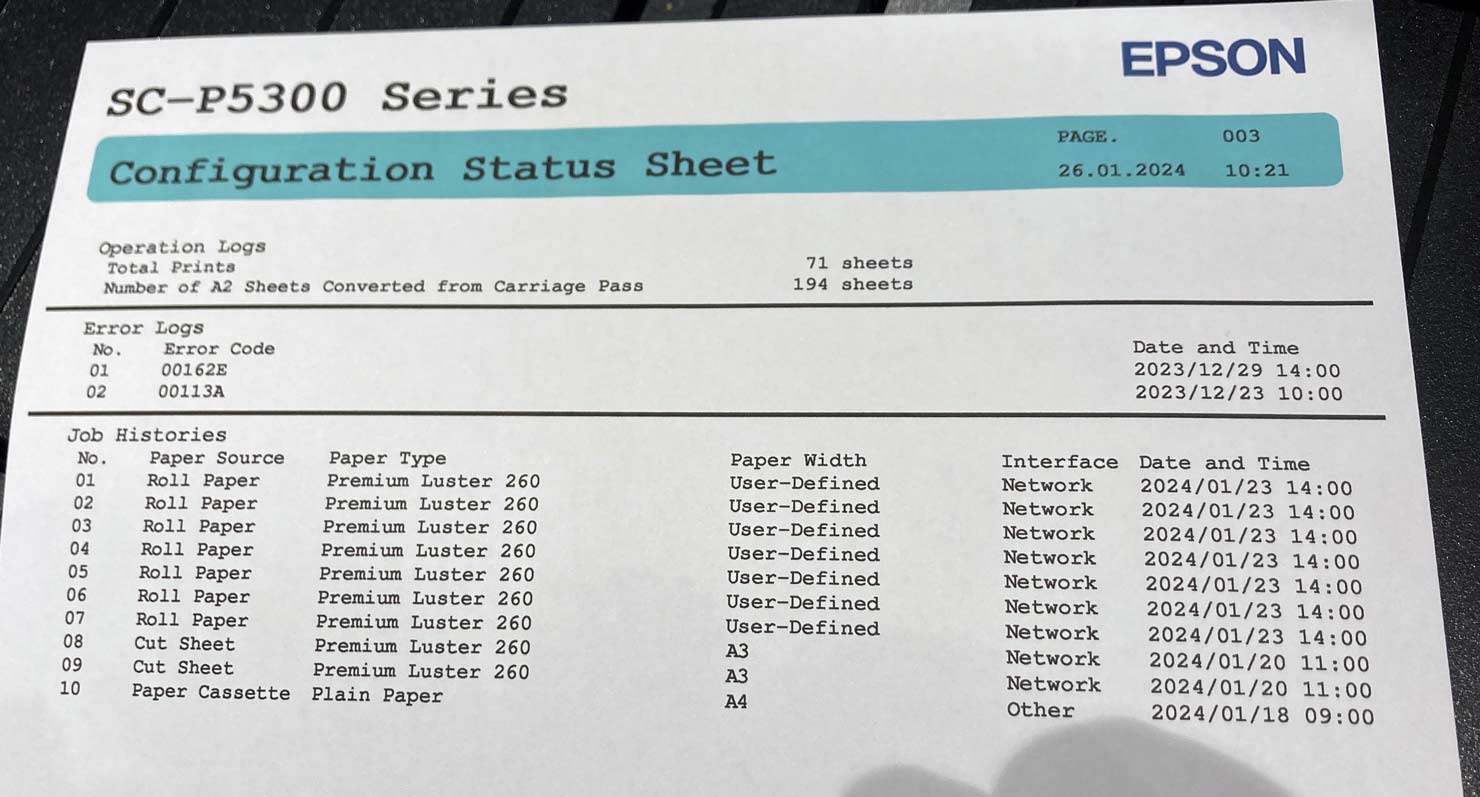
Epson does not produce any software for Macs [which are what we have here] for analysis of printer paper and ink usage.
The printer can be connected to Epson’s ‘Epson Cloud Solution PORT’ system, but that really is aimed at commercial print users. It’s just not the sort of set-up I can imagine home users, or even myself as a working photographer, having any actual use for.
More info: Epson Cloud Solution PORT
If you do use this, you need to set up data sharing for your printer via the printer web page. The agent key is supplied from the Epson site.
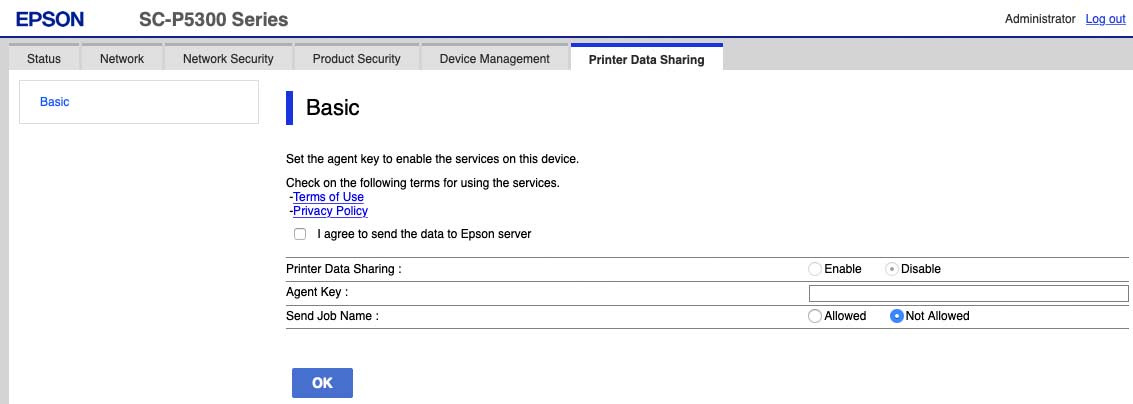
If you are on a corporate network, you really ought to check this is allowed.
The printer is accessible via the Epson Edge Dashboard:

The printer web page
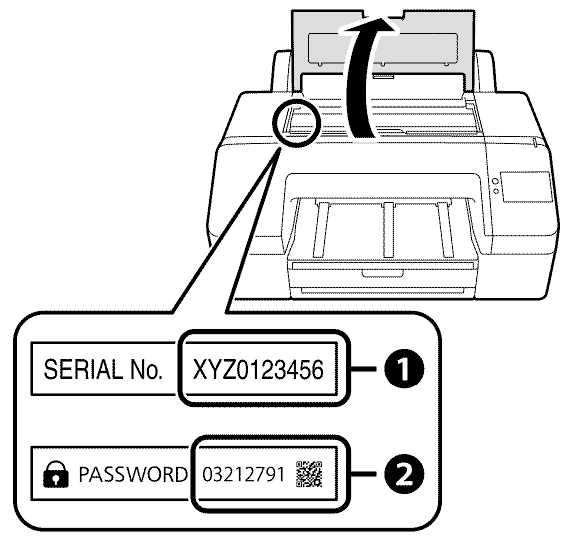
The printer has its own web pages, which duplicate some of the device the settings you can access from the front panel. Note that you will need to log in to it in admin mode to set many functions.
This needs the admin password. Fortunately, there are info stickers inside the printer.
Connectivity
The printer has Ethernet, USB and WiFI connectivity). The wired ports are at the rear.
Note that you shouldn’t connect up networking until you install the driver and software on the computer you want to print from.
There is an exception to that, in that if you know how to configure printers or this isn’t the only printer on the network, them you can configure a lot directly from the printer screen. However I’m aiming this review more at people entirely new to the printer and looking to get it up and running.
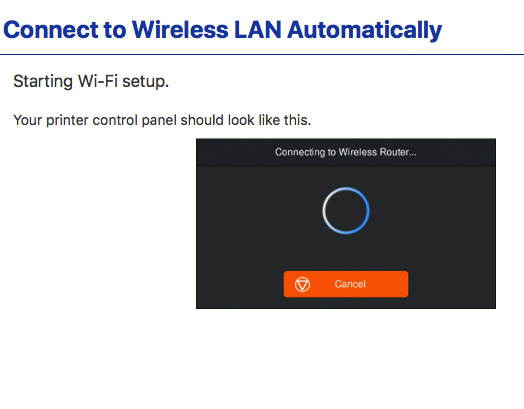
The Epson installer handled connection to our network very easily. I was installing from a MacBook Pro on the same network
Printer drivers – setup
The easiest way is via Epson.sn and the installer downloaded, but if using Macs, do be careful not to accidentally install the AirPrint Driver.
Symptoms of this are a loss of functions in the driver and general annoyance any time you try and print.
Make sure you follow the instructions carefully – don’t just assume you know what you are doing! I install a lot of printers and this has still caught me out.

This will look different on different systems, but just make sure that the driver installed does NOT say AirPrint or Secure AirPrint. AirPrint is good for nothing* with this printer – it is nothing to do with using Wi-Fi.
*Unless you really want to try printing from an iPhone or iPad, which have no meaningful colour management.
Firmware updates
With any relatively new printer, there are likely to be firmware updates. These should generally be installed when flagged.
The printer will check on power-up and offer you the chance to install any new firmware.

You can check via the printer’s web page, or you can check from the printer front panel.
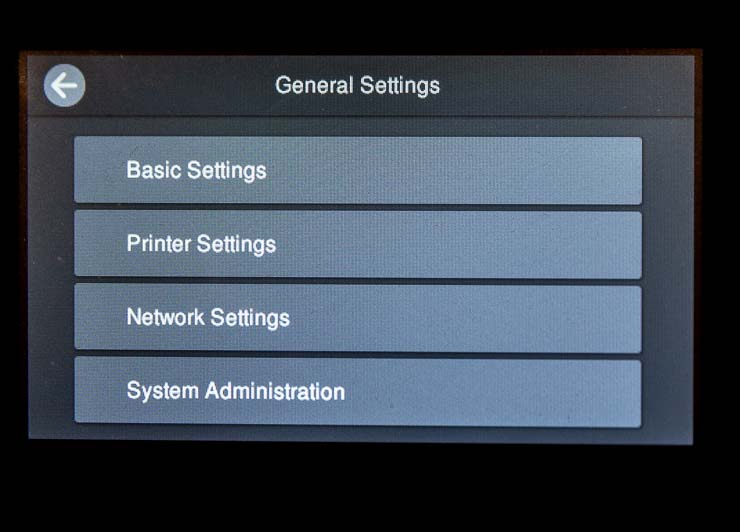

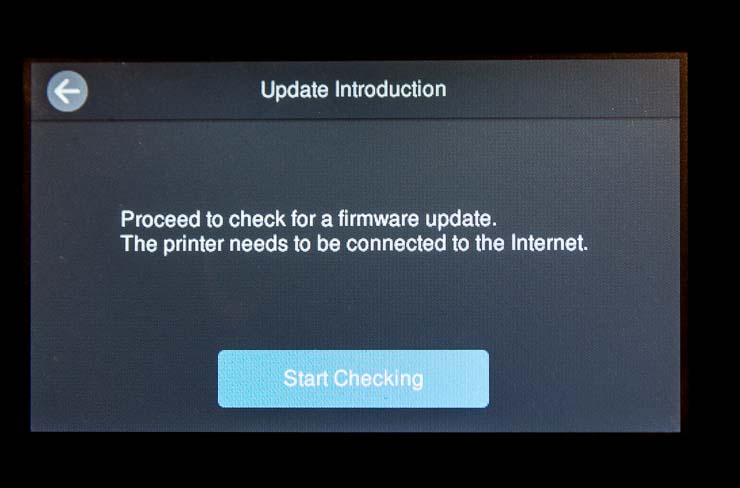
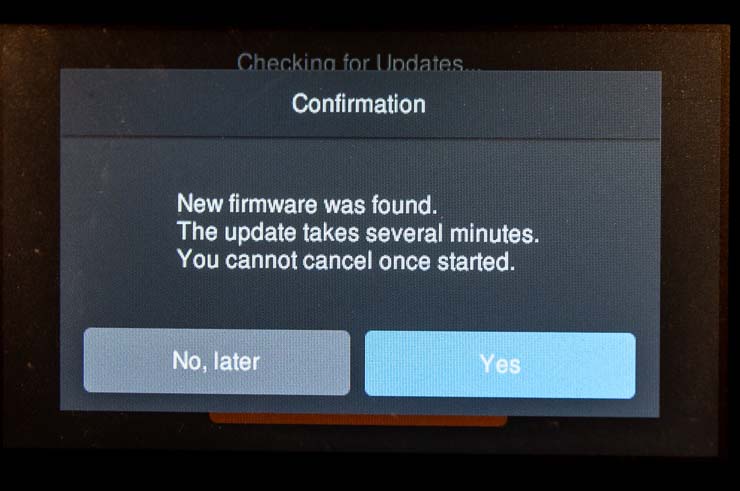
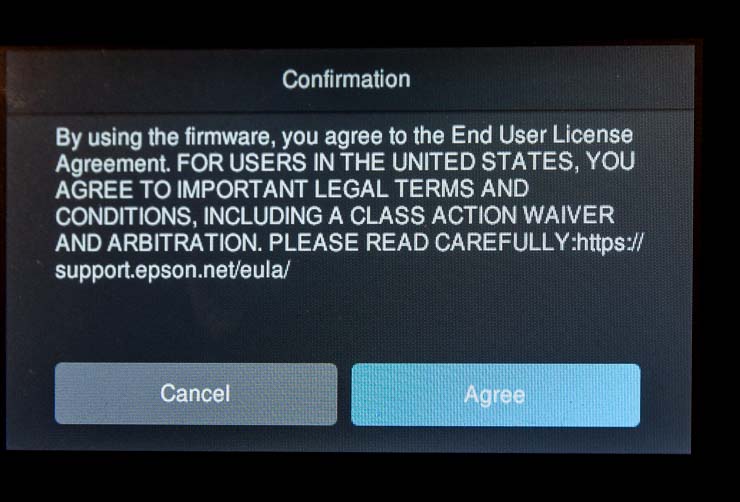
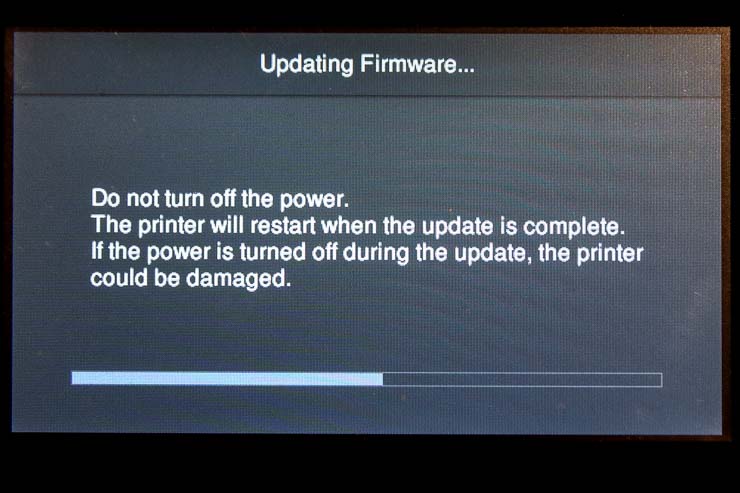
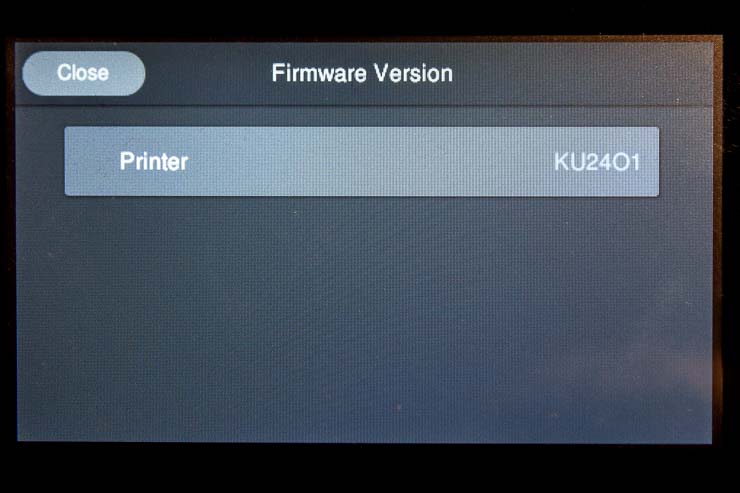
As the warning on the screen points out – do not turn the printer off when updating firmware.
The display
The display is the same type as the P700/900 and is very clear and easy to read.
Menus are clear and easy to use with the touch interface. There is a good use of colour and even small text is crisp and easy to read.
One minor difference between the P700/900 and P5300 is that they have an option to show the image being printed, like this:
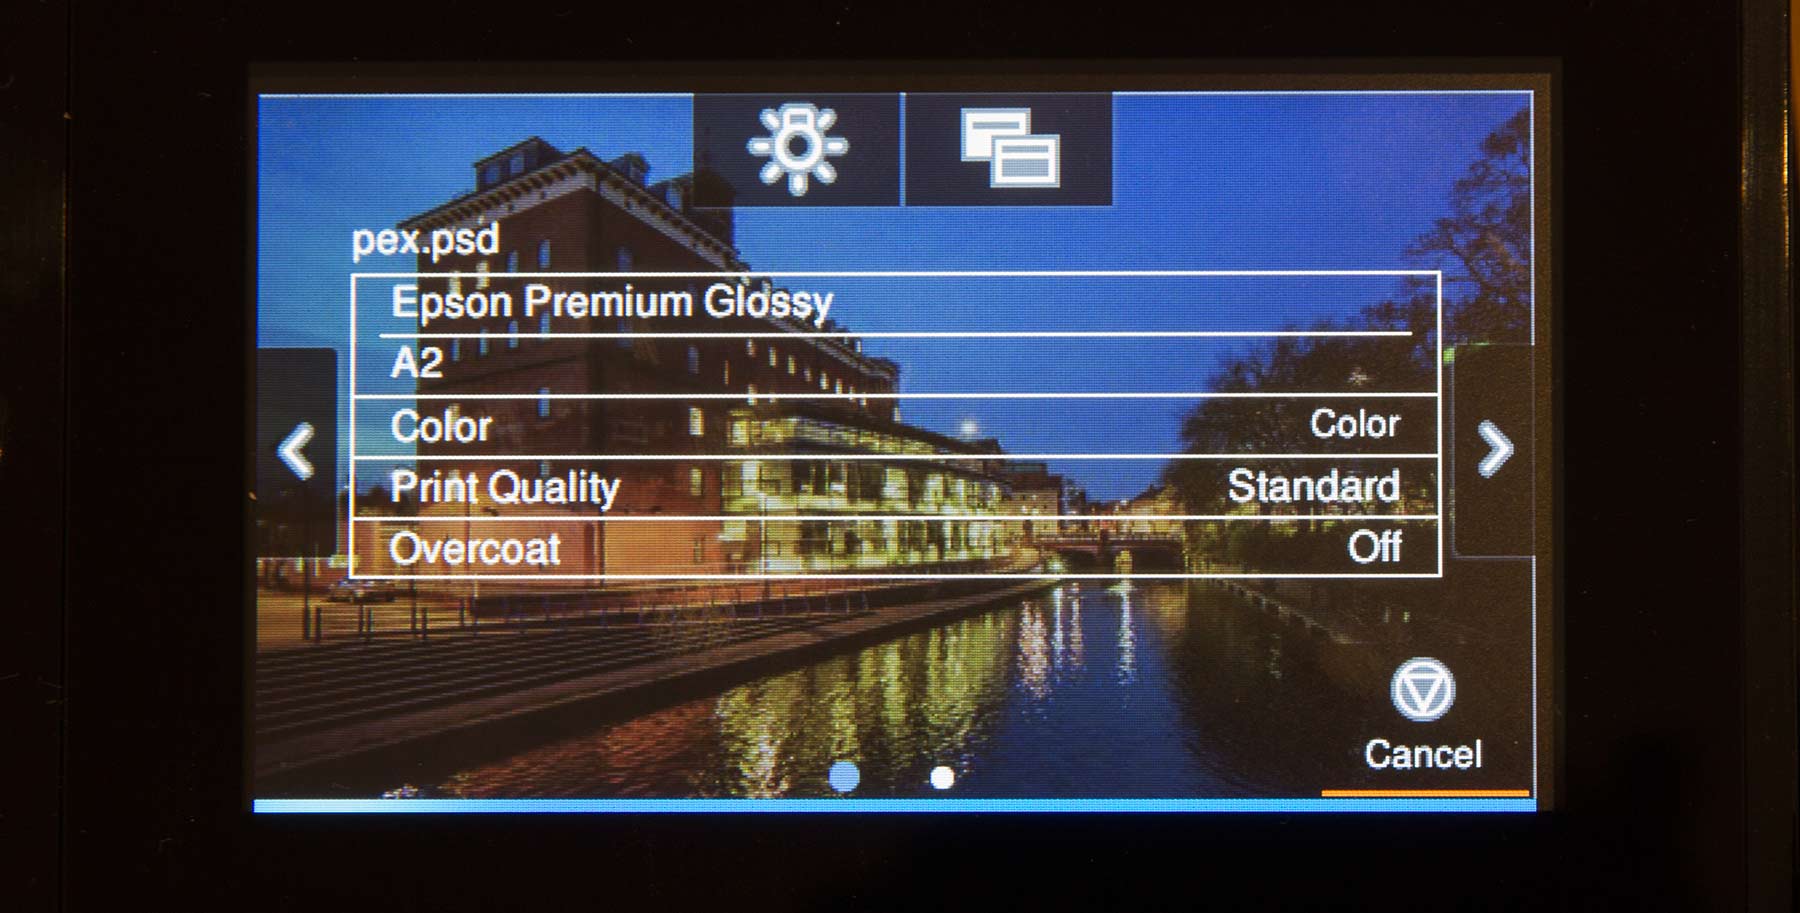
On the P5300, you just get the time remaining option

I’d note that the time estimates were generally reliable, with a tendency to slightly over-estimate the time needed.
Here’s the screen not long after my first ink change [LGY – the light grey].
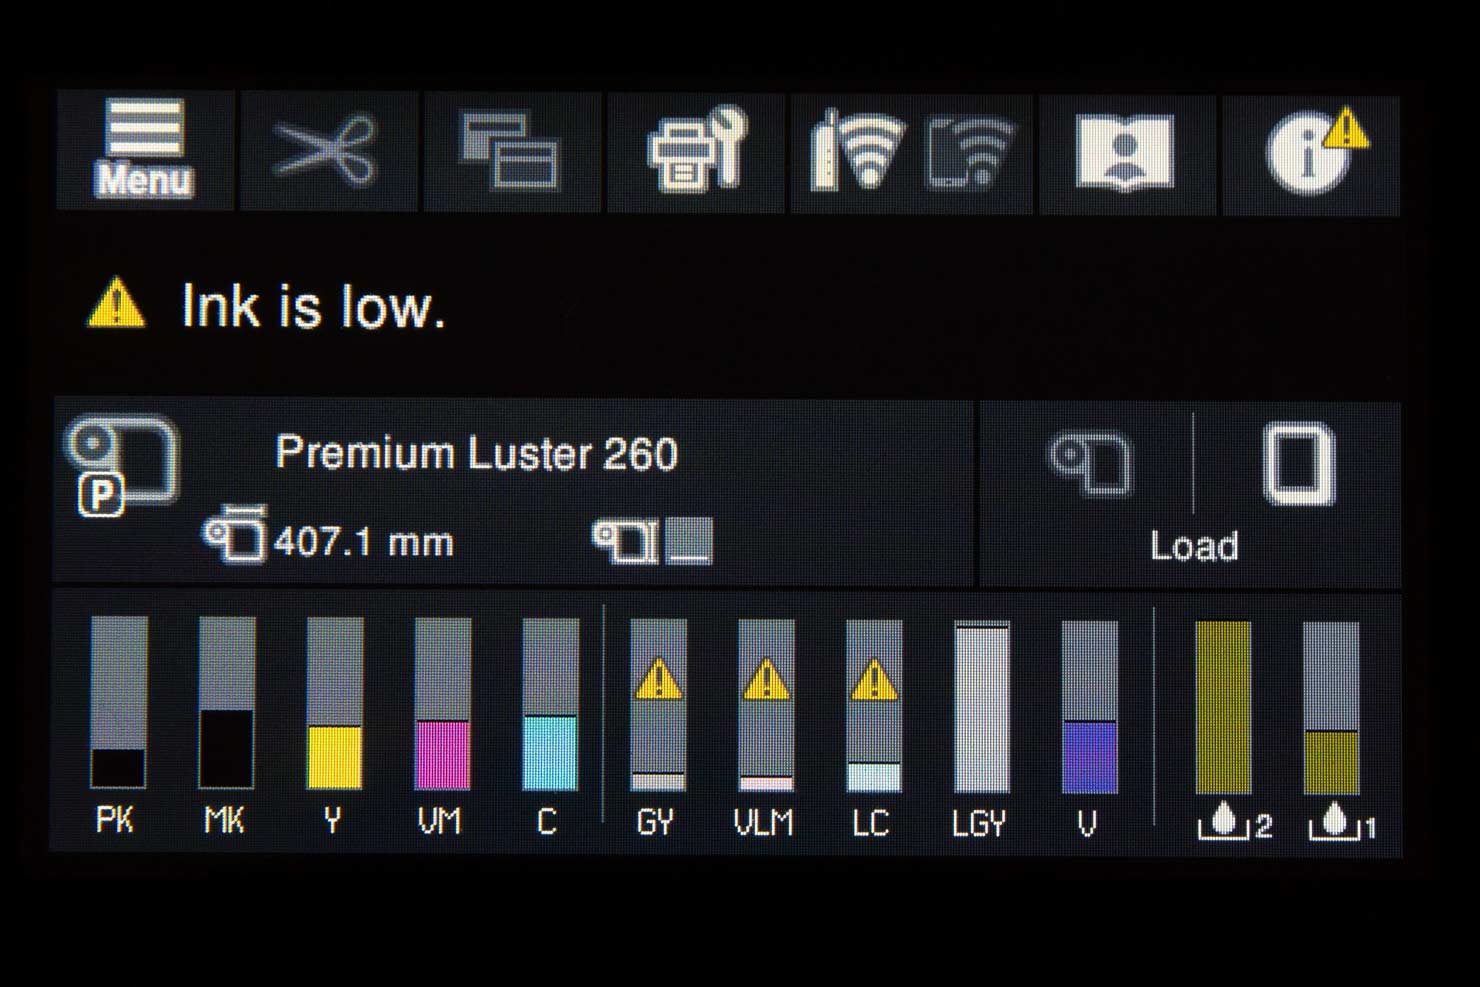
Note that I’ve got roll paper loaded [ the ‘P’ indicates it’s in the parked position – so as not to get roller marks if left].
Interestingly, it also gives the exact measured width of the paper – useful to know if you find that your margins are fractionally off.
Changing inks
I’ll discuss ink usage in the P5300 printer review conclusions, but at a certain point ink carts will be flagged as low or empty, on the printer, and at your computer. The screen view above shows three inks as low. The initial warning can be ignored, other than as a reminder to have spare ink available.
There will then be warnings that there may not be enough ink to finish a print. Initially you can ignore these, unless you’re making a big print…
Finally, an error will be thrown up and you have to change ink to proceed.
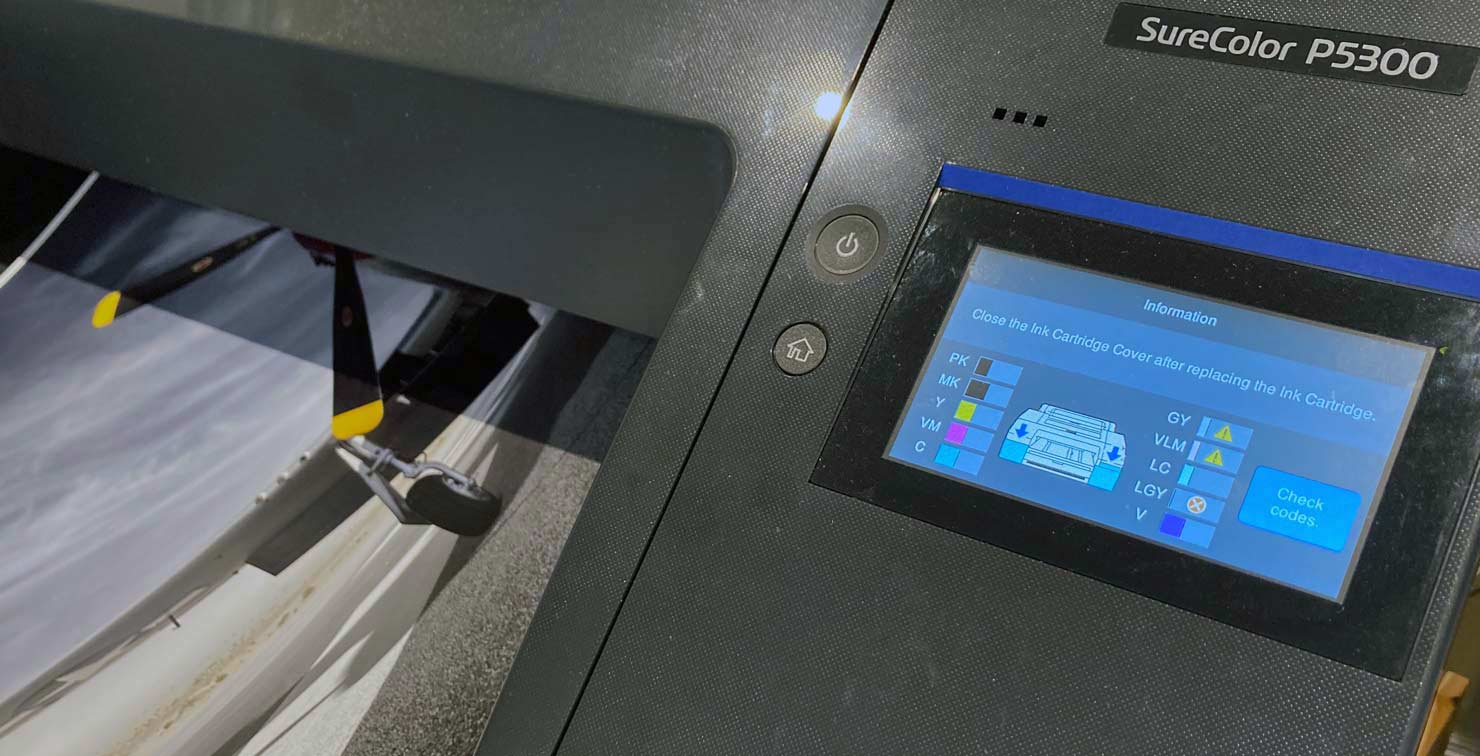
If this occurs during a print, you can ‘hot swap’, but with some very glossy papers there may be a very slight mark visible [if you know where to look and get the lighting just right].
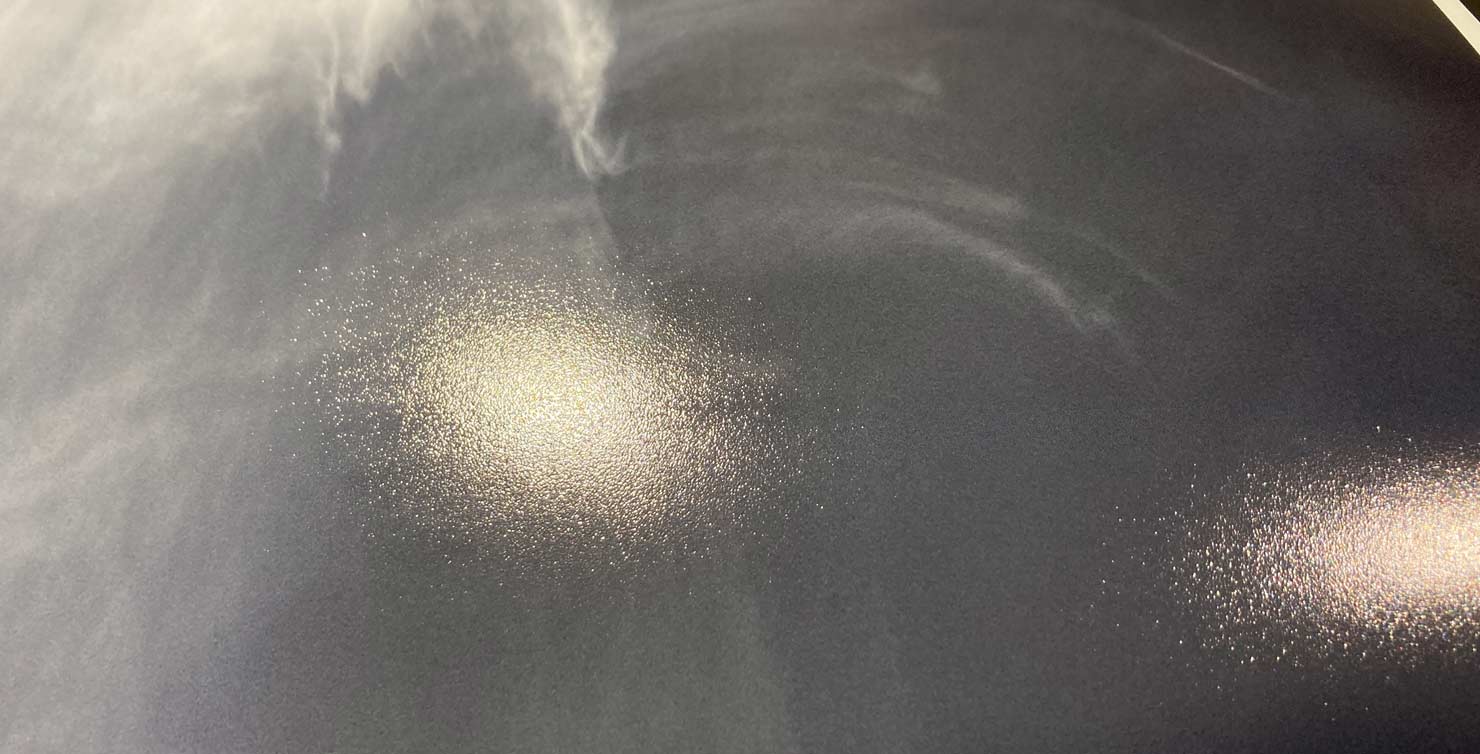
Yes – there is a mark there…
Replacement is exactly the same as installation. Open the panel for the ink, remove the old cart. Take your new cart, give it a bit of a shake and pop it in the printer.
There is no lengthy initialisation process, just a bit of whirring and the usual printer doing things noises.
If you are making a large print, you can remove a very low cart, and pop in a full one. Keep the ‘low’ cart, since you can put it back for testing or small prints. Do this when the printer is off and it doesn’t seem to bother at all, just showing the level of the cart present.
Maintenance carts
There are two maintenance carts – the main one is at the front below the ink carts and fills with ink used for setup and ongoing cleaning. Lift the front to be able to pull it out.
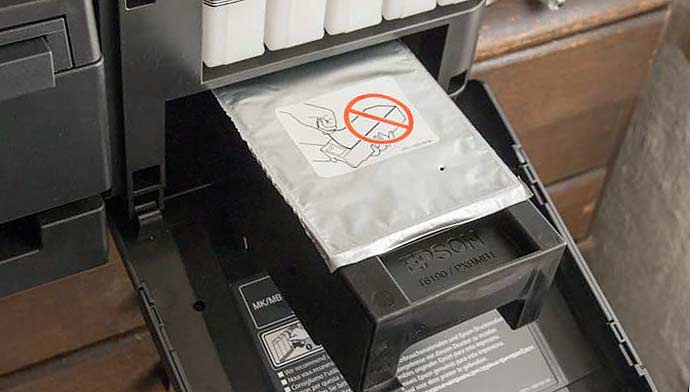
After setup, it’s about 50% full [indicator 1 at far right].
After hundreds of prints, and the first ink cart replacement, it’s gone down a tiny amount.
Don’t bother getting a spare when you buy the printer…
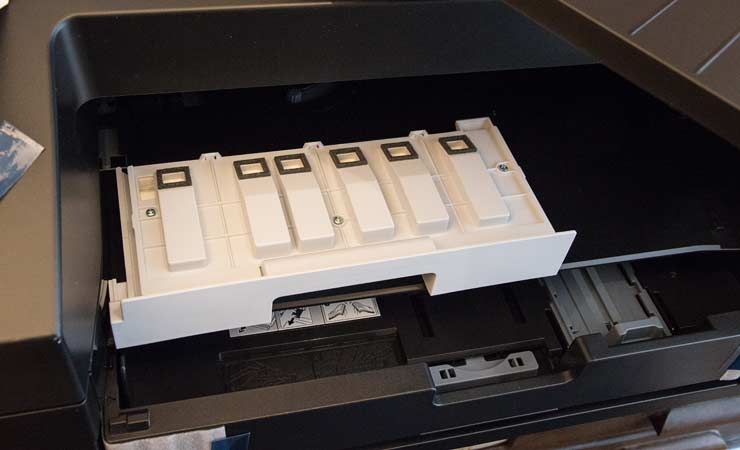
Maintenance cart 2 is for catching borderless overspray. Note how it hasn’t shifted level at all during my testing.
Note that the maintenance tanks’ bar indicates remaining capacity not ‘fullness’.
I’ve had a P5000 [same cart] for many years and it is still as new.I just don’t do much borderless printing.
The 2nd cart is accessed by removing the output paper tray and flipping a small lever. It then just pulls out.
Cleaning and maintenance
There are several maintenance options available from the main menu.
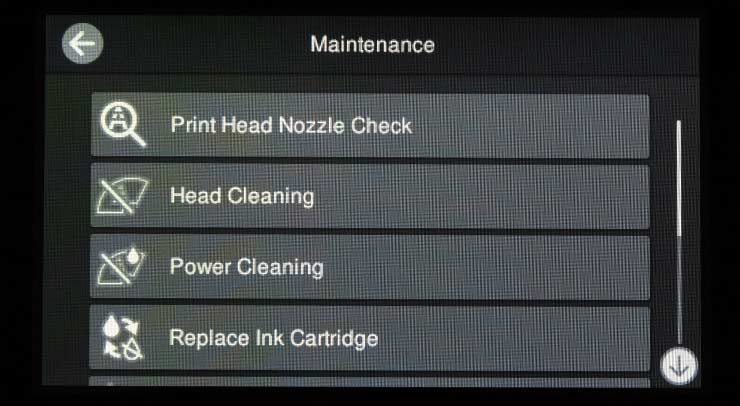
The nozzle check, prints a basic nozzle check [on plain paper here].
In the nearly two months I had the printer here, only once was there a break in any of the lines [I’d left the printer about a week].
Often a second check [I put the paper back in the cassette] clears it, but I wanted to see the nozzle clean process.
A basic clean was all I’d run.
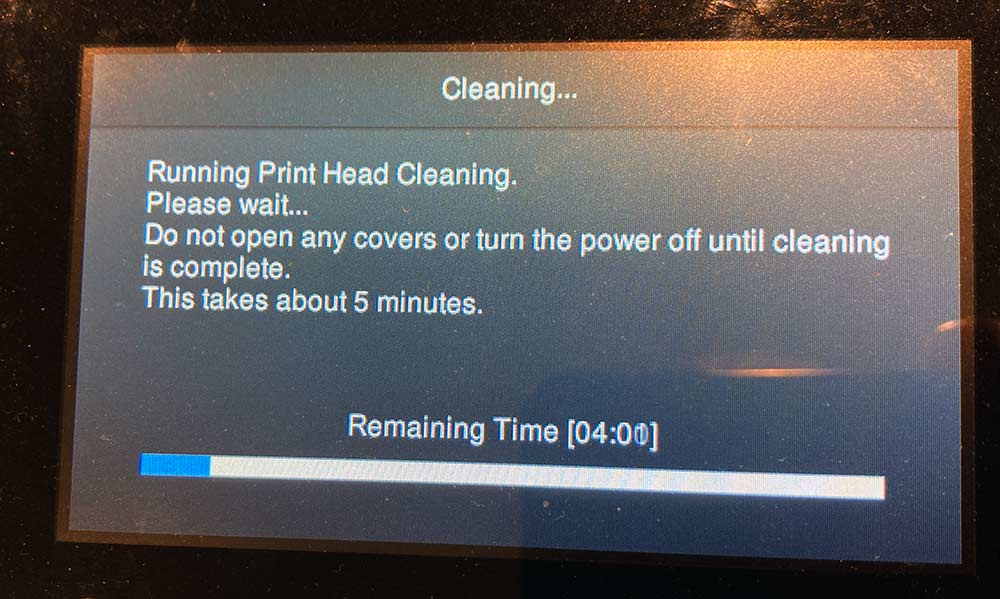
Unlike the P5000, which has the ability to just clean pairs of colours [and also has a paperless nozzle check] the whole head is cleaned.
How often to print?
The P5000 is meant for regular use, and does not like being left for weeks. This is one of the main reasons I’ve dissuaded several people from buying one – it’s a commercial printer made for daily heavy use.
The P5300 however, has the print head of the P900 – a consumer product. As such it should be a lot less susceptible to issues from a lack of use. Personally, if I had one, I’d set a diary reminder to switch it on at least every two weeks and run a nozzle check.
That said, if I went away for a month I’d not be concerned, whilst with the P5000, and other large printers I’ve had, I’ve had the friend who waters my house plants switch the printer on and run a check. You can just get the P5300 to sleep rather than shut down, so if you’ve remote access to your home network you can print a nozzle check on paper in the cassette. There are no doubt other solutions to this…
Other cleaning
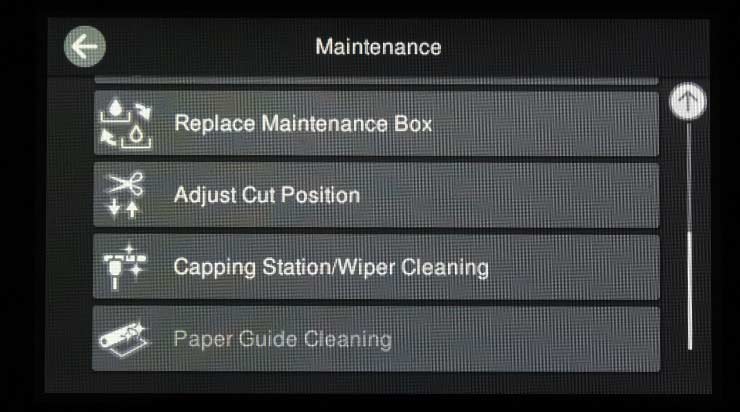
You can also clean the capping station [where the head parks].
Activating this moves the head out of the way to allow access for [careful] cleaning.
READ THE MANUAL before doing this – clumsiness could be very expensive.
The noisy printer
The P5000 chassis was designed to reduce dust build-up and problems. It has hefty fans in it to keep the insides clean and for a paper vacuum system to hold paper flat.
It is distinctly noisier than smaller desktop printers. You would not want this on the desk next to you whilst trying to work on something else.
P5300 printer review: Media options
There are three sheet media paths and the roll paper feed from the rear.
I’ve created P5300 videos showing the use of all the different paper feed options.
Note the thicknesses
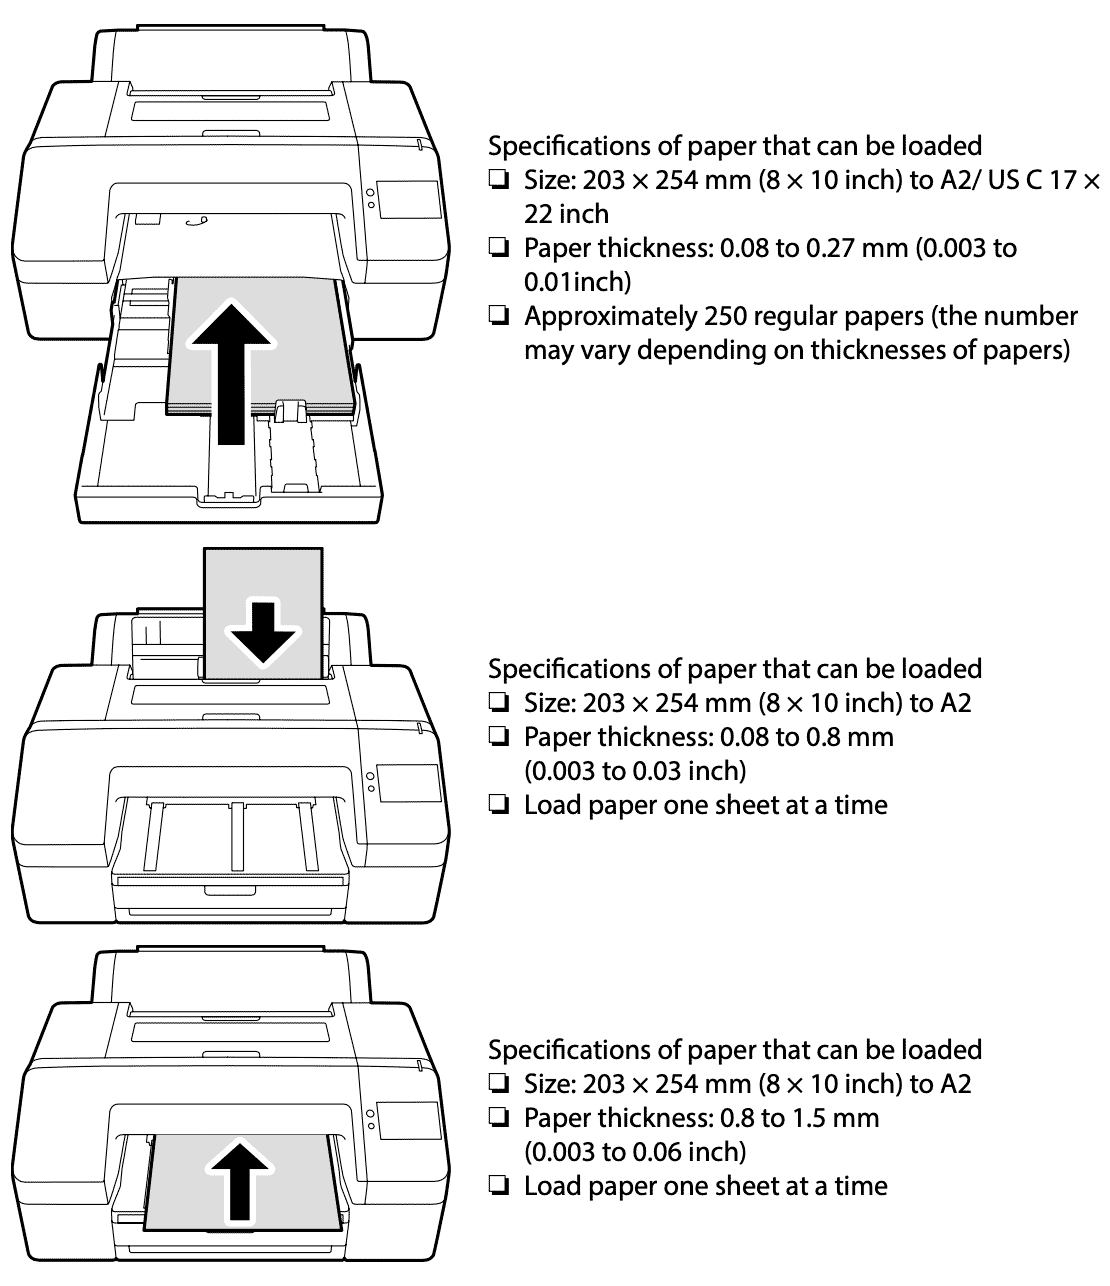
The printer has a vacuum system which helps hold paper flat and resist curl.
It just feels a lot more reliable and robust than smaller printers.
Any sheet media has larger top/bottom margins – take note of this when deciding layout and overall margins – full borderless is only possible with roll paper.
Top paper feed
The top feed folds upwards and extends to support a single sheet of paper.
The paper guide at the left should be positioned so as to guide, not pinch the paper.
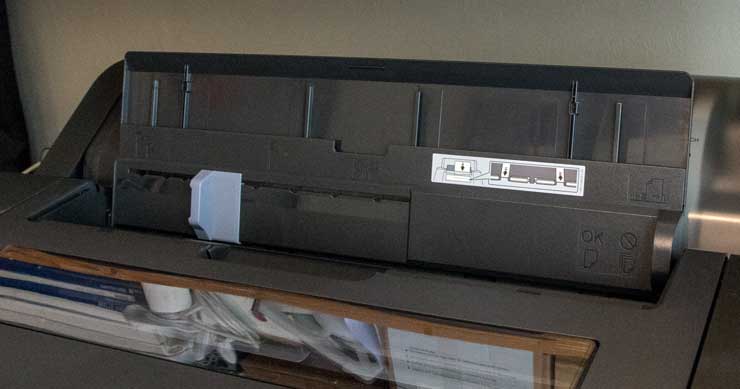
You can only load one sheet at a time.
There is a note showing how to load a sheet.
After years of using the [identical] P5000 I’ve learned just the right pressure to get a sheet in the right place. There is often a slight click as the paper fits under the rear of the rollers.
Take care with this if you are new to the printer – a few sheets of photo paper should be enough to give you the feel for the setup.

Note that the paper should not be pushed under the rollers. Unlike the P900, there is no light in the print area, so take care until you get the feel for sheet loading.
The paper tray
The P5000 and P5300 [5370] are the only pro level photo printers with a paper tray. This can be loaded up with a lot of paper. If you extend the tray, it will happily feed A2 photo paper. I’ve used it with lighter art papers, but stiffness and thickness are the limits. The paper has to bend 180º when loading, so beware of stiff papers, even if thin.
Remember that the paper is printable side DOWN in the tray
If you get a jam, there is access at the rear of the printer – I’ve only ever had this when I put some slightly tatty plain paper into the tray.
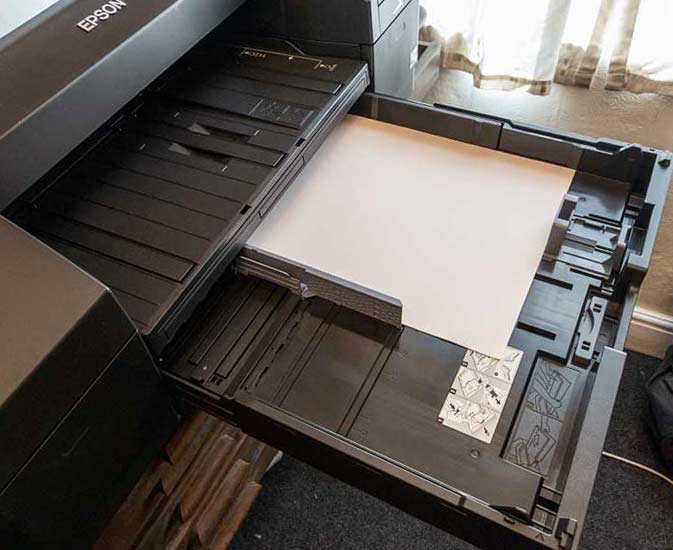
If you use larger papers, the tray itself extends, and there is a plastic cover [supplied] which will keep dust out.
Just one thing to remember – there is a tray for paper, but nothing to catch prints coming out…
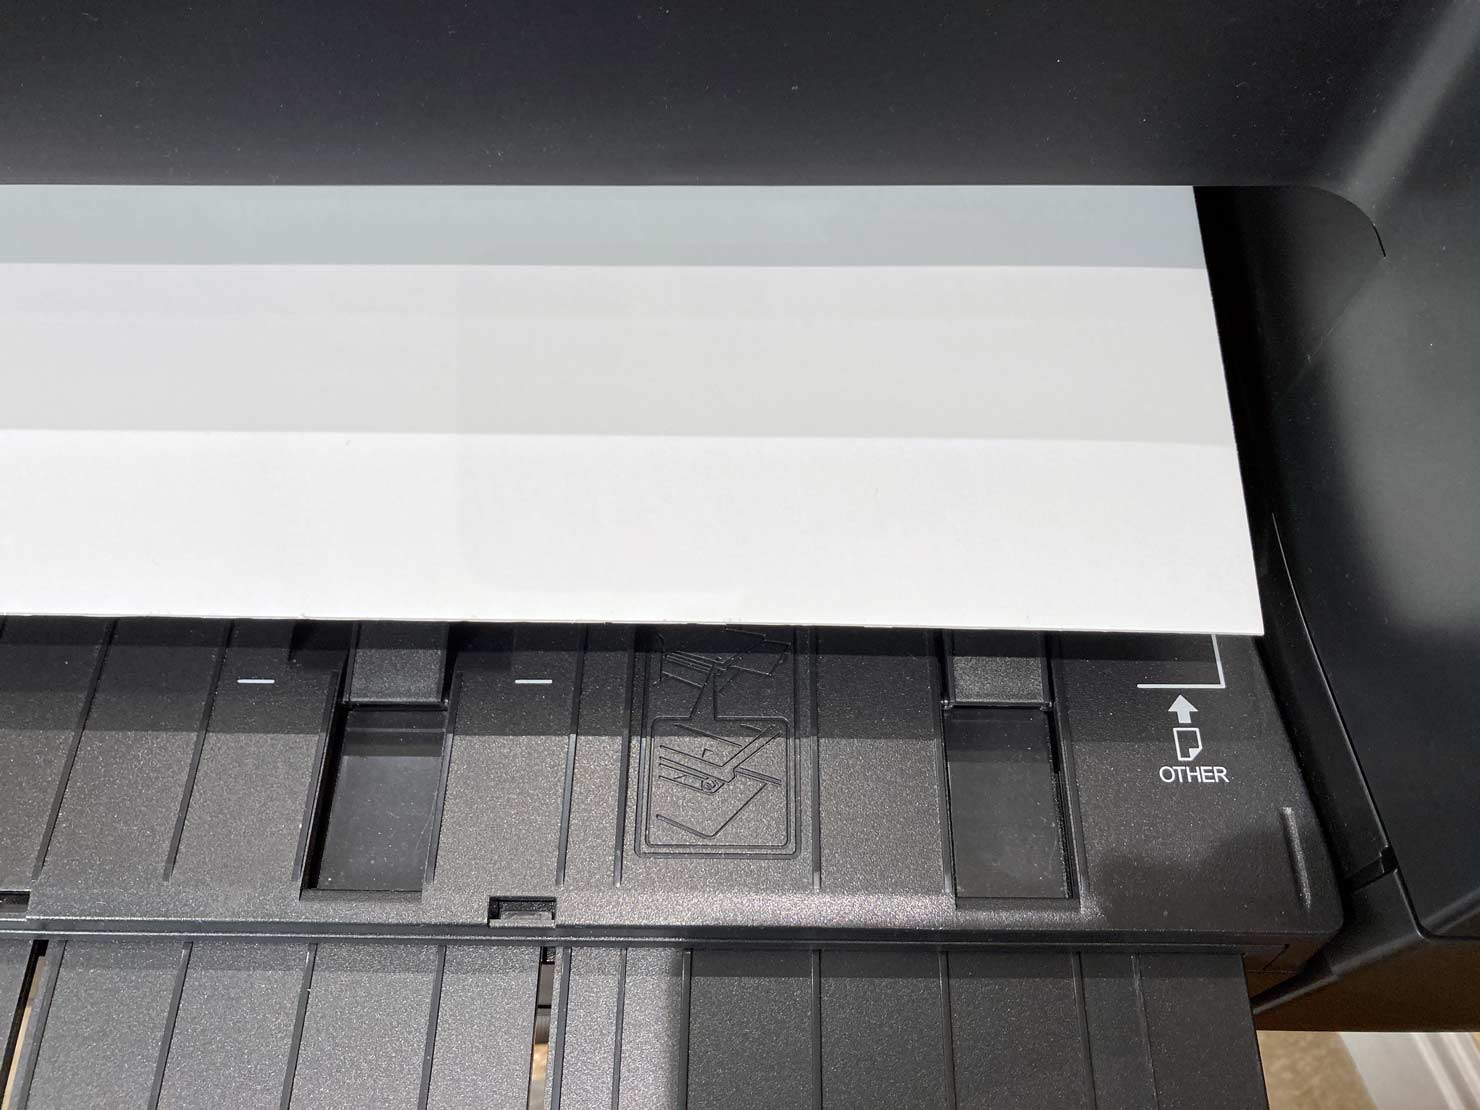
Front loading
Paper can be loaded at the front. It is drawn through the printer and comes out the front again as printed – just watch for space at the back.
Alignment for a sheet may seem a little imprecise – just make sure it’s against the right edge and roughly aligning the edge with the marks.
The edges of the paper are detected optically, so don’t fret about getting the loading position overly precise.
Poster board
The poster board setting increases clearance for the print head. I’ve a P5300 video showing printing.
Do note too that with the straight through feed, you get a larger enforced margin on the trailing edge.
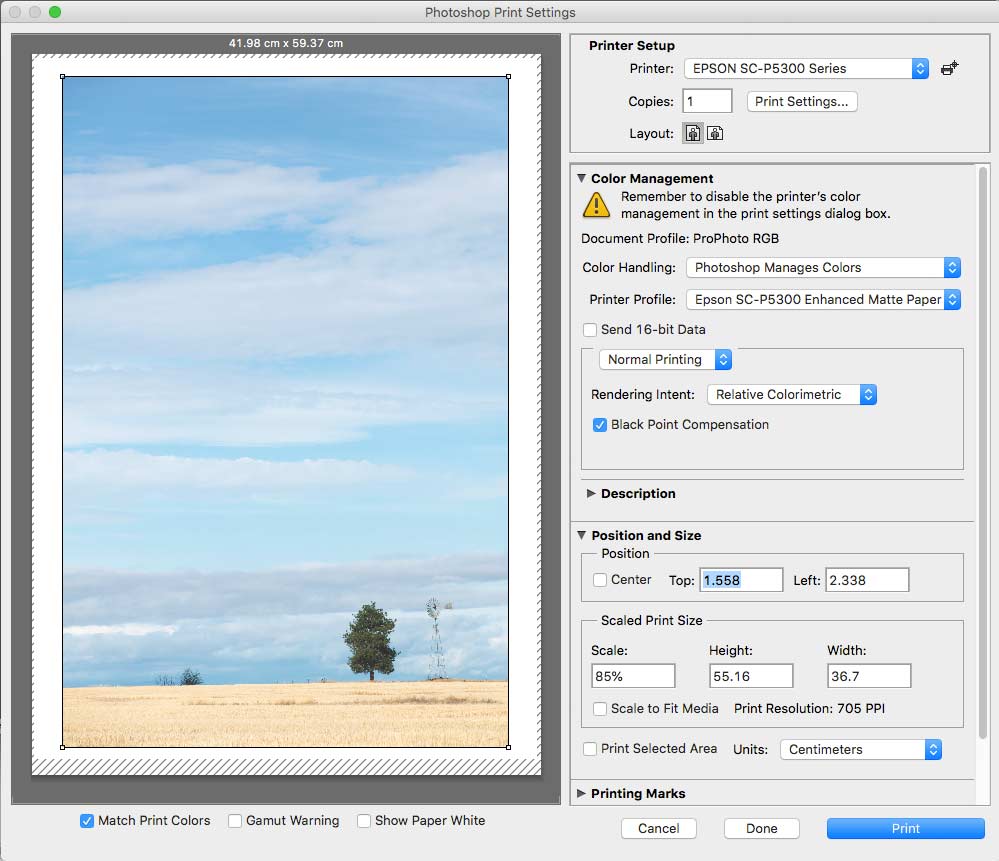
A print on A2 poster board – note the increased margin at the bottom.
Roll paper support
Roll paper is very easy to use – there is a guide on the screen. Touch the roll paper icon and you can load paper. There is an irksome confirmation step each time, but you load paper until the printer beeps, then it carries on loading and setting up the paper.
The roll unit on the P5300 is powered and can be adjusted for paper tension and feed – these are things most people will never need to worry about. It’s probably best to leave settings at defaults until you have a specific need to consider them, such as creating a custom media type.
Roll paper is an [inconvenient?] add-on for the P700/P900 – on the P5300 it is an integral part of what the printer is about.
There is an option to print a bar code on the end of a roll when unloaded. As long as you remember to do it from when first setting up a new roll, it will record how much paper is left on the roll. More a production thing – for me jut a way of wasting a few inches of paper – YMMV.
The paper cutter
For roll paper there is the option to cut paper. This is normally fully automatic at the end of printing, but can be manually instigated, such as trimming the leading edge of a roll – or removing paper at the start of a roll, which may have been damaged/marked through poor storage.
Cutting is also part of the borderless roll print options, in that you can have single or double cuts.
The blade is expensive – occasional cutting of a bit of canvas is probably OK, but if you are going to be printing a lot on canvas, don’t use the cutter, it will blunt it.
The cutter blade assembly is accessed by removing the front cover – I’ve described this in one of my P5300 videos.
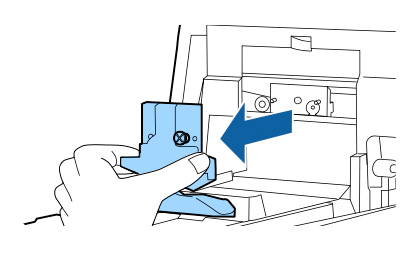
Depending on what media you cut, the blade should last a long while.
Paper marks? – Pizza wheels
There is a paper eject roller system at the front of the printer, which is used to eject sheet paper. On some delicate media, this can leave marks. I didn’t see any, but I’ve seen it complained about often enough.
There is a media setting where this can be deactivated. Just remember that if you are using sheet media there may be margin issues are the trailing edge since the printer does need to move the paper somehow [if not on a roll and being cut].
Printing CDs/DVDs
This is not supported – the only way I could think of doing it would be to make a custom holder from poster board, with holes or cut away areas – you could print several at the same time with a bit of A2 board and a suitable template.
Custom media sizes
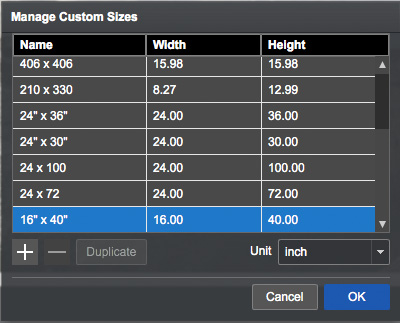
The front panel allows you to specify custom paper sizes not available in the standard list.
Typically this applies to custom sheets cut from roll paper or available from some suppliers in ‘panoramic’ print sizes.
For roll paper, it’s convenient to specify particular lengths of paper/print in the print software/driver, since the width will likely be a standard size.
This example [from the excellent EPL printing software] shows where I’ve created a custom 16″ x 40″ paper size for printing a panoramic image.
[See the videos for more]
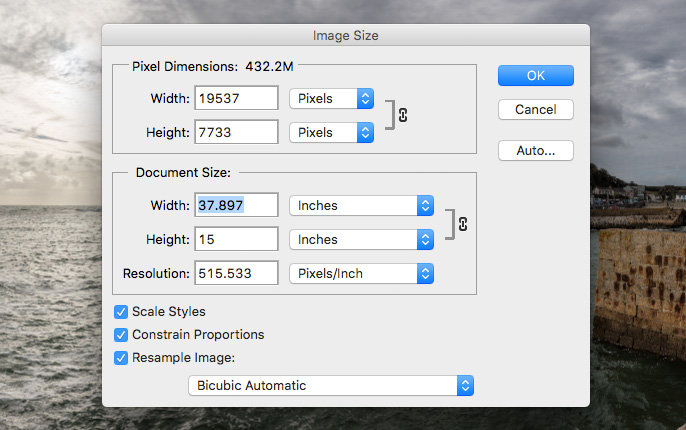
The image itself was resized in Photoshop to 15″ high,
Note the very high resolution [~515 ppi] – this is just fine. My detailed testing with the P700/900 applies to the P5300. All that stuff you saw on forums about using ‘360ppi’ for Epson printers is outdated ;-)
The image is printed, with the custom paper size.

Borderless printing on the P5300?
Borderless on sheet paper is only available from edge to edge on some sheet paper sizes – there will be a border at the leading and trailing edges of the paper.
Full borderless printing is only available on roll paper at the following sizes:
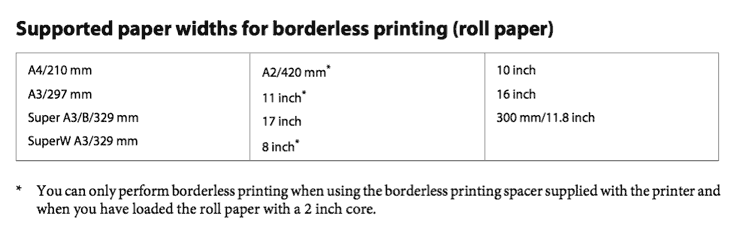
I’ve no idea why the 2″ core is specified.
Borderless on roll paper is printed edge to edge borderless, but the paper is cut to produce the other two edges.
Here I’ve set ‘double cut’ in the printer driver settings.
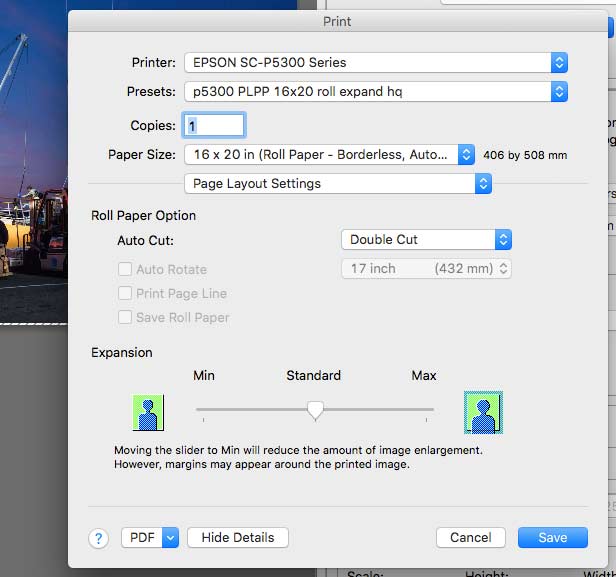
‘Double cut’ cuts the paper once for the borderless edge, and once again to give a clean end to the following roll paper.
[From the manual – click to enlarge…]
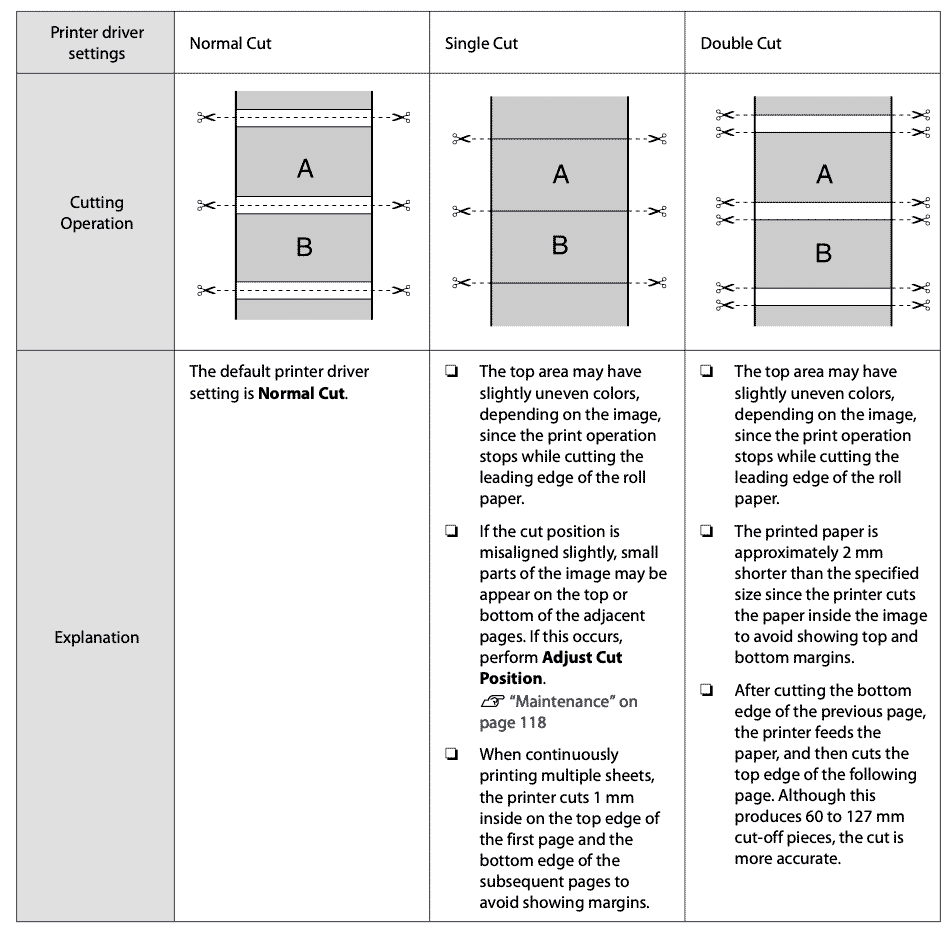
It really is worth reading the manual if you want to do a lot of borderless printing on roll paper [8×10 prints on 8″ or 10″ roll paper for example]
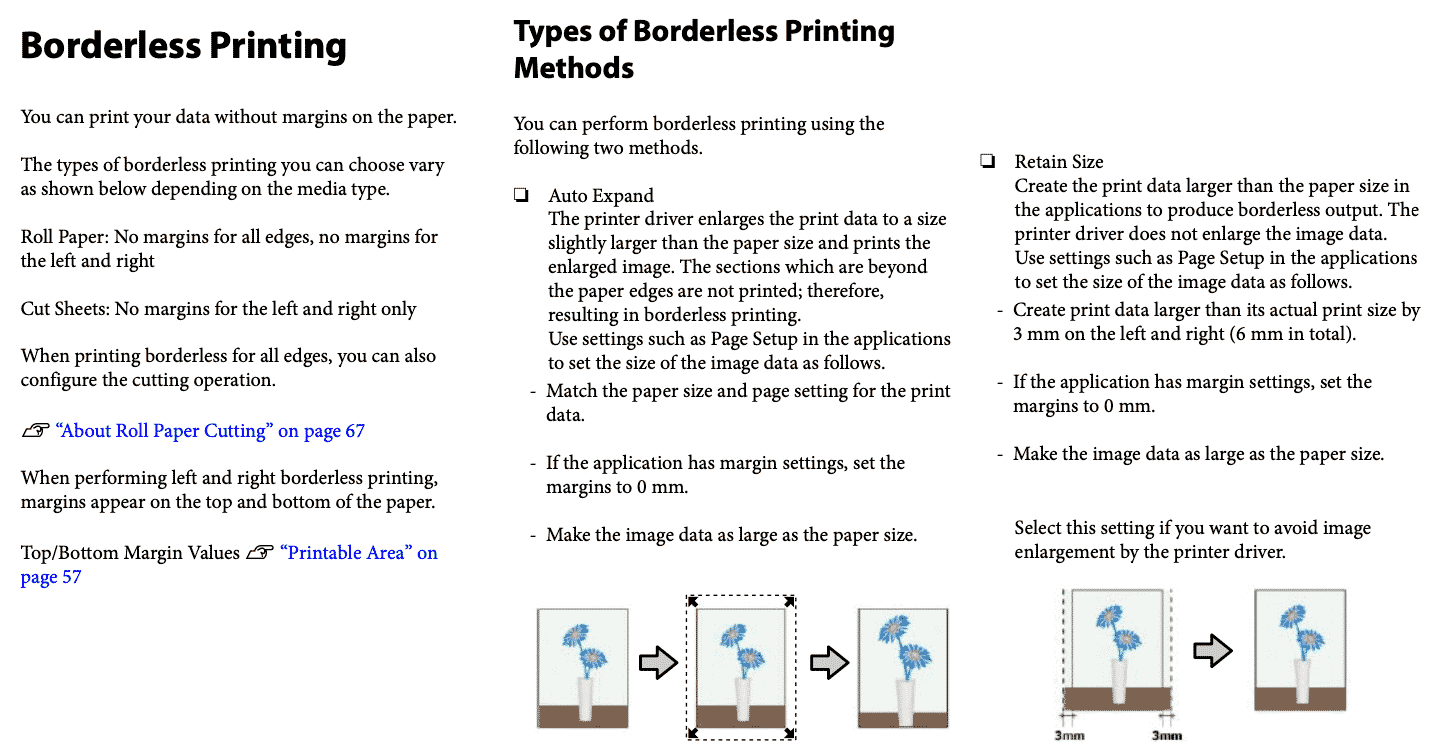
But it says borderless in the print settings…
This is a potential source of confusion. Look at the borderless paper options.

All but the roll paper are only edge to edge borderless.
The sheet borderless limits are set by the design of the printer.
THERE IS NO P5300 FULL SHEET BORDERLESS
Sorry to labour this, but I keep get asked if it is possible and I’ve been assured it isn’t.
Saving paper?
You might want to print an image of a particular size across the width of roll paper [if it fits]
There are options in the driver for auto rotation and saving paper.
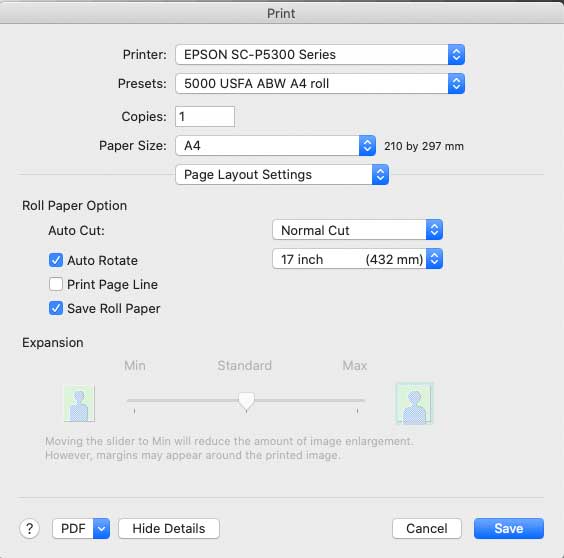
I forgot this a few times when printing my A4 B&W test prints meaning I ended up with more wasted paper on a 17″ roll.
If you want to lay out multiple prints on roll paper, consider layout/printing software like Mirage. I still use ImageNest on the Mac, but I’m not sure it’s still being sold.
P5300 printer review: Test prints
With any new printer I like to start with printing known good test images (Colour and B&W) on a paper from the paper manufacturer, using printer profiles from the manufacturer. If I can’t get good results with this setup, then what hope have I for my own images and some random third party paper?
I’ve lots of test images available on the site but the one printed here [roll paper 16″ Epson Premium Lustre] is a Datacolor one I’ve used for years and know very well.

Similarly, I have black and white test images [Downloads and info]
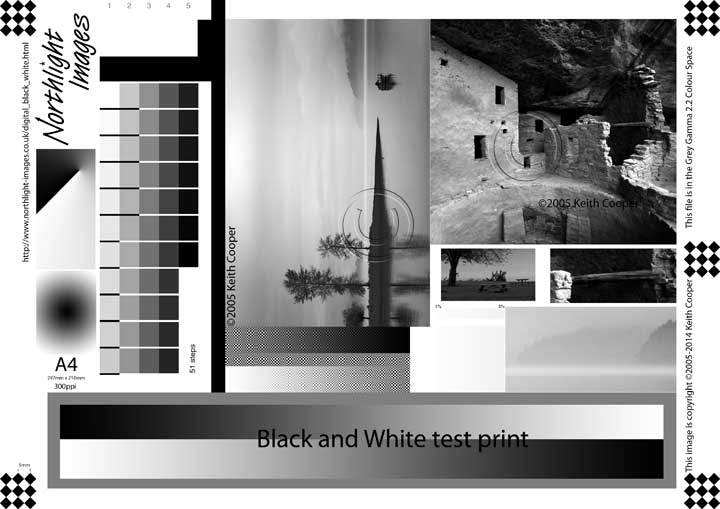
I’ve printed one of these for every paper tested [just a few here]

Colour Management
As well as using Epson profiles for some of their papers, I created quite a few profiles of my own. I use X-Rite i1Profiler software, measured with an i1iSis scanning spectrophotometer, typically from nearly 3000 patches on an A3+ sheet.

Here are my two targets [colour and B&W] for a roll paper.
Note how the B&W one wasn’t rotated properly on the roll, as mentioned earlier.
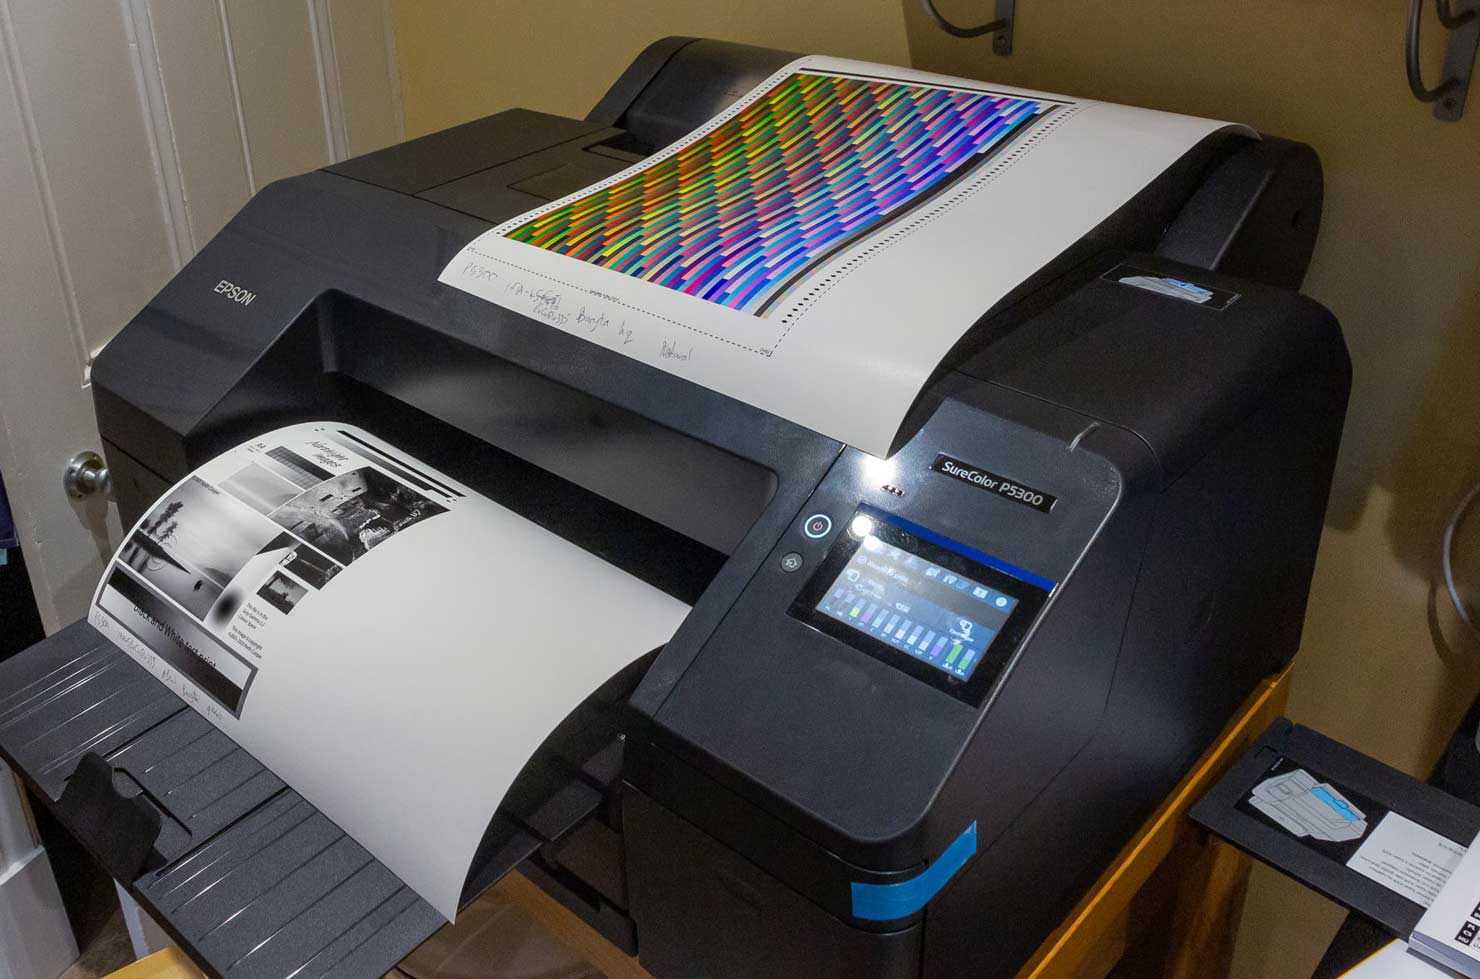
It’s worth noting that with the same inks and the same print head, profiles for the P700/900 will work with the P5300 and vice versa. I’ve not tested this in detail, but several people have contacted me to say it works. I’d regard it as an option if I couldn’t get a P5300 profile for a paper, but wanted to test it.
The papers I profiled for my P5300 printer review
Quite a few…
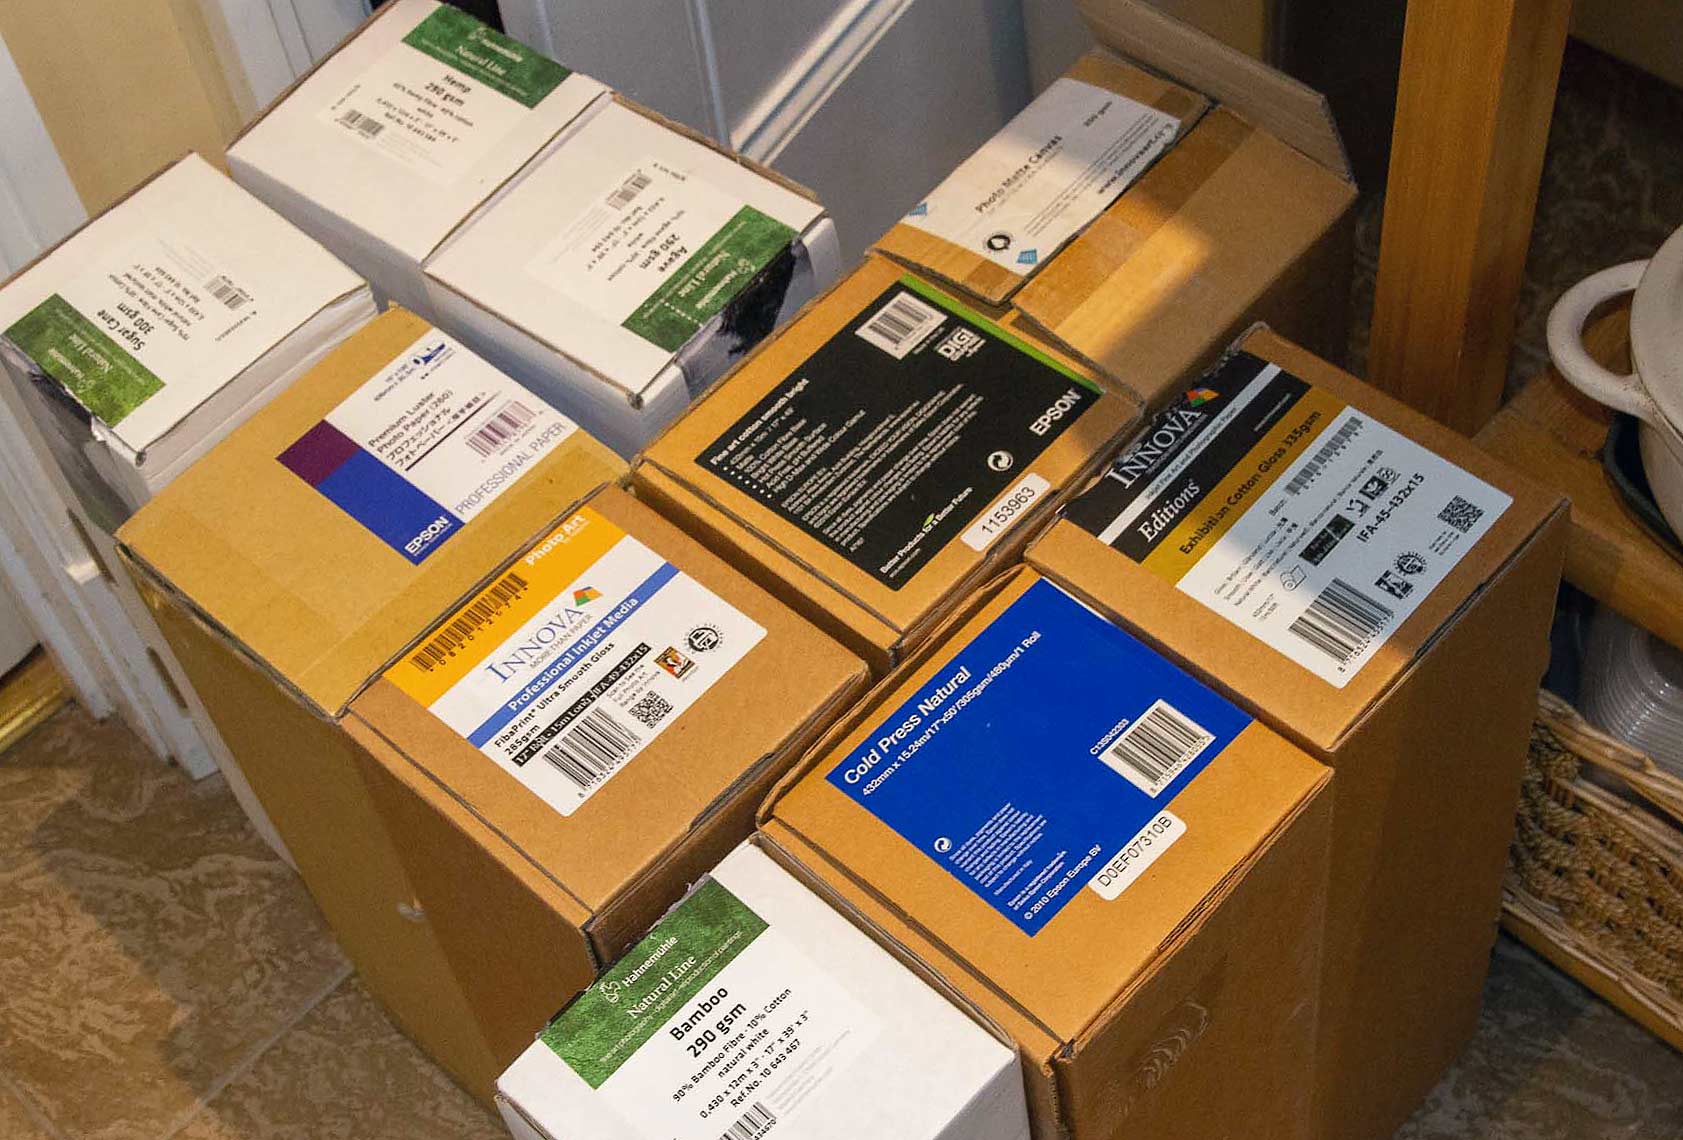
and sheet paper
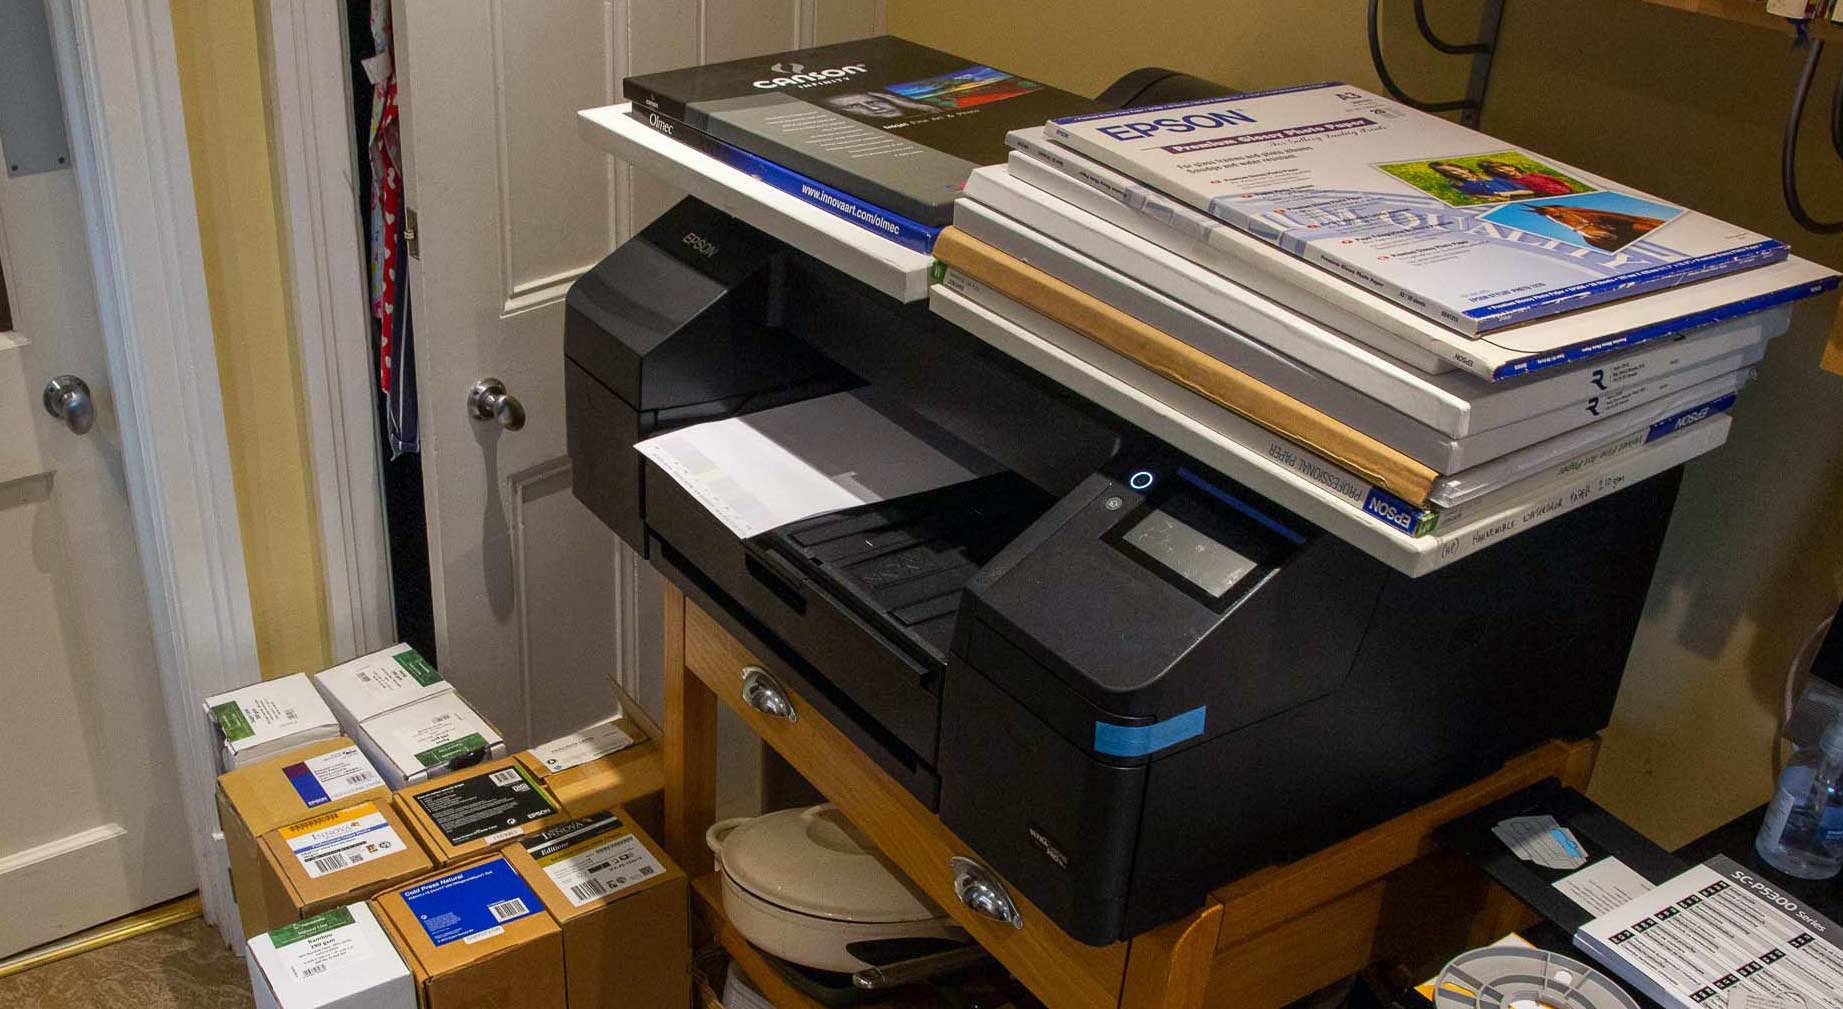
As a result of this, I’ve lots of profiles…
These are available on request.
If you feel they are helpful for you, a Kofi donation is all I’d ever request… https://ko-fi.com/keithcooper
The papers…
Epson papers
- Hot press bright
- Cold Press natural
- Velvet fine art [vfa]
- Fine Art smooth cotton bright
- Premium Luster photo paper 260 [plpp260]
- Premium Glossy photo Paper [pgpp]
Hahnemuhle
- Photorag Metallic 340
- Fineart Baryta 325
- Bamboo Gloss
- Photorag Matte Baryta 308
- Sustainable Photo Satin 220
- Water Colour 210
- Agave 290
- Hemp 290
- Sugar Cane 300
- Bamboo 290
Canson Rag Photographique 310
Red River
- Palo Duro 300
- Big Bend Baryta 310
Pinnacle [Paper Spectrum/Dupli]
- Cotton Rag Bright White
- Photo Matte 120
- Pinnacle Lustre 300
Olmec Photo Metallic Gloss 260 [OLM71]
Innova
- IFA-49 – FibaPrint Ultra Smooth Gloss 285
- IFA-45 – Exhibition Cotton Gloss
- IFA 35 – Matt canvas [DWM media setting]
In addition, I have saved the profiling measurement .mxf files [~3k patches] and the greyscale measurement files for many of the papers. Email me at Northlight if you want to know more about these files.
Note that icc profiles for the P700/P900 should be very similar – worth trying if you can’t find a P5300 one.
If a paper isn’t listed then I have not made a profile. If you are not in the UK then remember your paper may not even be available here.
Media settings
For most good papers, the suppliers will suggest a media setting to use for profiling. Occasionally you’ve no info and you need to make a ‘best guess’.
Here’s an example [a matte canvas], where the canvas setting just puts too much ink down on the media, and you can see ink bleeding. It’s also coming out distinctly wet looking.
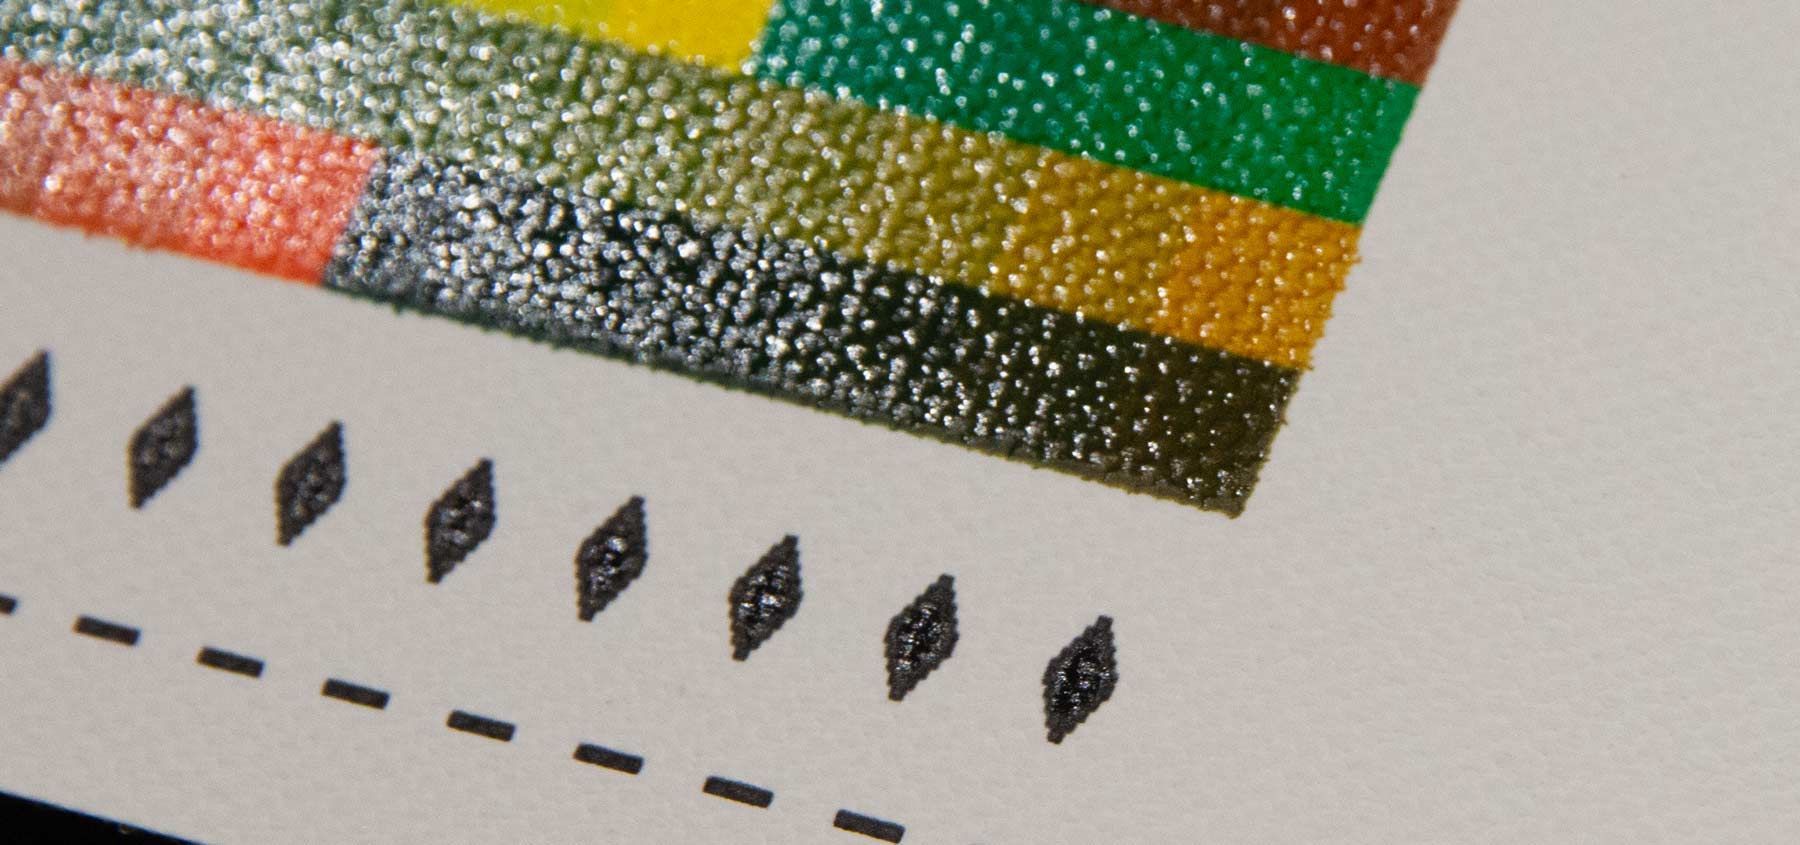
For this canvas, I needed to use the double weight matte paper setting to get a good print.
At this point, consider if the media is a good match for your printer? I persevered and made a custom media type for this canvas, but more because I wanted to explore custom media, than as a vote of confidence in the canvas.
Altering media settings
When loading a paper, you can change some of its default settings. An example would be the platen gap for the paper.
Let’s say I’m using a thickish baryta paper which was profiled at the Epson premium lustre photo paper setting?
The Epson PLPP media setting is for a thinner paper.
I could alter settings every time I load the paper…
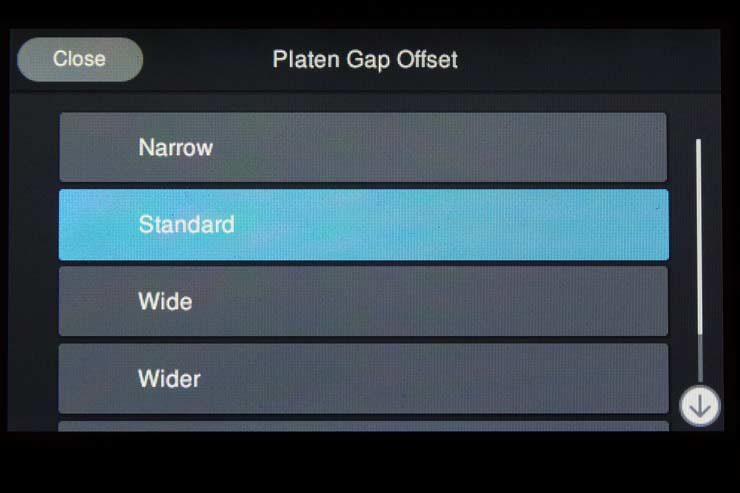
Or, if it was a paper I was going to use regularly, I could create a custom media type with specific settings for this media.
This new media type would then be listed on the printer [and driver settings when printing], with whatever name I gave it.
Epson Media Installer
 The Epson Media Installer software is an optional software install, which can be used to acquire media settings and profiles.
It’s meant to be a route for all paper suppliers to make profiles/media settings available for the P5300.
At the moment, there is no ‘user’ access to the tools for doing this distribution.
You can however make your own copies of installed media and install them on your printer.
One reason for this might be that you’ve a favourite third party art paper, with a P5300 colour ICC profile, which uses a particular Epson media setting.
I might create a profile for a paper and in the process try two or more different Epson media settings.
There are only so many listed in the driver for the P5300.
Using the Media installer lets me create a custom media setting, which can optionally link to my ICC profile. I can give it a meaningful name, and if it’s a thicker paper than the media setting I’ve based it on, adjust things like the head height (to minimise head strike chances).
If I let the software interrogate the printer, it will give me a list of media types

I’ve no idea why this takes minutes instead of seconds. It must be away checking something on Epson servers.
I can duplicate an existing media type, to make a new custom one.
There is an on-line manual for this process if you want to experiment [this process works for the P700/900 too]
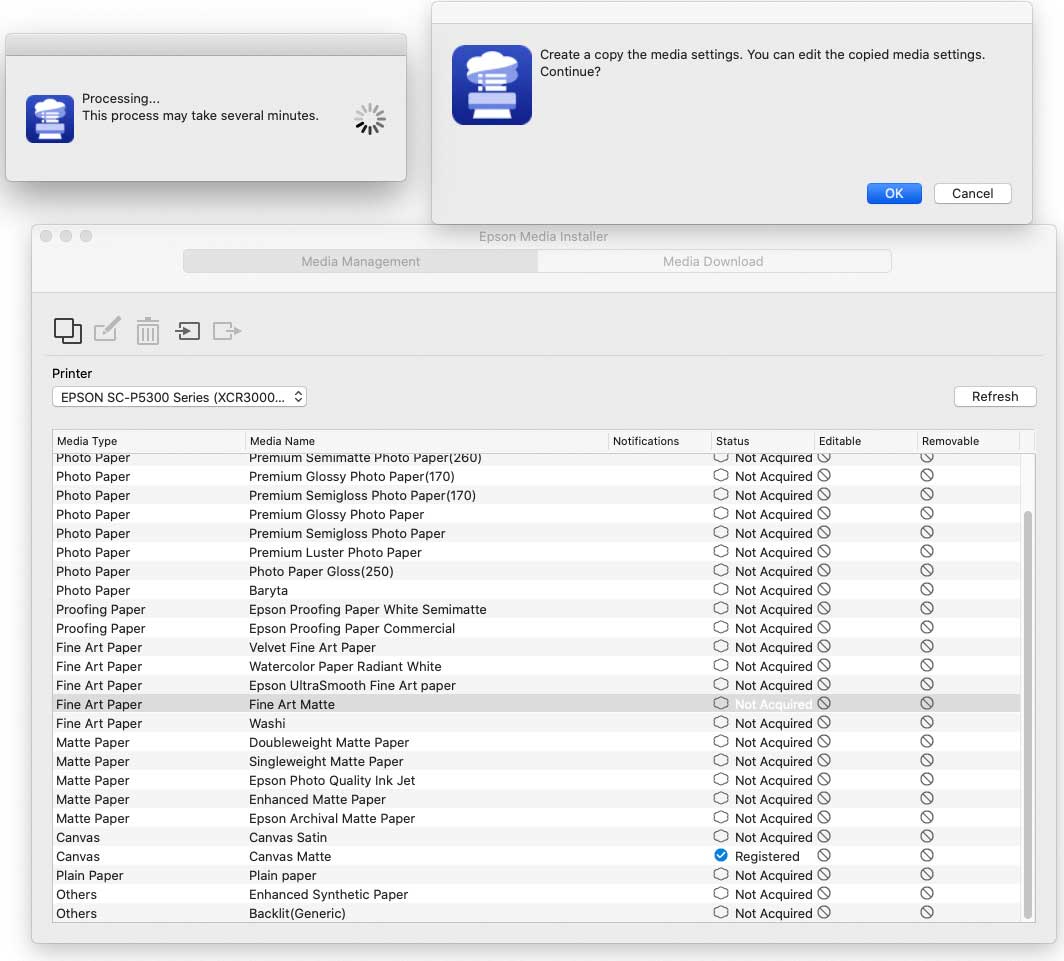
In this instance I’m editing a copy of Premium Lustre Photo Paper [260] to create a media type for Hahnemuhle Bamboo Gloss Baryta.
The key alterations you’d make here are paper thickness, and maybe increase the paper suction if it’s a stiff paper, to counteract curl. If you have issues with ‘pizza wheel’ marks, you can deactivate the paper eject roller.

There are all sorts of other options which if you don’t know what they are, and don’t want to read the manual, are best left untouched.
Note that you can specify RGB and CMYK profile defaults for the media as well.
There are a number of issues if you want to share your custom media settings, with numerous restrictions appearing.
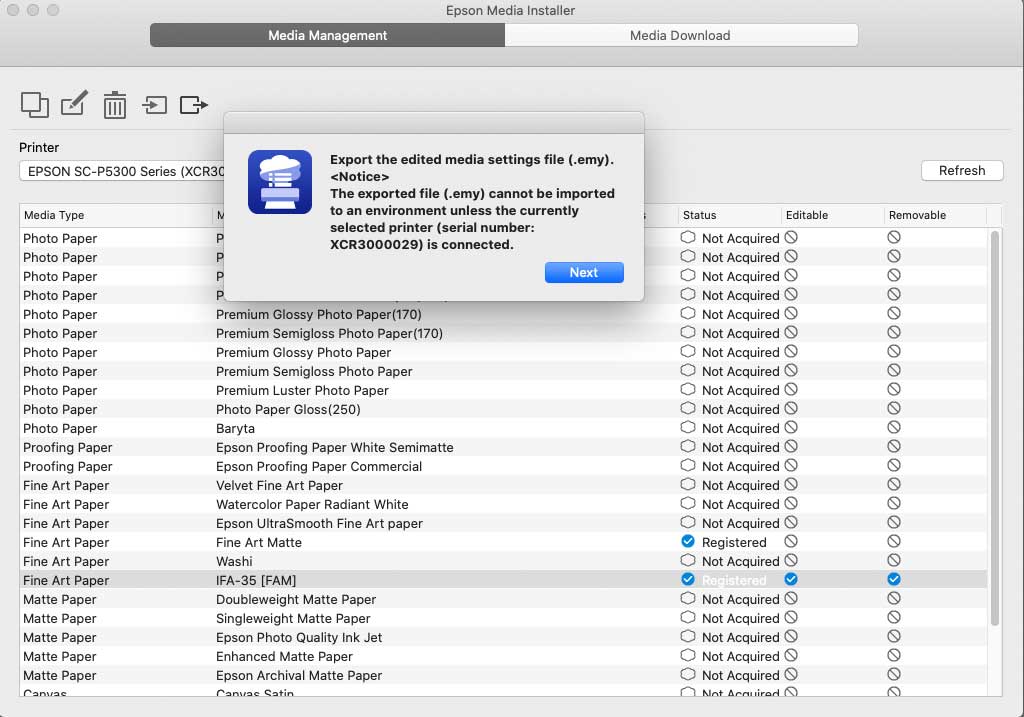
Custom media are useful, but for more advanced uses, this really seems a system where Epson wants to limit who can make full use of it.
By all means sort out your custom media, but if you want to share it with someone in another office of your company, think again.
It was at this point that even my own printer testing curiosity started to wane…
P5300 printer review: Black and White
The P5300 auto switches between matt black and photo black for different papers [this is from the media setting used]. There is no longer any requirement to do this yourself, as with the P5000 [and P800].
There are two grey inks to go with whatever black is in use, and experience with the P5000 and especially the P700/900 suggests it’s enough for pretty good B&W performance.
The grey and light grey inks are used a lot in colour printing too, one reason that light grey was the first to need replacing, followed by the other light colours
ABW – the best for B&W
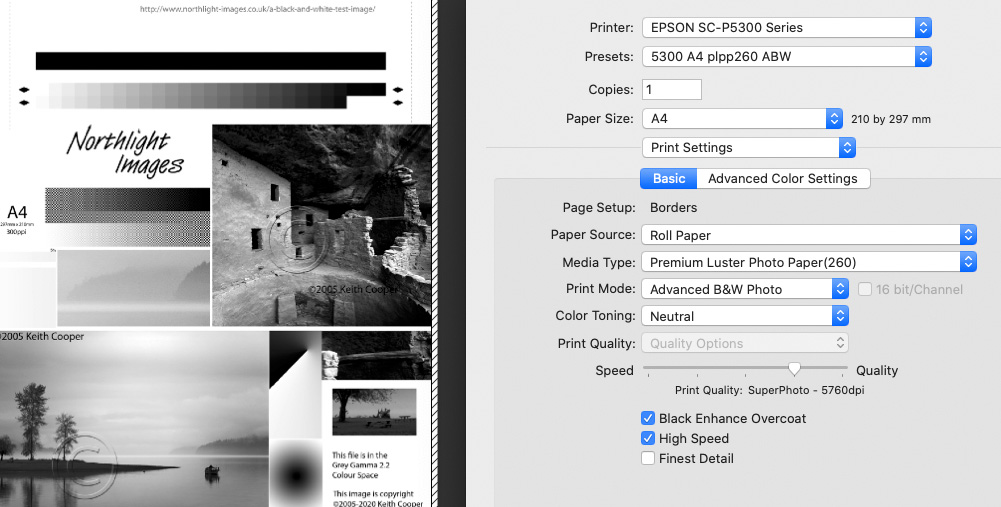
I’m using the Advanced B&W Photo print mode of the driver, more usually known as ABW. This is the same in the driver and if you print via Epson Print Layout [EPL].
I’d suggest that if you’re printing black and white prints on the P5300 with normal ICC printer profiles rather than ABW, then you’re probably doing it wrong.
So, in EPL, I have all the adjustments for tint available which can compensate for a slight colour tint seen with some ink/paper combinations. That said, I found most papers more neutral than with my P5000 – rarely was any adjustment required.

The Epson ABW print mode in printer drivers is fine tuned to give better black and white prints.
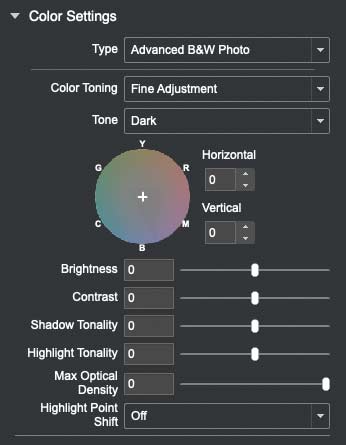 There are several adjustments available.
It incorporates toning/tinting, so unless you’re doing mixed colour/B&W prints the ABW mode is best.
It can reduce the colour tints (magenta/green) that you used to get with some B&W printing under different viewing lights.
Although the tone says ‘dark’, this is the default setting and the one I always use.
Whilst there are tone adjustments in the ABW dialog, I strongly believe this is completely the wrong place to be making any adjustments for B&W printing.
Remember that the ABW mode uses a small amount of coloured inks to fully neutralise the grey inks and paper colour.
There is no way of printing [with the Epson driver] of just printing with black and the two grey inks.
In the normal Photoshop print dialogue I choose ‘Printer manages colour’.

In the course of testing, I’ve printed numerous copies of this particular version of my B&W test image. shown earlier.
It’s a version of my Standard test image optimised for reading the greyscale step wedge at the top with an i1Isis scanning spectrophotometer.
You don’t need to take measurements from it, but they can assist in finding optimal driver settings for a particular paper
Remember – the highest ‘quality’ print setting may not be the ‘best’ for many people.
For B&W printing, I printed both directly from Photoshop and Epson’s Epson Print Layout software.
For several papers i printed versions across the full range of quality/resolution settings, to see what real differences there were.
Some curves
One thing I look for in B&W printing is linearity. That means that a good looking image on my (calibrated) monitor should make for a good print.
After printing several versions of my test image at different quality settings I measured the greyscale patches with my i1Isis spectrophotometer. I’ll use the default ‘darker’ setting for ABW for printing these.
Plotting these measurements give me a range of graphs indicating the linearity of the B&W printing mode.
I look for a nice smooth gradation from paper white to darkest black, with no crunching up of shadows – the most common problem after unwanted tints, in B&W printing.
Here’s the results for a check with Hahnemuhle’s Fine Art Baryta 325 – first at the 1440 high quality setting and then using 5760 with the black overcoat.
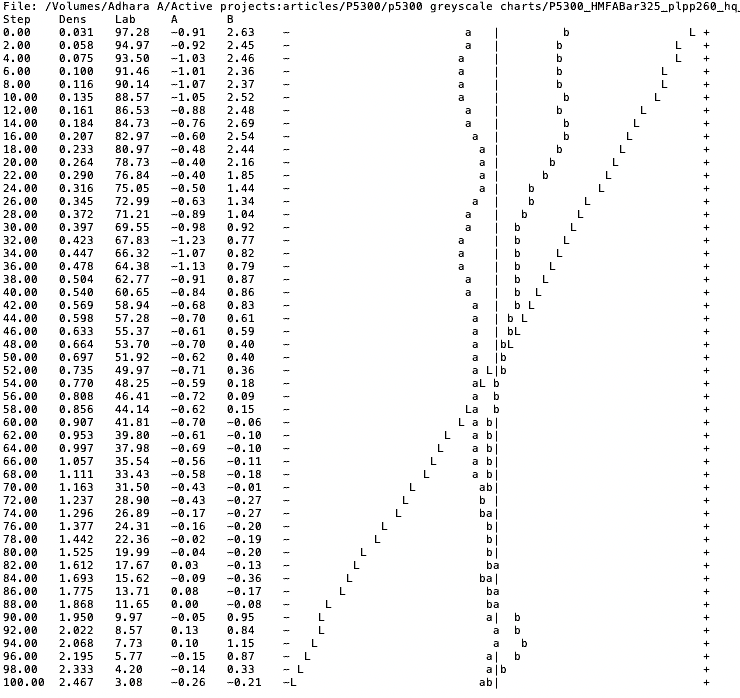
You can ignore most of what’s here. The differences I’m noticing are that the 5760 mode has a Dmax of 2.51 compared to 2.47 for the 1440 [hq] mode. This is almost un-noticeable in normal circumstances.
The other things I note are the straightness of the line of ‘L’s at the shadow end. The slight ‘hook’ indicates a stronger risk of blocked shadows. The line of ‘b’s also jumps around more above ~85% in the 5760 one.
Add to this the actual test of looking at the test prints, and for this paper I’ll definitely pick 1440dpi [hq] mode to print.

Some papers showed enough non-linearity, that I’d prefer to incorporate a slight adjustment curve if I was printing much B&W work on them.
An example with the Hahnemuhle natural line Hemp paper.
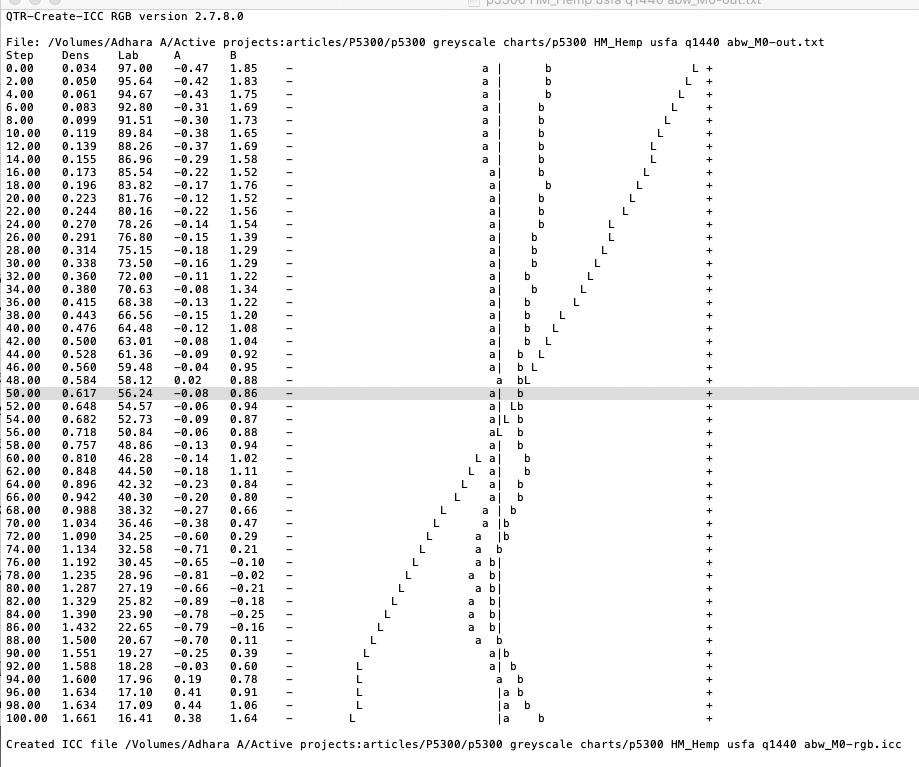
The drifting of the line of ‘L’s needs a very small adjustment to fix the potential shadow blocking.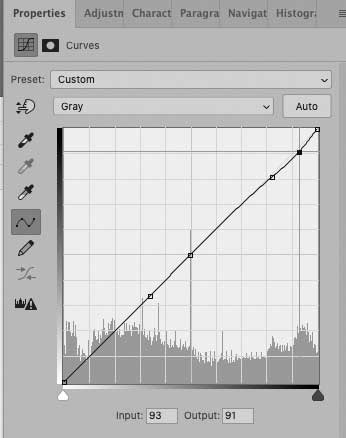
This is a simple photoshop curve added before printing using the ABW mode. If I’m going to use the paper a lot, I’ll save this curve as a preset. It applies just enough of a change to straighten out the linearity when printed.
These adjustments are small, but they make the printing just that little bit more predictable for B&W printing from my calibrated monitor.
Of course you still need to understand how different papers actually look and decide which suit what you want for your printed image.
Bronzing
Just as I first spotted on the P700 and P900, the two highest quality [5760dpi] settings for photo papers produce a bit too much bronzing for my liking when printing B&W on papers like Epson Premium Lustre
It’s nothing like the horrendous overall bronzing I’ve seen with some B&W prints in the past, but is enough for me to avoid the two higher settings for ABW printing on photo papers.
Of all the papers I tested, the Hahnemuhle Photo Rag Metallic 340 was the only one where I decided that the 5760dpi setting gave a fractional improvement over 1440. This is a very distinctive and unusual paper though. Even so, I just used the basic 5760 setting, not the ‘dials to 11’ or ‘Carbon black’ setting, which not only shows no advantage, but gives you enough time to go away and cook a light meal whilst waiting for the print…
Printing for my P5300 printer review…
Once set up, I produced several hundred prints for profiling and testing. Not one unwanted ink mark on paper, and no paper/feed issues whatsoever.
For my printing I’ve used Photoshop [several versions] and the Epson Print Layout (EPL) software. I’ve printed directly from Photoshop via its print dialog, and using EPL as a Photoshop plugin, where it’s accessed from the Automate menu. EPL works as a standalone application and can be used with some other editing packages. There is some more info about EPL below, but the majority of my printing was from Photoshop.
Note that Photoshop is what I use for most of my professional print work. Printing should be similar for other editing applications and on Win PCs
I’ve tried to cover all the main printing options for the P5300 in my many short videos.
These include panoramic and borderless options, as well as basic roll paper use.
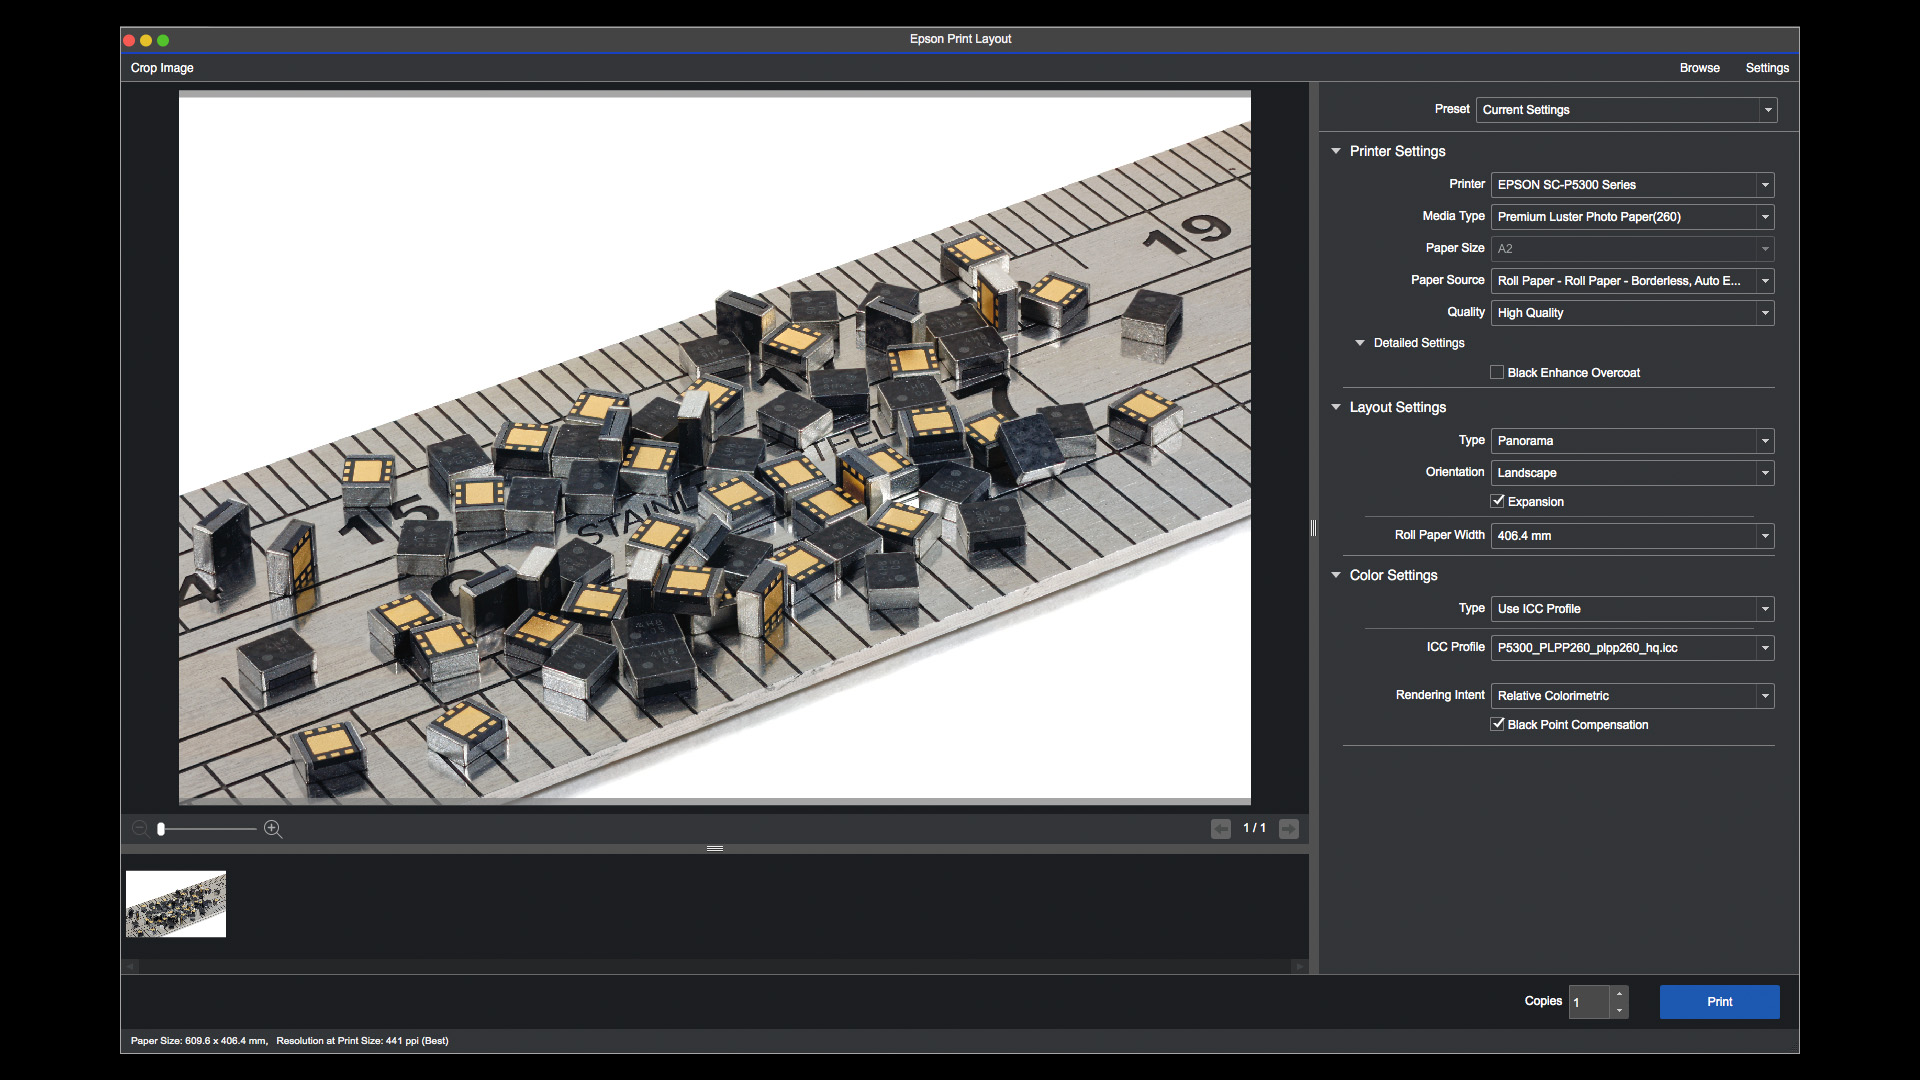
The examples often use Epson Print Layout [EPL] since it’s easy to use and the same for Windows and Mac/
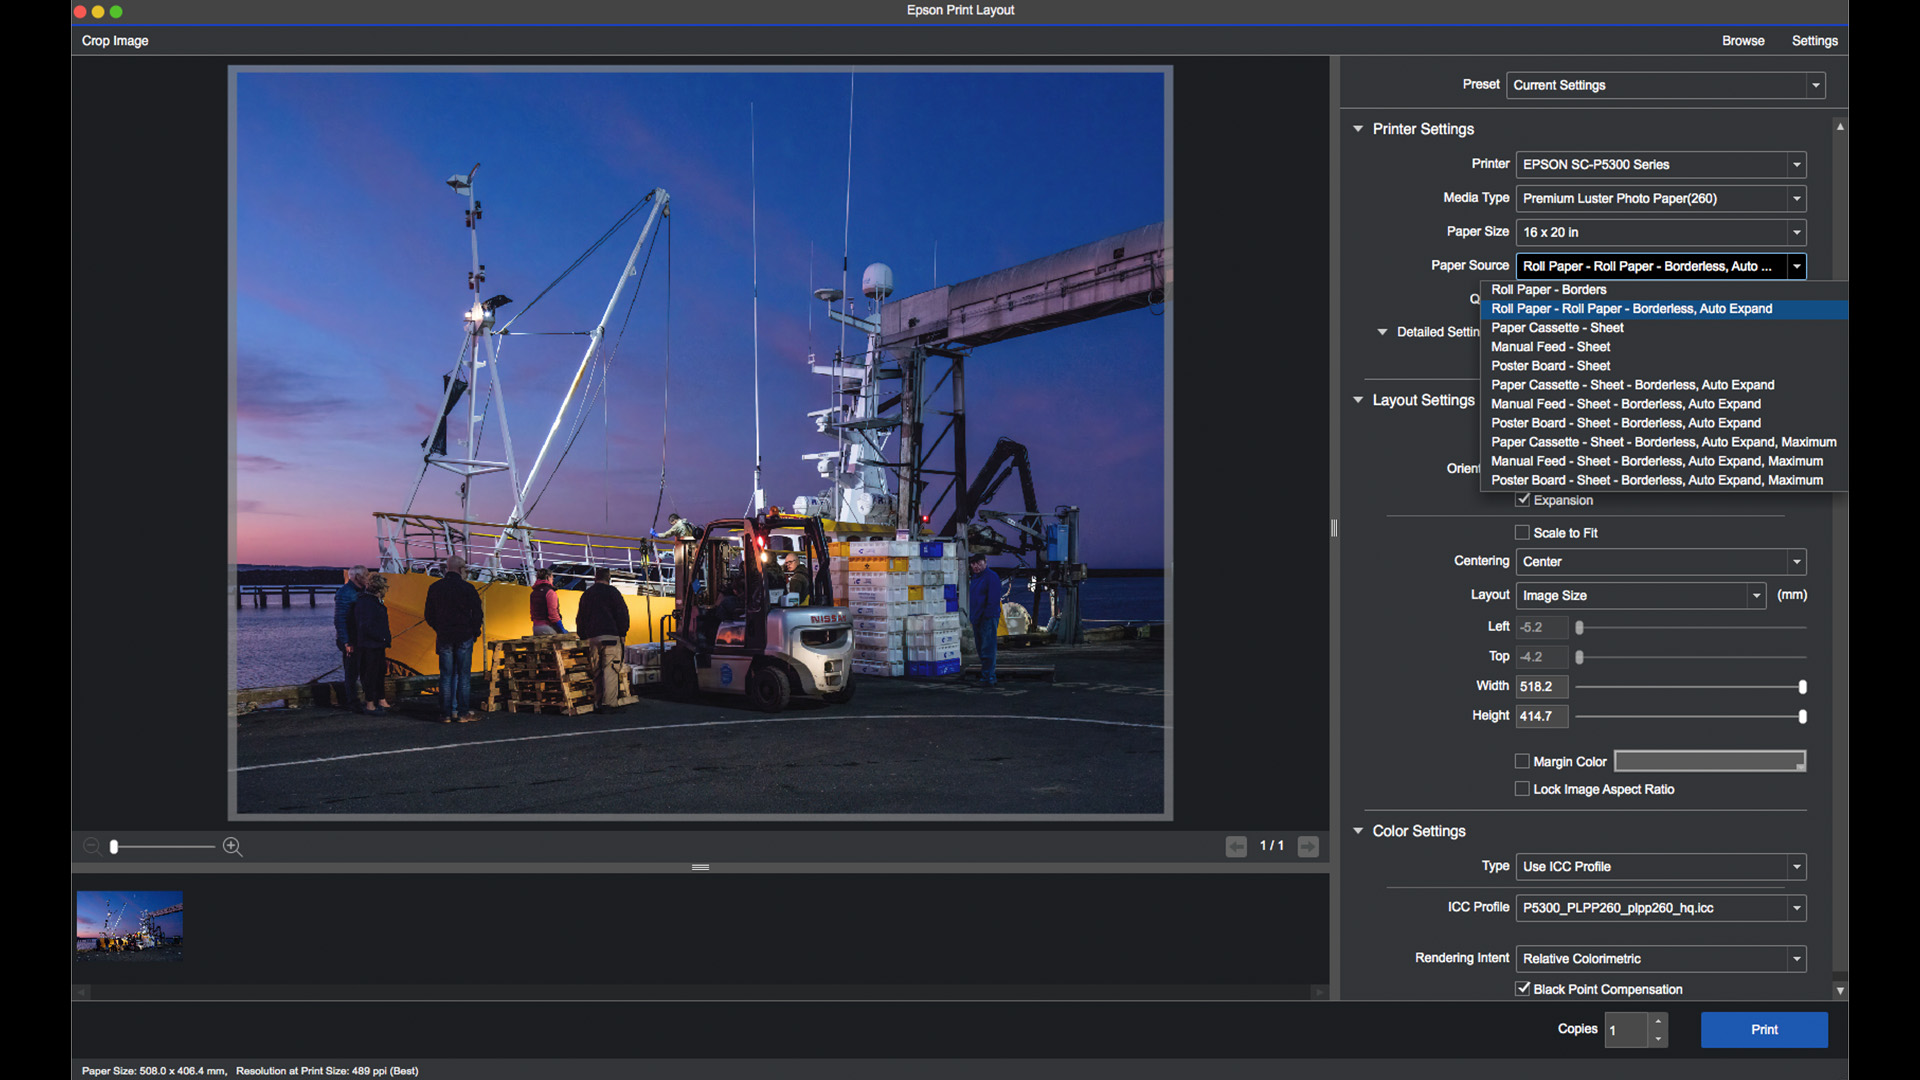

If you’re printing on Canvas, there are ‘Gallery Wrap’ options too

P5300 printer review – Print Quality and settings
I’ve mentioned the range of print settings earlier, along with my choices for B&W printing.
There are several different settings in the printer driver controls which have an effect on print quality.
The most obvious difference you’ll notice is print times.
There are essentially 5 different quality settings, the first at 720×720 resolution, second at 1440×720, then the mid or ‘high quality’ one at 1440×1440 and two higher ones at 5760×1440.
We can add to this, the ‘Black Enhance Overcoat’ option that’s supposed to improve ‘depth’ even more.
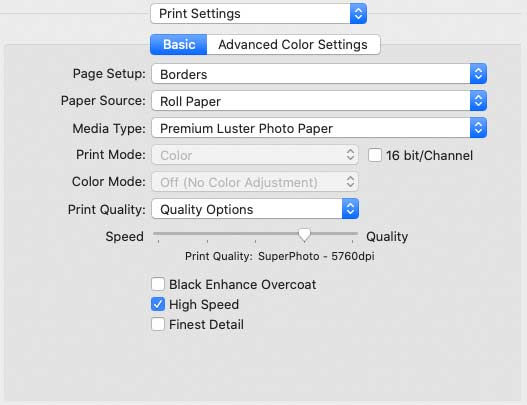
So, given my experience with the P5300 which is pretty much the same as the P700/P900, what settings would I print at?
With colour images on photo papers I’d use the mid ‘High Quality’ setting, since it reproduces fine detail a bit better than the basic mode. I can see no obvious improvements in the highest quality settings for most images.
As a test, I’d suggest leaving two identical prints overnight with only a note on the back as to which is which setting? Be honest in your evaluation, and maybe ask someone else if they can see a difference.
For matte art papers you only have two higher quality settings – I’d once again avoid the highest (slower) setting.
With black and white prints on photo papers, results vary with the paper. On Epson Premium Luster I found that a slight bronzing intruded into the higher quality settings ( 4/5 using ABW) On some papers the standard (lowest) setting gave the best tonality. You really do have to make some test prints and decide yourself if you’re investigating a new paper.
Gloss smoothing? – No, not with the P5300
With the P700/900 I noted a ‘gloss smoothing’ option in the driver – I couldn’t see anything it did.
It’s not there in the P5300 settings [see above]

A note of caution about settings
My observations about the ‘best’ settings not being the ‘best’ come as no surprise. Nor should they be taken as any criticism of the excellent prints I got during my P5300 printer review testing.
Just remember that printer specifications are there as much to sell printers as to give guidance to what you should use for your prints. Since when did anyone without more money than sense decide on a family car just because its top speed was 165 mph rather than one with a top speed of 145 mph?
The true source of quality in prints comes from a combination of photographic ability, camera skills, editing and printmaking skills, not dials that go to eleven.
Yes… I still don’t sell printers ;-)
P5300 Printer review: Software
Several Epson software packages, beyond the printer driver may be of use.
Printing from my phone – Epson iPrint
In testing the P5300, I’m printing via a wireless connection, so my iPhone can easily find the printer.
Yes, it works… beyond that I didn’t test much.
Epson Print Layout
At the time of writing, the Epson Print Layout software is not installed in the initial setup. The official download page from Epson UK is:
https://www.epson.co.uk/apps-software/epson-print-layout
The software is pretty straightforward to use and gives excellent results.
I’ve shown examples of its use in several instances already – it’s just very easy to use.
If you are using a Mac and Epson Print Layout does not see your printer, make sure you have not accidentally installed the AirPrint driver. It is nothing to do with using Wi-Fi connection and has no actual use for most people. See the install notes for the printer.
Alignment and media choices are simple to set, and you can store templates for multi image printing too.
The full ABW range of settings are available, but experience has told me that leaving these at their defaults is almost always best.
By all means experiment, if you have suitable supplies of paper and ink, but do step back every so often and be honest in evaluating what you see.
All your custom media and ICC profiles will be available when using EPL.
In the example above, I’ve selected Epson premium lustre paper and the correct profile.
If you use the Epson Media Installer to create or install media types, there is the option of specifying a profile to be automatically picked when choosing your custom media.
P5300 printer review [P5370] conclusions
This is an interesting printer since it’s a blend of a printer I had here to test quite extensively [the P900] and one I’ve had here for several years [the P5000].
Depending on how new the last large Epson printer you used was, two features are of note.
No black ink swap
Yes, it’s gone – it comes at the cost of one less ink channel. So, like the P700/900 it’s really a 9 ink printer [or 9+1].
The touch screen
The touch screen is of good quality, and very easy to get used to. So much so that I found myself jabbing the screen of my P5000 and wondering why nothing happened.
I note the curious loss of the print preview picture you get on the P900 – not considered worthwhile? or some obscure limitation from using the P5000 chassis for the P5300?
P5000, P900 or P5300?
If you have a choice – understand the differences. I’ve created several printer comparison video guides
- Which is best? Epson P900 vs Epson P5300 [P5370] 17″ A2 pigment ink printer shootout
- Do you want a big printer? Do you need a big printer? P900 vs P5300/P5370 both 17″ but very different
- P900 or P5000?
Design and usability
It’s a hefty printer, and a noisy one. This gives away its commercial origins. The P5000 was introduced with a lot of improvements to go with its roll as a commercial printer designed for daily use. There were many features improved over earlier models to reduce ink and dust build up.
This is the answer to those who say the P900 and its roll paper unit are just too flimsy…
Take care to note the space requirements for the printer, especially if using the front feed slot with larger media.
As was widely noted in my videos, the front ink over doors open very easily – you don’t want to do this accidentally – hence the bits of blue tape…
Print ‘quality’ and gamut
First up – no significant differences to the P700/900 [as expected given the print head and ink-set used].
Most prints looked great, and as ever, people not involved in testing, merely noted how much they liked the content of the photo [or not…].
As I’ve mentioned, the benefits of using the very highest quality settings are usually minimal – turning all dials to ’11’ doesn’t get you much. Looking at maximum print densities of prints shows minor variations, with the BEO setting off, at the 5 basic quality settings. That is:
720 x 720 | 1440 x 720 | 1440 x 1440 | 5760 x 1440 | 5760 x 1440
BEO is available for settings 2-4, enforced for 5. For 1440 settings, BEO gives about a 5-10% improvement in DMax, whilst for 4 and 5 it can be 10-20%.
How do those numbers relate to real world performance? Well, those were the biggest differences I was able to see – on many papers they were less. Just one paper benefitted enough form 5760 [4] for me to use it [Hahnemuhle photo rag metallic].
Mainly the number tell me that just using DMax as a quality indicator is not that reliable or particularly meaningful.
On many papers, where I saw darker blacks in the numbers, the black came at the cost of slightly poorer performance in darkest colours and especially with ABW.
The 5760 settings for B&W printing introduce slight bronzing on many shinier finish papers [just as per the P700/900].
The missing inks…
I’ve seen concern [albeit based on principles, not prints] concerning the loss of the orange and green inks of the P5000. The P5300 does get a violet ink though [an option for the p5000 – losing light grey, but not recommended for photo printing uses].
A simple gamut comparison for a lustre paper shows the extensions for green, orange and violet [red – P5000, blue – P5300].
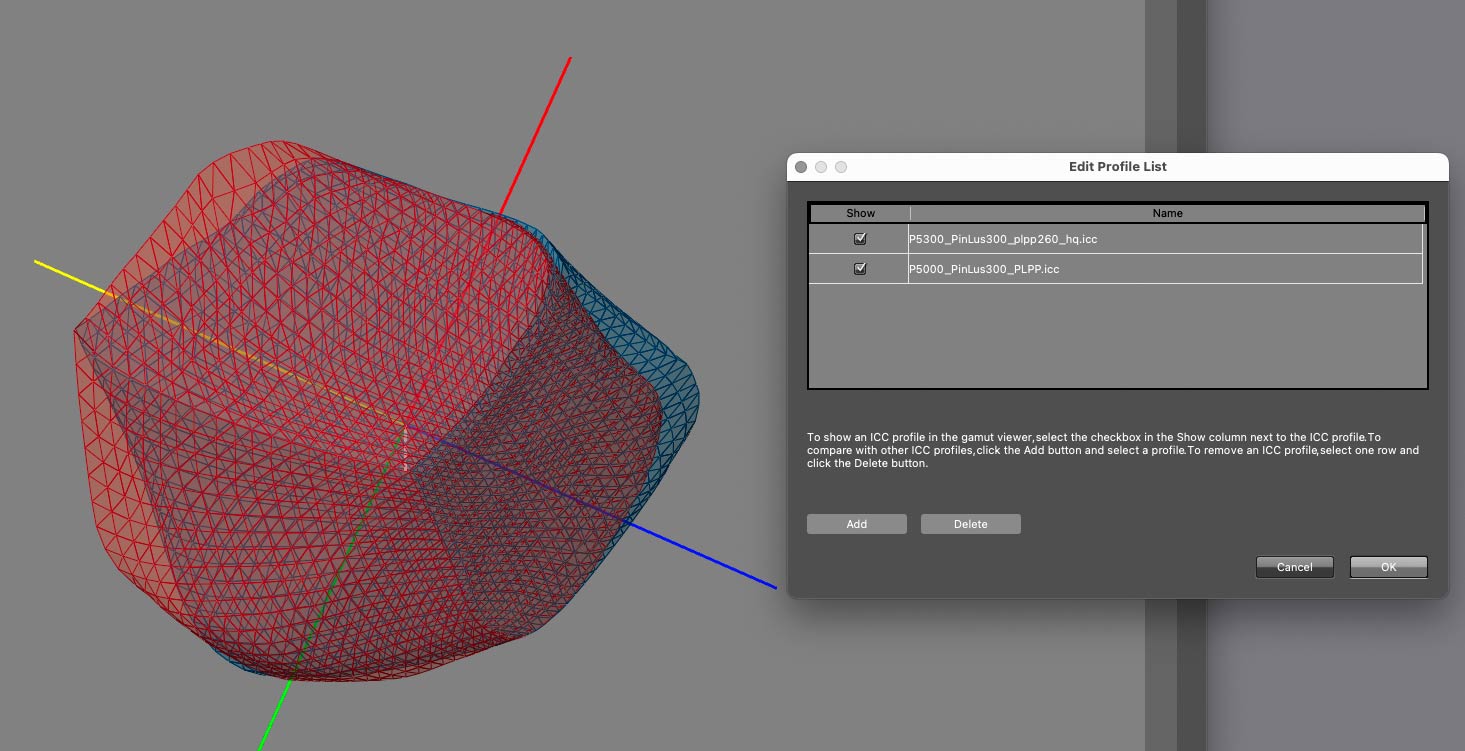
These charts look interesting but don’t tell a great deal about printing ‘real world’ images.
You might think that with the P5000, selecting the violet ink option at set-up would combine the best of both?
Well no, print quality is as much about the smoothness inside that gamut volume as its peak excursions.
The violet version of the P5000 was intended for proofing use, where a huge gamut is important – more so than the absolute quality of reproduction.
In printing a lot of images, including some on the P5000, I just don’t see much difference. Yes there are some differences when looking at the profiles, but they are just not very obvious.
I’d love to have two prints I could show a photograph of, where the difference was clearly visible, but I can’t.
Now that doesn’t mean you wouldn’t be able to come up with test images which show differences, just that not many people will see them.
I appreciate that there is a subset of photographers who want graphs and charts – hence my making measurement data available, it’s just that I’m very strongly of the belief that if your prints show problems with this printer, a good paper, and profile, then the issues are quite likely nothing to do with the printer or paper.
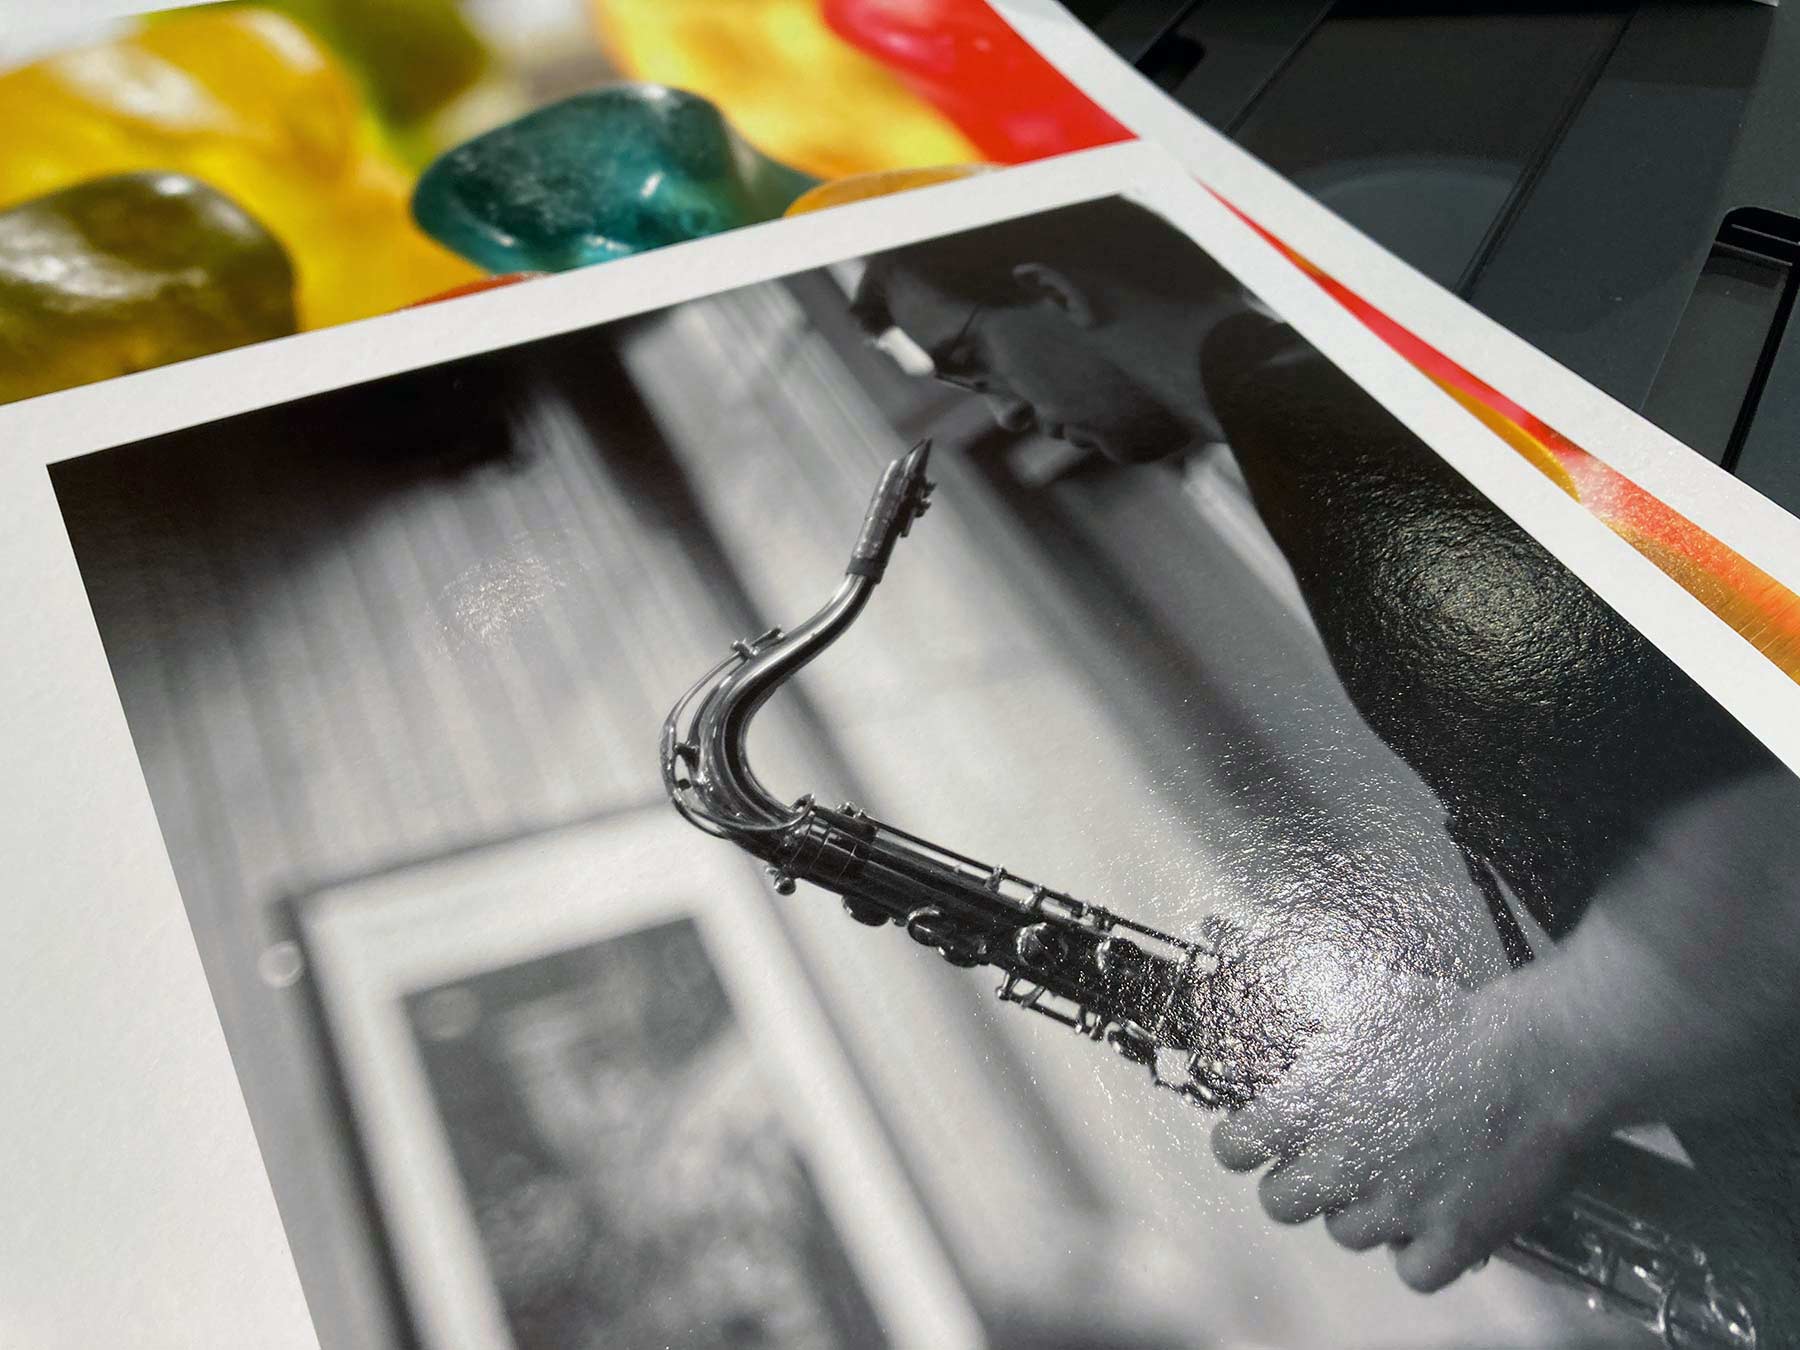
A baryta gloss print, with another colour one behind it – no issues whatsoever.
P5300 printer review: Paper feeding
As long as you don’t want small paper [8″ x 10″ min], or borderless on sheet paper, the feed system is robust and reliable.
The single sheet loading can take a bit of getting used to, given the need for the paper to almost ‘click’ into place under the back of the roller. This is the same paper feed as you get in the much larger P7000/9000, but was made simpler in the P7500/9500.
Once you’ve the knack for it, it works every time.
Roll paper loading seems to have included an extra ‘are you sure’ type step in the process, requiring a confirmation action, but is simple and robust. I like the fact that the display shows the actual measured width of the roll paper, since this can vary and has caused a lot of concern in the past to people wondering why a margins looks slightly too big or small.
The spindle based roll paper support is powered and compared to the roll paper feed of the P900, in a whole different league.
Add in the paper cutter, and roll paper use on the two machines is vastly different.
The paper tray
If you print on sheet paper a lot this is superb. It takes loads of sheets up to A2, and handles a good range of papers. There is no other printer like this since Canon decided not to update the 17″ iPF5100 years ago [detailed ipF5100 review]
Just remember that there is no paper output collection, before you start to use the printer to churn out 8″x10″ photo prints…
Ink usage and costs
The ink carts of the P5300 hold 200ml of ink, that’s four times the amount in P900 carts.
As I’ve observed, the light grey goes first, followed by other light colours. You’ll get quite a lot of prints from the 80ml starter carts, with the ~40ml left after initialisation.
The maintenance carts hardly changed levels during use – don’t bother keeping spares.
I’m afraid that I cannot give meaningful ink costs for the P5300 given the widely varying use I made of it whilst here.
However…
The site I usually suggest to check is Red River – here the ink cost for the P900 for a 13″ x 19″ print is listed as ~$1.80.
The ink for the P5300 costs about 0.46x as much as for the P900, giving an estimated ink cost of $0.84 per 13″ x 19″ [A3+]
If you are curious, given that the P900 is cheaper than the P5300, but the inks cost more, then I’ve calculated that at current [UK March 2024] prices, the cumulative cost of ink + printer will match when you have used up some 3 litres of ink – that’s 15 carts [one and a half sets] for the P5300 or 60 carts [6 sets] for the P900.
That is a lot of prints…
How often to use the P5300?
I have a diary reminder to check my P5000 every week, just in case I’ve not printed – lack of use is the main killer of such printers purchased by the unwary.
The P5300 uses print head of the P900 – a printer designed for ‘advanced consumer’ use – so a lot more forgiving of irregular use. Even so, I’d set my diary reminder to two weeks and if going away for more than a month I’d want to set up some way of getting the printer to print something [plain paper from the tray is fine] every few weeks.
If you plan on using such a printer only a few times a year, move along, this is not the printer you’re looking for…
I’d also suggest getting a maintenance contract for the printer – it is designed to be much more repairable than the P900.
So – what’s it like to use?
Apart from being noisy enough that I’d not want it sitting next to me, if working a lot, it’s very easy to use.
Set-up is simple. Paper loading from roll and cassette very easy – single sheet take a bit of practice …something to consider if your manual dexterity is limited.
I’m slightly biased, from knowing the P5000 so well – the best I can say is that if, when Epson wanted the P5300 back, they said they would take the P5000 instead, I’d not have complained ;-)
Info and profiles
All my profiles and target measurement files are available on request for non-commercial use. If you feel they are helpful for you, a Kofi donation is all I’d ever request… https://ko-fi.com/keithcooper
For commercial use, I’m happy to license them for a modest contribution…
P5300 printer review UPDATES
One of the biggest advantages of my written reviews over videos is that they can be updated over the lifetime of a printer.
This is where the info will be!
–ooOoo–
If you’ve questions or comments, please do feel free to email me at Northlight, or use the comments section at the foot of the article.
Buy via B&H in the US
…help support this site
Specifications
Technology
Printing Method – Epson Micro Piezo™ print head
Ink Technology – Ultrachrome® Pro10
Number of colours – 10 colour
Colours: Photo Black [Pigment], Matte Black [Pigment], Cyan [Pigment], Light Cyan [Pigment], Yellow [Pigment], Vivid Magenta [Pigment], Vivid Light Magenta [Pigment], Violet [Pigment], Grey [Pigment], Light Grey [Pigment]
Minimum Droplet Size: 1.5 pl, With Variable-Sized Droplet Technology
Print from: PC, MAC, Network, Mobile Device, USB, PC (Wired), PC (Wireless), Mobile Device (WiFi Direct)
Ink tank capacity: 200 ml
Nozzle Configuration: 180 Nozzles Black, 180 Nozzles per Color
Printing Resolution: 5,760 x 1,440 DPI
Paper / Media Handling
Paper Formats
A2 (42.0×59.4cm), A2+, A3+, A3 (29.7×42.0 cm), A4 (21.0×29.7 cm), Letter, 17″, User defined
Print Margins Sheet Media
Mode 1: 3 mm (top), 3 mm (right), 14 mm (bottom), 3 mm (left)
Print Margins Roll Media
Mode 1: 3 mm (top), 3 mm (right), 15 mm (bottom), 3 mm (left)
Paper Tray Capacity
250 Sheets Standard, 250 Sheets Maximum, 100 Photo Sheets
Compatible Substrate Thickness: 0.08 mm – 1.5 mm
Duplex: No
Number of paper trays: 1
General
Power consumption: 52 Watt, 5 Watt (economy), 0.5 Watt (standby)
Supply Voltage: AC 100 V – 240 V, 50 Hz – 60 Hz
Product dimensions: 863 x 766 x 406 mm (Width x Depth x Height)
Product weight: 52 kg
Sound Power: Operation: 6.2 dB (A)
Mobile and Cloud printing services: Epson Cloud Solution PORT, Epson Print Layout App
Noise Level: Operation (Roll): 47 dB (A)
Other Features
Memory: Printer: 256 MB, Network: 128 MB
Compatible Operating Systems
Mac OS X 10.9.5 or later, Windows 10 (32/64 bit), Windows 11, Windows 7 (32/64 bit), Windows 8 (32/64 bit), Windows 8.1 (32/64 bit), Windows Server 2008 (32/64bit), Windows Server 2008 R2, Windows Server 2012 (64bit), Windows Server 2012 R2, Windows Server 2016, Windows Server 2019, Windows Server 2022
Interfaces: Hi-Speed USB – compatible with USB 2.0 specification, USB 3.0, Ethernet Interface (1000 Base-T/ 100-Base TX/ 10-Base-T), WLAN
Media Handling (Standard): Paper Cassette, Paper trays
Network: Wired, Wireless
Optional Software & Solutions:
Epson Cloud Solution PORT, Epson Print Layout, Epson LFP Accounting Tool, Epson Net Config, Epson Edge Dashboard
Media Handling:
Auto Sheet Feeder, Auto cutter, Borderless Print, Fine Art, Manual duplex, Roll Paper, Thick Media Support
Other
Warranty: 12 months On-site service
LCD and Memory Cards
Panel: Type: Color, Smart-navigation touch-panel, Diagonal: 10.9 cm
Never miss a new article or review - Sign up for our occasional (ad-free) Newsletter
and please do subscribe to Keith's YouTube Channel

Other areas of our site that may be of interest...
All the latest articles/reviews and photo news items appear on Keith's Photo blog

Keith explains tilt and shift lenses
Keith has written a book that looks at the many ways that tilt/shift lenses can benefit your photography from a technical and creative point of view. If not in the UK check for import issues and maybe try an on-line bookshop. Keith has no connection with sales of the book.
ISBN 9781785007712
There is also a specific index page on the site with links to all Keith's articles, reviews and videos about using tilt and shift.
We've a whole section of the site devoted to Digital Black and White photography and printing. It covers all of Keith's specialist articles and reviews. Other sections include Colour management and Keith's camera hacks - there are over 1200 articles/reviews here...
Adverts removed
Keith | Jun 4, 2026 at 3:20 pm
The Epson P5000/5300 printers can be tilted to easily get through such gaps.
Even the P7500 was tilted to get it into the kitchen [see the P7500 review here]
29″ is not small – getting large printers round corners takes far more effort
Canon printers are OK moving when new, but much trickier to move once set up [see my PRO-2000 review here]
James Bondarenko | Jun 4, 2026 at 3:03 pm
I love this review! Many thanks. One issue is the relatively narrowness of doorways inside a house (29 inches in my case). How can one get the printer into the room without taking apart the doorframe? Here I am thinking of a new printer, rather than one needing to be moved out of a room. Can one tilt it (on its side at an angle). How did you get yours into your workspace (assuming you had to move it past an inner doorway)?
Keith | Aug 16, 2025 at 8:38 pm
Thanks – a typo copied from Epson’s own specs table!
Ron Cromberge | Aug 15, 2025 at 10:40 am
Hello Keith,
Thanks for your very detailed reviews (all of your printers). As I started many years ago with the canon ipf5100. And the P900 as turned out a intermediary one 3 years and already dead. And now the P5300. It’s like home coming all the nice things I have experienced are back. The perfect roll handling the loud vacuum system. The only thing I miss is the roll use accounting which was printed on the roll. The canon was able to do this because the rudimentary color measure device. Pro for the P5300 it is smaller and lighter than the iPF 5100 😂
But to the point now in your written review I see probably a typo about the sound noise levels:
‘Sound Power: Operation: 6.2 B (A)” I think when this is true it is the most silence printer all times. I assume it should be 62 dB (A)
Once again thanks for your effort you put in ALL your reviews.
Best Regards,
Ron
Keith | Jul 7, 2025 at 1:05 pm
Just fine
Keith | Mar 23, 2025 at 7:40 pm
Not that I know – I did a video comparing 17″ printers
Hannu | Mar 22, 2025 at 3:10 pm
Is there a comparison table for P900 and P5300?
Keith | Feb 10, 2025 at 1:09 pm
I only have limited print storage capacity in the house ;-)
Remo | Feb 9, 2025 at 4:13 pm
thank you for your reply :-)
Yeah, VERY different beast indeed. With it’s own upsides (24″) and downsides. Minimum Paper size, sheet handling….
In their manual Epson writes “We recommend that you print once a week to prevent the print head from clogging”. So that ain’t too bad.
And some first hand report I found in german seemed to indicate it seems to be rather frugal with ink for non printing cycles. He came from a Canon Pro-1000 though. Easy for something to feel frugal compared to that one. And his came with a VERY generous amount of ink in the cartridges that came with it. No idea how much is in the P5300 cartridges that come with it. But more ink quickly makes a couple hundred bucks. Further lowering the “printer alone” initial cost.
To bad about a comparison from you. I had hoped you had kept some of the test printouts of either for later comparisons.
thanks again :-)
Keith | Feb 9, 2025 at 12:52 pm
The P7500 is a ‘true’ large format printer – faster and with a larger range of inks. – not so good for sheets and needs far more regular use. – see my P5000, P7000 reviews as well
If you want a comparison, get someone to send me a P7500 and P5300 – the reviews were done at different times ;-)
Remo | Feb 9, 2025 at 8:21 am
Thank you for another in-depth review!
You have some comparisons with the P900, which makes perfect sense.
In my country. The P5300 is actually closer to the P7500 price wise than the P900.
Both absolutely and relatively.
P7500 is yet another very different beast to the P5300 than the P900. Just in the other direction.
And as unlike the P900, the P7500 uses different printhead and ink. A short comparison/opinion of/on
print quality for photography (Color/B&W on basic paper types) would be wonderful.
Does part of the extra bucks of the P7500 go towards even better prints.
Or does it all go into the extra width. And print quality is similar.
Or is some of the cost redirected from print quality to pay for the width/stand/build/weight. And P7500 can’t keep up print quality wise with the P5300/P900?