


Review: Laowa 20mm Shift lens f/4
Review: f/4 C-Dreamer Laowa 20mm shift lens
Keith Cooper tests a wide-angle shift lens

No more Google ads. Too many deceptive and irritating adverts.
Any ad links left are non tracking, to companies we know, trust and we've worked with for years [Park Cameras]
Ads helped pay for site running costs, so if you found something useful, please
...Make small KoFi donation?
...Subscribe to Keith's YouTube Channel
...Get Keith's book about how to use tilt/shift lenses
Our site contains affiliate links - these help support the site. See our Advertising policies for more
Keith has been testing the wide angle F4 Laowa 20mm shift lens for this review.
The lens is in Laowa’s C-Dreamer range and shows relatively low levels of distortion – an important feature if you use shift a lot for architecture or interiors. It’s also listed under the “Zero-D” category.
Check lens availability/prices at Venus Lens
The Canon RF mount version is tested here and there are lots of examples of it in use, tested here on the Canon EOS RP. There is a special adapter/support mentioned in the review – it’s covered in its own review
All other mount options use the same internal optics
Index
There is a 26 minute video review to go with this article.
The list price (US) for the 20/4 is $1299
The lens is available in several mount options: Canon EF, Nikon F, Canon RF, Nikon Z, L, Pentax, Fuji G and Sony E.
Also a short (~5 mins) set of video examples using the lens
The ‘Zero-D’ Laowa 20mm shift lens
The newly announced Laowa 20mm shift lens fits nicely in between my Canon 17mm and 24mm tilt/shift lenses. It’s close to the Nikon 19mm PC-E lens. Unlike those lenses, this one (like the Laowa 15mm) is just a shift lens. [all links to my detailed T/S reviews]. If you are using it on a medium format camera like the Fuji GFX range, the larger sensor gives a rough 35mm ‘equivalent’ focal length of ~16mm.
It’s marketed under Laowa’s “Zero-D” label – it’s a very good lens, but not quite zero distortion…
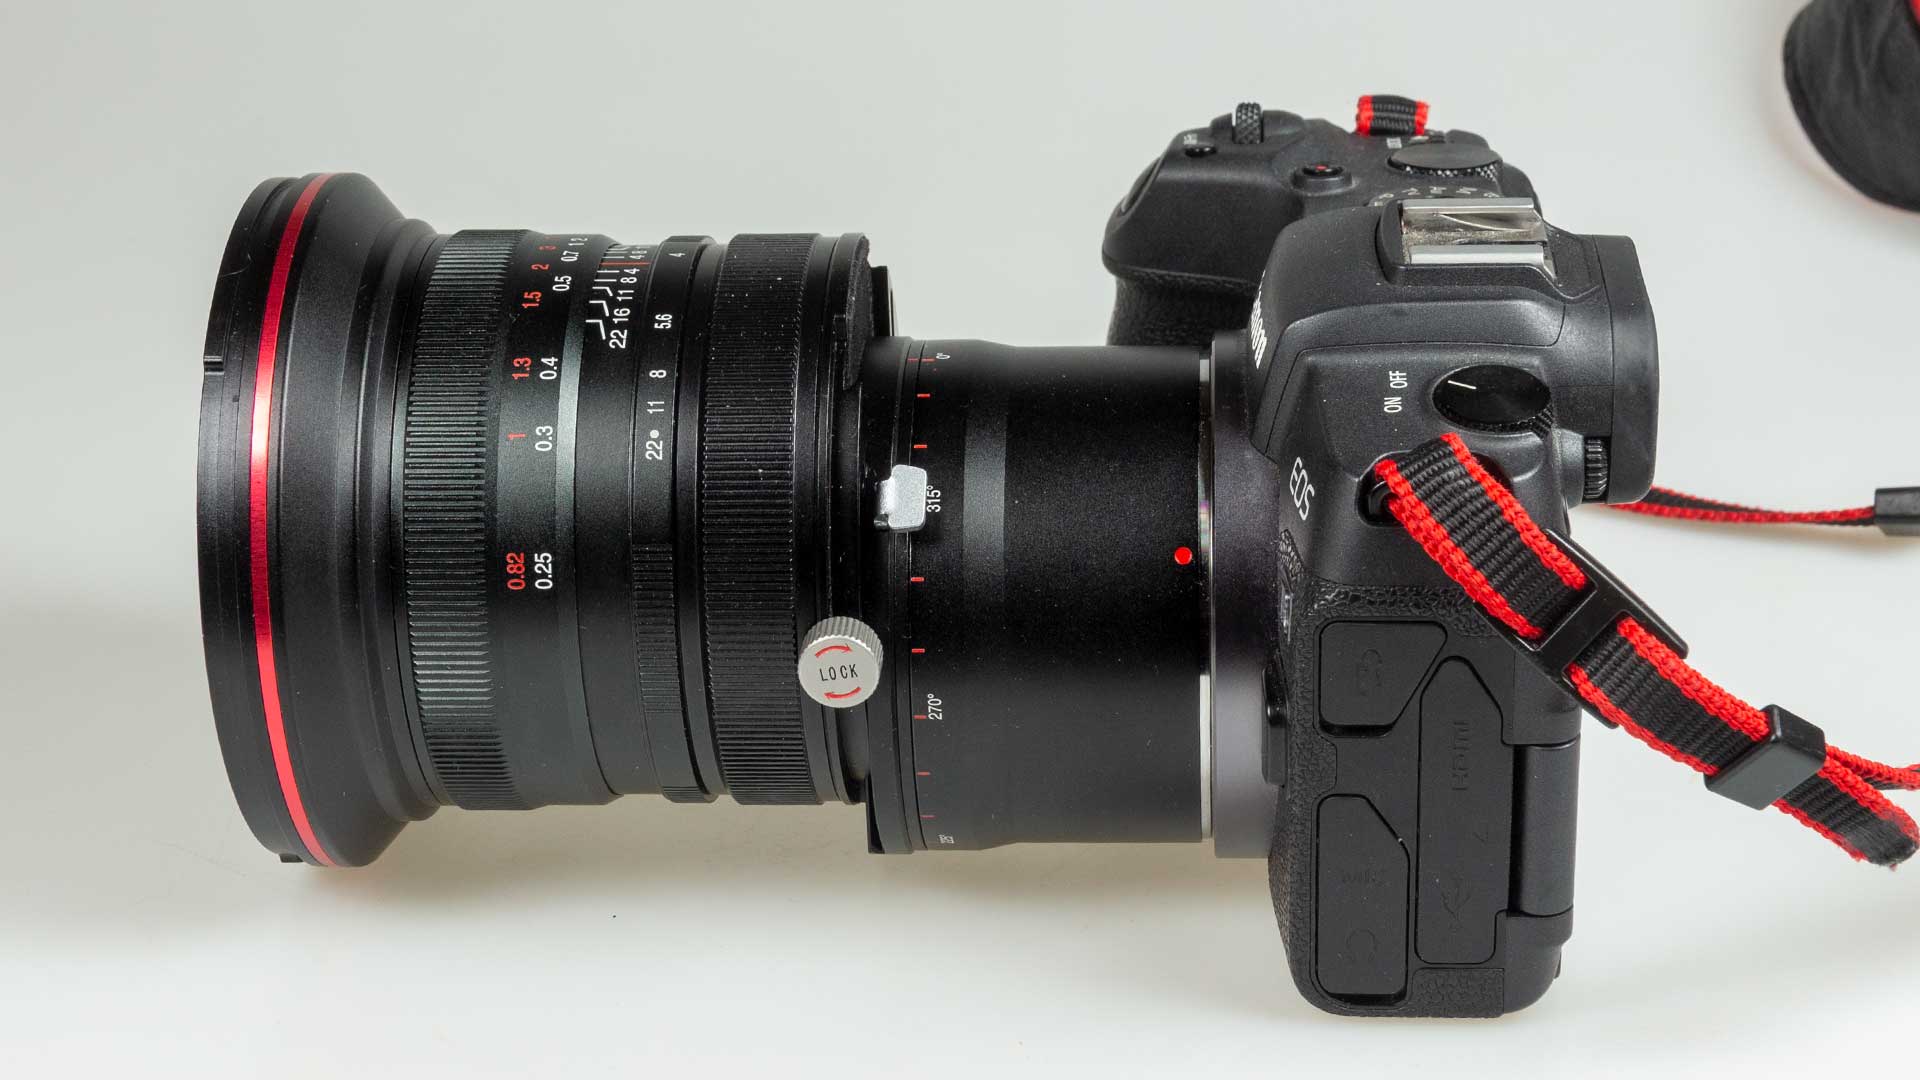
Here it is mounted on my mirrorless full frame EOS RP
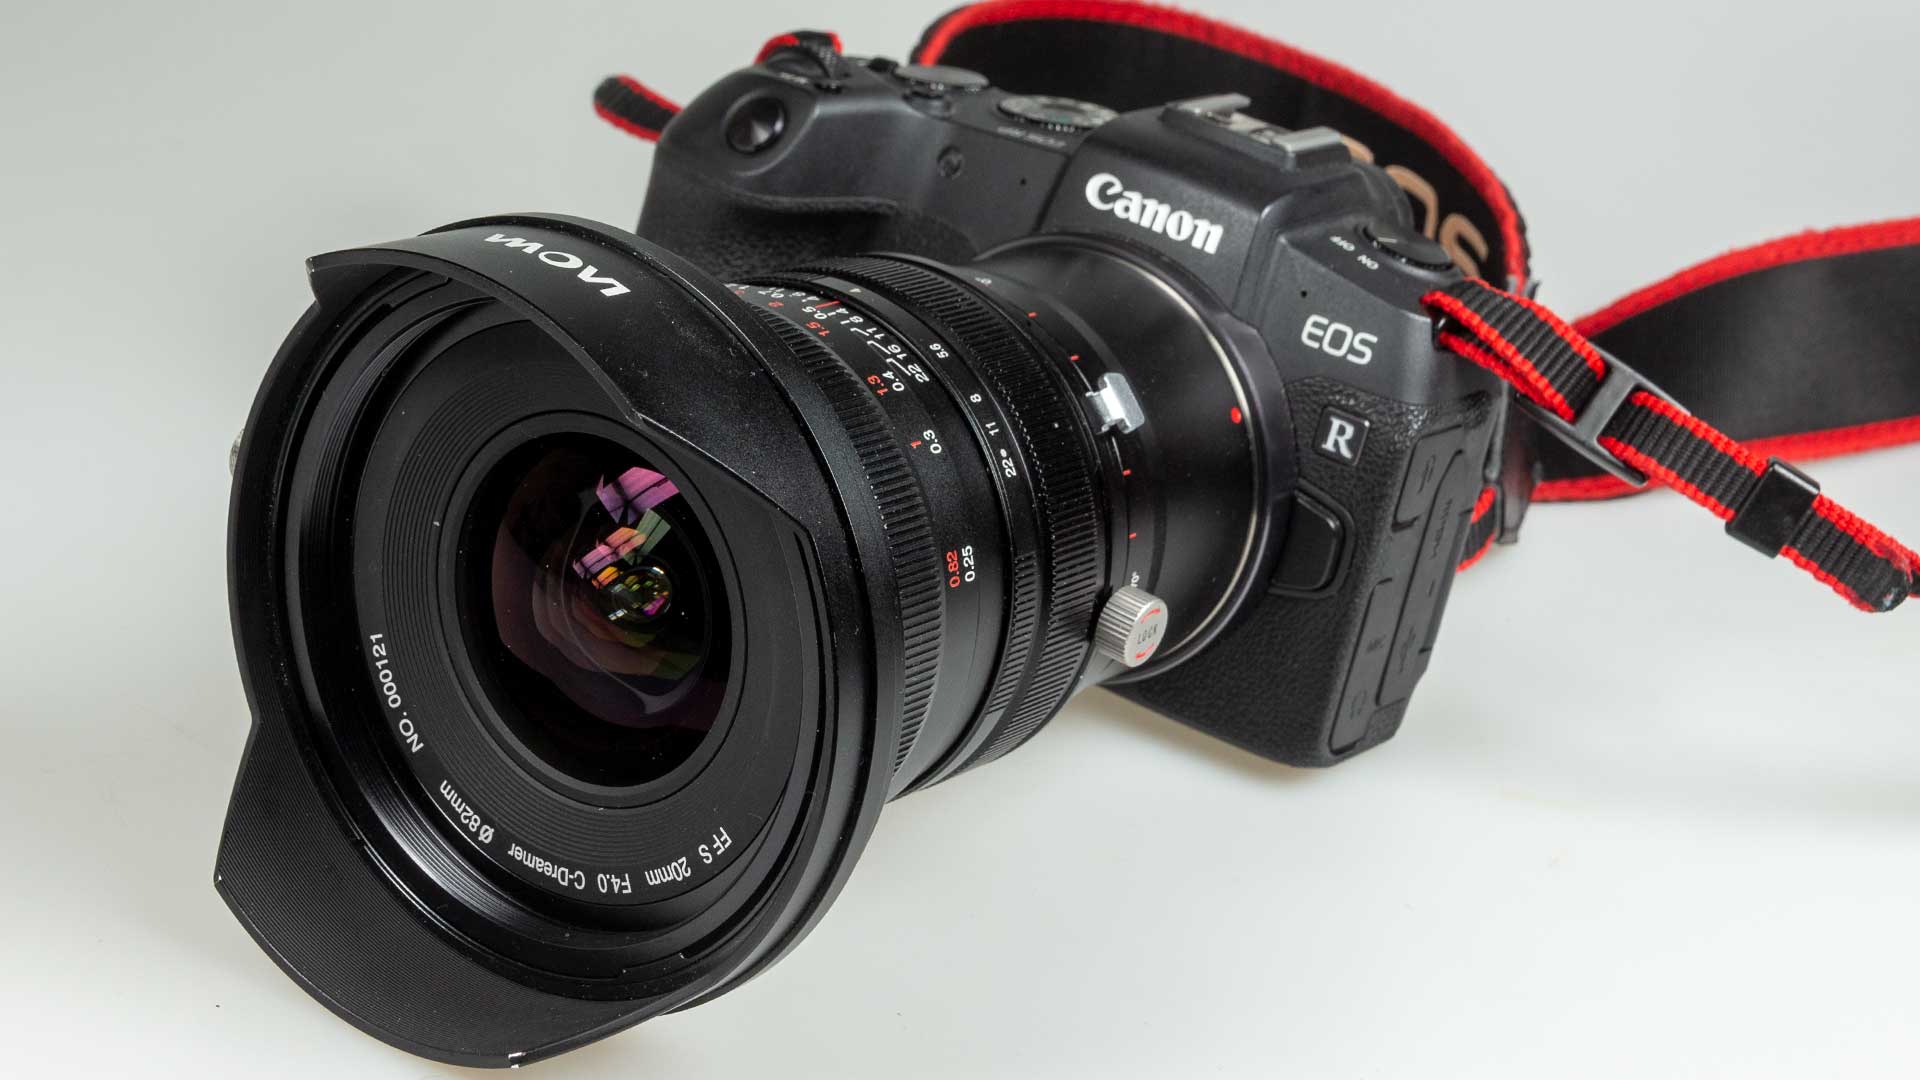
Laowa 20mm shift lens
It’s shift only – I’ll come back to this in the conclusions, but I’d merely note that in my day to day use of the TS-E17mm, far less than 1% of my shots make use of tilt.
By the way, if you’re unsure just how useful shift is, have a look at my article: How to use lens shift
There are many (70+) articles, reviews and videos looking at all aspects of tilt/shift lenses, See the Tilt/shift Index page for links to all, including my book about using such lenses.
It’s a wide lens but not excessively so – of course, your opinion of ‘wide’ may vary from mine ;-)
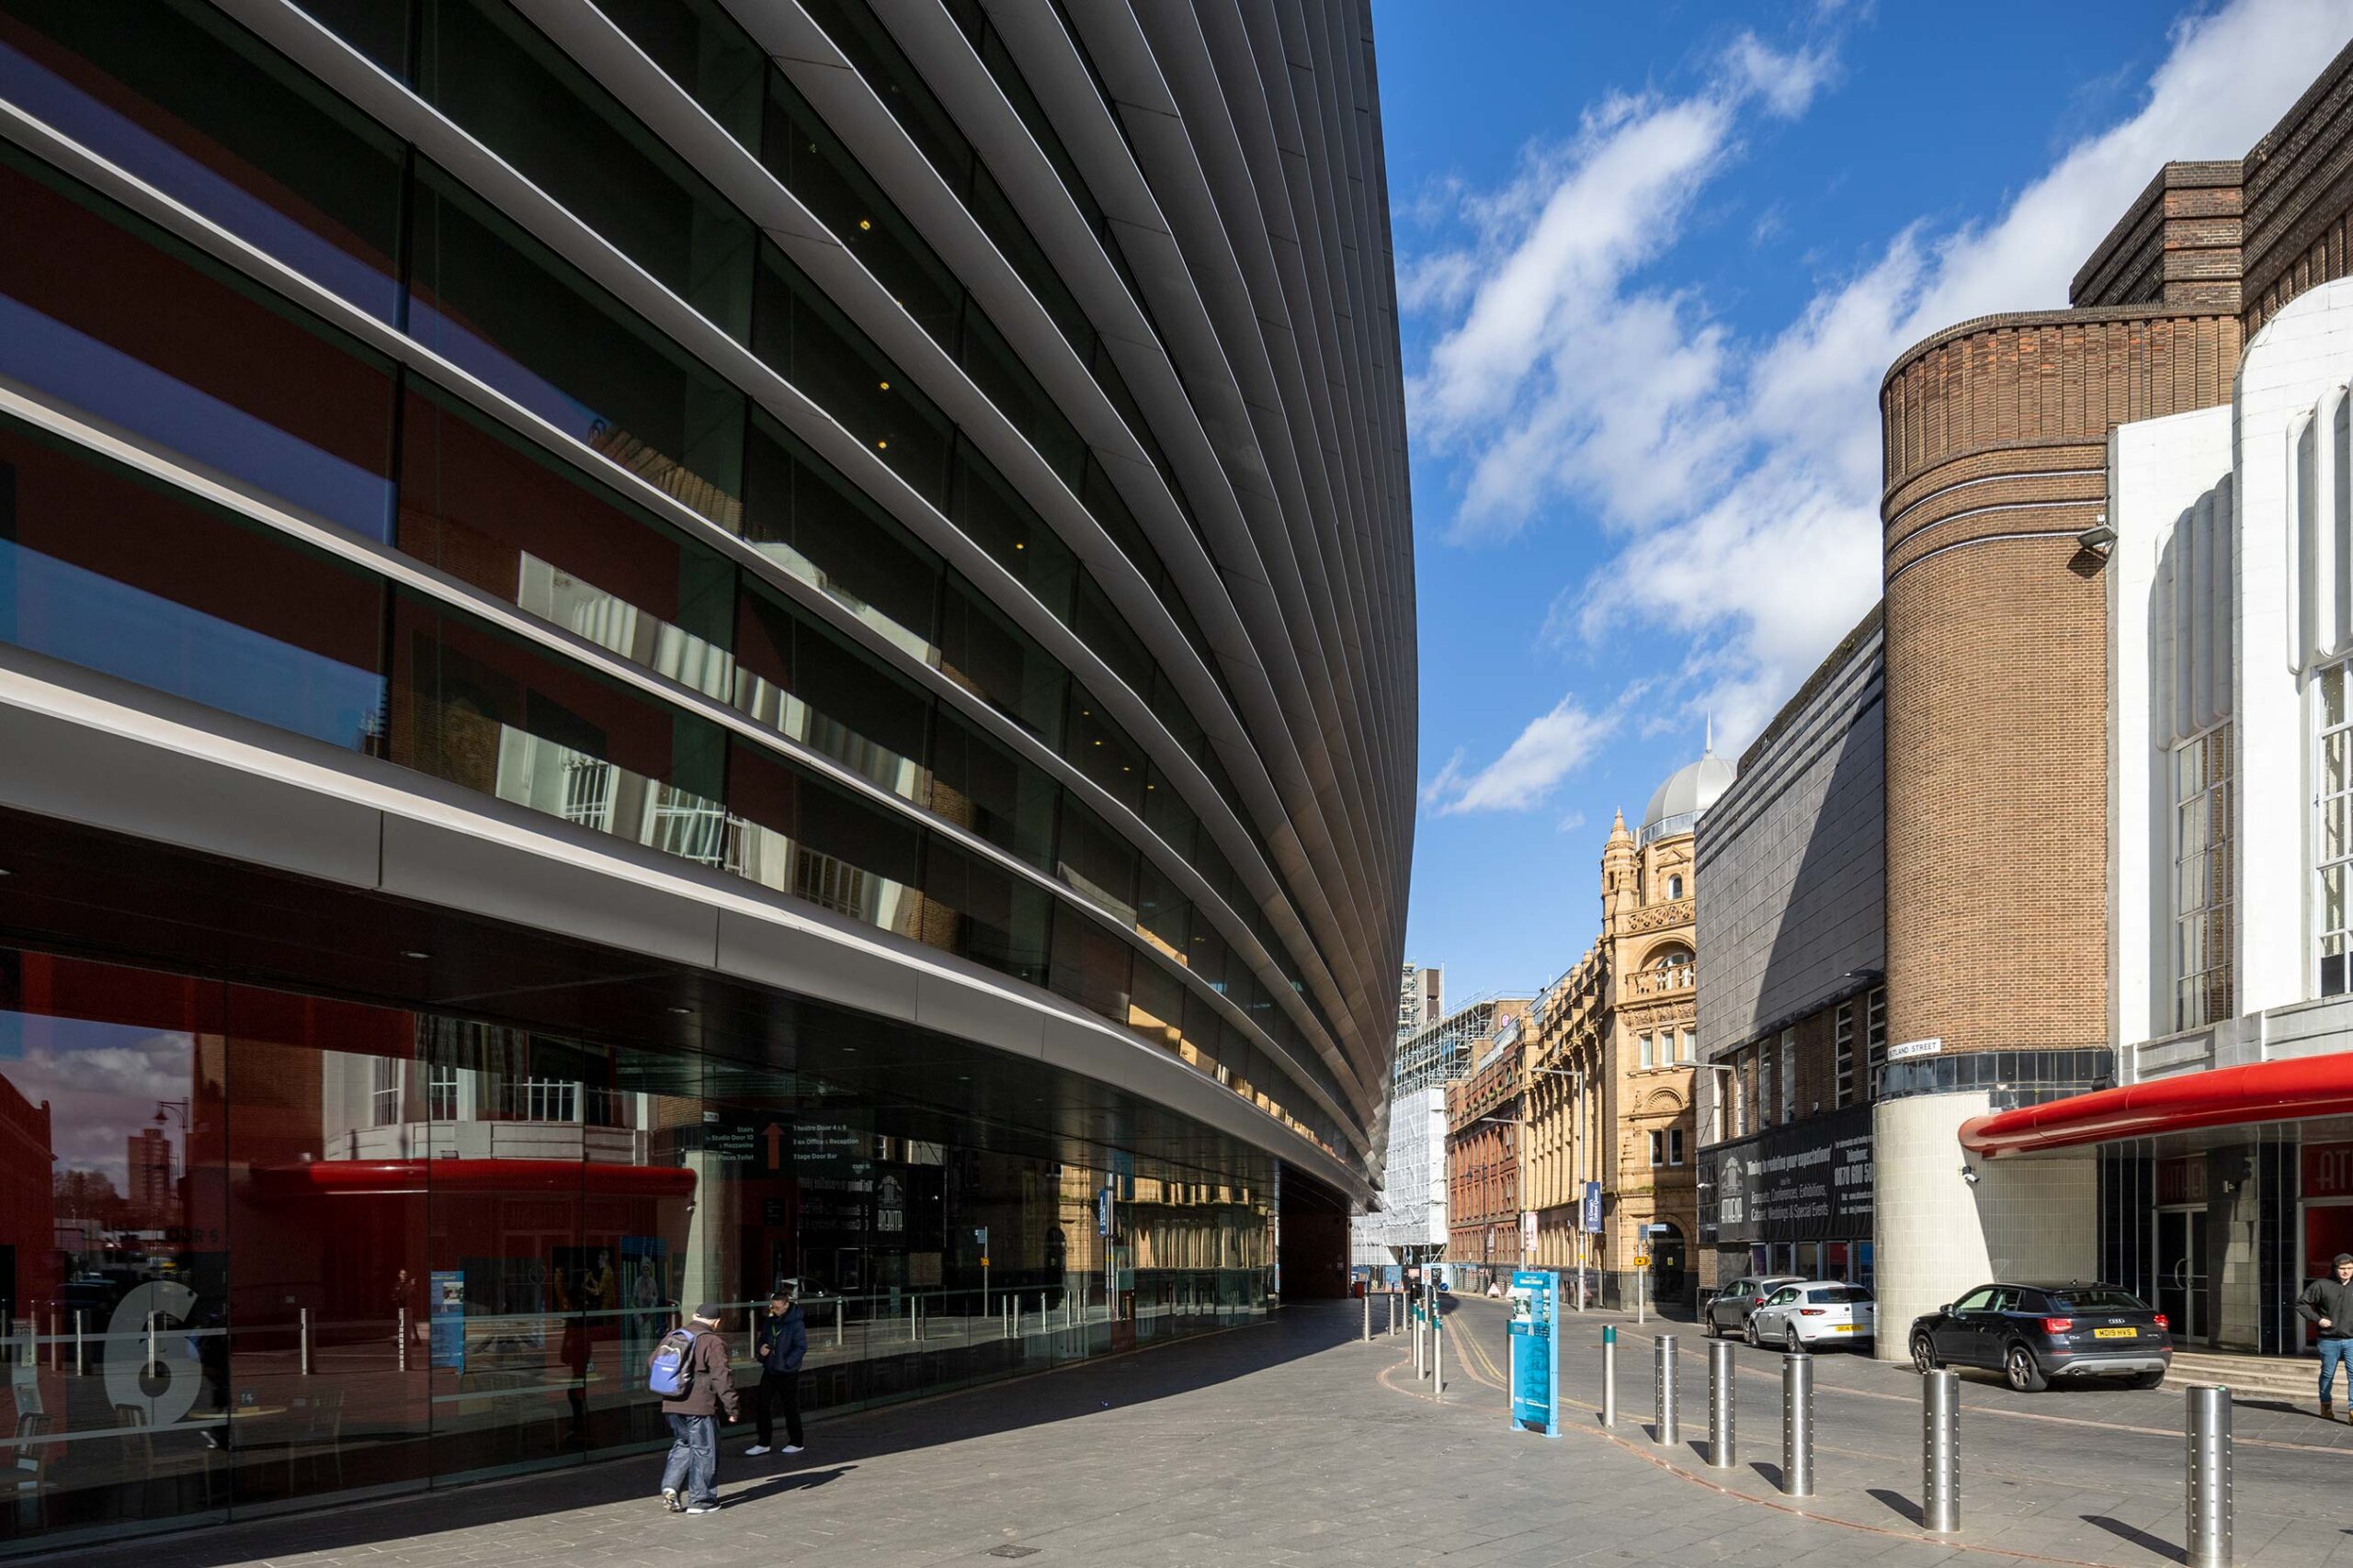
Vertical shift – Curve, Leicester
I’ll look at more examples of using the lens later, but first a look at the lens itself.
Laowa 20mm f/4 shift lens
I’m testing the RF mount version of the lens. It is also available in Canon EF, Nikon F and Z mounts. Additionally Sony E, Pentax, ‘L’ mounts and the [smaller] medium format Fuji G are available. Of these, the Nikon F mount is the narrowest and the most likely one where the mount aperture might cause some additional vignetting issues at full shift and larger apertures.
The lens is started to have a 65mm image circle.

Mount options
The lens is solidly made with metal parts
Note: You can click on most images here to see larger versions. Images have been reduced in size for this web article, They have also had minimal sharpening, so take heed before deciding that the lens is ‘soft’. Also I only have one copy of the 20mm so take this review as an indication of the sort of quality you should expect, not a rigorous optical analysis.
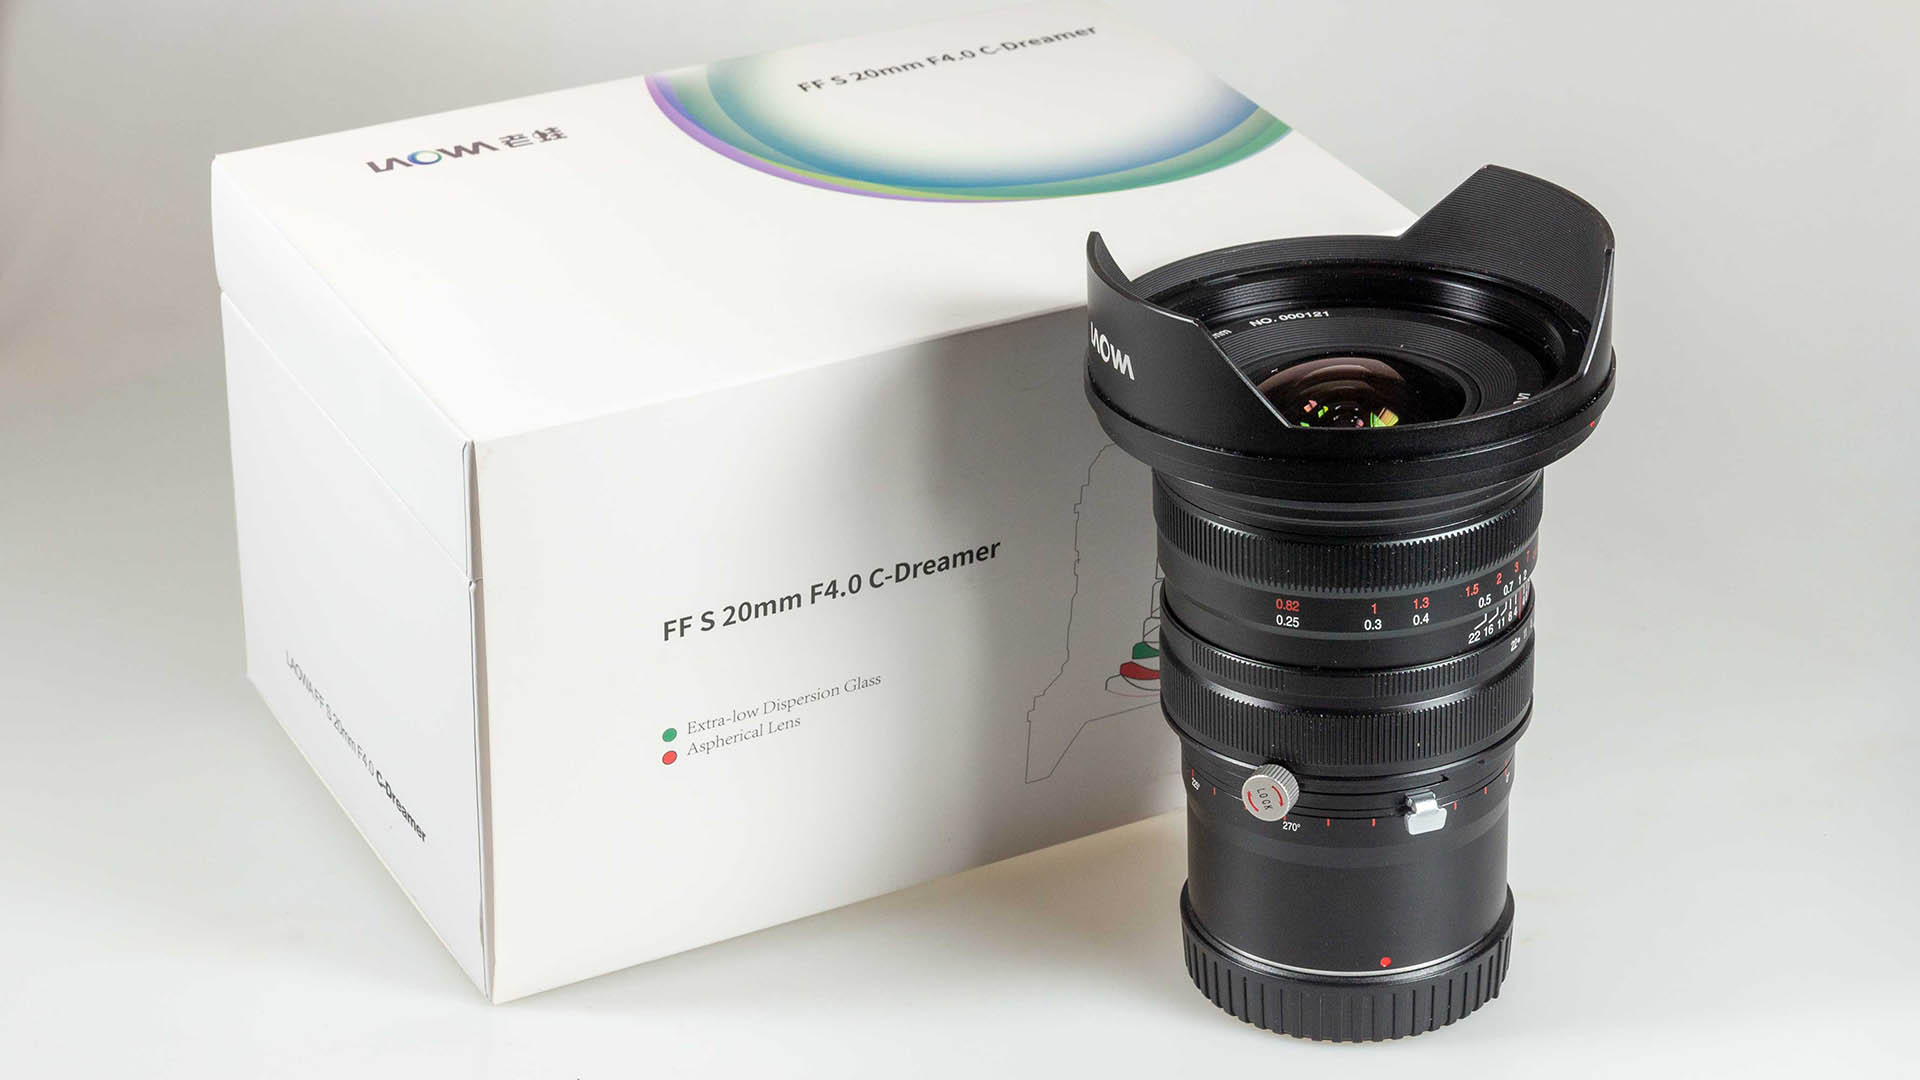
Note the relatively long tube at the rear – the lens has this longer part for mirrorless mounts.
The lens is manual focus. It has a long enough focus throw (~90º) that focus is relatively easy with a DSLR viewfinder.
There is a hard stop at infinity, but I noticed that best focus was sometimes just before this – this is a sample lens though, so check out precise focus settings for yourself if you get one.
The aperture ring directly stops down the lens with clicks at full stops. There is a depth of field scale, but I always treat these as mildly indicative at best…
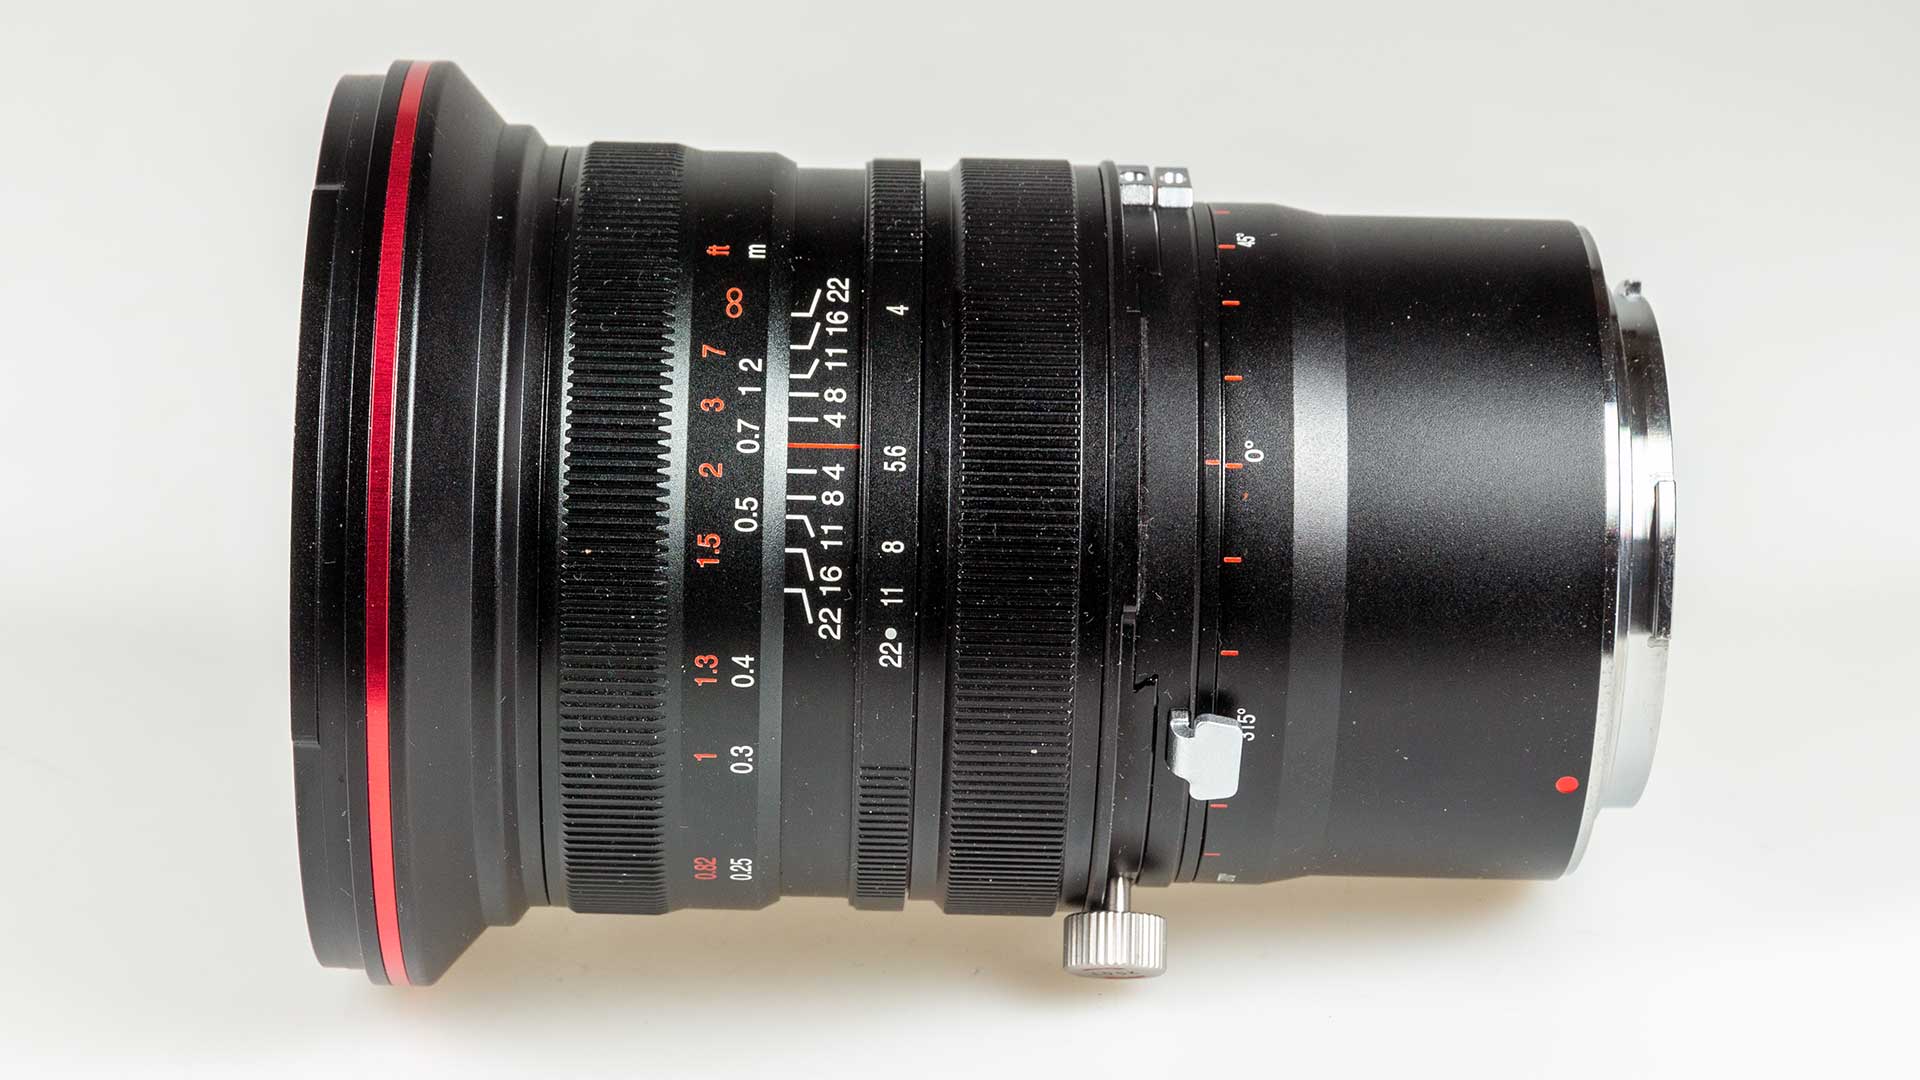
As this view (fully shifted by 11mm) shows, there are no electronics in the 20mm.

So, no EXIF data for focus/aperture or shift, although to be fair, no shift lenses as yet encode shift info…
The front element does not protrude at all, and the lens will accept 82mm filters.

Moveable lens hood
The metal lens hood rotates when attached (the knob at the side holds it in place.

Why?
Well for normal (unshifted) and sideways shift, you want the larger petals at the top/bottom.
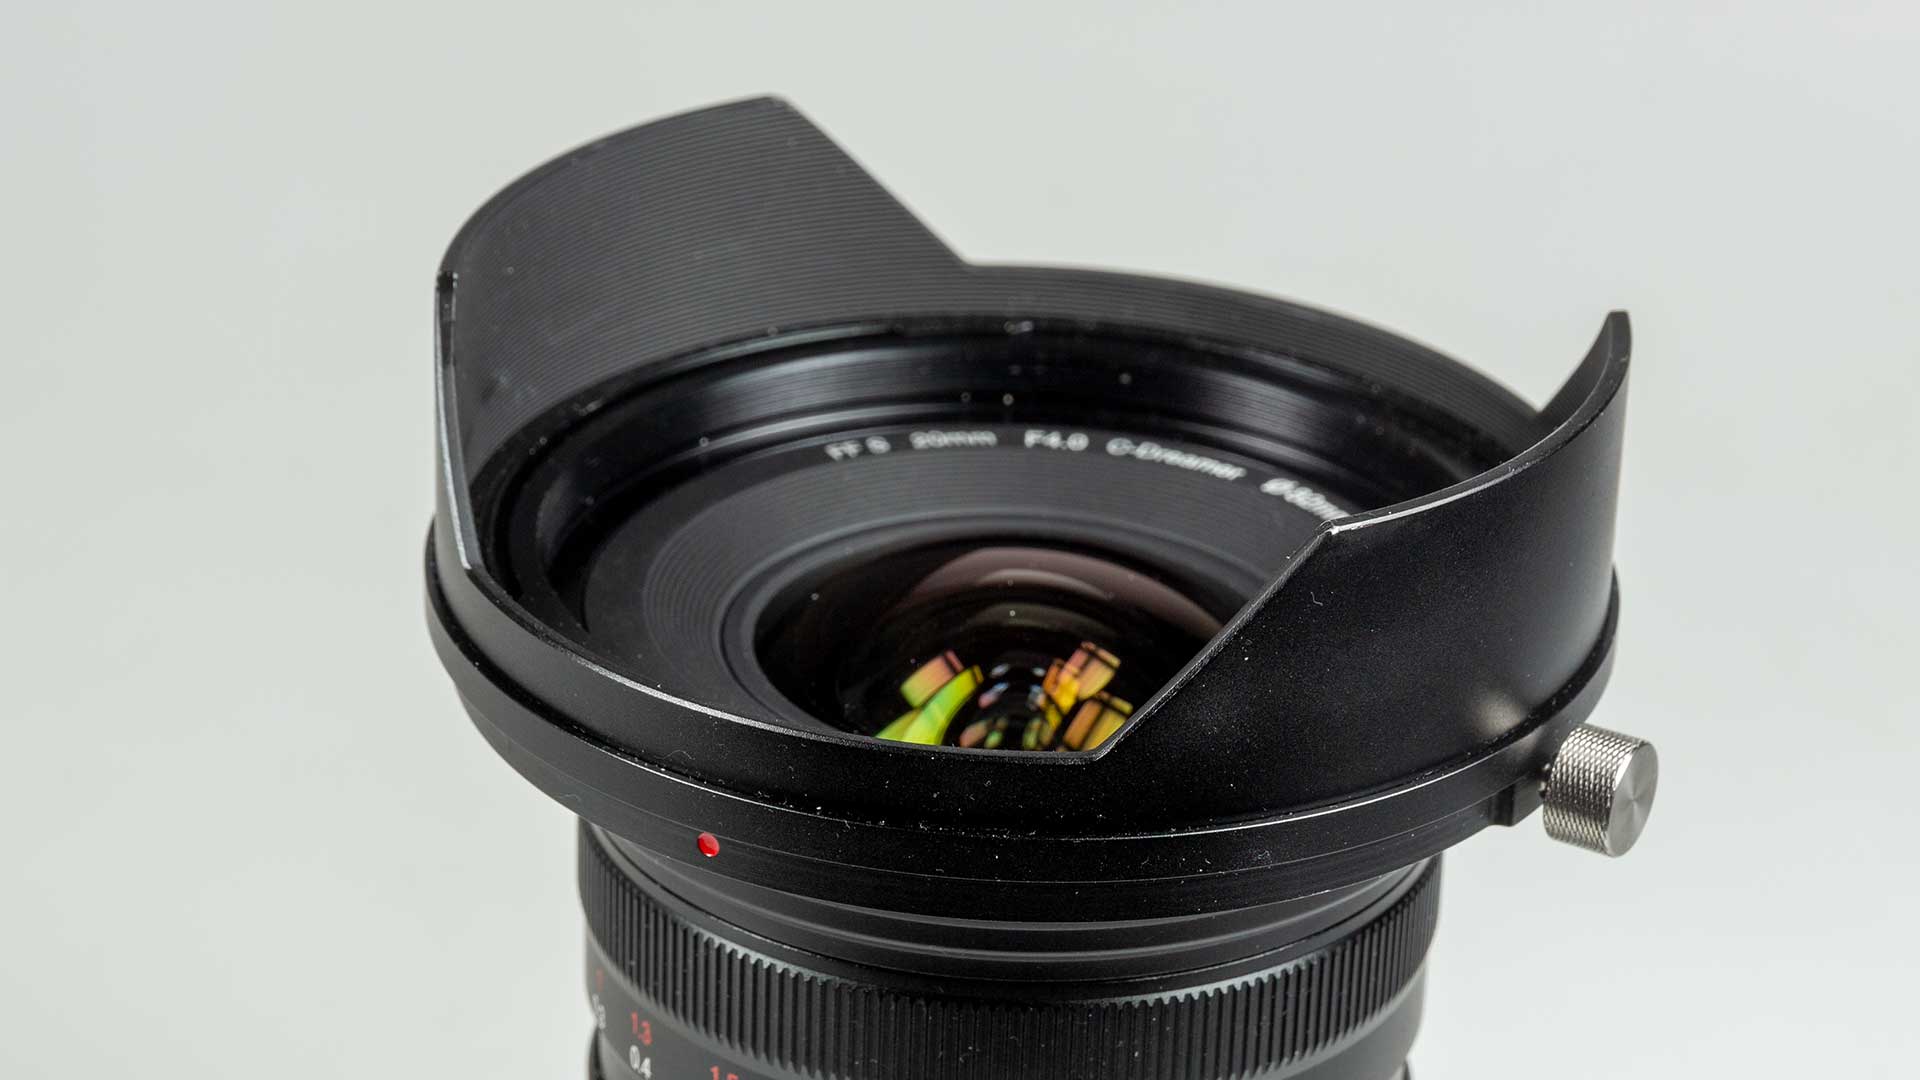
For a diagonal shift, the hood needs rotating. It has click stops, you don’t need to loosen the knob.
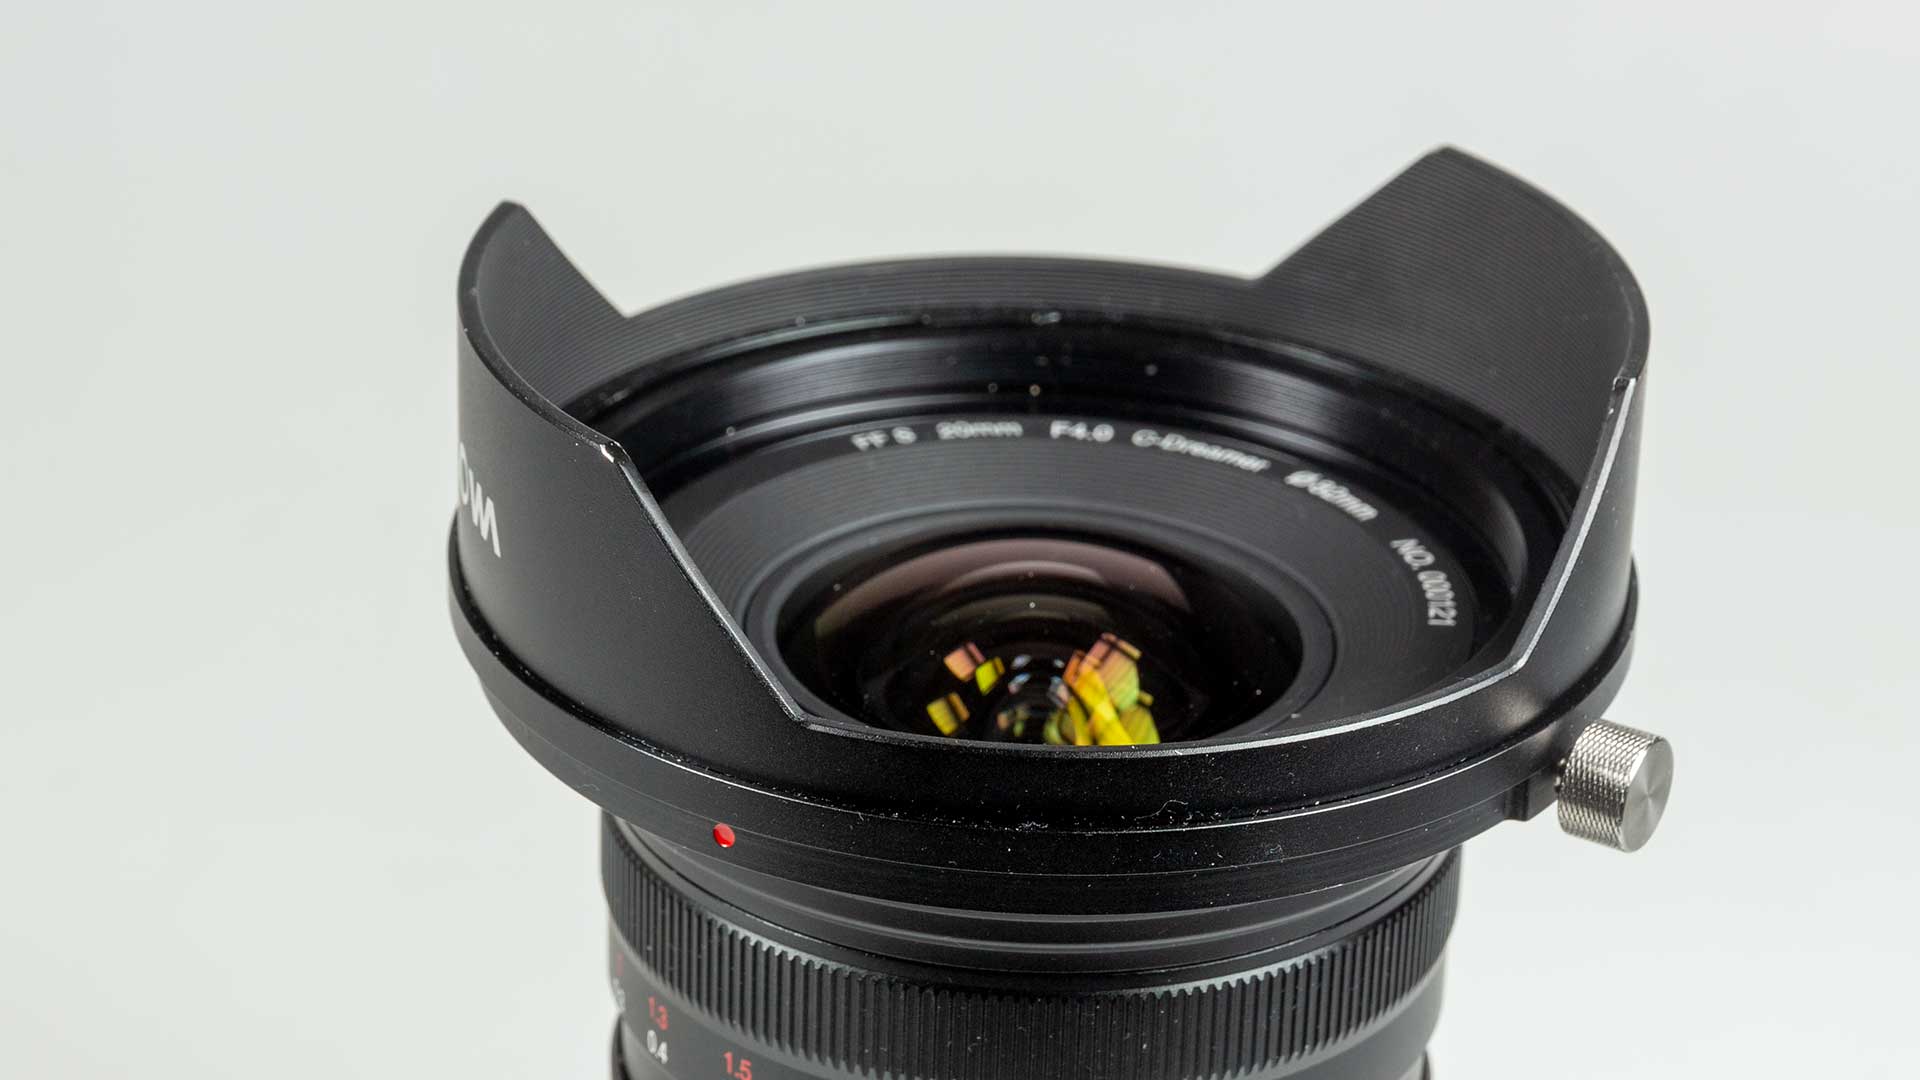
For full up/down shift, the large petals are best at the side.
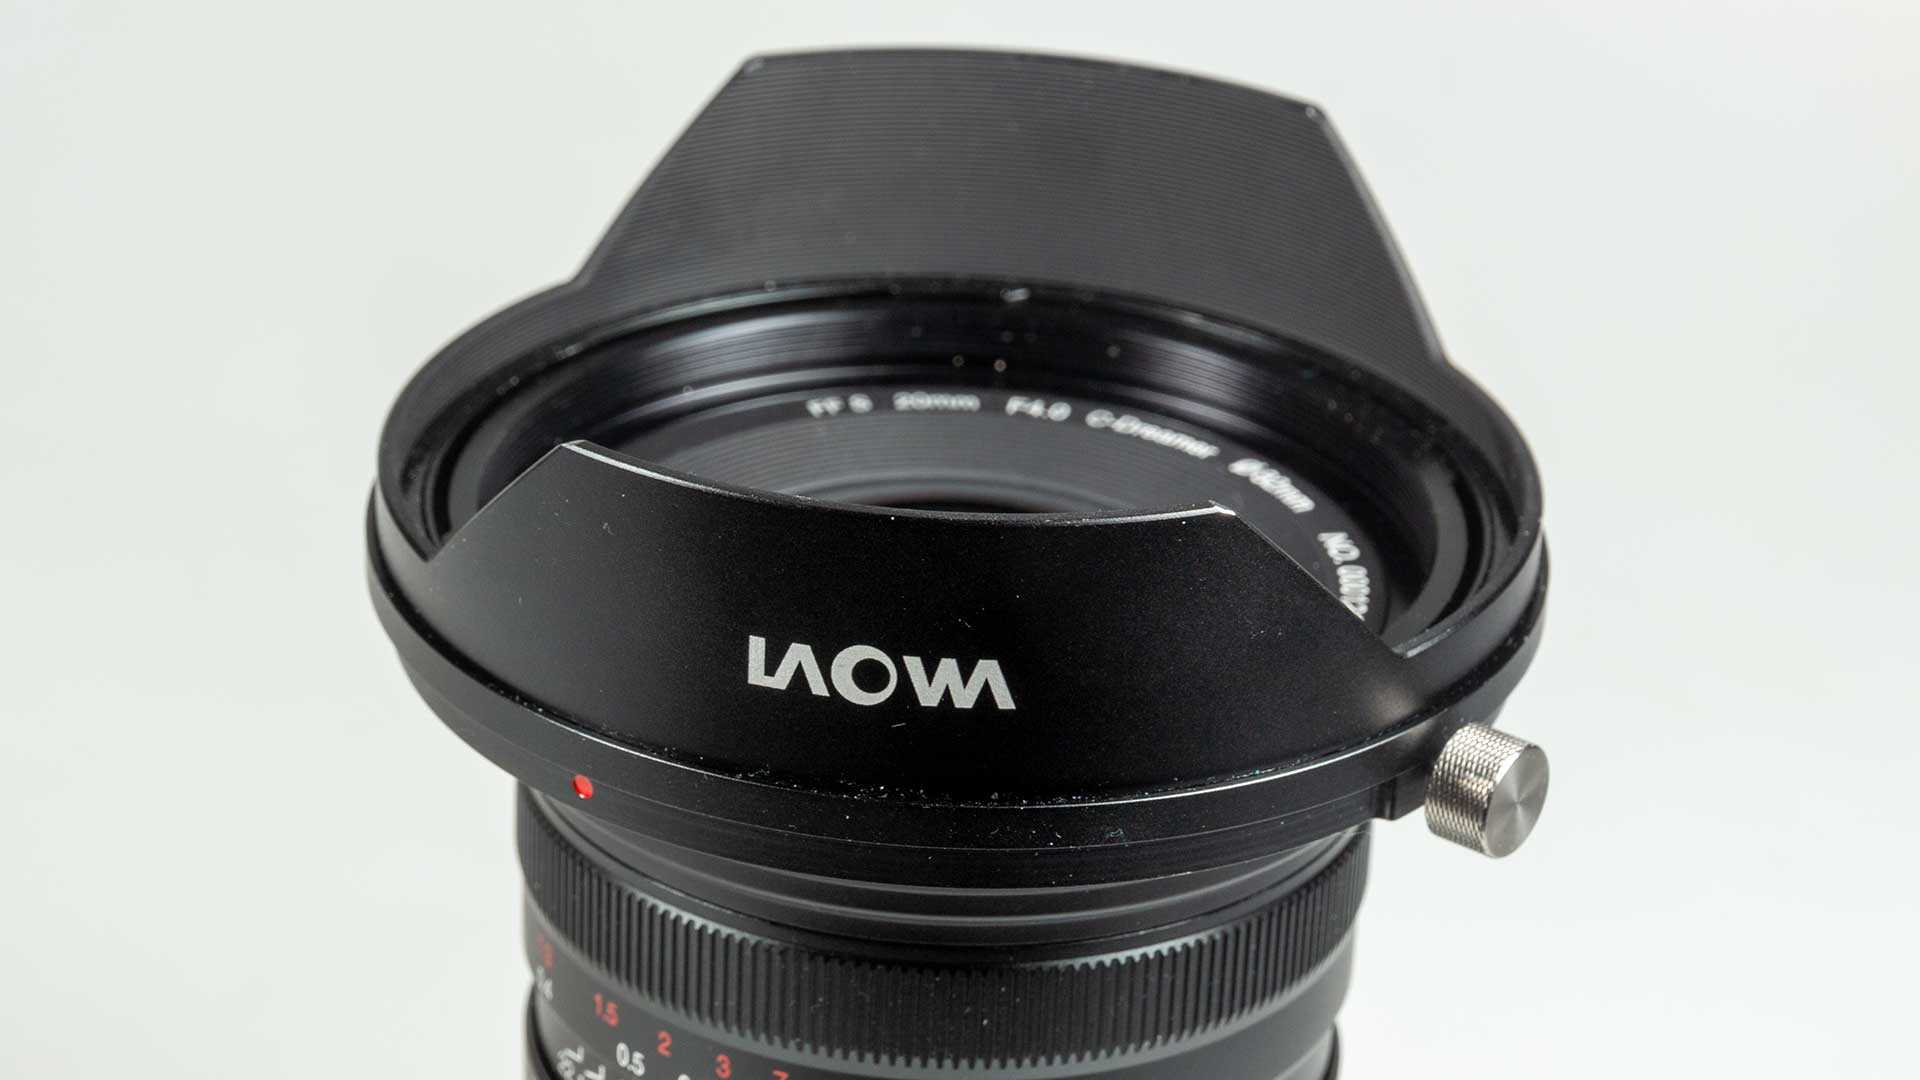
Useful, but do remember to check the setting if you use shift a lot. Any intrusion of the petals into the frame should be quite obvious at strong shift. Here’s a full vertical shift with the hood in a position which works fine for normal unshifted use.

Shift mechanism
Further down from the focus/aperture rings can be seen the lock for setting the lens shift.
Shift is via the lens ring directly above the knob. You rotate this ring and the lens shifts either direction along the set shift axis.
Also seen is the release tab and rotation scale, allowing you to rotate the whole front of the lens on the mount by 360º
This is in 15º click stop increment – much more useful that the 30º steps both Canon and Nikon use.

Here fully shifted.

The scale shows the amount of shift in millimetres. There is a detent at 0mm.
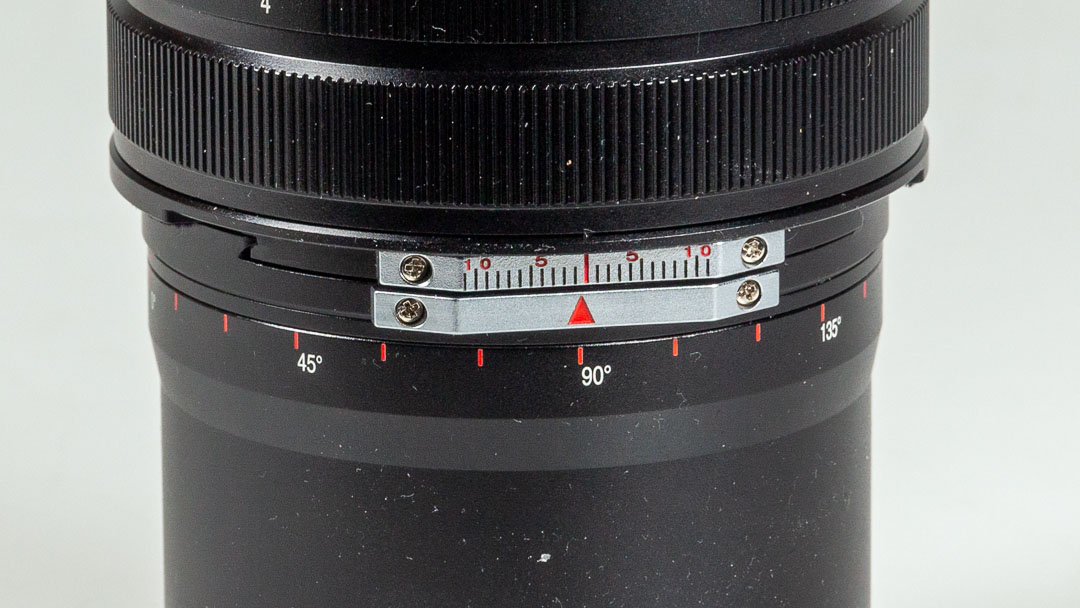
You get ±11mm of shift on any axis. For the Fuji G mount (medium format) you get ±8mm.
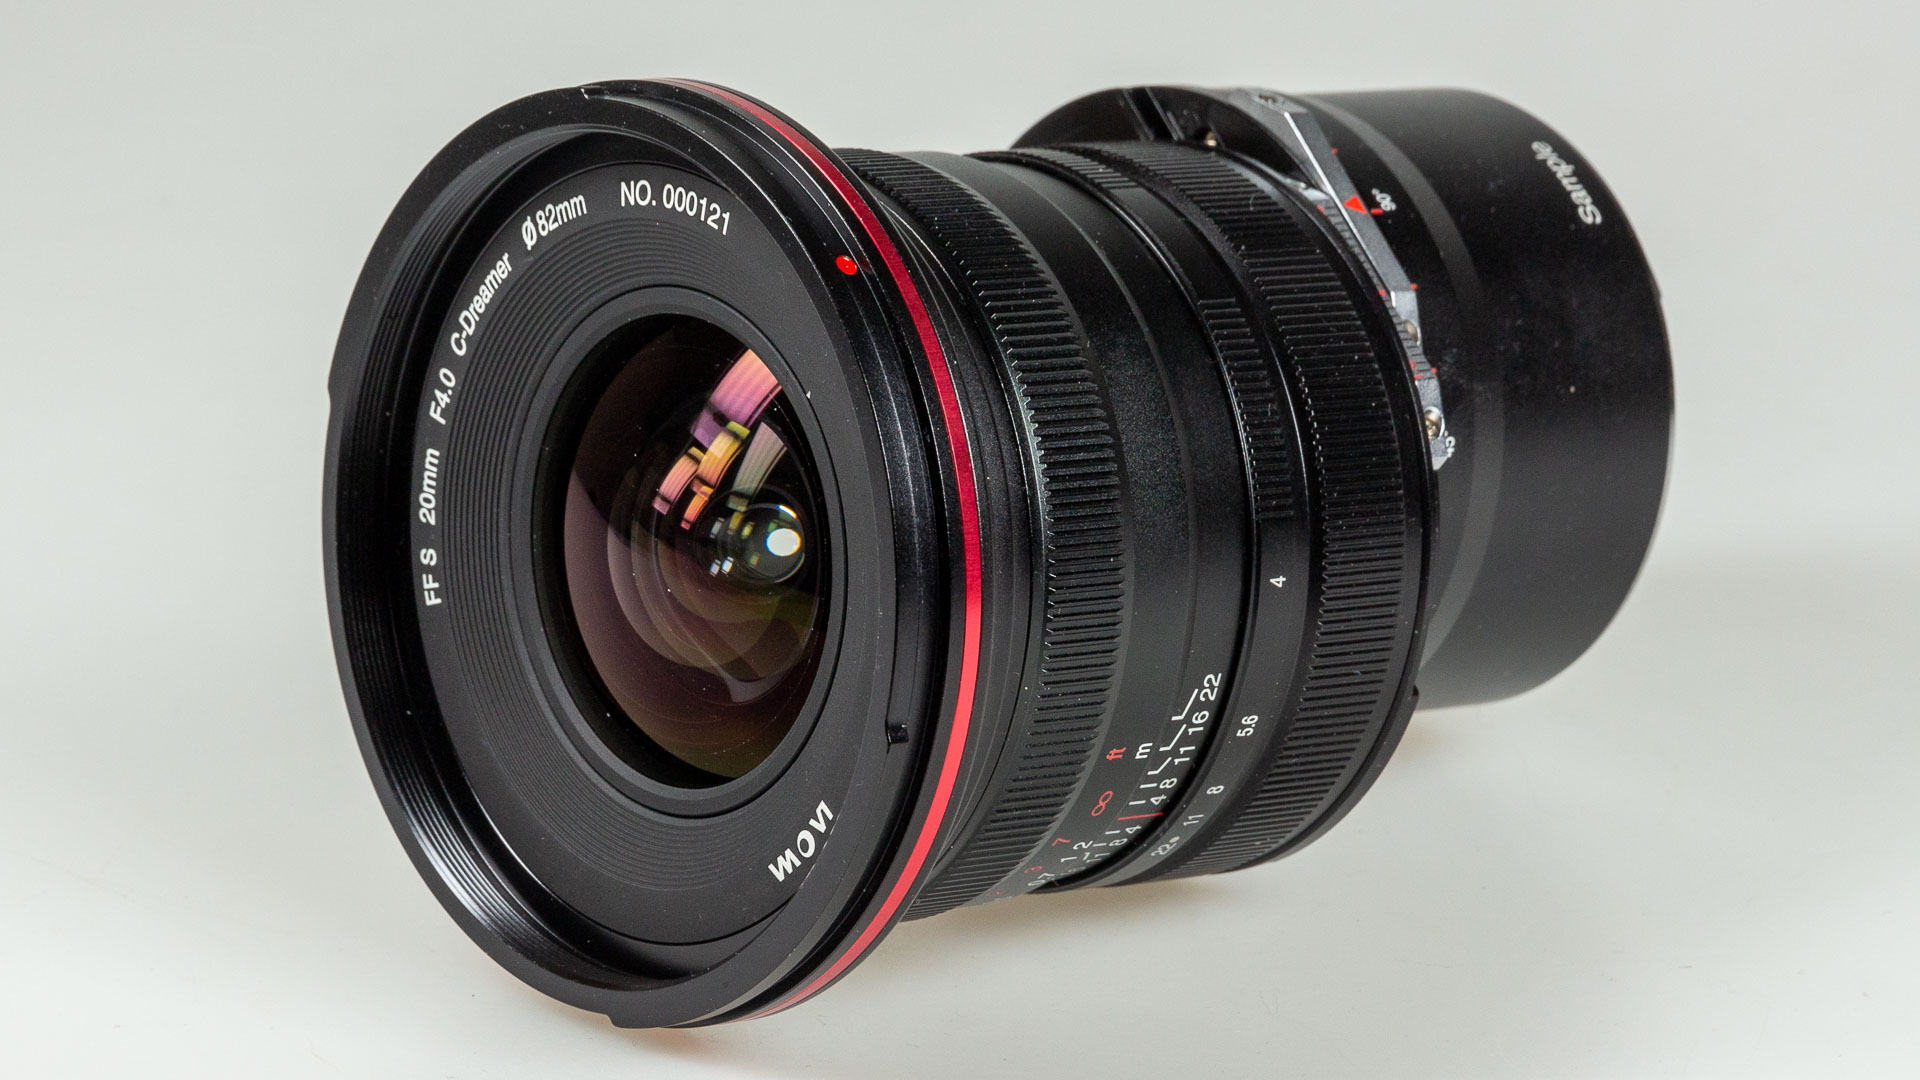
At zero shift, remember it’s just a very good quality 20mm lens.
It is a very solid shift mechanism. I first came across this design in the Laowa 15mm shift lens and rather liked it.
Aperture
Looking through the lens, I can see that at full aperture there is unlikely to be much vignetting from the mount. The narrower throat of the F mount might cause some slight mount vignetting, but only at wider apertures.
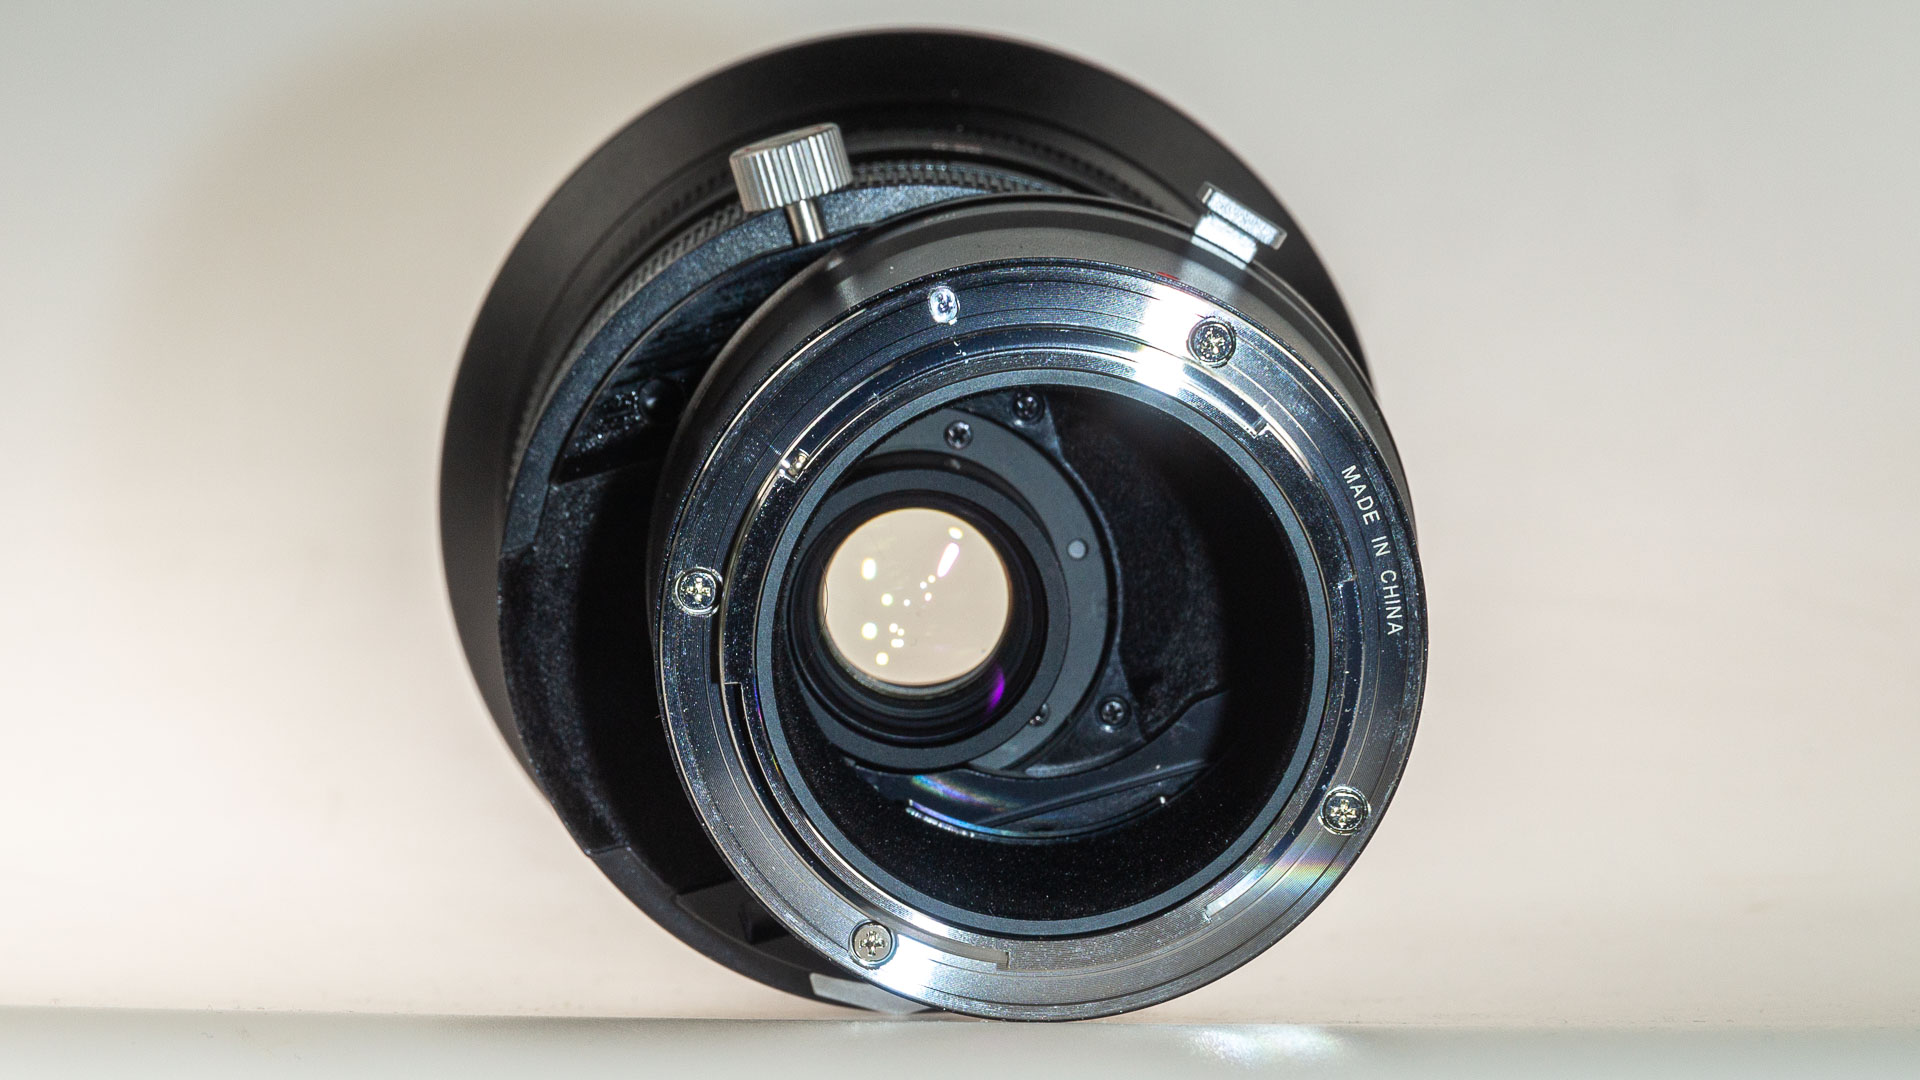
The round aperture is fully open or f/4.
Moving to f/8, the 14 (curved) blades of the aperture are quite difficult to see.
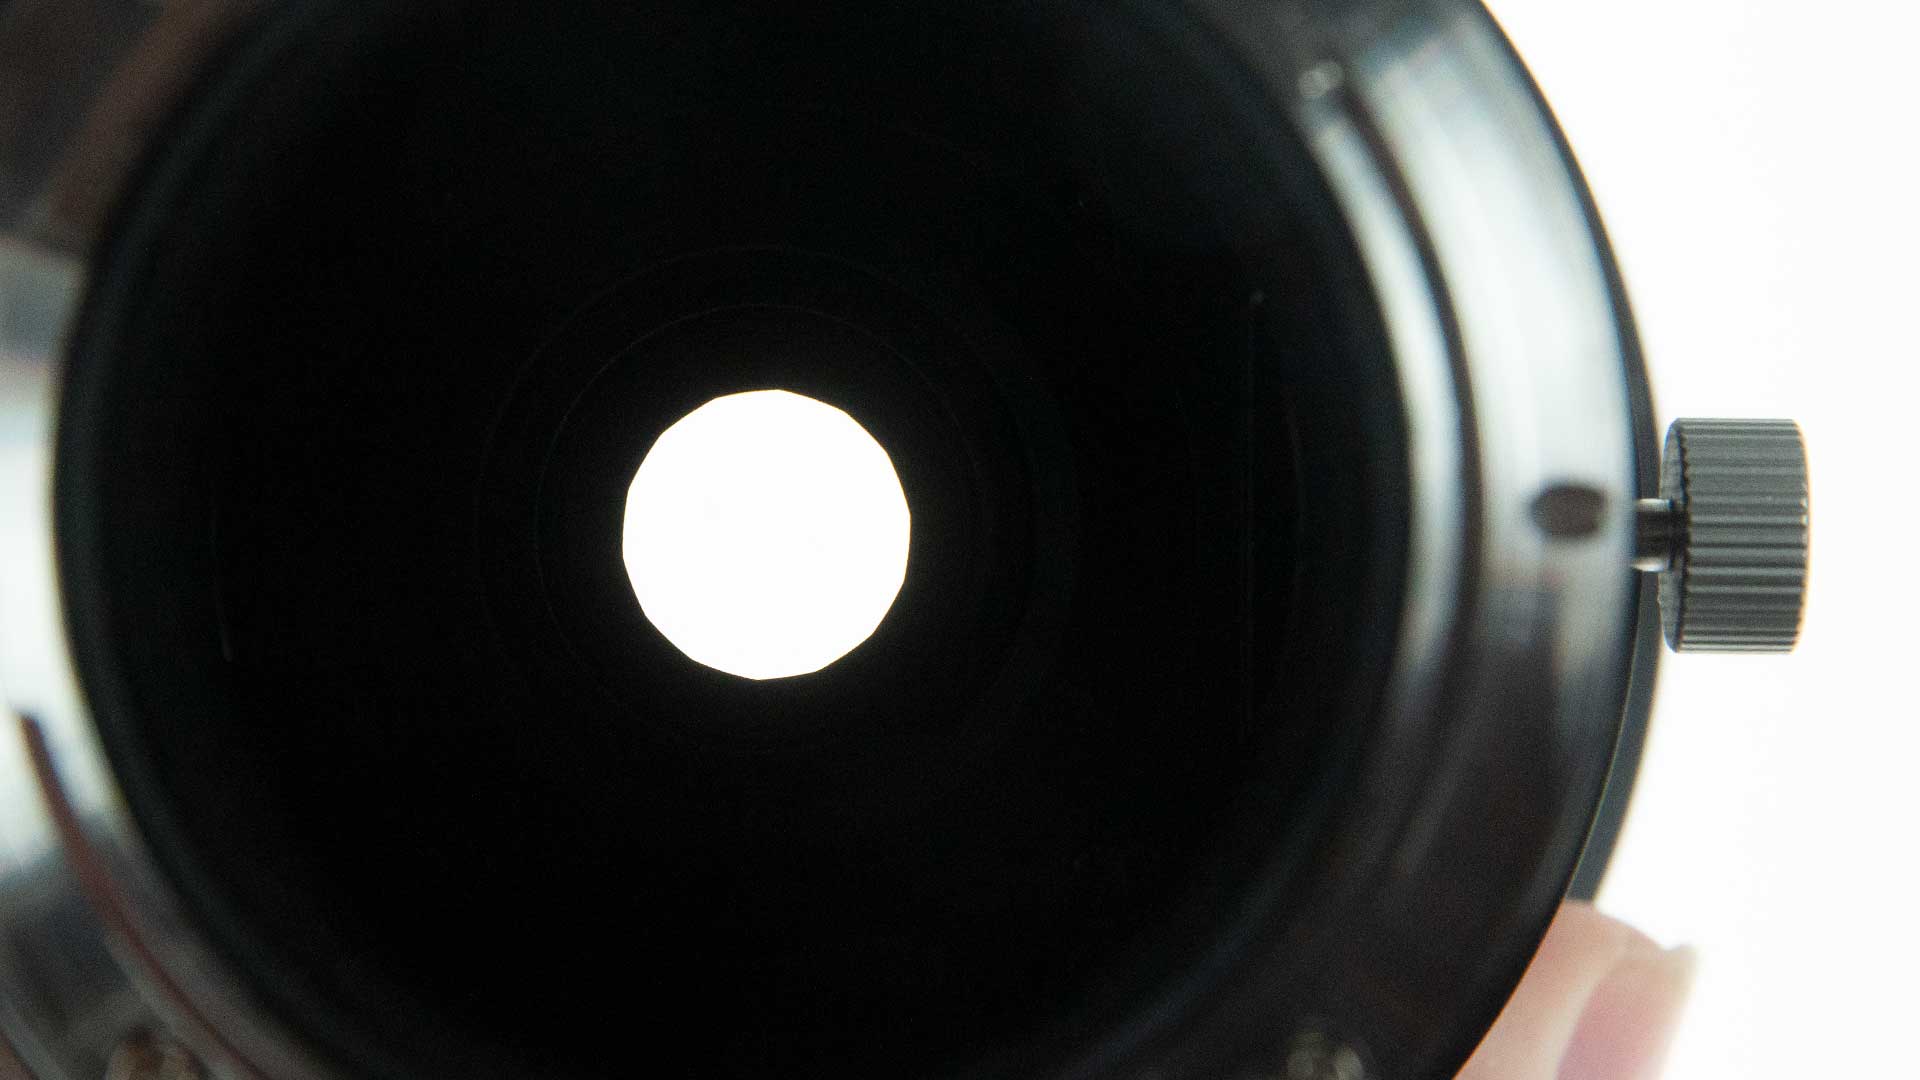
Compare this the the 5 blade design of the original Laowa 15mm shift lens [There is a new version of the 15mm which has the same 14 blade aperture as the 20mm]

This means that any ‘star spikes’ are much less obvious than with the 15mm. I’ll show examples later, but even though the optical formula of the 20mm is similar to the 15mm, it feels a quite different lens.
The lens specifications
This table is from the initial lens launch information.
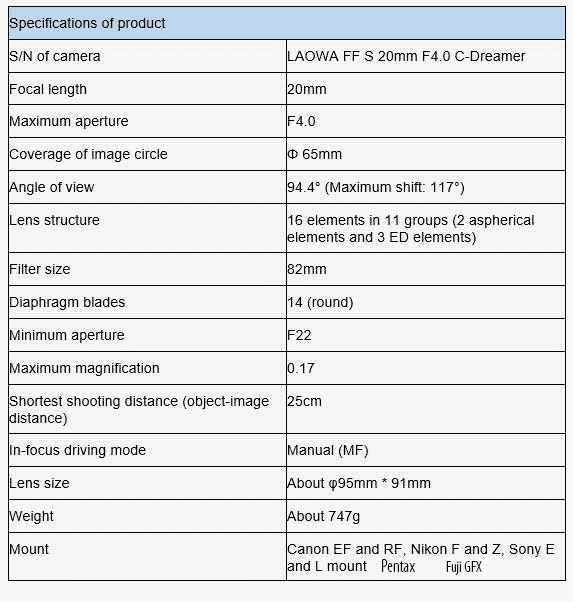
Internally, the Laowa 20mm has quite a complex design, to minimise distortion and cover such a large image circle.

The image circle refers to the area behind the lens where it projects the image for your camera sensor to capture. This image is circular, and for a lens like this, much larger than is needed to just cover the sensor. When you shift the lens, a different part of the image circle is captured, giving the characteristic change in view associated with shift.
MTF
Two MTF charts are given – the second cover more of the image circle

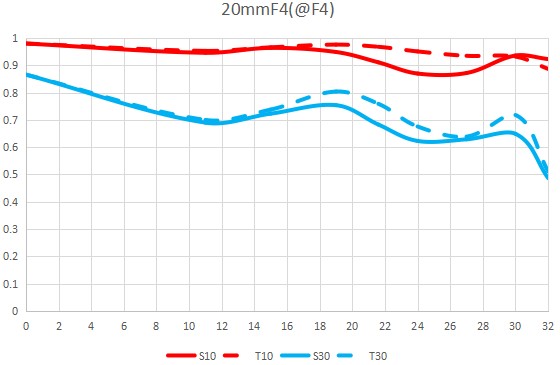
The lens takes an 82mm filter size
The 20mm is an internally focusing design, so the front element does not move when adjusting focus.
Vignetting
I’ve looked at quite a few shift lenses (most with tilt as well) and as with any lens it’s there to some extent.
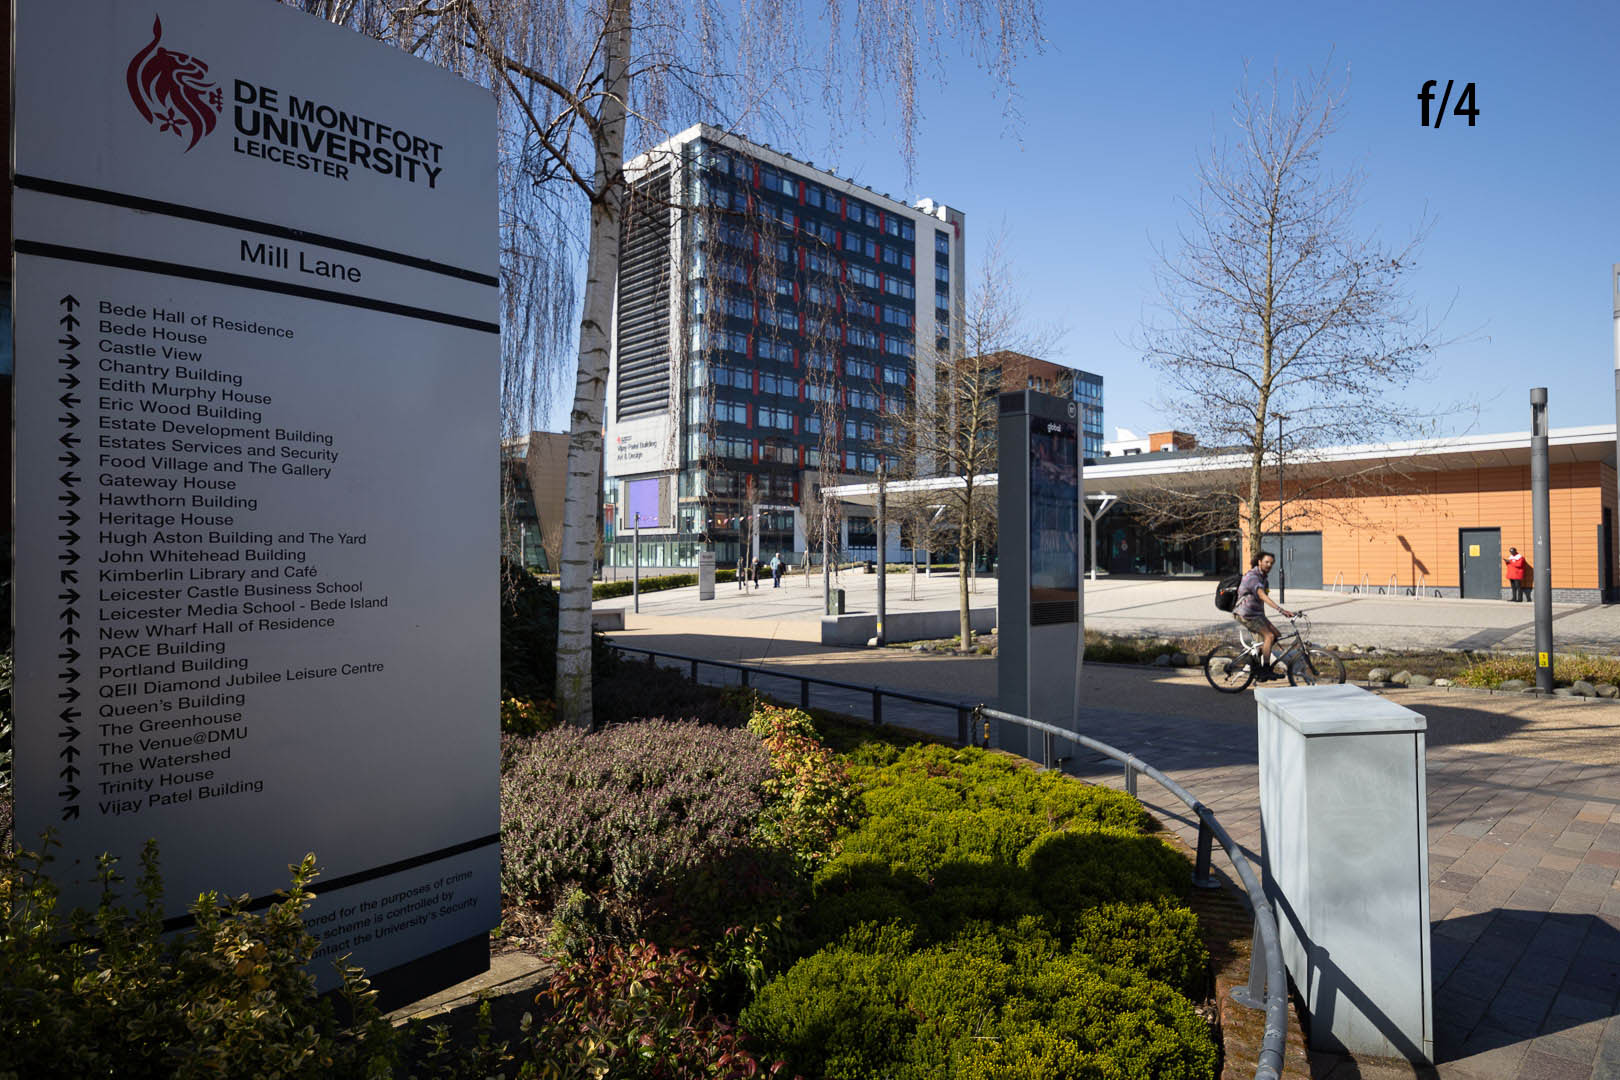
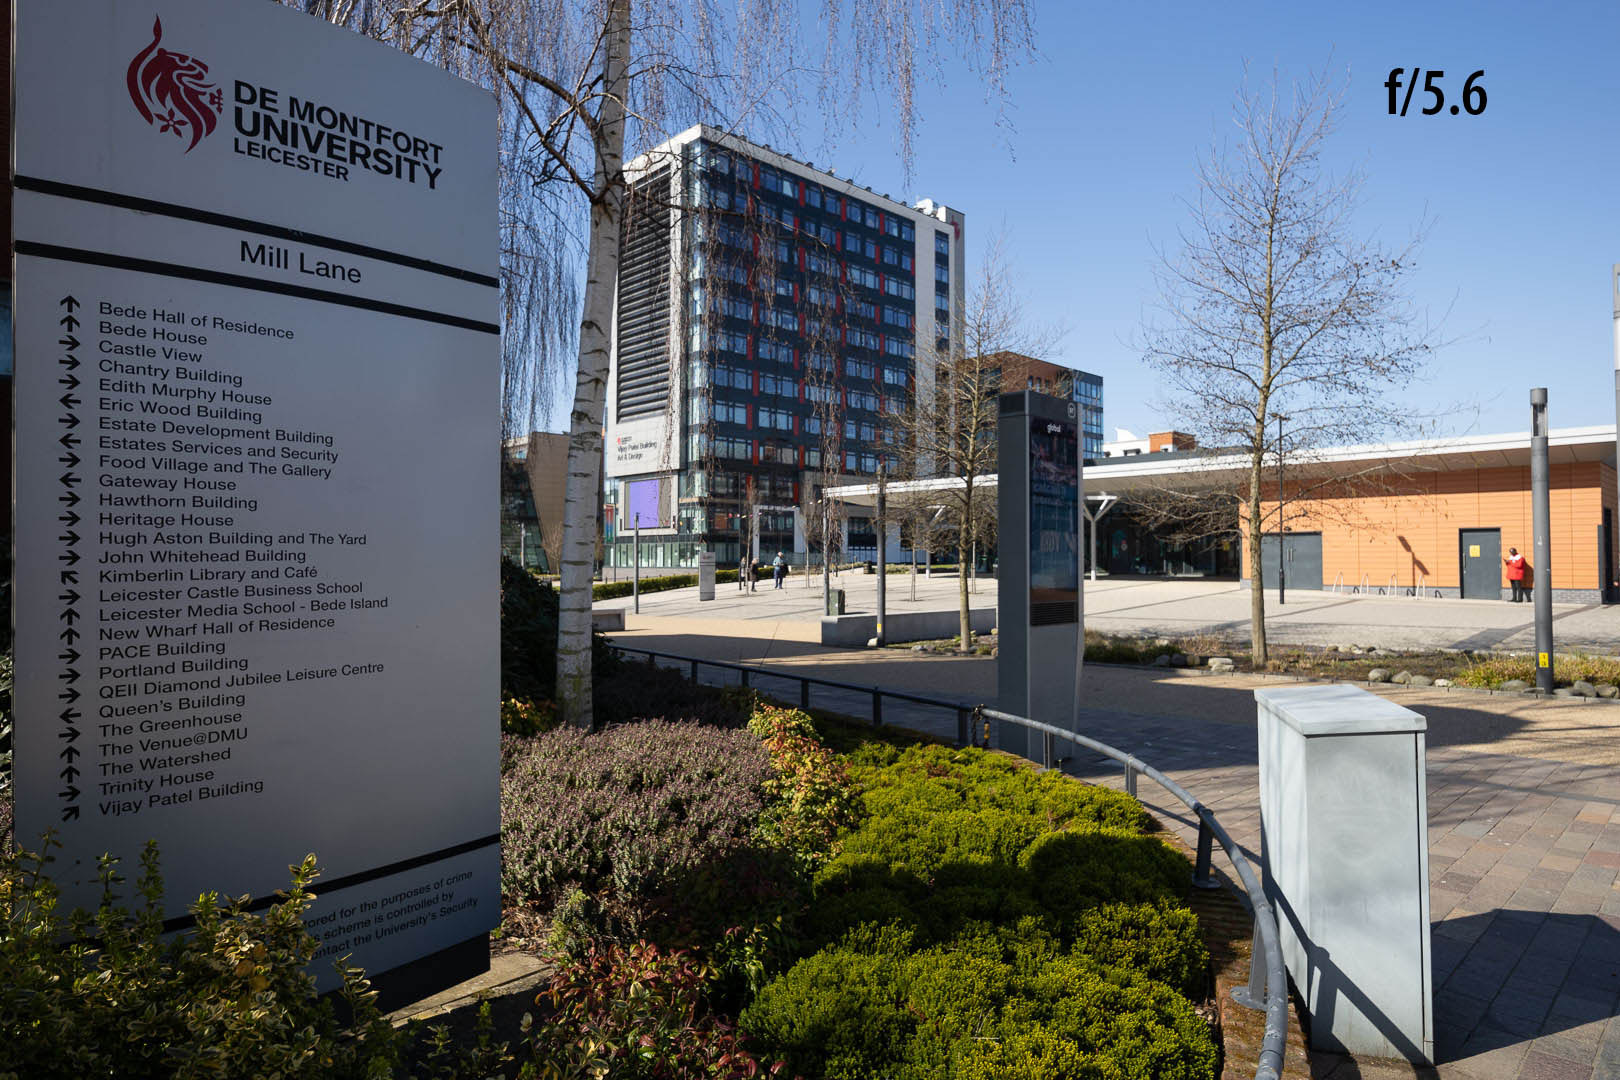
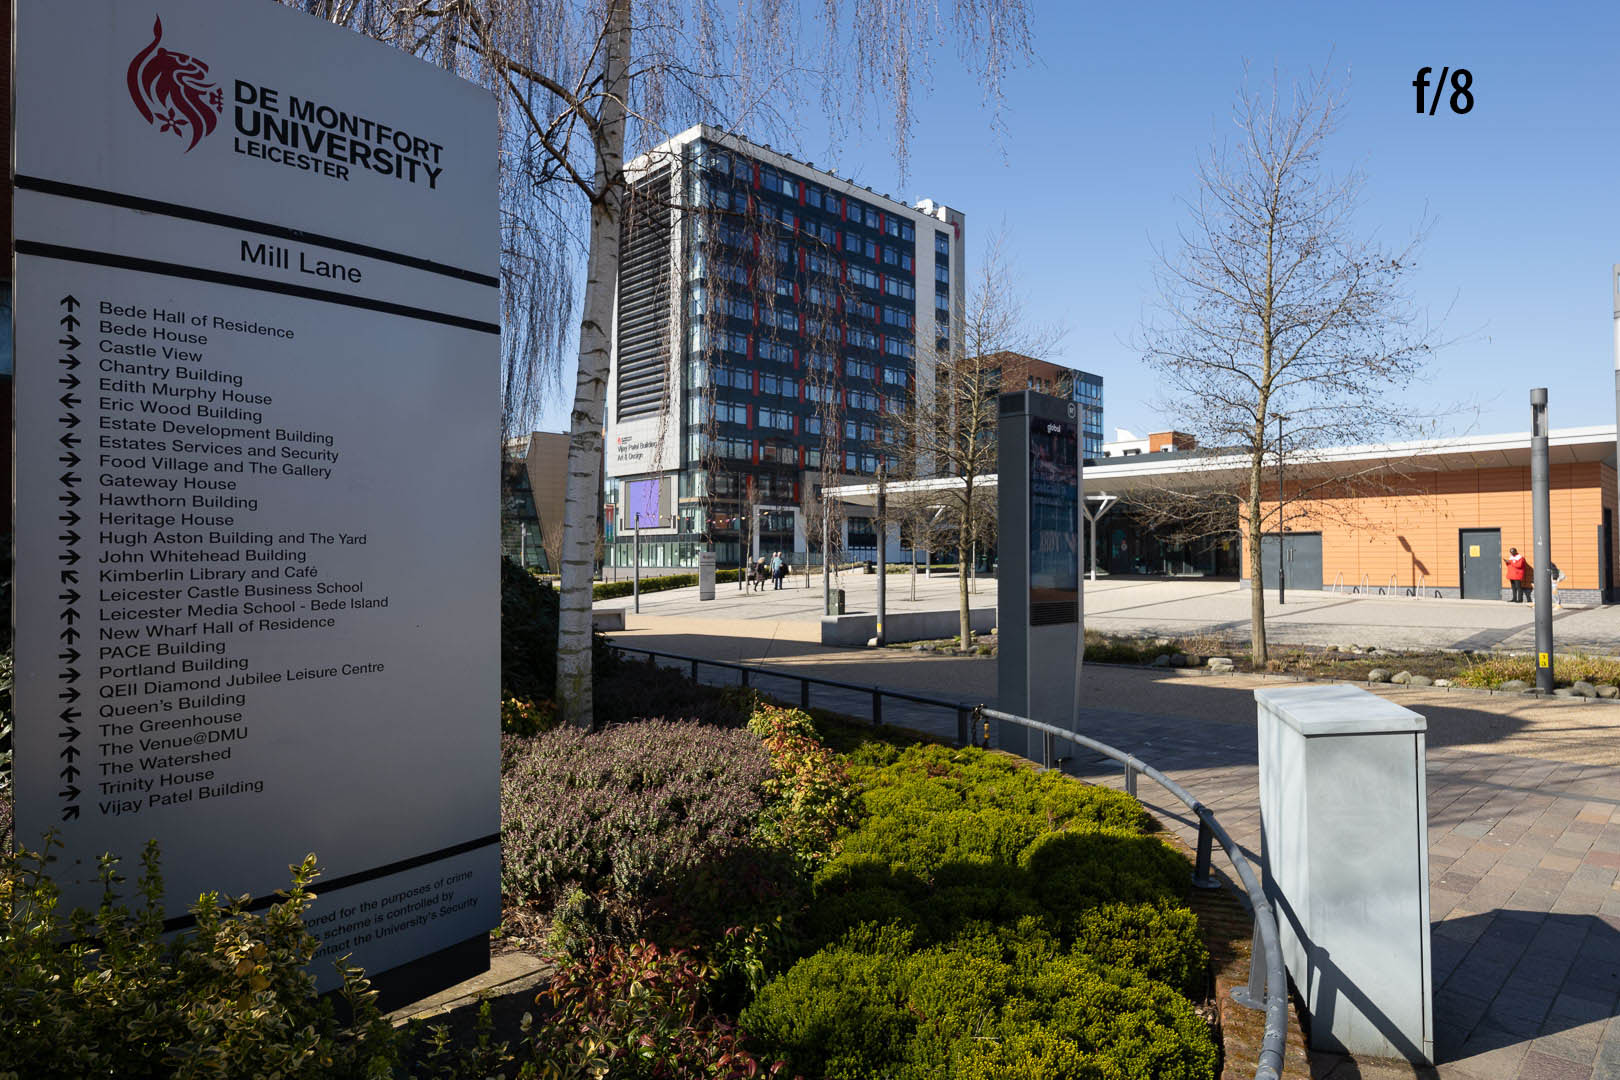
As expected, vignetting drops off as you stop down. I’m also looking for shift vignetting on the opposite side. This is caused by the lens mount, and as I suspected when looking in the back of the lens, it’s just not there. I’ve carried out similar tests in many of my tilt/shift lens reviews and it’s almost always there when wide open.
It can cause minor issues when stitching pairs of images taken at different shift. Normally it’s not a problem by f/8, and you generally tend to use such shifted lenses at small apertures if shifting much.
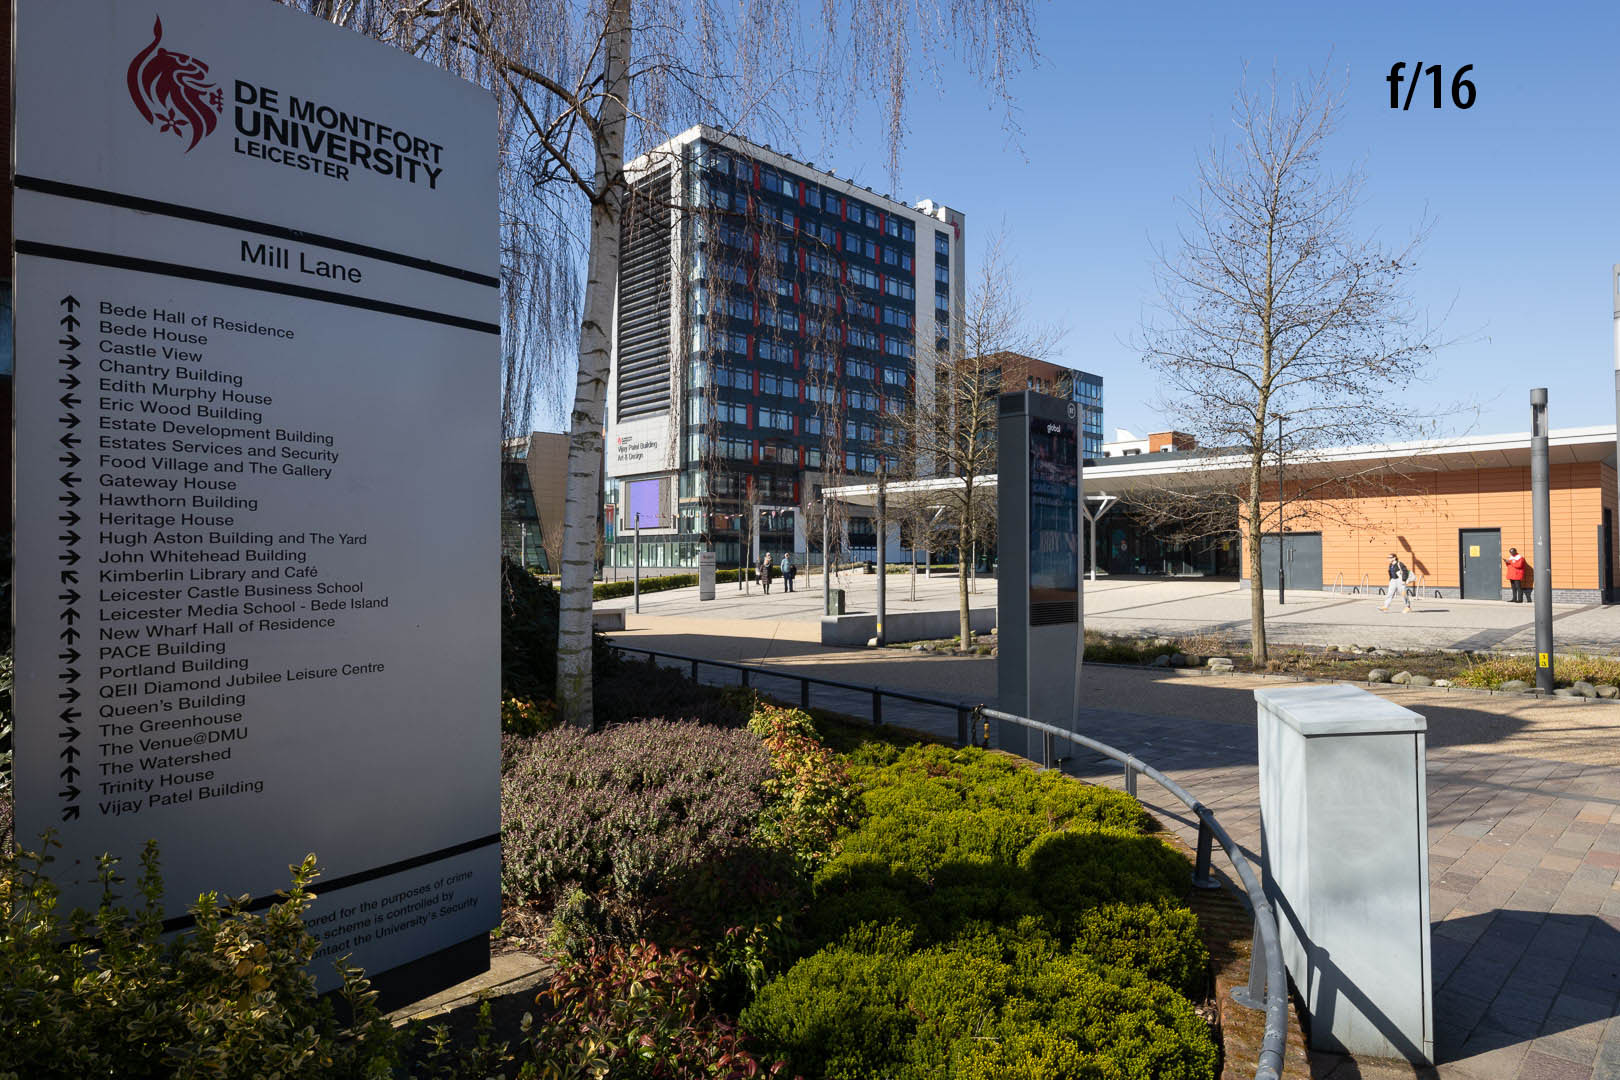
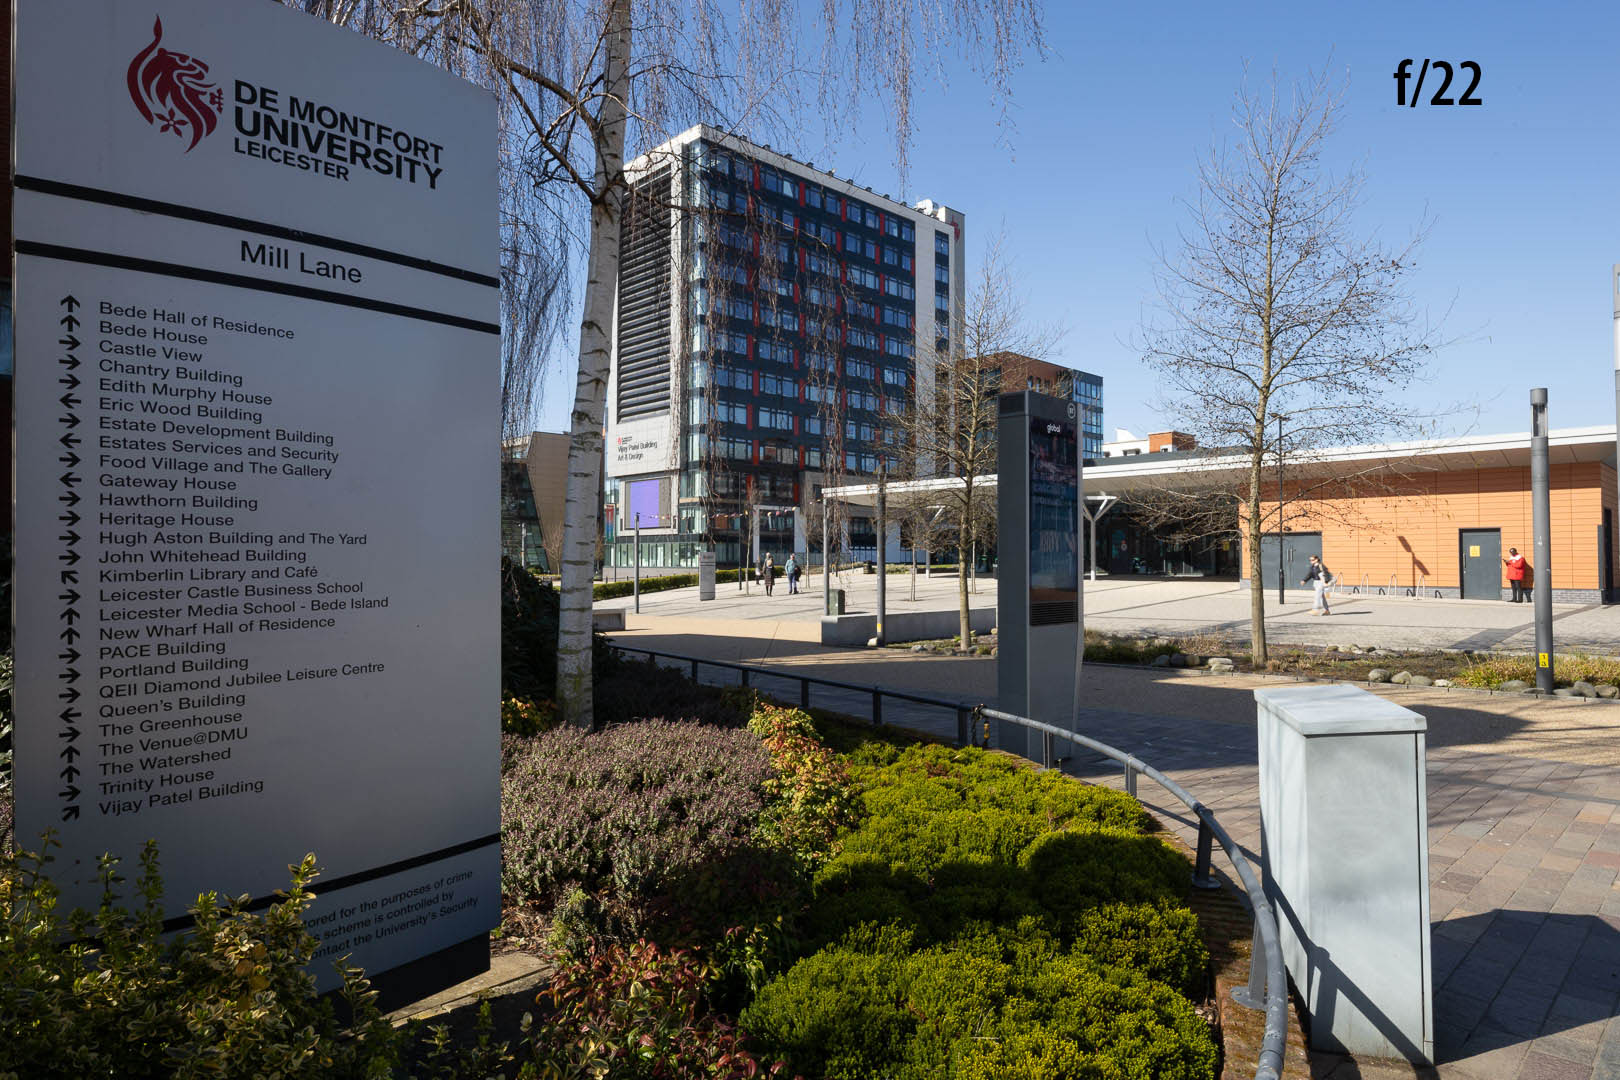
I found ~f/8 the best for the 20mm for unshifted shots and f/11 if you were using a lot of shift. For diagonal shift with detail in the shifted corner, f/11-16 might be better, but f/16 is showing a degree of softening.
Here’s a sequence of shots, with no shift, at different apertures to give a feel for how the vignetting looks in real world images. I’m focused on the sign, which also give a feel for the extensive depth of field at 20mm.

Lens detail – Zero-D?
I don’t have the equipment to do MTF charts (or patience/inclination if I’m honest). A series of shots of a building and some 100% crops give a good feel for the detail.
These are taken with my 26MP EOS RP.
They do have the very slight chromatic aberration (CA) fixed in RAW processing. See later for more CA details.
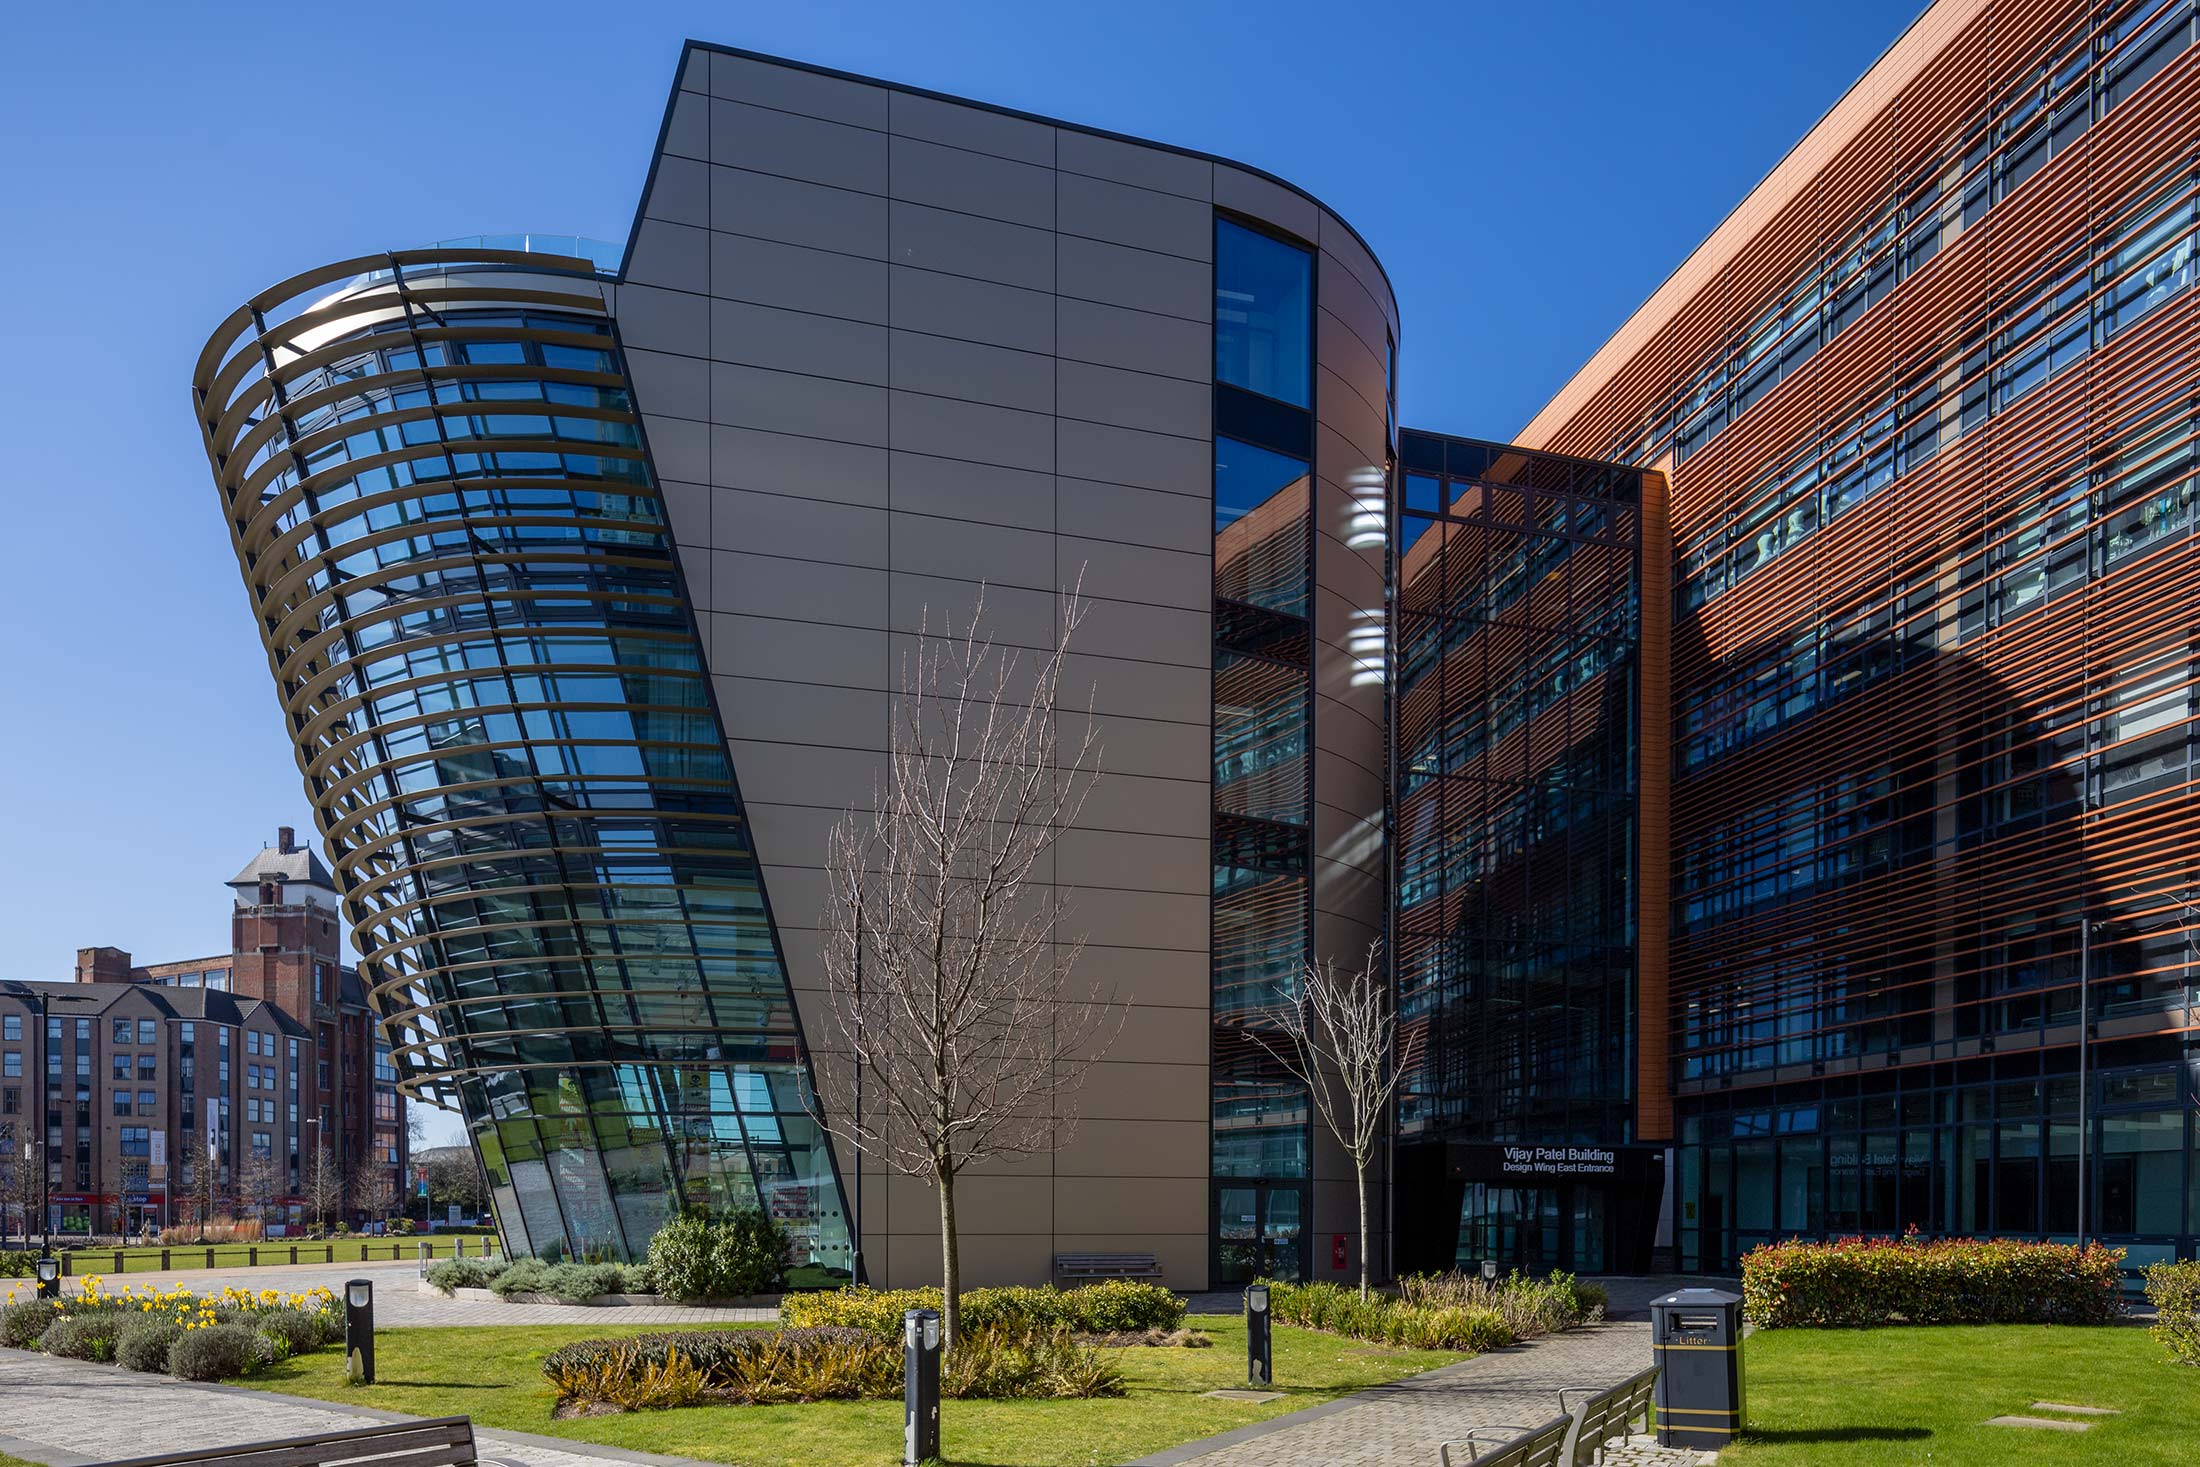
Here’s the building at f/11, with quite a lot of vertical shift.
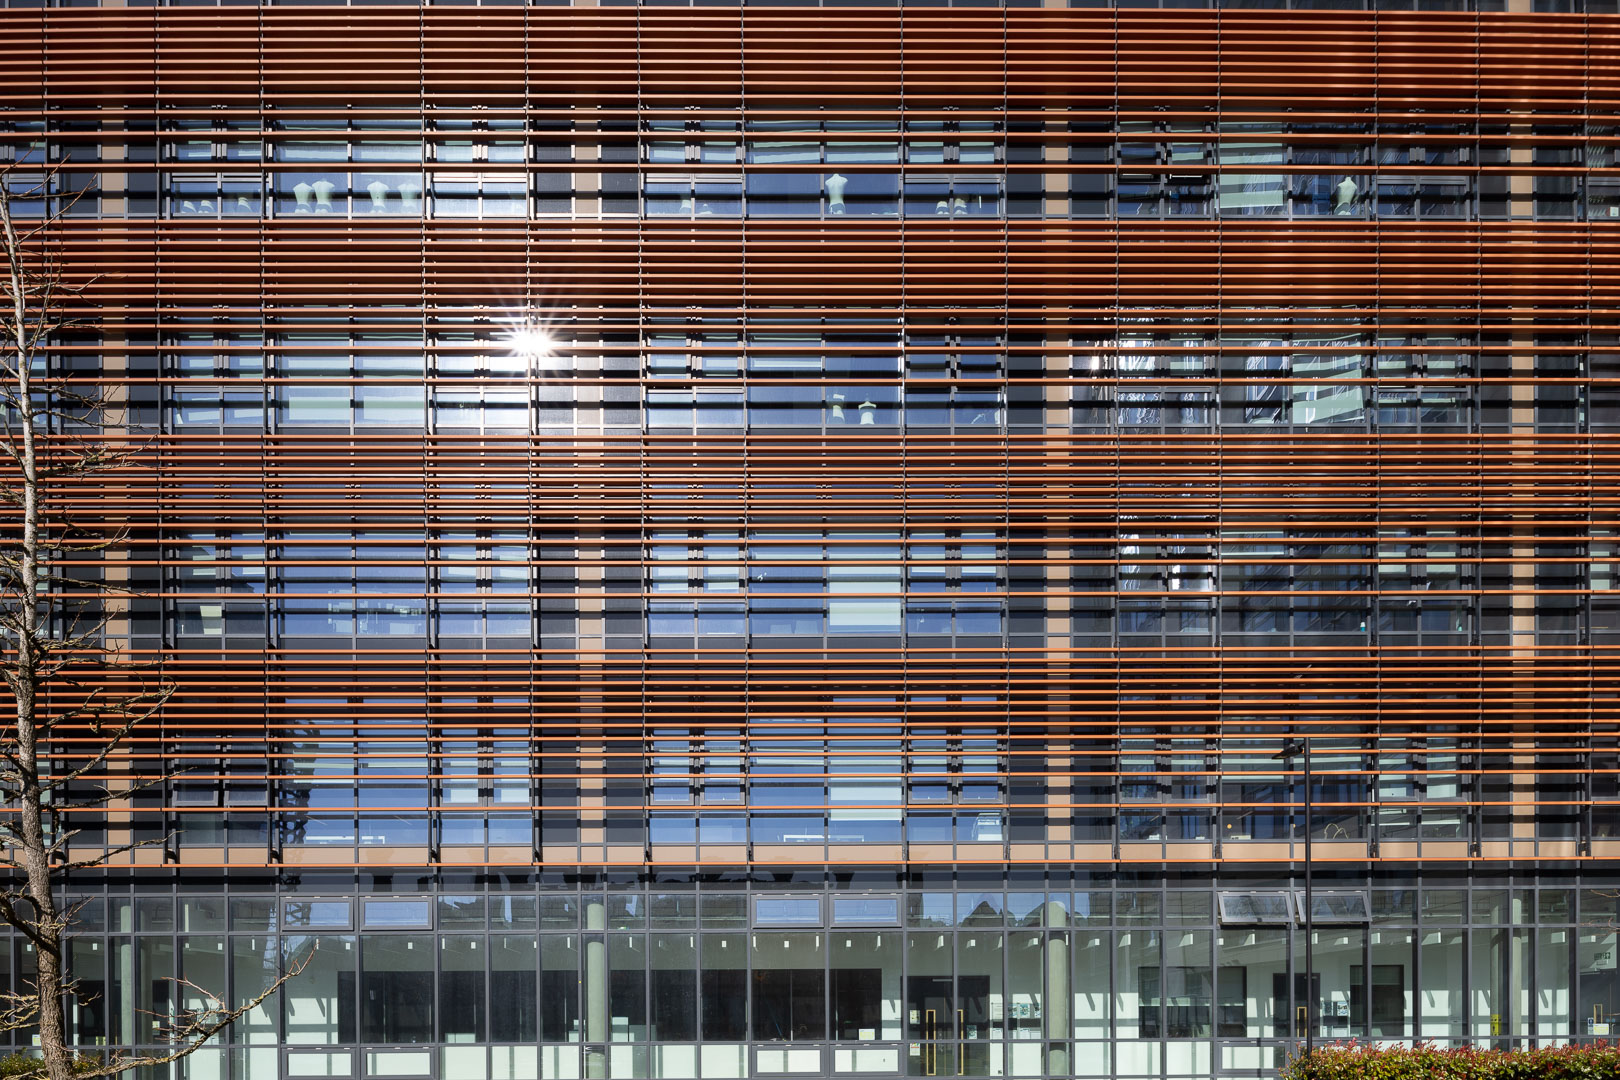
Apart from a slight camera misalignment, it’s clear that the lens has only very slight barrel distortion.
The slight misalignment? – probably taking too much notice of where the sun’s reflections was, and relying on the alignment being correct before shift. The strong shift will tend to amplify the visibility of any slight camera misalignment.
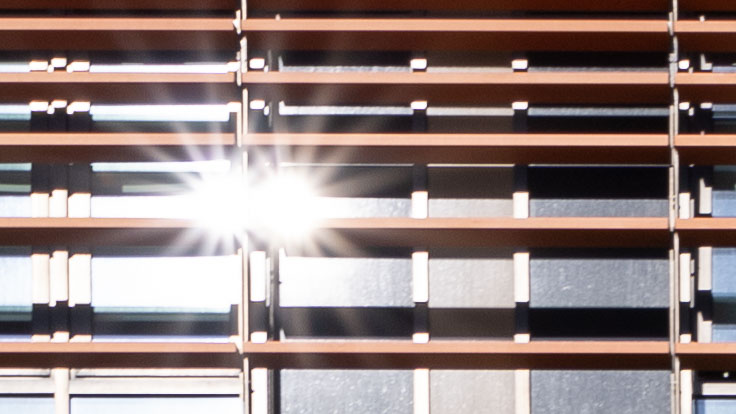
Here are 100% crops around where the sun is – look at dust on the widows for a feeling of sharpness.

f/4

f/5.6
f/8
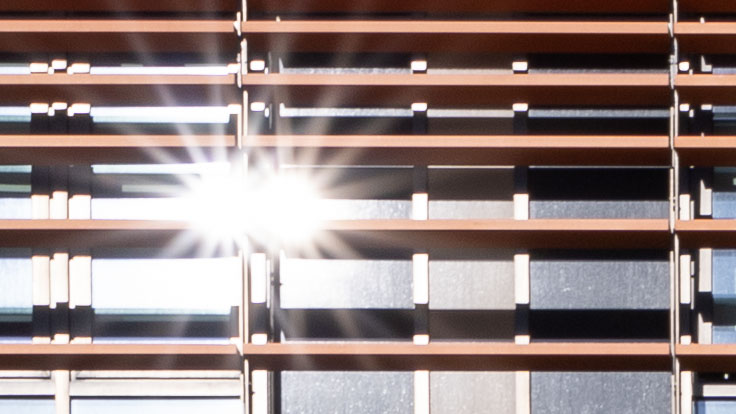
f/11

f/16
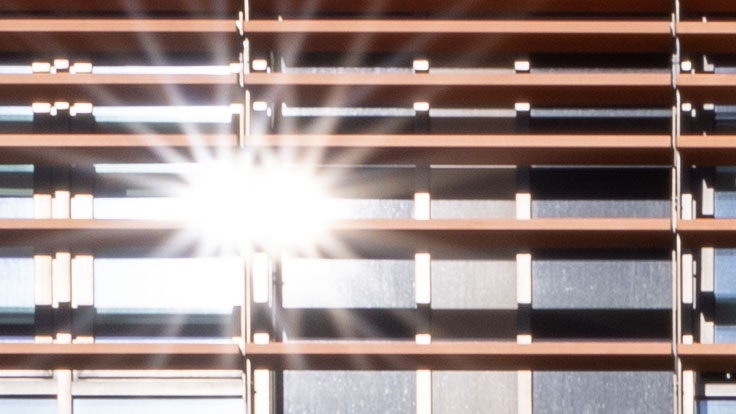
f/22
With vertical shift the detail drops off in both top corners. At strong diagonal shift, the detail falls off a bit more in the top shifted corner. This means that lens softness is not symmetrical in any shifted image.
My preferred sharpening solution for this is software that doesn’t assume the image is unshifted. At the time of writing, I’m getting best results with Topaz Sharpen AI (I have examples in my Sharpen AI review).
I only need do this where there is important detail right in that corner. If it were sky I’d not be concerned by loss of sharpness. For this lens shooting at f/11 -16 was enough to give good far corner detail.
Flare and CA
Putting the sun into the frame gives a not entirely unexpected amount of flare. The photo is shifted up, and has been processed to exaggerate any flare.

For a wide lens, this performance is good. Keeping the sun off the front element is much easier with the slightly recessed front element. The novel lens hood design helps too. As with any camera – it’s best not to point it at the sun for any length of time, given the effects you see with a magnifying glass and sheet of paper…
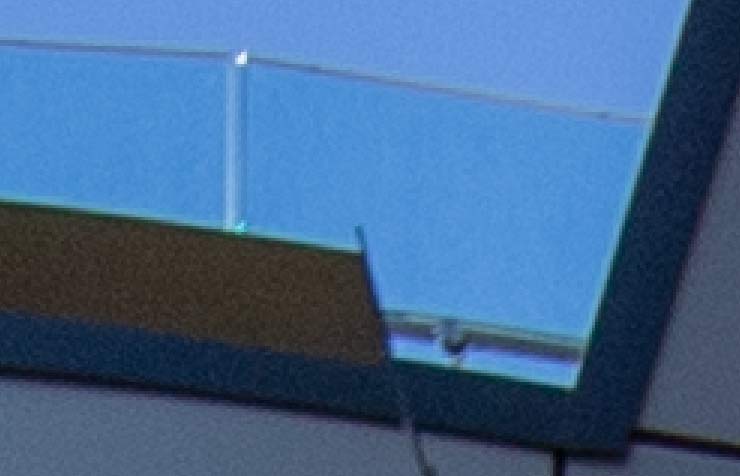
The visible CA is very slight. Two 300% crops show before and after fixing automatically in Adobe Camera Raw

Some out of focus shots
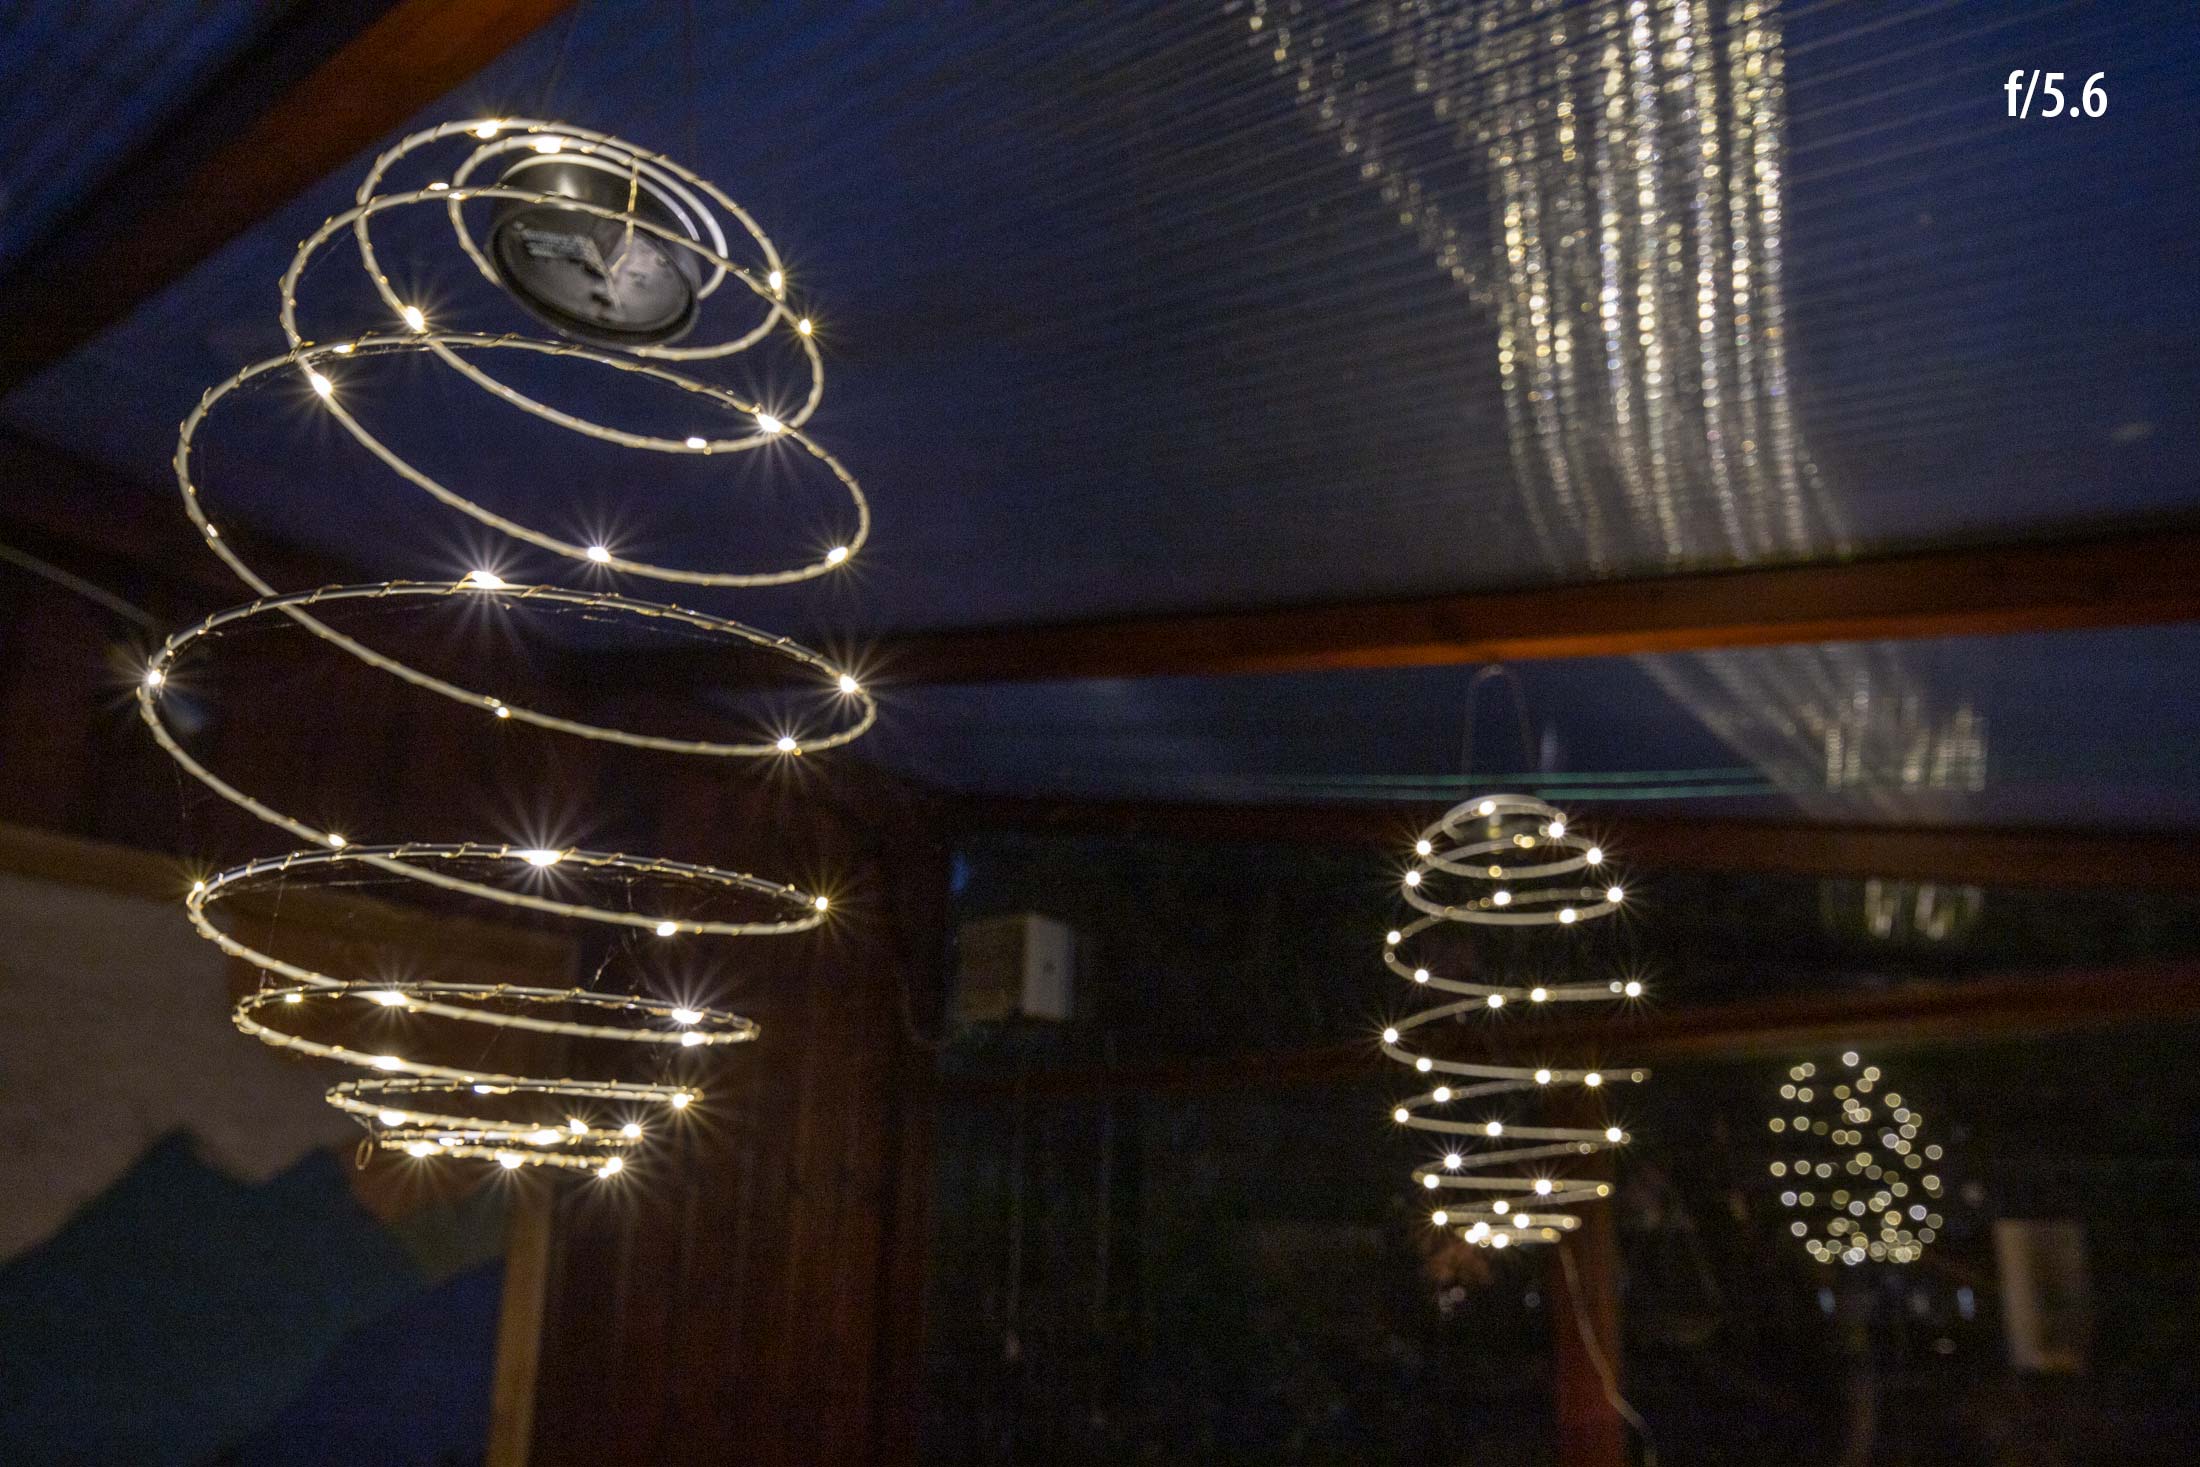
These two shots are of solar powered lights, hanging in our conservatory at night. The lens is shifted upwards a bit and focused on the nearest lamp some ~30cm away. The second lights and reflections show out of focus highlights at f/4 and f/5.6
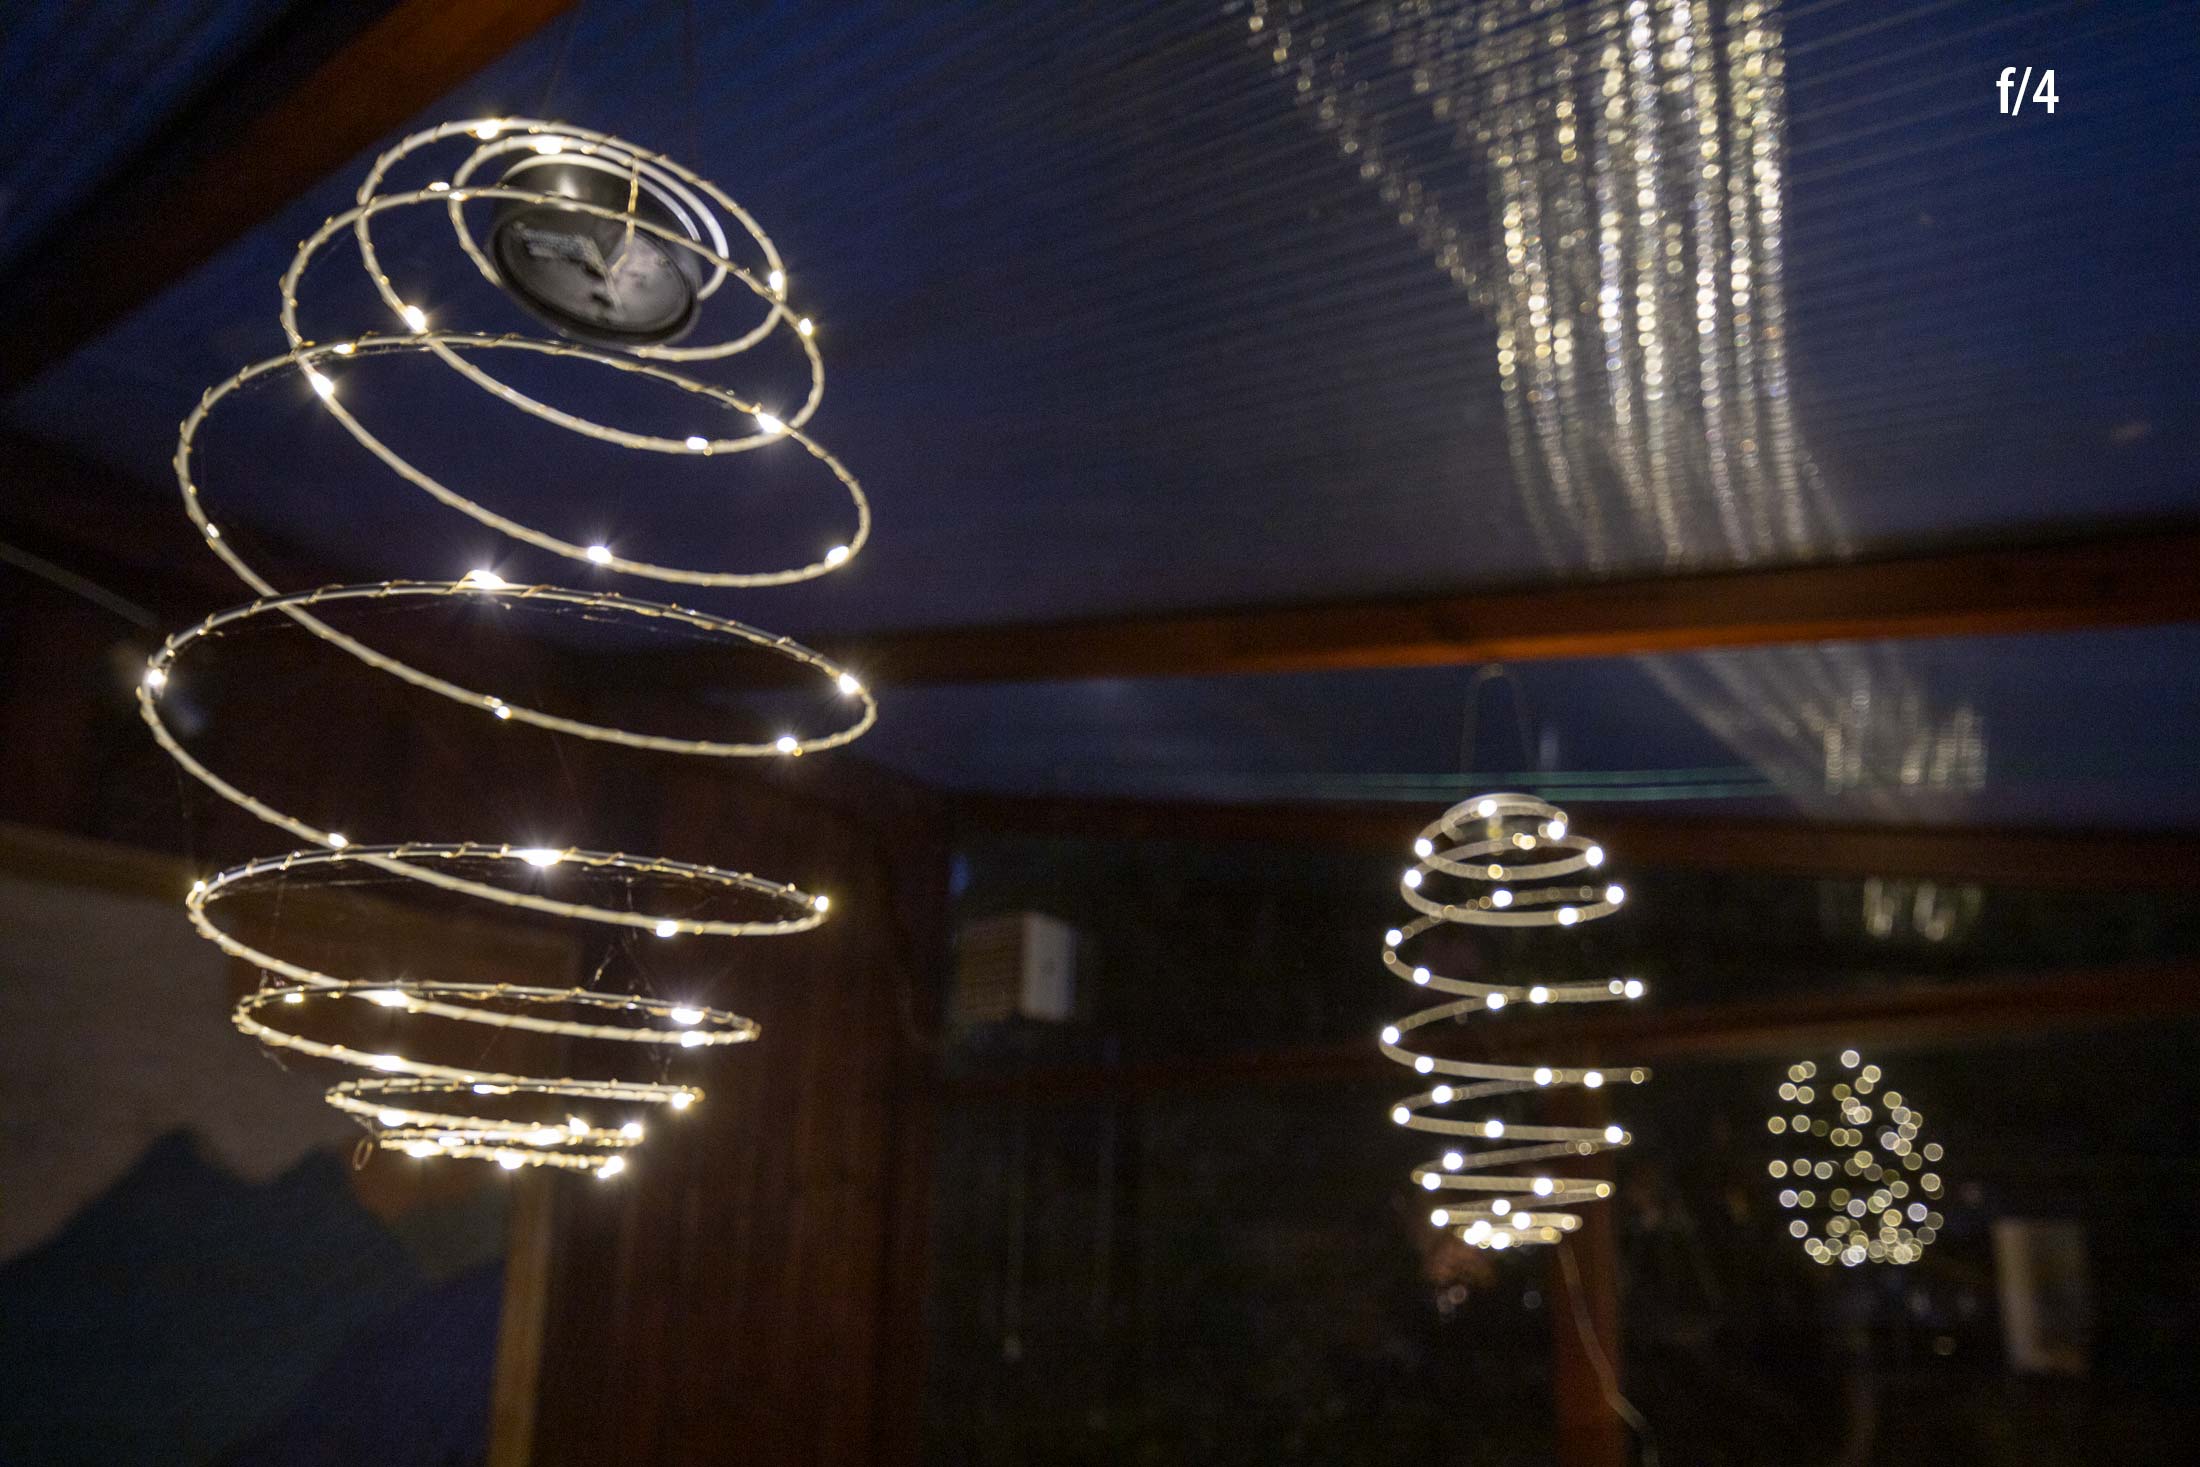
A wide angle f/4 lens is hardly one you’re going to use to fill the frame with huge soft areas out of focus, but what OOF areas I’ve seen look quite smooth. The 14 blade aperture helps – distinctly different to the more intrusive look of the 15mm f/4.5.
Two more shots at f/4 and f/8 – lens set at closest focus distance
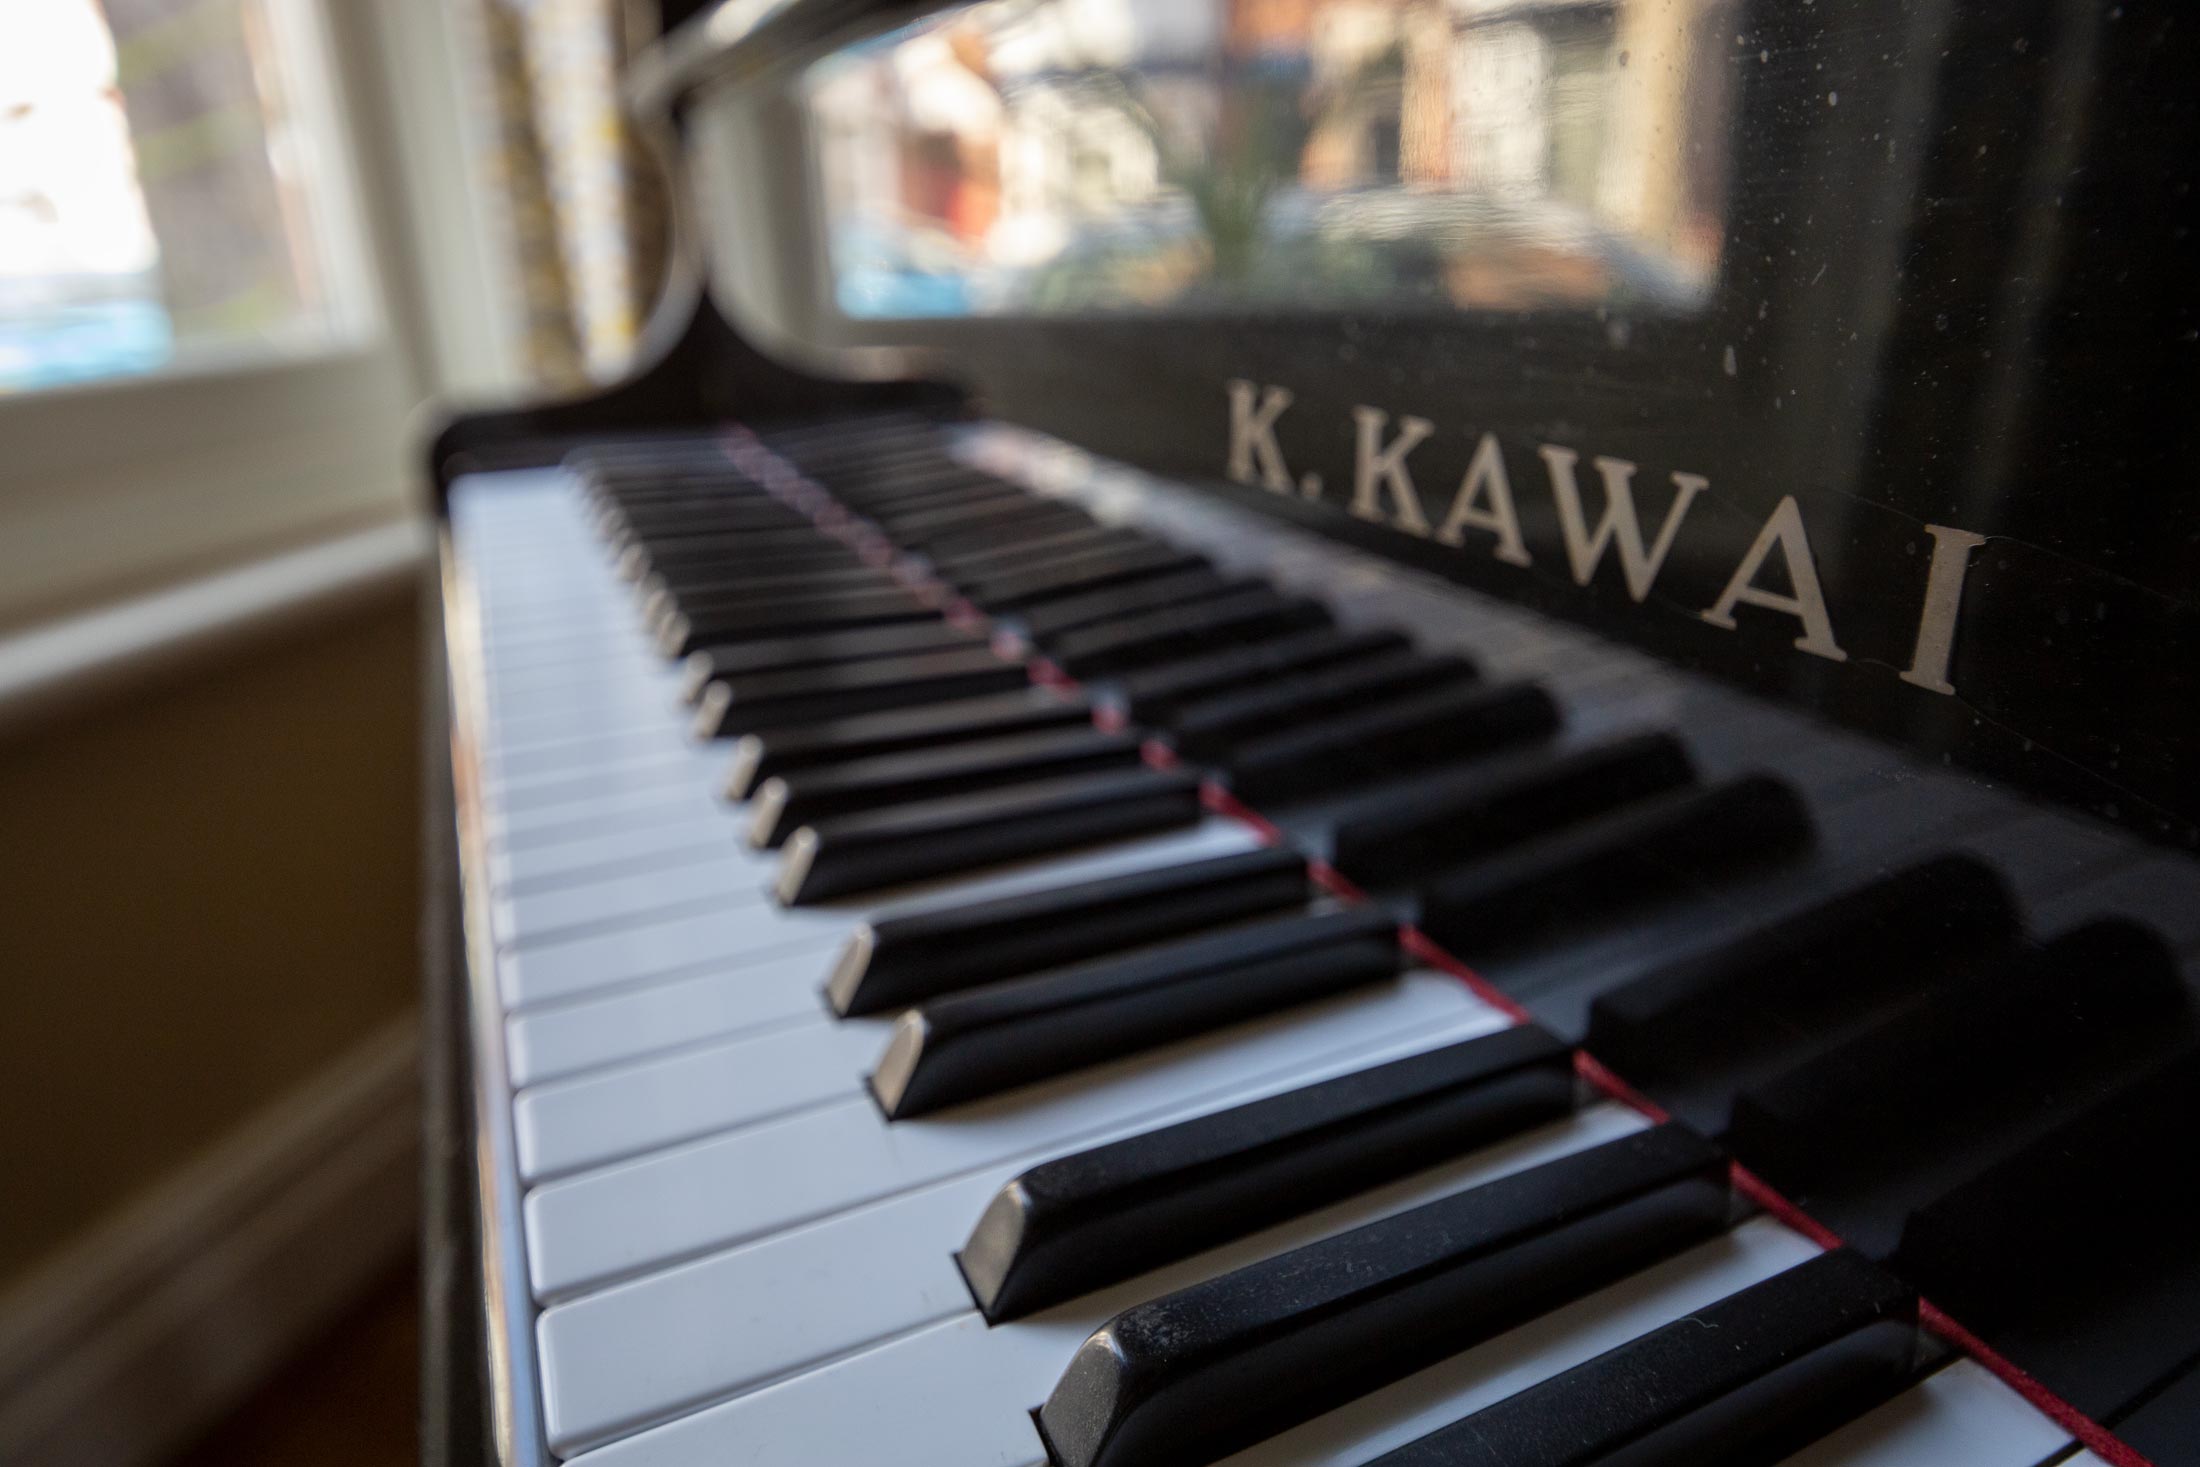
Keith’s piano f/4
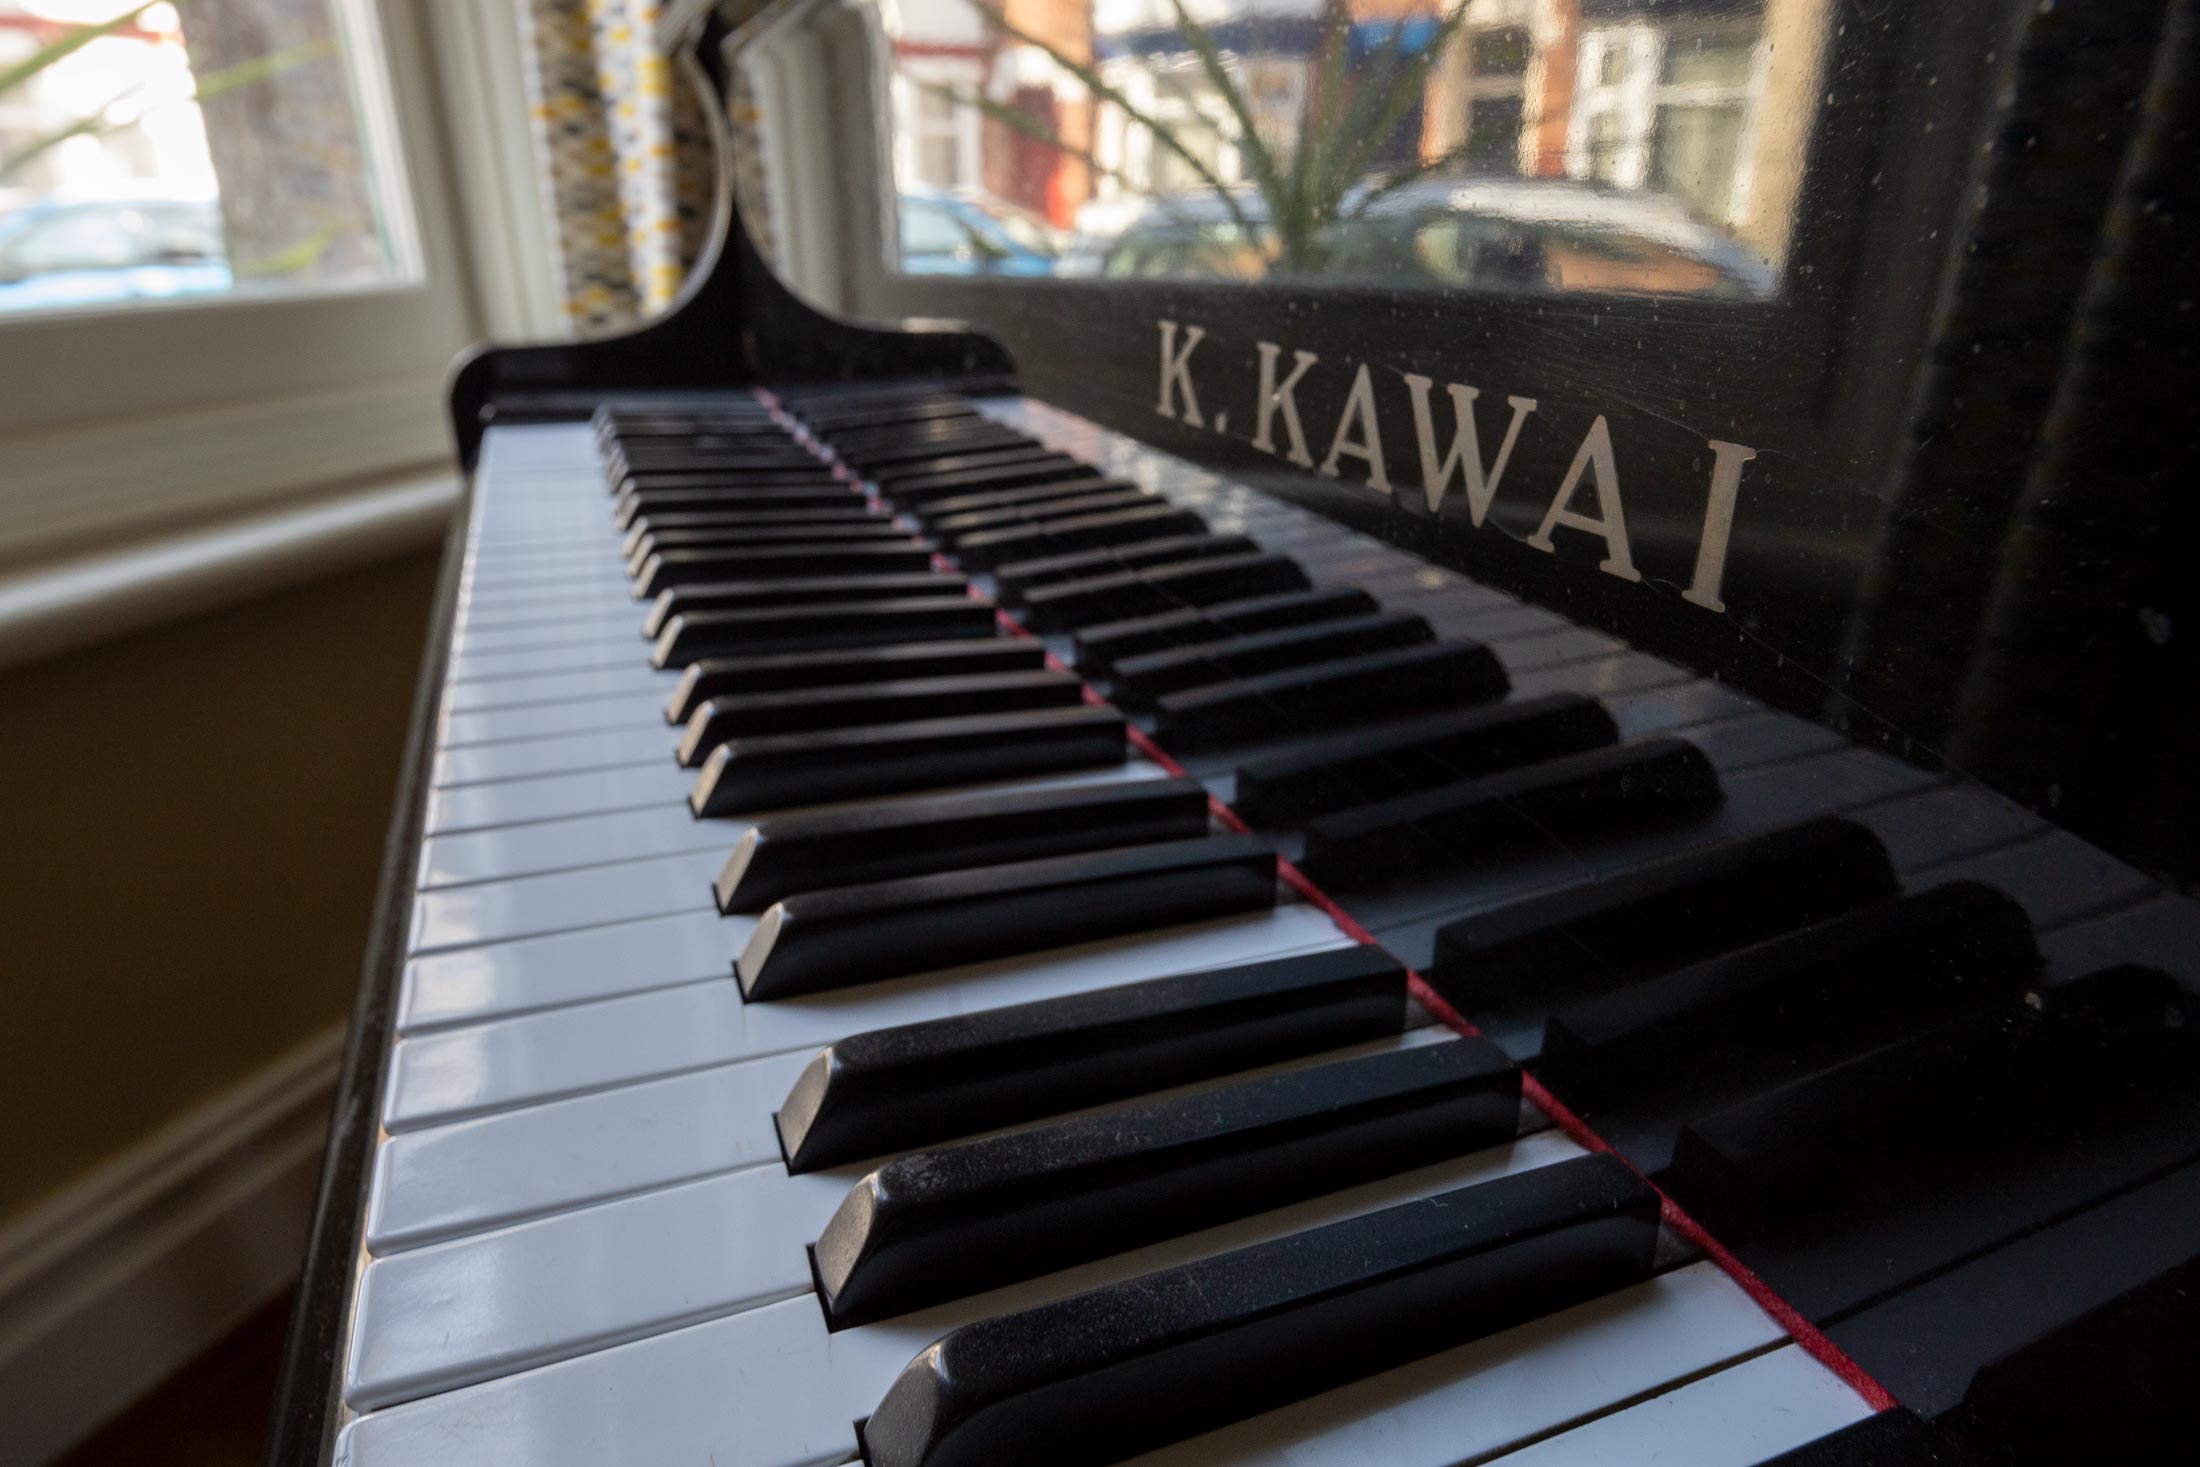
Keith’s piano f/8
Magnification – Macro?
Laowa have a 15mm shift macro, which I reviewed a while ago. This is not a macro lens…
Here’s a quick shot of a ruler at as close as I could focus (25cm on the lens)
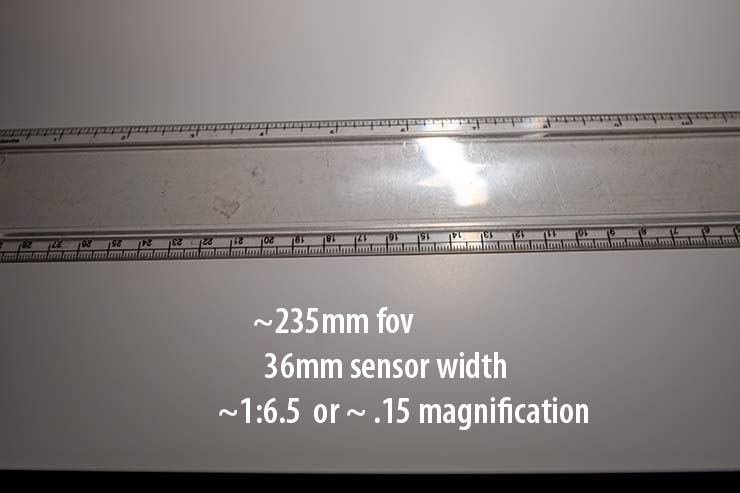
Very rough and ready, but more than enough to get an idea of the magnification.
Using the lens
With no electronics, you’re going to be using a lens like this fully manually. If you’re inexperienced with manual operation, look on it as a way of thinking more about what you’re doing, and an opportunity to better appreciate how light varies around you.
That said, you probably do need to use your camera for metering. For the 20mm, I was only testing on my mirrorless EOS RP, however I know from testing the 15mm f/4.5 shift that with my EOS 5Ds [DSLR] there can be minor issues in using live-view with lenses with no electronics. This varies by camera, so see the Laowa 15mm f/4.5 shift review for more info.
Mirrorless
The EOS RP metering for the lens worked just fine, with or without exposure simulation turned on. Setting the camera mode to aperture priority gave reliable results.
The vignetting examples shown earlier (with the deep blue sky) were shot in Av mode at 100 ISO. Shift did not cause any metering issues.
Mirrorless Focus
Enabling focus peaking made focusing a simple process, with direct viewing of the screen a distinct help for accurate focus. Using focus peaking and the inbuilt level made it very easy to use the camera and 20mm hand held, even with strong shift.
Photography with a 20mm shift lens
Without any shift, the 20mm f/4 is simply a very good quality 20mm full frame lens. Fully manual and with low distortion and aberrations.
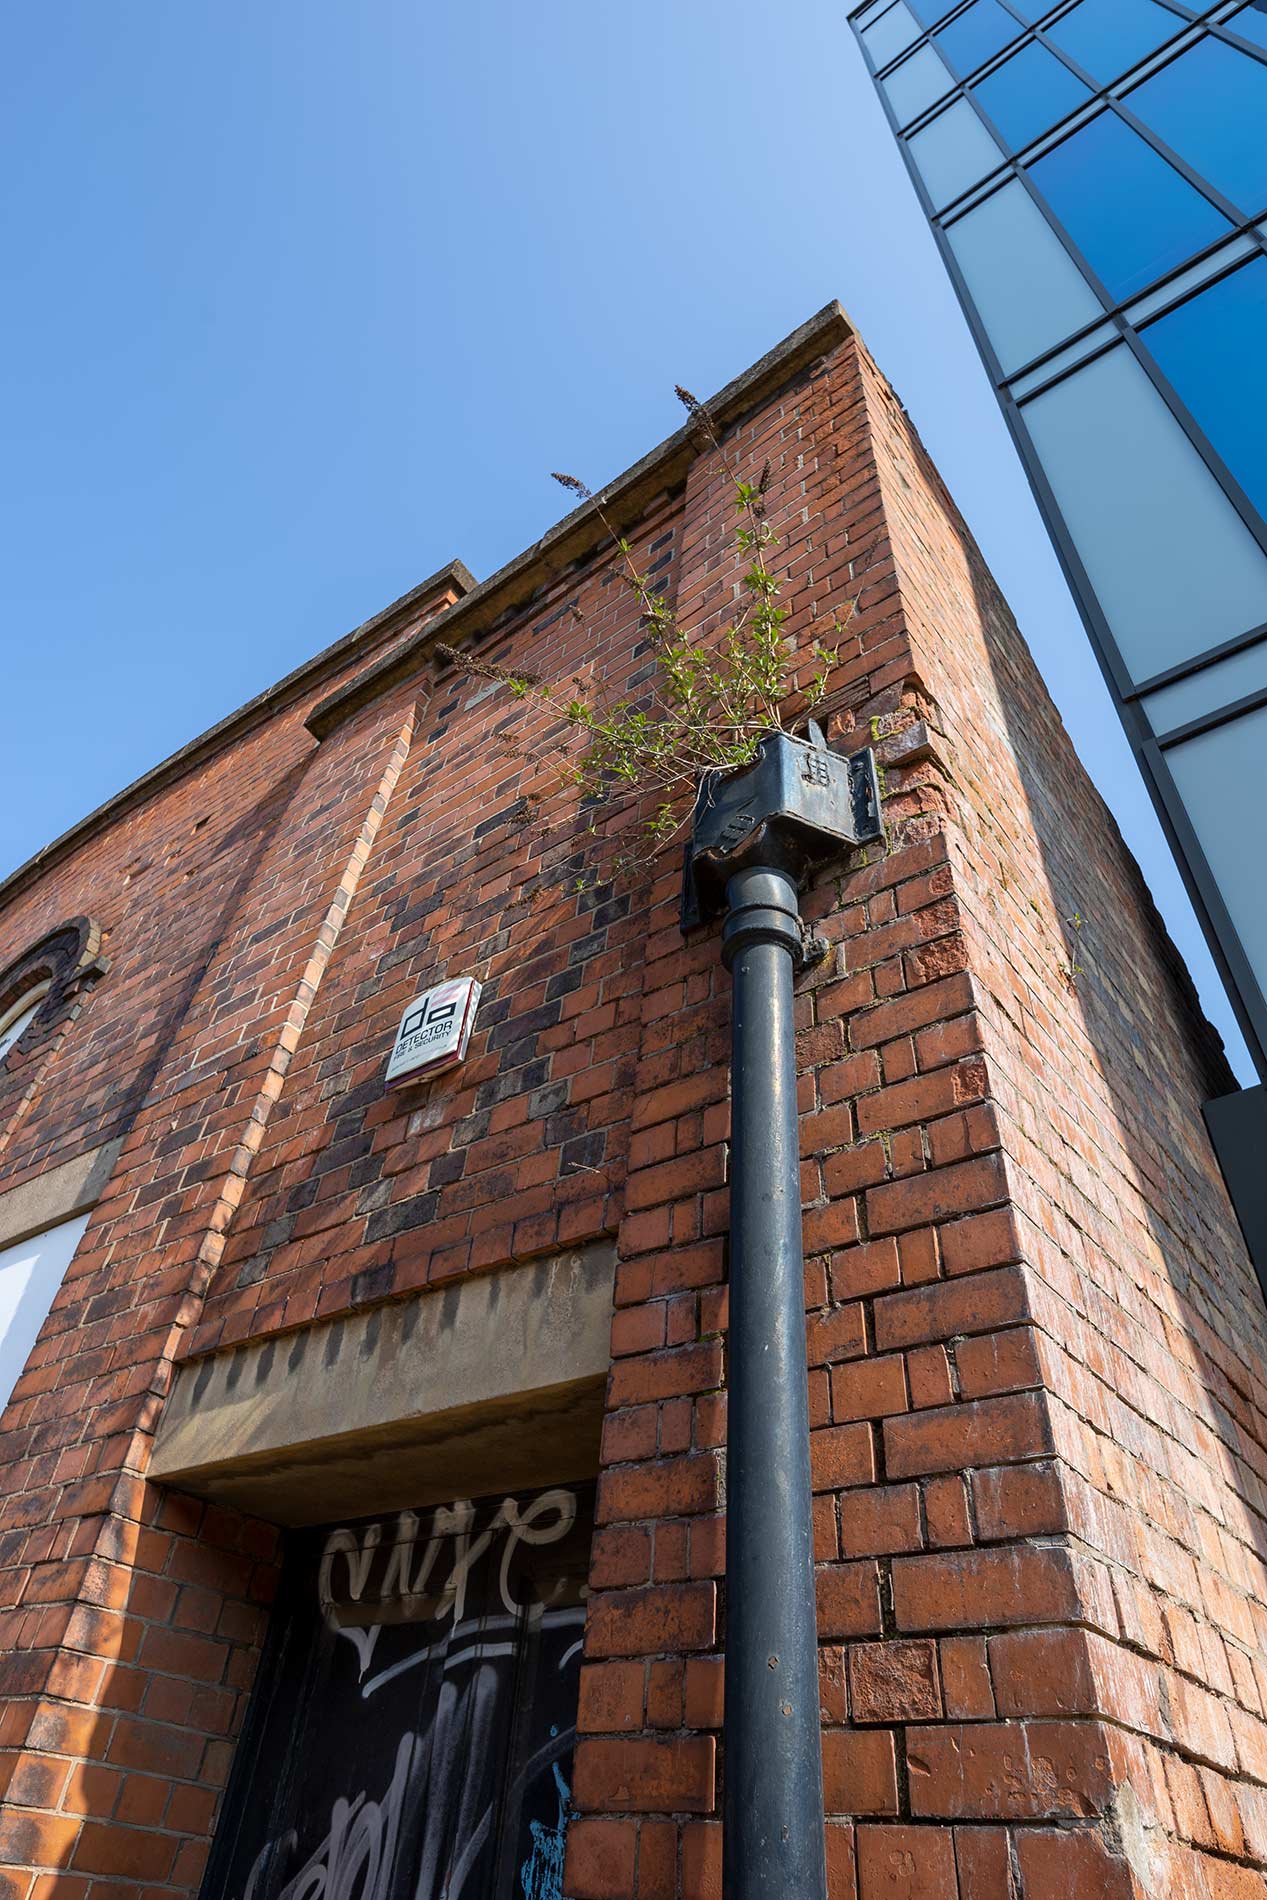
Of course, the feature that you’d buy it for is the shift…
Basic vertical shift
The normal use of such wide shift lenses is to be able to get a wide view of a scene, without having to tilt the camera upwards. Tilting the camera upwards causes convergence of verticals, not usually a desired state with buildings or trees in a landscape.
See How to use shift, for a lot more about this.
 Now, this is not a hard and fast rule – strongly converging verticals can be a creative choice and give a dynamic feel to a shot.
This view of the viaduct (EF14mm F2.8L II) at John O’ Gaunt in Leicestershire is far more interesting than one using shift to keep the columns vertical.
I wrote an article discussing aspects of this several years ago: ‘Vertical lines and movement‘
The examples in this review are to show the capabilities of the 20mm shift lens, not to suggest that I would have necessarily used it for a particular client or subject.
I have shift lenses of my own at 17/24/35/55/90 mm and the choice of what to use and how much much shift is one of those things that ‘just depends’. Oh, and there are no prizes for using the entire frame, so with plenty of MP to spare, both cropping and stitching multiple shots are options.
The range of shift is clear in these three shots: at zero, some and full vertical shift – it’s ‘some’ due to the lack of EXIF shift data in any current shift lens.

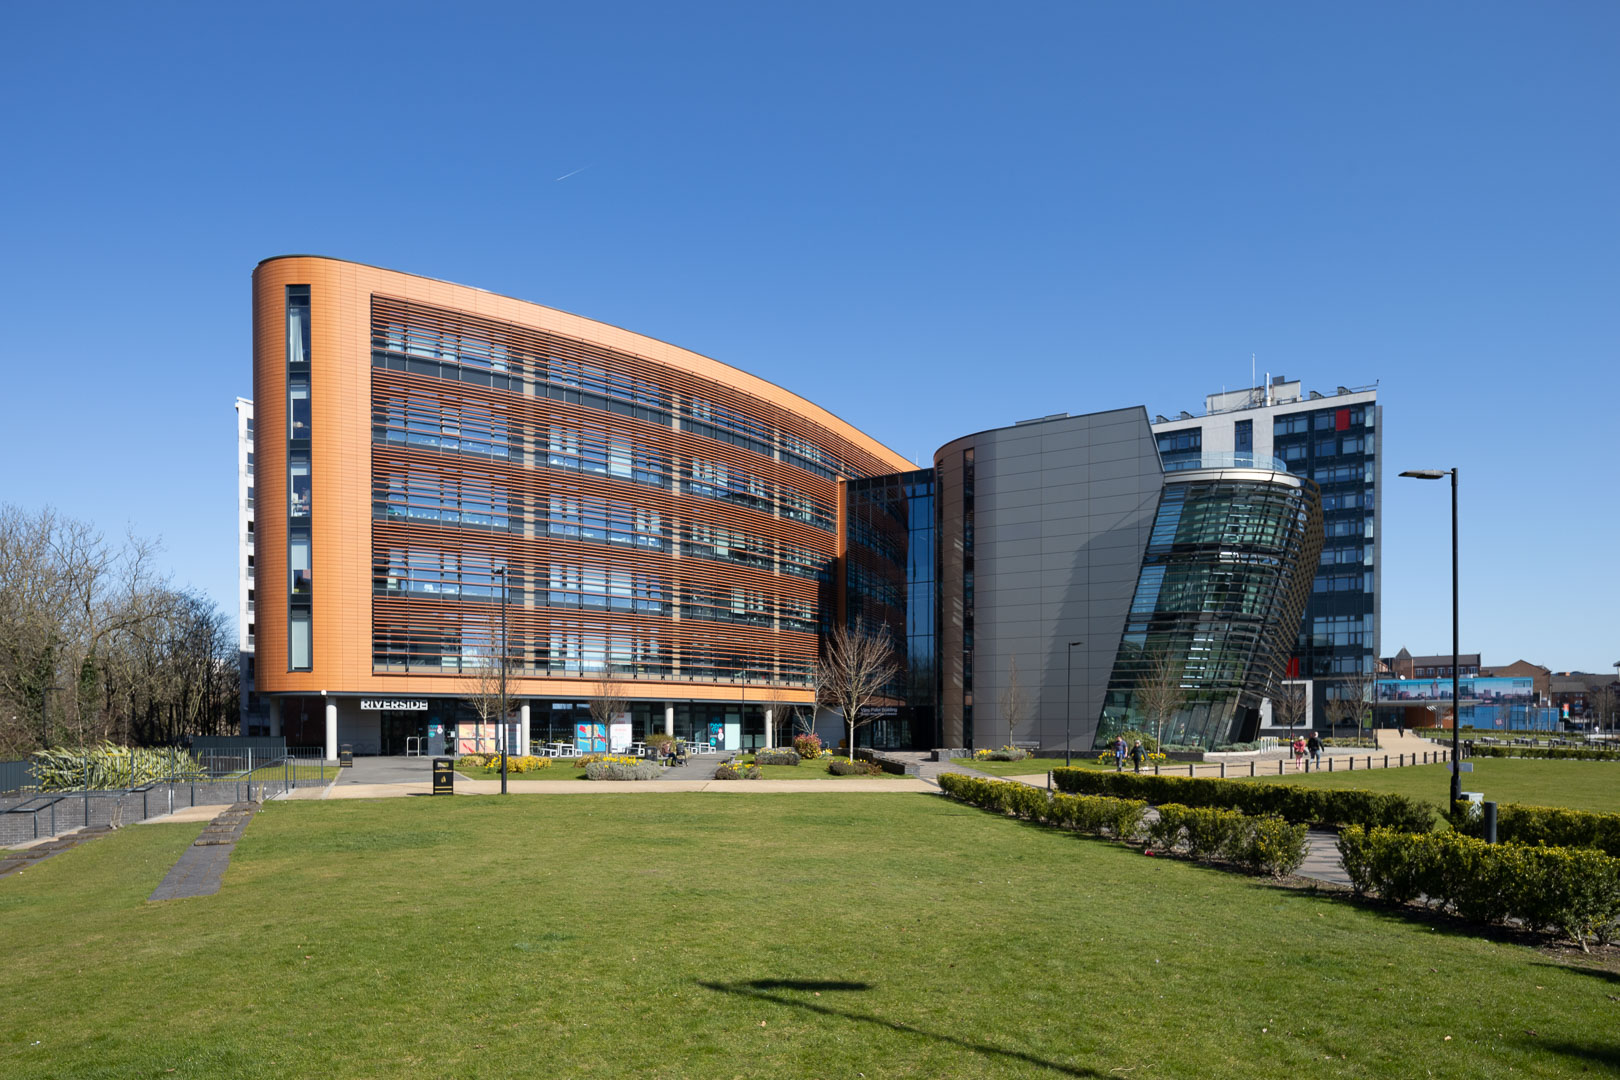

Rotating the camera
Rotate the camera and shift axis by 90º
Near full shift gets this view

If you have horizontal lines that you want to keep level, as well as verticals, then you need to look square on to the distant building, as here.

This limits where you can point the camera, but as I’ll show later, shifting diagonally can be of use here.
A spot of downward shift shows how wide the 20mm is. The downward shift lets me include the floor marking and less of the ceiling.

Shifting and stitching
Shifting, taking a photo, then shifting a different amount and taking another shot, gives a series of photos which, if the camera was stationary will be easy to flat stitch.
This example, shows one frame, and a second added.
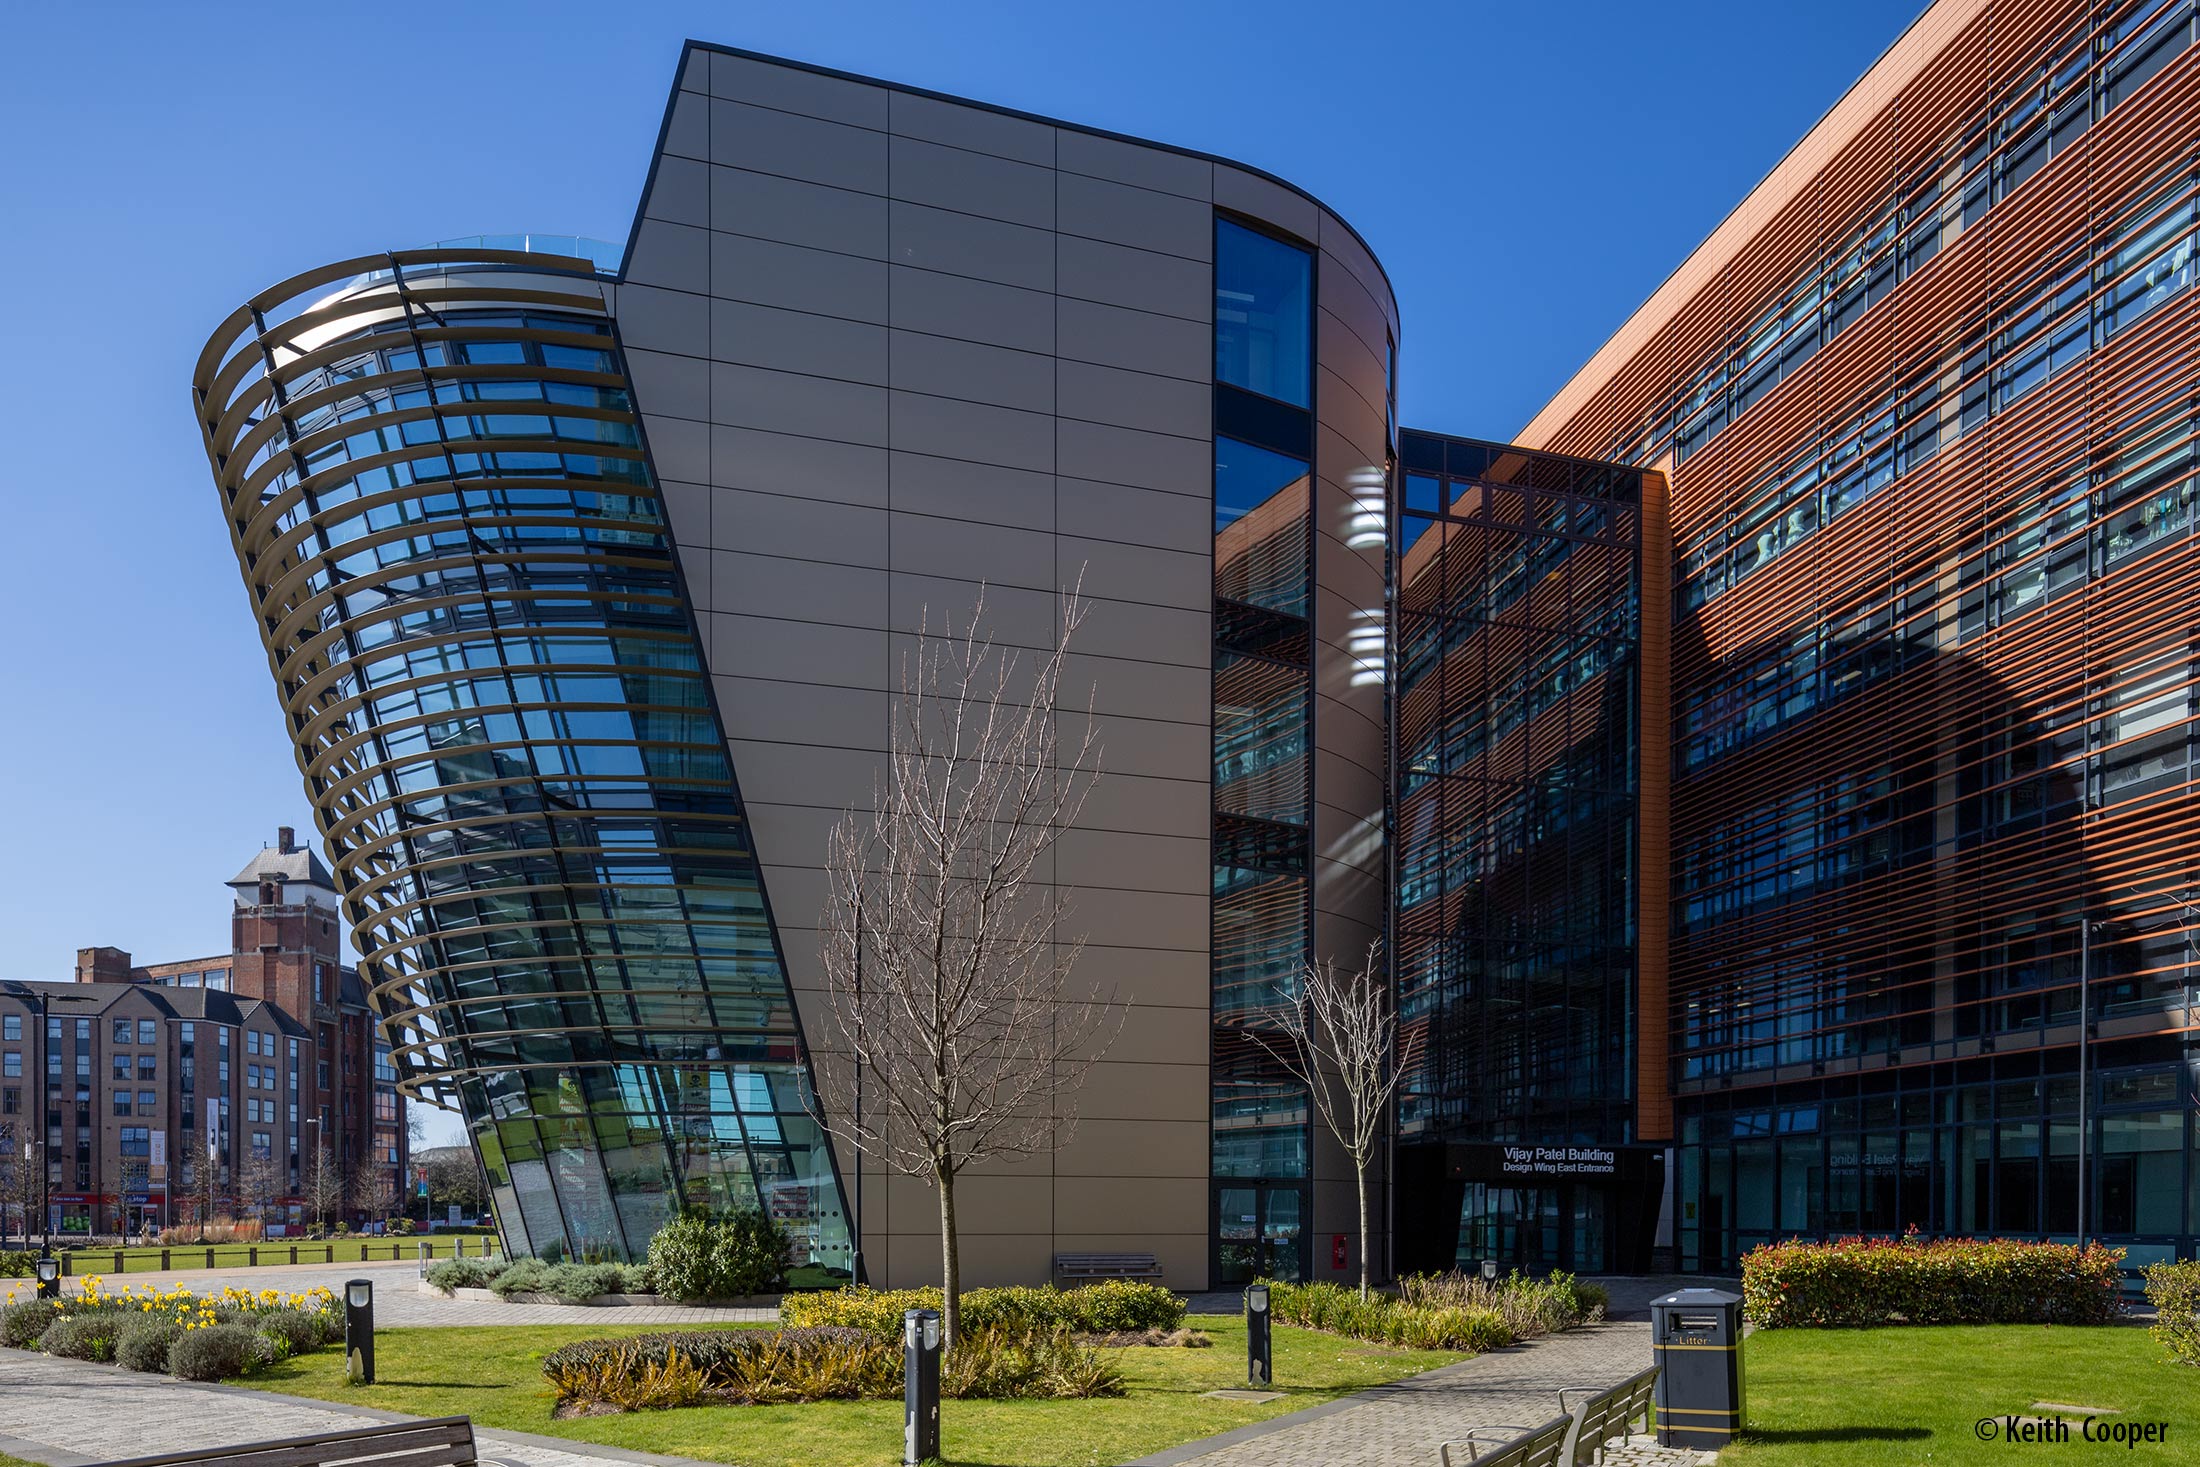
The first frame is shifted up, the second downwards.

It’s possible to stitch left/right shifted shots as well – or any number of shots taken at the same point.
Parallax?
You might note that with the lens shifting at the front of the camera, the precise viewpoint of the shot is shifted as well.
If your subject has near/far elements which cross each other, then this shift may well cause stitching errors through parallax.
One thing I would note is that up/down stitching such as in the example above, tends to produce less noticeable stitching issues.
These can be countered by shifting the camera the opposite direction to the lens movement (with an L bracket for example) but it can be a cumbersome process to get right, especially with multiple shifts at an angle.
I have a specialist bracket for my TS-E17 and 24mm which attaches the lens to the tripod.
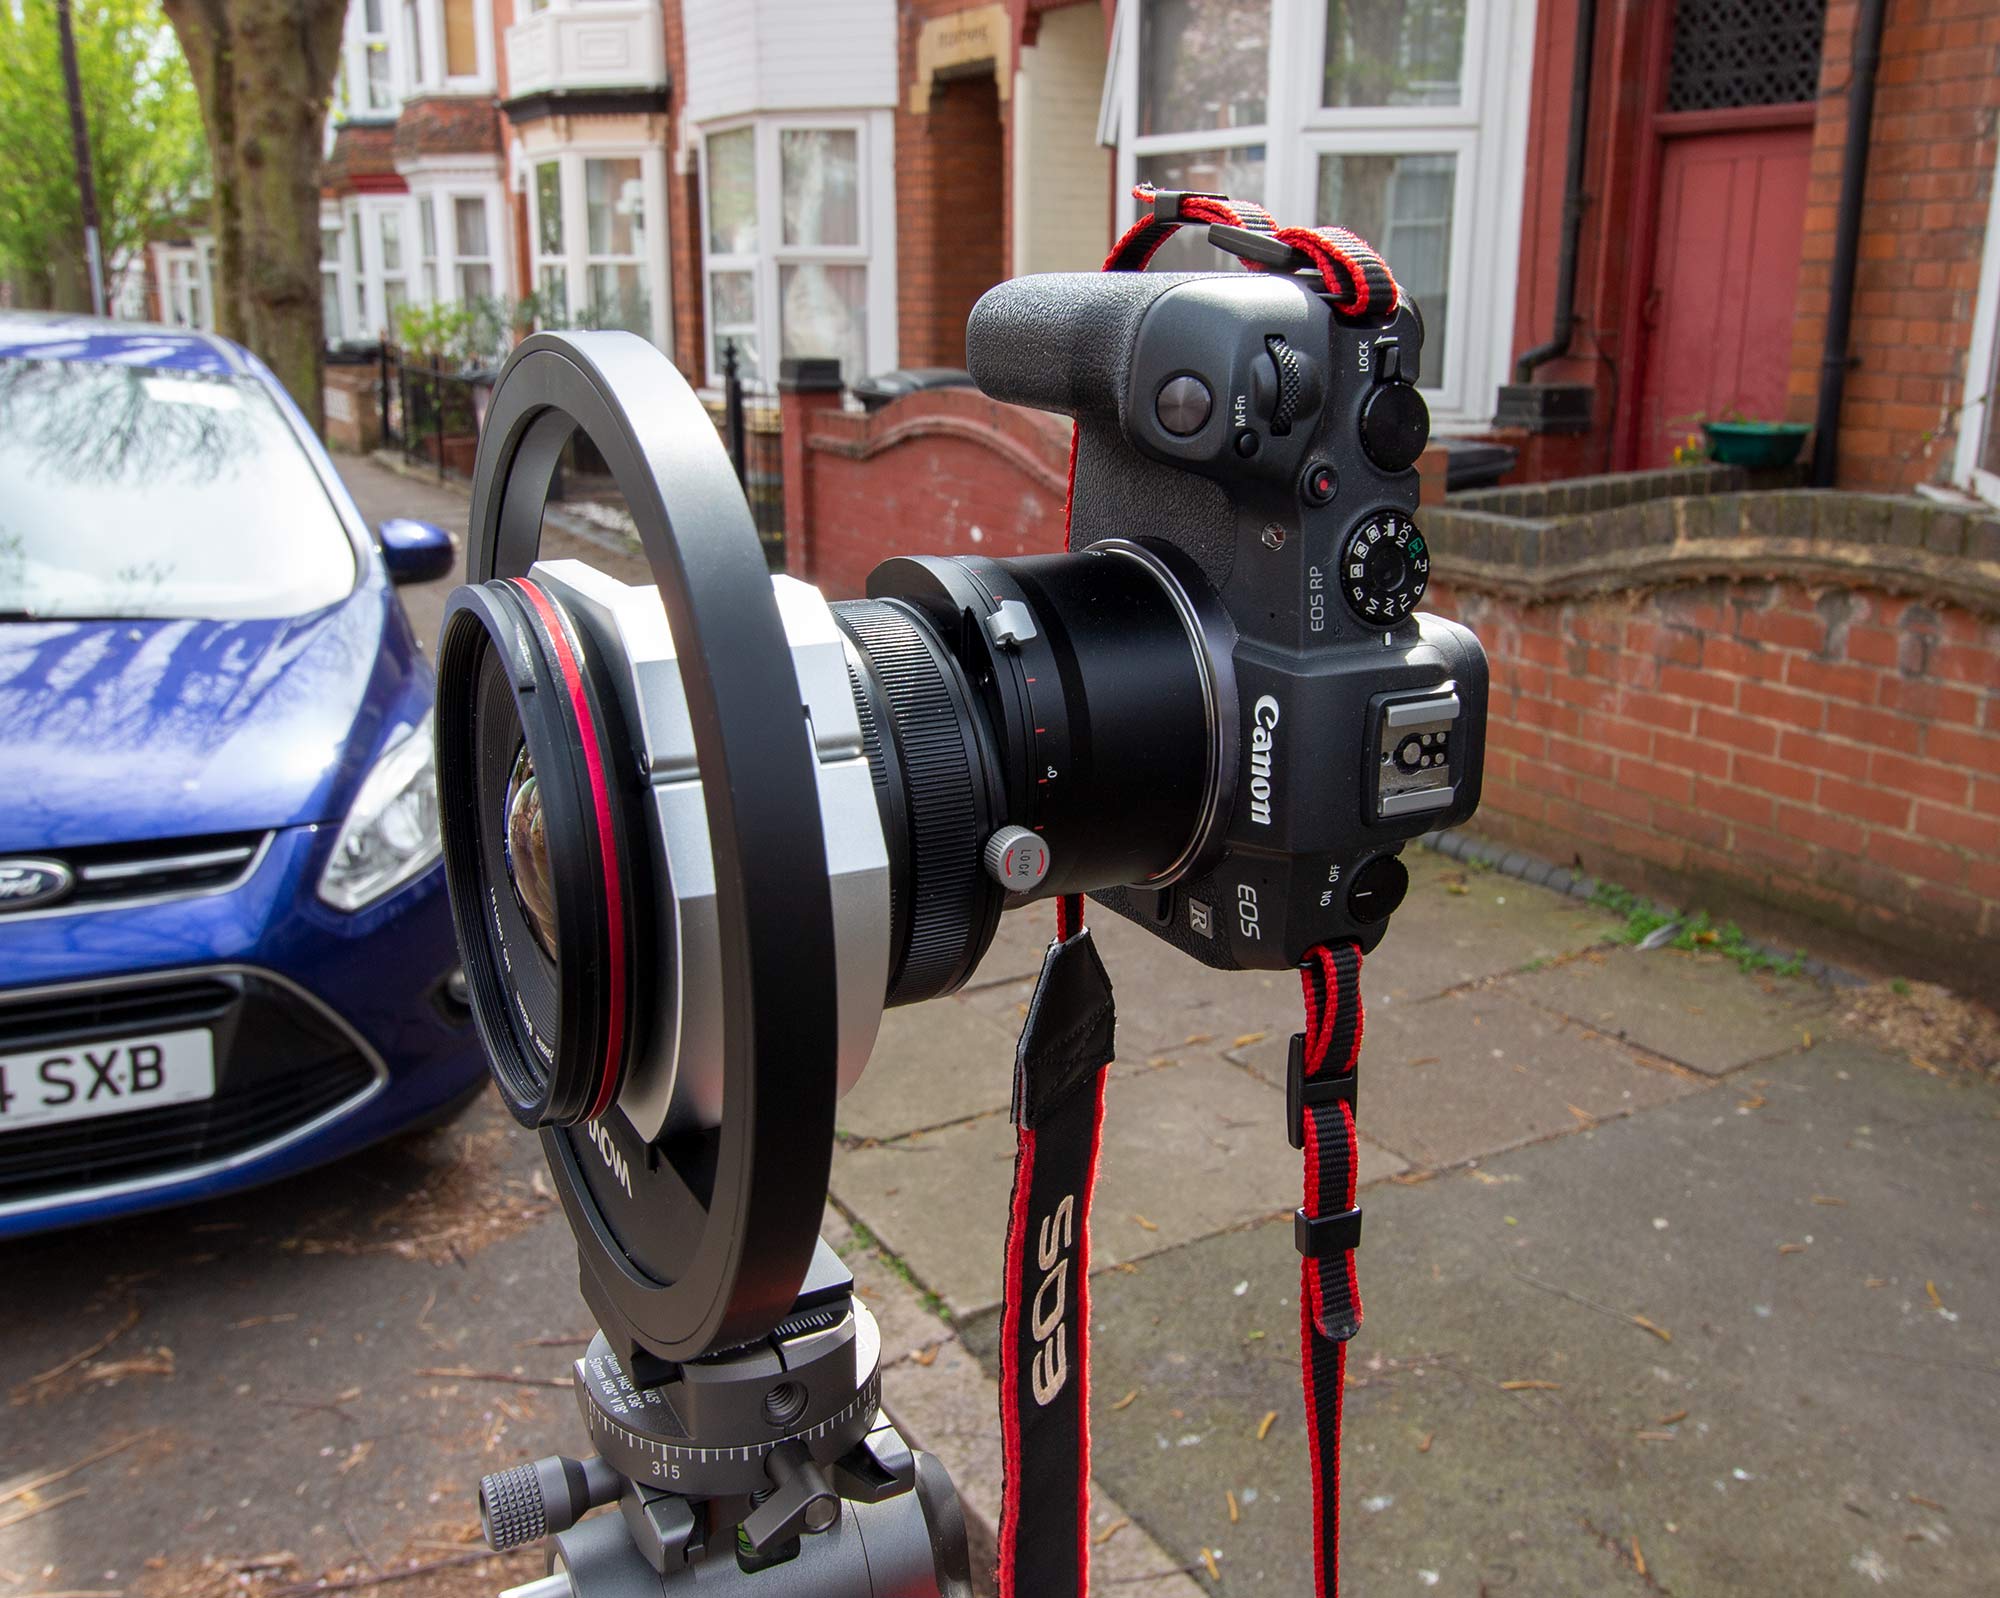
Venus Lens tells me they will be releasing a mount for the Laowa 20mm shift lens for parallax elimination, in due course. It’s an aluminium ring (360º rotation) with click stops at 15º
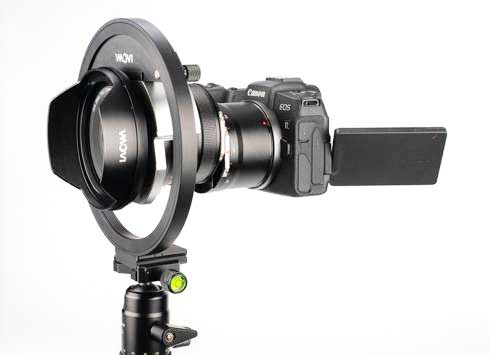
This was not available to test at the time of writing. I do hope to look at it before long though.
UPDATE – currently testing the adapter – See Adapter review article
Other shifts
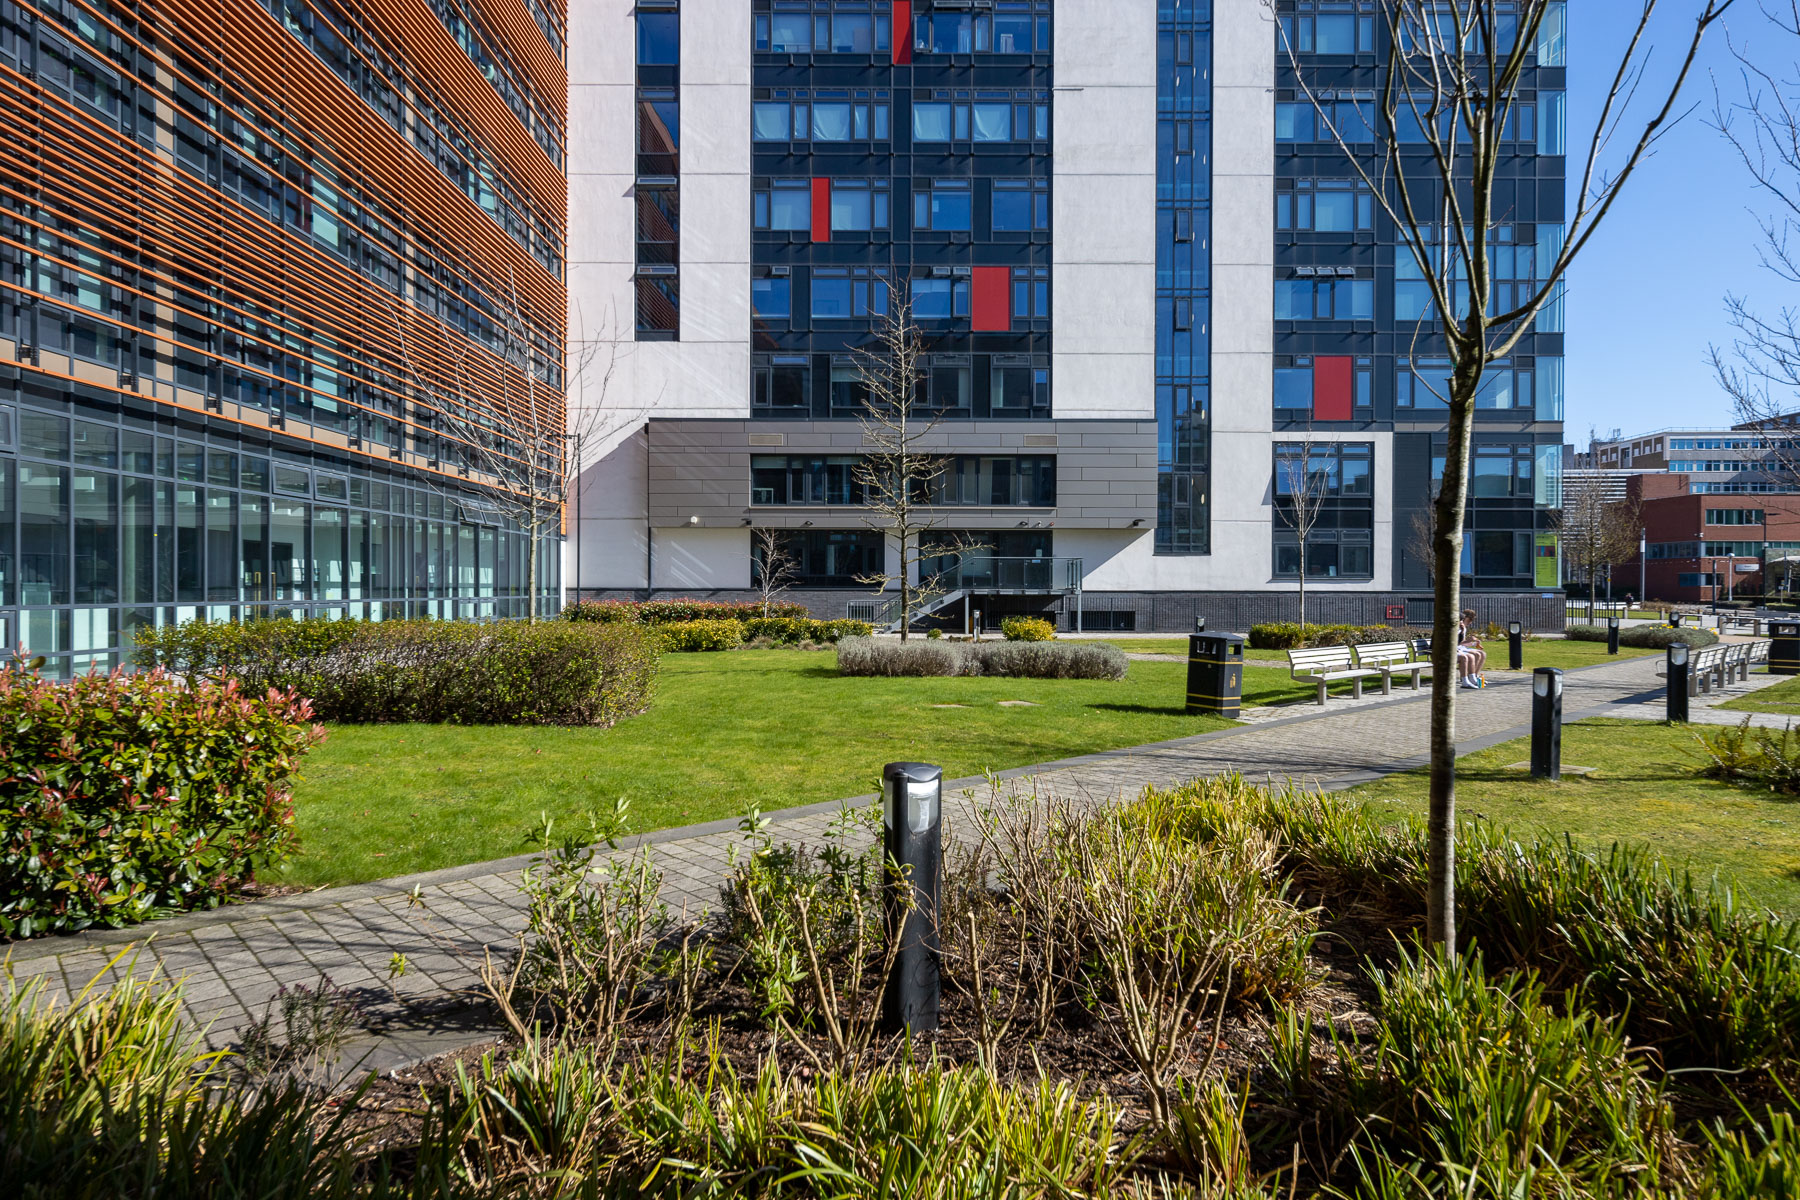
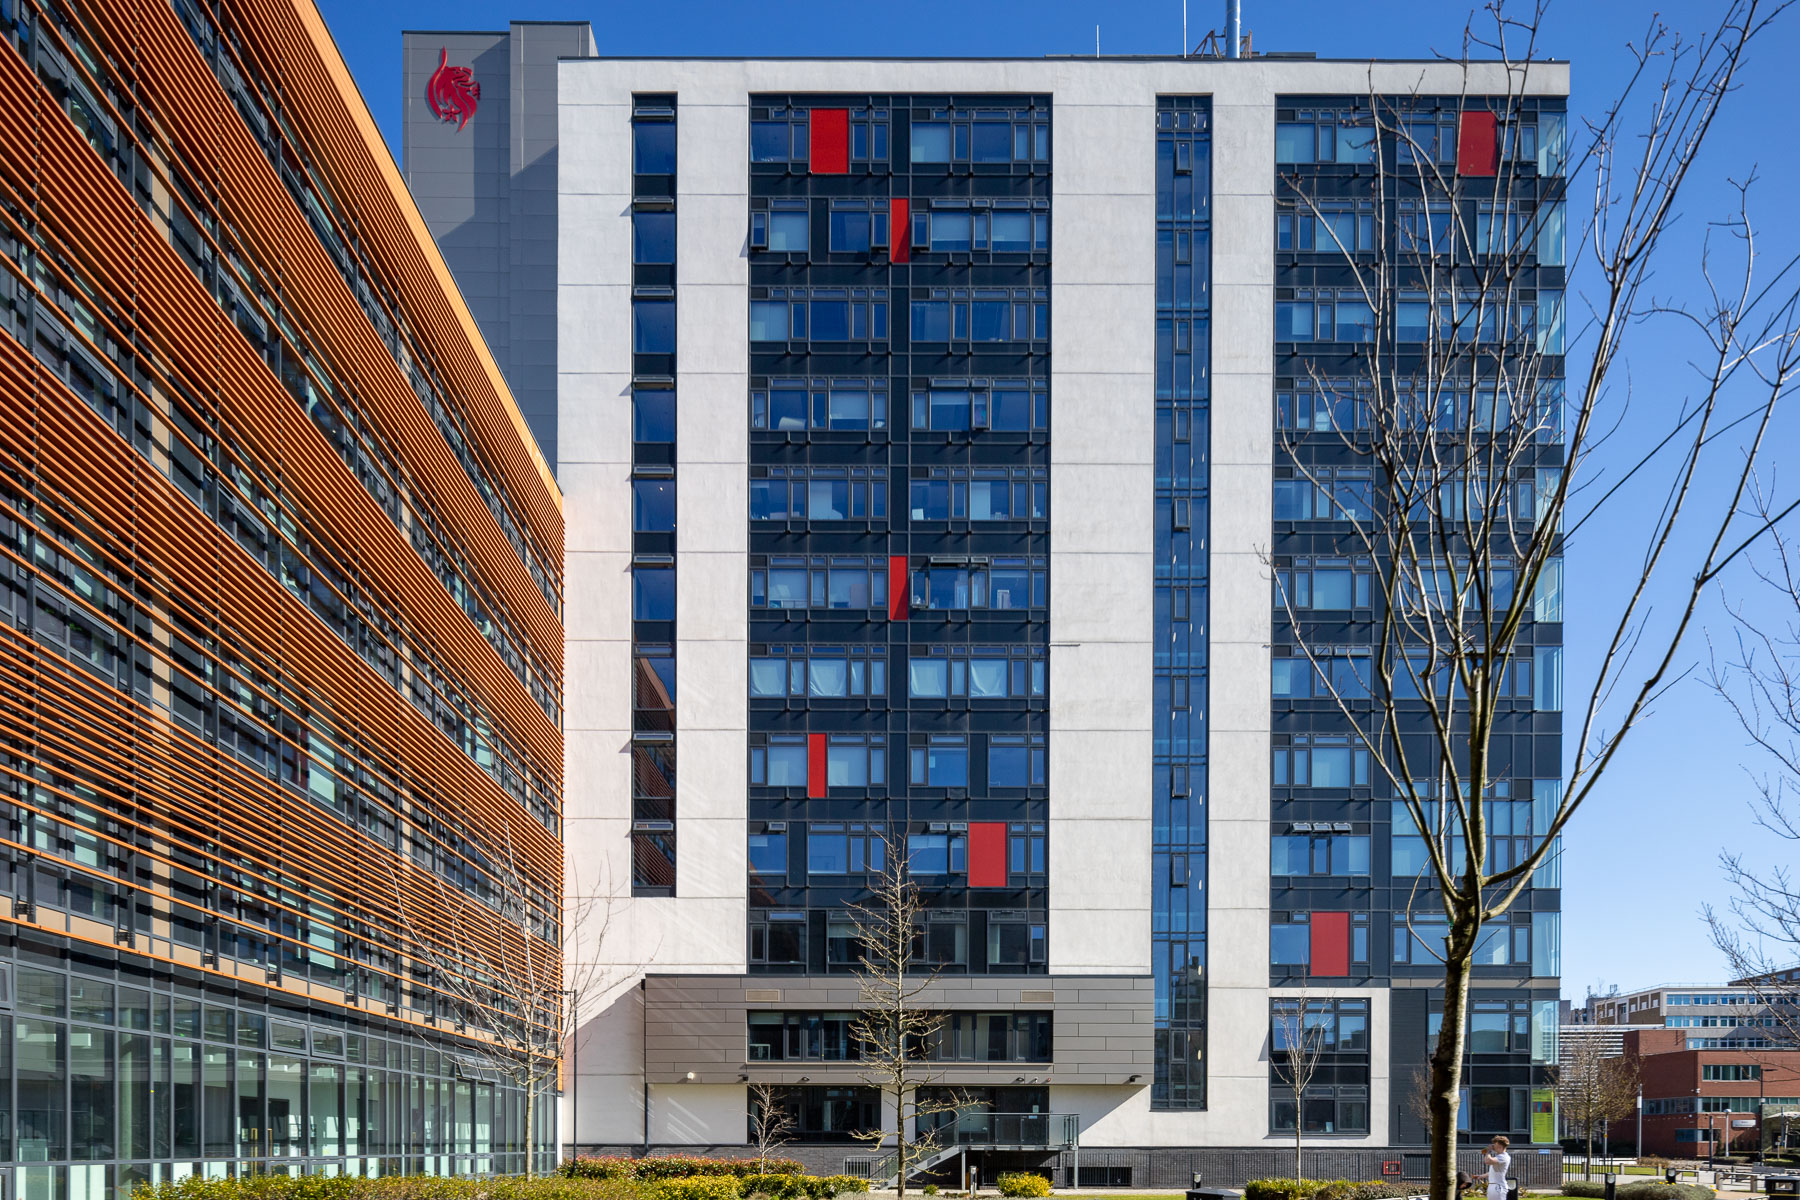
The three shots below show no shift, upwards shift and a shift diagonally to the up/right. The idea is that I like the view facing the building, but want less of the brown building in the shot. Pointing the camera more to the right would cause horizontal lines to converge. The solution is to point the camera square on to the building, but shift upwards and to the right.

More uses of diagonal shift
Diagonal shift can be though of as two elements, The vertical aspect fixes converging verticals, whist the left/right element affects the convergence of horizontal lines (assuming a level camera).
This means that putting your subject in the centre of the frame, with shift to the left or the right has the camera not pointing towards the subject.
This difference in viewpoint has a considerable effect.
The three shots below are all taken from exactly the same spot – if you enlarge the images, note the same relative position of the lamp-post and sign on the building.
First, the lens is shifted upwards and to the left. The camera is pointing towards the smaller of the trees

In the second shot, there is just vertical shift, to ‘fix’ converging verticals.
The camera is pointed towards the front corner of the building (the middle of the picture).
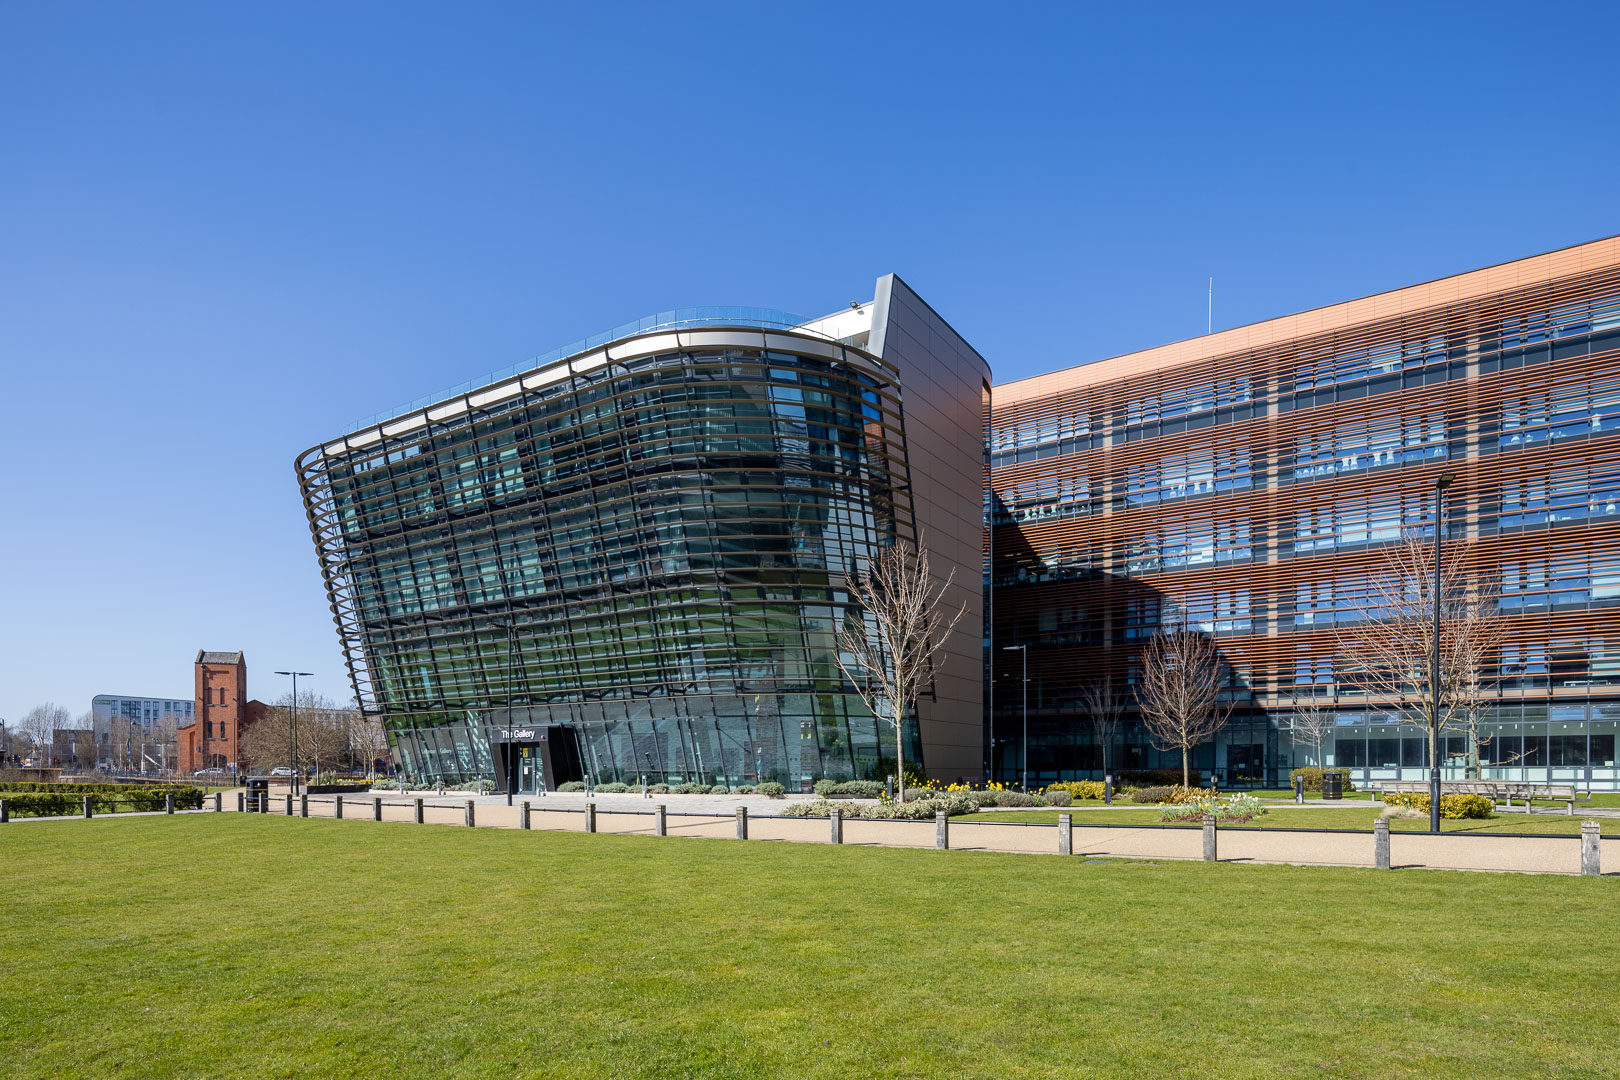
Lastly, the lens is shifted upwards and to the right.
The camera is aimed roughly towards the distant brick tower

It’s a very powerful effect, but much less intuitive than simple up/down shift to fix converging verticals. As with all these things, the more you try it out the easier it becomes to spot its potential uses.
It’s also of use in landscape photography where left/right shift can give a sense of directionality to clouds. If you’re curious, I have a video that shows the effects: Diagonal shift, clouds and composition
Diagonal shift: Interiors
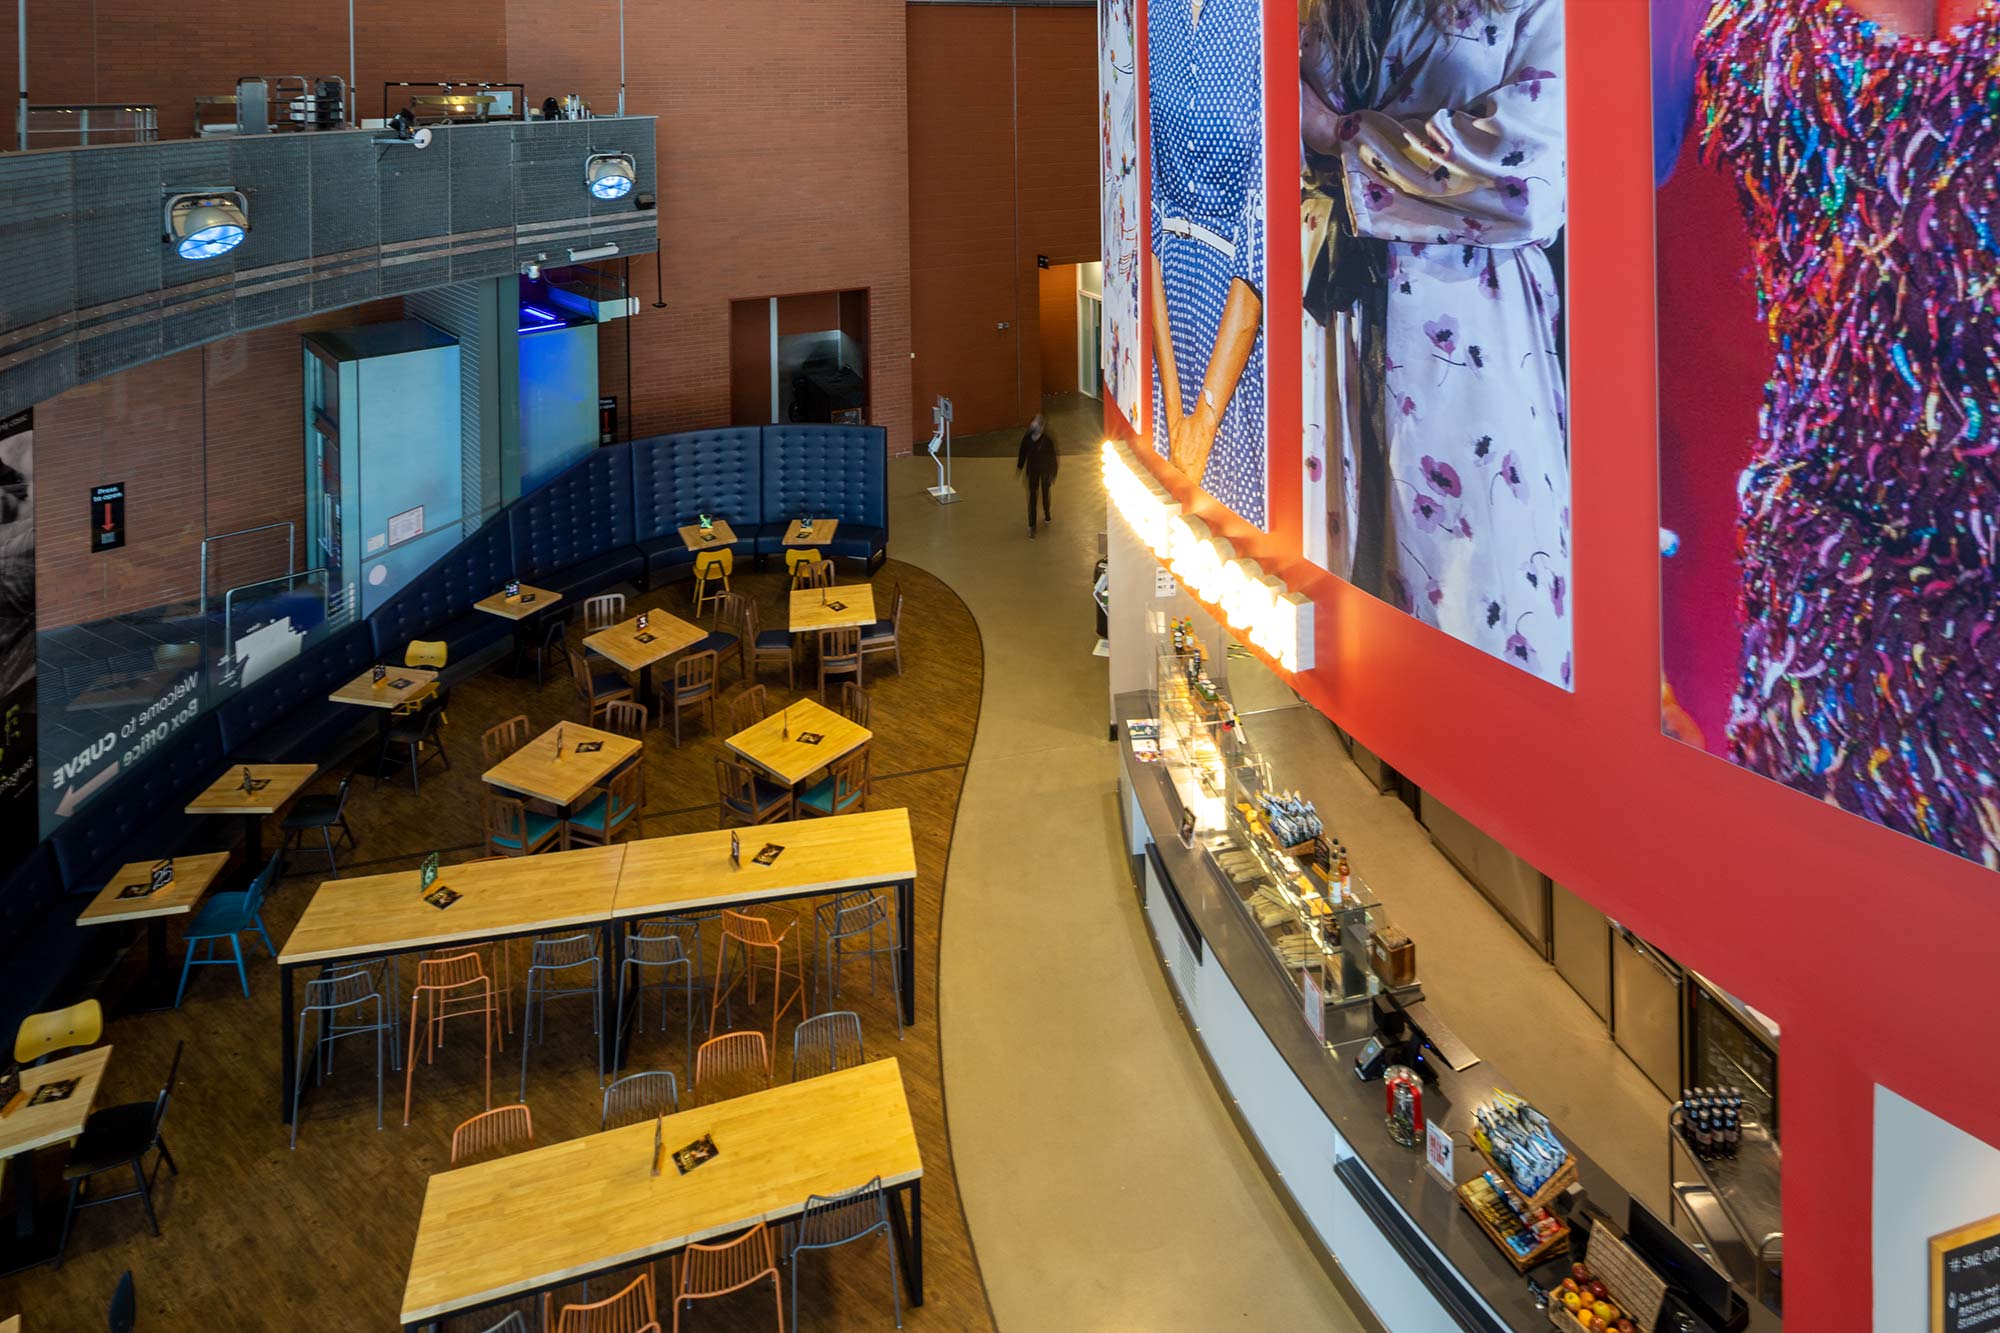
Here’s an interior shot [Curve, Leicester] with a similar diagonal-left, up only, diagonal-right sequence.
Remember, the camera position does not change, just the shift and direction the camera is pointing.


Here’s a simple up/down stitch from the same position.

Quality at the corners
This next view, using extreme diagonal shifting is actually looking down the walkway at the side of the building. It’s the same view I’ve taken testing several shift lenses and gives a feel for the vignetting and softness at full diagonal shift, as well as general geometric distortions.
The top right corner is effectively at the edge of the lens image circle and shows at f/8 here, how detail is fairly good out to the edge. At f11 the slight vignetting is reduced, but fine brickwork like that will still need some sharpening work…

Before you get too attached to strong diagonal shifts, take note of what detail you want in that far corner. 10 minutes using Sharpen AI works wonders (I picked correction for camera shake), but it’s still 10 minutes.
As I said, this is a sample lens so I’m not looking at detail very carefully. It responds to smart sharpening, such as Sharpen AI quite well, but you do need to experiment with settings. I was quite aware too that I normally use a 50MP 5Ds rather than the 26MP RP.
Does shift look better?
Just because you can correct everything doesn’t mean you have to. Take this view (hand held) from a balcony at Curve in Leicester. The first shot has the camera level but the lens is shifted downwards. The second is jus shot as a normal lens.

Remember that shift is just an option…
Conclusions: Laowa 20mm shift lens f/4
Thanks to Laowa for asking me to test this pre-release lens. My first thoughts are that if it performs as well on other cameras as it did in my testing, then they will sell a lot of them.
It is solidly built and handles well, but is relatively heavy and long for the focal length. I guess this is because it’s also available for DSLRs, where the back focus distance needs to allow for a mirrorbox.
The operation of the shift mechanism and the lens axis rotation is smooth.
It’s fully manual, so some may find it a chore, but that’s what you get with lenses like this.
The 20mm is distinctly sharper than the Laowa15mm f/4.5 shift lens, with fewer aberrations, and a better sharpness over the full field at strong shift.
Of course, the 15mm is a lens you get for the extremes, the 20mm feels far more ‘normal’ in its coverage. Yes, I know some people consider 20mm extreme, but as a regular user of the Canon TS-E17mm and 24mm lenses, this feels a focal length I’d be very comfortable with.
The 14 blade aperture makes for far less obvious sun-spikes on specular highlights and a smoother out of focus look as well.
The lack of tilt wasn’t much of an issue for me. The only common lenses near to this one are the Canon TS-E17mm F4L and Nikon PC-E19mm F4E (links are to my reviews), They do have tilt, but are a lot more expensive.
For the Fuji G mount version, 20mm will be a welcome addition to what can be used.
For people not having a shift lens – this becomes an excellent introduction. It will challenge many aspects of your photography, but that’s a good thing.
If you’ve any questions – please feel free to ask. There is a short video review to go with this article.
Comparison images: TS-E17 | Laowa 15/4.5 | Laowa 20/4
So, how does 20mm with ±11mm compare with 17mm with ±12mm compare with 15mm and ±11mm?
I’ve using the same location I used when testing the 15mm f/4.5 shift lens. Level camera, full vertical shift.
Obviously, my tripod may not have been at exactly the same spot and height, but it’s close enough to see
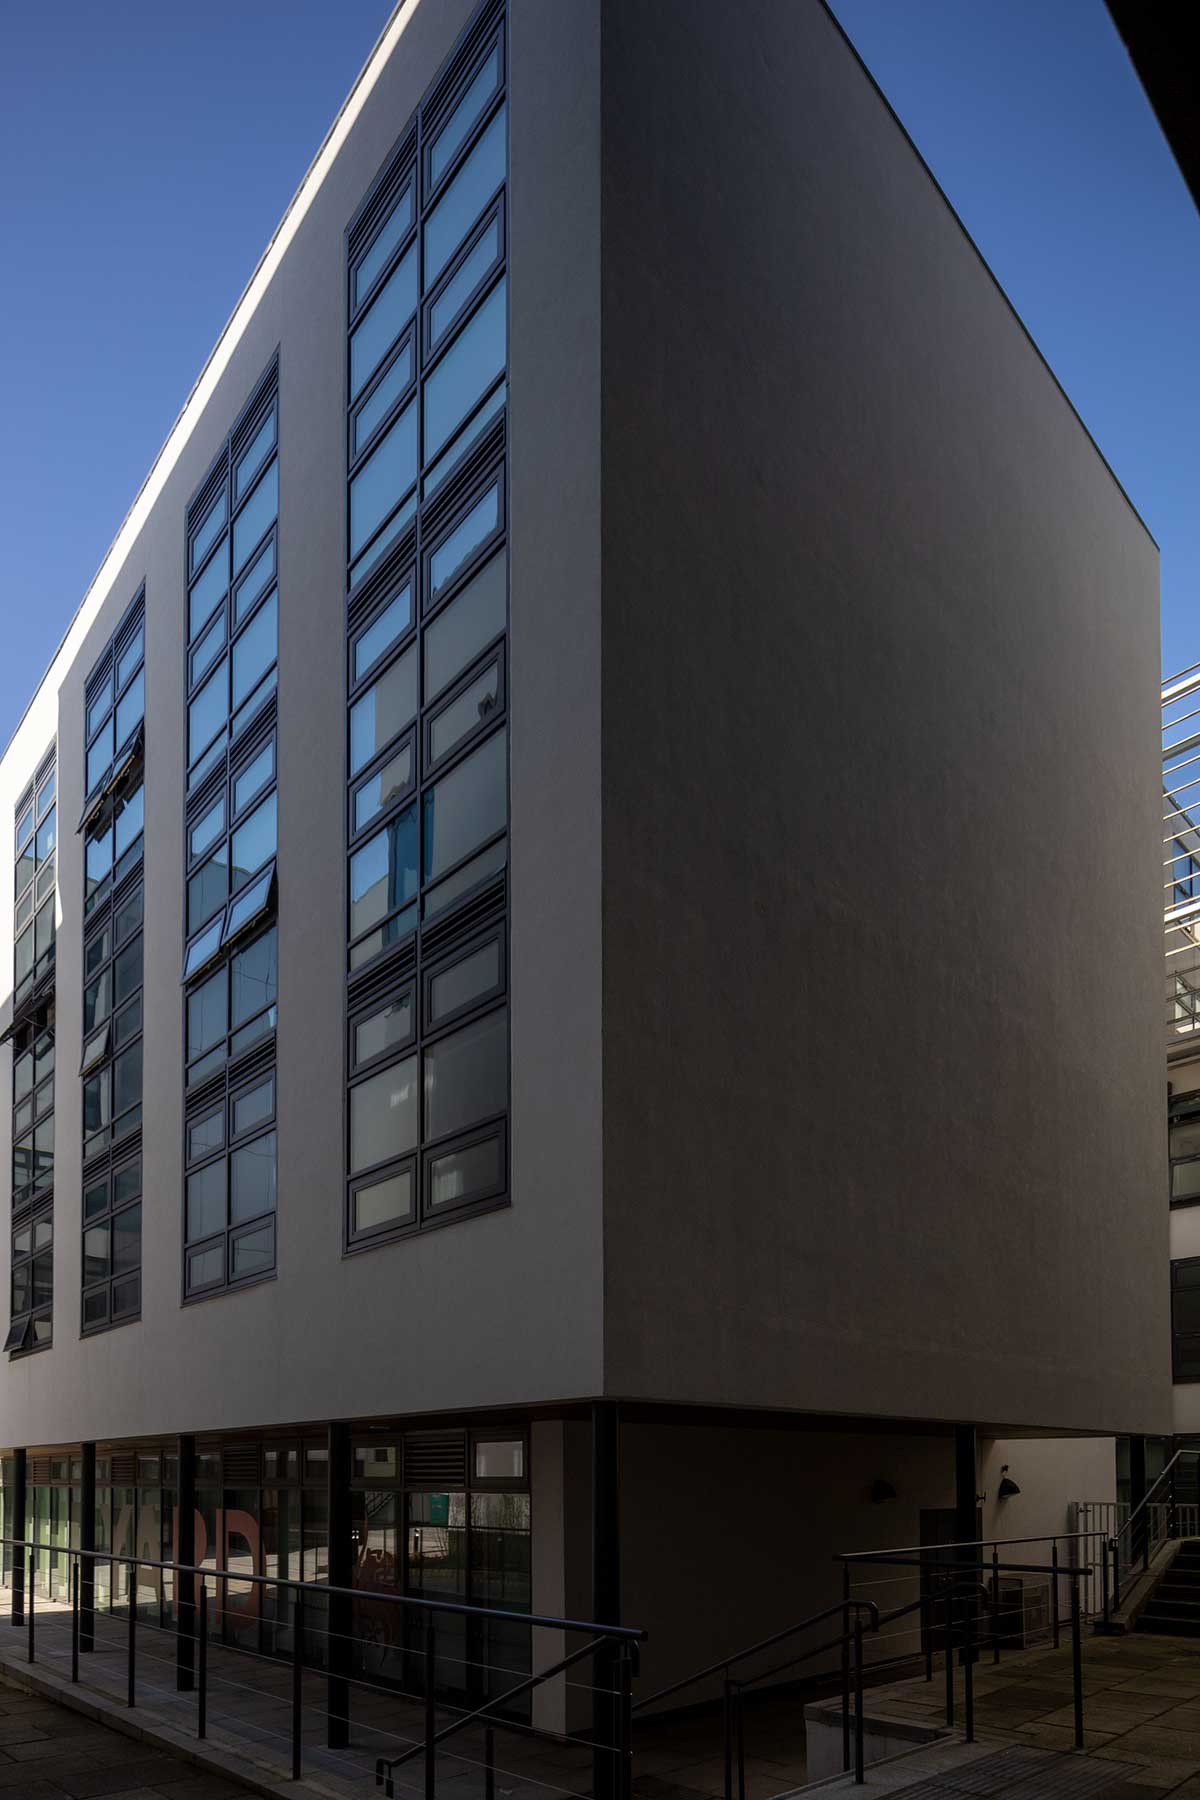
Next, the 17mm, shifted upwards as much as possible.

Next, the 15mm shifted up by as much as possible.

It’s this building (20mm up/down shift and stitch)

If you’ve any questions – please feel free to ask. There is a 26 minute video review to go with this article.
There is also a specific Tilt/shift index page on this site with links to all Keith’s articles, reviews and videos about using tilt and shift.
–ooOoo–
Never miss a new article or review - Sign up for our occasional (ad-free) Newsletter
and please do subscribe to Keith's YouTube Channel

Other areas of our site that may be of interest...
All the latest articles/reviews and photo news items appear on Keith's Photo blog

Keith explains tilt and shift lenses
Keith has written a book that looks at the many ways that tilt/shift lenses can benefit your photography from a technical and creative point of view. If not in the UK check for import issues and maybe try an on-line bookshop. Keith has no connection with sales of the book.
ISBN 9781785007712
There is also a specific index page on the site with links to all Keith's articles, reviews and videos about using tilt and shift.
We've a whole section of the site devoted to Digital Black and White photography and printing. It covers all of Keith's specialist articles and reviews. Other sections include Colour management and Keith's camera hacks - there are over 1200 articles/reviews here...
Adverts removed
Arun Kapur | Feb 5, 2024 at 5:10 pm
An excellent and detailed review. Thank you!
Keith | Oct 9, 2022 at 10:43 pm
Long gone back…see
https://www.northlight-images.co.uk/review-laowa-shift-lens-support/
Ellis Vener | Oct 9, 2022 at 8:23 pm
Now that you have the tripod mount
how well does the shift mechanism in the lens support the weight of the camera?
-does it, like the Rogeti TSE 3+ for the Canon TS-E lenses, have. An Arca-Swiss type QR plate marked with the nodal plane?
Thank you Keith. As usual your reviews are always well-written and filled with practical insights, tips and advice.
Ivan Muraenko | Apr 19, 2022 at 9:35 pm
Huge thanks for your review, Keith!!!