


Nikon PC-E 45mm f/2.8D ED review
Nikon PC-E 45mm F2.8 tilt/shift lens review
Nikon PC tilt-shift lens

Keith has removed all Google ads. Too many deceptive and irritating adverts.
Any ad links left are non tracking, to companies we know, trust and we've worked with for years [Park Cameras]
Ads helped pay for site running costs, so if you found something useful, please
...Make small KoFi donation?
...Subscribe to Keith's YouTube Channel
...Get Keith's book about how to use tilt/shift lenses
Our site contains affiliate links - these help support the site. See our Advertising policies for more
Keith Cooper looks at the Nikon PC-E Nikkor 45mm f/2.8D ED tilt/shift lens.
This Nikon F mount ‘perspective control’ lens gives up to 8.5º of tilt and ±11.5mm of shift.
The lens was tested on a Nikon Z7 45MP mirrorless camera, with a ‘FTZ’ adapter to go from the camera’s Z mount to the lens F mount.
This review is one of over 50 articles on this site that Keith has written about tilt/shift lenses. We’re aiming to cover all Nikon PC-E lenses in due course.
There is also an index page specifically devoted to the subject, including all Keith’s articles, reviews and videos.

Keith’s video review of the PC-E 45mm on YouTube
Nikon PC-E Nikkor 45mm f/2.8D ED tilt and shift
The Nikon PC-E 45mm f/3.5D ED lens was launched in January 2008. It gives a wide field of view and large enough image circle to allow for ±11.5mm of shift.

PC-E 45mm with vertical shift. Friars Mill, Leicester
Click on images to see larger versions.
I’m testing the lens with the Nikon FTZ adapter on a Z7

Tilt/shift/swing/rise/fall
In all my articles I refer just to lens shift or tilt along with the direction it is in. You may sometimes see vertical up/down shift referred to as rise or fall, and left/right tilt as swing. These terms are familiar to anyone coming at lenses like the 45mm from a view camera background, but I prefer to be more consistent for readers coming from a 35mm camera background. My apologies if you’re a long time large format camera user, but you should already know all this stuff ;-)
Basic specifications
- Mount Type: Nikon F-Bayonet
- Focal Length: 45mm
- Maximum Aperture: f/2.8
- Minimum Aperture: f/32
- Format: FX
- Maximum Angle of View (DX-format): 34°50’
- Maximum Angle of View (FX-format): 51°
- Maximum Reproduction Ratio: 0.50x
- Lens Elements: 9
- Lens Groups: 8
- Compatible Format(s): FX, DX, FX in DX Crop Mode, 35mm Film
- Diaphragm Blades: 9
- Distance Information: Yes
- Nano Crystal Coat: Yes
- ED Glass Elements: 1
- Super Integrated Coating: Yes
- Minimum Focus Distance: 0.83ft (0.25m)
- Focus Mode: Manual
- Filter Size: 77mm
- Accepts Filter Type: Screw-on
- Approx. Dimensions: 3.2in (82.5mm) x 4.4in (122mm)
- Weight (Approx.): 26.1oz (740g)
- Supplied Accessories: HB-43 hood, CL-1120 soft case, LC-77 front cap, LF-4 rear cap
It’s a solidly built lens, with the front inner and outer parts moving out at closer focus distances.

Note the 9 blade aperture.

Here’s the internal construction detail and MTF

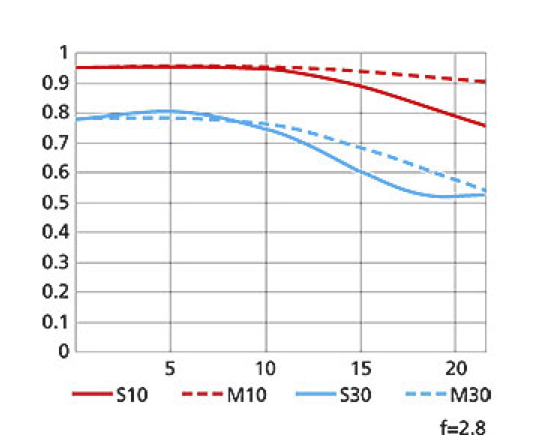
The focus throw is ~120 degrees, giving a good range for both near and far focus. At the closest focus distance, the subject is relatively close to the front of the lens, making it easy for the lens to get in the way of lighting.
Whilst the minimum shooting distance is listed as 25cm, it’s important to note that this is from the focal plane – i.e. towards the back of the camera. The maximum magnification of 0.5x is useful, but remember that at close focus distances, lens tilt gives you much reduced range of tilting the plane of focus.
The focus extends just a bit past infinity. This is a good thing since it gives an increased flexibility in setting the plane of focus when using tilt. It does however mean that you do have to focus on objects rather than just trust the focus end stop.
Lens movement
The shift and tilt are controlled by small knobs. These also have locks to set/hold in place. There is a detent at the zero settings making it easier to feel when movements are zeroed.

In the view above, the lens is fully shifted downwards. The tilt is at zero
Here’s tilt without shift.

The lens tilt setting is measured in degrees – note that this is not the same as any movement of the focal plane caused by tilting the lens. That is set by the combination of tilt and focus setting.
The button next to the tilt knob is to stop down the aperture when in auto mode.
The complexity of the adjustments can feel daunting, but in my teaching I always start with shift and no tilt. First vertical, then horizontal and then mixing them for diagonal shifting.
Once shift is mastered, it’s time to work through the basics of tilt, such as how to run the plane of focus along the ground or a wall.
Lens rotation
The lens rotates with respect to the mount by ±90 degrees meaning that the shift/tilt axis can be set in any arbitrary direction. A small tab releases the mechanism, and there are click stops at 30º intervals.

This is where I have a small complaint (for Canon too!, but not Laowa). 30º steps do not include a setting at 45º, meaning that if you want to shift (or tilt) at a 45º angle, you have to estimate the position – this is a source of error when doing multi-shot stitching. I’d prefer 15º steps.
Another issue is with the tilt and shift axes being set at 90º to each other. You can see this form the position of the knobs in the picture above.
This means that if I use up/down shift, I’m limited to left/right tilt. Older Canon T/S lenses also had this limitation, but you could partially dismantle the lens and set both axes on the same plane. Although the design of the PC-E45mm looks similar, do not try this. In the Nikon lens a part needs changing – you can potentially cause damage with a DIY conversion.
Here is the lens before and after modification.


Compatibility
The protruding parts of the lens can cause problems for some camera bodies when moved. This applies to cameras with an overhanging flash/prism.
In particular with the Df, D6xx series, D300 series, D700, D750, D800/D800E, D3xxx series, D5xxx series, and D7xxx series there will be issues. I don’t have any of these cameras to test, but have noted the same problem with some Canon models and the TS-E lenses where it limits the amount of upwards shift. This table (from Nikon) shows how different lenses are affected
| Camera | Metering | Aperture Control | Max Shift/ | Exposure Modes |
|---|---|---|---|---|
| Nikon D3/D4/D5 series | Yes | Yes | 11.5mm | P/S/A/M |
| Nikon D2 series | Yes | No | 9.5mm | M |
| Nikon D800 series | Yes | Yes | 11.5mm | P/S/A/M |
| Nikon Df | Yes | Yes | 11.5mm | P/S/A/M |
| Nikon D600/D700 series | Yes | Yes | 11.5mm | P/S/A/M |
| Nikon D500 | Yes | Yes | 11.5mm | P/S/A/M |
| Nikon D300 series | Yes | Yes | 11.5mm | P/S/A/M |
| Nikon D100/D200 | Yes | No | 9.5mm | M |
| Nikon D7000 series | Yes | Yes | 8mm | P/S/A/M |
| Nikon D3000/D5000 series | Yes | Yes | 6mm | P/S/A/M |
| Nikon D90 | Yes | Yes | 8mm | P/S/A/M |
| Nikon D70/D80 | Yes | No | 8mm | M |
| Nikon D40/D60 | Yes | No | 6mm | M |
| * The above chart is only valid for Nikon 24mm f/3.5D, 45mm f/2.8D and 85mm f/2.8D PC-E lenses |
Filters
The lens takes 77mm filters. Be careful with thicker variable ND ones if you want to use full shift, since there is potential for slight additional corner vignetting.
Flare and distortion
Putting the sun at the top of this view (f/8) shows quite obvious flare and spikes but very few effects anywhere else.

The 9-blade aperture has slightly rounded blades, but will still give 18 pointed sunstars on some specular reflections as well as light sources.
This second view shows that the flare is well controlled, and at f/11 showing the serious dust you can collect on a mirrorless sensor in a short time.
It’s taken quickly moving the camera – mirrorless cameras don’t like having the sun focused on the sensor at one spot for any amount of time.

Keeping direct sun off the front element is very advisable but the lens is pretty good in this respect.
Aberrations
The lens exhibits slight barrel distortion, but at a level that can be hard to spot. This building front (vertically shifted up) shows a very slight bowing.

It also shows the slight chromatic aberration of the lens.

Easily fixed in RAW image processing.

The lack of EXIF shift/tilt data in images means that corrections cannot be automated as with many other modern camera/lens combinations.
Vignetting
The PC-E 45mm is definitely better than the PC-E24mm showing negligible vignetting in the top corners at full shift in this image (~f/9). The lens hood does however introduce a small amount at full shift, so take care – I’d normally leave it on.

To test for vignetting in more detail I photograph an old light box. The focus is set at infinity and I step through apertures.
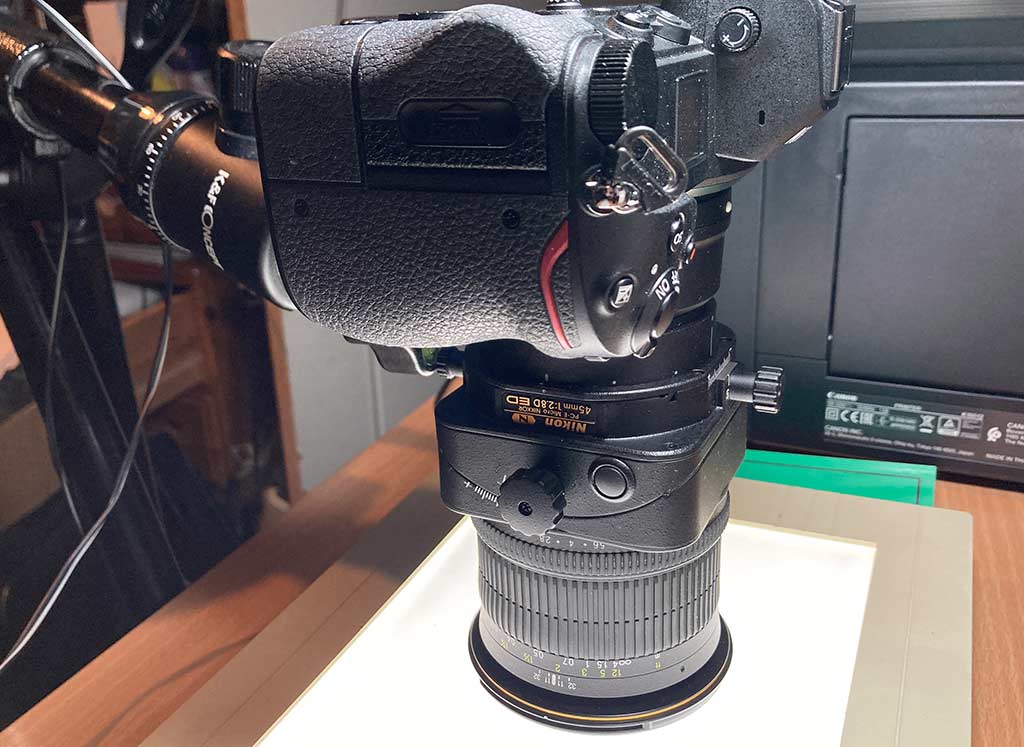
There are two sorts of vignetting I see with most shift lenses.
One is the normal falloff you see towards the corners with any lens. This is clear, but I’ve made it a bit more prominent in the example below, shot at f/2.8. Shifting the lens just shows more of the periphery of the image circle of the lens, so it becomes even more obvious.
Second is a vignetting that occurs on the opposite side with a shifted image, it is caused by physical obstruction of the light path by the mount.

I’ve added some posterisation to the image to emphasise the vignetting profile.

A view in the back of the lens when shifted clearly shows where the shift vignetting comes from.

Is this a problem? Mainly if you want to stitch multiple images with different amounts of shift. If stitching a left/right pair of shots at full shift, it may be worthwhile including a third centre shot (no shift). Most stitching software should be able to cope, but it is an obscure effect that might be worth considering.
Apertures
When testing the PC-E 45mm I used the fully manual aperture setting ring of the lens. With the Z7 this gives instant feedback for depth of field. There is an ‘L’ setting on the aperture ring for ‘auto’. Used with a compatible Nikon camera, all exposure modes are available to take photographs without operating the aperture stop-down button.
Image quality
For central parts of the image circle the image quality peaks around f/5.6 with the relatively high resolution Z7. It drops off slightly as the aperture gets smaller, but even at f/11 there is not much softening visible. In shifted parts of the image you are looking further from the optical axis, so it’s no surprise that you need to get nearer to f/10 to get the best sharpness in corners.
By f/22 there is a distinct softening from diffraction effects, and you probably only use f/32 where depth of field is absolutely needed.
I’m often asked if ‘diffraction’ doesn’t limit the use of small apertures. Well it depends…
Most of the shifted images I shot were at ~f/9 or thereabout, so as to get enough depth of field in the scene. If like me you are used to using tilt/shift lenses at 17 or 24mm then it’s easy to forget the reduced depth of field when moving to a longer focal length like 45mm.
I do have full sets of images taken stepping through apertures – but I’m always wary of trying to claim too much precision in results based on the testing of a single lens. Essentially, I would be happy with the PC-E 45mm I tested. Note though that I do not have years of editing/processing experience with Nikon RAW files so have to accept that I may not have been seeing all the lens could manage.
Lens focus – no AF
The lens is a manual focus lens. What’s particularly useful when using the Z7 is the ability to show focus peaking in the viewfinder. This can really help you get the feel of how tilt actually works.
The camera focus points will also show when focus is achieved.
For non-tilted use, the distance scale is fine and the depth of field scale gives a rough idea of DOF
(I rarely use them, see Hyperfocal focusing – why I ignore it for more).

Once you add tilt, the focus distances no longer have any meaning and the focus setting is just used to place the plane of focus where you want it.
Shift
My own most common use of shift is a simple vertical shift. This is typically used to get the framing from looking upwards, but without the converging verticals this produces.
Here’s a simple pointing up of the camera.

Now, don’t think you have to use shift, but I find that unless you want the convergence to be part of your composition, then the use of shift produces images that are much more popular with architectural clients.

The 45mm focal length can give a more natural perspective and relative importance of near and far parts of the image.

However, that does depend on getting far enough from your subject.
This image is just a little ‘tight’ for my liking and I’d have preferred to use a 35mm lens, or even a 24mm if I had the pixels available to crop.

This view, taken with a wider lens would give a very different feeling for the relationship between the people and the space they are in.

As ever – it’s up to yo to decide what works, but having the ability to add that bit of shift can really help.
Diagonal shift
Just as horizontal and vertical shift moves the camera view direction away from the centre of the frame, they can be combined for diagonal shift, where the camera view direction is moved to one corner (lens shifted the opposite direction).

I’m pointing the camera down the path, but want more of the right hand side of the scene in the shot.
Setting the lens diagonally combines upwards shift (to correct convergence) and rightwards shift (to capture more of the right hand side of the scene.

The amount of rotation of the lens and amount of shift is just something you have to experiment with.
Here’s the view, with the vanishing point for the path moved off to one side in the frame.
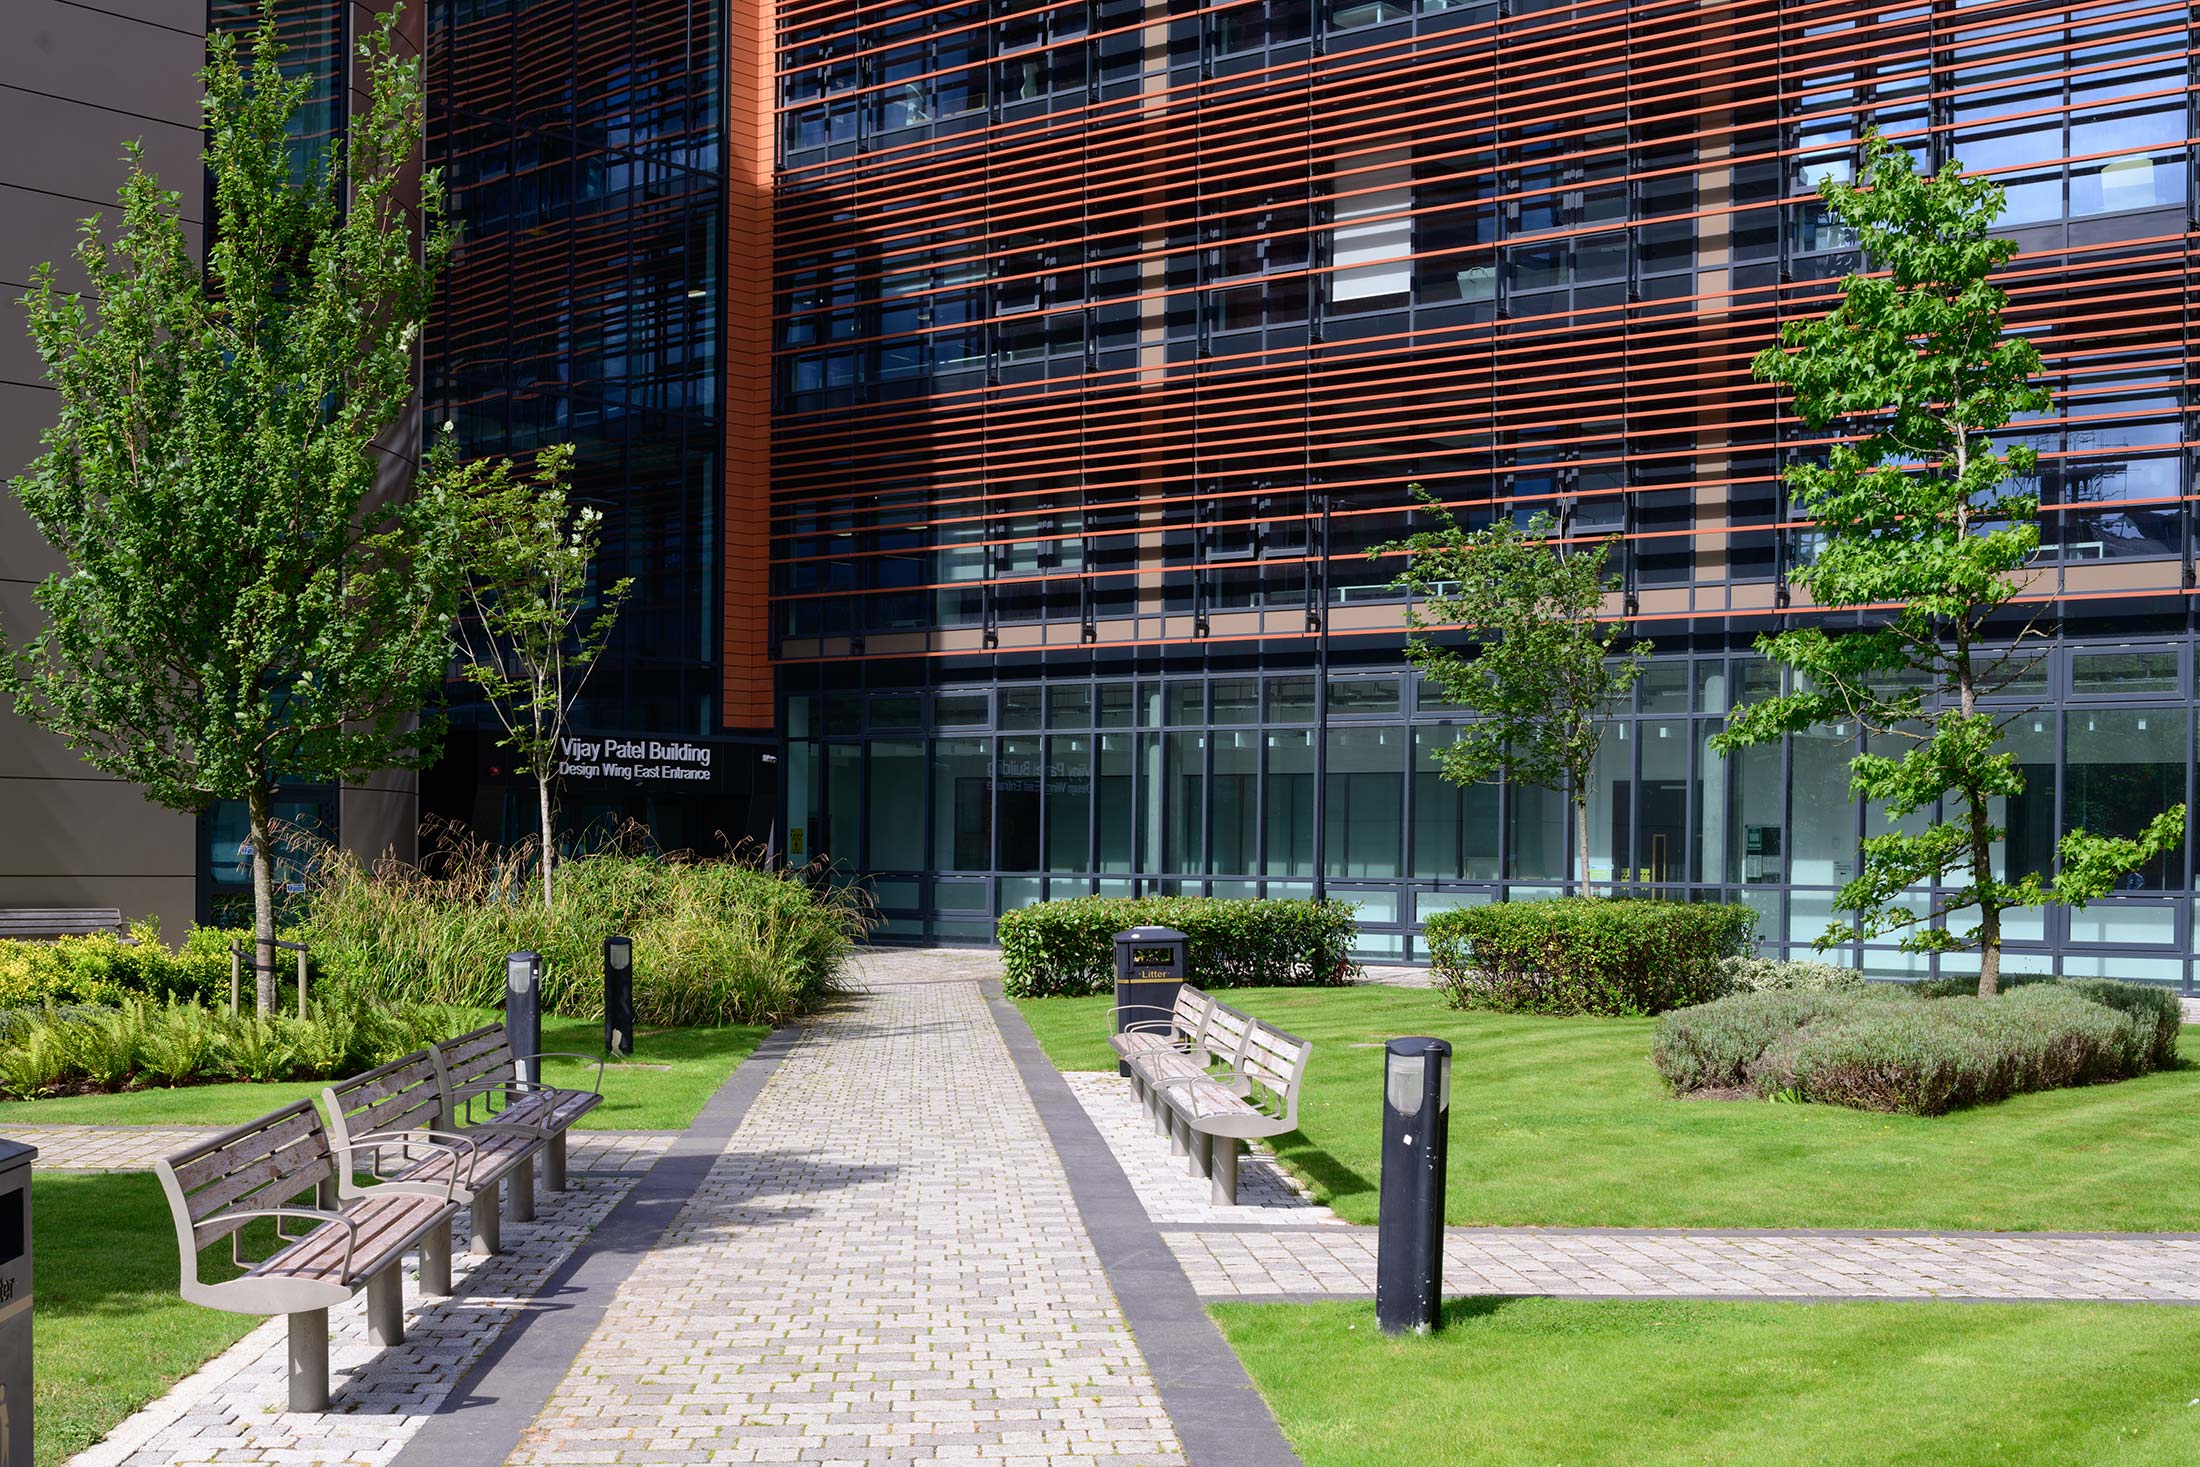
Diagonal shifting is less intuitive in its use, but practice will mean you see chances to use it more often.
Two more examples with just vertical, and diagonal shift.


Tilting the lens
Whilst I’ve found that most photographers pick up the idea of a shifted lens quite readily, the same is not so with tilt.
My personal explanation is that with shift you can focus as normal, and then just add some shift for composition.
With tilt, the effect is given by a combination of the lens tilt angle and the lens focus setting. This places the plane of focus in a certain position and orientation in space. The distance markings on the lens have no direct meaning and the amount the plane of focus is tilted doesn’t seem to relate to the physical amount the lens is tilted.
Now, I’ve written quite a lot about using tilt in quite a few articles (and my book) so don’t worry if it’s not clear to you here. The best place to start is with some of my introductory articles on the tilt/shift index page
One simple way to see the effect of tilt is to tilt the lens fully left or right and then adjust the focus setting. The plane of focus will be a vertical plane that runs beside you and out into the distance. Focus peaking does help here, as does setting the aperture to f/2.8.
In this view, lens tilted to the right, I’m running the (vertical) plane of focus through the bikes.

Using f/2.8 really emphasises the tilt.
In the next shot the position of the plane is very clear, however if I’d taken the shot at f/11 or f/16, the use of tilt would be a lot less obvious.

How do I know the value of tilt to set to get the plane of focus along that wall?
I have a simple printed/laminated sheet in my camera bag with tilt tables. These are discussed in more detail elsewhere, but they allow you to set your plane of focus knowing just the ‘J’ distance of your camera.
This is a set of tables for Nikon PC lenses.

The table shows that with for the PC-E 45mm lens, and a tilt of 3º, the plane of focus passes less than a metre from the camera.
In the explanatory articles there are downloads and a spreadsheet you can use to create your own version
- Focusing the tilted lens [includes Keith’s tilt table spreadsheet (zipped file)]
If you’re looking for the ‘miniature world’ look then try strong upwards tilt and then use the focus setting to place the plane of focus through the view in front. Use a wide aperture and try and look down on the subject.
It’s very much an experiment as to what it comes out like – personally I’ve tried it a few times, ticked the ‘Done that’ box and moved on. It’s very dependent of the material in the scene as to whether the miniature look is convincing. I keep it in the range of effects I can do, but no-one has ever commercially asked me for that look ;-)
Close up and tilt
At such short distances, the tilt tables become less useful and an iterative focus technique is easier to use.
I’ve more detailed close up info in my Nikon PC-E 19mm review and other articles looking at focus with close-up tilt.
Stitching
The large image circle of the lens needed to provide the shift function is much larger than the camera sensor. That means you can take photos with different amounts of shift and stitch them together,
Here are two images (shifted up and down) stitched together to give a wider coverage (and more megapixels).

Similarly it’s possible to shift left and right and combine images to get wider ‘panoramic style’ of shot.
Here are two images from earlier, combined in a flat stitch in Photoshop

Parallax
One potential issue is that in taking the pair (or more) of photos, the camera is fixed and the lens moves. Ideally, the lens should be fixed and the camera moved to capture different parts of the image circle.
The slight movement of the lens can cause stitching errors, especially when elements of the scene cross at different distances. So, for the first image above, the problem might appear with the columns. I use a vertical shift more often since with scenes like the one above, errors are more likely to appear on vertical edges. and an up/down shift reduces this.
However, for optimum results, the camera needs to be moved in the opposite direction to the shift. I have a tripod where the arca style clamp has measurements on it. This means that if I use 10mm of shift I need to move the camera 10mm to the opposite side. This can get awkward and benefits from using a camera ‘L’ bracket.
Concerns about such stitching issues do very much depend on what’s in the shot. The second example above has a few minor glitches, but I had to look carefully through the full resolution files to think I’d found any.
A few minor edits were needed on this (up/down) image, near the tree.

A wider angle
One popular use of shift is to make ‘panoramic’ style images with strong left/right shift. The fall off in image quality and vignetting at strong shift mean that some care is needed in getting optimal results, and it’s here that the lens perhaps most shows its age.
When using left/right stitching it may be worthwhile using a diagonal shift, so that the two images have an element of vertical shift in them as well as the desired left/right shift.
PC-E 45mm Conclusions
A useful focal length to have for general use, and I find that occasionally using a somewhat longer focal length than my 24mm helps me think about spaces differently, even if I choose the 24mm more often.
The PC-E 45mm lens works very well on modern mirrorless cameras such as the Z7 I was able to test it with.
It’s an excellent introduction to learn about the use of tilt and shift, and with the longer focal length and wider aperture than the 24mm, it is much easier to see the effects of lens tilt.
The lens quality is good but does perhaps show its age a bit, and the relatively narrow F mount contributes issues at wider apertures and shift. However image taken on the Z7 sharpened up very nicely, especially with tools such as Topaz Sharpen AI, whilst colour fringing and aberrations were easily tamed when processing RAW files.
Mechanically, the lens is robust, although the restrictive fixed setting of the tilt/shift axis orientation could be an annoyance for some.

River Soar – slight downward shift
With stitching and even basic use of vertical shift it can give a much better understanding and appreciation of the geometry of the space in front of you.
A manual lens like this is, I’d suggest, a good choice for anyone looking to develop the ‘slower’ side of their photography – it’s not a choice for sport/action shots but one where the creative use of shift and tilt can teach a lot.
I hope the review has been of interest – please do feel free to ask (email or the comments below) if you’ve any specific questions. Thanks to Nikon UK for the loan of lens and camera.
If you’re buying any equipment, then using one of our links to B&H or Adorama or Amazon US will help our site.
Lens at: B&H | Adorama | Amazon US
Never miss a new article or review - Sign up for our occasional (ad-free) Newsletter
and please do subscribe to Keith's YouTube Channel

Other areas of our site that may be of interest...
All the latest articles/reviews and photo news items appear on Keith's Photo blog

Keith explains tilt and shift lenses
Keith has written a book that looks at the many ways that tilt/shift lenses can benefit your photography from a technical and creative point of view. If not in the UK check for import issues and maybe try an on-line bookshop. Keith has no connection with sales of the book.
ISBN 9781785007712
There is also a specific index page on the site with links to all Keith's articles, reviews and videos about using tilt and shift.
We've a whole section of the site devoted to Digital Black and White photography and printing. It covers all of Keith's specialist articles and reviews. Other sections include Colour management and Keith's camera hacks - there are over 1200 articles/reviews here...
We're an Amazon.com affiliate, so receive payment if you buy via Amazon US