


Macphun Luminar V1.0 review
Macphun Luminar Review
Image editing software from Macphun

No more Google ads. Too many deceptive and irritating adverts.
Any ad links left are non tracking, to companies we know, trust and we've worked with for years [Park Cameras]
Ads helped pay for site running costs, so if you found something useful, please
...Make small KoFi donation?
...Subscribe to Keith's YouTube Channel
...Get Keith's book about how to use tilt/shift lenses
Our site contains affiliate links - these help support the site. See our Advertising policies for more
Macphun have just released an all new image editing program called Luminar, for the Apple Mac.
It works as stand alone editor, or can be used as a plugin for Photoshop, Lightroom and Elements.
It offers layers for combining and masking adjustments – normally associated with advanced image processing, such as in Photoshop, where it’s been a key element of Keith’s image editing workflow for many years.
Keith is looking at the software working as a Photoshop plugin here.
There is a Free Trial version of Luminar available
See also V1.1 and V1.2 updates for extra features added
July 2017 – see Luminar for Windows
Article Index

Luminar V1.0
Macphun have produced several interesting editing packages over recent years and I’ve reviewed most of them.
[contentblock id=38 img=html.png]
Luminar represents a step towards a more complete editing package, and more importantly is aimed at users with a wide range of expertise and experience.
Macphun describes it thus:
“Luminar is an new all-in-one photo editor designed to ensure the ultimate in creativity and convenience. The Luminar user interface is built around the idea that every photographer is different, and therefore their photo editing needs are different too. Users can choose from pre-built user interface configurations that match their editing style and needs, or create their own.”
Pricing: Retail Price: $69 | Launch Price for Macphun Users: $49 | Launch Price for New User Price: $59
Luminar Key Features:
Adaptive User Interface
- Multiple Modes: From basic to advanced
- One-click switch between modes
- Change modes any time
All-in-one photo editing tool set
- Includes essential editing tools for different photography styles
- Live editing, live processing, live previews
- Non-destructive editing
- Works as a standalone App or plug-in
- RAW converter & processor
- History Panel
The software has a pretty hefty list of functions and features, so this review is more of a walk-through, looking at some of the ways you might choose to use it.

Luminar – What do you get?
The software can be installed as a trial version, which can be activated later if you buy it.
Using Luminar
I’ll start off with the standalone version, which opens by asking for a file to work on. Opening more files will open additional Luminar edit windows.

The plugin version is simply opened from within whatever software you are calling it from.
You’ll notice the ‘Load Sample Image’ option. If you’re new to the software, select this and you’ll get an image to experiment with.
Heres the sample image in the default start-up mode.
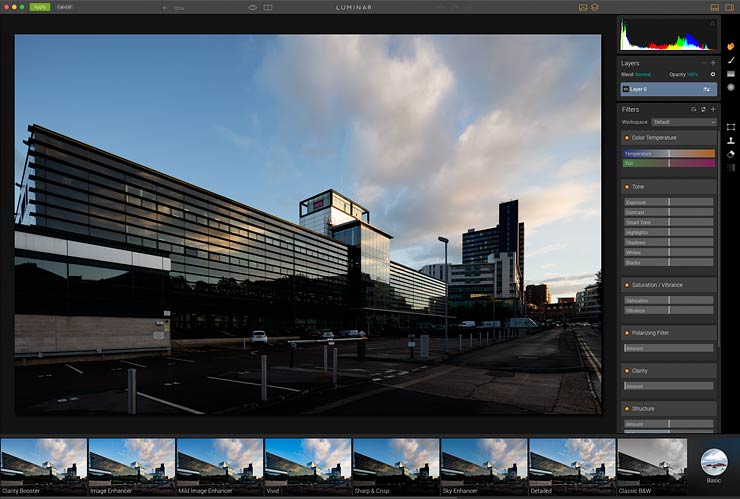
There are viewing controls along the top, whilst presets adjustments run along the bottom and filters and editing tools sit at the right. The right filter settings bar and the presets can optionally be hidden.

Looking more closely at the controls shows the image histogram, layers control and the topmost filter (colour temperature in this case). The set of filters can be customised via the presets or your own preferences.
The basic edit tools are along the right side.

The ‘transform’ too allows for resizing the image.

Cropping removes part of your image.

One basic tool I was interested to try was the eraser.
I recently reviewed Macphun Snapheal and found that it could work well in some circumstances – how would it do here?
I’m going to remove that large building just above the centre of this view

A quick painting in over the building and it’s ready to go.

A few seconds later, it’s gone.
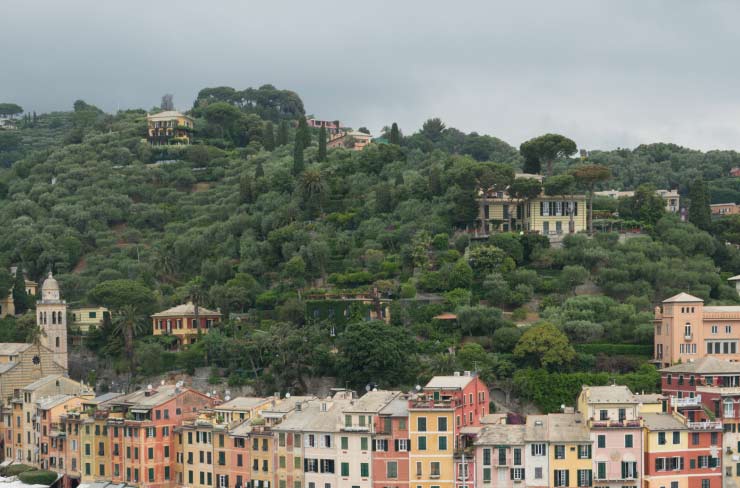
It looks rather good – I know how much work it can take to do this well, by hand, so have always been a bit suspicious of auto tools.
I zoom in to the view at 200% zoom
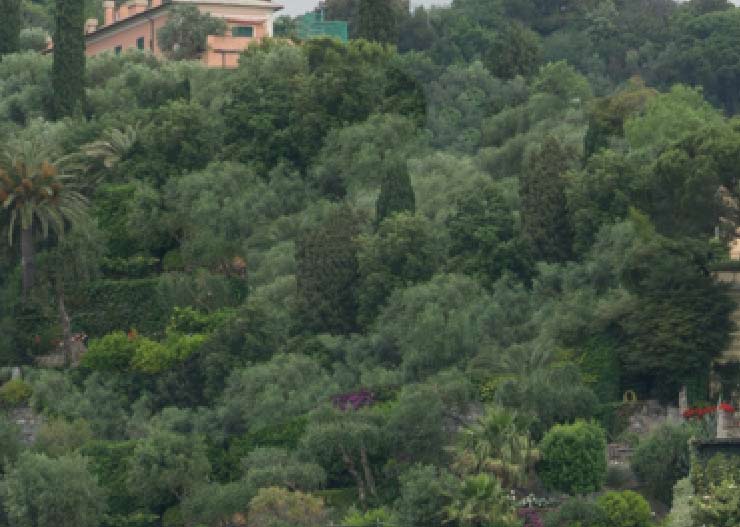
Let’s just put it back.

That’s not bad for a quick fix.
Preset adjustments
There are masses of preset options to experiment with.

These range from subtle to utterly tawdry, so something for all tastes and none…
The autoenhance setting loads up its needed filters at specific initial settings.
This becomes a custom workspace. There are options to clear the space and load other default sets.
As you might suspect, this could rapidly become confusing if you were new to the software, but you can always go back to simpler modes if need be.
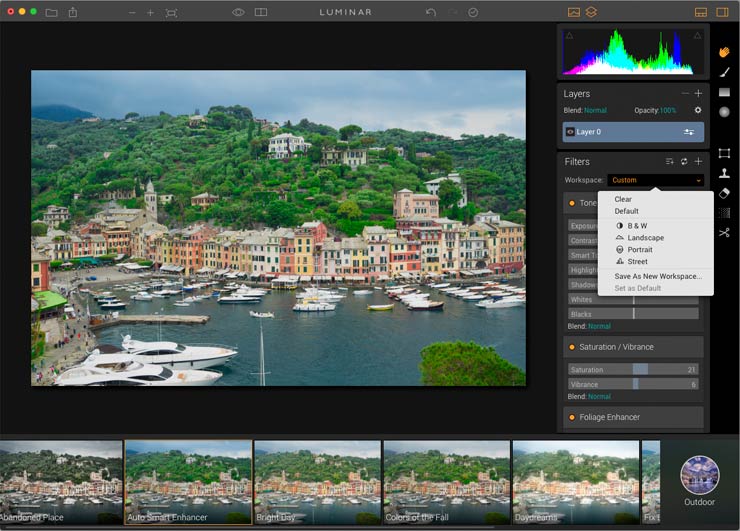
The presets don’t have to be used at ‘full strength’ and all have a slider that allows you to dial back the amount.
What looks awful at 100% might suit an image quite well at 15%, so don’t dismiss the harsher looking settings too quickly.
After spending some time with the sample image, I decided to load one of my RAW files from a recent bit of industrial photography.
The man in the white coat is removing some carbon fibre composite from a press.
This particular shot is a bit underexposed, since I didn’t want to burn out the outside view. Even though it’s at 100ISO, I still expect some noise in the shadows.
This is a split view showing the basic processed RAW file on the left, and a bit of shadow boosting on the right.

Noise levels in the shadows (Canon 5Ds 50MP file) are kept at reasonable levels.
I’d note that there is no fine control over RAW processing options or the noise reduction applied during conversion.
RAW processing is very much on automatic here.
Magnified detail out of the door shows some chromatic aberration (coloured fringes)

This is the sort of thing I’d normally correct when processing RAW files with Adobe Camera RAW or DxO Optics Pro.
It may not show much, but it’s vital for my higher quality work (but do note my observations on this in the conclusions)
Looking at this example I decided that to really see what Luminar could do, I needed better quality input files.
The software can install as a plugin if you have the host software installed.
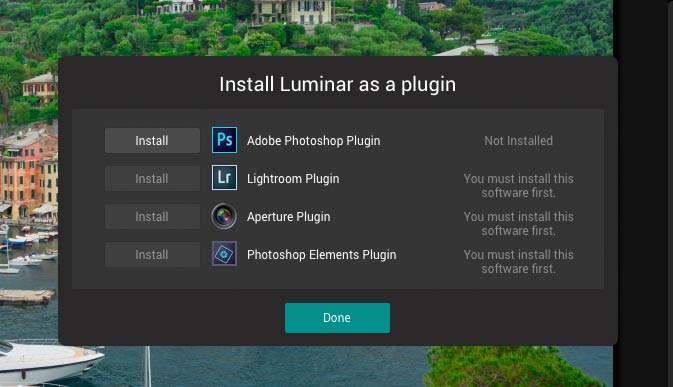
I’m trying Luminar with Adobe Photoshop CS6.
Here’s a very high contrast interior view of an office.
It’s ben processed with ACR to make sure that there is no clipping of the highlights if the view out of the window.
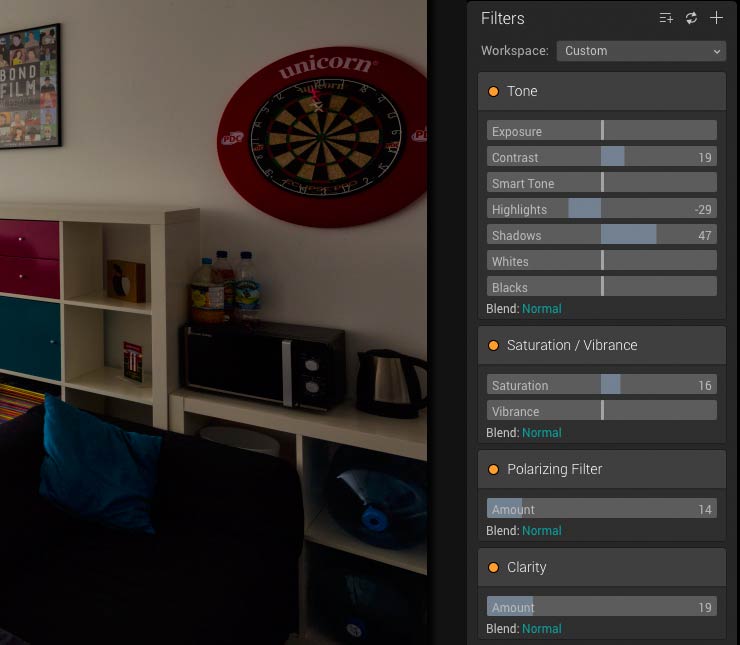
This view shows the ‘Image enhancer’ preset at 100%.
It’s too much for my tastes, showing some halos in the dark areas.

As I said though, these are just starting points.
All the settings for each filter element can be altered as you feel fit.
I could try a black and white version, but clients hardly ever want B&W…

When experimenting, push sliders too far and then drop back.
I find this helps get a feel for what works. Note the sensor noise starting to show in the really dark area

For the version of this image supplied to a client (the owner of the office complex) I masked together two shots at different exposures.
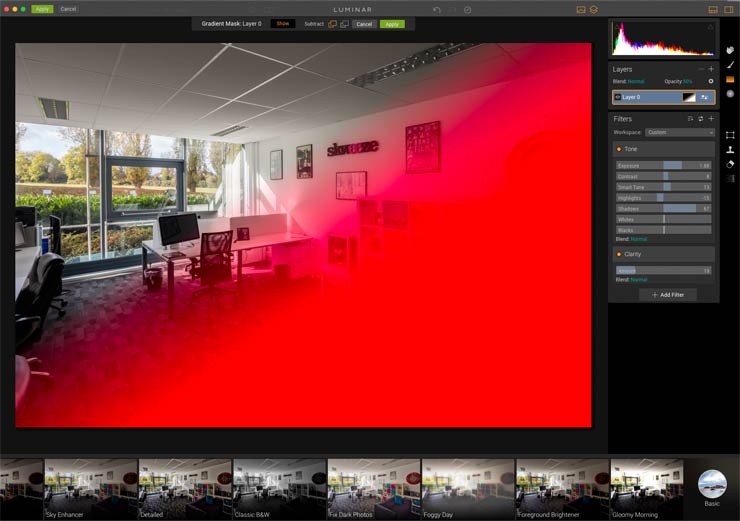
I could also use a gradient when processing the RAW file, but there’s another choice here. A gradient mask for the filters.
Sets of filters can be combined in layers and masked.

If I remember to duplicate my working layer in Photoshop before calling Luminar, I can further mask its effects later.
You can show the mask more directly (red equates with applying the filter)
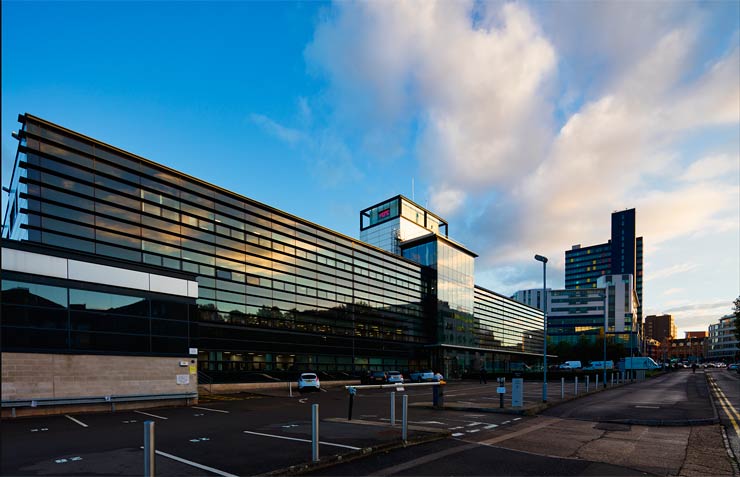
The Leicester Mercury building
A photograph of the Leicester Mercury building near the city centre.
A hand held shot with a 17mm shift lens, taken on my way to a nearby event.
Again quite dark, since I was careful not to clip image highlights (Canon 5Ds 50MP – processed in ACR. Image is in the ProPhoto colour space)
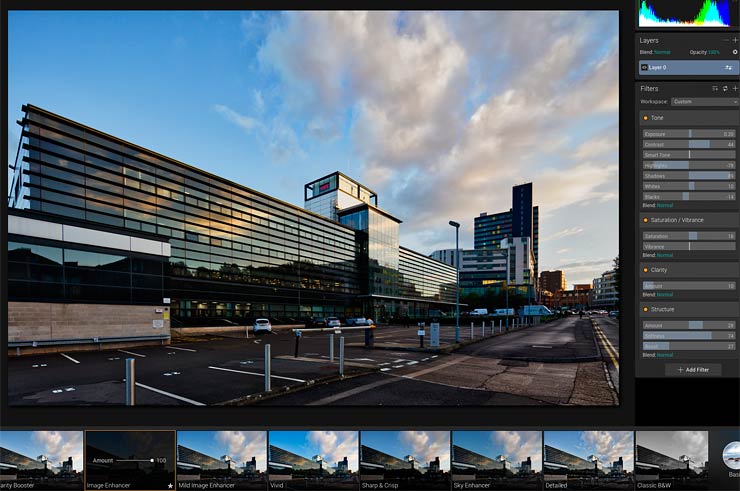
A ‘Clarity boost’ brings up some of the detail in shadows.

The ‘image enhancer’ preset pushing things a bit too far, especially the halo effect in the sky to the top left.
The ‘Vivid’ preset
Foreground brightener at 100%
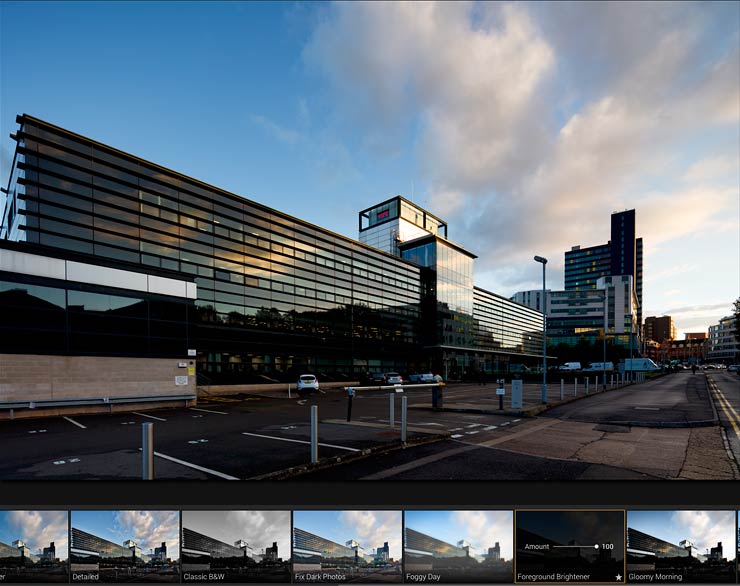
Reducing it to 29%

How about the aptly named ‘Fix Dark Photos’
Not too bad, here at 100%

Pushing up the image ‘structure’ setting has a very noticeable look to it.

The split view shows just what’s changed.
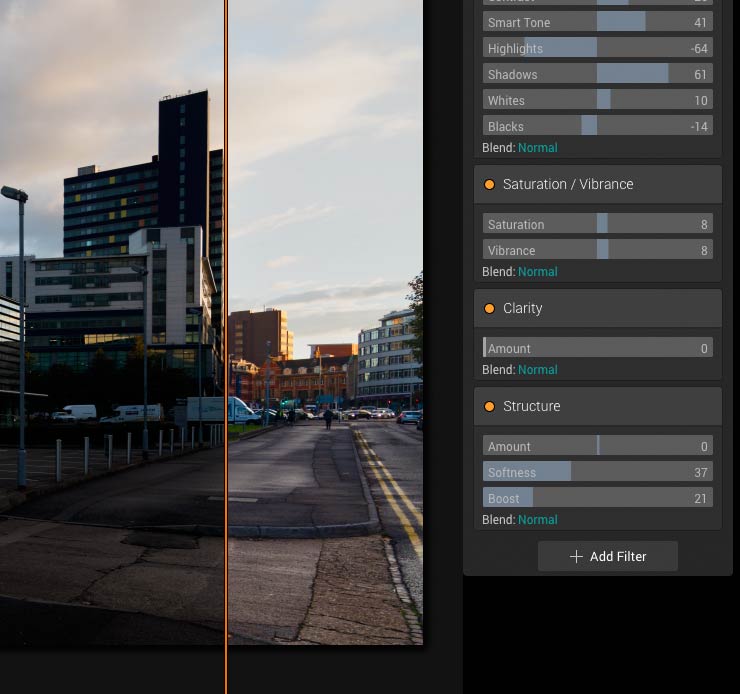
A wider view of what’s happening to the image.

If I’m not happy here, there is a multitude of other filters I can add.

Some work very well whilst other may leave you wondering what they are for…
Take time to experiment with different source images, not everything works with all images.
The software does have a good deal of consistency in its design and I was not often left wondering what to do, which is not bad for a program of this complexity.

There is a detailed history option, recording what you’ve done, although I’d like to see it include snapshots to make stepping back an easier process.
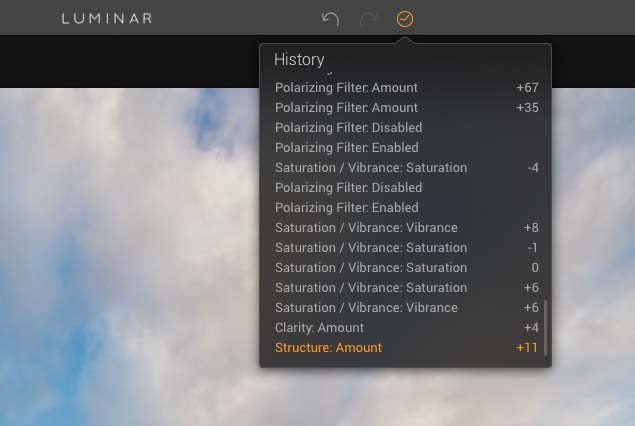
Masking effects
A very powerful feature of Luminar is that effects can be combined into layers which can be masked together.
This is not just simple ‘painting in’ of effects or the graduated mask shown earlier.
There are a wide range of blending modes – if this means something to you, then you’ll appreciate the power and complexity they offer. If not, then just start simple and work up. Macphun have lots of training resources available, and with this being brand new software, expect them to grow.
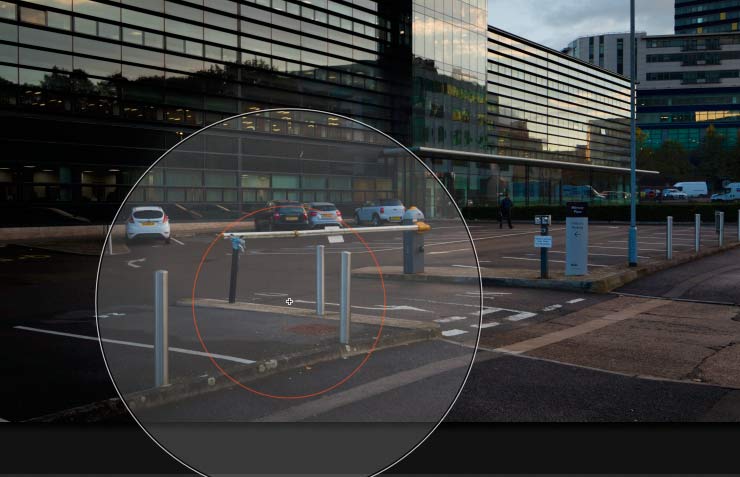
In the shot below I’m ‘painting in’ lightness to the darker parts of the image. You can see it to the right of the brush indicator.

The mask icon shows the masking.
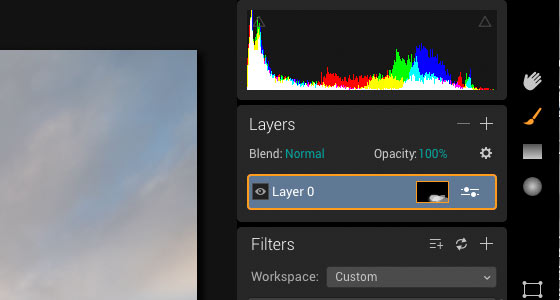
Zooming in shows the effect more clearly.
Here’s a version of the photo I’m quite happy with. The strong colour gives a good feel for the lighting conditions that caught my attention that afternoon.

Saving files
When you’ve finished working on an image, it just gets sent back to the calling program.
However, if you are working with the standalone application you can either save the file in a native format (which is fully editable in respect of layers/masks/adjustments/history, or export the file in one of several common formats.

Exporting…

Conclusions
A whole new image editing package is always going to be a big job, and I’m pleased with how well Macphun have done with this first version of Luminar.
[contentblock id=39 img=html.png]
I hope the examples here give a feel for what you can do – there is much more I’ve not even touched on…
At the moment I consider that, for my work, it sits in the middle between RAW image processing and printing/web output.
I’ve been testing RAW conversion software for many years and with my production of large prints, I have built a good collection of RAW files that can cause difficulties for software.
The lack of fine tuning and lens/camera corrections men that I’d not use Luminar with RAW files, but remember that I do this stuff for a living and am very particular about this aspect of my workflow [keep reading though…]
For people looking to get into photo editing and move on from in-camera JPEG images, it’s a great way of dipping your toes in the water. It’s been designed to be easy to pick up, and much of the fine tuning and tweaking is just not needed if you don’t want it.
The software comfortably handled the huge 16 bit 50MP files in the ProPhoto colour space that I exported from Photoshop.
Personally I don’t like using Adobe Lightroom very much, but even so it has excellent RAW processing and adequate print handling, so Luminar would fit very well with a Lightroom based workflow.
Just one more thing… remember I said that the software was V1.0 – that means updates should polish off a few rough edges before too long. If you have a look through Macphun’s features comparisons down the page, you’ll see much more advanced RAW processing (inc. lens corrections) and image library functionality are listed as on the way.
If you’re Mac based, be sure to give the free trail version a go.
I’ve had the software to test for a couple of weeks and have already used it for tweaking a few images sent to clients.
You can make comments and ask questions about this review below.
Summary
Image editing software package for the Mac from MacPhun. Work with many file formats including RAW.
Works as a standalone or plugin application.
See also V1.1 and V1.2 updates for extra features added
System requirements (Mac)
Min. Requirements
- Processor Core 2 Duo from late 2009 or newer
- Minimum 4 GB RAM
- OS X 10.10.5 or newer
- 2 GB free space on hard drive
- Display resolution 1280×800 or higher
- Retina displays supported
Recommended for best performance
- Mac late 2012 or newer with Core i5+ processor
- 8 GB RAM
- macOS 10.12
- 15 GB free space on SSD drive
Features list comparison
A list (from Macphun press release info.) showing Luminar features compared with some from Aperture and Lightroom
‘S’ indicates a pending feature
| Luminar | Aperture | Lightroom | |
|---|---|---|---|
| Adaptive UI for different skill levels | √ | X | X |
| Adjustment Gradient filter | √ | X | √ |
| Advanced Contrast filter | √ | X | X |
| Apple Photos extension | √ | X | X |
| Batch processing | S | √ | √ |
| Bi-Color Toning filter | √ | X | X |
| Black & White conversion | √ | √ | √ |
| Blend modes for filters | √ | X | X |
| Brightness adjustment | √ | √ | √ |
| Channel mixer | √ | X | X |
| Chromatic Aberration (Auto) | √ | X | √ |
| Chromatic Aberration (Manual) | S | √ | √ |
| Clarity filter | √ | X | √ |
| Clone & Stamp tool | √ | √ | X |
| Color Balance filter | √ | X | X |
| Color Contrast filter | √ | X | X |
| Color Temperature | √ | √ | √ |
| Compare modes | √ | X | X |
| Contrast | √ | √ | √ |
| Crop | √ | √ | √ |
| Cross Processing filter | √ | X | X |
| Curves | √ | √ | √ |
| Defringe | S | X | √ |
| Dehaze | S | X | √ |
| Details Enhancer filter | √ | X | X |
| Eraser (Object removal) | √ | X | √ |
| Fog filter | √ | X | X |
| Foliage Enhancer filter | √ | X | X |
| Gradient masking | √ | X | √ |
| Grain Filter | √ | X | √ |
| High Key filter | √ | X | X |
| Highlights and Shadows | √ | √ | √ |
| Histogram | √ | √ | √ |
| History panel | √ | X | √ |
| Hue-Saturation-Luminance | √ | √ | √ |
| Image flip (horizontal or vertical) | S | √ | √ |
| Image Radiance | √ | X | X |
| JPG, PNG and other formats supported | √ | √ | √ |
| Layers | √ | X | X |
| Layers: blend modes | √ | X | X |
| Layers: duplicate layer | √ | X | X |
| Layers: masking | √ | X | X |
| Layers: rasterize layer | √ | X | X |
| Lens correction | S | X | √ |
| Levels | √ | X | √ |
| Live image processing | √ | √ | √ |
| Luminosity Masking | √ | X | X |
| Masking brush | √ | √ | √ |
| Masking with filters | √ | X | X |
| Micro structure | √ | X | X |
| Moiré removal | X | X | √ |
| Noise reduction | √ | √ | √ |
| Non-destructive editing | √ | √ | √ |
| Orton Effect filter | √ | X | X |
| Panorama Stitching | X | X | √ |
| Perspective Correction | S | X | √ |
| Photo Filter | √ | X | X |
| Photo library and catalogue | S | √ | √ |
| Plug-in functionality | √ | X | X |
| Polarizing filter | √ | X | X |
| Presets | √ | √ | √ |
| Presets: built-in gallery & preview panel | √ | X | X |
| Presets: custom amount | √ | X | X |
| Presets: save texture inside preset | S | X | X |
| Presets: visual previews | √ | X | √ |
| Radial masking | √ | X | √ |
| RAW support | √ | √ | √ |
| Red Eye removal | X | √ | √ |
| Remove Color Cast filter | √ | X | X |
| Resize | √ | √ | √ |
| Sharpening | √ | √ | √ |
| Show Highlights/Shadows clippings | √ | X | √ |
| Smart Tone adjustment | √ | X | X |
| Social Sharing | √ | √ | √ |
| Soft Focus filter | √ | X | X |
| Soft Glow filter | √ | X | X |
| Split Color Warmth filter | √ | X | X |
| Split Toning filter | √ | X | X |
| Straightening | √ | √ | √ |
| Structure filter | √ | X | X |
| Texture overlay | √ | X | X |
| Tone filter | √ | √ | √ |
| Top & Bottom Lighting | √ | X | X |
| Transform | √ | X | √ |
| Vibrance adjustment | √ | √ | √ |
| Vignette | √ | √ | √ |
| Vignette: feather adjustment | √ | X | √ |
| Vignette: Inner brightness adjustment | √ | X | X |
| White Balance | √ | √ | √ |
| Whites & Blacks adjustment | √ | √ | √ |
| Workspaces | √ | X | X |
| Workspaces: export & import | √ | X | X |
| Zoom | √ | √ | √ |
| Zoom: up to 3000% | √ | X | X |
Never miss a new article or review - Sign up for our occasional (ad-free) Newsletter
and please do subscribe to Keith's YouTube Channel

Other areas of our site that may be of interest...
All the latest articles/reviews and photo news items appear on Keith's Photo blog

Keith explains tilt and shift lenses
Keith has written a book that looks at the many ways that tilt/shift lenses can benefit your photography from a technical and creative point of view. If not in the UK check for import issues and maybe try an on-line bookshop. Keith has no connection with sales of the book.
ISBN 9781785007712
There is also a specific index page on the site with links to all Keith's articles, reviews and videos about using tilt and shift.
We've a whole section of the site devoted to Digital Black and White photography and printing. It covers all of Keith's specialist articles and reviews. Other sections include Colour management and Keith's camera hacks - there are over 1200 articles/reviews here...
We're an Amazon.com affiliate, so receive payment if you buy via Amazon US