


Epson FF-680W print scanner
Epson FF-680W print scanner
Quickly scan both sides up to A4/letter

No more Google ads. Too many deceptive and irritating adverts.
Any ad links left are non tracking, to companies we know, trust and we've worked with for years [Park Cameras]
Ads helped pay for site running costs, so if you found something useful, please
...Make small KoFi donation?
...Subscribe to Keith's YouTube Channel
...Get Keith's book about how to use tilt/shift lenses
Our site contains affiliate links - these help support the site. See our Advertising policies for more
The Epson FF-680W print scanner is aimed at people wanting to bulk scan photos of different sizes.
It’s fast – see the videos. It even tales long panoramic prints up to 91cm long
More details at Epson UK [£500]
Features
- Fast scanner with auto feeder
Scan up to 30 photos in 30 seconds - Enhance batches of photos
Auto crop, rotate and enhance colours and contrast - File sizes to suit application
Creates shareable JPEGs or large TIFFs for maximum image quality - Share photos online easily
Set automatic upload to Dropbox and Google Drive - Scans different shapes and sizes
Takes photos 9x13cm up to 21x91cm [min 50.4 x 50.4mm]

Introduction to the scanner [7 mins]
Epson FF-680W print scanner – bulk scanning
Scanner review – supplement to this review [13 mins]
Epson FF-680W print scanner – fast and double sided
The scanner is really designed to be easy for home use. It’s obviously aimed at people with large collections of prints looking to archive them.
The range of media it handles is quite good [see the specs below], with no trouble for postcards, as long as they are not too tatty.
The capacity though, and things like replaceable feed rollers, makes it suitable for higher volume archival use too.
It’s also usable as a basic document scanner – see the PDF manual for more about that though.

The Epson FF-680W print scanner folds out for use – it’s very compact otherwise.


There is an external [24V 2A] power supply for the scanner.

Note too the USB connection [type B]. which I’m using plugged in to the Mac Studio behind it.
There is Wi-Fi connectivity too [2.4GHz]

The 300/600/1200 resolutions suit different needs – more detail makes for bigger files and slower scanning.
This is from the specs, but if you look at the scanning I’ve included in the video, scanning some 6×4″ prints, you’ll note that the 1200 dpi ones take hardly any longer [for a stack of 10 prints]. The ‘big’ difference in speed is between 300 and 600.

For delicate prints, there is a transparent carrier ‘wallet’ to put pictures in. Use this for damaged prints where the feed mechanism may have issues or potentially damage your print.
The scanner will detect most instances of double feeding and pause for correction.
There are actually two identical scan sensors, for the front and back of the print

The feed roller units are actually a replaceable part [Epson £46]
The supplied ones are good for many tens of thousands of scans. You can check the number of scans in Epson Scan 2 Utility.

Many functions can be controlled from the front panel.with the ability to directly launch selected scan software.
Be sure to set the guides for the print sizes you have.

You can load different sizes. So, if you are loading 4×6″ and 5×7″ photos in the same batch, align the middle of the photos and load them at the centre of the input tray with the 5×7″ photos at the back and the 4×6″ photos at the front.
If the photos are sticking or other feed issues you can press the ‘slow mode’ button on the front
Epson FF-680W print scanner software
The installation of the scanner provides two software applications.
Smartscan+ is the basic scan software.
The Epson DocumentScan app also work with this device to scan documents through smart devices. You can save the scanned data in smart devices or cloud services, and send by e- mail.
Software is easily installed by going to Epson.sn and entering the model number FF 680W
Follow through the install and update options to get the updated OCR elements of the software.
On my Mac [M3 Mac Studio OS 14.6], even the basic [Apple] Image Capture app, allows for single scans – but I noticed it scans the opposite side. So, for the Epson software, the prints face you [and should be put in upside down].
That’s me behind the candles, in about 1972…

The software most people will choose for bulk scanning is FastFoto – which can automate all sorts of functions, including uploading images to cloud servers and applying various auto corrections – something which mostly works well with faded prints
Fastfoto
Something it’s really worth thinking about before you start to scan a large number of images, is just how are you going to organise them?
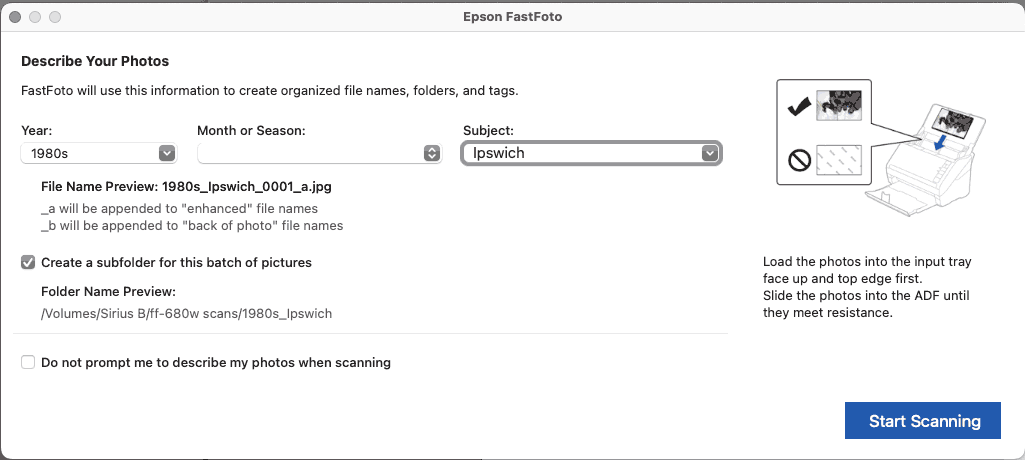
Think of a meaningful folder structure – this is from the FastFoto settings.

The software can prompt you for extra info at the start of every scan run. This includes dates, which will get written to EXIF data as creation dates.
In this example I have a bunch of loose photos from one of my Father’s boxes of photos – they are form the 1980’s and some have writing on the back. I’m running the auto enhance option as well and scanning at 600 dpi so I can enlarge them a bit if needed
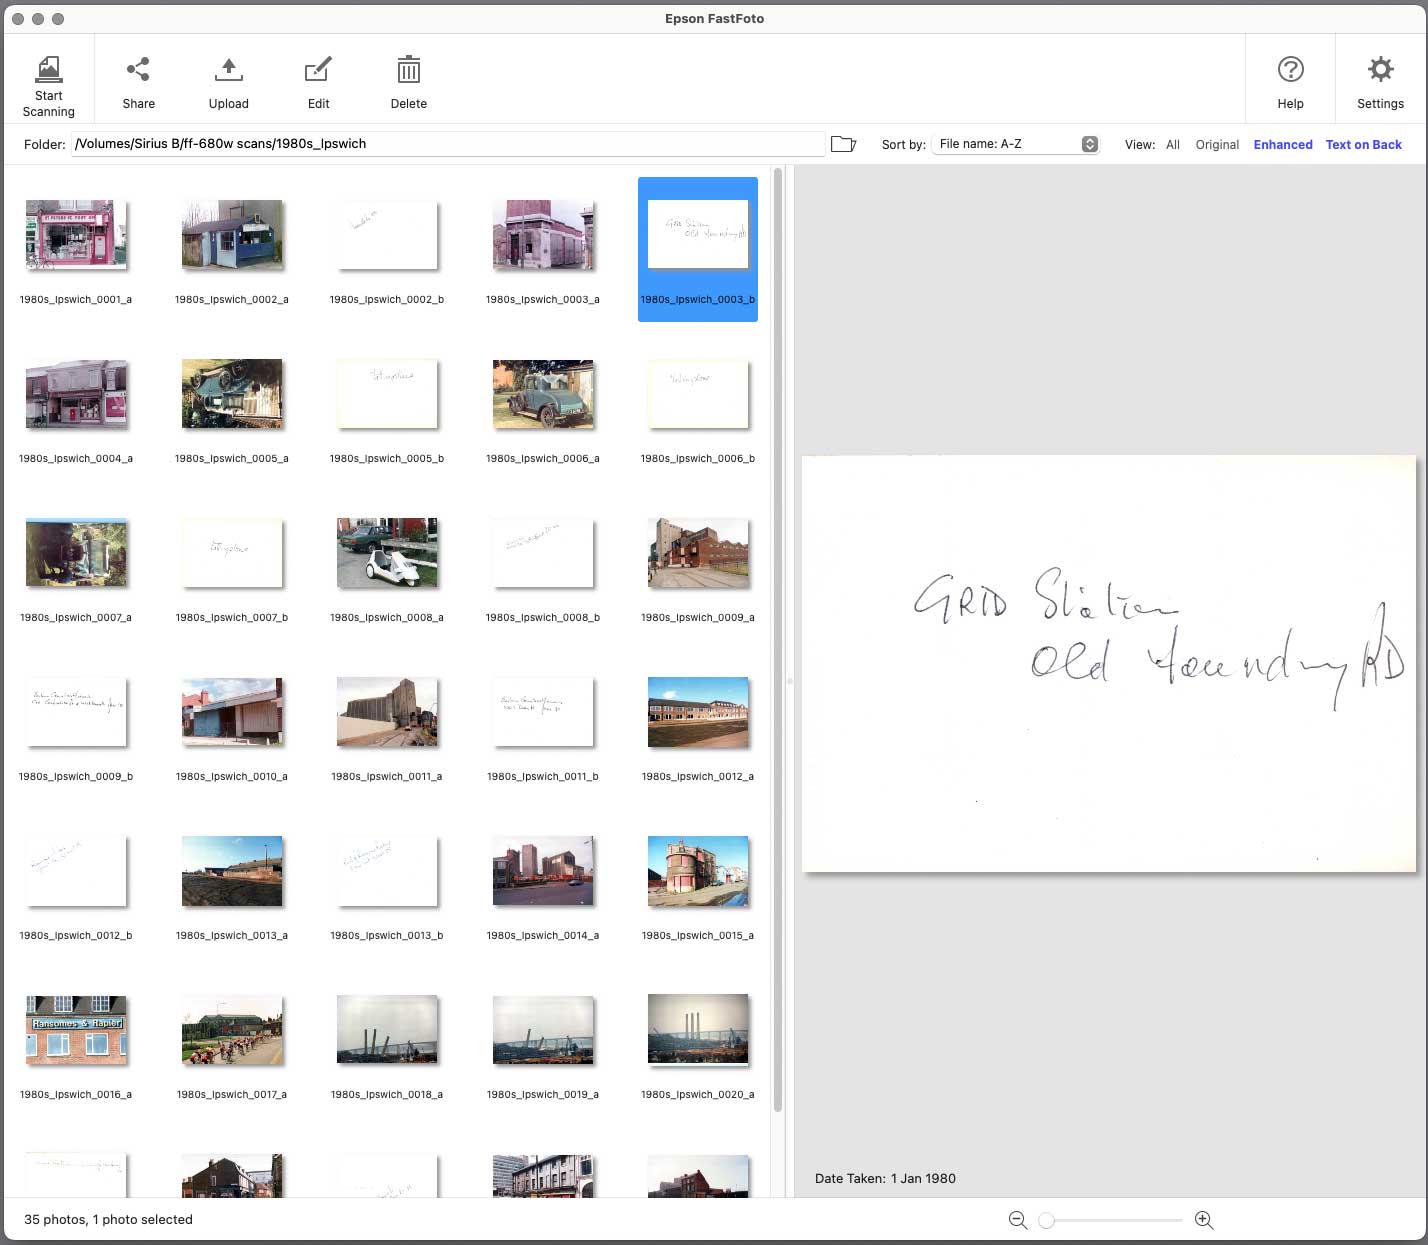
The prints take a few seconds each to scan and after the processing runs [it does this after the scans] I have a large folder of images, some showing writing on the backs of photos. [click on images to enlarge]
The image processing takes place after the prints are scanned in.
As you can see, not all the prints had anything written on them.
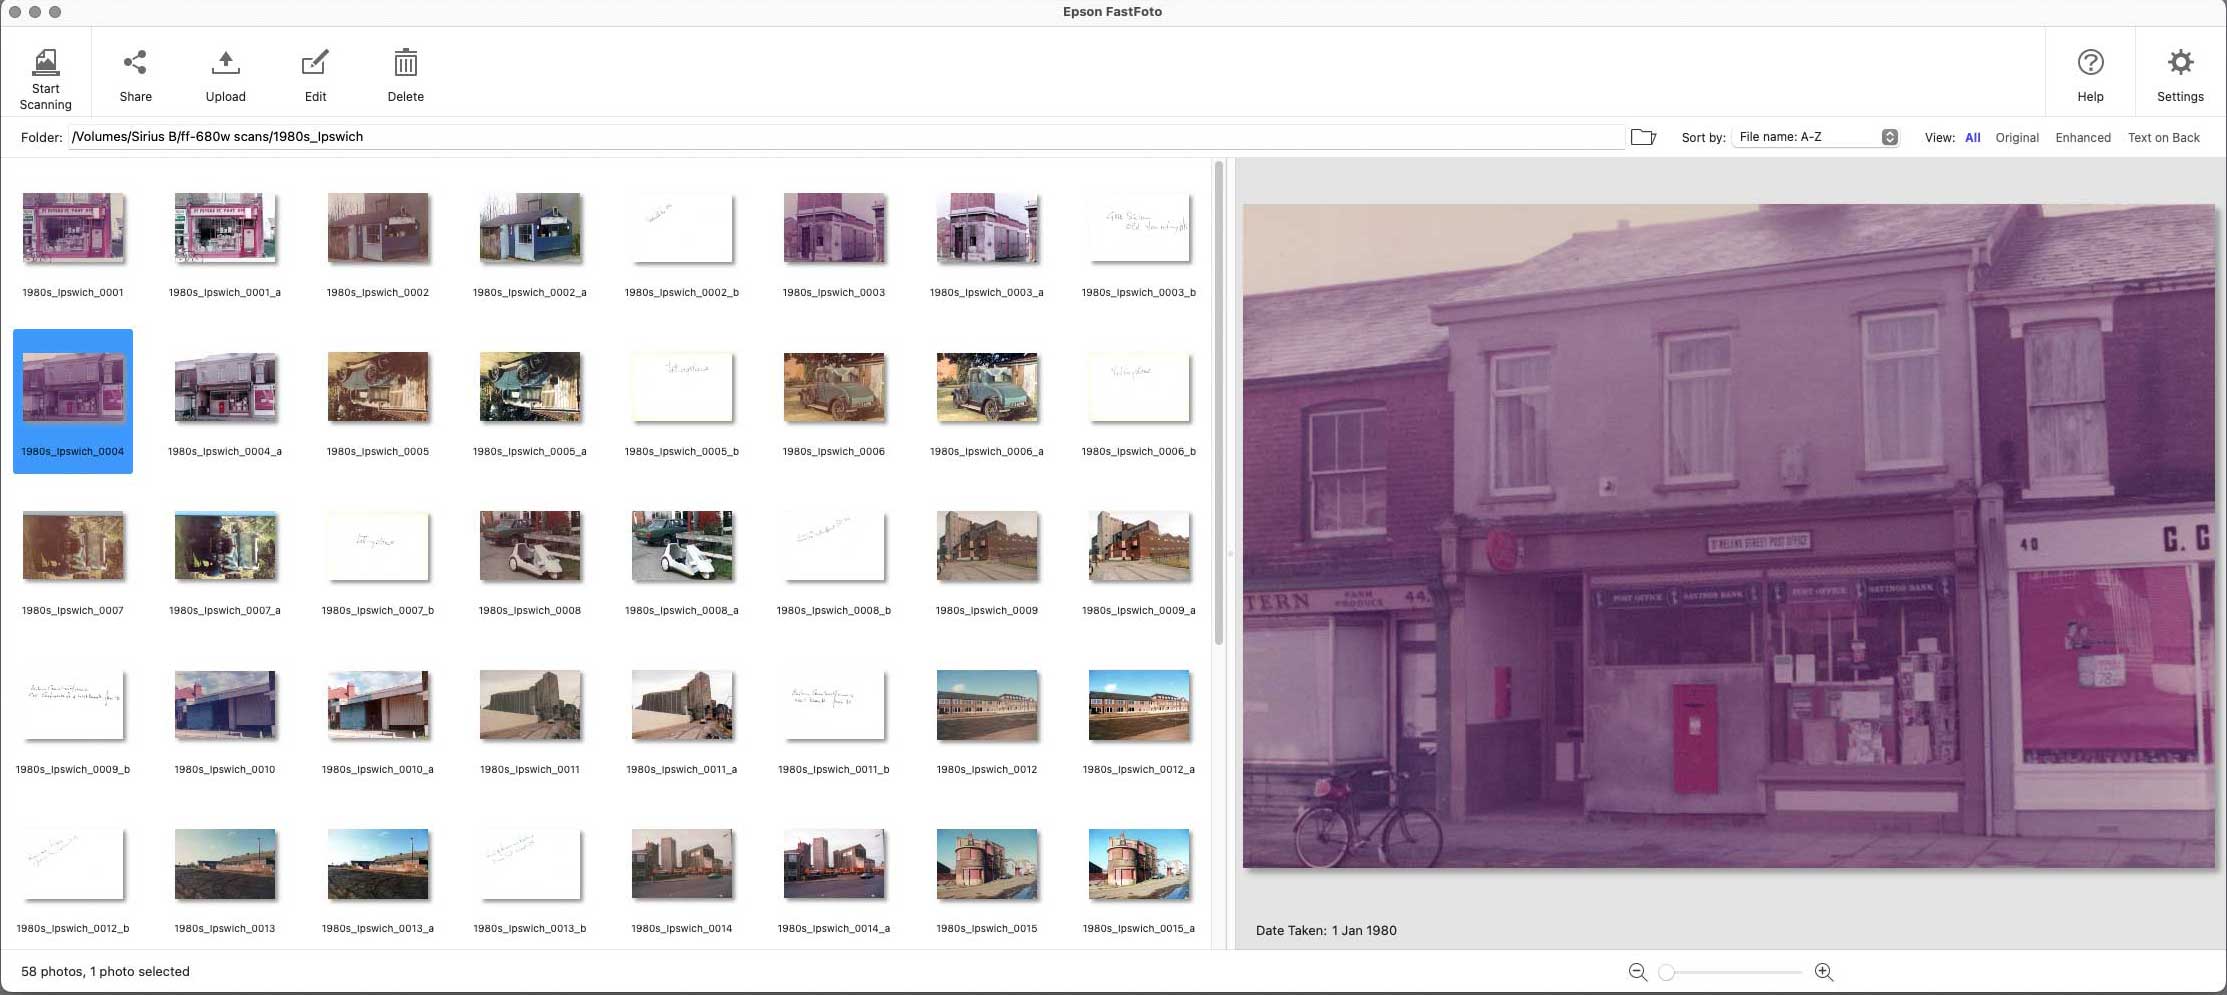
Here’s the corrected version, of what is a very badly faded print

Black and white is handled well. Here I am in 1965 with my Mother and grandparents.

Another windy beach on the east coast…
This is Shingle Street …looks like an Olympus OM10 my Dad’s holding.

Editing
If I wanted to do much with an image, I’d do it afterwards in Photoshop, but the FastFoto app has some useful editing features.
The scanned images can be edited in different ways in the software. – I left the enhancement set at auto, since originals are retained. More useful was the ability to correct orientations, where pictures were upside down or on their side. Full functionality is listed as
- Rotate Left/Rotate Right: Rotate the selected images.
- Crop (Windows only): Crop the image. An outline appears around the selected image in the preview pane. Click and drag the outline to highlight the cropped area, and then click Apply to crop the image. You can select one image each time when applying this item.
- Enhance: Applies photo enhancement (brightness, contrast, and saturation) to the selected images.
- Restore: Applies color restoration to the selected images.
- Red Eye: Reduces the red eye effect in the selected images.
- Date (Windows only): Allows you to add, edit, or remove a date on the selected images (shown as the Date Taken information).
- Undo All: Removes all edits from the selected images made during the current session, since you started Epson FastFoto.
Epson FF-680W print scanner – Scan quality limitations?
The main limitations I noticed came from the source material.
Take these two images [~1995 and ~2005 IIRC] – One at Shingle Street in Suffolk, and the second in my home a few years later [with a large B&W print of Shingle Street in the background. [From ~1987, also taken with the Zuiko 24/2.8 – a lens I now use for my YT videos]
These are the actual 300dpi scans [corrected]


The 100% crop of my Dad’s OM40 [or it could be his older OM10?] below, shows that there just isn’t much detail there, in the image created by whatever compact camera my Mum was using, and however it was printed. This was at 600dpi.
With higher resolution originals, especially some small B&W prints, there is much more detail there, and you will see [at the full 1200dpi] how the interpolation and nature of the scan element limits detail a bit.
But that’s what proper photo scanners are for – See my V850 review

I can see that the lens is also the Olympus Zuiko 24mm f/2.8 …a favourite for both of us.
The scan output is 8 bit, from 10 bit internal.That’s not too bad for good prints, but means that it’s difficult to apply a lot of correction, if for example, the images are seriously faded.
This scanner is for fast bulk scanning, not optimal scanning for further work.
If you want better quality, then you will take a lot longer getting your scans done – that is the trade-off.
Just one note about newer prints – the second print above is from ~2005. That means it was quite likely scanned digitally and then printed digitally. This is the likely source of a very fine grid pattern seen in the scan [600 and 1200] at 100%

Making prints with the Epson FF-680W print scanner
As I’ve said, if I wanted to make a big print and the original print was up to it, I’d scan the print with a better scanner. Even my old Epson 1200U flatbed does much better, especially when driven by software like VueScan [the best value bit of software I ever purchased – still regularly updated after nearly 15 years].
However, if you just want to print copies or slightly larger versions for sending out to people, then the scans and corrections are good enough.
Those 6×4″ prints above would look fine to most people on A4 sheets, if scanned at 600 – just remember the changes in paper aspect ratios when you go for larger sheets of paper.
For printing at 12×18″ [half inch border on A3+ 13×19″] I’d want to use one of the 1200 scans and it had better be a pretty sharp original.
A lot depends on your audience for the prints… Most people just don’t see what I’d consider critical flaws in prints – but then again I’m a working photographer, shooting architecture, on 100MP Medium Format, with £3k lenses… YMMV as they say.
Epson FF-680W print scanner conclusions
It’s mighty impressive to watch the scanner zoom through a hundred prints – you can stack just over a centimetre thickness of prints in the loading slot [see the specs below]. Just make sure they are not stuck together first, or have labels which might peel off.
The software works well, and it’s good that you can set dates, which are written to EXIF data.
The highest resolution images [1200] are interpolated, but are easier to work on for creating enlarged prints.
Take care in keeping the scanner clean and dust free – look out for vertical lines appearing in prints and regularly clean the scan windows with a soft cloth.
That said, if you’ve an important print with enough detail, it is absolutely worth finding a better quality scanner to create the file to work from.
Real print detail?
One thing you’ll very quickly realise is that an awful lot of ‘snaps’ are out of focus or exhibit camera shake. They look fine at 6×4″ in your hand, but enlarged on a screen, many are truly awful from a technical viewpoint. Well, that’s just the way they are – I look at these images in a very different way to how I do images from the camera when I’ve been out on a professional architectural photography job!
Now what?
OK, you’ve scanned the 8000 prints you found in shoe boxes. You were assiduous in naming folders and setting file names.
You have an archive – back it up somewhere! If you were scanning B&W prints, then the physical prints will long outlast the computer you are using. If you’re scanning colour prints, then they will continue to fade, some faster than others.
The last question though is what are you going to do with the scanner? It’s not cheap, so think of relatives who might want to use/buy it… I’ve now run out of relatives likely to leave me boxes of prints, so this one is going back to Epson.
Just one other thought on the price… There is no better way of giving up on scanning an archive than it taking a long time, especially if tedious as well. The scan speed here makes it easy to do thousands of prints – what’s that worth to you?
Epson FF-680W print scanner: Overall conclusions
+ Effective and fast – a simple way to archive large collections of photo prints.
+ Handles multiple sizes
+ Scans notes and writing on the back of prints
+ Software is easy to use
+ Upload option for cloud storage
– Not cheap [£500] Aimed at organisations/users with a lot of photos to scan
– Needs care in keeping scan windows clean
Epson FF-680W print scanner Specifications
Scanning

Loading photos into the Epson FF-680W print scanner.

Epson FF-680W print scanner -technology
Scanner Type
- Sheetfed Scanner
Optical Resolution
- Main 600 DPI x Sub 600 DPI
Scanning Range (maximum)
- 216 mm x 910 mm (Horizontal x Vertical)
Scanning colour depth
- Output: 24 Bits Color / 8 Bits Monochrome
Ultrasonic Sensor
- Yes
Scanner
Optical Sensor
- CIS (Contact Image Sensor)
Light Source
- RGB LED
Output Resolution
- 300, 600 DPI
Scan speed
Scanning Speed
- Monochrome: 45 pages/min – Color: 45 pages/min measured with Size: A4 , Resolution: 300 dpi
Epson FF-680W print scanner: Paper / Media Handling
Paper weight
- Manual loading: 60 – 400 g/m²
Automatic Document Feeder Type
- Single pass dual scanning
Paper Tray Capacity
- 100 Sheets Standard, 36 Photo Sheets
Document size – Flatbed
- A4, A5, A6, B4, B5, C4 (Envelope), C5 (Envelope), C6 (Envelope), Letter, Postcard, Business cards, Legal, Executive
Duplex Scan
- Yes
General
Supply Voltage
- AC 100 V – 240 V, 50 Hz – 60 Hz
Energy Use
- 18 Watt (Operation), 9.2 Watt (Ready), 1.4 Watt (sleep mode), 0.1 Watt (Power off)
Product dimensions
- 296 x 169 x 176 mm (Width x Depth x Height)
Product weight
- 3.7 kg
Included Software
- Epson FastFoto, Epson ScanSmart
Compatible Operating Systems
- Mac OS X 10.11.x, Mac OS X 10.12.x, Windows 10, Windows 11 or later, Windows 7, Windows 7 x64, Windows 8 (32/64 bit)
Note: tested here on M3 Mac Sys 14.6
Other
Warranty
- 12 months Carry in
Never miss a new article or review - Sign up for our occasional (ad-free) Newsletter
and please do subscribe to Keith's YouTube Channel

Other areas of our site that may be of interest...
All the latest articles/reviews and photo news items appear on Keith's Photo blog

Keith explains tilt and shift lenses
Keith has written a book that looks at the many ways that tilt/shift lenses can benefit your photography from a technical and creative point of view. If not in the UK check for import issues and maybe try an on-line bookshop. Keith has no connection with sales of the book.
ISBN 9781785007712
There is also a specific index page on the site with links to all Keith's articles, reviews and videos about using tilt and shift.
We've a whole section of the site devoted to Digital Black and White photography and printing. It covers all of Keith's specialist articles and reviews. Other sections include Colour management and Keith's camera hacks - there are over 1200 articles/reviews here...
Adverts removed