


Epson SureColor P7500 printer review
Epson SureColor P7500 printer review
Using the SC-P7500 24″ inch printer
Note: The P7500 is also known as the P7540, P7550, P7560 and P7570 in some markets

No more Google ads. Too many deceptive and irritating adverts.
Any ad links left are non tracking, to companies we know, trust and we've worked with for years [Park Cameras]
Ads helped pay for site running costs, so if you found something useful, please
...Make small KoFi donation?
...Subscribe to Keith's YouTube Channel
...Get Keith's book about how to use tilt/shift lenses
Our site contains affiliate links - these help support the site. See our Advertising policies for more
The Epson P7500 was first announced in October 2019. It’s a significant development of the SP7000 and uses Epson’s new 12-colour UltraChrome ink-set. We had hoped to have the printer here earlier to review, but Covid etc…
Epson UK kindly lent us a printer to test. This review is largely applicable to the larger SC-P9500.
The printer supplied is the basic model – we did not test the spectroproofer version (see the P7000 review for more about this).

Related articles
Videos produced for this review
- Video review [35 mins]
- First prints and profiling
- Gallery wrap canvas using EPL
- Panoramic sunset and handling colour
- Making a large print – what’s needed in the image
- Printing on poster board
- Using custom media settings
- P7500 optimising B&W linearity
- Two large prints – colour or B&W
- Paper differences – two B&W prints
- Fixing dull colours – a P7500 print
- So do you really want a large printer?
Keith’s Epson SC-P7500 printer review
The P7500 (and P9500) are high end pigment ink printers. The P7500 (known by other numbers, such as P7570 in the US) is currently top of Epson’s range of printers for photo and art printing.
The older P7000 I reviewed a while ago is still available as is the 17″ P5000 [review – setup ] which has the same ink set as the P7000.
I’m looking at one of Epson’s demo printers here, so it’s been moved round a bit and already had a fair few yards of prints run through it. This review is based on a somewhat shorter period of use than some of our long reviews, so I’ve concentrated on testing image quality and producing a collection of videos to augment this review.

The P7500 printing on a heavy art paper – note the internal light and window showing the print head.
The P7500 was shipped here in the back of a van, and as part of the process of getting it into my kitchen, tipped on its end to get the printer round a doorway. After setting up, apart from powering up and a few checks to see it was it was OK, I left it overnight before starting any detailed testing.

I’ve quite a few videos and written numerous other printer related articles and reviews. Check some of the article categories listed in the right hand column.
What do you get with the SC-P7500?
The printer definitely needs two people to shift it. It does come off the stand (which for a new printer needs assembling).
It’s noticeably heavier than the P7000 I had here a few years ago – you will need to fairly strong people to lift/carry it – we had some difficulties in getting it back out of the house.
The new 12 colour Ultrachrome Pro12 inks have orange, green and violet inks. There is no light light black and at last, black ink swapping is banished – both Pk and Mk are available all the time.
The print head assembly is much larger, giving an increased print speed, even at higher quality settings.
The cutter assembly is now unconnected to the print head, removing cutting stresses as a source of strain/wear, as well as removing a source of paper dust away from the print area.
Key Features (info. from Epson)
- Powered by PrecisionCore – New 2.6-inch PrecisionCore MicroTFP printhead performs at speeds up to 2.4 times faster than previous generations1
- Extreme Color Gamut – All-new UltraChrome Pro12 Ink with Violet produces astounding color with up to 99 percent coverage of the PANTONE® FORMULA GUIDE solid-coated standard3
- Realtime Photo and Matte Black Ink Switching – Dedicated channels for both black ink types
- Industry-leading Print Permanence – Creates prints that last up to 200 years color and 400 years black-and-white2
- New Customizable Touchscreen – First-in-class to feature a customizable, 4.3-inch color touchscreen for easy navigation
- Reliable Printer Design – Redesigned industrial-level print engine for lasting durability and an interior LED light for convenient operation
- Black Density with Black Enhance Overcoat – Improved DMAX for a wider contrast ratio with enhanced clarity and increased sharpness on glossy papers
- Optional Epson SpectroProofer® – Automates color calibration and proof verification tasks for proofing applications with optional third-party RIP and workflow software
- Easy Workflow Integration – Compatible with most third-party RIP workflow software
The full technical specs. are listed at the foot of the article
Which printer?
I’m looking at the basic P7500 without the optional hard disk (for job storage) or spectroproofer unit.
Unlike the P7000 and P5000 there is no one-off ‘light light grey’ [LLK] or ‘violet’ ink choice to be made on setup. The violet ink was provided for a slightly larger gamut for proofing purposes. Epson advised choosing LLK for photo printing since the LLK ink provided smoother tones.
If the lack of LLK causes any issues, then I couldn’t see them in the testing – a bigger advantage for some might be no longer needing to swap blacks for different papers.
Setting up for my P7500 printer review
This printer was already set up, but I still needed to connect it to our Ethernet network and all my Macs.
To start off, go to the Epson.sn site and enter the model number – all you need will be here.

I used our network for the printer – no wireless here

I also took the opportunity to update the printer firmware. I do this every time I test a printer.

The latest firmware for your printer can be found on your local Epson site.
Connectivity
The printer is very easy to connect into a network, with 2 methods of connection.
- Hi-Speed USB
- 100/1000Base-T Ethernet

These are at the side of the printer.
The manual suggests quite a bit of space is left round the printer, but all was fine where I’d got it, with quite a bit less space.
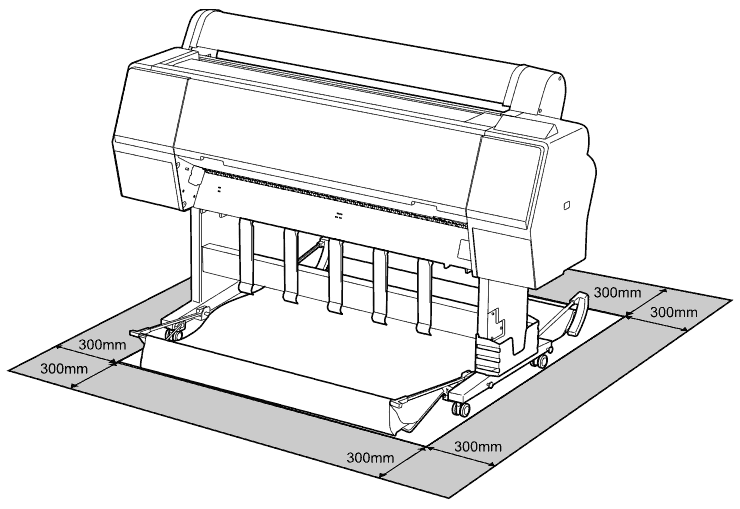
Image from Epson manual
Using the SC-P7500
After the printer arriving and settling for an hour or so I ran some nozzle checks via the print utility.

If you’re familiar with nozzle checks on Epson printer, you’ll notice how big these patterns are.
That’s because the print head assemble and print head on the P7500 is considerably larger than smaller printers, and has a lot more nozzles. The nozzle spacing is now 1/300th inch rather than the customary 1/360th inch – this means the default print resolution is now 300dpi and multiples (600/1200/2400 dpi).
The large heads have a minimum 3.5pl drop size – larger than many smaller printers. The resolution and dot size might suggest a slightly coarser print capability, but tests show a very good coverage of fine detail (I’ll come back to this in another article). The large heads do mean that even at high quality, prints come out of the printer relatively rapidly. You’ll need to check the specs for details – I didn’t conduct any detailed print timings.
The following day, after a clear nozzle check, I decided to run the automated head alignment

Here’s the alignment pattern – printed on a 260gsm Lustre paper at the premium Luster (260) media setting.

I used the automatic set-up, but there are more detailed manual options if needed.
There is another setting available to optimise the size accuracy of printing – this does conflict somewhat with optimal quality, which was my preference.
During the few weeks I had the printer here I ran quite a few nozzle checks. All perfect bar one where a single jet showed up faint. Given the use and treatment this printer has had (trade shows and demos) I’d take that. Remember, these printers are designed for regular use, not sitting unused for weeks…
Printing
The printer has a good size buffer, so any delays in printing I saw were entirely due to my ancient MacBook Pro.
If you have the disk option, then print jobs can be spooled to the printer and reprinted as needed.
The display shows the estimated print time.

If you can’t wait, there all sorts of notification options available via the printer web page.
It can send you emails…

Papers used in my P7500 printer review
A range of paper types reflecting what I had in stock (17″ and 24″ rolls) and would use for my printing.
Roll unless mentioned
- Epson Premium Gloss -sheet
- Epson Premium Lustre -sheet
- Epson Premium Lustre(260)
- Epson Hot press bright
- Innova IFA-14
- Innova IFA-56 gloss canvas
- Fotospeed Platinum Gloss Art Fibre 300
Changing ink on the SC-P7500
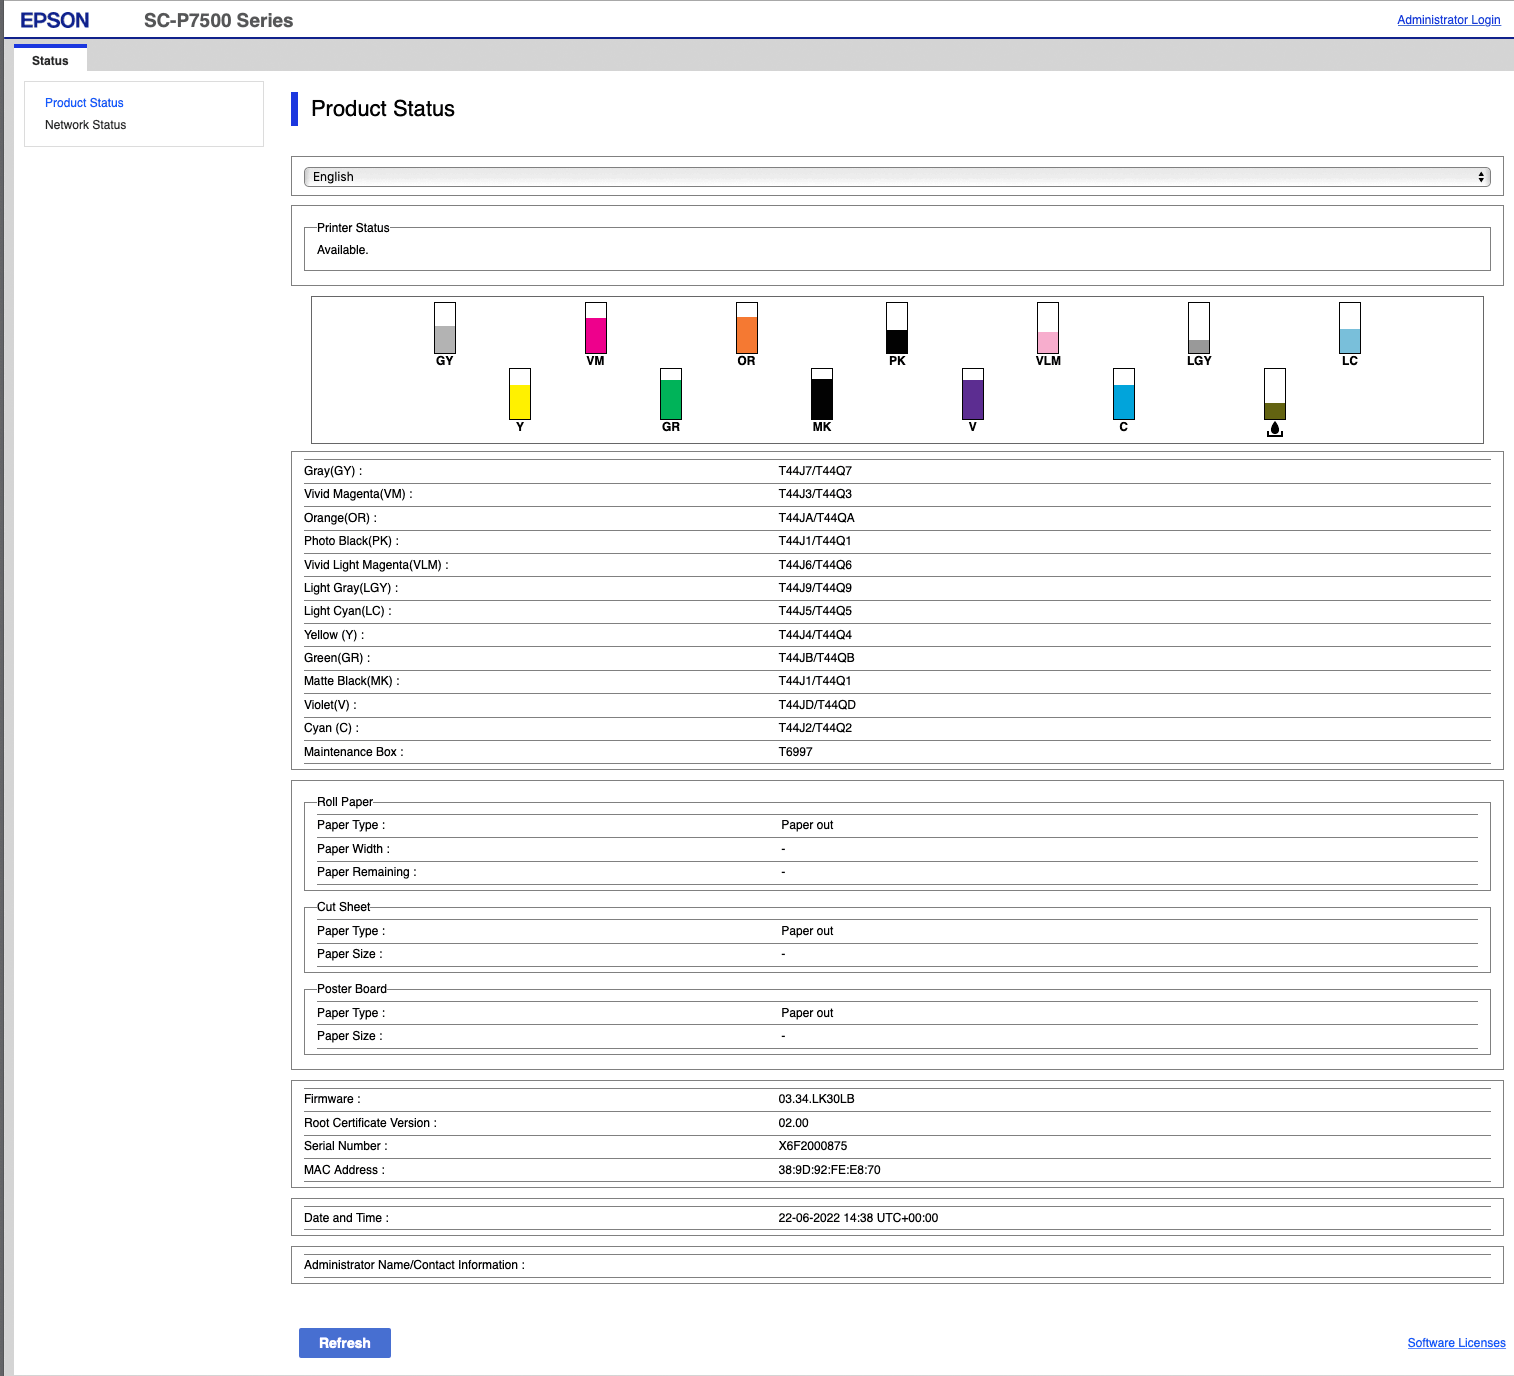
The ink levels are clearly indicated on the main display.
The P7500 lets you use both 350ml and 700ml ink carts.
After using the printer for a while you should get a pretty good idea which inks go down fastest for your sort of printing.
The light grey and grey seem to go down fast enough that I’d likely get 700ml ones for them, but orange and green? For my testing, the levels of these hardly shifted.
The printer has a built in web server giving a lot of information (and setup options).
The maintenance cart is accessed at the side of the printer.
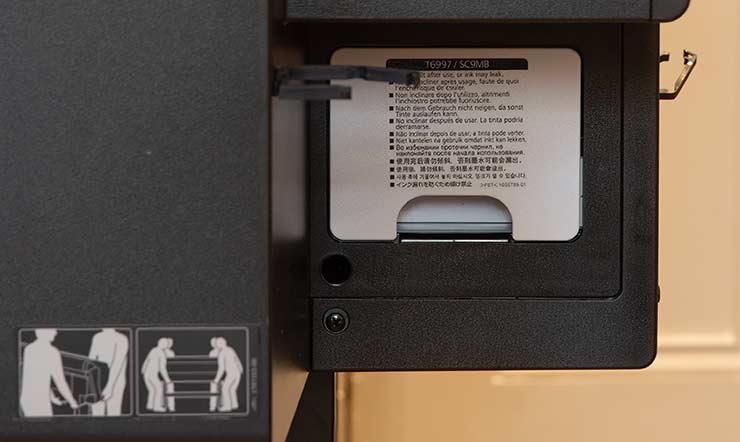
It just pulls out for access.

Cleaning/maintenance
As well as the maintenance tank, there are strips of absorbent material to collect overspray from borderless printing. These can be replaced as needed.
The panel above the right hand ink cartridge slots also slides off to reveal the capping station and cleaning area for the print heads.

There is a cleaning mode which moves the print head over to the far left, where a rea panel allows direct access to the print head for cleaning


Take care doing this! Follow the instructions about what bits to clean…
Changing black inks?
Not needed any more… (yay!)
Paper Loading and Media handling
The easiest way to use the printer is just to load roll paper and print away.
The paper feed is a spindle-less system, with two end caps. These can switch between 2″ and 3″ core media

There is a shallow groove on the top of the printer which makes loading a bit easier.
Note that I have kept the roll’s protective paper in place.

The screen shows assorted guides to operations.
The paper just needs feeding in until the printer beeps – no alignment is needed, but take care that the end caps are properly in place. It’s possible for paper to be loaded on the skew if you’re not careful.

There are checks for skew during loading. I only saw this cause an issue with a roll of glossy canvas where the core had moved relative to the media itself.
Standing the roll end on the floor and wiggling it seemed to get everything true again.
Here’s a 24″ roll in place

Here’s a 17″ roll. Note the strip of paper with green tape. I keep this to wrap round the roll when unloading it and putting it back in the box.

When loading the paper, the roll end may move up and down quite a few times, as the printer works out paper sizes and [optionally] checks for skew.
Sheet papers
A small flap opens, when the roll cover is down. Sheet paper is just dropped into this, where it will rest, as in this A4 sheet waiting to be loaded for a nozzle test print.

Large sheets do need supporting as the are fed into the printer.
The load process asks for media type and size – recently used settings are remembered.
Media settings can be adjusted if need be, for a particular media, although this is perhaps best addressed by creating a custom media type.

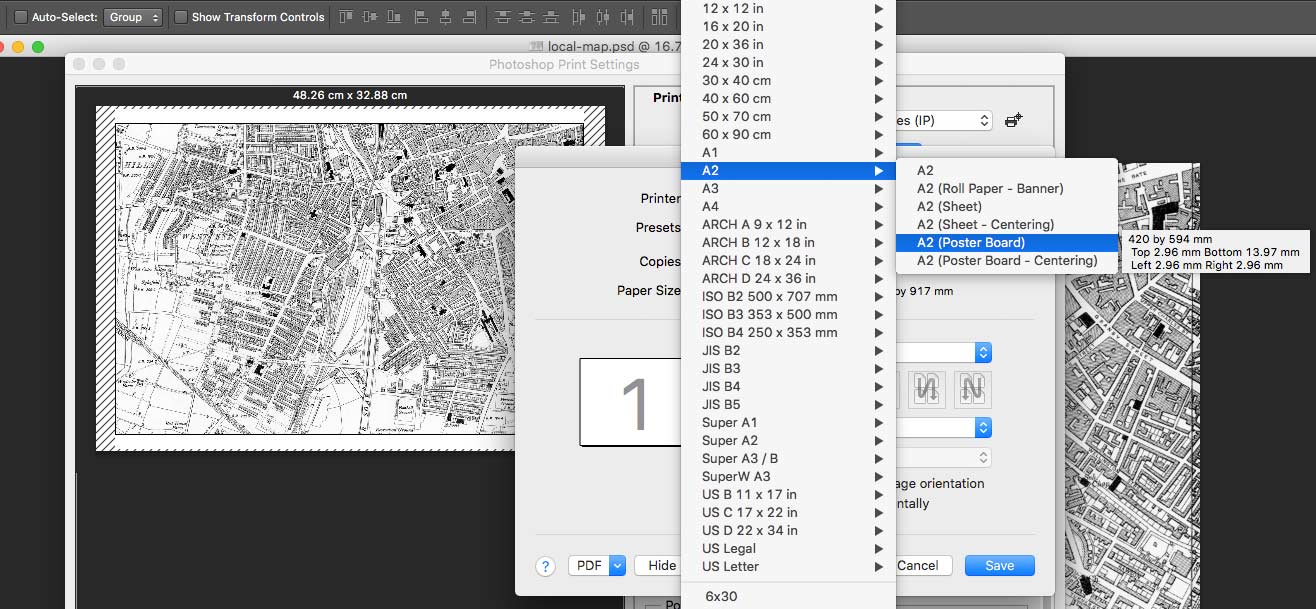
Printing on poster board
The board does not autoload – you need to push it through the slot (when asked) and align the edge with the marks on the roll cover lid.
Here are the print settings for A2 – note the margin sizes [click to enlarge].
There is a poster-board example in the videos I’ve made.
P7500 printer review: Custom media types
Although there are many different media types to choose from, it’s possible that you might want to use a paper which needs special settings.
I do have a video about aspects of the custom media process.
I made two custom settings. One was a fibre based art paper which was much thicker than the suggested media choice (premium semigloss). The other was a glossy canvas, also thicker than the nearest Epson glossy canvas setting.
I’ve covered custom media in several earlier reviews (P7000/P5000/P900) if you’re curious.
Essentially you find an existing media type, copy it, change a few settings, and save it as a new media type.
In this example, I’ve duplicated the Premium SemiGloss setting.
I’ve increased the roll paper vacuum (it’s a stiff paper) and upped the paper thickness. I’ve heard it suggested that for some heavy stiff media it’s also worth cancelling the ‘Lateral Feed Adjustment’. I didn’t do it for this set-up though.

At this stage I’ve not updated the default icc profile since I’d not yet made one. This default is only relevant if you print with software like Epson Print Layout which will preselect the profile listed here.
Do note that if you do add your own profile into the media type it has the effect of altering the position of the profile in some dropdown lists you may see when printing. The first print I tried from within Photoshop after updating the custom media, moved my profile up into the default list of Epson profiles. causing me a good 5 minutes of concern when I couldn’t find it in it’s normal position in the list with my other custom profiles.
Here it is in my media list when I printed the target to make the profile.

It’s possible to export the settings (and profile if needed) as a file for other people to make use of, as a [.emy] file.
Here’s my glossy canvas type on the printer screen, from when I was doing some canvas prints (also covered in a video)

It may be worthwhile performing a paper feed adjustment [optimise quality] after making your new custom media and you’re happy it’s OK.
Trimming
The built in cutter (blade is replaceable) is no longer attached to the print head. This reduces loading (and wear) on the printhead assembly and drive.
It also keeps dust from cutting away from the print head.
There is a cloth print catcher which rolls out forward of the printer if you have long prints. The prints can also go back under the printer.

The cloth rolls up on the extended unit, much like a window blind. It’s attached with various cords. I’ve no doubt it works well, but it just feels a bit fiddly to me – that and it’s a superb dust catcher underneath if you forget to clean it.
Borderless printing
Borderless printing is offered at the following media widths: 254 mm, 300 mm, 329 mm, 406 mm, 432 mm, 515 mm, 594 mm, 610 mm.
…or if you like: 10 inches, 11.81 inches, 12.95 inches, 15.98 inches, 17.01 inches, 20.28 inches, 23.39 inches, 24.02 inches, 20 inches
Note that borderless printing prints to the edge on roll paper – the top and bottom edges are cut.
Printer testing
With any new printer I’ve a series of known test images that I always start off printing, I know what these images look like on different types of paper and many different printers.
It’s a quick way of seeing if the printer is up to more detailed testing, since if it can’t manage one of these images, it’s not going to suddenly look better with others.
I always suggest using such images when testing new papers, rather than your own favourite photos. If you can print an image you like the quality of, from these, then it makes refining the printing of your own work so much easier.
The images (and many others) are available for free download on this site.
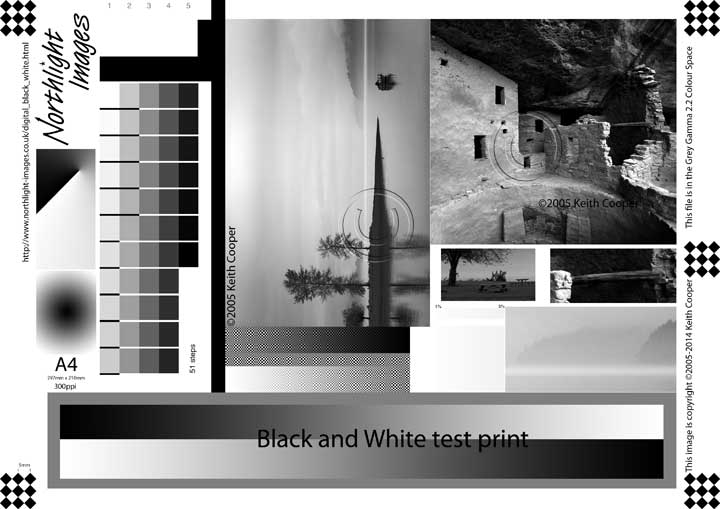

Both images have lots of components to specifically test different aspects of printer performance.
I also use both for testing the performance of printer profiles. If you make use of them, then do be sure to read the explanatory notes that go with them.
P7500 printer review: Various Prints
Most of my printing in these tests is via Photoshop, using custom printer ICC profiles to match the paper.
This example from Photoshop (actually CS6 on my old MacBook Pro) is using a 24″ x 36″ custom paper size and one of my custom media types.

A much larger custom size for printing a large panoramic print (80″ width)

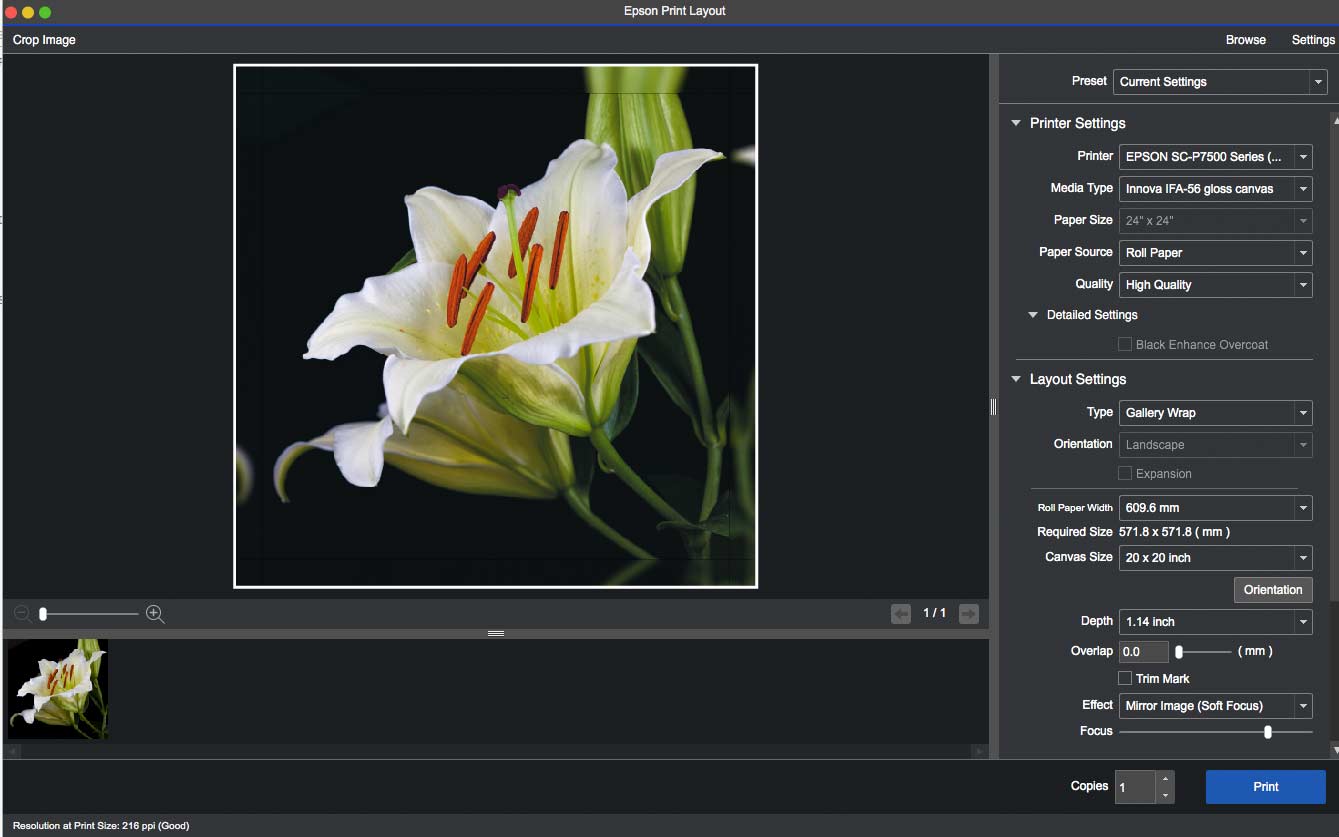
I also used the Epson Print Layout software. This free software is also covered in several of my other Epson printer reviews and printing videos
Here I’m using it with the custom glossy canvas media type.

Now with a 24″ x 24″ custom paper size and the EPL ‘Gallery wrap’ function [this is covered in a video].
Quality settings
The printer driver has various quality settings available, along with different options.
At the basic quality settings we are at 600dpi – fine for draft use and posters not meant to viewed close.
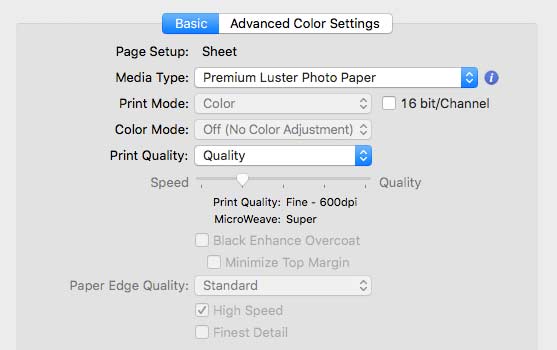
Stepping up through options (those available depend on the media type) the resolution can be taken to 2400.
The BEO setting does work on some papers and images but slows down printing and can cause border issues on sheet paper (set ‘minimise top margin’ is needed as well).
if you’re looking at that 2400 option and thinking – “My desktop printer does more than that”, then you are thinking what you are supposed to think ;-)
Many ‘highest’ settings are put there just to make the printer specs look good – not here. 2400 is better and not just there for marketing purposes…
If fine detail is important in your work, you’ll need to experiment as to which options work best for you, similarly if speed matters.
Note that the new Epson print heads have a 1/300th inch spacing as opposed to 1/360th. Thus new resolutions are 300/600/1200/2400 unlike the previous 360/720/1440/2880. I’m so used to writing the old ones, a few typos may have crept in to the original article – there is only me writing/proofing articles here at Northlight. Tpyos happen ;-)
P7500/7570/9500/9570 Best print detail?
What settings are ‘best’ and how much print resolution do you need to send to the printer? I’ve some real world testing which gives the lie to that old ‘optimal print setting’ dogma.
No, setting the image resolution to 300 is just out of date ‘forum wisdom’ ;-)
Colour profiles and profiling for the P7500 printer review
I prefer to create my own paper profiles with my X-Rite i1iSis scanning spectrophotometer and i1Profiler profiling software. I have a range of profiling targets, but one of my favourites fits just shy of 3000 patches on a single sheet of A3+ paper.
I’ll print this at different quality settings for some papers, such as here with the Premium Lustre paper, I did a range of profiles at different print quality settings, to see if the profiles were much different.

In particular, I was keen to see if the Black Enhance Overcoat [BEO] setting made a difference. On the P700 and P900 I decided it wasn’t worth using…
Now, I’m generally very wary in discussing things like gamut volumes without a lot of exposition and caveats, but I feel this animation showing the ‘shape’ of the paper gamut, from basic to best with BEO shows why I could see the difference (albeit only with some prints and in direct comparison) in image quality.

No, it’s not a huge difference, but one worth noting when deciding on print, paper and profiling choices.
Just one thing – this printer needs good colour profiles. if you’re using basic consumer level profiling solutions, think carefully before carrying them over to this printer – it deserves better.
Black and White
The ABW B&W print mode works well on every Epson printer I’ve tested. I use my own specialist B&W test image to get a visual feel for the print quality and also for quantitative measurements via the 51 step greyscale target.
Here’s some test prints from a check at how linearity and tone varies with the basic ABW mode at different quality settings.

The charts are read with the i1iSis scanning spectrophotometer.
You don’t need this to make use of the test image, I’ve lots of info covering this topic

The ABW mode for the P7500 gives good basic linearity and tone with a variety of papers and settings (all ABW settings at default).
However, look at this graph (ignore the numbers, just look at the shape of the line of’L’s).
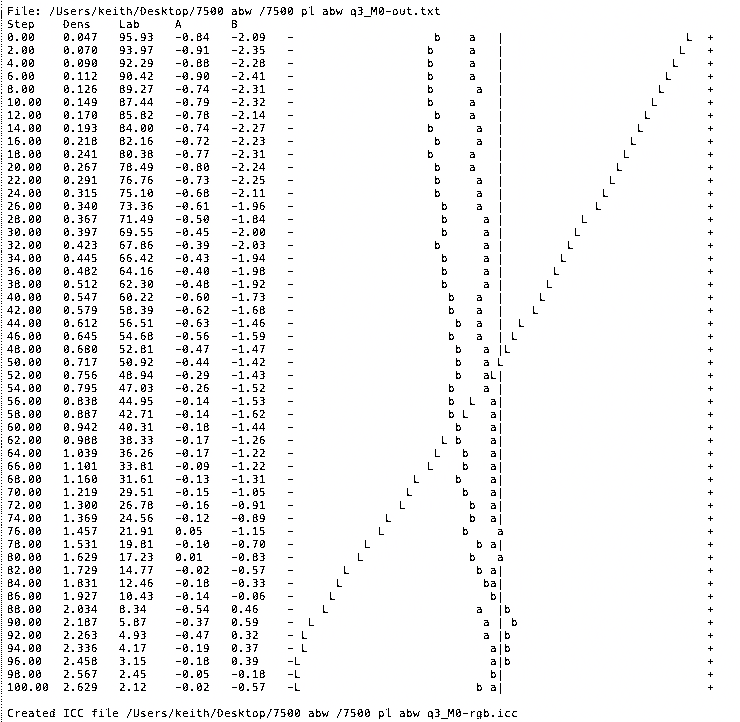
The problem is the slight hook at the bottom. This tells me that shadow detail (in the bottom ~10% of tones) will be somewhat compressed.
It’s easy to fix with an adjustment curve before printing. Here’s the curve for a lustre paper – I can save it in Photoshop and apply just before printing.

It works well. Not every image has such details in shadows, but I shouldn’t need to do this.
It’s a common thing I find with B&W print modes for any printer, and many are much more unpredictable than the P7500.
Am I being picky? Yes, for sure I am, it’s just that every other aspect of B&W printing works well on the P7500, so why not this?
I just wish there were some way of adjusting the ABW mode linearity without the need for an externally applied curve.
Just to be sure it’s clear – the P7500 is excellent for B&W, so much so, that this non-linearity jumps out at me in that it occurs with lots of papers (other printers vary far more by paper).
What about the prints I did make. I’m minded to say I couldn’t do better on any other printer I’ve tested to date.
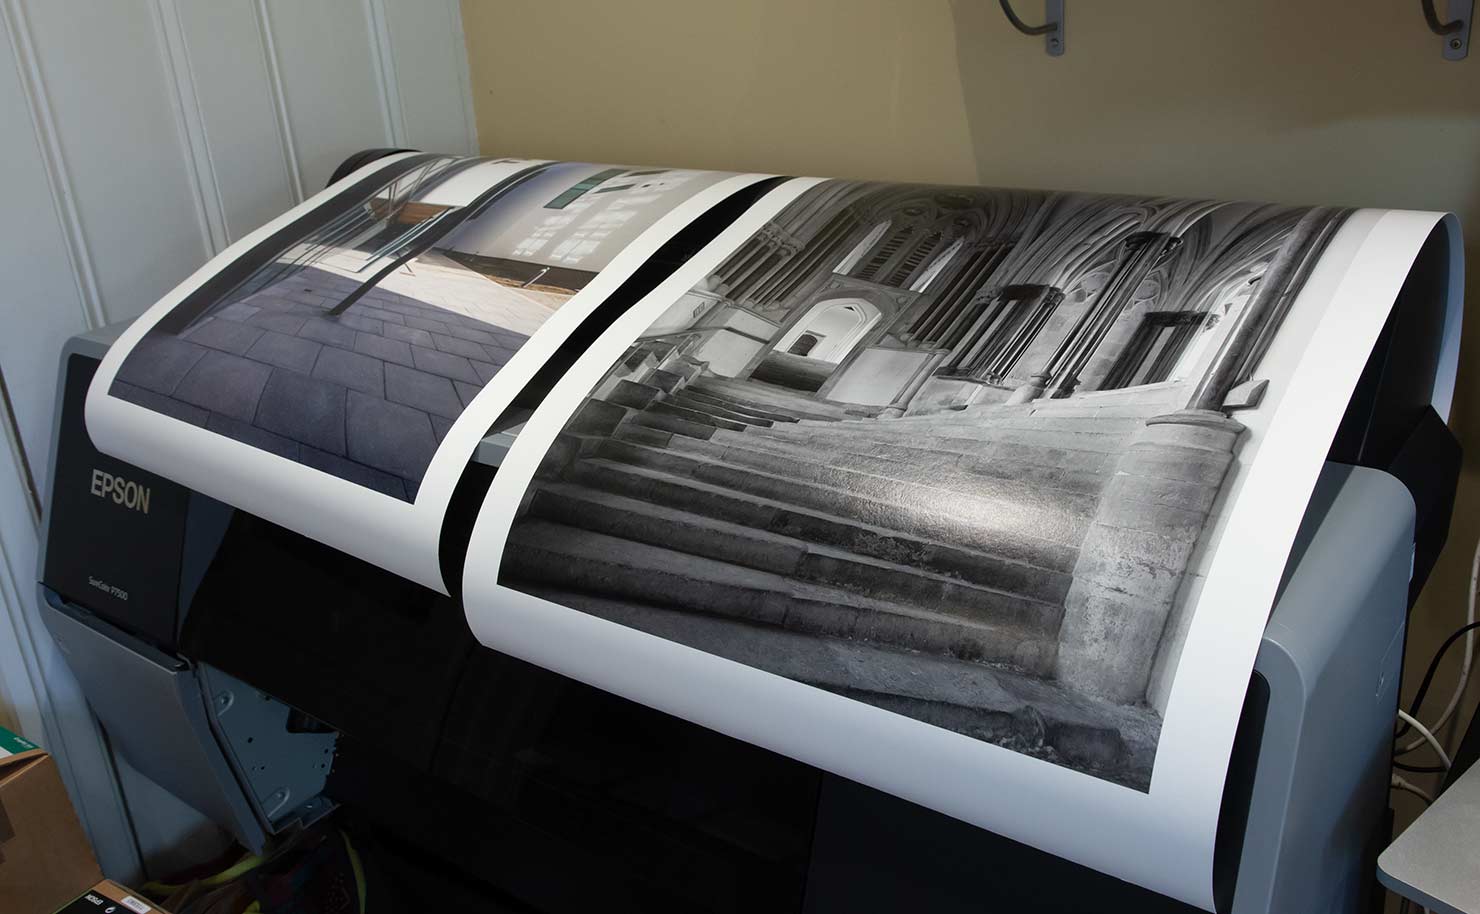
Two prints – art paper and lustre. Both look more neutral in real life (room lighting and camera effects).

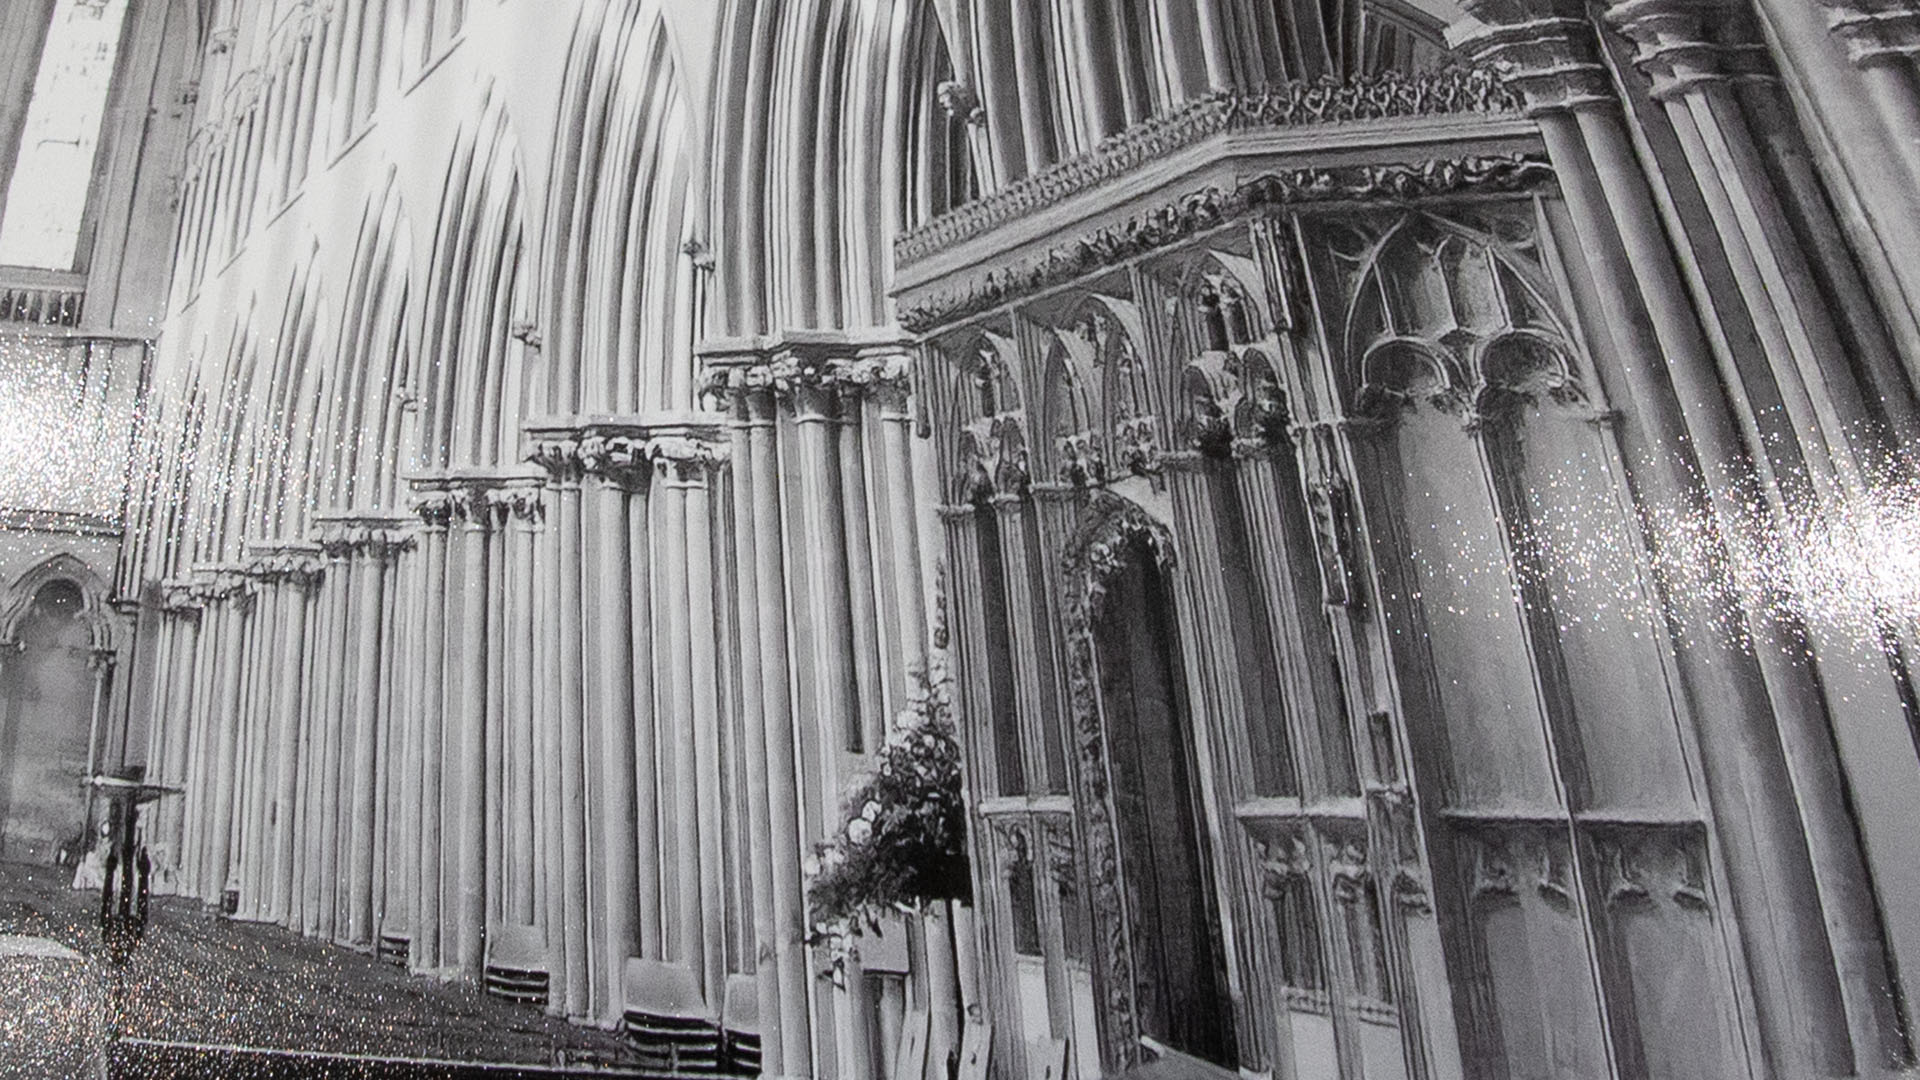
A B&W print on a satin finish heavy art paper.
A detail from the print.

A B&W print on a lustre paper.
It’s had a curve applied before printing – note that detail in the deep shadows – that’s what’s affected by the non-linearity. The photo is slightly underexposed to show reflection/texture.
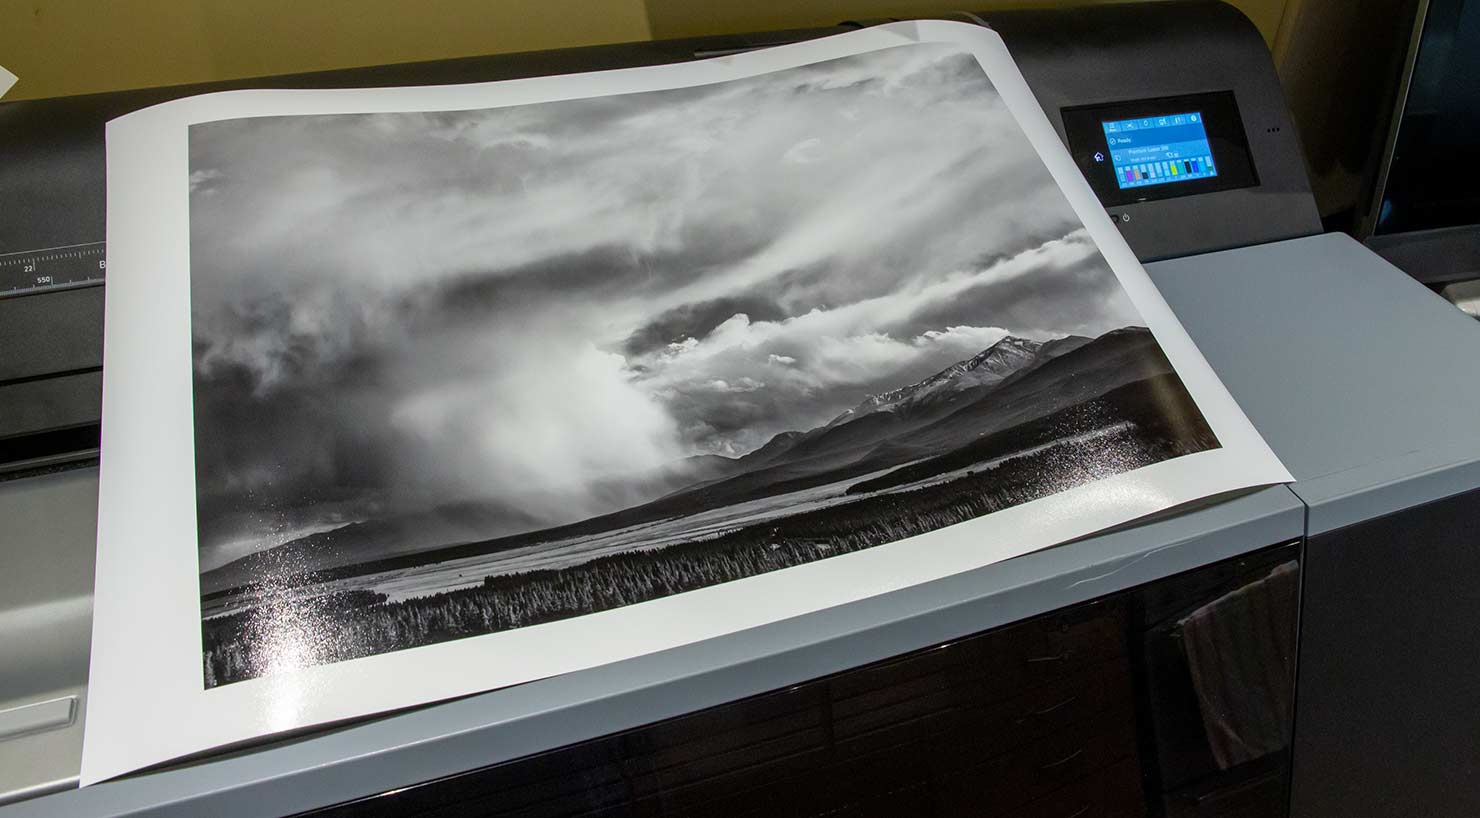
Yes, the B&W is good…
P7500 printer review conclusions
I’ve split this section over a number of areas, since there are many aspects of using the printer that may or may not be relevant for different potential users. If there is something not covered, please do ask, since it’s possible I missed a point in this review.
Paper handling
The printer has some of the best paper handling I’ve seen. Roll loading is simple and reliable – but make sure your hands are clean, since some stiffer media will need a bit of handling to get the leading edge into place.
Sheet loading, with the flip out slot, is simple and reliable. Apart from poster board, where you need to manually push it in and line it up, there is no more matching print edges to lines.
Very large sheets will require holding so they drop in, but I can’t see sheet loading becoming much easier than this.
The straight through print path, clear window and lights all help raise you confidence that everything is set up right.
Print resolution
The printer offers 1200 and a higher 2400 dpi resolution. With the large print head and speed, I was happy to print at higher quality settings.
I’ll have a look at the details of settings in due course, but unlike say the P700/900 I found that the black enhance option and best print quality did make a slight difference in some prints. Using the BEO setting does however require care with some print settings (margin related) if printing on sheets. I’ve quite a few B&W A4 test sheets where a large margin at one end chopped parts of the image off.
Print ‘Quality’
This is a notoriously difficult area to address, since print quality is a term that means something different to almost everyone who uses it.
What aspects stood out in my P7500 printer review?
- Gamut – for a few highly coloured prints the vibrance and depth of colour looked very good. However this feature is somewhat optimised on the P7500 for proofing use, where a large gamut is important marketing collateral for the proofing market (remember – my use for fine art print is just part of it’s target market).
- Smoothness of tone – looking at my profiles and test images, there were no obvious deficiencies I could point to. The BEO setting actually made a difference to some prints. Remember though, this is direct comparison and most people simply won’t see any difference.
- Detail – I’ll be covering aspects of this in another article, but there was no graininess or coarseness visible in prints viewed up close. There was no obvious ‘inkjet look’.
- B&W tonality – smooth, without obvious colour tints, even better when linearised…
- Media handling – print quality was consistent across media
Epson profiles
The ones I tried all worked well – that said, I make my own for testing, and would do if I had such a printer here for my work.
The Epson combined media setting/profile files [.emy] are potentially a good idea, but don’t seem to have caught on in a big way with paper suppliers, who are more likely to just supply icc profiles
Ink costs
With the option of 350ml and 700ml ink carts, the printer’s running costs should be quite reasonable.
I didn’t get enough use to measure actual print usage over time – that and the full accounting software won’t run on any of the computers in our business (all Macs).
The printer does have quite detailed accounting info, but unless you have the version of the printer with an internal disk, this is not stored long term.
No more black Ink swap
Did I mention this? Yes it’s something I’ve seen rationalised many times over the years, but it was irksome and the loss of ink, well it just annoyed me on principle (a bit).
Cleaning, reliability and other bugbears
The P7500 has specific user access to both the print head (via the panel at the back) and the front, to both the print head and all the area around the capping station.
Take care to read the guidelines and procedures – such access comes with the ability for the clueless and or clumsy to cause expensive damage.
The cutter is no well away from the head assembly – this should keep down the build-up of paper fibre
With only a relatively short testing period, I’m unable to comment on any longer term usability issues – the printer I tested was one of Epson’s demo units, so has had a lot more robust use than it would get if I had one.
I’ve heard some mixed reports by some P7500 users, but I can only say that the printer I had here showed no problems in operation.
Will getting an SC-P7500 massively improve your prints?
Only if you have the skill and expertise to use it properly.
I’d just note that I’ve been able to produce good looking prints with every 13″ and above printer I’ve tested in the last few years. Where I see limitations, they are more likely to be in my photographic skills and vision…
If you can get really great prints from an Epson P900 (or P800/SP3880) then the P7500 could do even better. Compared to the P900, I found slightly better B&W performance with respect to bronzing at high quality settings.
Visible gloss differential seemed lower than many previous Epson printers I’ve used. At it’s simplest, the BEO seems to work on the P7500, whilst on P700/900 I’d probably not bother with the setting – this is likely due to the larger minimum ink droplet size of the P7500 (I’m just guessing at this).
Compared to the P7000, there are some advantages in ink set and the new print head. The P7500 has quite a lot of changes – it feels much more of a production printer.
One other thing to take note of is that although the P7500 looks very similar to the P7000, the print head and paper feed design are much more akin to the huge P20000 I tested a while back [P20000 quick review]. This means that if you have custom media settings on a P7000, the values may be different for the P7500. I’d look at creating any custom settings anew based on copying a standard (P7500) similar media and modifying as needed (thickness is the usual one to start with).
I compared some of my old P7000 prints, but I didn’t have enough for any clear opinion. Just one point I’d note is that it is different enough that if I had a P7500 or P9500 I would start my paper choices anew. Remember that ideally, you buy the printer first and then decide which papers you like.
It works…
So, here’s a B&W print on a basic lustre paper – printed using ABW mode
A colour print on the art fibre paper I made the custom media setting for.

Many other pigment ink printers would show more bronzing in the reflected light.
Overall P7500 printer review thoughts…
This printer is a definite improvement over the last large format Epson I had here, the P7000 [review] and that’s one I’d happily use.
The new print head is faster and the P7500 seems more solidly built. The ink set is a good one – I can’t say I noticed the lack of LLk and the complete end of black swapping is welcome. Black and white print linearity could be improved but B&W neutrality was excellent, even with a range of third party papers.
Paper handling for sheets is made easier and the design thought given towards keeping the inside of the printer clean is most welcome.
Print quality is excellent, if you take enough care with your editing and photographic skills.
Telling high end printers apart has become increasingly difficult over the years, but for the type of prints I’d use it for, this must rank as one of the best I’ve tested (Summer 2022).
–ooOoo–
Summary
12 ink 24″ wide format printer, supporting roll and sheet media, with a straight through print path for thicker media.
Optional SpectroProofer, hard disk and Postscript support.
More information on our site
- So, you want a large format printer – questions to ask yourself
All of Keith’s P7500 printer review videos
- Video review [35 mins]
- First prints and profiling
- Gallery wrap canvas using EPL
- Panoramic sunset and handling colour
- Making a large print – what’s needed in the image
- Printing on poster board
- Using custom media settings
- P7500 optimising B&W linearity
- Two large prints – colour or B&W
- Paper differences – two B&W prints
- Fixing dull colours – a P7500 print
- So do you really want a large printer?
Specifications (from Epson)
Technology
- Printing Method PrecisionCore™ Micro TFP printhead
- Ink Technology Ultrachrome® Pro12
- Colours: Photo Black, Matte Black, Cyan, Light Cyan, Yellow, Vivid Magenta, Vivid Light Magenta, Violet, Orange, Green, Grey, Light Grey
- Minimum Droplet Size 3,5 pl, With Variable-Sized Droplet Technology
- Ink tank capacity 700 ml/ 350ml
- Nozzle Configuration
800 Nozzles Black 800 Nozzles per Color Printing Resolution 1.200 x 2.400 DPI
Paper / Media Handling
- Paper Formats A1, A2 (42.0×59.4cm), A2+, A2++, A3+, A3++, A3 (29.7×42.0 cm), A4 (21.0×29.7 cm), 17″, 24″, B2 (51.4×72.8 cm), B3, B4
- Compatible Paper Thickness 0,08 mm – 1,5 mm
- Borderless printing on 10 inches, 11.81 inches, 12.95 inches, 15.98 inches, 17.01 inches, 20.28 inches, 23.39 inches, 24.02 inches, 20 inches
General Power consumption
- 85 Watt, 32 Watt (economy) 3,4 Watt (standby) 0,3 Watt (Power off)
- Supply Voltage AC 100 V – 240 V, 50 Hz – 60 Hz
- Product dimensions 1401 x 667 x 1218 mm (Width x Depth x Height)
- Product weight 121.7 kg
- Sound Power Operation: 7.5 B (A)Noise LevelOperation (Roll): 49.5 dB (A)
Other Features
- Memory Printer: 2 GB
- Emulations ESC/P-R, Adobe® Postscript 3® (optional) Features
- Touchscreen Panel Type: Color, Touch-panel
- Interfaces USB 3.0, Ethernet Interface (1000 Base-T/ 100-Base TX/ 10-Base-T)
- Other Warranty 12 months On-site service
-- --
Never miss a new article or review - Sign up for our Newsletter (2-4 a month max.)More print related information from Keith
...or use the search box at the top of any pageReference pages and test images
- Printer Test Images
- B&W printer test image
- Printer cleaning
- Paper reviews
- Printer info/news/speculation Canon | Epson
Adverts removed
Keith | Feb 3, 2023 at 1:27 pm
With the right media I don’t doubt you could do two prints on the same sheet – but it’s not a supported function in any way and I can’t see it would work with roll media.
As to accuracy – no idea I’m afraid. One to ask an Epson dealer [and see it done! ;-) ]
Allan | Feb 3, 2023 at 8:56 am
Can you print dublex print on it and is it so accurate that the cut marks fall on top of each other?
Keith | Dec 22, 2022 at 2:09 pm
Thanks for that info
John Erwin | Dec 15, 2022 at 6:54 pm
I purchased mine in May 2021 and have just replaced the first maintenance tank.
The empty weight of the tank is 346 grams and the weight of the full tank I’ve just replaced was 1090 grams. Roughly equates to a whole 700ml cartridge or in other terms £200 of waste ink.
Divide this by the time I’ve had it 20 months and it equates to £10 per month cost for wasted ink. Plus the cost of the tank itself.
It’s a very important cost which is easily overlooked
Keith | Jul 19, 2022 at 10:19 am
Yes, I was on the lookout for such issues, but didn’t see any.
Remember that although I used the machine pretty thoroughly, I had it for just under three weeks
The thick paper issue was why I was careful to try several thick media and canvas types. It’s also why I included info on custom media settings.
All I can say is that I saw no issues which would cause me concern…
Keith | Jul 19, 2022 at 10:13 am
Quite correct – typos fixed. There is only me doing the writing and proofing, so I’m afraid errors happen…
This is one of my big problems with the YouTube videos – I make minor slips all the time and can’t go back and simply correct them ;-)
Hsu Kang-Wei | Jul 19, 2022 at 4:09 am
The highest quality is 2400 dpi rather than 2880 dpi.
New Epson heads are 300 npi, resolution setting are 300-600-1200-2400.
donna joslyn | Jul 18, 2022 at 11:46 pm
At first I was excited about the 75xx series. Then I read a lot of complaints about it, in a wide format printer group: paper skews, running amok unrolling paper and breaking a part inside, having to print while holding the cover open and faking the sensor into thinking the cover was closed, to stop the paper when it begins to unroll uncontrollably, and especially issues with thick third party matte fine art papers – which are my favorites. Your review is positive. Now I’m not sure. I miss having a 24″ printer. I wore my last one out. But I retired from production work. I don’t use ink fast enough. I still want my next printer, when my P5000 comes to the end of its life, to be 24″ again – with tiny carts!